The Magnus Cardigan-Free Crochet Pattern
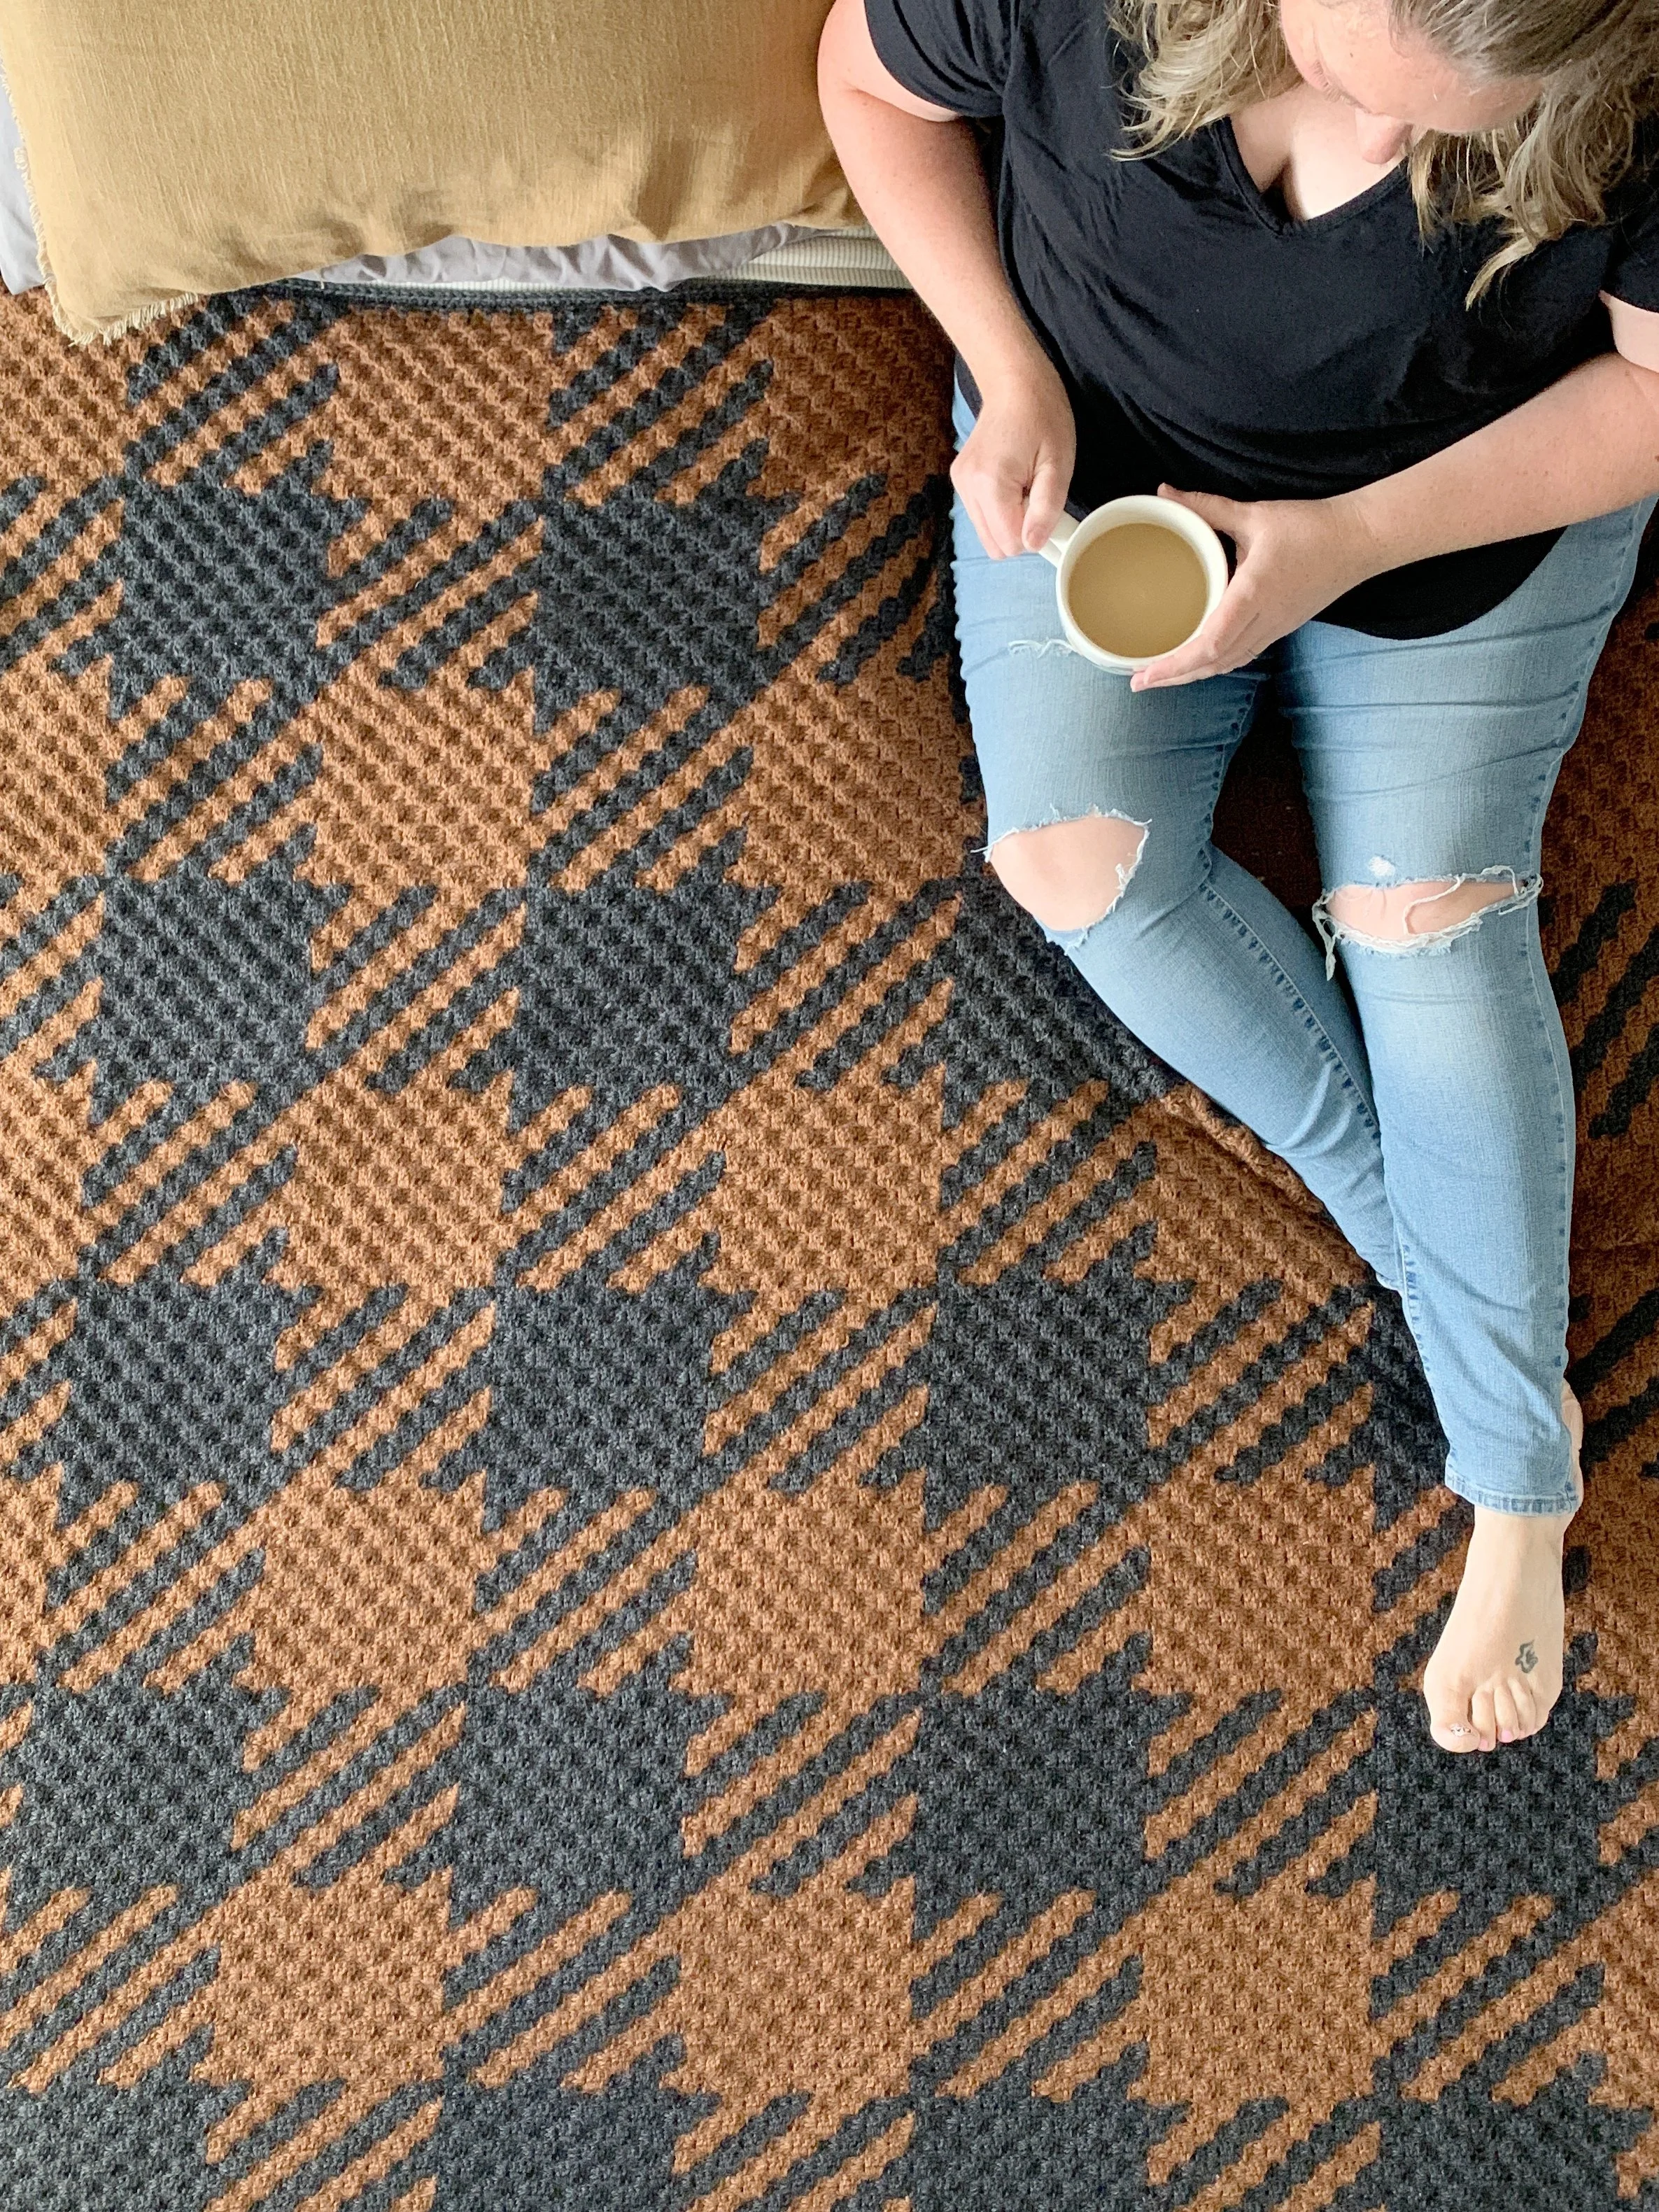
The Magnus Cardigan crochet pattern is perfect for creating a soft and cozy garment. It features bright and colorful Scarfie Lite yarn paired with classic Wool-Ease yarn. The open front design and pockets are perfect for the transition from Fall to Winter. Find the free pattern below, get a PDF version in the shop or grab the complete kit from Lion Brand Yarn.
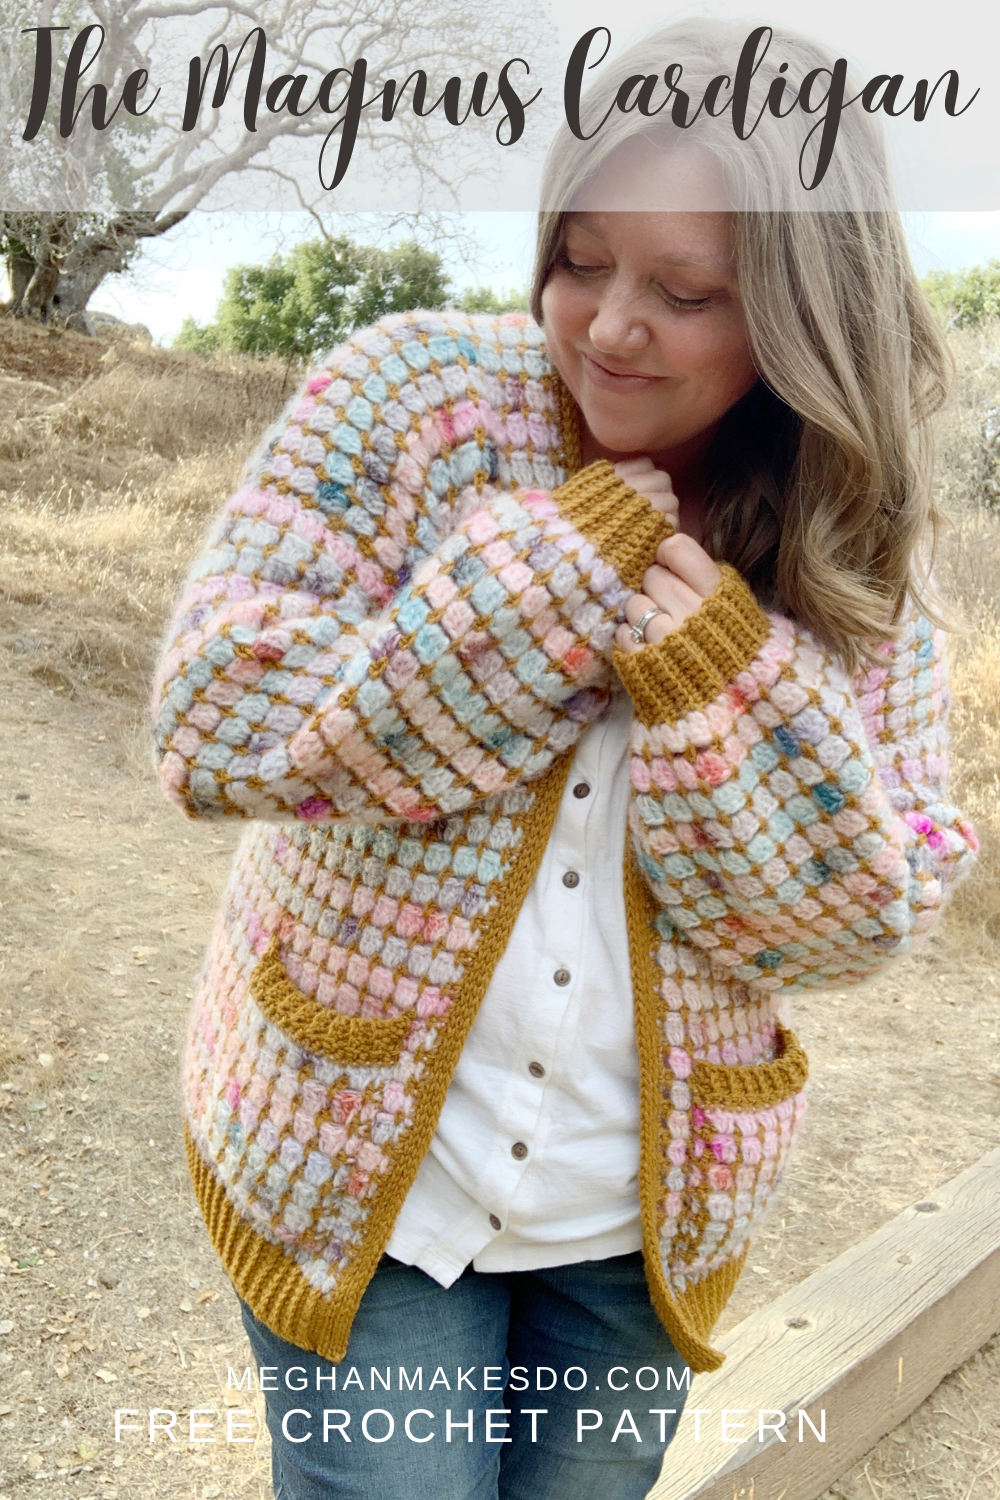
Say hello to your new favorite cardigan! I’m thrilled to be bringing you The Magnus Cardigan crochet pattern. It’s been a HUGE hit over on Instagram and it’s so exciting to know so many of you will be making one.
I first saw Scarfie Lite last year and fell in love with the Sunset color way. I knew I wanted to use it for a design, but wasn't sure what I should make. I played around a bit with the idea of a hat and scarf set, but then during a late night scroll sesh on Pinterest I found a tutorial for the block stitch. It was so eye catching and I instantly knew that it would be perfect for Scarfie Lite.
I loved the look of the block stitch using two colors so went on the hunt for the perfect yarn to pair with the Sunset color. Wool-ease is such a classic and comes in so many beautiful colors so it was a given. I am a bit obsessed with mustard yellow so decided to be adventurous and see how it would do paired with the bright pinks and blues of the Scarfie Lite. There was a small moment when the yarn arrived that I questioned my choice, but once I worked up a swatch I knew I had found the perfect match.
I think the Magnus is one of my all time favorites now. It’s definitely the wildest design when it come to colors. I’m so happy with how it turned out and I’m even more happy with the love it’s already received. I hope you love her as much as I do and I can not wait to start seeing yours!

The construction of the Magnus is very similar to how I constructed my Malloy Cardigan. You’ll start with the bottom section of the entire cardigan, then separate for the arm holes and work up the top sections of the front panels and back. Seam the shoulders, work up the sleeves in turned rounds and seam them into the armholes. The collar is then added directly around the front of the cardigan and the pockets are sewn in place.
I’ve made a complete video tutorial so you’ll know exactly what to do which you can view below.
Video Tutorial:
The Magnus Cardigan Crochet Pattern
Materials:
715-1363 yards (3-4skeins) of Lion Brand Scarfie Lite in Color A (Sunset)
455-812 Yards (3-5 skeins) of Lion Brand Wool-Ease in Color B (Arrowwood)
Tapestry needle, scissors, tape measure, stitch markers
Clips for seaming (optional)
Abbreviations:
Ch(s)- chain(s)
St(s)- stitch(es)
sc- single crochet
dc- double crochet
sl st- slip stitch
BLO- back loop only
sp- space
RS- right side
WS- wrong side
Notes:
1.The bottom of the main body is worked in one piece. The ribbing is worked first and then the main body is worked directly into the edges of the ribbing until the underarm is reached. The fronts and back are then worked directly onto the bottom piece. The shoulders are seamed. The sleeves are then worked bottom up in turned rounds and seamed into the armholes. The collar is worked directly onto the front edges of the cardigan and pockets are attached last.
2.Ch(s) at beginning of rounds and rows do(es) not count as a stitch.
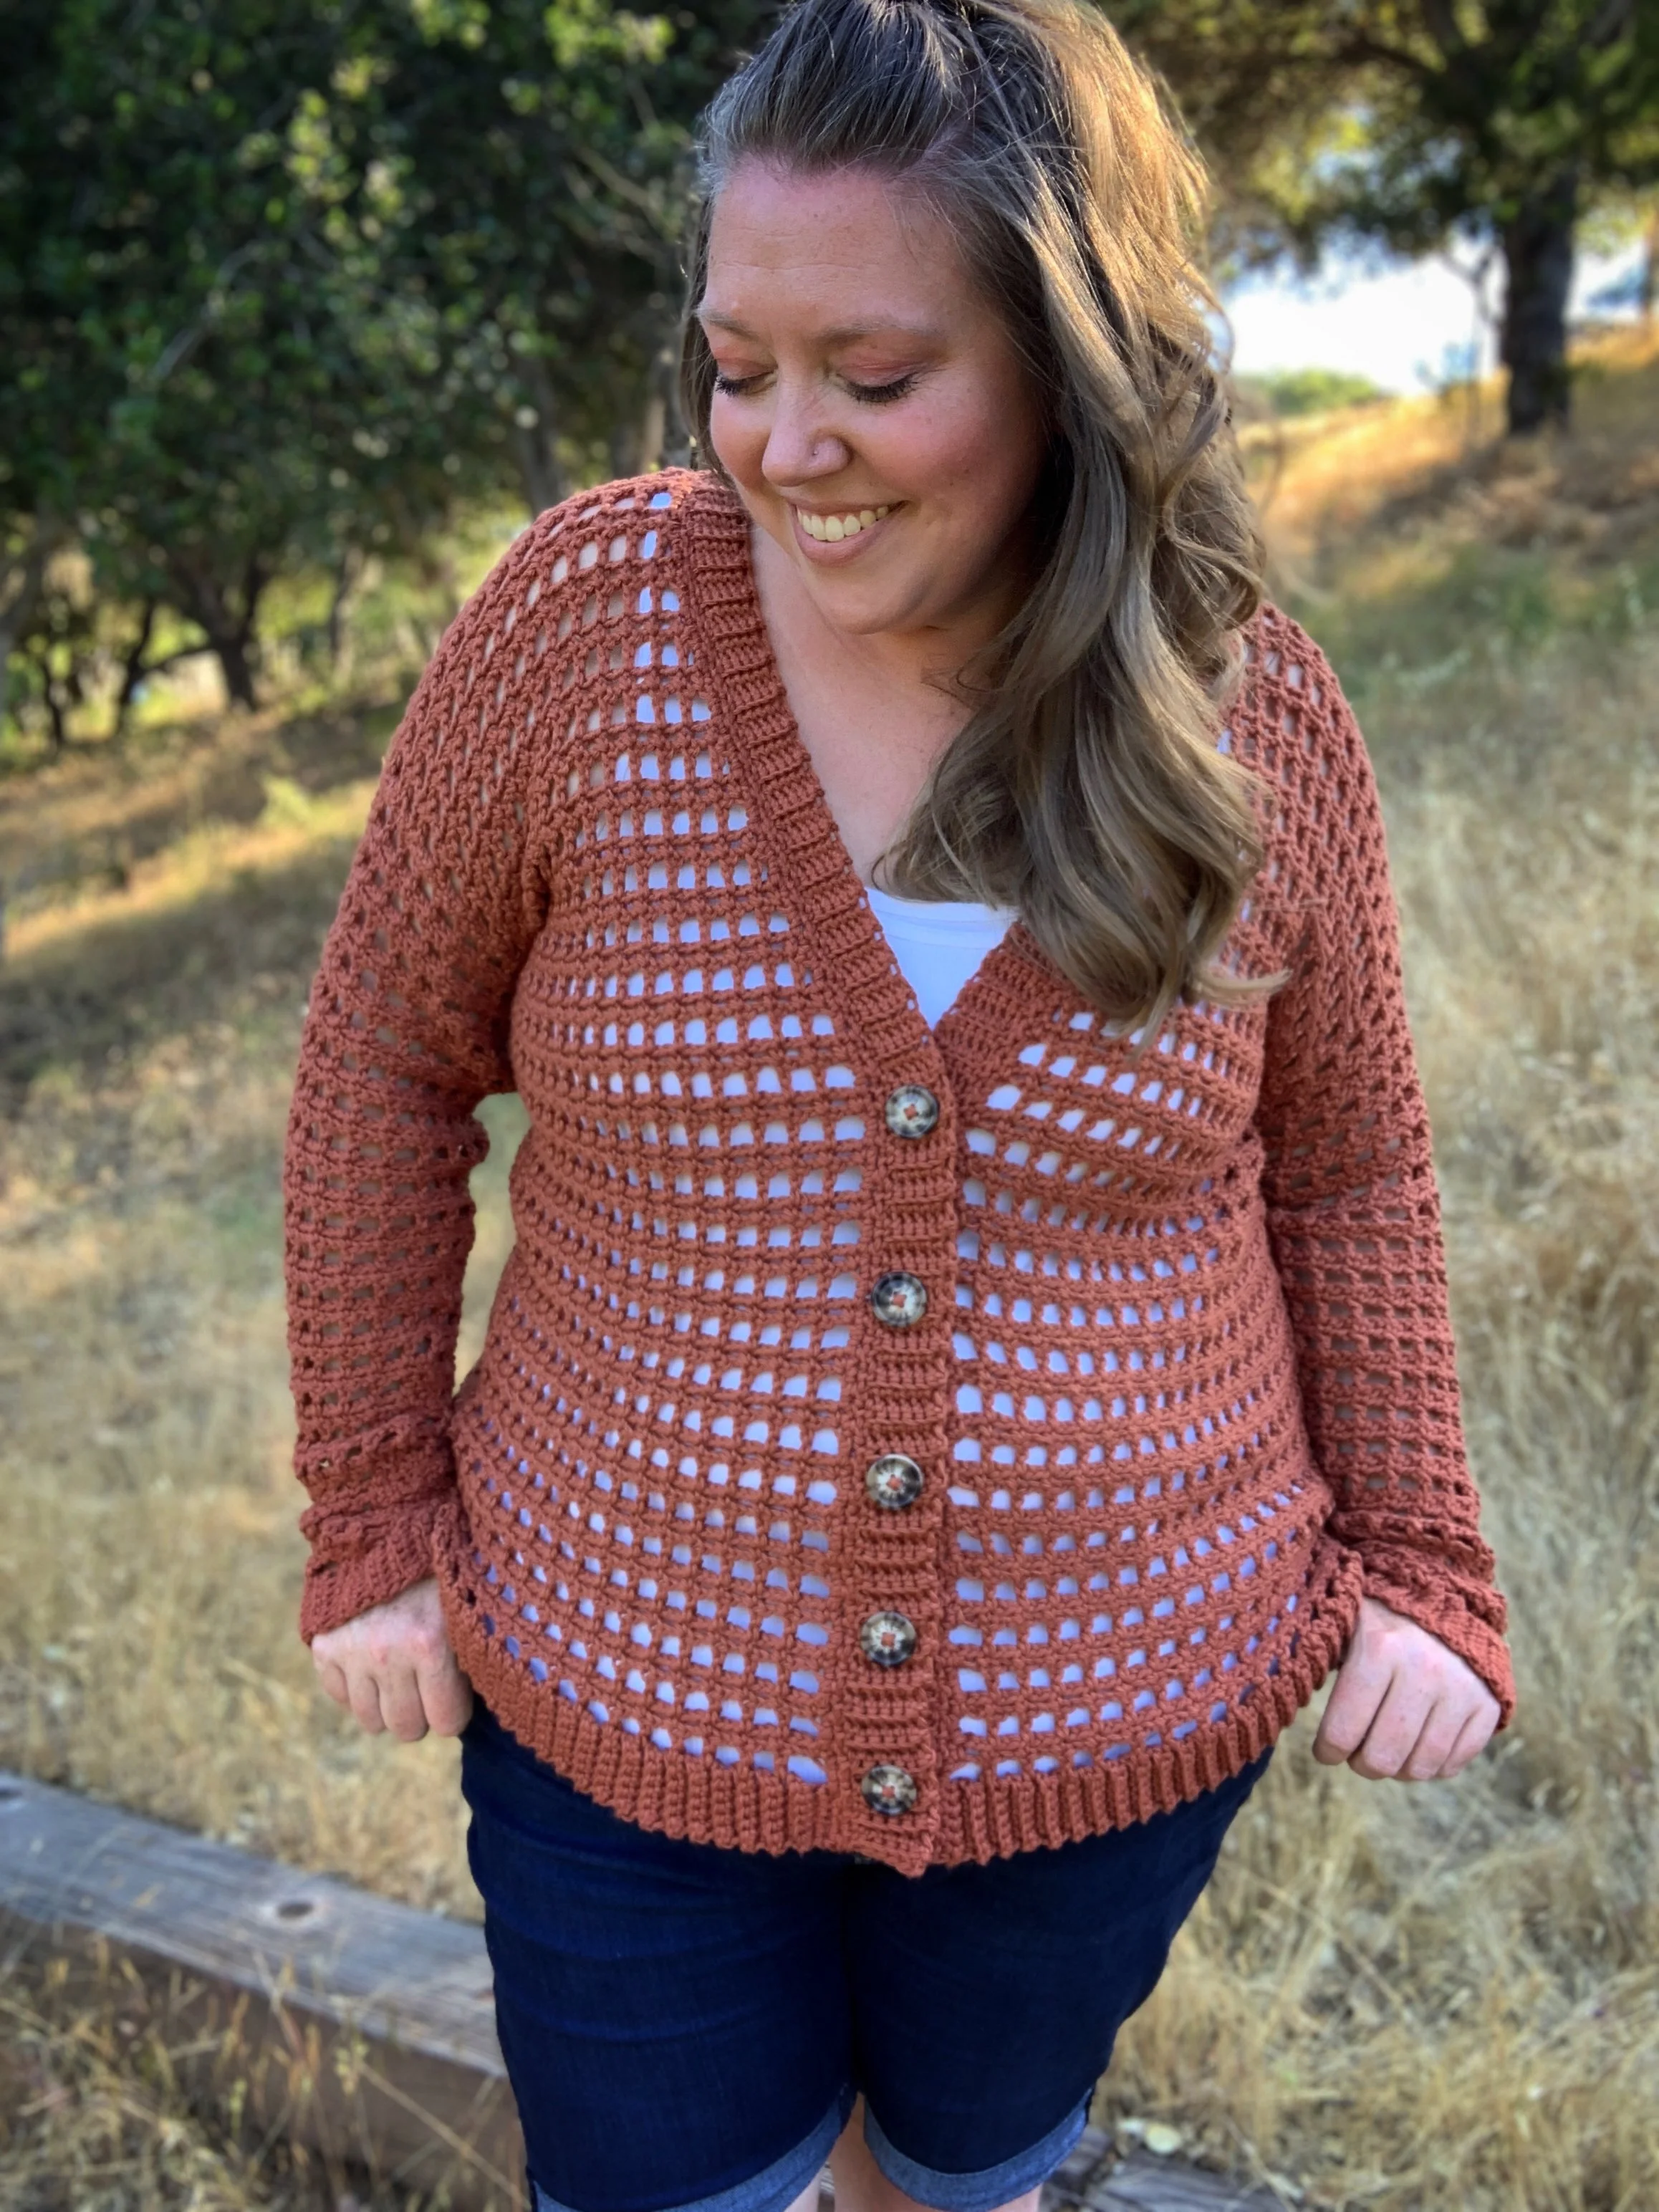
3.Pattern is made with 0-2” of positive ease. Size up for a looser fit
4. Model is wearing a size 2X and is 5’9”
5.A complete video tutorial for The Magnus Cardigan can be found on the Meghan Makes Do YouTube Channel.
Gauge:
14 sts X 10 rows = 4.5” X 4.5” in block stitch
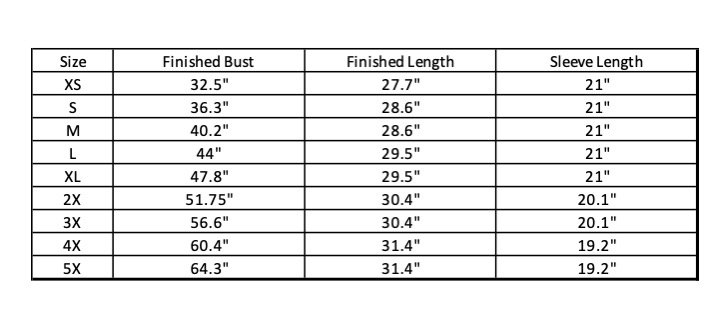
Size:
XS: fits bust 28-30” Color A (approx. 715 yards/ 3 skeins) Color B (approx. 455 yards/3 skeins)
S: fits bust 32-34” Color A (approx. 820 yards/ 3 skeins) Color B (approx. 512 yards/3 skeins)
M: fits bust 36-38” Color A (approx. 873 yards/ 3 skeins) Color B (approx. 542 yards/3 skeins)
L: fits bust 40-42” Color A (approx. 984 yards/ 3 skeins) Color B (approx. 601 yards/4 skeins)
XL: fits bust 44-46” Color A (approx. 1038 yards/ 3 skeins) Color B (approx. 631 yards/4 skeins)
2X: fits bust 48-50” Color A (approx. 1135 yards/ 4 skeins) Color B (approx. 685 yards/4 skeins)
3X: fits bust 52-54” Color A (approx. 1206 yards/ 4 skeins) Color B (approx. 726 yards/4 skeins)
4X: fits bust 56-58” Color A (approx. 1305 yards/ 4 skeins) Color B (approx. 779yards/4 skeins)
5X: fits bust 60-62” Color A (approx. 1363 yards/ 4 skeins) Color B (approx. 812 yards/5 skeins)
Pattern:
Bottom Main Body Ribbing:
With Color B and 5.5mm hook ch 9.
Row 1: sc in 2nd ch from hook and in each ch across, ch 1, turn. (8)
Row 2: sc in BLO of each st across, ch 1, turn. (8)
Repeat Row 2 for a total of 101(113, 125, 137, 149, 161, 176, 188, 200) rows.
Turn piece 90 degrees and switch to Color A and 6mm hook, ch 2, then pull Color B tight until the last ch made with Color B disappears into the ribbing.
Bottom Main Body:
Row 1: dc into the edge of each row of ribbing across. (101(113, 125, 137, 149, 161, 176, 188, 200)
Change to Color B, ch 1 and turn.
Row 2: sc into 1st st, sc into sp between first and second st, *ch 2, sk 3, sc into sp right after the 3rd skipped st, repeat from * until 1 st remains, sc into last st. (101(113, 125, 137, 149, 161, 176, 188, 200)
Change to Color A, ch 2 and turn.
Row 3: dc into 1st st, *3dc into ch-2 sp, repeat from * across until 1 st remains, dc into last st. (101(113, 125, 137, 149, 161, 176, 188, 200)
Change to Color B, ch 1 and turn.
Rows 4-41: repeat Rows 2 & 3.
Do not fasten off.
Change to Color B, ch 1 and turn.
Place stitch markers in the following stitches to indicate where the right side, back and left side of the cardigan will be worked.
XS: place markers in the 23rd and 25th stitch in from each side.
S: place markers in the 26th and 28th stitch in from each side.
M: place markers in the 29th and 31st stitch in from each side.
L: place markers in the 32nd and 34th stitch in from each side
XL: place markers in the 35th and 37th stitch in from each side
2X: place markers in the 38th and 40th stitch in from each side.
3X: place markers in the 41st and 43rd stitch in from each side.
4X: place markers in the 44th and 46th stitch in from each side.
5X: place markers in the 47th and 49th stitch in from each side.
Upper Main Body Right:
Row 1(WS): sc into 1st st, sc into sp between first and second st, *ch 2, sk 3, sc into sp right after the 3rd skipped st, repeat from * until 1st sm, sc into same st as sm. (23(26, 29, 32, 35, 38, 41, 44, 47)
Change to Color A, ch 2 and turn.
Row 2(RS): dc into 1st st, *3dc into ch-2 sp, repeat from * across until 1 st remains, dc into last st. (23(26, 29, 32, 35, 38, 41, 44, 47)
Change to Color B, ch 1 and turn.
Repeat Rows 1 and 2 for a total of 16(18, 18, 20, 20, 22, 22, 24, 24) rows.
Fasten off leaving a long tail for seaming.

Upper Main Body Center:
With WS facing you, attach Color B in the same stitch as the next sm, ch 1 and turn.
Row 1(WS): sc into 1st st, sc into sp between first and second st, *ch 2, sk 3, sc into sp right after the 3rd skipped st, repeat from * until next sm, sc into same st as sm. (53(59, 65, 71, 77, 83, 92, 98, 104)
Change to Color A, ch 2 and turn.
Row 2(RS): dc into 1st st, *3dc into ch-2 sp, repeat from * across until 1 st remains, dc into last st. (53(59, 65, 71, 77, 83, 92, 98, 104)
Change to Color B, ch 1 and turn.
Repeat Rows 1 and 2 for a total of 16(18, 18, 20, 20, 22, 22, 24, 24) rows.
Fasten off leaving a long tail for seaming.
Upper Main Body Left:
With WS facing you, attach Color B in the same stitch as the next sm, ch 1 and turn.
Row 1(WS): sc into 1st st, sc into sp between first and second st, *ch 2, sk 3, sc into sp right after the 3rd skipped st, repeat from * until 1st sm, sc into same st as sm. (23(26, 29, 32, 35, 38, 41, 44, 47)
Change to Color A, ch 2 and turn.
Row 2(RS): dc into 1st st, *3dc into ch-2 sp, repeat from * across until 1 st remains, dc into last st. (23(26, 29, 32, 35, 38, 41, 44, 47)
Change to Color B, ch 1 and turn.
Repeat Rows 1 and 2 for a total of 16(18, 18, 20, 20, 22, 22, 24, 24) rows.
Fasten off leaving a long tail for seaming.
Sleeves: make two
Ribbing:
With Color B and 5.5mm hook ch 9.
Row 1: sc in 2nd ch from hook and in each ch across, ch 1, turn. (8)
Row 2: sc in BLO of each st across, ch 1, turn. (8)
Repeat Row 2 for a total of 23(25, 25, 25, 25, 28, 28, 28, 28) rows.
Bring ends together and slip stitch into a loop. Turn cuff RS out. Change to Color A and ch 2.
The main body of the sleeve is worked directly into the edges of the ribbing and is made in turned rounds. Yarn can be carried up along the seam. No need to fasten off after every round.
Main Body:
Switch to 6mm hook.
XS-ONLY
Round 1(initial increase): working directly into the edges of the ribbing, 1dc into first edge, 2dc into each edge around, sl st to 1st st to join. (45)
S(M)-ONLY
Round 1(initial increase): working directly into the edges of the ribbing, 2dc into each edge around, 3dc into last edge, sl st to 1st st to join. (51)
L(XL)-ONLY
Round 1(initial increase): working directly into the edges of the ribbing, 3dc into 1st edge, *2dc into next 3 edges, 3dc in next, repeat from * around, sl st to1st st to join. (57)
2X(3X)-ONLY
Round 1(initial increase): working directly into the edges of the ribbing, 2dc into 1st edge and next 2 edges, *3dc in next, 2dc into each of the next 3 edges, repeat from * around until 1 st remains, 3dc in last edge, sl st to1st st to join. (63)
4X(5X)-ONLY
Round 1(initial increase): working directly into the edges of the ribbing, 2dc into 1st edge, *3dc in next, 2dc in next, repeat from * around, 2dc in last edge, sl st to1st st to join. (69)
Change to Color B, ch 1 and turn.
All Sizes:
Row 2: sc into sp between first and last st of previous round, *ch 2, sk 3, sc into sp right after the 3rd skipped st, repeat from * around, sl st to1st st to join. (45(51, 51, 57, 57, 63, 63, 69, 69)
Change to Color A, ch 2 and turn.
Row 3: *3dc into ch-2 sp, repeat from * around, sl st to1st st to join. (45(51, 51, 57, 57, 63, 63, 69, 69)
Change to Color B, ch 1 and turn.
Repeat Rows 2-3 for a total of 43(43, 43, 43, 43, 41, 41, 39, 39) rows. *adjust number of rows to lengthen or shorten sleeves.
Fasten off leaving a long tail for seaming.


Seaming:
Shoulders:
Line up front panel shoulders with the top of the back panel. With Color A and a tapestry needle, seam the shoulders together using your preferred method of seaming. Mattress stitch was used for the sample.
Sleeves:
Turn cardigan WS out. Place sleeve into armhole with right sides facing each other. Make sure the seam of the sleeve in lined up with the bottom of the armhole. Pin or clip in place then using Color A and a tapestry needle use your preferred method of seaming to join the sleeve to the armhole.

Pockets: make two
With 6mm hook and Color A, ch 22
Row 1: dc in 3rd ch from hook and in each ch across. (20)
Change to Color B, ch 1 and turn.
Row 2: sc into 1st st, sc into sp between first and second st, *ch 2, sk 3, sc into sp right after the 3rd skipped st, repeat from * until 1 st remains, sc into last st. (20)
Change to Color A, ch 2 and turn.
Row 3: dc into 1st st, *3dc into ch-2 sp, repeat from * across until 1 st remains, dc into last st. (20)
Change to Color B, ch 1 and turn.
Repeat Rows 2-3 for a total of 13 rows.
Change to Color B, ch 1 and turn.
Row 14: sc into 1st st and each st across. (20)
Do not fasten off. Ribbing is applied directly to top of pocket.
Pocket Ribbing:
Row 1: ch 4, sc in 2nd ch from hook and in next 2 chs, sl st into 1st 2 sts on top of pocket, turn. (3 sc, 2 sl sts)
Row 2: sk sl sts, sc BLO in each st across, ch 1, turn. (3 sc)
Row 3: sc BLO 3, sl st into next 2 sts on top of pocket, turn. (3sc, 2 sl sts)
Repeat Rows 2-3 until you’ve reached the end of the pocket, ending on a Row 3 repeat and sl stitching into the last st of the pocket.
Fasten off leaving a tail for seaming.
Collar:
With 5.5mm hook and Color B, attach yarn to bottom right front of cardigan and ch 1.
Row 1: sc in same st as join and in each st of the ribbing, then work 2 sc into end of each double crochet row and 1 sc into the end of each sc row and neckline st around, ch 1, turn.
Rows 2-4: sl st BLO into each st around, ch 1, turn.
Row 5: sl st BLO into each st around.
Fasten off and weave in ends.
Attach Pockets:
Pin pockets to both sides of the cardigan 2” in from the collar and 3” up from the bottom edge.
Sew in place along both sides and bottom using your preferred method. Fasten off and weave in all ends.

I hope you LOVE you new Magnus Cardigan! Make sure to share on socials and tag me @meghanmakesdo so I can see and share. You can also use #themagnuscardigan or #themagnuscardi so others can see your amazing work.
As always you can find a digital PDF of this pattern in my shop, Etsy or Ravelry and as a complete kit from Lion Brand Yarn.
Happy Crocheting,
Meghan