
The Flynn Cardi-Free Crochet Pattern
Introducing the Flynn Cardigan crochet pattern, a stylish and quick project using Lion Brand Pima Cotton yarn. This classic design features a button-up V-neckline and an airy open mesh stitch for breathability. Perfect for layering year-round, it adds sophistication to any outfit with minimal effort. Scroll down for the free pattern, grab the PDF in my shop or get the complete kit from Lion Brand Yarn.

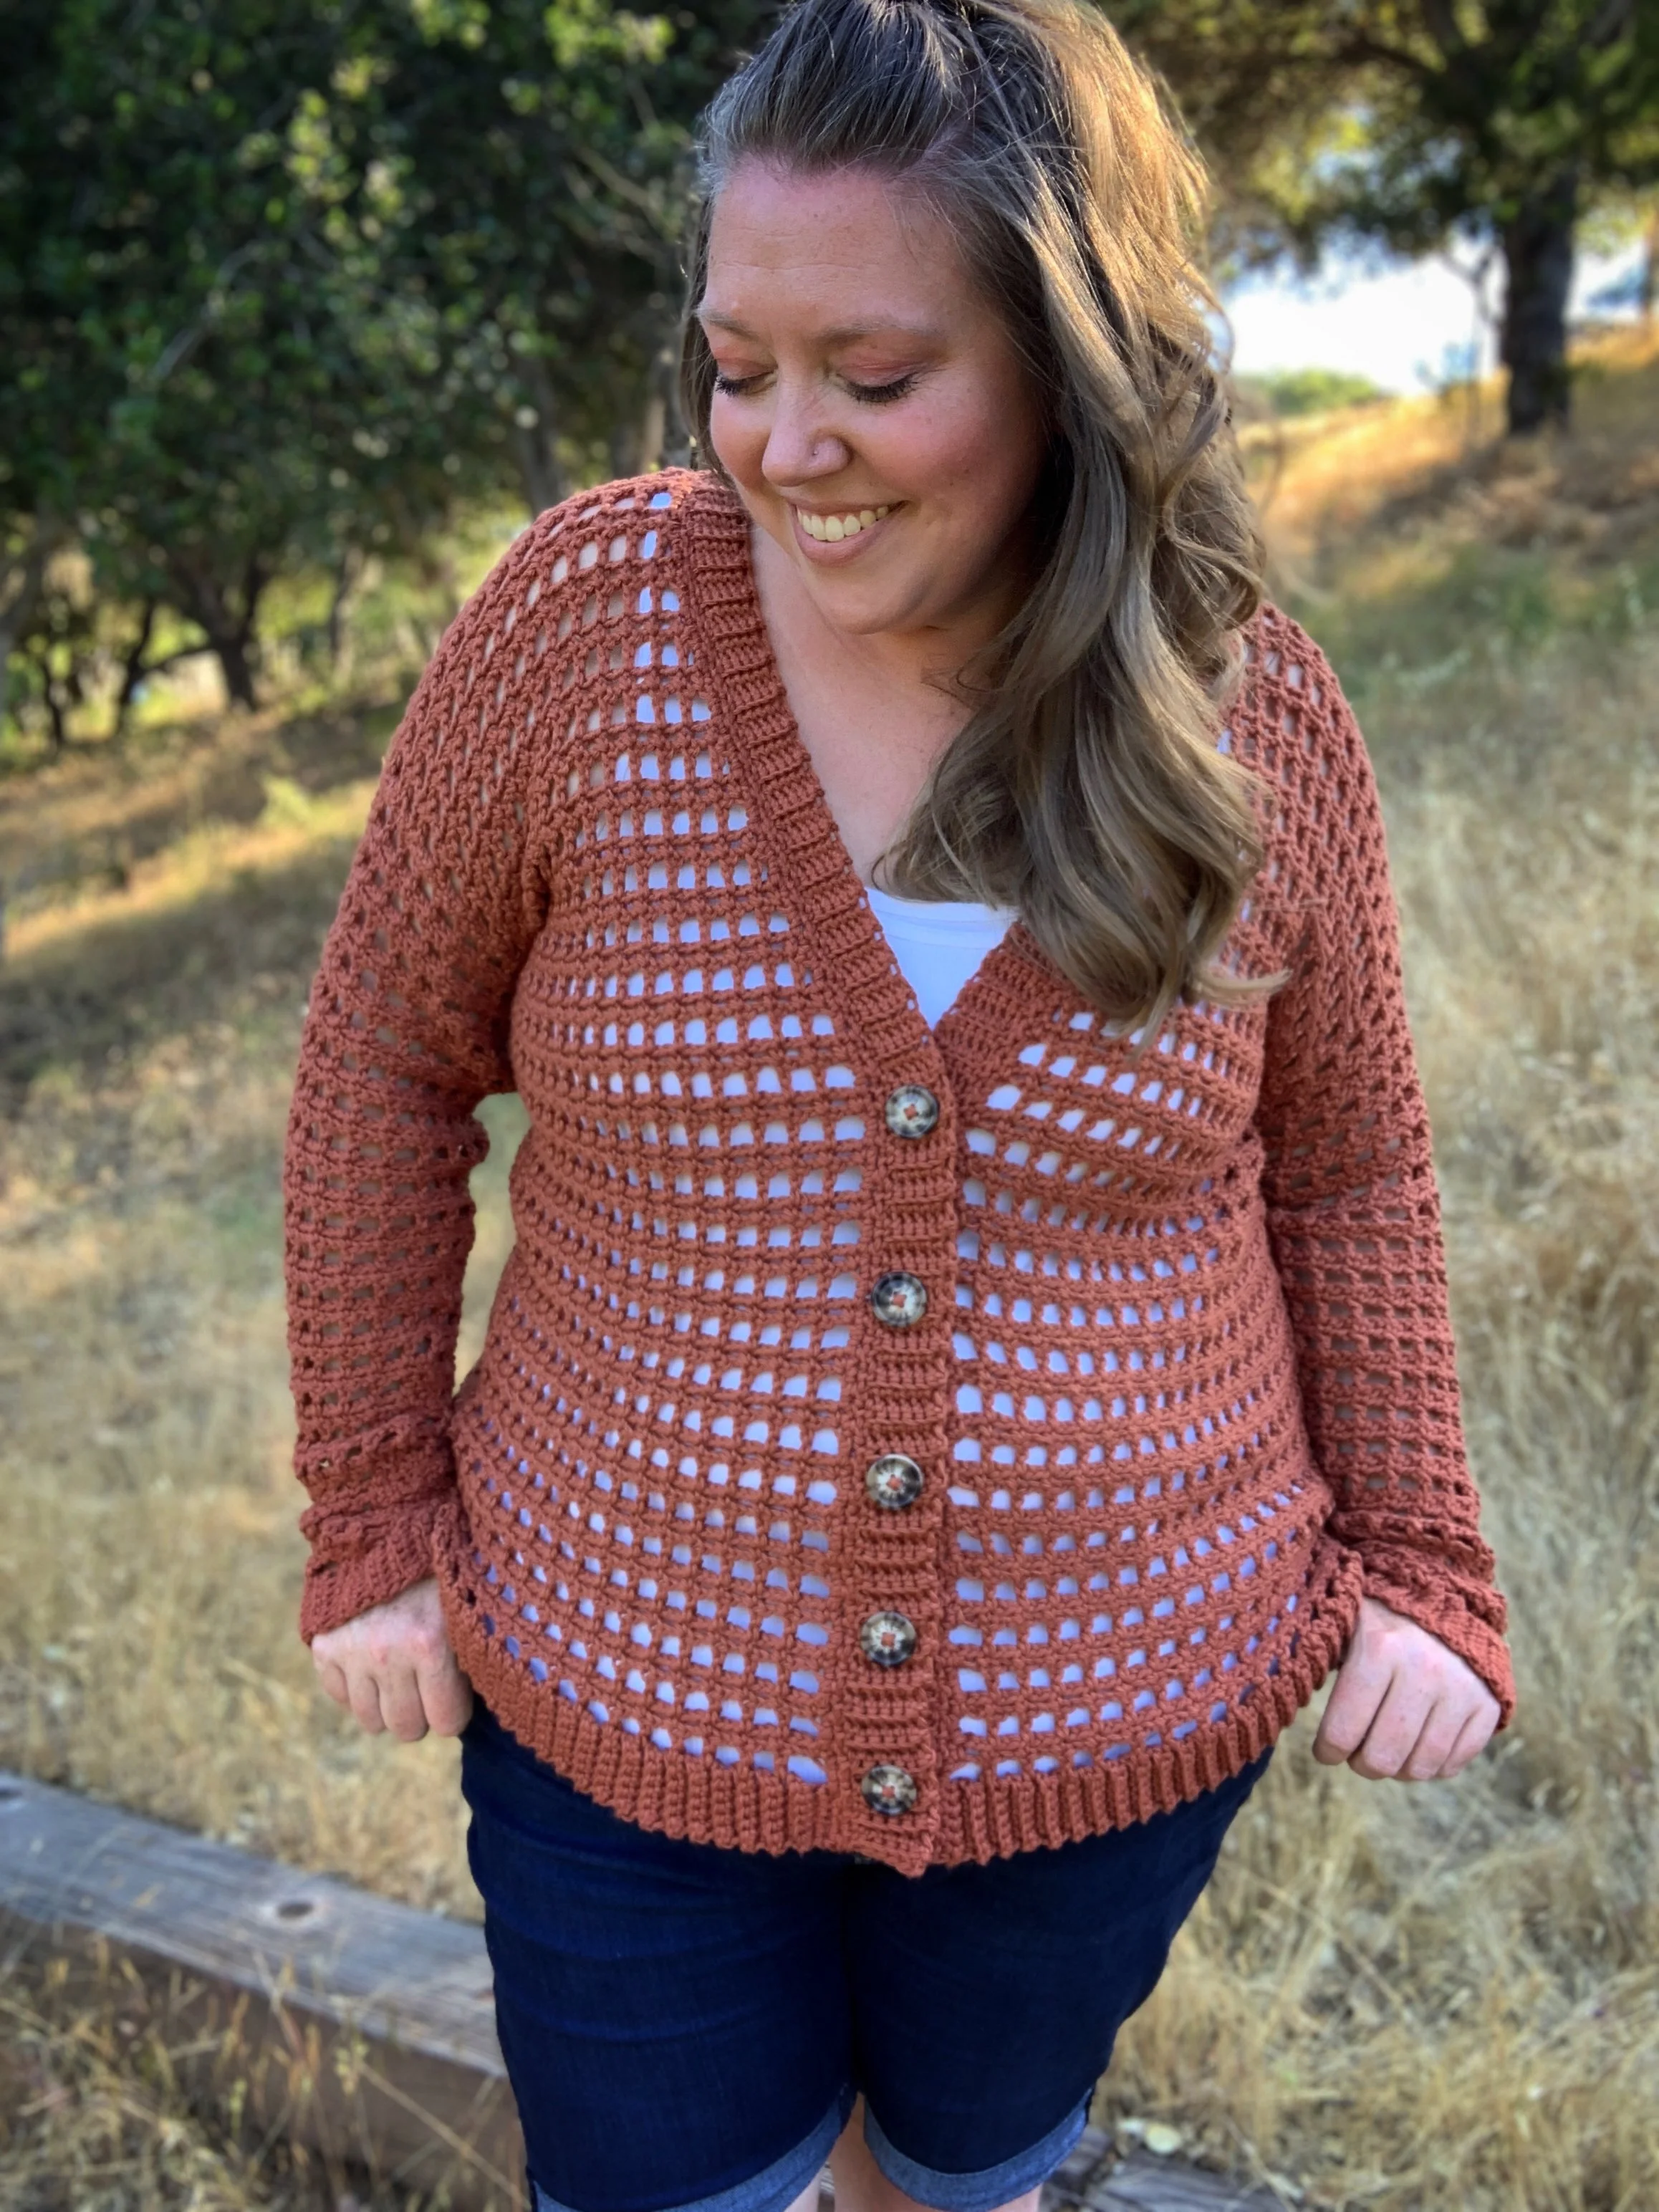
Say hello to your new favorite Summer Cardigan. The Flynn is everything you want when the weather gets warm, but you like to stay somewhat covered. Anyone else feel naked without a cardigan? It’s like an emotional support cardi right?
Here in the bay our summer’s are a bit more mild and once the sun starts to go down it gets a bit chilly so I wanted to design a cardigan that could give me just a bit of warmth, but still keep me cool. The unique open stitches of the Flynn are perfect for just that. I love the way the combination of basic stitches creates such a fun design.
The Flynn features Lion Brand’s Pima Cotton and it comes in so many beautiful colors to choose from. I’m currently loving all the rusty reds and oranges so the color Spice was a must have for me. It’s 100% cotton which is great for warmer months.
The Flynn also has a v-neck line and a button front with tapered sleeves. I’ve included a complete video tutorial as well so you’ll have some help along the way. Make sure to check it out below and subscribe to my YouTube channel so you don’t miss any new videos.

The Process
The Flynn Cardi is made in five pieces and then seamed together. We will start with the back panel, working a single crochet BLO ribbing and then turning and working the main body of the back panel into the ribbing row edges. We will do the same for the front panels, but also create the v-neck shape as we go. It can be helpful to mark which side if your right side with a stitch marker or little scrap of yarn so you know which side is which.
Then it’s on to the sleeves which are made similarly to the front and back panels, but this time we will be adding increases evenly along both sides as we work our way up. You can easily adjust the length of your sleeves by adding or subtracting rows after the final increases.
Next it we will seam our pieces together at the shoulders and along the sides and underarm. Then it will be time to add our collar with button holes. We will use the applied ribbing technique which can be a bit tricky if you’ve never done it before. I highly recommend watching the video for this part. Make sure to mark out where your button holes will be using some locking stitch markers. It will make it super easy to know when to work a button hole row.
Last we will sew our buttons in place, weave in our ends and steam block to finish! You’ll be wearing your new Flynn Cardi in no time.

The Flynn Cardi Crochet Pattern
Materials:
791-1329 yards (5-8 skeins) of Lion Brand Pima Cotton in the color Spice
Tapestry needle, scissors, tape measure, stitch markers
(4-XS/S/M/L/XL) or (5-2X/3X/4X/5X) 1-inch buttons
Abbreviations:
Ch(s)- chain(s)
St(s)- stitch(es)
sk- skip
sc- single crochet
dc- double crochet
dc2tog- double crochet two together
sl st- slip stitch
BLO- back loop only
RS- right side
WS- wrong side
Gauge:
18 sts X 9 rows = 4” X 4” in main pattern stitch.
For swatch use 5mm hook and ch 24,
Row 1: dc in 8th ch from hook, *ch 2, sk 2, dc, repeat from * across, turn.
Then use Rows 2-3 of main body back panel to finish swatch.
Notes:
1.Cardigan is made in five pieces. Back panel, 2 front panels and two sleeves. It is then seamed together and a collar with button holes is added directly to the front edge. Buttons are sewn on last.
2.Ch 3 at beginning of rows counts as a stitch. Ch 1 at beginning of rows does not count as a stitch.
3.The main pattern stitch is a multiple of 3+1.
4.Pattern is made with 0-2” of positive ease. Size up for a looser fit.
5. Model is wearing a size 2X and is 5’9”
Size:
XS: fits bust 28-30” (approx. 791 yards/ 5 skeins)
S: fits bust 32-34” (approx. 827 yards/ 5 skeins)
M: fits bust 36-38” (approx. 888 yards/ 5 skeins)
L: fits bust 40-42” (approx. 967 yards/ 6 skeins)
XL: fits bust 44-46” (approx. 1029 yards/ 6 skeins)
2X: fits bust 48-50” (approx. 1125 yards/ 7 skeins)
3X: fits bust 52-54” (approx. 1207 yards/ 7 skeins)
4X: fits bust 56-58” (approx. 1254 yards/ 7 skeins)
5X: fits bust 60-62” (approx. 1329 yards/ 8 skeins)

Video Tutorial
Pattern:
Back Panel: make one
Ribbing:
With 4.5mm hook, ch 7 (for all sizes)
Row 1: sc in 2nd ch from hook and in each ch across, ch 1, turn. (6)
Row 2: sc in BLO across, ch 1, turn. (6)
Repeat Row 2 for a total of 73(79, 88, 97, 103, 112, 121, 127, 136) rows. Do not ch 1 on the last row.
Main Body:
Change to 5mm hook. Turn your ribbing 90 degrees.
We will now be working into the edges of the ribbing to start the main body of the back panel.
Row 1(WS): ch 5(counts as 1st st and ch 2), *sk 2 edges, dc into the edge of next row of ribbing, ch 2, repeat from * until 3 rows remain, dc into last row edge, turn. (73(79, 88, 97, 103, 112, 121, 127, 136)
Row 2(RS): ch 1, sc in 1st dc, *ch 2, sc in next dc, repeat from * across placing last sc in 3rd ch of turning ch, turn. (73(79, 88, 97, 103, 112, 121, 127, 136)
Row 3: ch 5, *dc in next sc, ch 2, repeat from * across, dc in last sc, turn. (73(79, 88, 97, 103, 112, 121, 127, 136)
Repeat Rows 2-3 for a total of 49(49, 49, 49, 49, 53, 53, 53, 53) rows.
Fasten off leaving a long tail for seaming.
Front Left Panel:
Ribbing:
With 4.5mm hook, ch 7 (for all sizes)
Row 1: sc in 2nd ch from hook and in each ch across, ch 1, turn. (6)
Row 2: sc in BLO across, ch 1, turn. (6)
Repeat Row 2 for a total of 34(37, 40, 46, 49, 52, 58, 61, 64) rows. Do not ch 1 on the last row.
Main Body:
Change to 5mm hook. Turn your ribbing 90 degrees.
We will now be working into the edges of the ribbing to start the main body of the front panel.
Row 1(WS): ch 5(counts as 1st st and ch 2), *sk 2 edges, dc into the edge of next row of ribbing, ch 2, repeat from * until 3 rows remain, dc into last row edge, turn. (34(37, 40, 46, 49, 52, 58, 61, 64)
Row 2(RS): ch 1, sc in 1st dc, *ch 2, sc in next dc, repeat from * across placing last sc in 3rd ch of turning ch, turn. (34(37, 40, 46, 49, 52, 58, 61, 64)
Row 3: ch 5, *dc in next sc, ch 2, repeat from * across, dc in last sc, turn. (34(37, 40, 46, 49, 52, 58, 61, 64)
Repeat Rows 2-3 for a total of 28(28, 28, 28, 28, 30, 30, 30, 30) rows, ending on a Row 2 repeat.
Decrease Section:
Row 1(WS): ch 4(counts as 1st st and ch 1), *dc in next sc, ch 2, repeat from * across, dc in last sc, turn. (33(36, 39, 45, 48, 51, 57, 60, 63)
Row 2(RS): ch 1, sc in 1st dc, *ch 2, sc in next dc, repeat from * across until ch 4, ch 1 place last sc in 3rd ch of turning ch, turn. (33(36, 39, 45, 48, 51, 57, 60, 63)
Row 3: ch 3, *dc in next sc, ch 2, repeat from * across, dc in last sc, turn. (32(35, 38, 44, 47, 50, 56, 59, 62)
Row 4: ch 1, sc in 1st dc, *ch 2, sc in next dc, repeat from * across until last dc, sc in top of ch 3, turn. (31(34, 37, 43, 46, 49, 55, 58, 61)
Rows 5-20: Repeat Rows 1-4. (19(21, 23, 25, 31, 34, 37, 43, 46, 49
Row 21: ch 5, *dc in next sc, ch 2, repeat from * across, dc in last sc, turn. (19(21, 23, 25, 31, 34, 37, 43, 46, 49
XS(S, M, L, XL)-ONLY
Fasten off leaving a long tail for seaming.
2X(3X, 4X, 5X)-ONLY
Row 22: ch 1, sc in 1st dc, *ch 2, sc in next dc, repeat from * across placing last sc in 3rd ch of turning ch, turn. (37(43, 46, 49 )
Row 23: ch 5, *dc in next sc, ch 2, repeat from * across, dc in last sc, turn. (37(43, 46, 49 )
Fasten off leaving a long tail for seaming.

Front Right Panel:
Repeat instructions for Front Left Panel thru row 28(28, 28, 28, 28, 30, 30, 30, 30) rows.
Decrease Section:
Row 1(WS): ch 5, *dc in next sc, ch 2, repeat from * across until 4 sts remain,, dc in next sc, ch1, dc in last sc, turn. (33(36, 39, 45, 48, 51, 57, 60, 63)
Row 2(RS): ch 1, sc in 1st dc, ch 1, sc in next dc, *ch 2, sc in next dc, repeat from * across placing last sc in 3rd ch of turning ch, turn. (33(36, 39, 45, 48, 51, 57, 60, 63)
Row 3: ch 5, *dc in next sc, ch 2, repeat from * across until 3 sts remain, dc in next 2 sc sts, turn. (32(35, 38, 44, 47, 50, 56, 59, 62)
Row 4: ch 1, sk 1st dc, sc in next dc, *ch 2, sc in next dc, repeat from * across placing last sc in 3rd chof turning ch, turn. (31(34, 37, 43, 46, 49, 55, 58, 61)
Rows 5-20: Repeat Rows 1-4. (19(21, 23, 25, 31, 34, 37, 43, 46, 49)
Row 21: ch 5, *dc in next sc, ch 2, repeat from * across, dc in last sc, turn. (19(21, 23, 25, 31, 34, 37, 43, 46, 49)
XS(S, M, L, XL)-ONLY
Fasten off leaving a long tail for seaming.
2X(3X, 4X, 5X)-ONLY
Row 22: ch 1, sc in 1st dc, *ch 2, sc in next dc, repeat from * across placing last sc in 3rd ch of turning ch, turn. (37(43, 46, 49 )
Row 23: ch 5, *dc in next sc, ch 2, repeat from * across, dc in last sc, turn. (37(43, 46, 49)
Fasten off leaving a long tail for seaming.
Sleeves: (make two)
Ribbing:
With 4.5mm hook, ch 7 (for all sizes)
Row 1: sc in 2nd ch from hook and in each ch across, ch 1, turn. (6)
Row 2: sc in BLO across, ch 1, turn. (6)
Repeat Row 2 for a total of 28(28, 31, 34, 34, 34, 37, 37, 37) rows.
Do not ch 1 on the last row.
Sleeves Main Body:
Change to 5mm hook. Turn your ribbing 90 degrees.
We will now be working into the edges of the ribbing to start the main body of the sleeve.
Row 1(WS): ch 3, dc into edge of 1st row of ribbing, *sk 2 edges, dc into the edge of next row of ribbing, ch 2, repeat from * until 3 rows remain, 2dc into last row edge, turn. (30(30, 33, 36, 36, 36, 39, 39, 39)
Row 2(RS): ch 1, sc in 1st dc, ch 1, sc in next dc, *ch 2, sc in next dc, repeat from * across, ch 1, sc in 3rd ch of turning ch, turn. (32(32, 35, 38, 38, 38, 41, 41, 41)
Row 3: ch 5(counts as 1st st and ch 2), *dc in next sc, ch 2, repeat from * across, dc in last sc, turn. (34(34, 37, 40, 40, 40, 43, 43, 43)
Row 4: ch 1, sc in 1st dc, *ch 2, sc in next dc, repeat from * across placing last sc in 3rd ch of turning ch, turn. (34(34, 37, 40, 40, 40, 43, 43, 43)
Row 5: ch 5, *dc in next sc, ch 2, repeat from * across, dc in last sc, turn. (34(34, 37, 40, 40, 40, 43, 43, 43)
Row 6: ch 1, sc in 1st dc, *ch 2, sc in next dc, repeat from * across placing last sc in 3rd ch of turning ch, turn. (34(34, 37, 40, 40, 40, 43, 43, 43)
Row 7: ch 3, dc 1st st (increase made), ch 2, *dc into next sc, ch 2, repeat from * across, 2dc into last sc, turn. (36(36, 39, 42, 42, 42, 45, 45, 45)
Row 8: ch 1, sc in 1st dc, ch 1, sc in next dc, *ch 2, sc in next dc, repeat from * across, ch 1, sc in top of turning ch, turn. (38(38, 41, 44, 44, 44, 47, 47, 47) Row 9: ch 5(counts as 1st st and ch 2), *dc in next sc, ch 2, repeat from * across, dc in last sc, turn. (40(40, 43, 46, 46, 46, 49, 49, 49)
Row 10: ch 1, sc in 1st dc, *ch 2, sc in next dc, repeat from * across placing last sc in 3rd ch of turning ch, turn. (40(40, 43, 46, 46, 46, 49, 49, 49)
Row 11: ch 5, *dc in next sc, ch 2, repeat from * across, dc in last sc, turn. (40(40, 43, 46, 46, 46, 49, 49, 49)
Row 12: ch 1, sc in 1st dc, *ch 2, sc in next dc, repeat from * across placing last sc in 3rd ch of turning ch, turn. (40(40, 43, 46, 46, 46, 49, 49, 49)
XS(S, M, L)-ONLY
Rows 13-36: Repeat Rows 7-12. (64(64, 67, 70)
Rows 37-41: Repeat Rows 11-12, ending on a Row 11 repeat. (64(64, 67, 70)
Fasten off.
XL(2X, 3X)-ONLY
Rows 13-41: Repeat Rows 7-12, ending on a Row 11 repeat. (76(76, 79)
Fasten off.
4X-ONLY
Rows 13-24: Repeat Rows 7-12. (61)
Rows 25-39: Repeat Rows 7-10, ending on a Row 9 repeat. (85)
Fasten off.
5X-ONLY
Rows 13-39: Repeat Rows 7-10, ending on a Row 9 repeat. (91)
Fasten off.
Seaming:
Lay Back Panel and two Front Panels together at the shoulders with RS facing each other. Using your preferred seaming method attach front panels to back panel.

Attach the sleeves to the sides of the cardigan, using your preferred seaming method, making sure to align the center of the sleeve with the shoulder seam. Make sure the sleeves are attached evenly from the center shoulder seam, down the sides. Using stitch markers to hold the sleeve in place is recommended.

Fold cardigan so that the back and front panels are on top of each other. Then seam the sleeves from the underarm to the cuff. Seam the sides from the underarm down to the bottom.
Collar:
With 4.5mm hook, attach yarn to bottom front right hand side of cardigan with RS facing and ch 1.
Set up row: sc in same st as join and in each st of ribbing, sc evenly around entire edge of cardigan making sure to work 3 sc for every 2 rows, sc in each st of ribbing on the left hand side. (approx. 194(194, 197, 194, 194, 209, 206, 206, 209)
Do not fasten off.
Using locking stitch markers, place one in each of the following stitches along the right hand side of the cardigan collar. Start counting on the first st of the set up row.
XS/S/M/L/XL: 7th, 18th, 29th, and 40th
2X/3X/4X/5X: 6th, 16th, 26th, 36th, and 46th
These will be the button hole rows.
We will now be adding an applied ribbing for the collar by working horizontal rows and attaching to the set up row as we go.
Ch 7
Row 1: sc in 2nd ch from hook and in each ch across, sl st 2 into 1st 2 sts of the set up row, turn. (6sc, 2slsts)
Row 2: sk sl sts, sc BLO in each st across, ch 1, turn. (6)
Row 3: sc BLO in each st across, sl st 2 into next 2 set up row sts, turn. (6sc, 2slsts)
Repeat Rows 2-3 around entire collar, making button holes in marked rows as you go.
To make a button hole on a Row 2 repeat: sk sl sts, sc BLO 1, ch 1, sk 1, sc BLO 4, ch 1, turn.
To make a button hole on a Row 3 repeat: sc BLO 4, ch 1, sk 1, sc BLO 1, sl lst 2 into next 2 set up row sts, turn.
Fasten off and weave in all ends.
Attach Buttons:
Sew buttons to left side of collar in the
XS/S/M/L/XL: 7th, 18th, 29th, and 40th
2X/3X/4X/5X: 6th, 16th, 26th, 36th, and 46th
Rows in 4th stitch from the edge.
Steam block if needed and enjoy!

I hope you love your new Flynn Cardi. If you make one, I’d love to see it! Make sure to tag me @meghanmakesdo on social media and use #theflynncardi
As always you can find a PDF version of this pattern in my shop, Etsy and Ravelry or get the complete kit from Lion Brand Yarn.
Happy Crocheting,
Meghan

