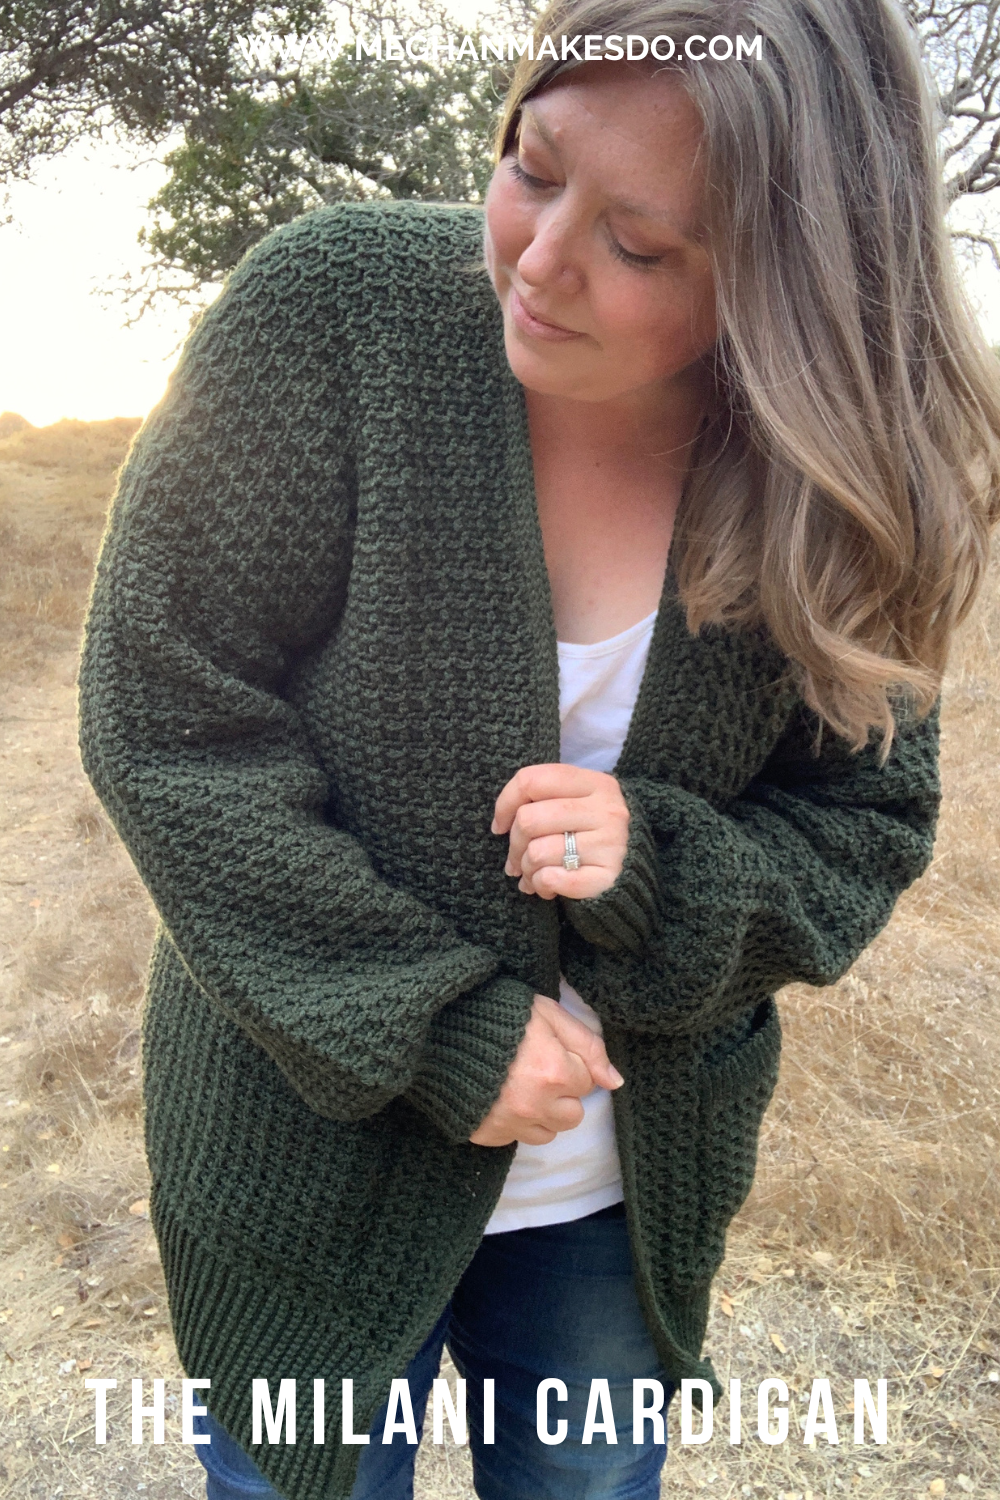
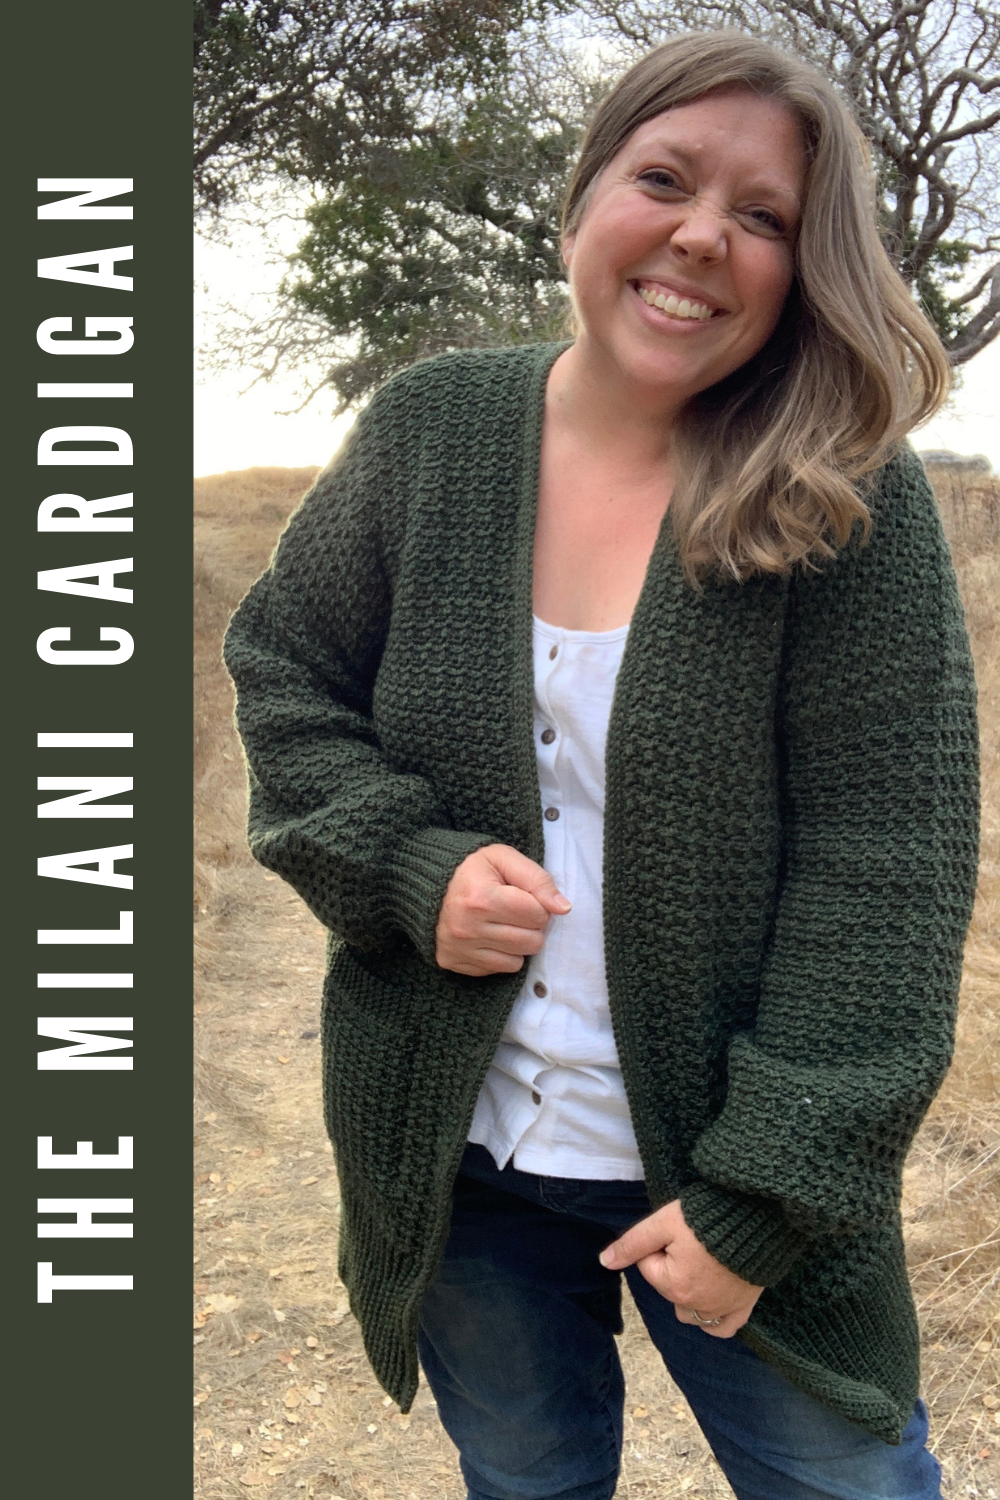
The Milani Cardigan-Free Crochet Pattern
Get ready for cooler weather with this modern cardigan. The Milani Cardigan features a beautiful texture, oversized fit and pockets. The easy construction will have you wearing your new Milani in no time. Find the free pattern below or grab the PDF in my shop.
I almost can’t believe this day is here. I’ve been slowly working on designing this cardigan for over 3 years! Yes, I know that is an unusually long time to be working on a project. This was one of those designs that kept having to get pushed back due to other projects with strict deadlines. I would pick it up here and there when I could and I even brought it with me on my annual summer trip to Ohio back in 2022. I had high hopes of finishing it then, but of course other things got in the way and it wasn’t until this August that I was finally able to work that last stitch.
It was totally worth it though. This cardigan has been such a labor of love and it turned out even better than I envisioned. It all started with the perfect shade of green yarn. I searched for weeks all over the internet to find just the right shade that I wanted. Luckily Cascade Yarns makes so many gorgeous colors that I knew their Olive Heather would be perfect. They were so kind to send me over what I needed.
I just love the stitch definition their 220 Superwash yarn gives this stitch. It was a perfect match. I’ve always been a fan of the waffle stitch, but it can be a huge yarn eater. I decided to modify it a bit using half double crochets and utilizing the magical third loop to create a unique waffle like texture. The result is stunning and quite honestly a bit of an addicting stitch to make.
I’ve included a video tutorial for this alternate waffle stitch so you’ll know exactly which loops to work into.
I hope you love working on this cardigan as much as I did and hopefully it won’t take you as long as me. LOL.

The Milani Cardigan Crochet Pattern
Materials:
2021-3257 yards of Cascade 220 Superwash in Olive Heather-865 (220yds/3.5oz)
Tapestry needle, scissors, tape measure
Abbreviations:
Ch(s)- chain(s)
St(s)- stitch(es)
sc- single crochet
BLO- back loop only
hdc- half double crochet
hdc3LO- half double crochet in the 3rd loop
RS- right side
WS- wrong side
Gauge:
17 sts X 10 rows = 4” X 4” in pattern stitch (alternate waffle stitch) using a 3.75mm hook
Notes:
1.Ch(s) at beginning of rows do(es) not count as a stitch.
2.The cardigan is made in 7 pieces (back panel, 2 front panels, 2 sleeves and 2 pockets). All pieces are seamed together and then the collar is worked directly onto the cardigan and pockets are attached to the front panels.
3.Sizes are written like this XS(S, M, L, XL, 2X, 3X, 4X, 5X). It is recommended to highlight the numbers for your size before starting.
Size:
XS: fits bust 28-30” (approx. 2021 yards/ 10 skeins)
S: fits bust 32-34” (approx. 2148 yards/ 10 skeins)
M: fits bust 36-38” (approx. 2394 yards/ 11 skeins)
L: fits bust 40-42” (approx. 2548 yards/ 12 skeins)
XL: fits bust 44-46” (approx. 2650 yards/ 13 skeins)
2X: fits bust 48-50” (approx. 2820 yards/ 13 skeins)
3X: fits bust 52-54” (approx. 3024 yards/ 14 skeins)
4X: fits bust 56-58” (approx. 3051yards/ 14 skeins)
5X: fits bust 60-62” (approx. 3257 yards/ 15 skeins)

Pattern:
Back Panel: make one
Ribbing:
With 3.75mm hook, ch 22,
Row 1: sc in 2nd ch from hook and in each ch across, ch 1, turn. (21)
Row 2: sc BLO in 1st st and in each st across, ch 1, turn. (21)
Repeat Row 2 for a total of 75(81, 93, 102, 111, 117, 126, 129, 141) rows.
Turn ribbing 90 degrees, continue working the back panel main body by working into the edges of the ribbing for Row 1.
Main Body Back:
Row 1(RS): hdc into the end of each row of the ribbing, ch 1, turn. (75(81, 93, 102, 111, 117, 126, 129, 141)
Row 2(WS): hdc3LO in 1st st, hdc, * hdc3LO 2, hdc, repeat from * until 1 st remains, hdc3LO in last st, ch 1, turn. (75(81, 93, 102, 111, 117, 126, 129, 141)
Row 3: hdc in 1st st, hdc3LO, *hdc 2, hdc3LO, repeat from * until 1 st remains, hdc in last st, ch 1, turn. (75(81, 93, 102, 111, 117, 126, 129, 141)
Repeat Rows 2-3 for a total of 75(75, 77, 77, 77, 77, 79, 79, 79) rows.
Fasten off, leaving a long tail for seaming.
Front Panels: make two
Ribbing:
With 3.75mm hook, ch 22,
Row 1: sc in 2nd ch from hook and in each ch across, ch 1, turn. (21)
Row 2: sc BLO in 1st st and in each st across, ch 1, turn. (21)
Repeat Row 2 for a total of 33(36, 42, 45, 48, 51, 57, 57, 63) rows.
Turn ribbing 90 degrees, continue working the front panel main body by working into the edges of the ribbing for Row 1.
Main Body Front:
Row 1(RS): hdc into the end of each row of the ribbing, ch 1, turn. (33(36, 42, 45, 48, 51, 57, 57, 63)
Row 2(WS): hdc3LO in 1st st, hdc, * hdc3LO 2, hdc, repeat from * until 1 st remains, hdc3LO in last st, ch 1, turn. (33(36, 42, 45, 48, 51, 57, 57, 63)
Row 3: hdc in 1st st, hdc3LO, *hdc 2, hdc3LO, repeat from * until 1 st remains, hdc in last st, ch 1, turn. (33(36, 42, 45, 48, 51, 57, 57, 63)
Repeat Rows 2-3 for a total of 75(75, 77, 77, 77, 77, 79, 79, 79) rows.
Fasten off, leaving a long tail for seaming.
Sleeves: make two
Ribbing:
With 3.75mm hook, ch 15,
Row 1: sc in 2nd ch from hook and in each ch across, ch 1, turn. (14)
Row 2: sc BLO in 1st st and in each st across, ch 1, turn. (14)
Repeat Row 2 for a total of 33(35, 35, 36, 36, 38, 39, 41, 41) rows.
Turn ribbing 90 degrees, continue working the sleeves main body by working into the edges of the ribbing for Row 1.
Main Body Sleeves:
XS(L, XL, 3X)
Row 1(RS): 2hdc into the end of each row of the ribbing, ch 1, turn. (66(72, 72, 78)
S(M, 2X, 4X, 5X)
Row 1(RS): 2hdc into the end of each row of the ribbing until 1 row remains, hdc in last row of ribbing, ch 1, turn. (69(69, 75, 81, 81)
All Sizes:
Row 2(WS): hdc3LO in 1st st, hdc, * hdc3LO 2, hdc, repeat from * until 1 st remains, hdc3LO in last st, ch 1, turn. (66(69, 69, 72, 72, 75, 78, 81, 81)
Row 3: hdc in 1st st, hdc3LO, *hdc 2, hdc3LO, repeat from * until 1 st remains, hdc in last st, ch 1, turn. (66(69, 69, 72, 72, 75, 78, 81, 81)
Repeat Rows 2-3 for a total of 47(47, 47, 47, 45, 45, 45, 43, 43) rows.
Fasten off.
Seaming:
Lay Back Panel and two Front Panels together at the shoulders with RS facing each other. Using your preferred seaming method attach front panels to back panel. There will be 9(9, 9, 12, 15, 15, 12, 15, 15) sts unseamed in the center of the back panel.

Attach the sleeves to the sides of the cardigan, using your preferred seaming method, making sure to align the center of the sleeve with the shoulder seam. Make sure the sleeves are attached evenly from the center shoulder seam, down the sides. Using stitch markers to hold the sleeve in place is recommended.
Fold cardigan so that the back and front panels are on top of each other. Then seam the sleeves from the underarm to the cuff. Seam the sides from the underarm down to the bottom.

Pockets: make two
With 3.75mm hook, ch 28,
Row 1(RS): hdc in 2nd ch from hook and in each ch across, ch 1, turn. (27)
Row 2(WS): hdc3LO in 1st st, hdc, * hdc3LO 2, hdc, repeat from * until 1 st remains, hdc3LO in last st, ch 1, turn. (27)
Row 3: hdc in 1st st, hdc3LO, *hdc 2, hdc3LO, repeat from * until 1 st remains, hdc in last st, ch 1, turn. (27)
Repeat Rows 2-3 for a total of 19 rows.
Pocket Ribbing: without fastening off, ch 7 and turn.
Row 1: sc in 2nd ch from hook and in each ch across, sl st into 1st and 2nd stitch of main body of pocket, turn. (6 sc, 2 sl sts)
Row 2: sc in BLO of each st across, ch 1, turn. (6 sc)
Row 3: sc in BLO of each st across, sl st into next 2 stitches of main body of pocket, turn. (6 sc, 2 sl sts)
Repeat Rows 2-3 across the top of the pocket. You will end on a Row 3 repeat, but only sl st once into the last stitch of the main body of the pocket. Fasten off leaving a long tail for sewing.
Collar:
With 4mm hook, attach yarn to bottom right hand side of cardigan with RS facing you, ch 1.
Row 1(RS): sc into each st of the ribbing, 2sc into the edge of each row up the right side, sc into each stitch along the neck, 2sc into the edge of each row down the left side, sc into each st of the ribbing, ch 1, turn.
Collar may look wavy at this point but should tighten up as you work the sl st BLO over the next several rows.
Rows 2-5: sl st into BLO of each st across, ch 1, turn.
Row 6(WS): sl st into each st across.
Fasten off and weave in any remaining ends.
Attach Pockets:
Pin pockets to both sides of the cardigan 2(2, 2, 2, 3, 3, 3, 3, 3)” in from the collar and 6” up from the bottom edge.
Adjust pocket placement if needed to fit your needs.
Sew in place along both sides and bottom using your preferred method. Fasten off and weave in all ends.

Now go enjoy your brand new Milani Cardigan! If you make one, I’d love to see it. Make sure to tag me @meghanmakesdo on social media and use #themilanicardigan so I can share.
As always you can find a PDF version of this pattern in my shop, Etsy or Ravelry.
Happy Crocheting,
Meghan