
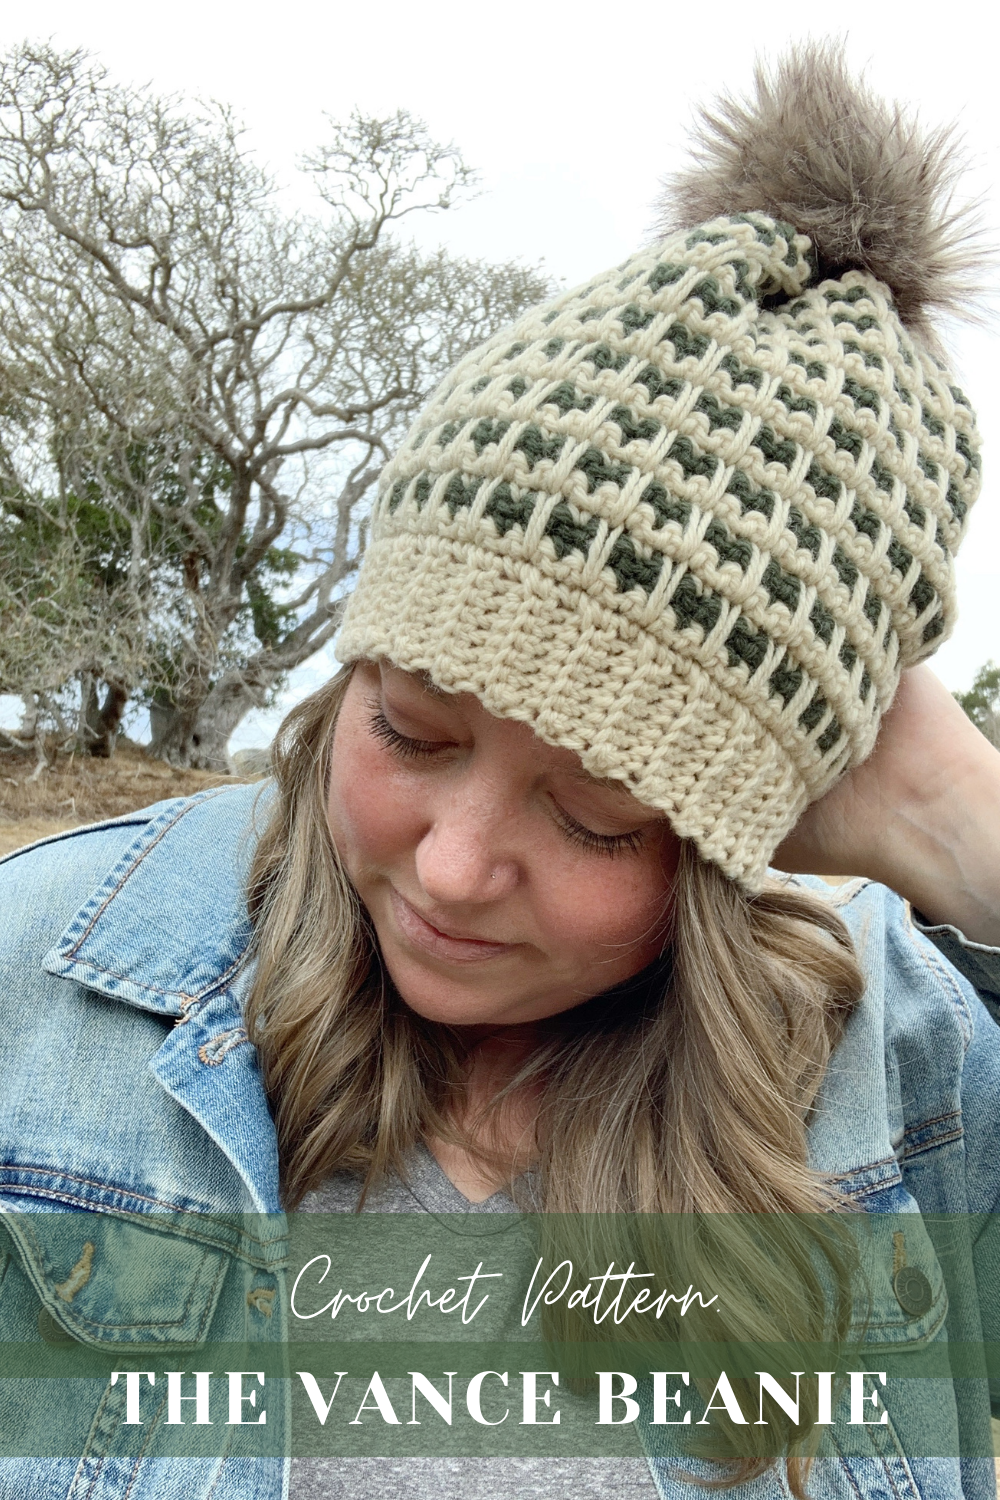
The Vance Beanie-Free Crochet Pattern
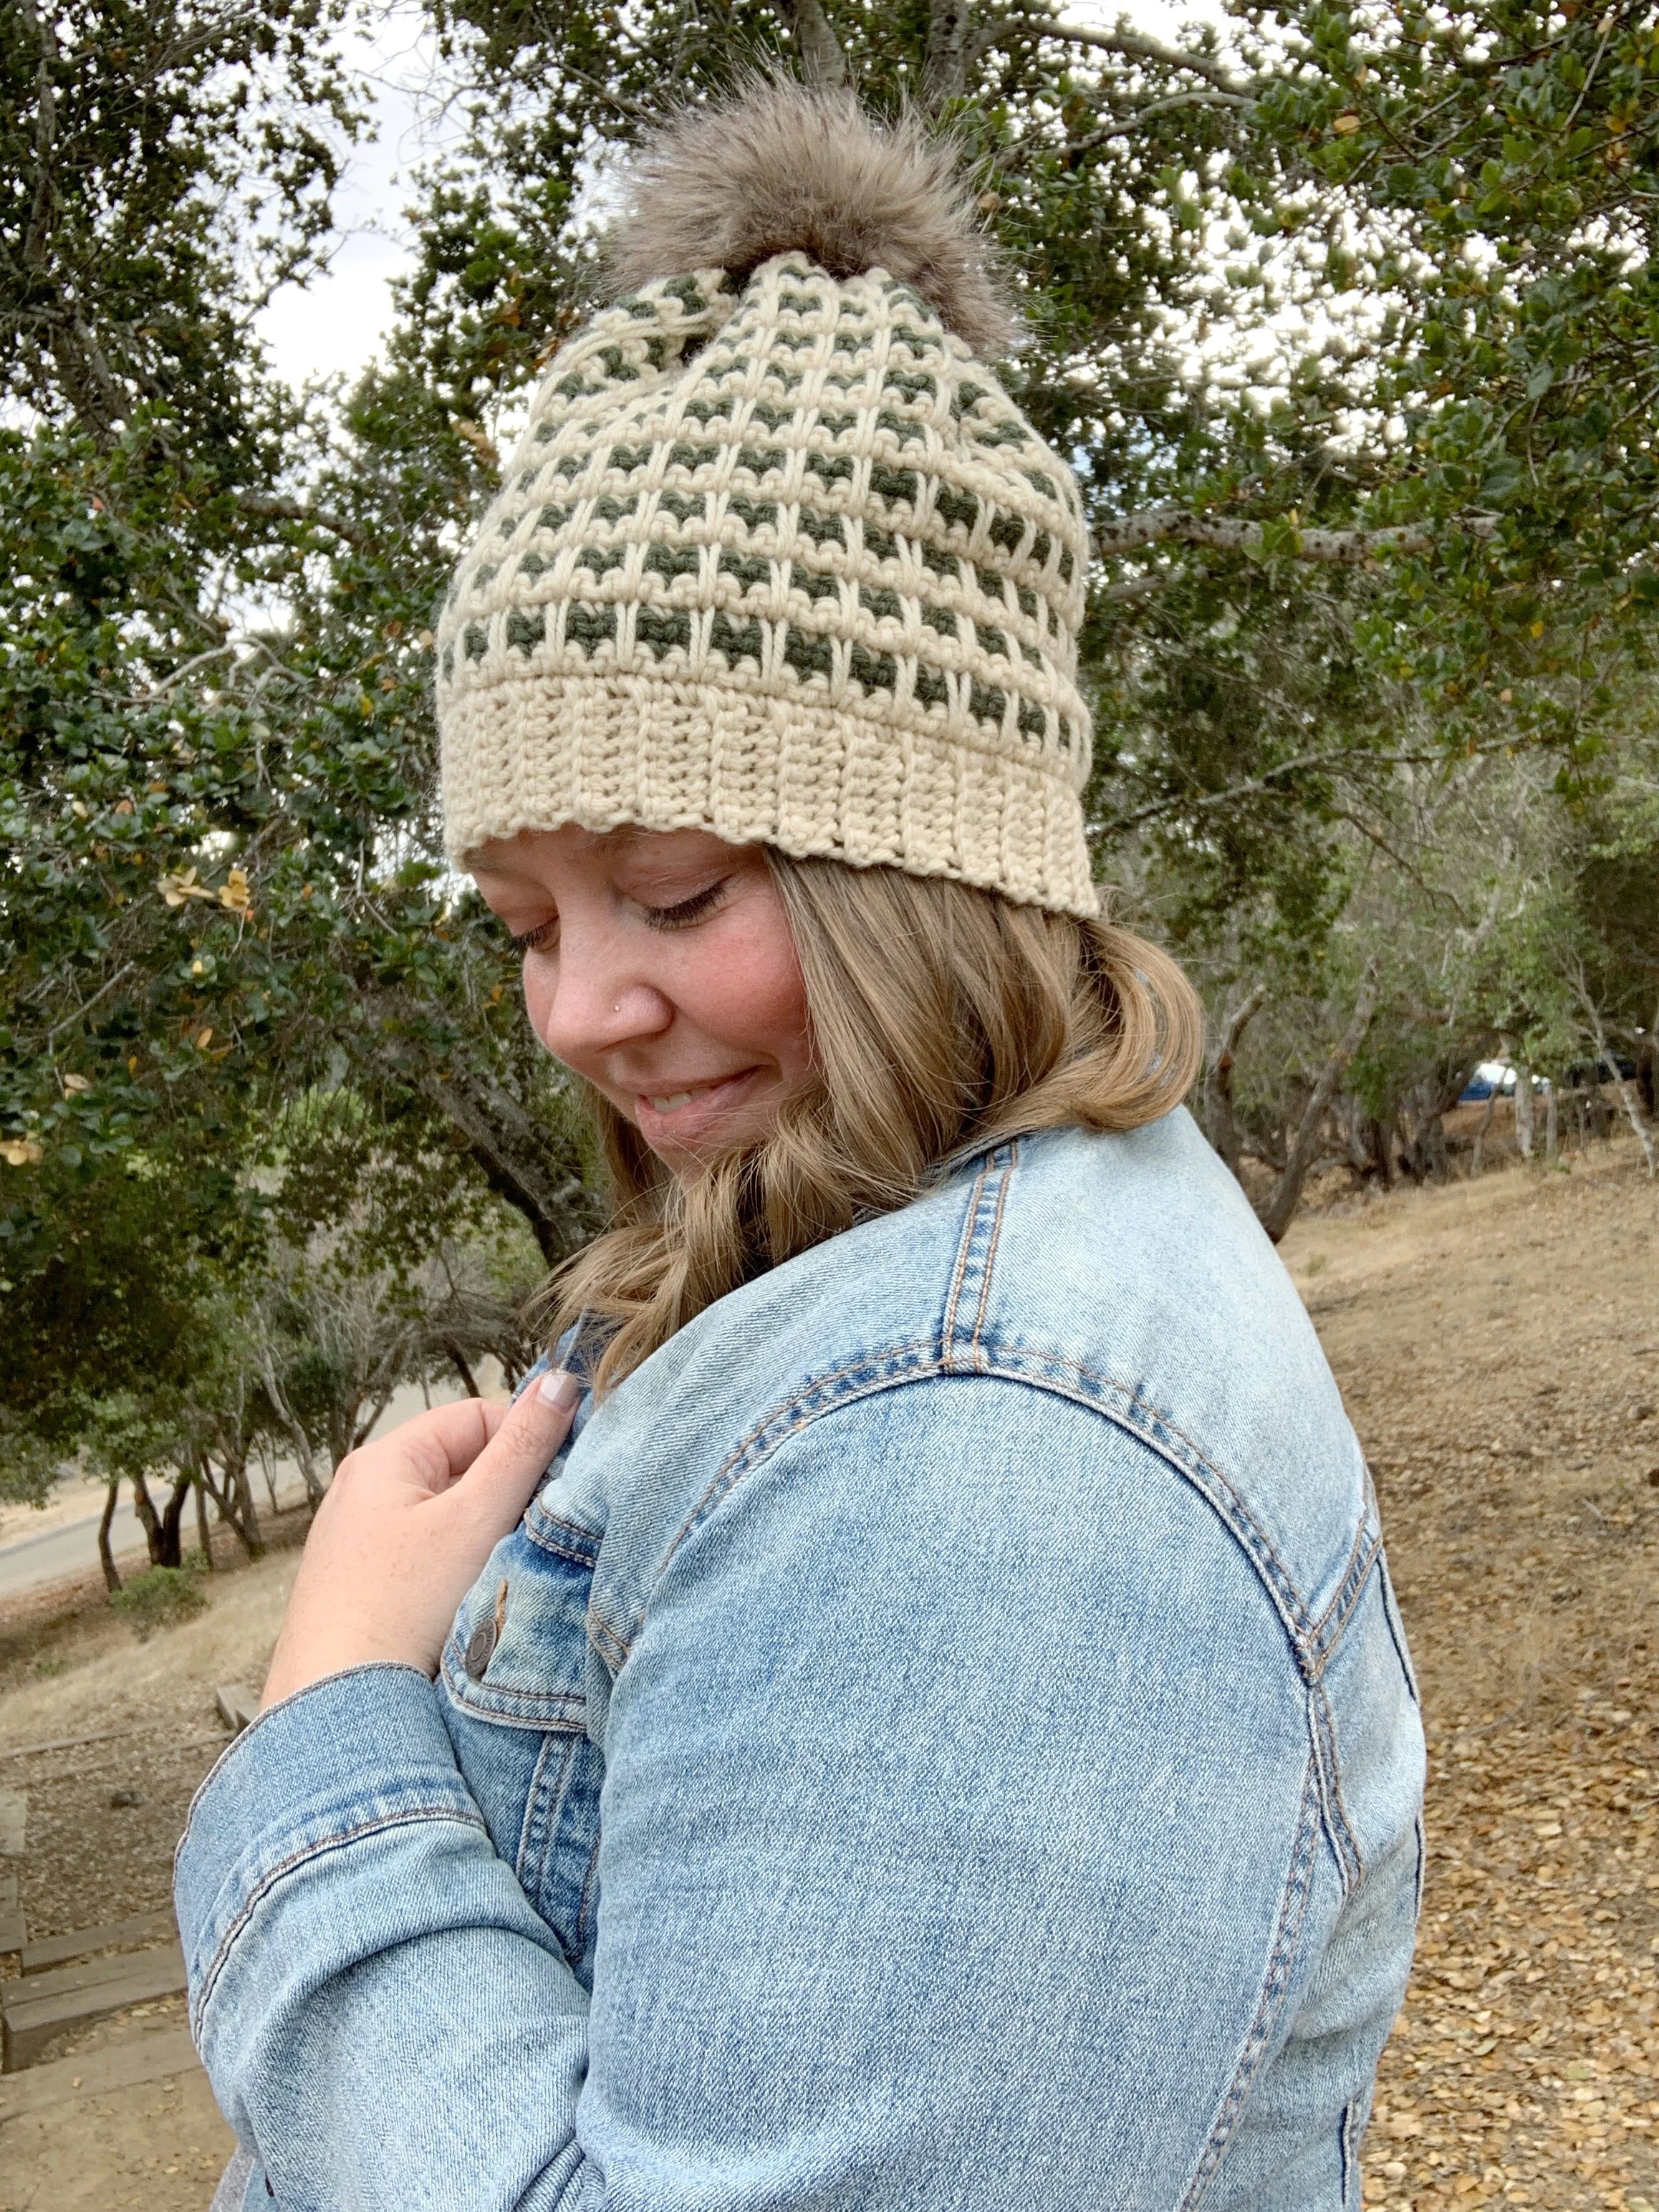
Looking for a unique winter hat pattern? This two-color crochet hat pattern features a colorful and eye-catching design. It is perfect for advanced beginners looking to level up their skills. Keep scrolling for the step-by-step instructions and create your own stylish crochet hat.
A few months ago I took a trip to my local Joann to check out all the colors of the new Local Grown 100% wool yarn from Lion Brand. I fell in love with all the colors, but only took home two. I knew I wanted to design something warm and cozy for the winter months ahead.
I spent an afternoon playing around with different crochet stitches that would look great with two colors. As soon as I tried this beautiful stitch I knew it was the one!
The best part is, it’s just basic crochet stitches. The magic happens by doing a single crochet stitch a few rows below the working row. It creates such a unique design that I knew it had to become my new winter hat.

The Vance Beanie uses basic crochet stitches and a few more advanced techniques, like working into different rows and turned rounds. I’ve made a complete video tutorial to help along the way. I suggest watching while also following along with the written pattern. You can find the tutorial below.
The Vance Beanie Crochet Pattern
Materials:
175 yards of Lion Brand Local Grown in Vanilla Bean (Color A)
100 yards of Lion Brand Local Grown in Moss (Color B)
Tapestry needle, scissors, tape measure
Faux fur pom or pom-pom maker for yarn pom (optional)
Abbreviations:
Ch(s)- chain(s)
St(s)- stitch(es)
sl st- slip stitch
sc- single crochet
BLO- back loop only
RS- right side
WS- wrong side
Notes:
1.Ch(s) at beginning of rows do(es) not count as a stitch.
2.The hat is made ribbing first, in rows, then the ribbing is slip stitched together to create a loop. The main body of the hat is worked in turned rounds directly into the edge of the ribbing. The hat is then sewn together at the top to close and a pom-pom is added if desired.
3.Pattern stitch is a multiple of 6. To adjust the size add or subtract the number of band rows by 6.
Size:
One size: adult
Finished size will be approx. 19” in circumference and 9.5” high after closing.
Gauge:
12 sts X 22 rows = 4” X 4” in pattern stitch (use 6mm hook and Rounds 1-22 for gauge)

Pattern:
Ribbing:
With 5mm hook and Color A, ch 8.
Row 1: sc in 2nd ch from hook and in each ch across, ch 1, turn. (7)
Row 2: sc BLO in 1st st and in each st across, ch 1, turn. (7)
Repeat Row 2 for a total of (60) rows.
Bring beginning row up to current row and sl st into the BLO of the current row and the beginning chs of the first row to join. Make sure the loop is not twisted.
Turn loop RS out, change to J(6mm) hook and ch 1.
Main Body:
Round 1(RS): sc into the end of each row of the ribbing, sl st to 1st st to join, ch 1, turn. (60)
Round 2(WS): sc in first st and in each st around, sl st to 1st st to join, ch 1, turn. (60)
Change to Color B.
Rounds 3-4: sc in first st and in each st around, sl st to 1st st to join, ch 1, turn. (60)
Change to Color A.
Round 5: sc in first st, sc into next st 3 rounds below, *sc, sc in next st 3 rounds below, repeat from * around, sl st to 1st st to join, ch 1, turn. (60)


Repeat Rounds 2-5 seven more times.
Repeat Round 2 once more.
Fasten off leaving a long tail for seaming.
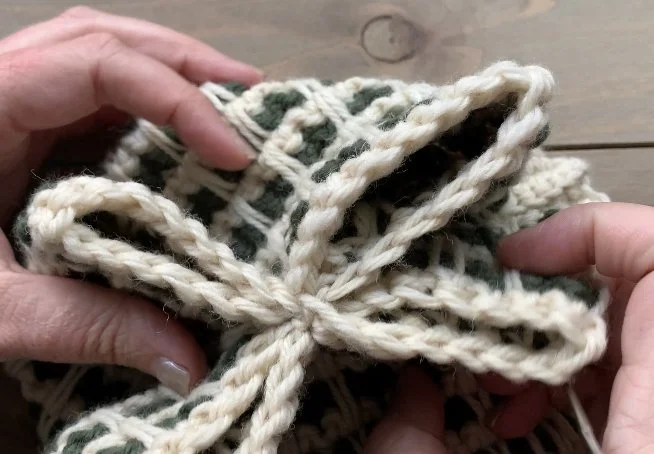
Closing:
To close the hat, fold it in half so the seam is in the center. Thread a tapestry needle onto the end of the tail. Fold hat in half and make one stitch going though both sides in the center. Fold hat in half the other way and make one stitch going through each center side and middle of hat. You will now have four “loops” at the top of your hat.


Stitch the middle of each of those “loops” to the center stitch of the hat.
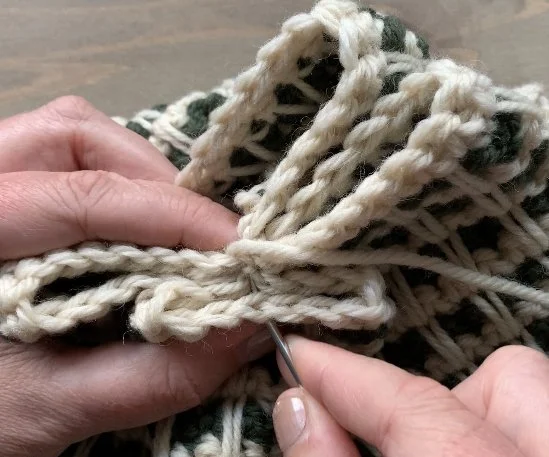
You will now have 8 small “loops” at the top of your hat. Stitch the middle of each of those “loops” to the center stitch of the hat to close. Bring the tail to the inside of the hat and tie and knot. Weave in all ends. Attach a faux fur pom pom to the top of the hat if desired.


I hope you love your new Vance Beanie! If you make one I’d love to see it. Make sure to tag me @meghanmaeksdo and use #thevancebeanie on social media so I can share.
As always a PDF version of The Vance Beanie is available in my shop, Etsy or Ravelry.
Happy Crocheting,
Meghan

