
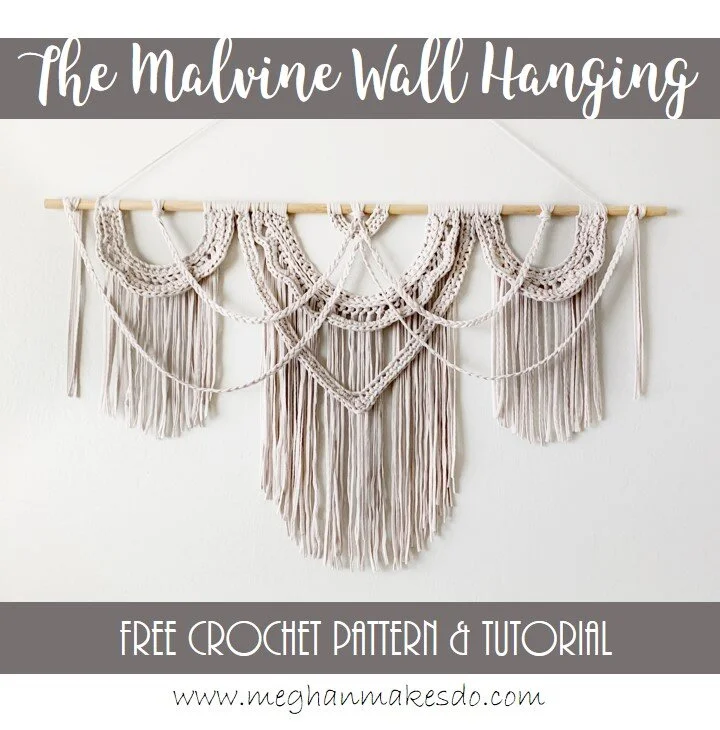
The Malvine Wall Hanging-Free Crochet Pattern
This post contains affiliate links. If you make a purchase through one of those links I may receive a small commission. Find our full disclosure policy here.
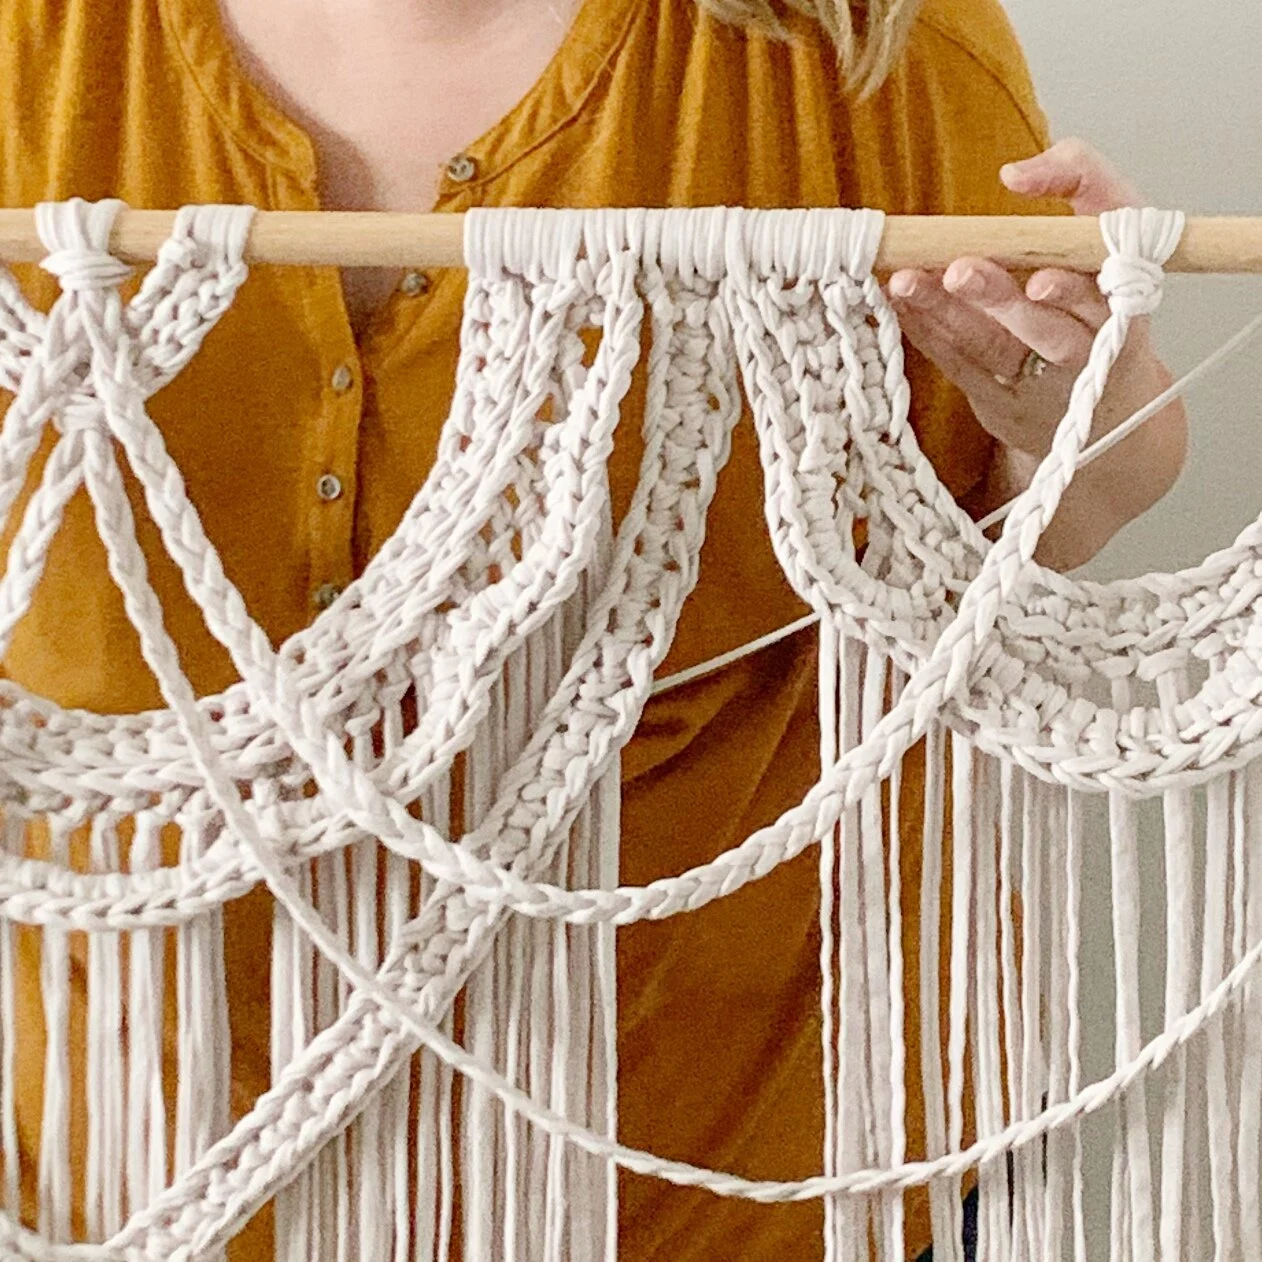
Get the look of macrame without all the knots with The Malvine crochet wall hanging. This quick project will have you adding a decorative piece to your home in no time. Grab an ad-free PDF copy in my shop or scroll down for the free pattern.
A few weeks ago Irina from KnitznPurlz sent me some gorgeous t-shirt yarn to try. I had been wanting to try t-shirt yarn for a while and couldn’t wait to get my hands on some. This yarn is amazing! It’s soft and smooth with just the right amount of stretch to it. I knew it would be the perfect yarn to use for my very first wall hanging.
I’ve admired the stunning macrame pieces that are all over Pinterest for a long time, but didn’t know the first thing about how to create them. I set out on a mission to create a crochet version that would be just as pretty as the macrame ones.
I had a few false starts and there was a lot of experimenting along the way, but I think I finally created exactly what I’d wanted and it’s quickly becoming one of the favorite handmade pieces in my house. Ready to make your own Malvine Wall Hanging? Find the step by step tutorial and pattern below.

The Malvine Wall Hanging Crochet Pattern
Materials:
210 yard (2 Skeins) of T-Shirt Yarn from KnitznPurls in the color Pearl
Crochet Hook size N-15 (10mm)
Smaller crochet hook (G or H) for weaving in ends
3/4inch X 4 ft dowel rod
Hook for hanging
Scissors & Measuring Tape
Glue (optional)
Abbreviations:
ch- chain
st(s)- stitch(es)
sl st- slip stitch
sc- single crochet
hdc- half double crochet
dc- double crochet
tr- treble crochet
BLO- back loop only
FLO- front loop only
3rd loop- the extra loop that is created when making hdc. This loop will be in the front when working this pattern.
RS- right side
Size:
Finished size is approximately 4ft long X 28” from top of dowel to bottom of fringe.
Gauge:
7sc stitches X 7 rows = 4” square
Notes:
Wall hanging is made in five separate pieces, which are then each attached to the dowel rod.
Chs at beginning of rows does not count as a stitch unless otherwise noted.
Pattern:
Large center piece: Make 1 leaving a long tail at the beginning.

Ch 36
Row 1: sc in 2nd ch from hook and in each ch across, turn. (35)
Row 2 (RS): ch 2 (counts as first st), hdc in BLO in each st across, ch 1, turn. (35)
Row 3: sc in 3rd loop of 1st st, ch 4, sk 2, sc in 3rd loop of next st, ch 5, sk 3, sc in 3rd loop of next st, ch 7, sk 5, sc in 3rd loop of next st, ch 9, sk 7, sc in 3rd loop of next st, ch 7, sk 5, sc in 3rd loop of next st, ch 5, sk 3, sc in 3rd loop of next st, ch 4, sk 2, sc in back bump of ch 2, ch 1, turn. (49)


Row 4: sc in 1st st, 5sc into ch-4 sp, sc in next st, 7sc into ch-5 sp, sc, 9sc into ch-7 sp, sc, 11sc into ch-9 sp, sc, 9sc into ch-7 sp, sc, 7sc into ch-5 sp, sc, 5sc into ch-4 sp, sc in last st. (61)


Fasten off leaving a long tail.
Long center piece: Make 1

ch 66
Row 1 (RS): sc in 2nd ch from hook and in next 31 chs, [dc, tr, dc] into next ch, sc 32. (67)
Fasten off leaving a long tail.
Small Center Piece: Make 1

Ch 12
Row 1 (RS): sl st into 2nd ch from hook and each ch across, ch 1, turn. (11)
Row 2: sl st FLO in each st across. (11)
Fasten off leaving a long tail.
Small side pieces: Make 2

Ch 26
Row 1 (RS): sc in 2nd ch from hook and in each ch across, ch 1, turn. (25)
Row 2: sc 5 in FLO, ch 5, sk 3, sc FLO, ch 9, sk 7, sc FLO, ch 5, sk 3, sc 5 FLO, ch 1, turn. (31)
Row 3: sc 5 in BLO, 7sc into ch-5 sp, sc in next st, 11dc in ch-9 sp, sc, 7sc into ch-5 sp, sc 5 in BLO. (37)
Fasten off leaving a long tail.
Weave in all short tails using smaller crochet hook.


Assembly:
Starting with the Long Center Piece, attach each end to the dowel rod by wrapping the long tail around the dowel and then back through the end of the piece. Make sure to wrap it around the same number of times on each end. Weave in all ends on the wrong side.


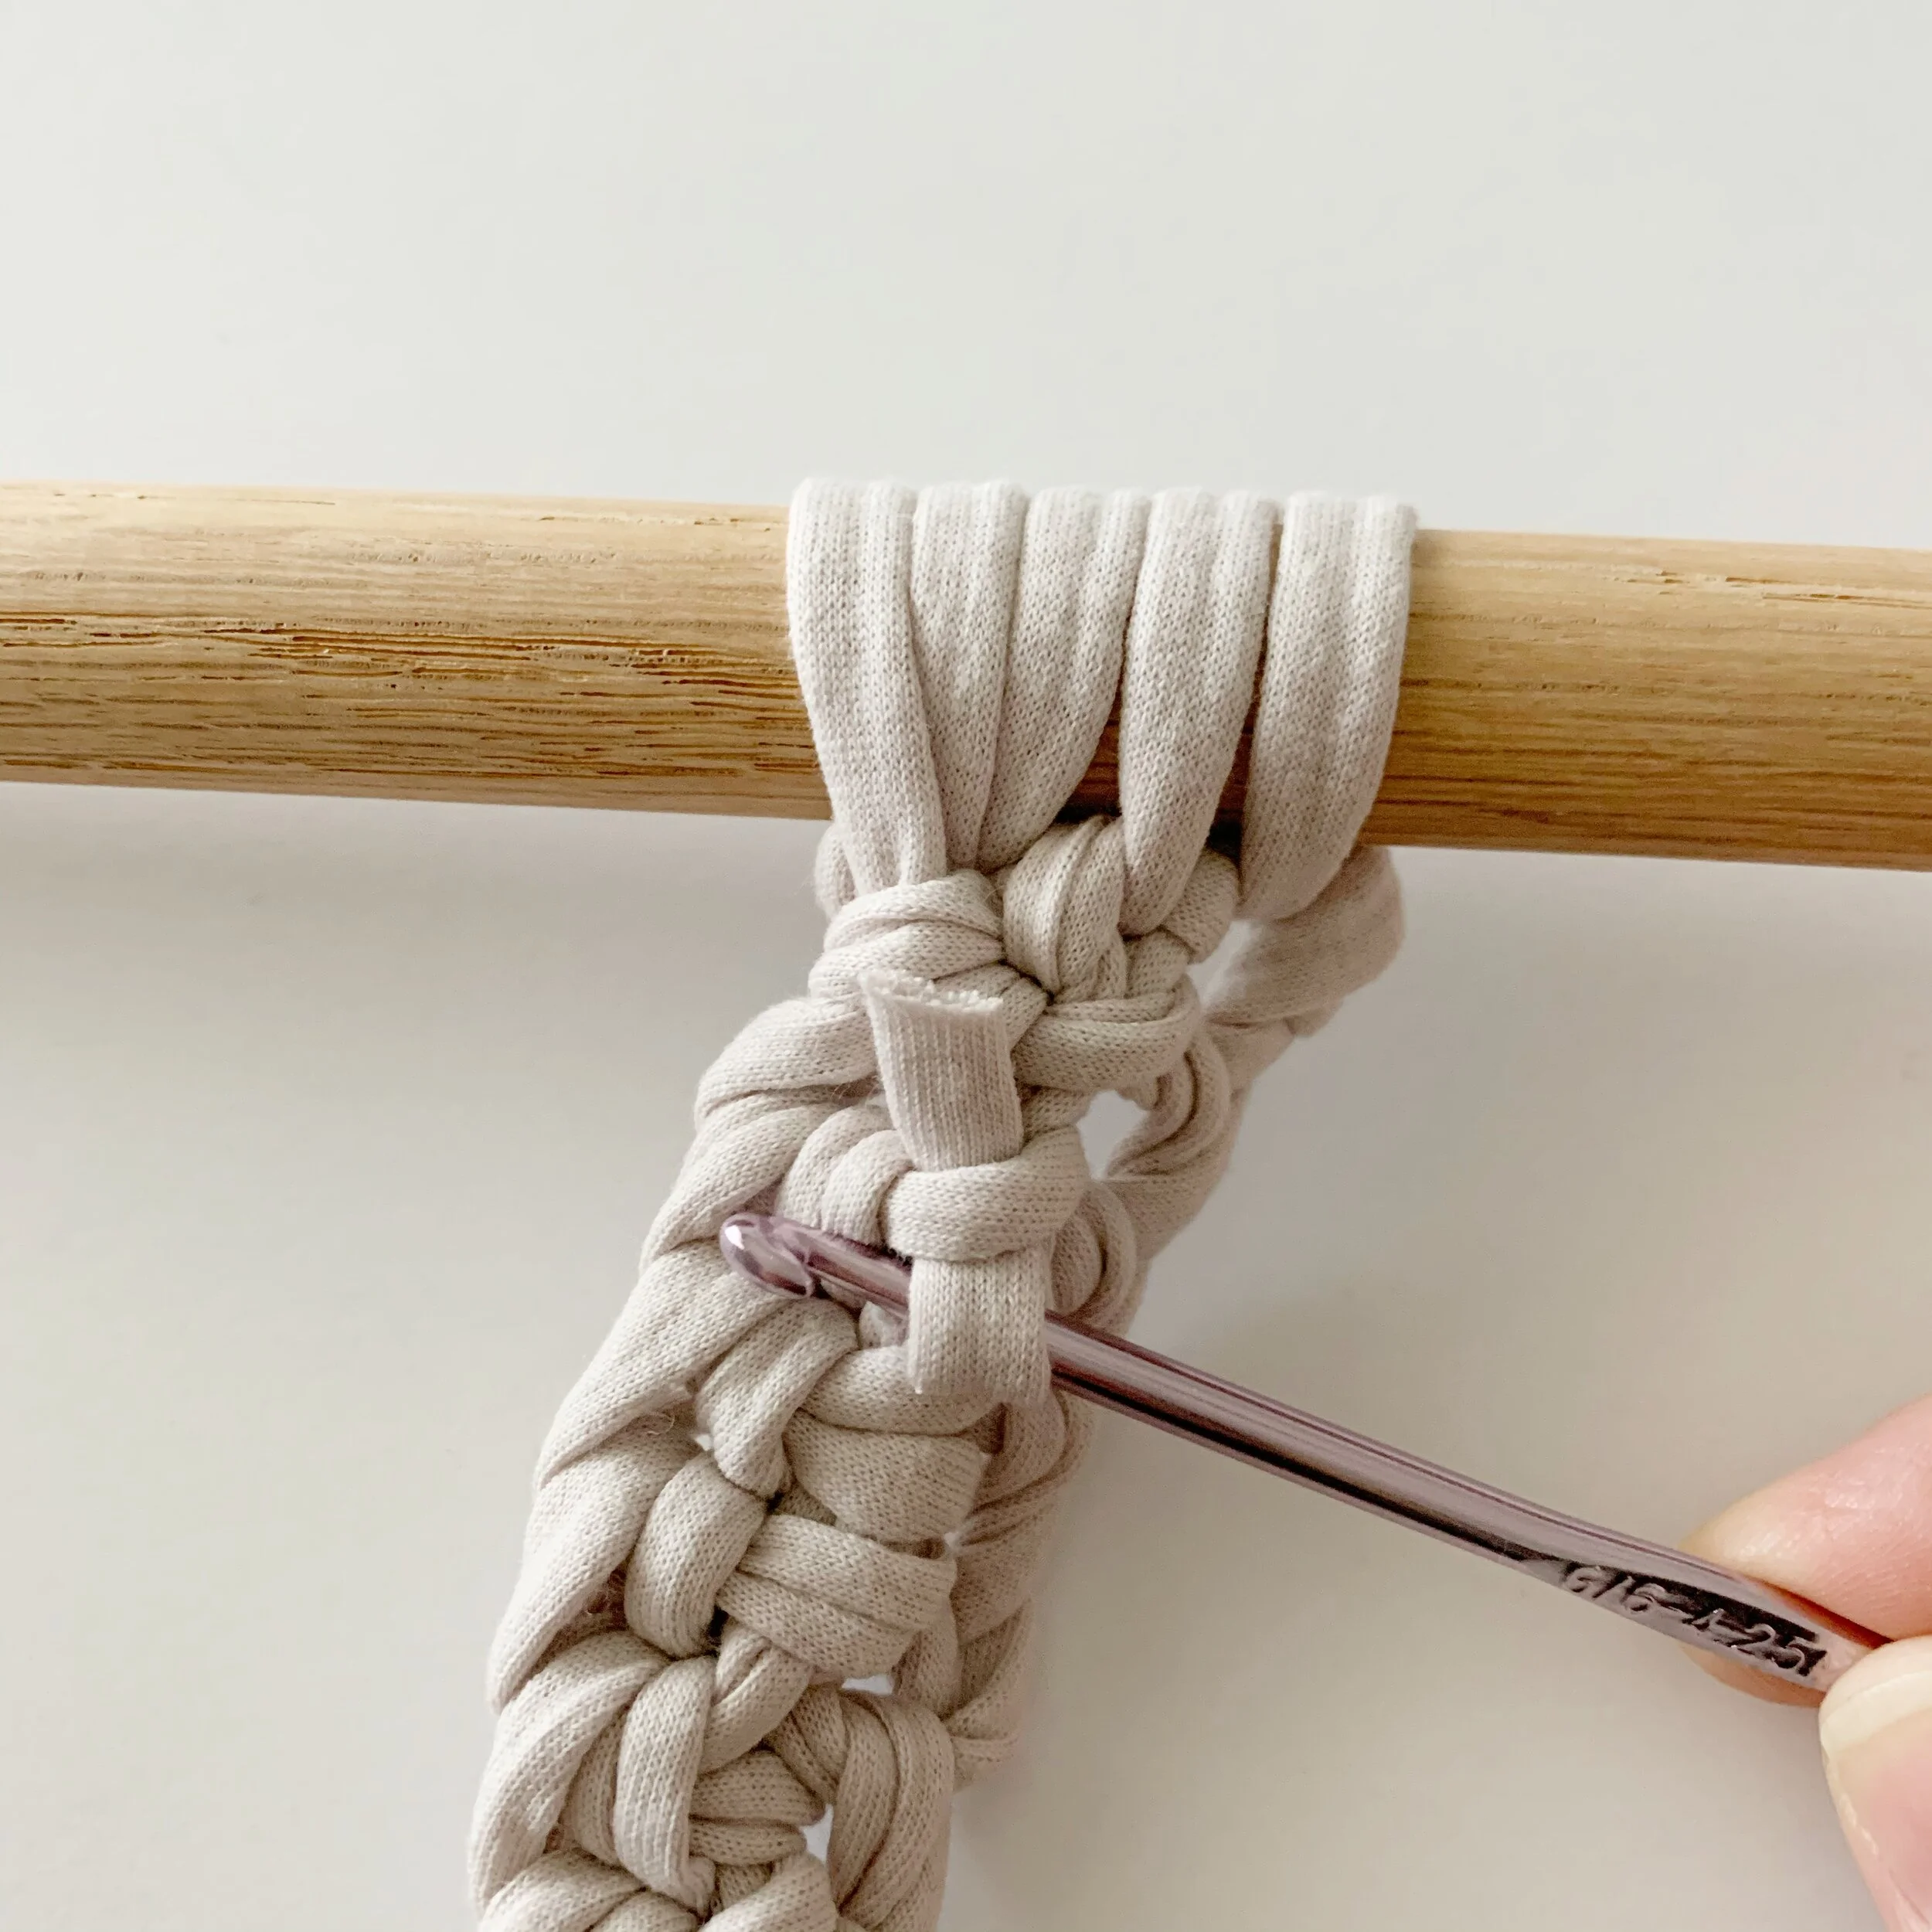

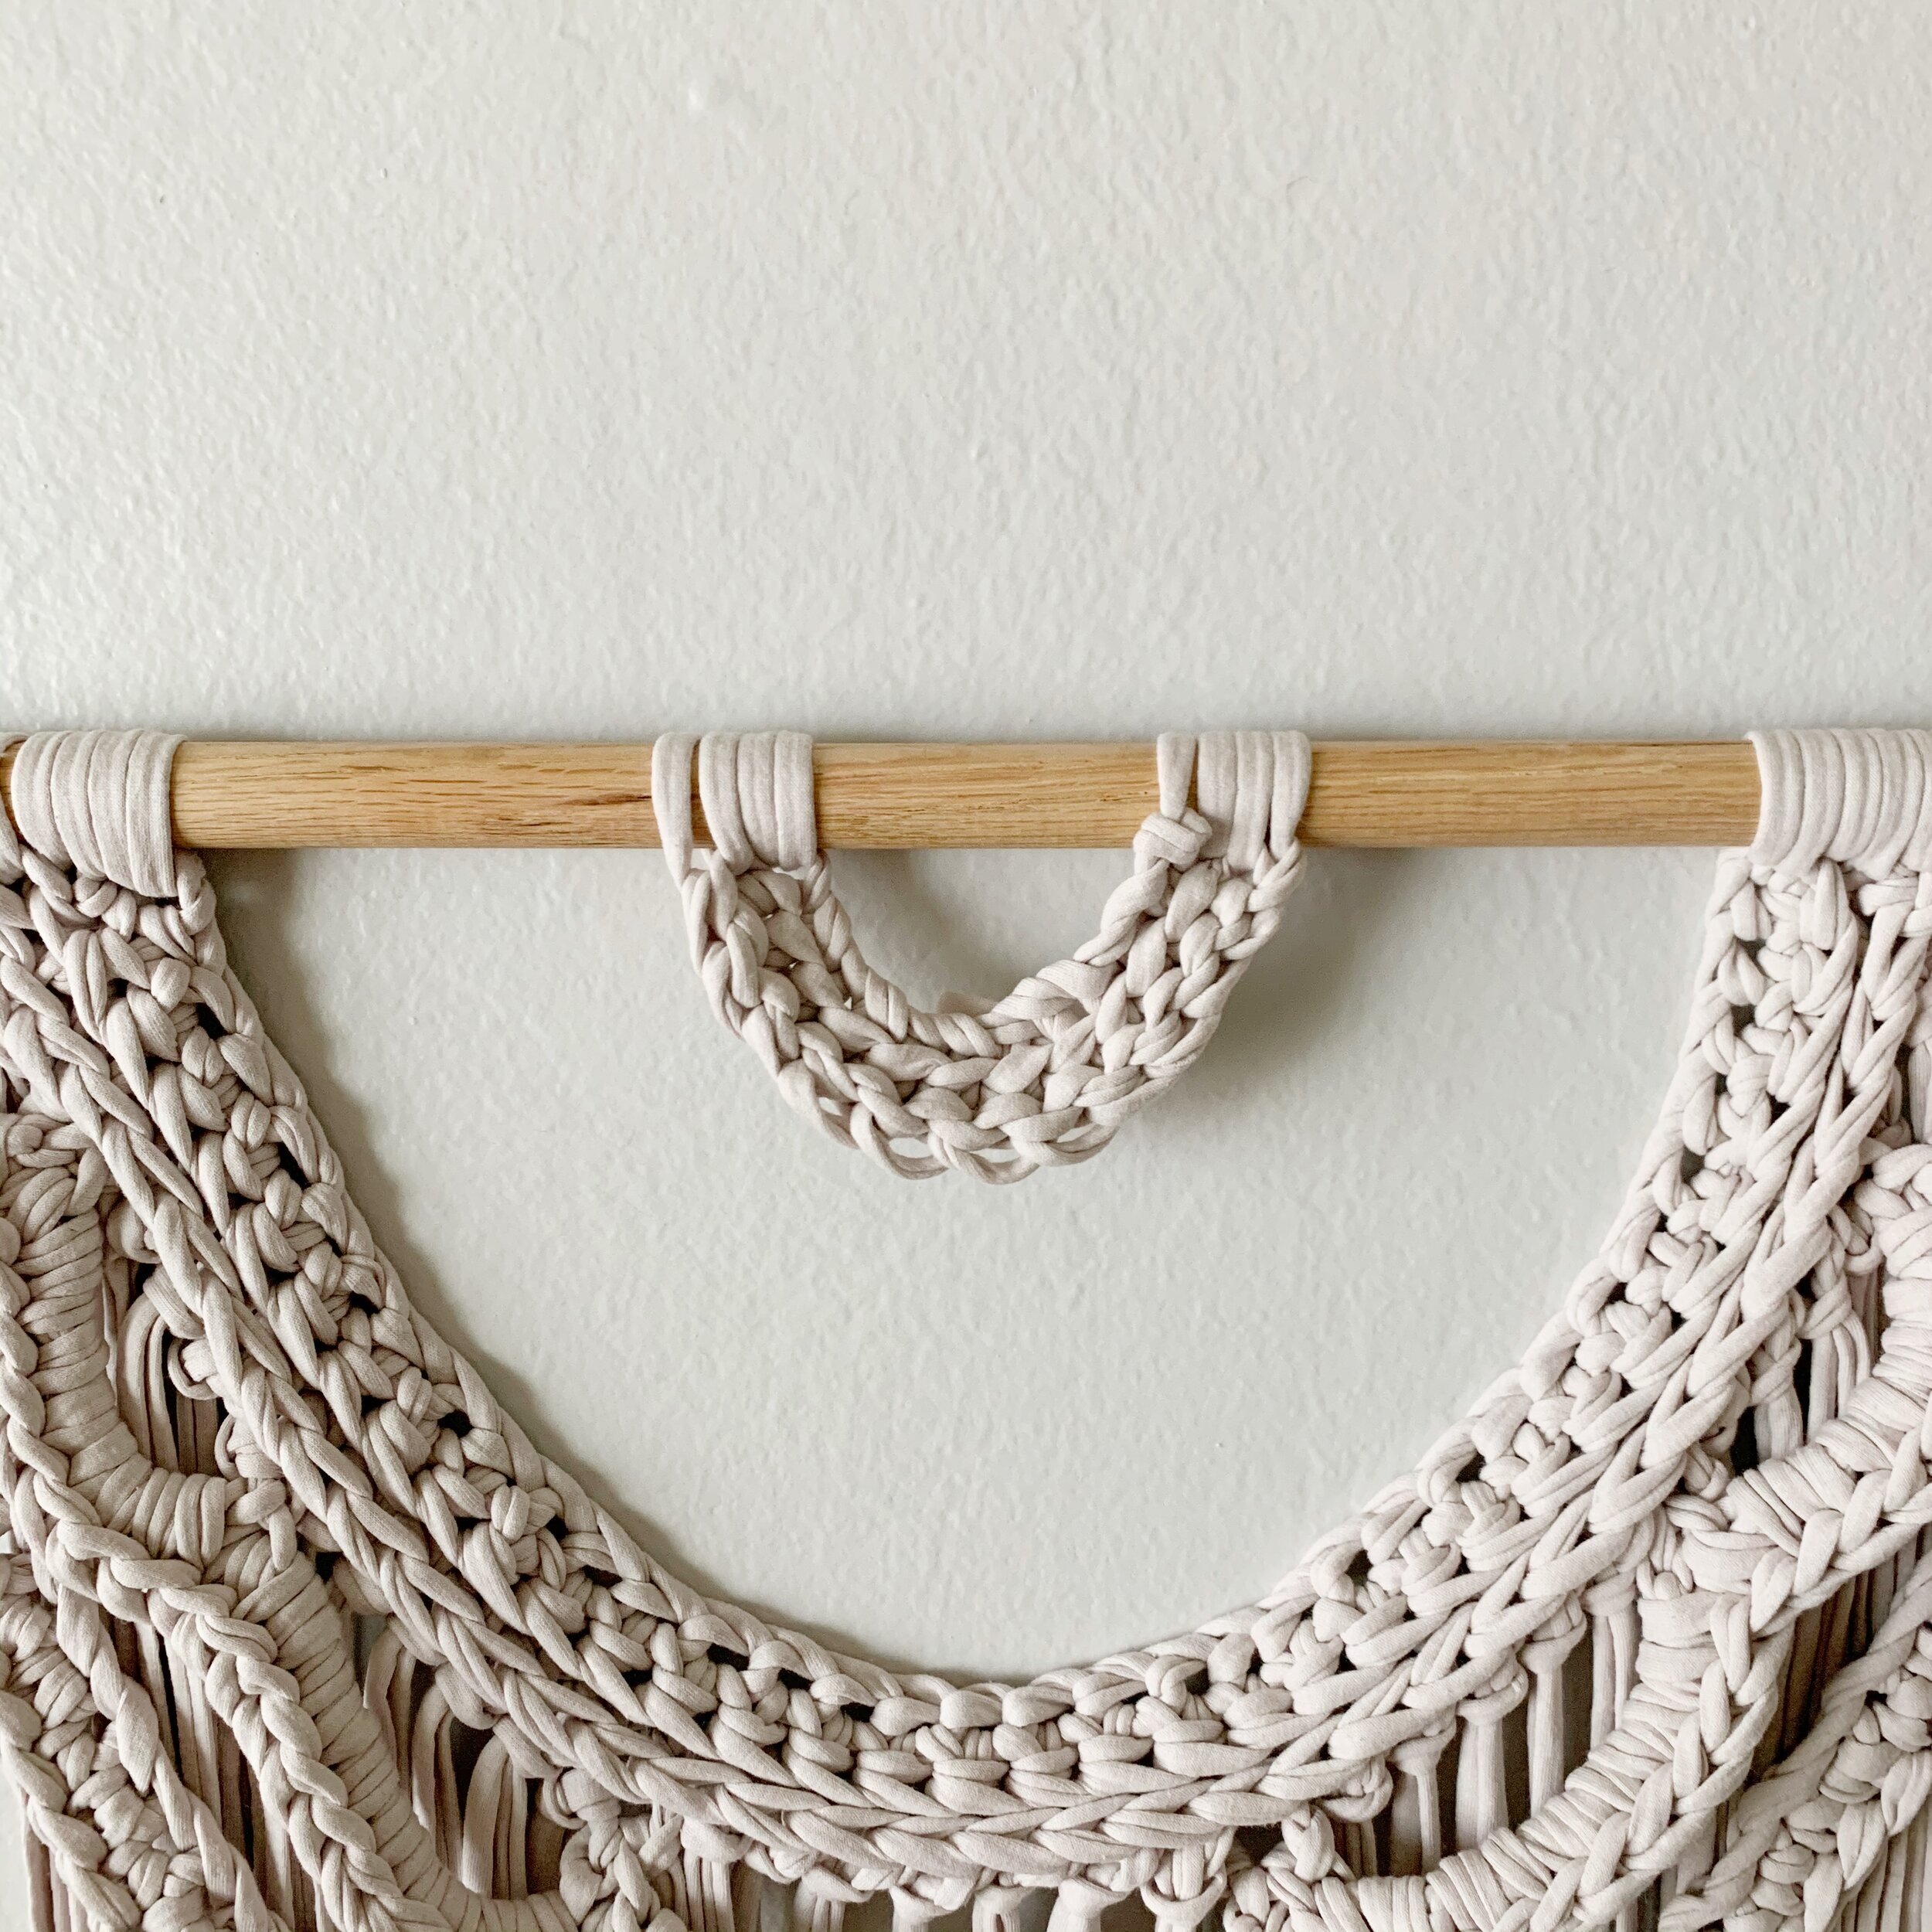
Attach each piece as pictured below.


At this point I recommend attaching your hanging piece so you can more easily at the fringe for the next step. To do this, attach yarn to one end of the dowel by tying it in place. Stretch the yarn across the top of the dowel so it is taught (it will stretch quite a bit when hung), then tie a knot around the dowel at that end too.


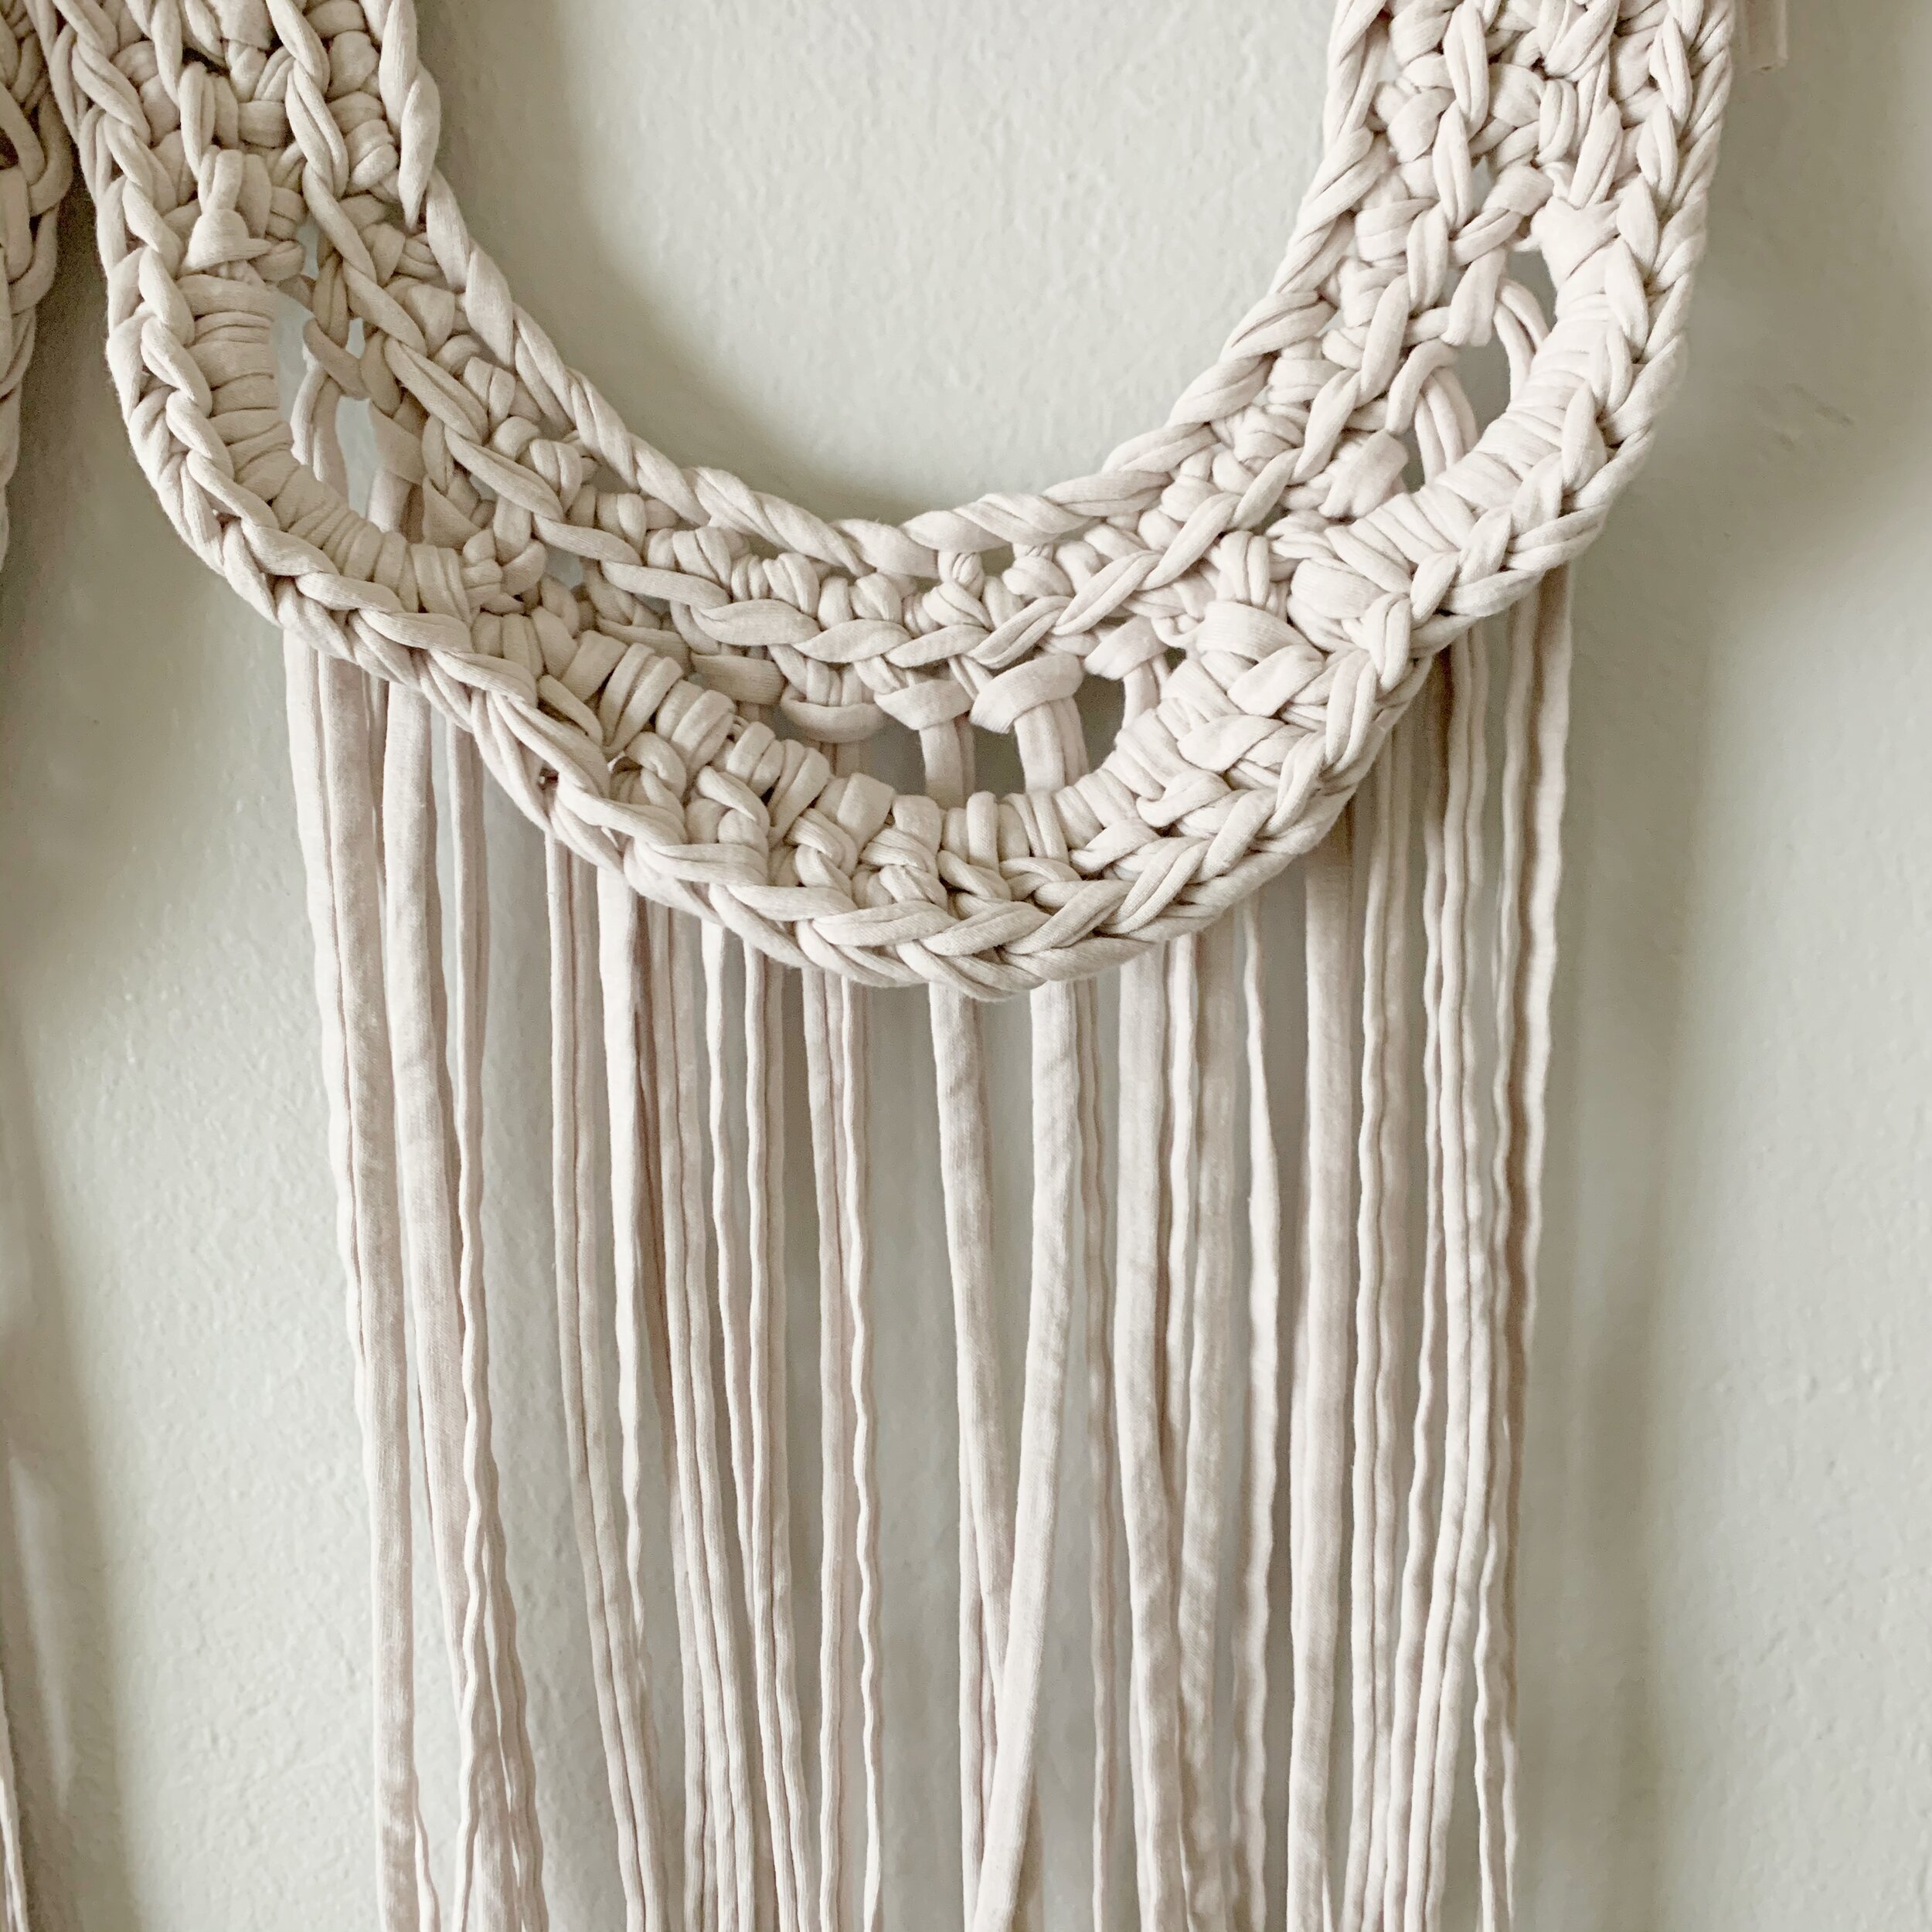
Next add fringe to the Large Center Piece by cutting (35) 44” inch pieces of yarn and attaching them into the 3rd loop of Row 3. Fold each piece in half and then thread the folded end from top to bottom through the 3rd loop. Then draw both ends through the loop and pull tight. You will also be attaching a piece of fringe into the 3rd loop that was worked into for Row 4. Push fringe to the back so the Long Center Piece lays on top.


Next cut (30) 28” pieces of yarn for the Small Side Pieces. Attach the fringe again by folding the strands in half and threading the folded end from top to bottom through the back loop of each open st in Row 1, including the two stitches that were worked into.

Then attach one piece of 28” fringe to the tr st at the tip of the Long Center Piece. This completes the fringe.


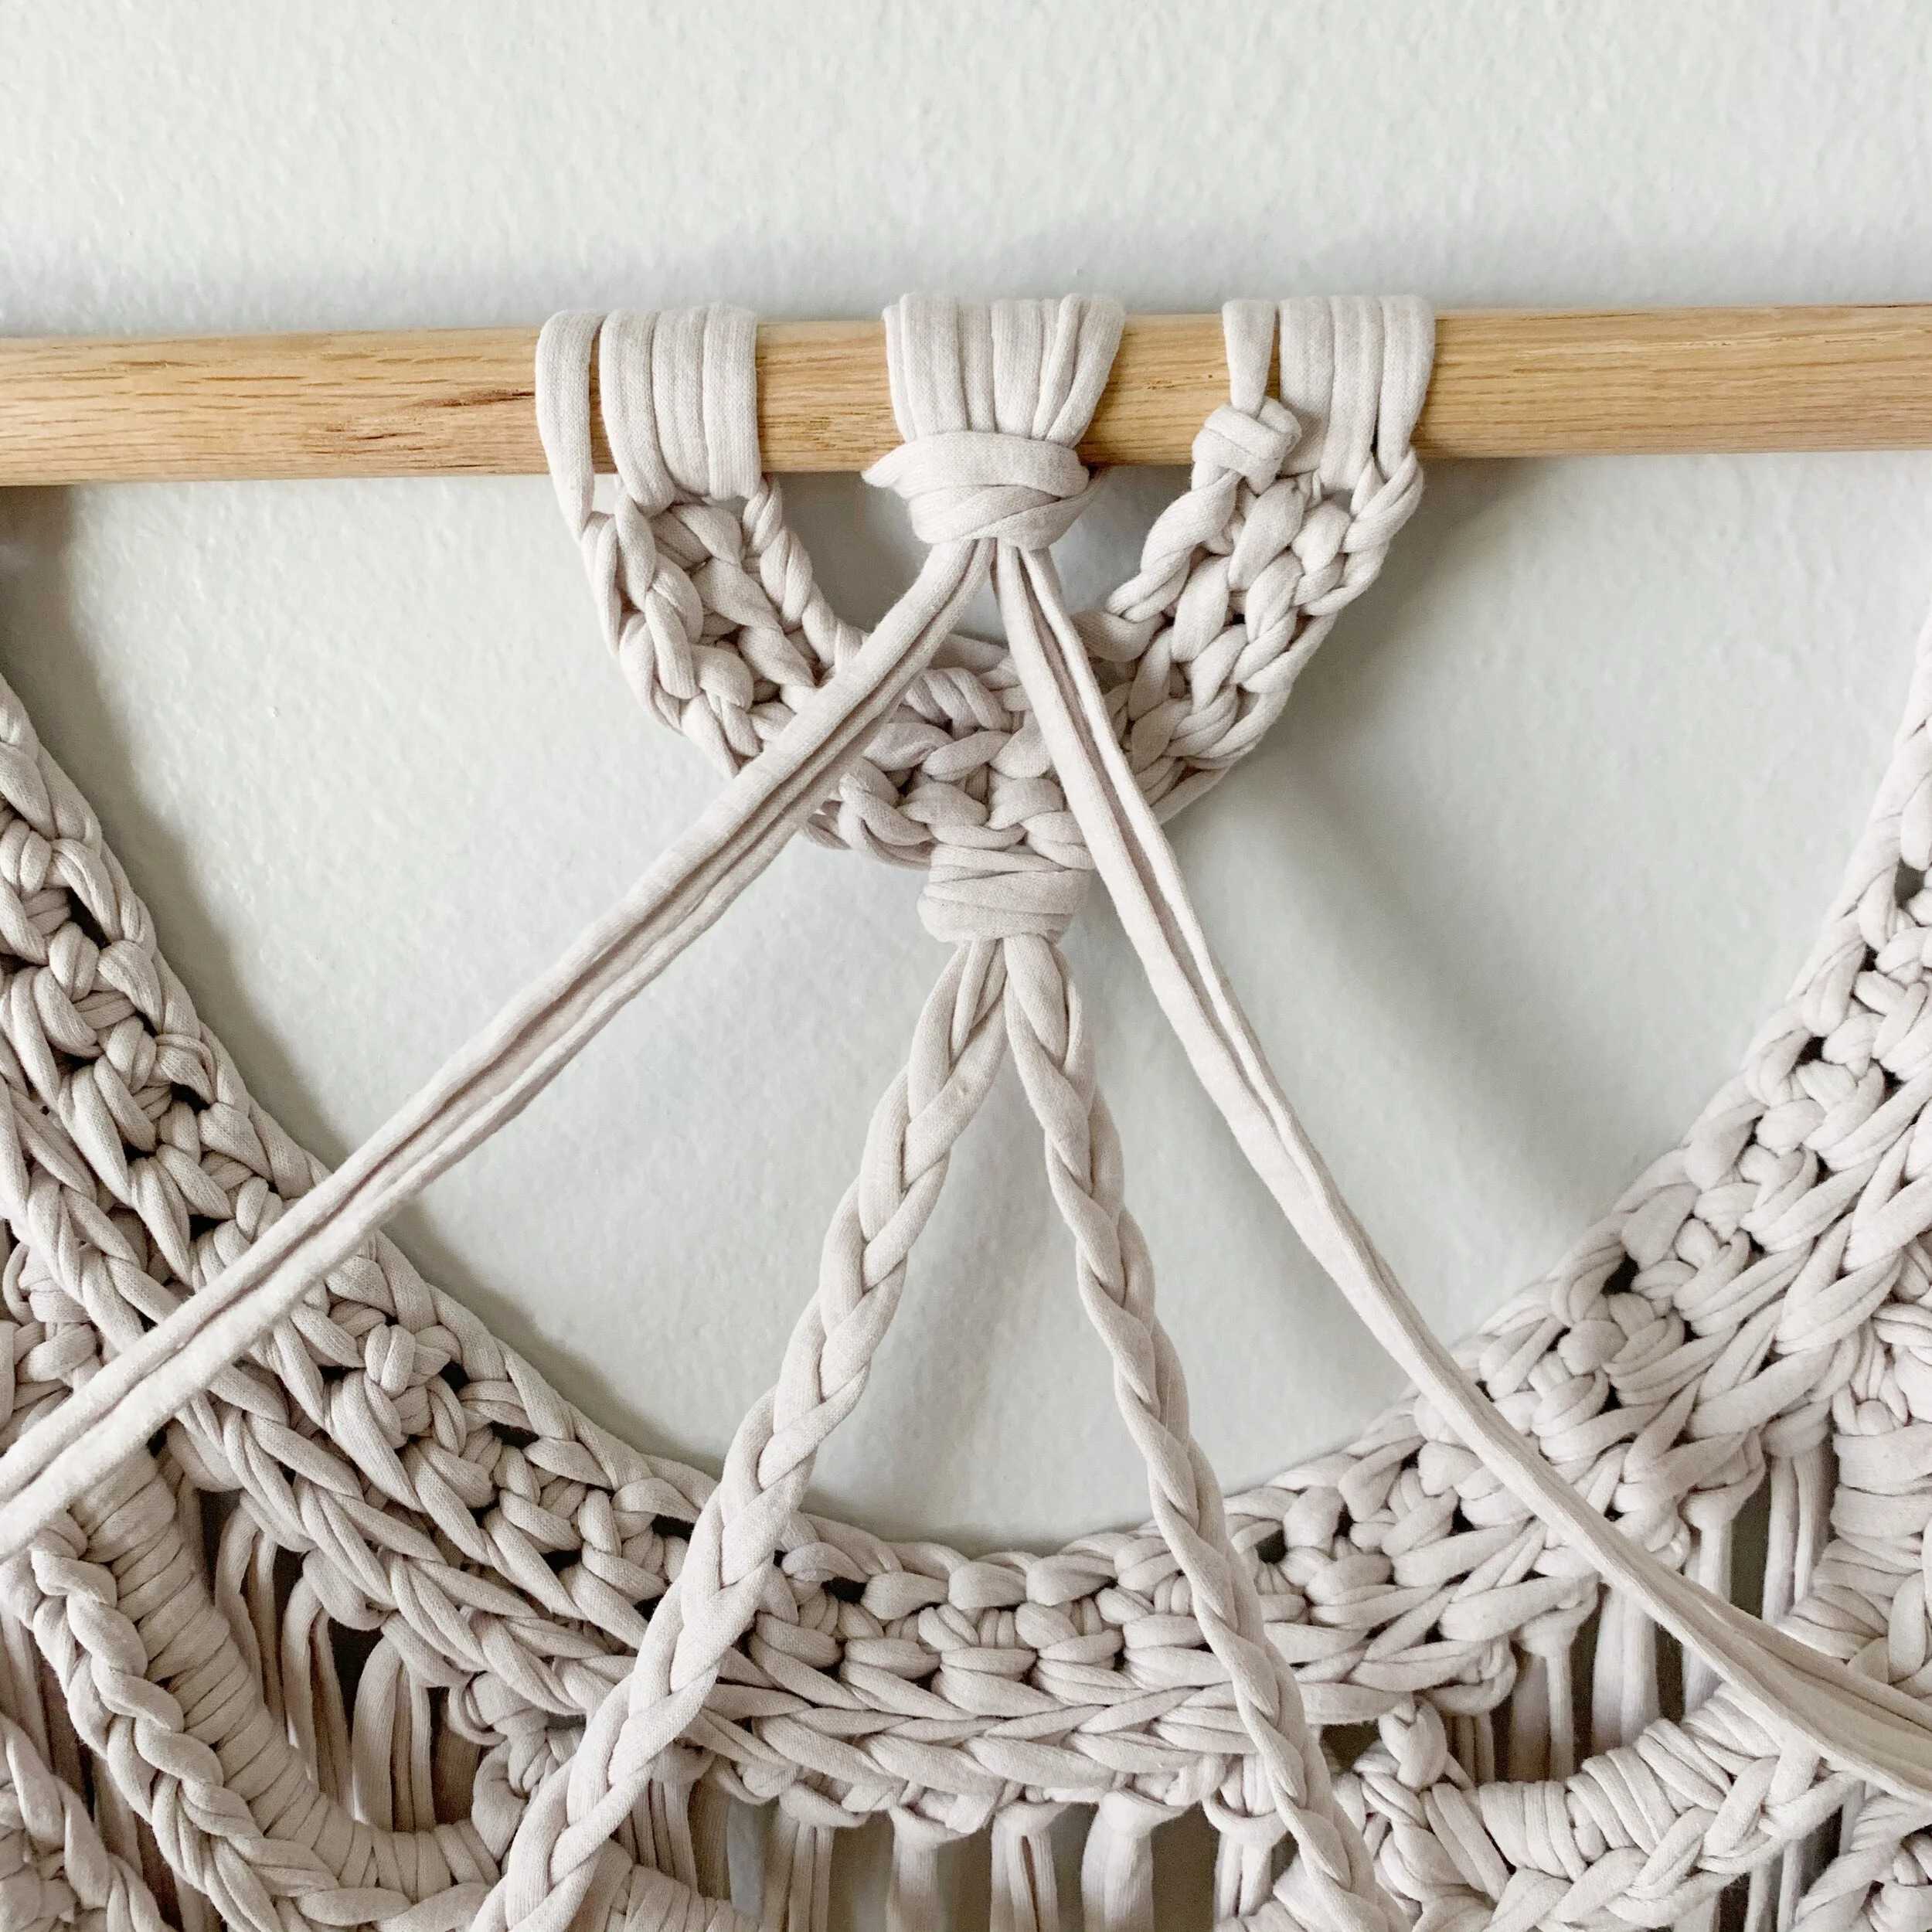
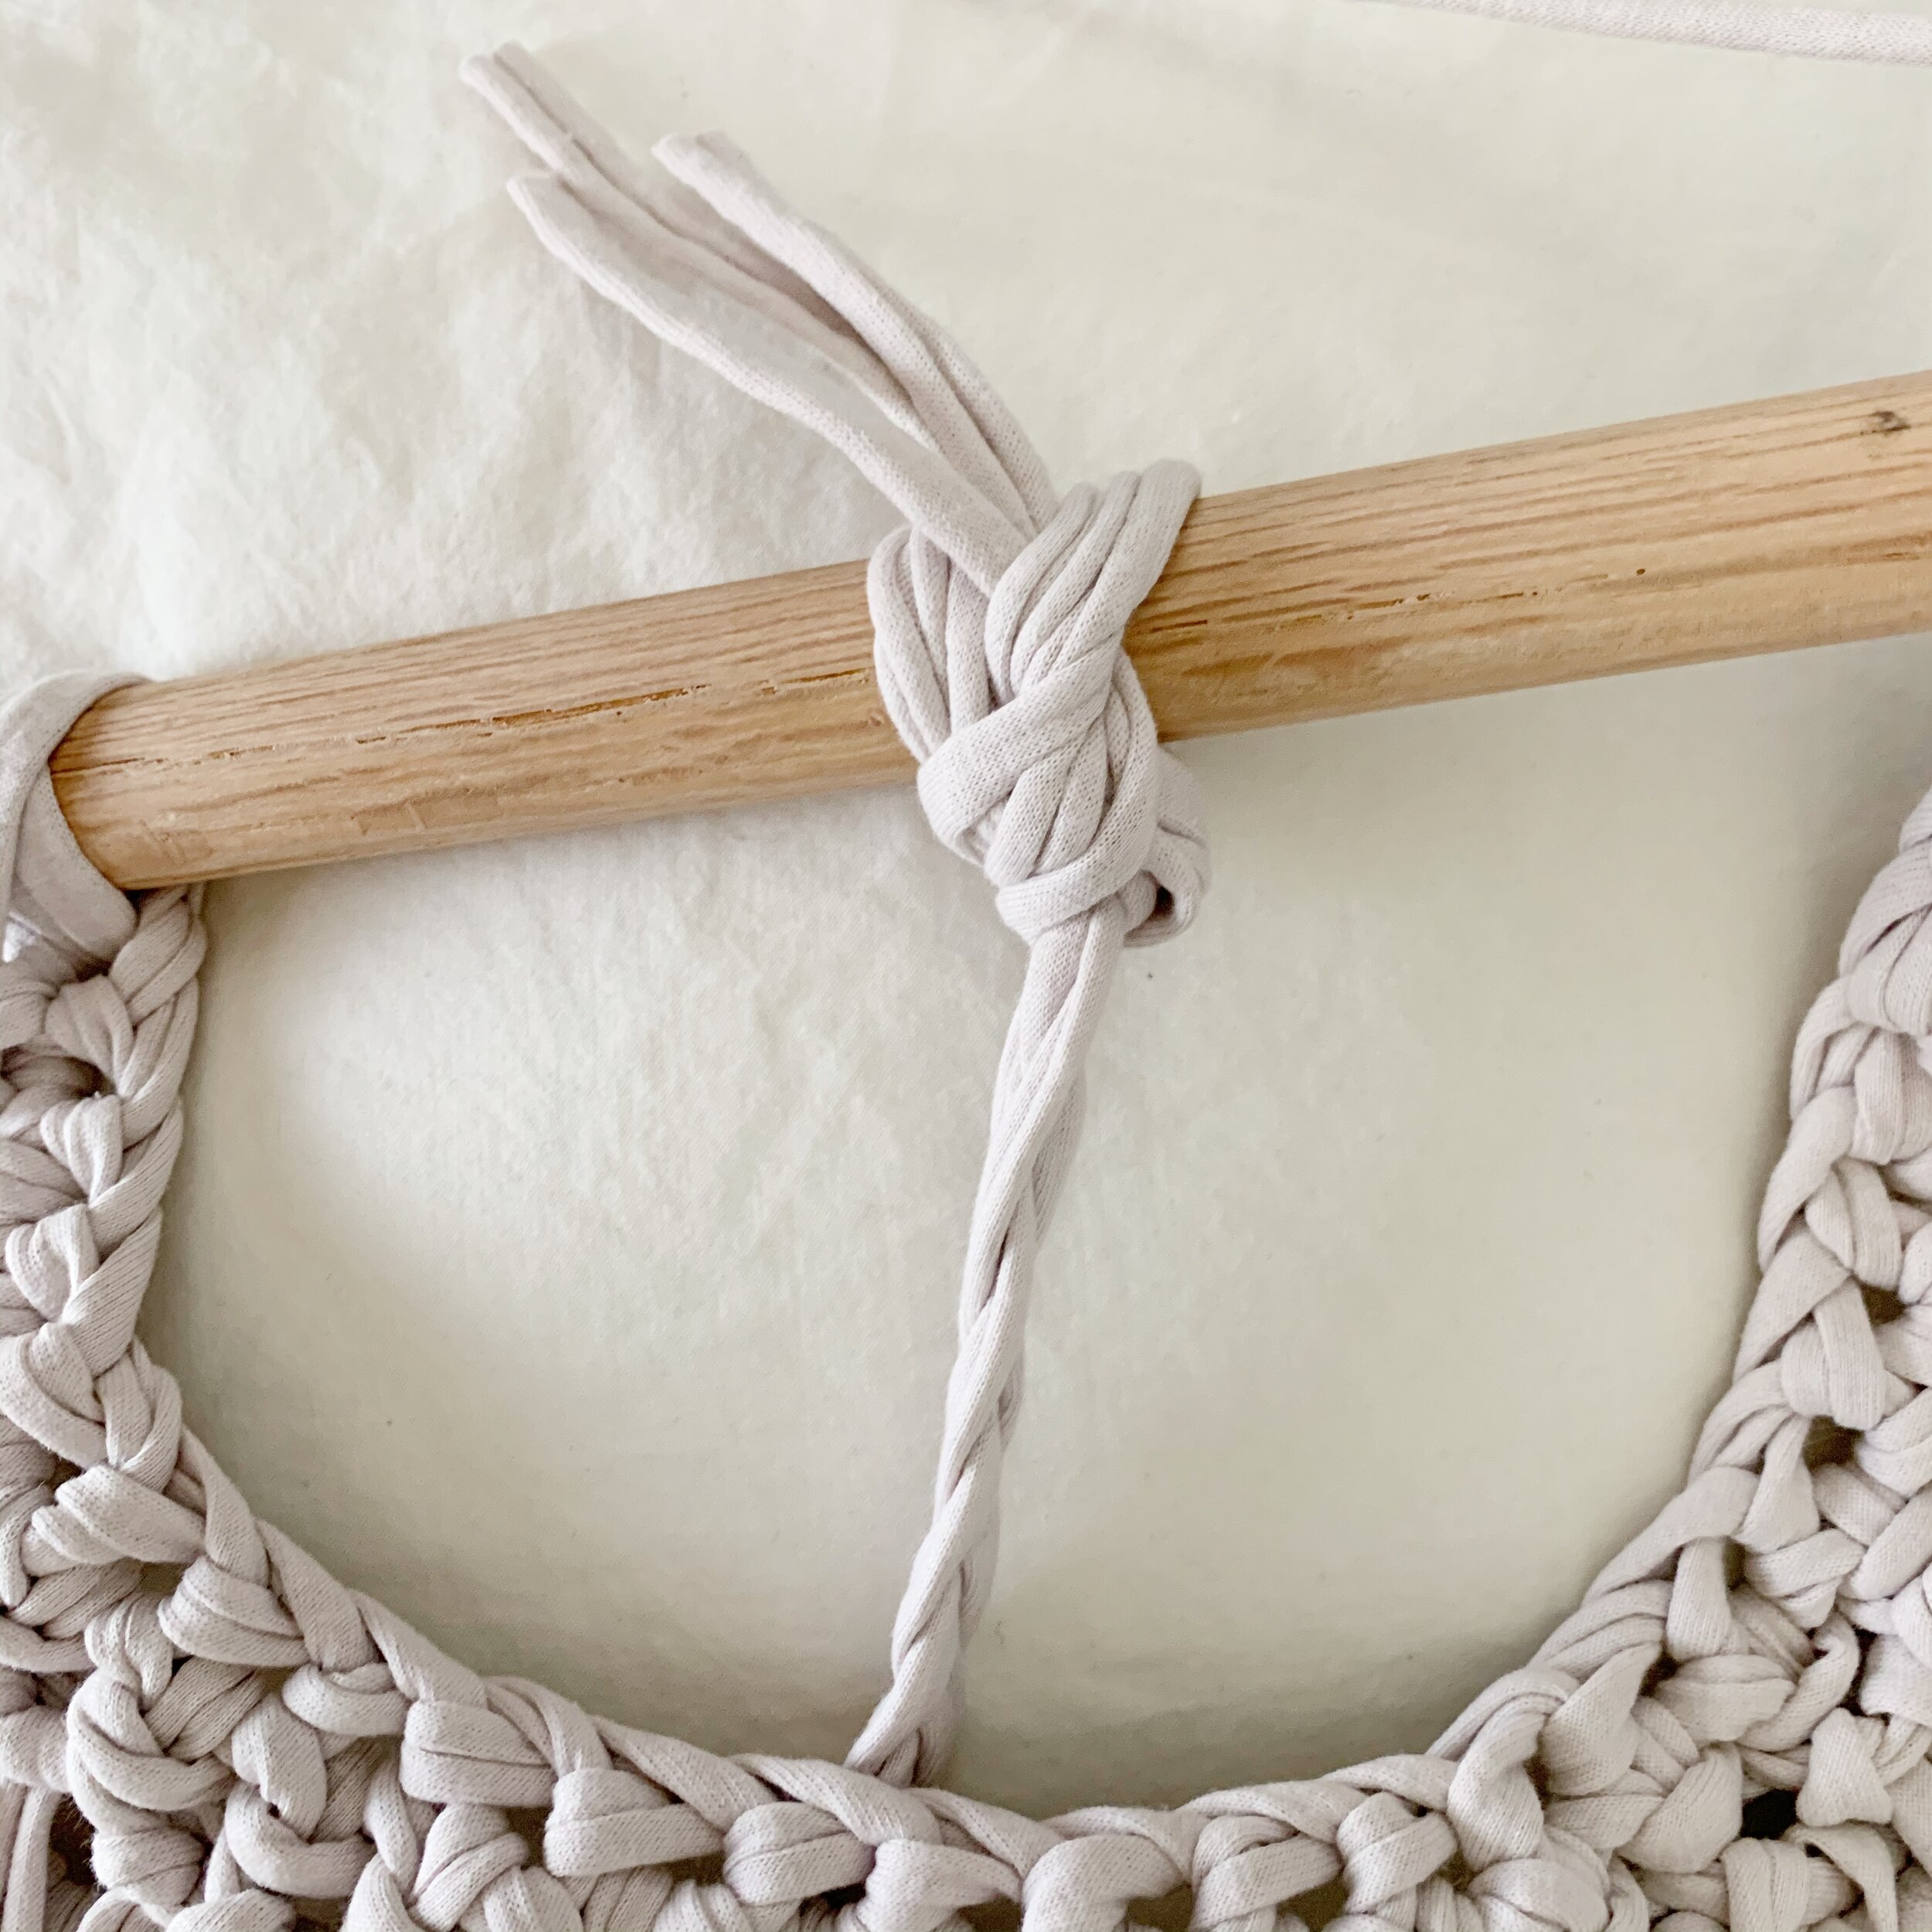
The last step is to attach the draping braids to your piece. Cut three pieces of yarn that are each 130” long. Fold all three pieces in half together and thread from top to bottom through the middle stitch of the Small Center Piece. Then separate the strands into two groups of three. Braid each group about 40.” Then drape the tails over the end of the dowel, wrap the tails around the dowel again loosely and then thread the tails through those loops and pull tight.
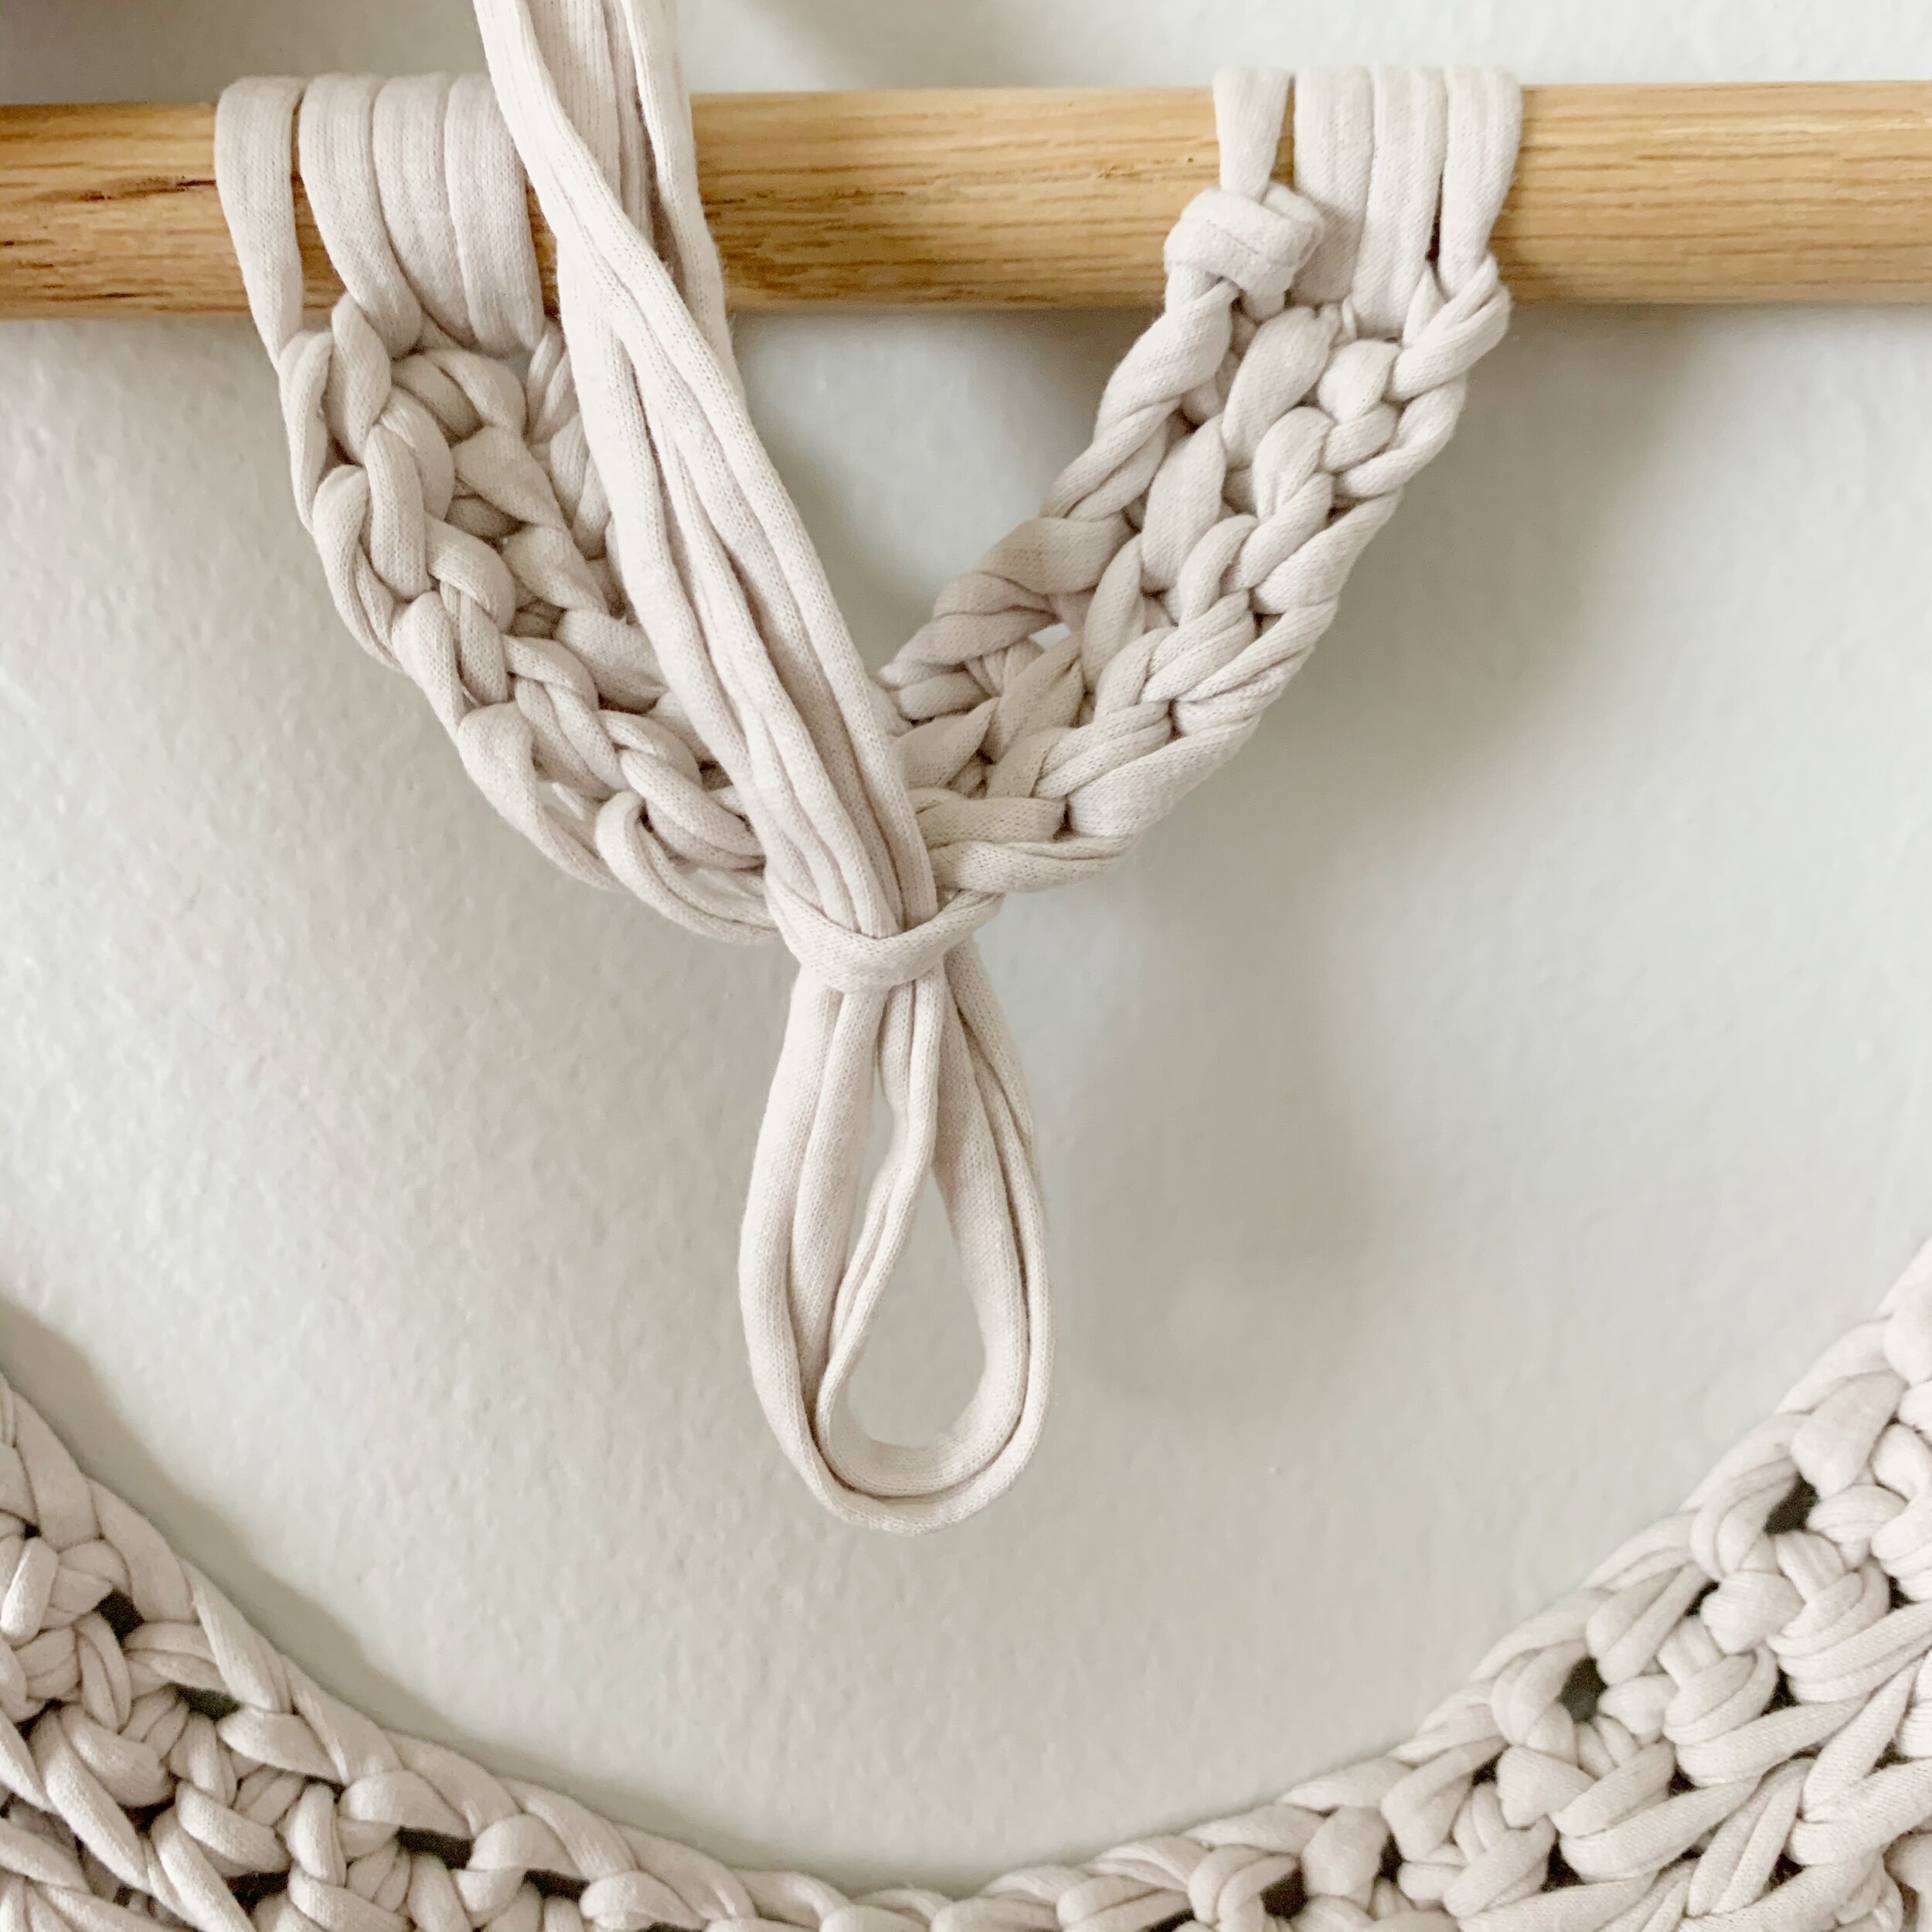


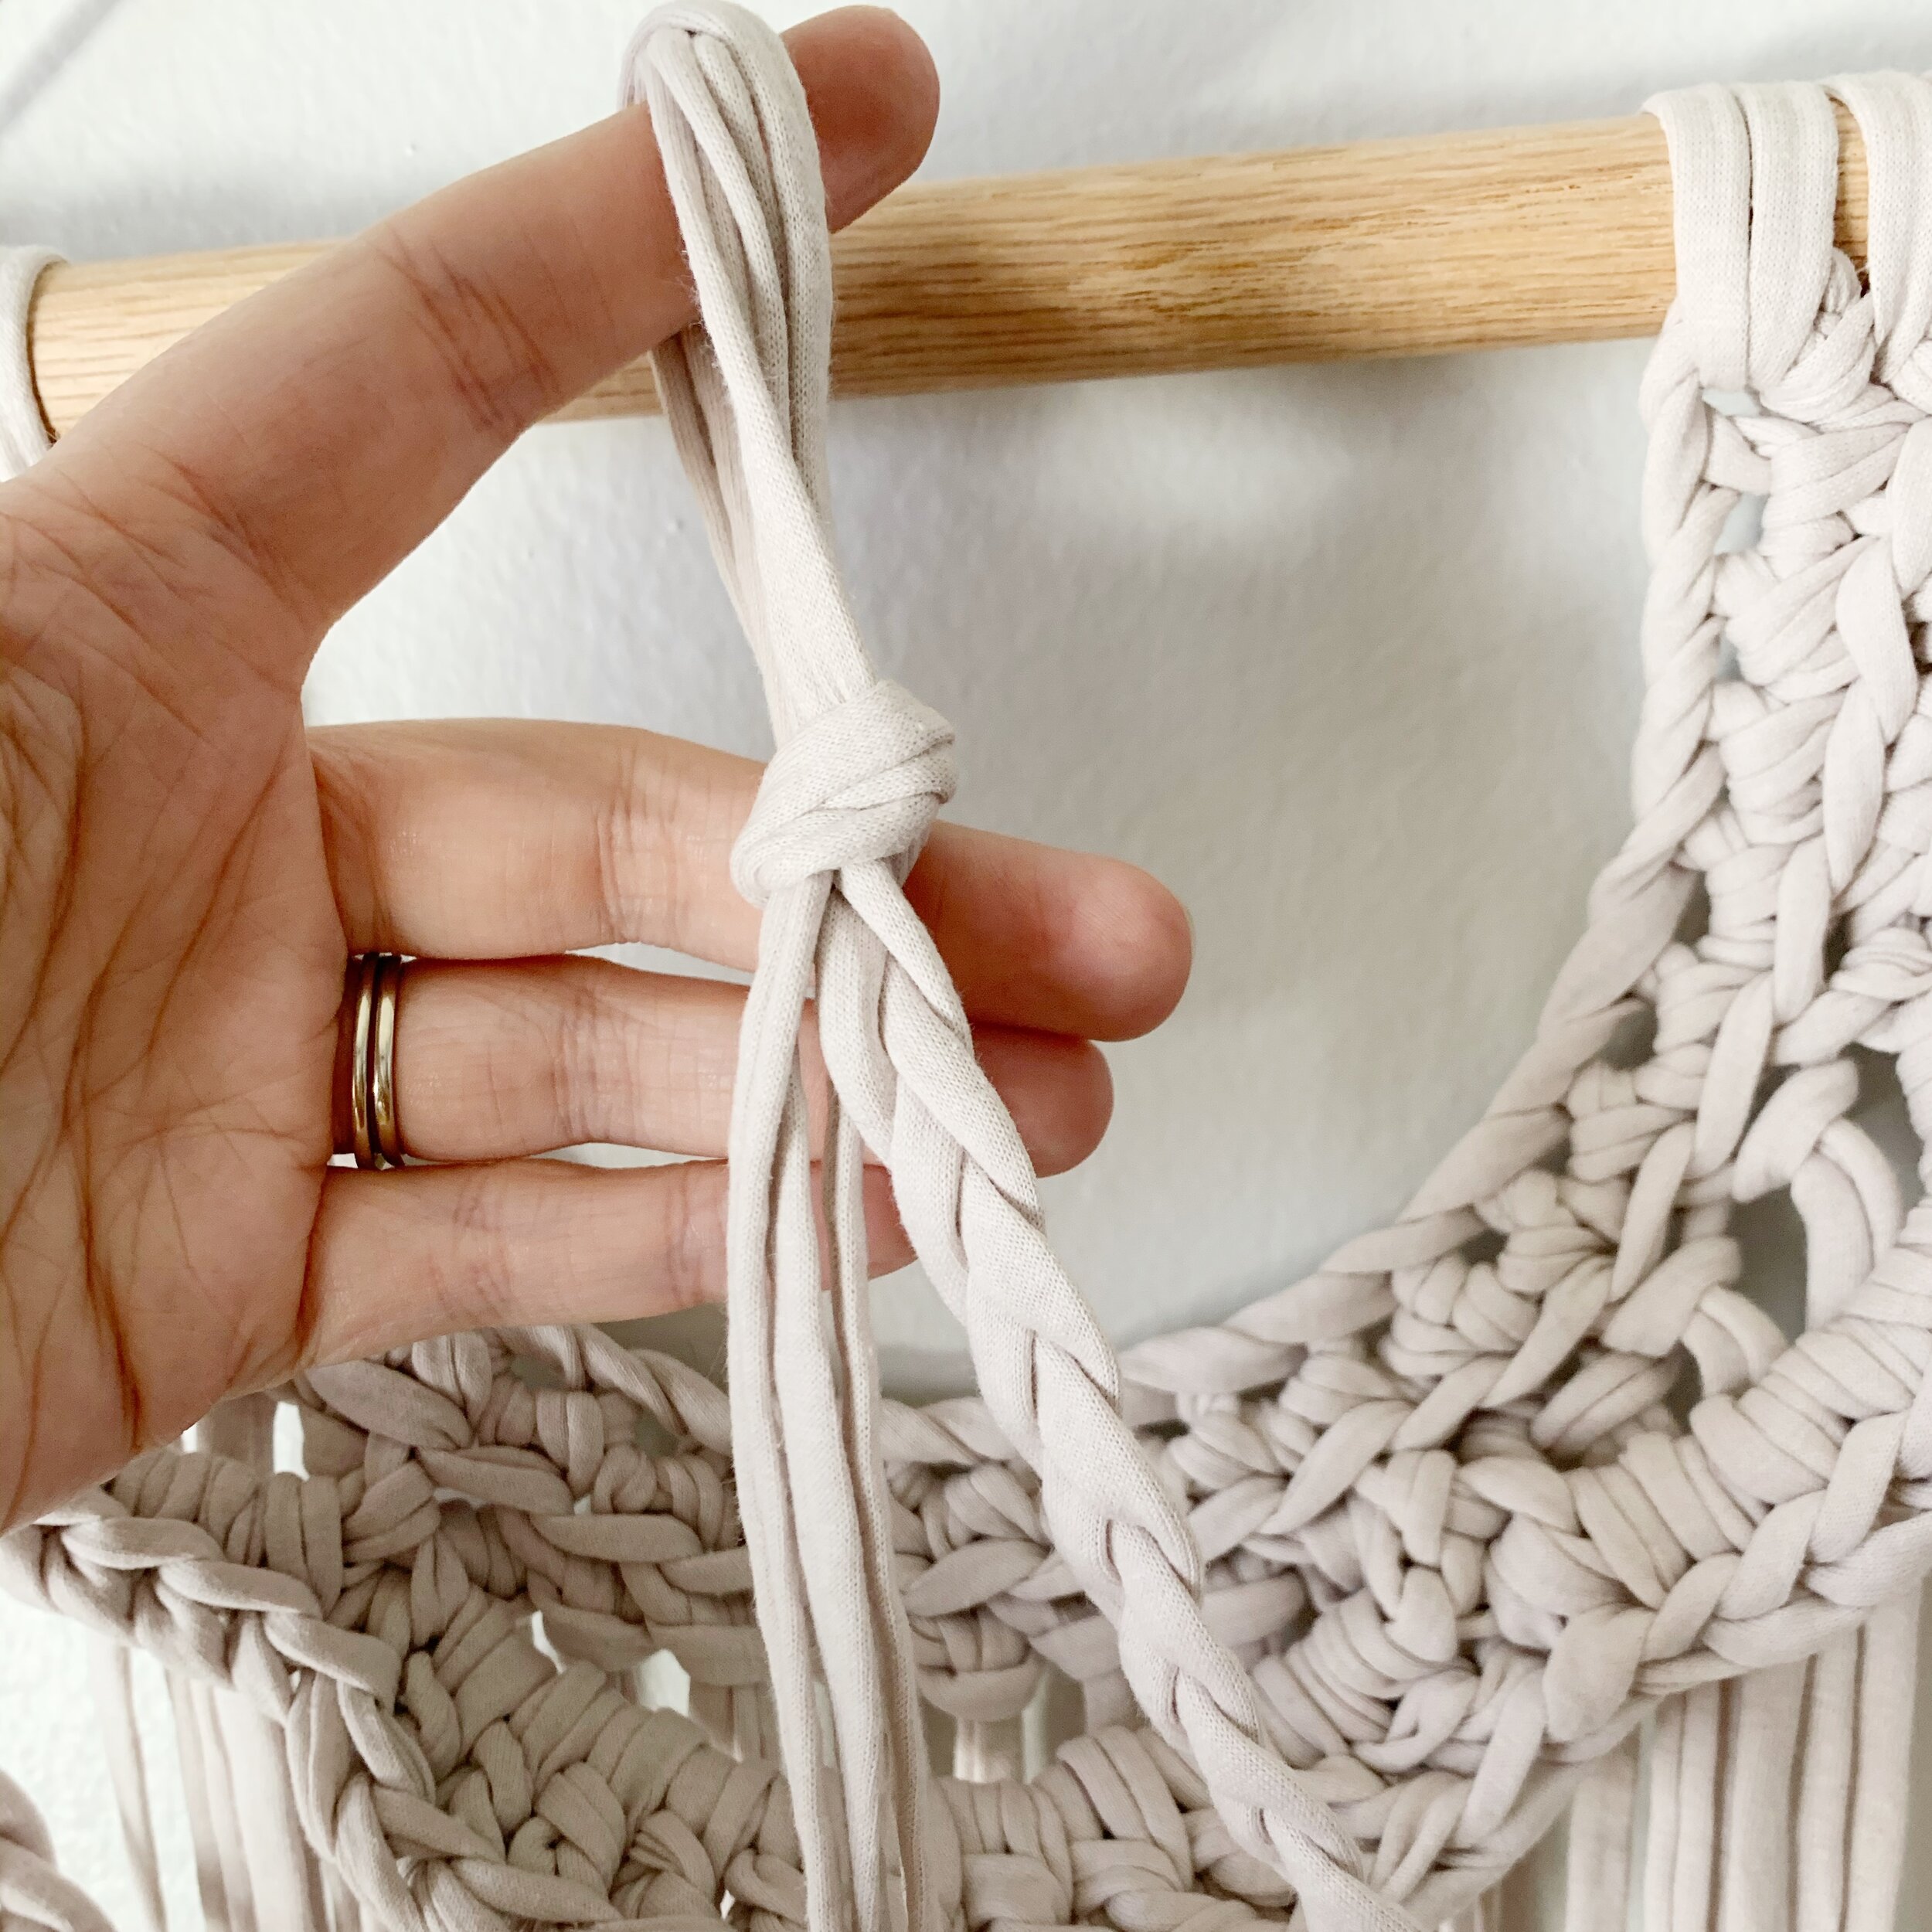
For the smaller draped braids cut three pieces of yarn that are each 90” long. Fold all three in half together and attach to the dowel in the center of the Small Center Piece going from the top to the bottom of the dowel and then pulling then ends through the loop. Separate the strands into two groups of three and braid each group about 26.” Tie a not at the end, but don’t pull the ends all the way through. Leave a loop at the end and use that to attach the braid to the dowel as shown. Draw ends down around the back of the dowel and then across the knot in the front. Thread ends through one side of the loop from the knot to secure. Cut ends off and glue in place (optional).


Finally, trim the fringe to create smooth lines. Trim the tails from the first braid so they hit just above where the Small Side Pieces fringe ends.
Now hang up your Malvine masterpiece and enjoy!

I hope you enjoyed this free crochet pattern and tutorial. I’d love to see your finished Malvines so make sure to share the with me on social media. Just tag @meghanmakesdo or use #meghanmakesdo & #themalvine so I can see!
Don’t forget you can find the PDF version in my shop, on Etsy and Ravelry.
Happy Crocheting!
Meghan


