The Jessa Cardigan-Free Knitting Pattern
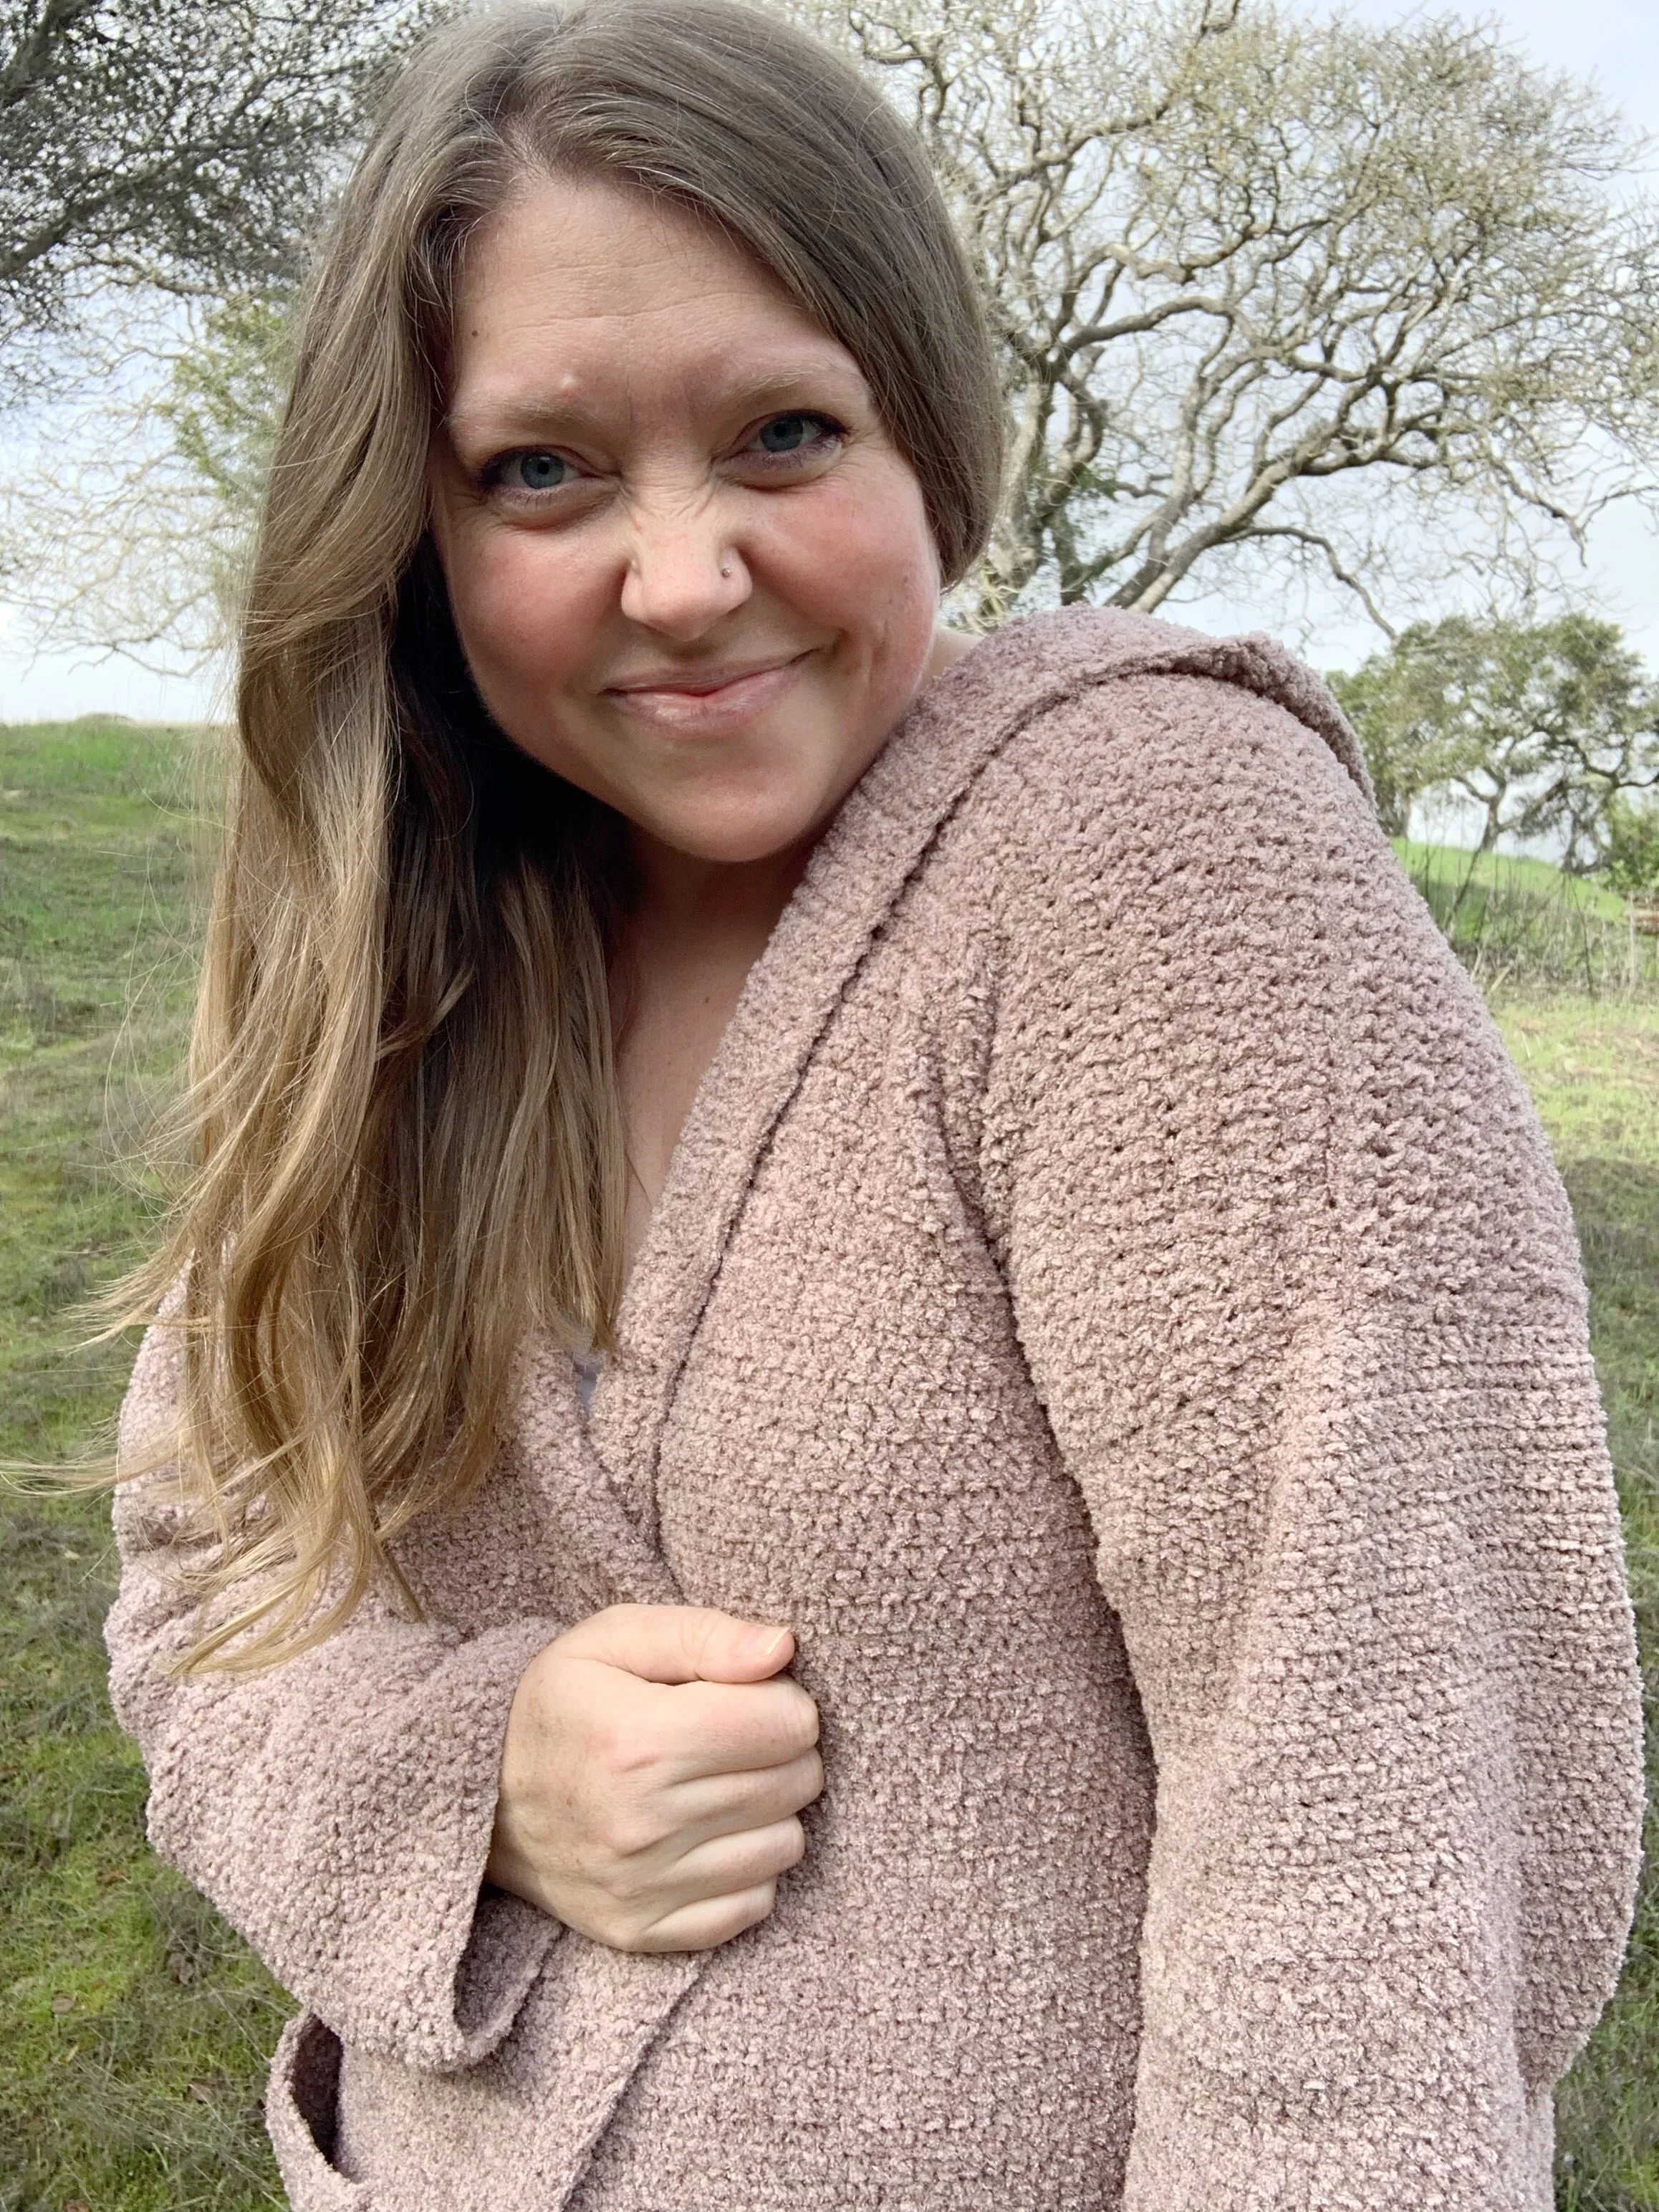
Stay extra cozy this season with the Jessa Cardigan. This oversized cardigan features a longer length, basic stitches, a hood and pockets. Made with the ultra soft chenille appeal yarn it is sure to become one of your favorites. Scroll down for the free version or grab a digital PDF version in my shop.

The Jessa Cardigan is also available as a complete kit from Lion Brand Yarn. The kit comes with all the yarn you need in the color of your choice plus a digital copy of the pattern. Grab yours today at the link below.
I’m so excited to be sharing The Jessa Cardigan knitting pattern with you. This is the sister design to my Jordie Cardigan crochet pattern and I just love how they both turned out. The beautiful chenille yarn makes a stunning fabric that looks great in both crochet and knit.
The Jessa is constructed out of five main pieces and then sewn together. The pieces are made of simple shapes with minimal shaping, making it great for beginners to intermediate knitters. The whole piece is made in reverse stockinette which gives it an extra fuzzy texture.
The added hood and pockets make the Jessa extra cozy. It’s the perfect piece for those cool nights heading into spring or for lounging around the house on rainy days. Grab some Chenille Appeal yarn and let’s get started!

Psst…did you see that Stitch Together Official is hosting the Jordie Cardigan as their February CAL? You can join in too by making The Jessa Cardigan along with us for a knit along by following the same schedule. All the details are available here and the CAL/KAL starts February 1st!
The Jessa Cardigan Knitting Pattern
Materials:
1286-1994 yards of Lion Brand Chenille Appeal in Rose Taupe
28” circular US size 5 (3.75mm) knitting needles
US size 5(3.75mm) double point needles
Tapestry needle
Stitch Markers
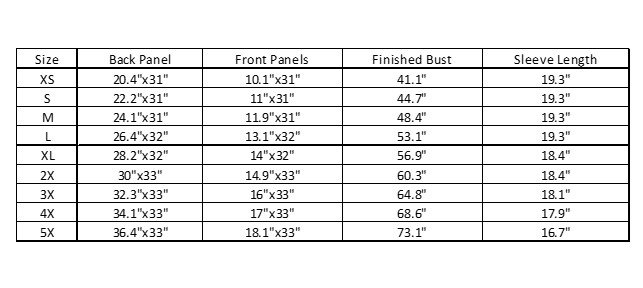
Size:
XS: fits bust 28-30” (approx. 1286 yards) 5 skeins
S: fits bust 32-34” (approx. 1386 yards) 5 skeins
M: fits bust 36-38” (approx. 1450 yards) 6 skeins
L: fits bust 40-42” (approx. 1583 yards) 6 skeins
XL: fits bust 44-46” (approx. 1620 yards) 6 skeins
2X: fits bust 48-50” (approx. 1764 yards) 7 skeins
3X: fits bust 52-54” (approx. 1825 yards) 7 skeins
4X: fits bust 56-58” (approx. 1952 yards) 7 skeins
5X: fits bust 60-62” (approx. 1994 yards) 8 skeins
Abbreviations:
CO- cast on
st(s)- stitch(es)
RS- right side
WS- wrong side
K- knit
P-purl
BO- bind off
K1FB- knit one front and back
K1tbl- knit one through back loop
SSK- slip slip knit
K2tog- knit two together
sm- slip marker
pm- place marker
Gauge:
17.5 sts and 28 rows in reverse stockinette = 4” square
Notes:
1. Pattern is worked in five main pieces (back panel, two front panels and two sleeves) worked bottom up. The front and back panels are seamed at the shoulders and then sleeves are sewn in place. Underarms and sides are then seamed. The hood is added by picking up stitches along the neckline and the pockets are sewn on to the front panels. An applied i-cord edge is added around outside edges of the cardigan. A video tutorial for applied i-cord can be found here.
2. Pattern is made with 11-12” of positive ease. Size down for a tighter fit.
3. Model is wearing a size 2X and is 5’9”
4. When seaming the yarn may bunch in pieces leaving bare string. If this happens feel free to use a crochet hook and slip stitch the seams together instead.

Pattern:
Back Panel: make one
CO 89(97, 105, 115, 123, 131, 141, 149, 159)
Row 1(WS): K all sts. (89(97, 105, 115, 123, 131, 141, 149, 159)
Row 2(RS): P all sts. (89(97, 105, 115, 123, 131, 141, 149, 159)
Repeat Rows 1 & 2 for a total of 216(216, 216, 224, 224, 230, 230, 230, 230)
BO all sts, leaving a long tail for seaming.
Front Panels: make two
CO 44(48, 52, 57, 61, 65, 70, 74, 79)
Row 1(WS): K all sts. (44(48, 52, 57, 61, 65, 70, 74, 79)
Row 2(RS): P all sts. (44(48, 52, 57, 61, 65, 70, 74, 79)
Repeat Rows 1 & 2 for a total of 216(216, 216, 224, 224, 230, 230, 230, 230)
BO all sts, leaving a long tail for seaming.
Sleeves: make two
XS(S, M)
CO 51(51, 51)
Row 1(WS): K all sts. (51(51, 51)
Row 2 and all even Rows: (RS): P all sts. (51(51, 51)
Rows 3 & 5 & 7: K all sts. (51(51, 51)
Row 9: K1, K1FB, K across until 2 sts remain, K1FB, K1 in last st. (53(53, 53)
Rows 11 & 13 & 15 & 17: K all sts. (53(53, 53)
Row 19: K1, K1FB, K across until 2 sts remain, K1FB, K1 in last st. (55(55, 55)
Repeat Rows 11-20 10(11, 11) more times (75(79, 79)
XS-ONLY
Rows 121-134: repeat Rows 1&2. (75)
BO all stitches.
S(M)-ONLY
Rows 131-134: repeat Rows 1&2. (79(79)
BO all stitches.
L(XL, 2X, 3X)
CO 53(53, 57, 57)
Row 1(WS): K all sts. (53(53, 57, 57)
Row 2 and all even Rows: (RS): P all sts. (53(53, 57, 57)
Rows 3 & 5: K all sts. (53(53, 57, 57)
Row 7: K1, K1FB, K across until 2 sts remain, K1FB, K1 in last st. (55(55, 59, 59)
Rows 9 & 11 & 13: K all sts. (55(55, 59, 59)
Row 15: K1, K1FB, K across until 2 sts remain, K1FB, K1 in last st. (57(57, 61, 61)
Repeat Rows 9-16 13(13, 13, 13) more times (83(83, 87, 87)
L(XL)-ONLY
Rows 121-134(128): repeat Rows 1&2. (83(83)
BO all stitches.
2X(3X)-ONLY
Row 121: : K all sts. (87(87)
Row 123: K1, K1FB, K across until 2 sts remain, K1FB, K1 in last st. (89(89)
Rows 125-128(126): repeat Rows 1&2. (89(89)
BO all stitches.
Get The Jessa Cardigan PDF Pattern in my shop, Etsy or Ravelry.
4X(5X)
CO 57(57)
Row 1(WS): K all sts. (57(57)
Row 2 and all even Rows: (RS): P all sts. (57(57)
Rows 3 & 5: K all sts. (57(57)
Row 7: K1, K1FB, K across until 2 sts remain, K1FB, K1 in last st. (59(59)
Rows 9 & 11: K all sts. (59(59)
Row 13: K1, K1FB, K across until 2 sts remain, K1FB, K1 in last st. (61(61)
Repeat Rows 9-14 12(12) more times (85(85)
Row 87: K all sts. (85(85)
Row 89: K1, K1FB, K across until 2 sts remain, K1FB, K1 in last st. (87(87)
Repeat Rows 87-90 5(5) more times. (97(97)
Rows 111-124(116): Repeat Rows 1&2. (97(97)
BO all stitches.

Seaming:
Lay Back Panel and two Front Panels together at the shoulders with RS facing each other. Using your preferred seaming method attach front panels to back panel, leaving 31 sts unworked in the center of the back panel and 15 sts unworked on both front panels.

Attach the sleeves to the sides of the cardigan, using your preferred seaming method, making sure to align the center of the sleeve with the shoulder seam. Make sure the sleeves are attached evenly from the center shoulder seam, down the sides. Using stitch markers to hold the sleeve in place is recommended.
Fold cardigan so that the back and front panels are on top of each other. Then seam the sleeves from the underarm to the cuff. Seam the sides from the underarm down to the bottom.

Hood:
We will now be adding the hood directly on to the neckline working in rows. With RS facing you, starting at the right front panel, pick up stitches evenly around the neckline (15 sts along right front, 31 sts along back, 15 sts along left front; 61 total stitches)
Row 1(WS): K1, K1FB, K6, K1FB, K5, K1FB twice, K6, K1FB, K6, K1FB, pm, K1, pm, K1FB, K6, K1FB, K6, K1FB twice, K5, K1FB, K6, K1FB, K1. (73)
Row 2(RS) and all even rows: P all sts slipping all markers. (73)
Row 3: K to marker, sm, K1FB in next, sm, K to end. (74)
Rows 5 & 7: K all sts slipping all markers. (74)
Row 9: K to marker, sm, K1FB twice, sm, K to end. (76)
Rows 11 & 13: K all sts slipping all markers. (76)
Row 15: K to marker, sm, K1FB, K to 1 st before next marker, K1FB, sm, K to end. (78)
Rows 17 & 19: K all sts slipping all markers. (78)
Row 21: K to marker, sm, K1FB, K to 1 st before next marker, K1FB, sm, K to end. (80)
Rows 23 & 25: K all sts slipping all markers. (80)
Row 27: K to marker, sm, K1FB, K to 1 st before next marker, K1FB, sm, K to end. (82)
Rows 29 & 31: K all sts slipping all markers. (82)
Row 33: K to marker, sm, K1FB, K to 1 st before next marker, K1FB, sm, K to end. (84)
Rows 35 & 37: K all sts slipping all markers. (84)
Row 39: K to marker, sm, K1FB, K to 1 st before next marker, K1FB, sm, K to end. (86)
Rows 41 & 43: K all sts slipping all markers. (86)
Row 45: K to marker, sm, K1FB, K to 1 st before next marker, K1FB, sm, K to end. (88)
Rows 47 & 49: K all sts slipping all markers. (88)
Row 51: K to marker, sm, K1FB, K to 1 st before next marker, K1FB, sm, K to end. (90)
Rows 53 & 55: K all sts slipping all markers. (90)
Row 57: K to marker, sm, K1FB, K to 1 st before next marker, K1FB, sm, K to end. (92)
Rows 59 & 61: K all sts slipping all markers. (92)
Row 63: K to marker, sm, K1FB, K to 1 st before next marker, K1FB, sm, K to end. (94)
Rows 65 & 67: K all sts slipping all markers. (94)
Row 69: K to marker, sm, K1FB, K to 1 st before next marker, K1FB, sm, K to end. (96)
We will now be splitting the hood and working two sides separately. This will give the back of the hood a more curved edge.
Left Side:
Row 71: K45, K2tog, K1. (47)
Row 73: K44, K2tog, K1. (46)
Row 75: K43, K2tog, K1. (45)
Row 77: K42, K2tog, K1. (44)
Row 79: K41, K2tog, K1. (43)
Row 81: K38, K2tog twice, K1. (41)
Row 83: K36, K2tog twice, K1. (39)
Row 85: K34, K2tog twice, K1. (37)
Row 87: K32, K2tog twice, K1. (35)
Row 89: K30, K2tog twice, K1. (33)
BO after Row 90.
With WS facing you attach yarn to right side of hood at the center where you left off.
Right Side:
Row 71: K1, SSK, K to end. (47)
Row 73: K1, SSK, K to end. (46)
Row 75: K1, SSK, K to end. (45)
Row 77: K1, SSK, K to end. (44)
Row 79: K1, SSK, K to end. (43)
Row 81: K1, SSK twice, K to end. (41)
Row 83-89: repeat Row 81. (33)
BO after Row 90 leaving a long tail.
Using the long tail from the right side of hood, seam the top of the hood closed using your preferred method of seaming.

Edging:
To finish the Jessa you will be adding an i-cord edging around the entire outside edge of the cardigan (bottom, front right, hood, front left).
With US size 5(3.75mm) double point needles, CO 3 sts. Starting in the bottom seam of the front right panel, with the WS facing you, pick up a stitch. Then slide the stitches to the right tip of the needle. K2, K2togtbl, 3 sts will now be on the right needle. Pick up another stitch along the bottom edge back panel, and repeat.
Continue with the i-cord edging all the way around the bottom back and left panels, up the left front, around the edge of the hood, down the right front panel and along the bottom right panel. You will need to work 3 times into each front bottom corner as well. BO and seam the ends together.
Pockets: make two
CO 27
Row 1(WS): K all sts. (27)
Row 2(RS): P all sts. (27)
Rows 3-48: repeat Rows 1&2. (27)
BO off leaving a long tail for sewing to the cardigan.
Position pockets on front panels approx. 6 inches from the bottom and 3.5 inches from center edge. Feel free to adjust to the position you feel works best. Using a tapestry needle sew the pockets to the front panels along each side and bottom.
Weave in all remaining ends and enjoy!

I hope you love your new Jesse Cardigan! I’d love to see your finished piece. Make sure to tag me @meghanmakesdo and use #thejessacardigan on socials so I can see.
As always you can get a PDF version of this pattern in my shop, Etsy or Ravelry. Or treat yourself to a kit from Lion Brand Yarn.
Happy Knitting,
Meghan