The Briar Beanie- Free Crochet Pattern
***This pattern is available as an AD-FREE downloadable PDF in my shop or on Etsy or Ravelry. The PDF includes sizes for adult, child and toddler as well as two brim styles. You will receive 15 pages with color photos detailing all special stitches used. Find it here.***
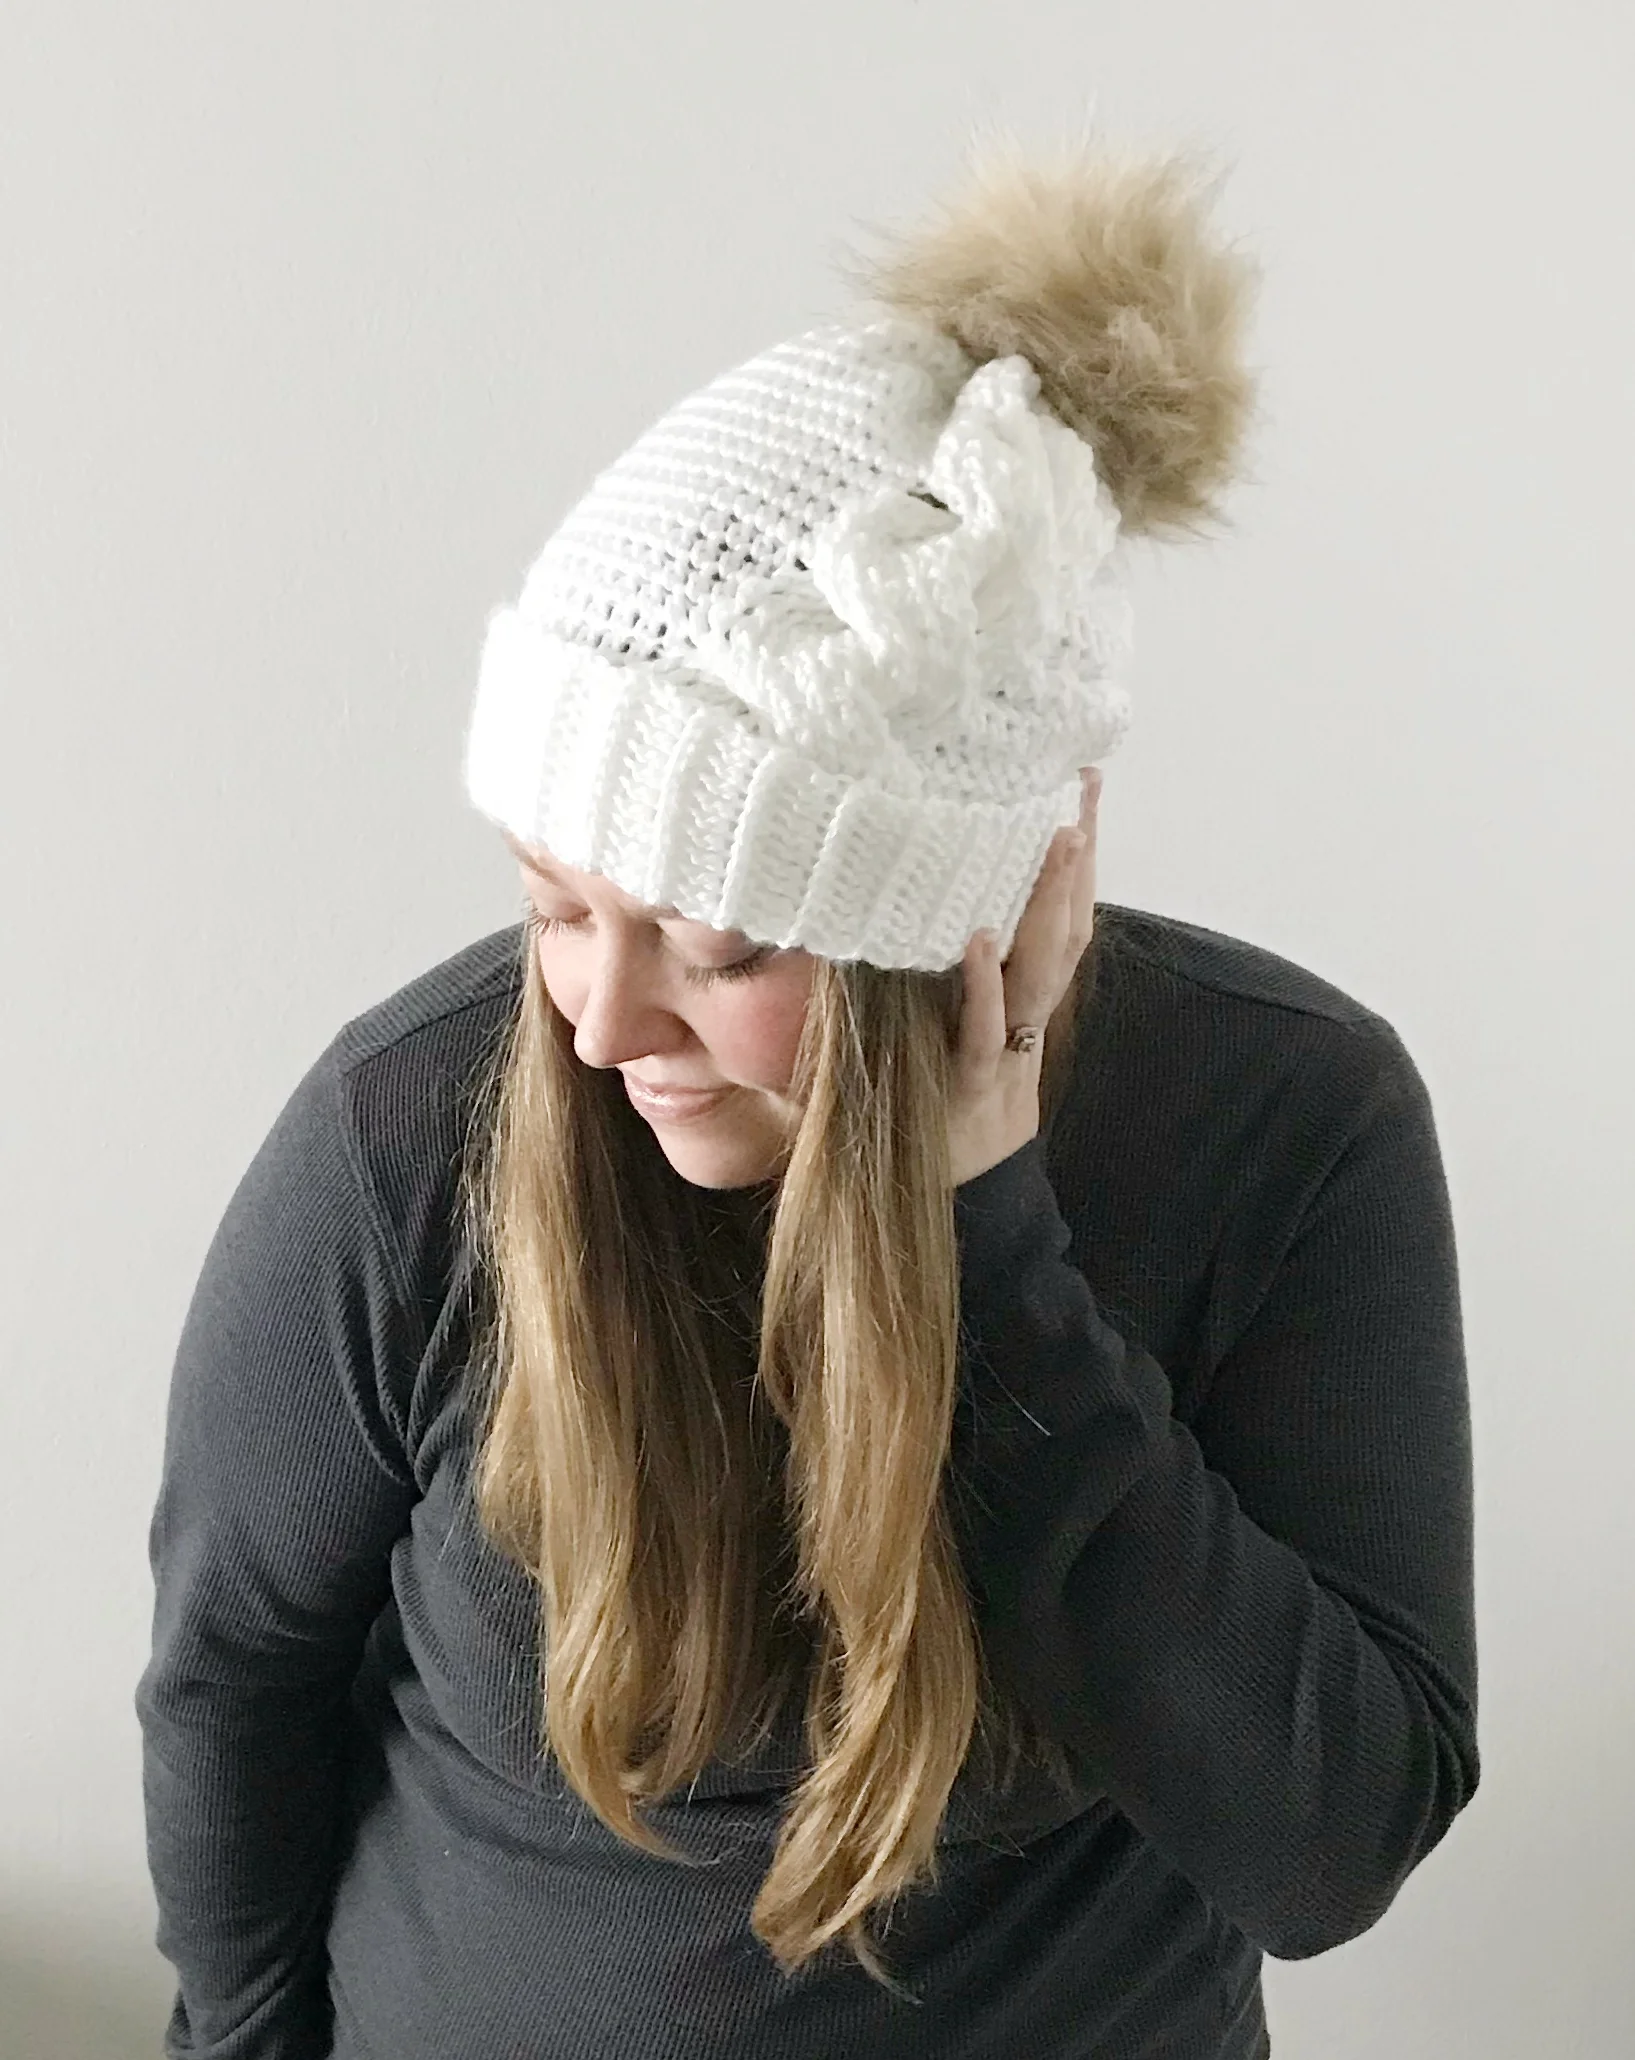
I am so excited to share The Briar Beanie crochet pattern with you today.
I have been really into trying new things with my crochet. Since learning how to do crochet cables, I've been wanting to see just how big I could make one. It took me a few tries to get it just right and it is surprisingly easy once you know the basics to making cables in crochet.
This pattern can be made in three sizes adult, child or toddler. Today I'm going to share with you the adult sized hat. If you want to make the child or toddler size you can purchase an inexpensive PDF in my shop. I've included instructions for two styles of brim. A regular ribbed brim or a fold-over brim.
Materials:
•Approx. 250 yards of worsted weight yarn (I used Caron's Simply Soft in white)
•Size h crochet hook
•Tapestry needle
•Faux fur pom-pom (optional)
Abbreviations:
Chain stitch (ch)
Slip Stitch (sl st)
Half Double crochet (hdc)
Double crochet (dc)
Treble crochet (tr)
Double Treble crochet (dtr)
Skip (sk)
Stitch (st)
Yarn Over (yo)
Front Post Double Crochet (fpdc)
Front Post Treble Crochet (fptr)
Front Post Double Treble Crochet (fpdtr)
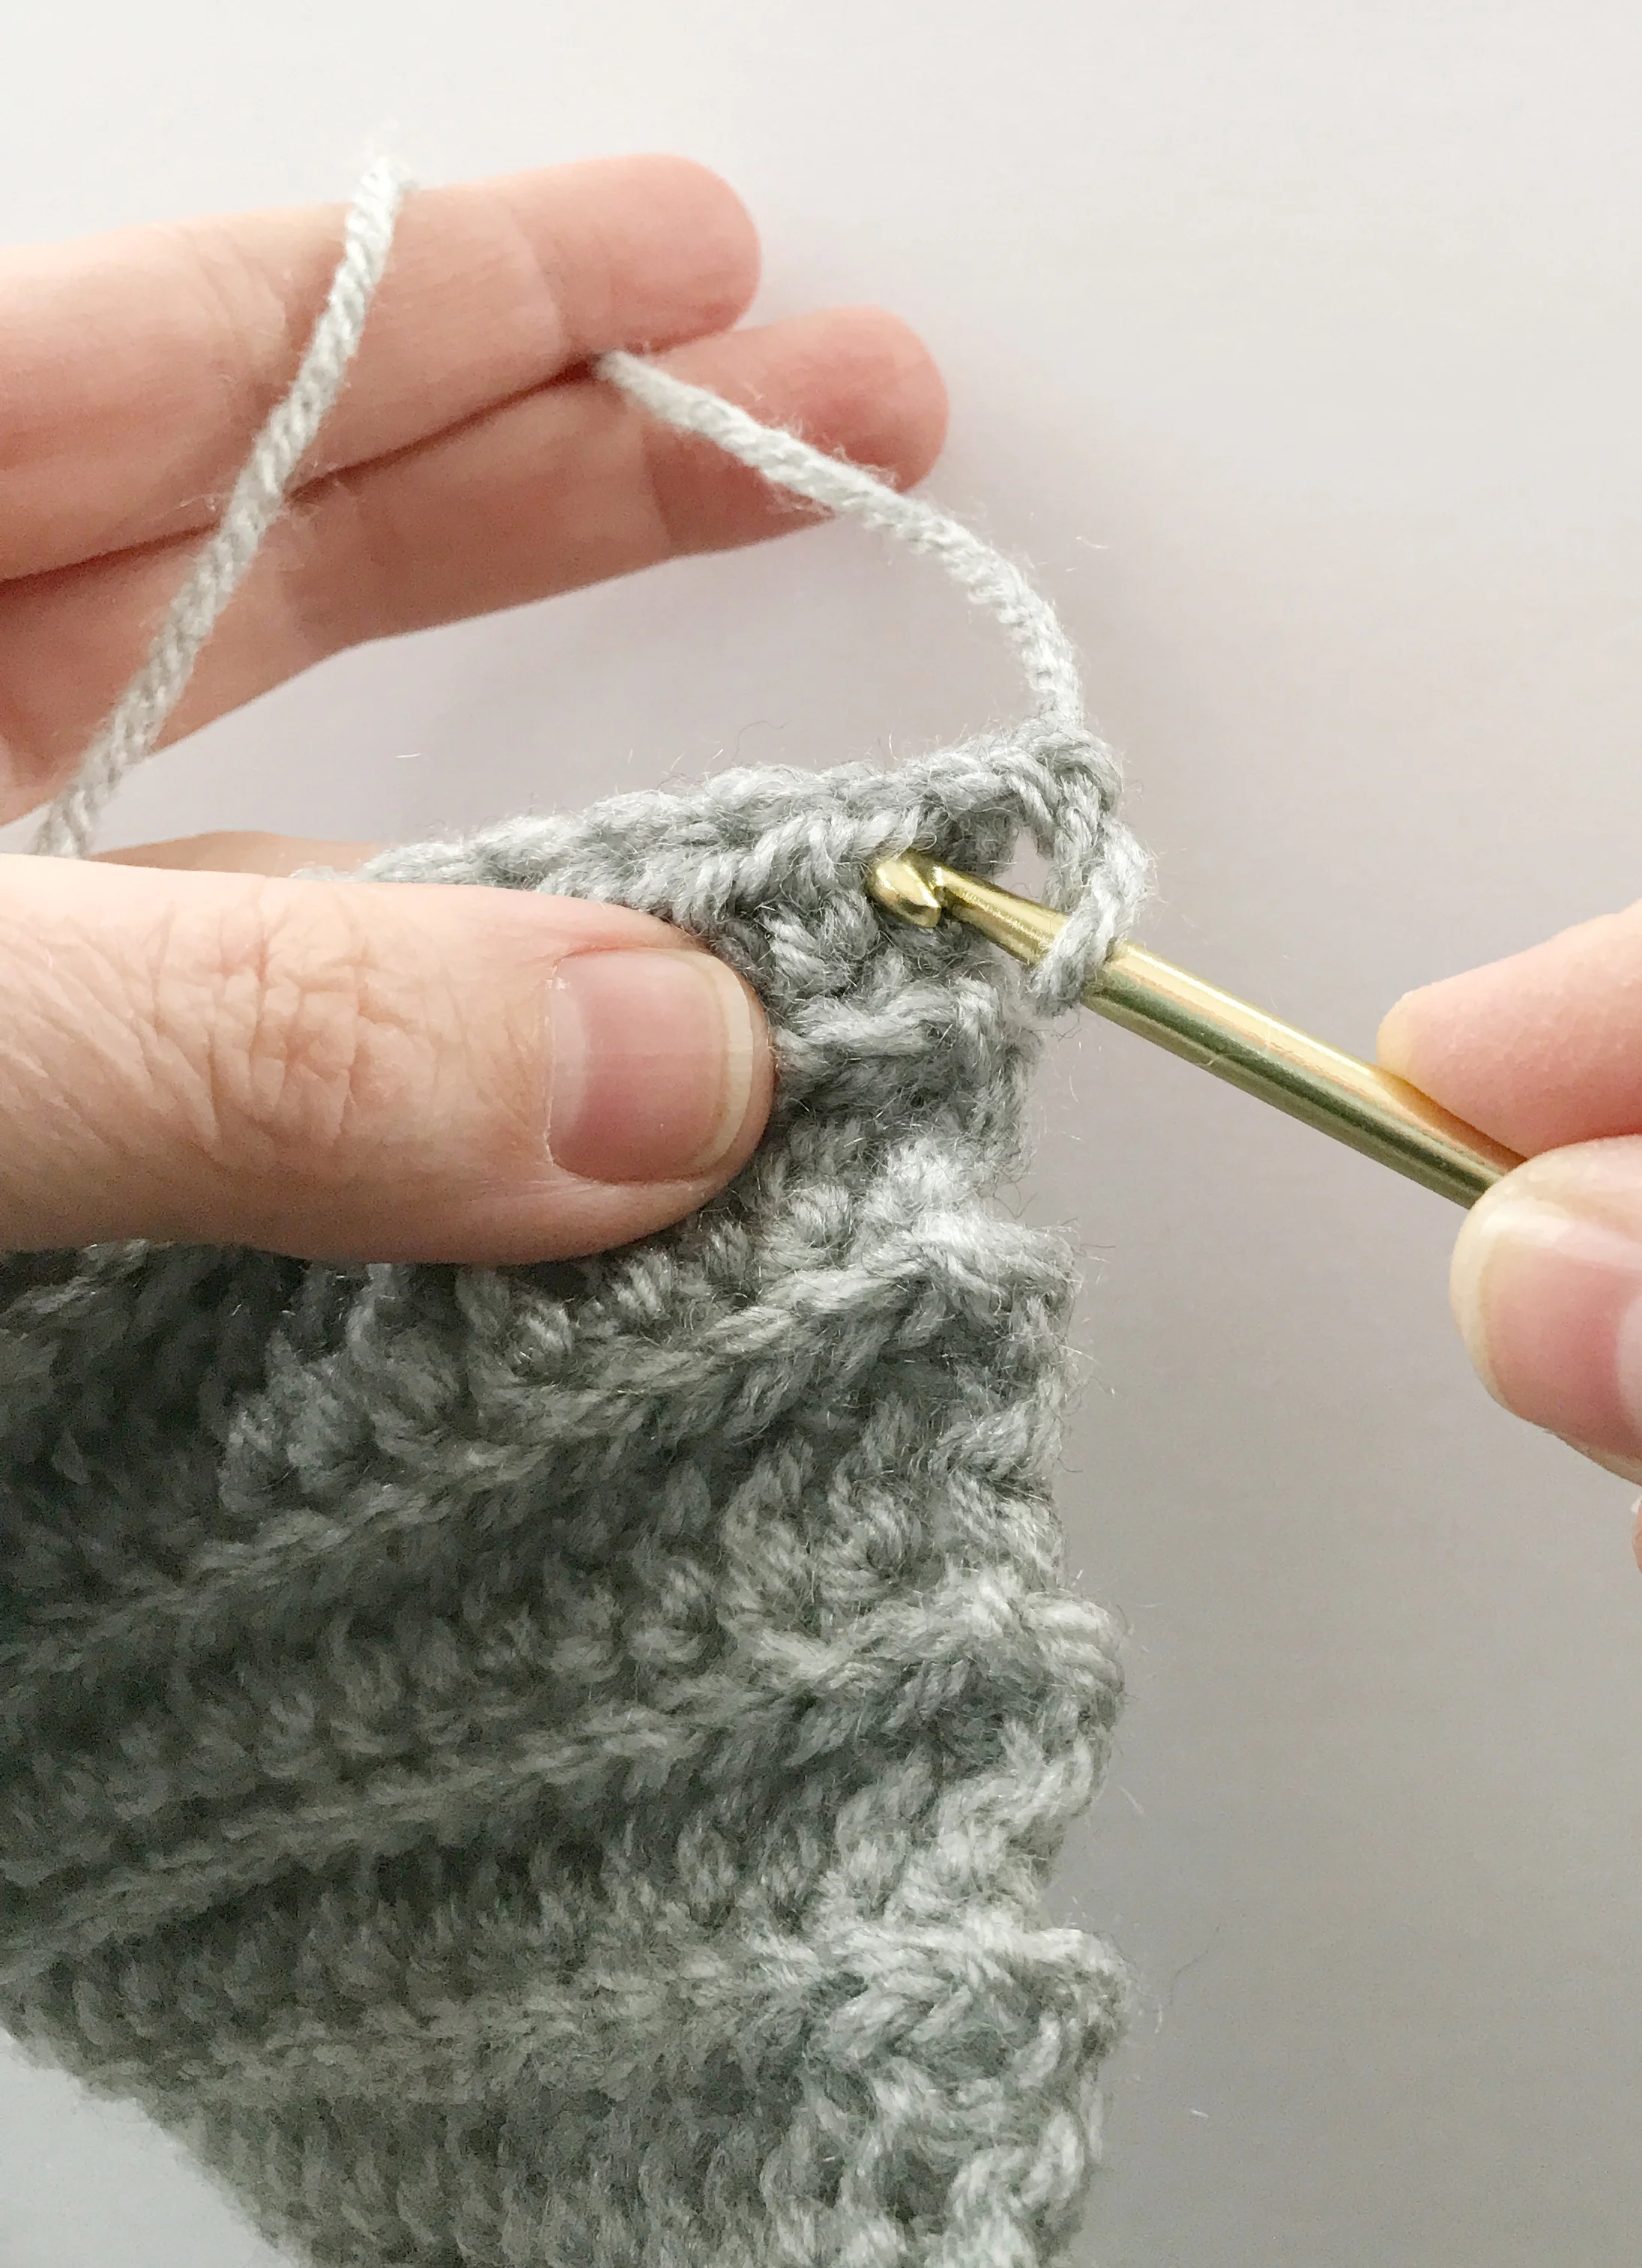
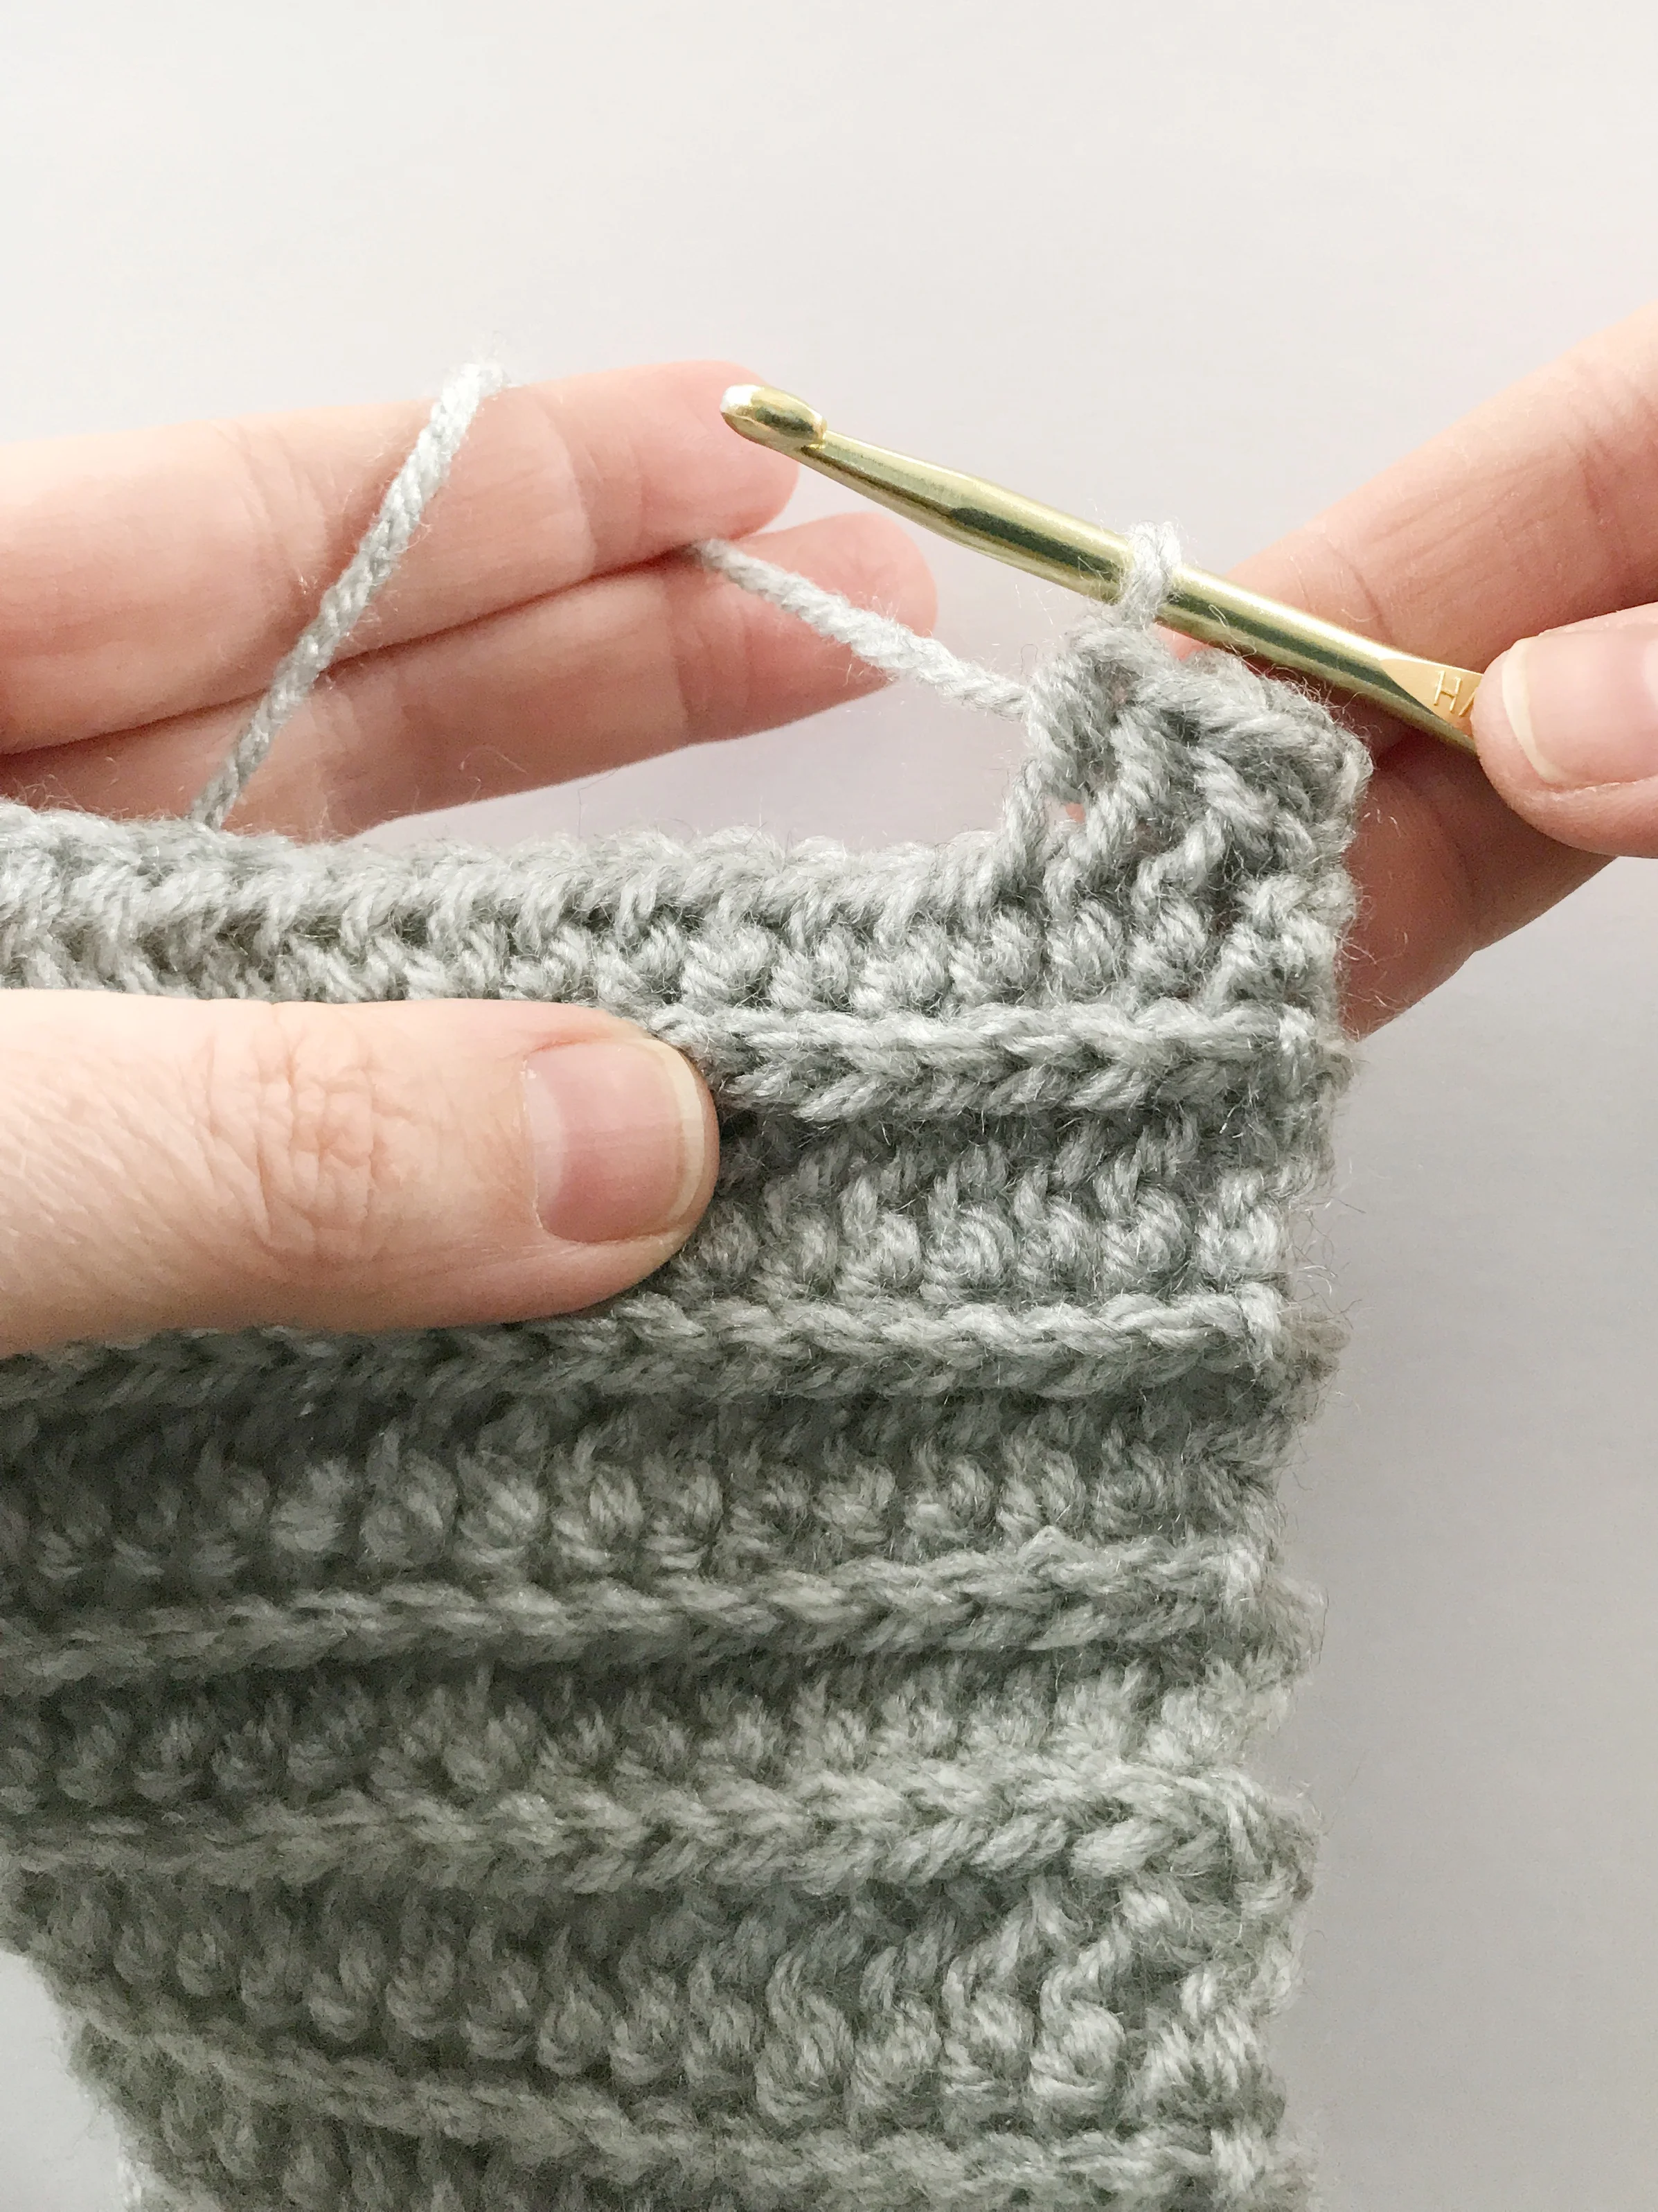
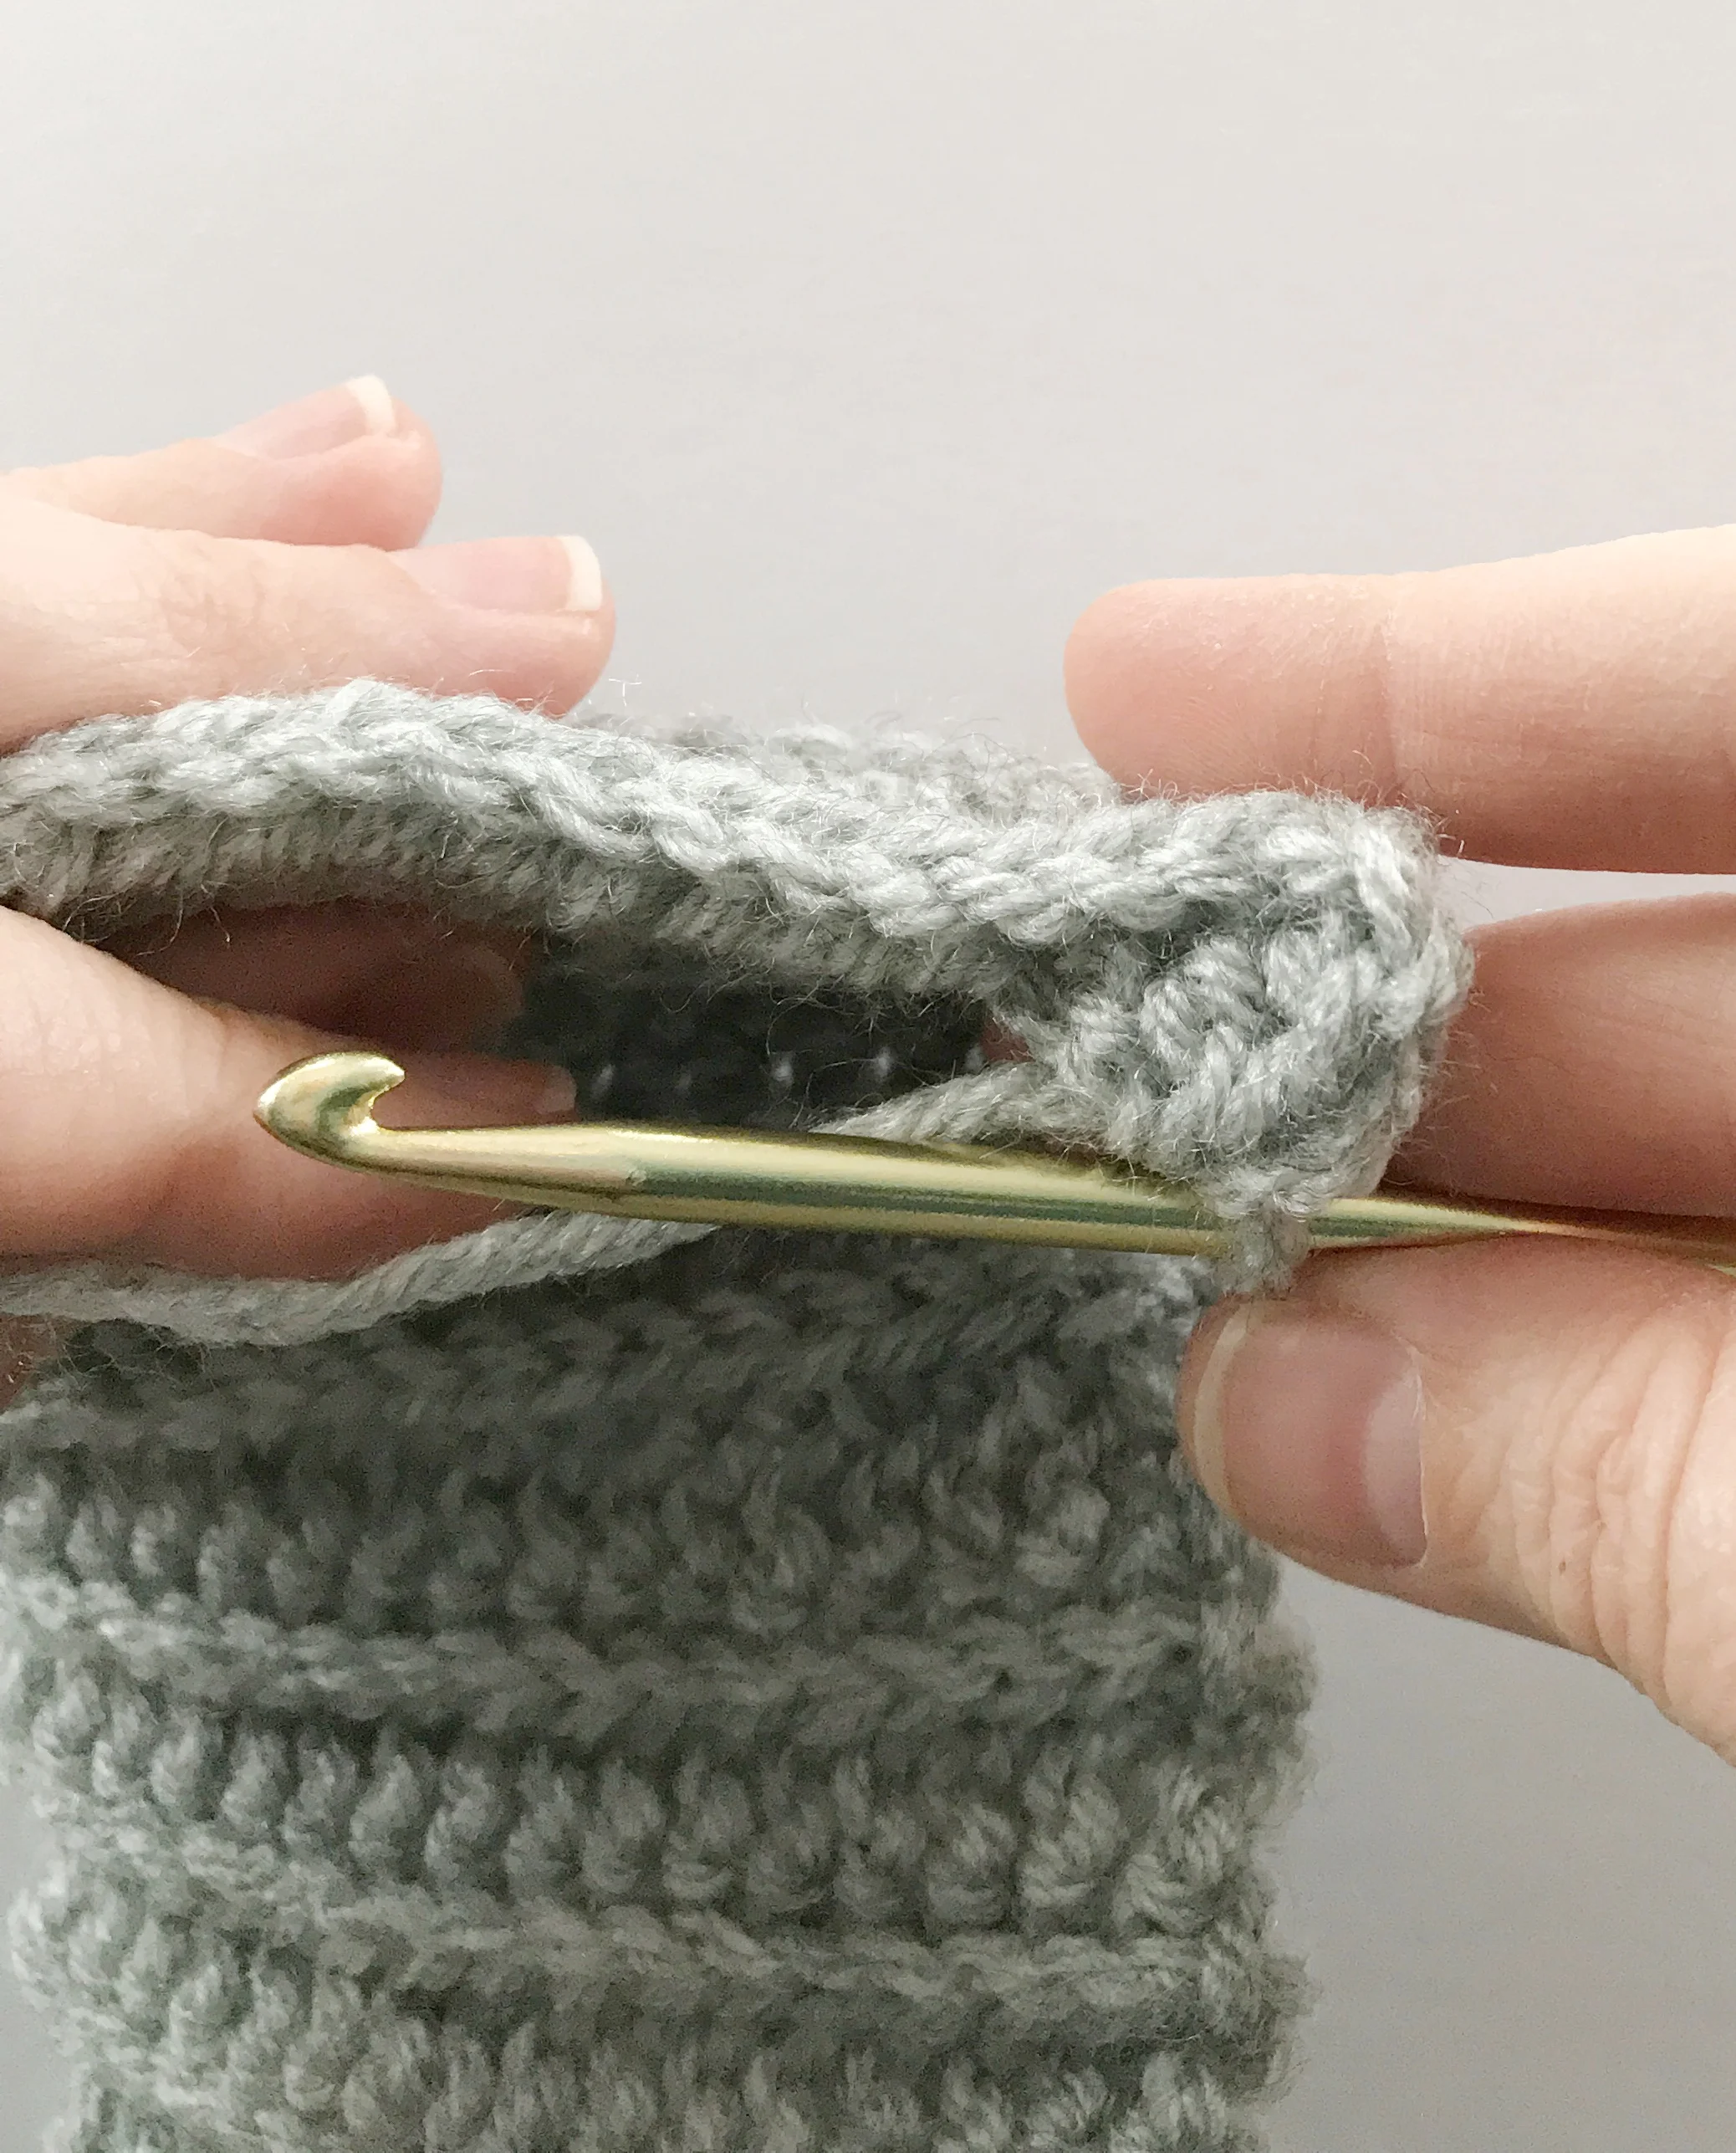
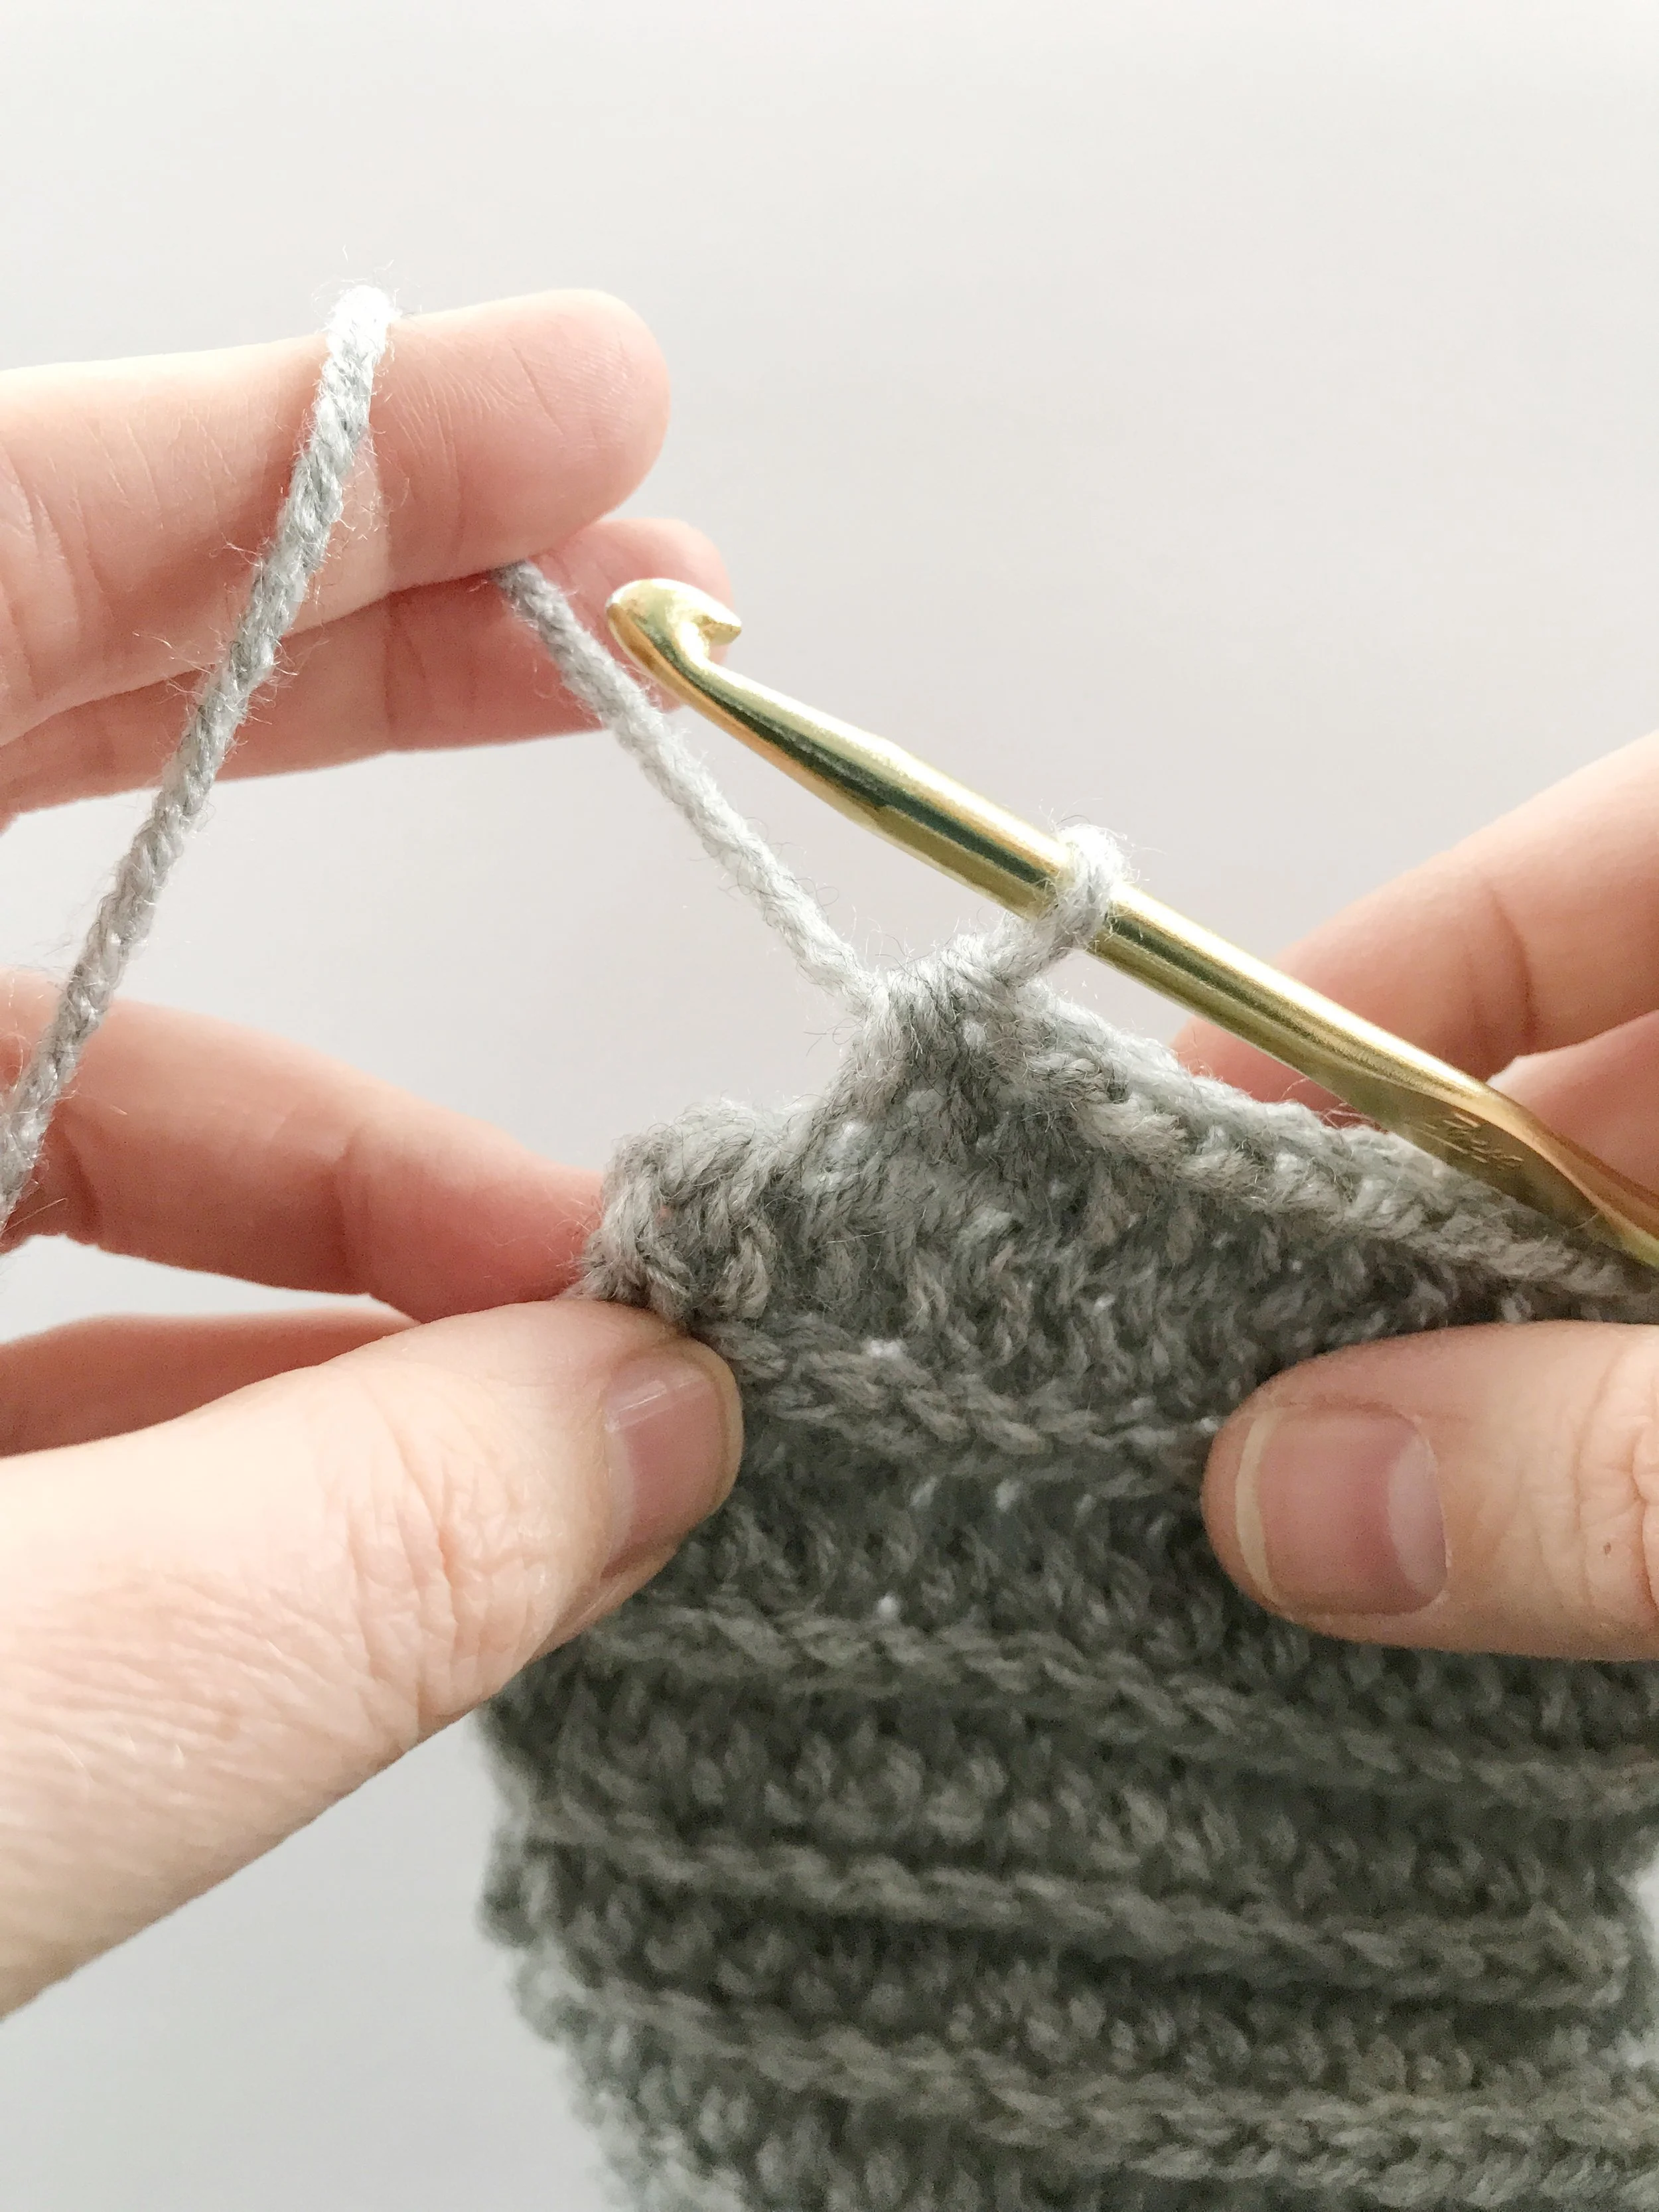
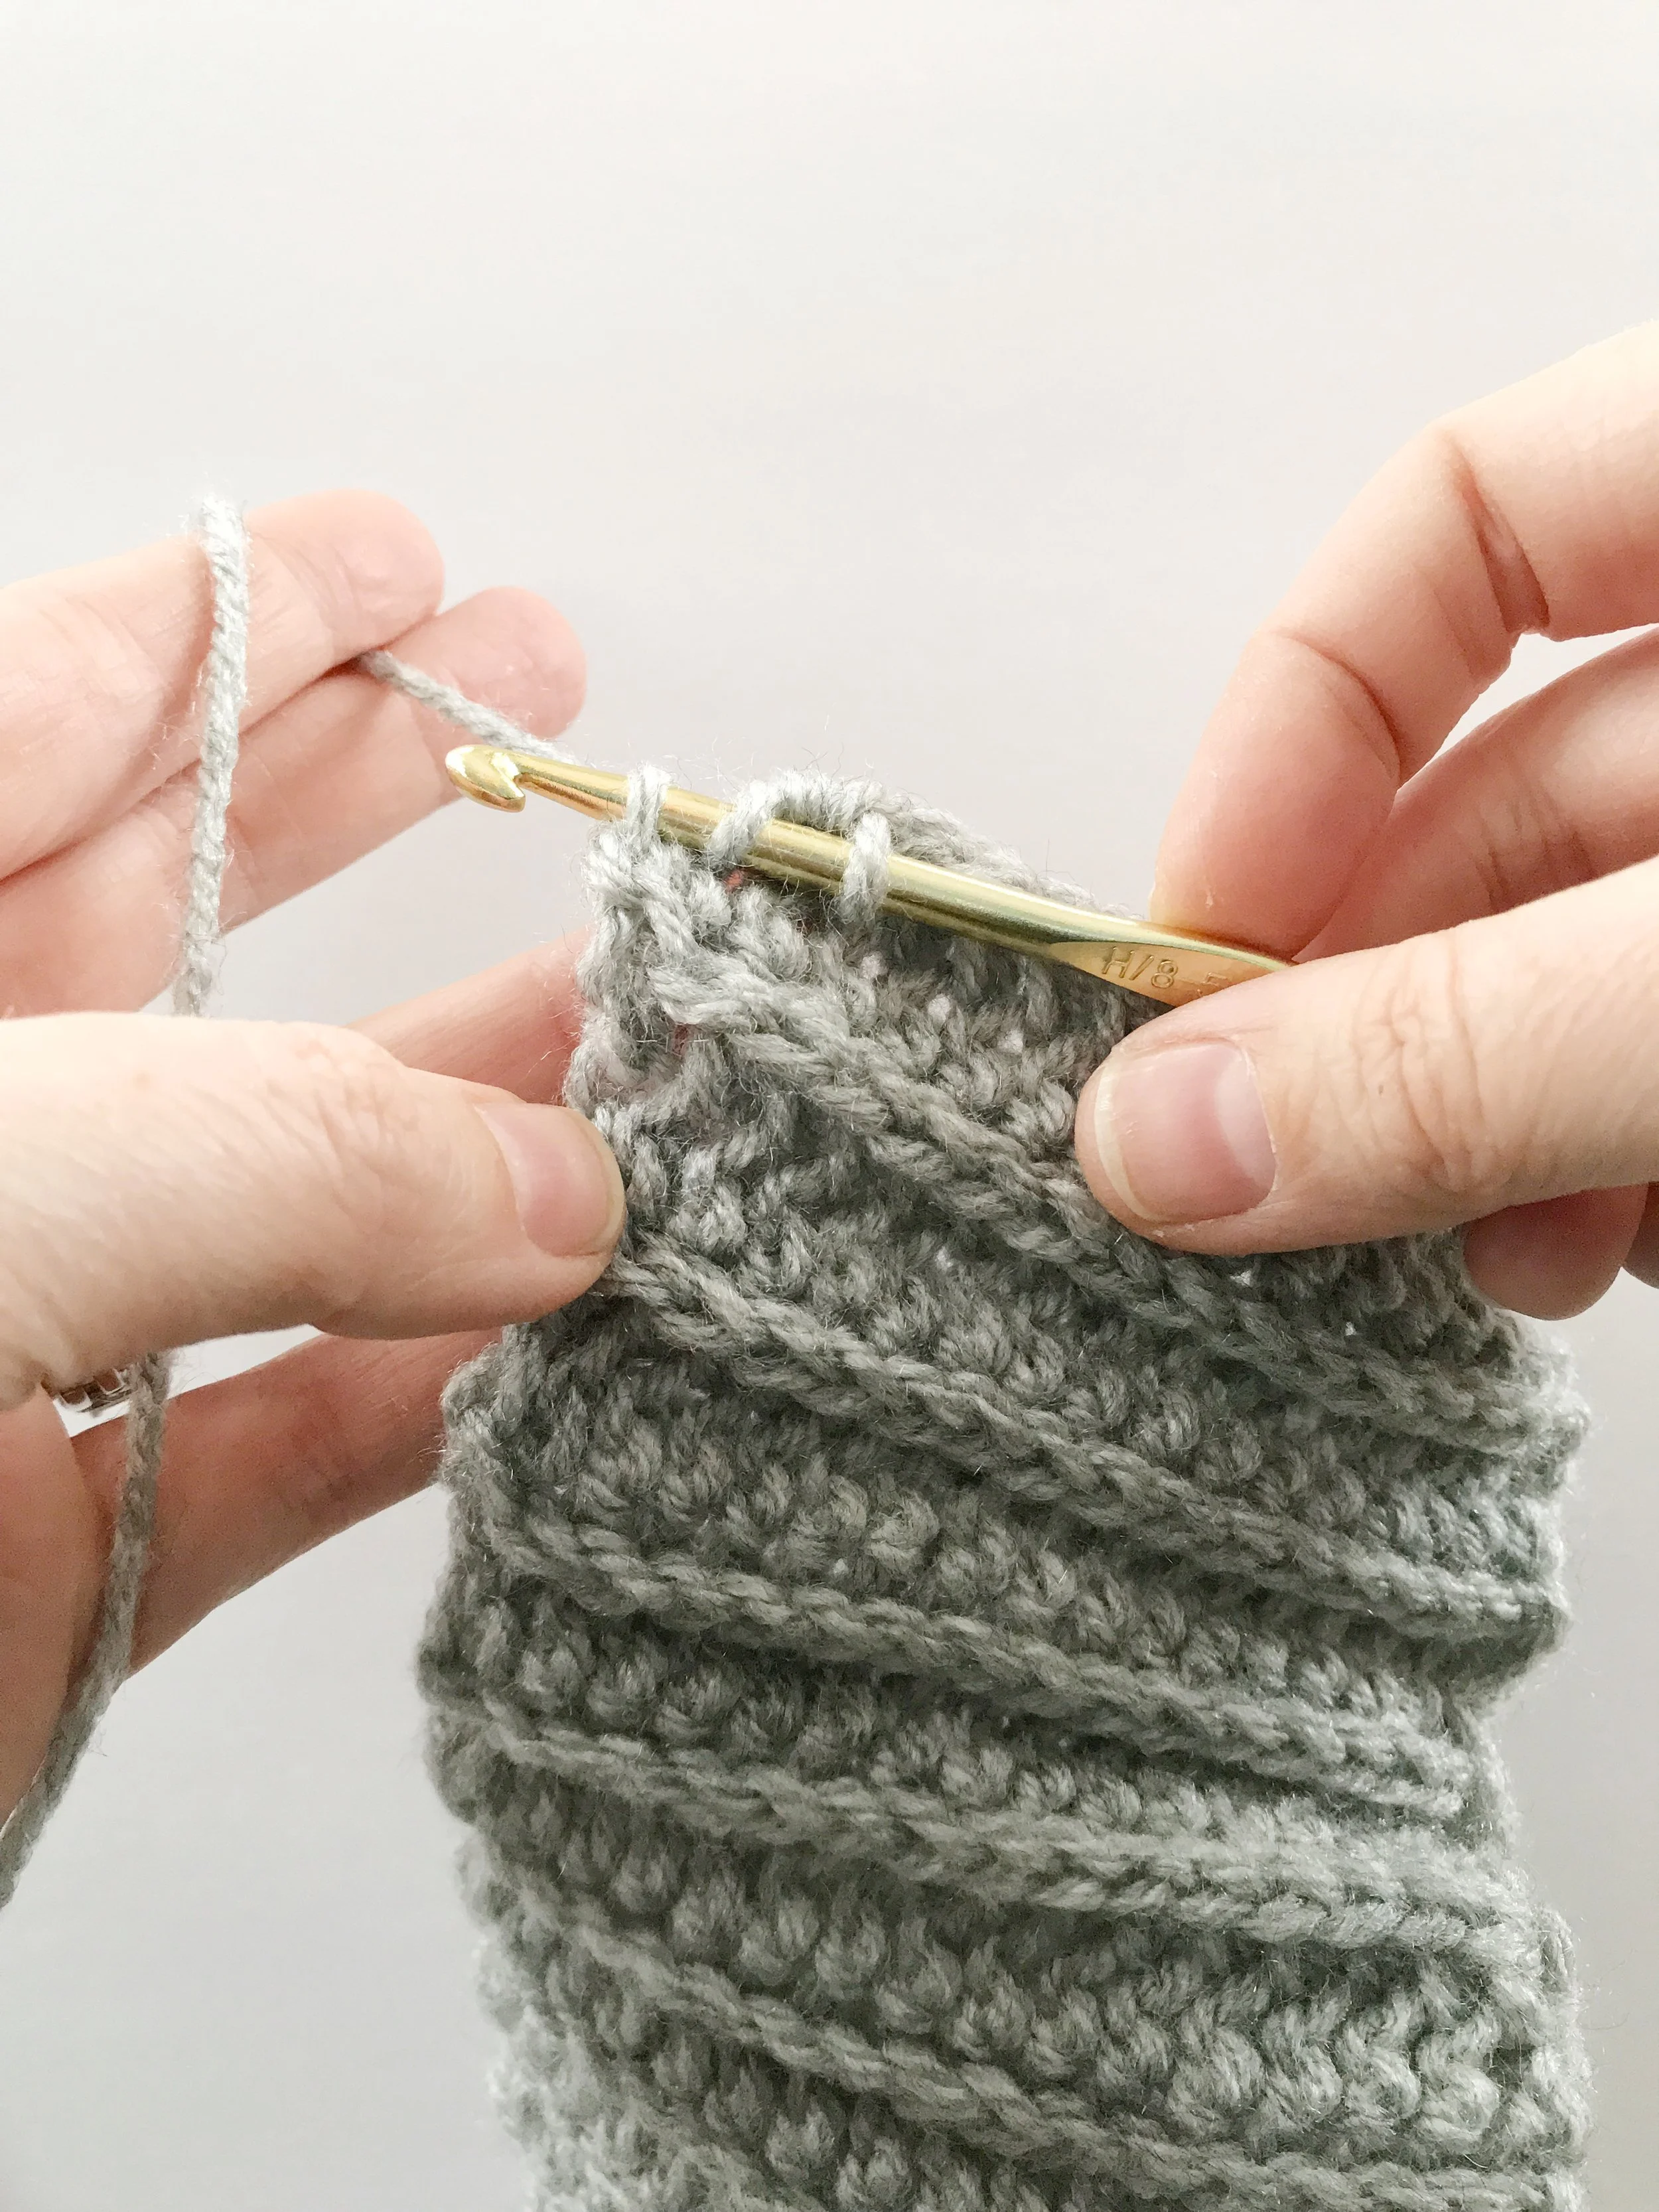
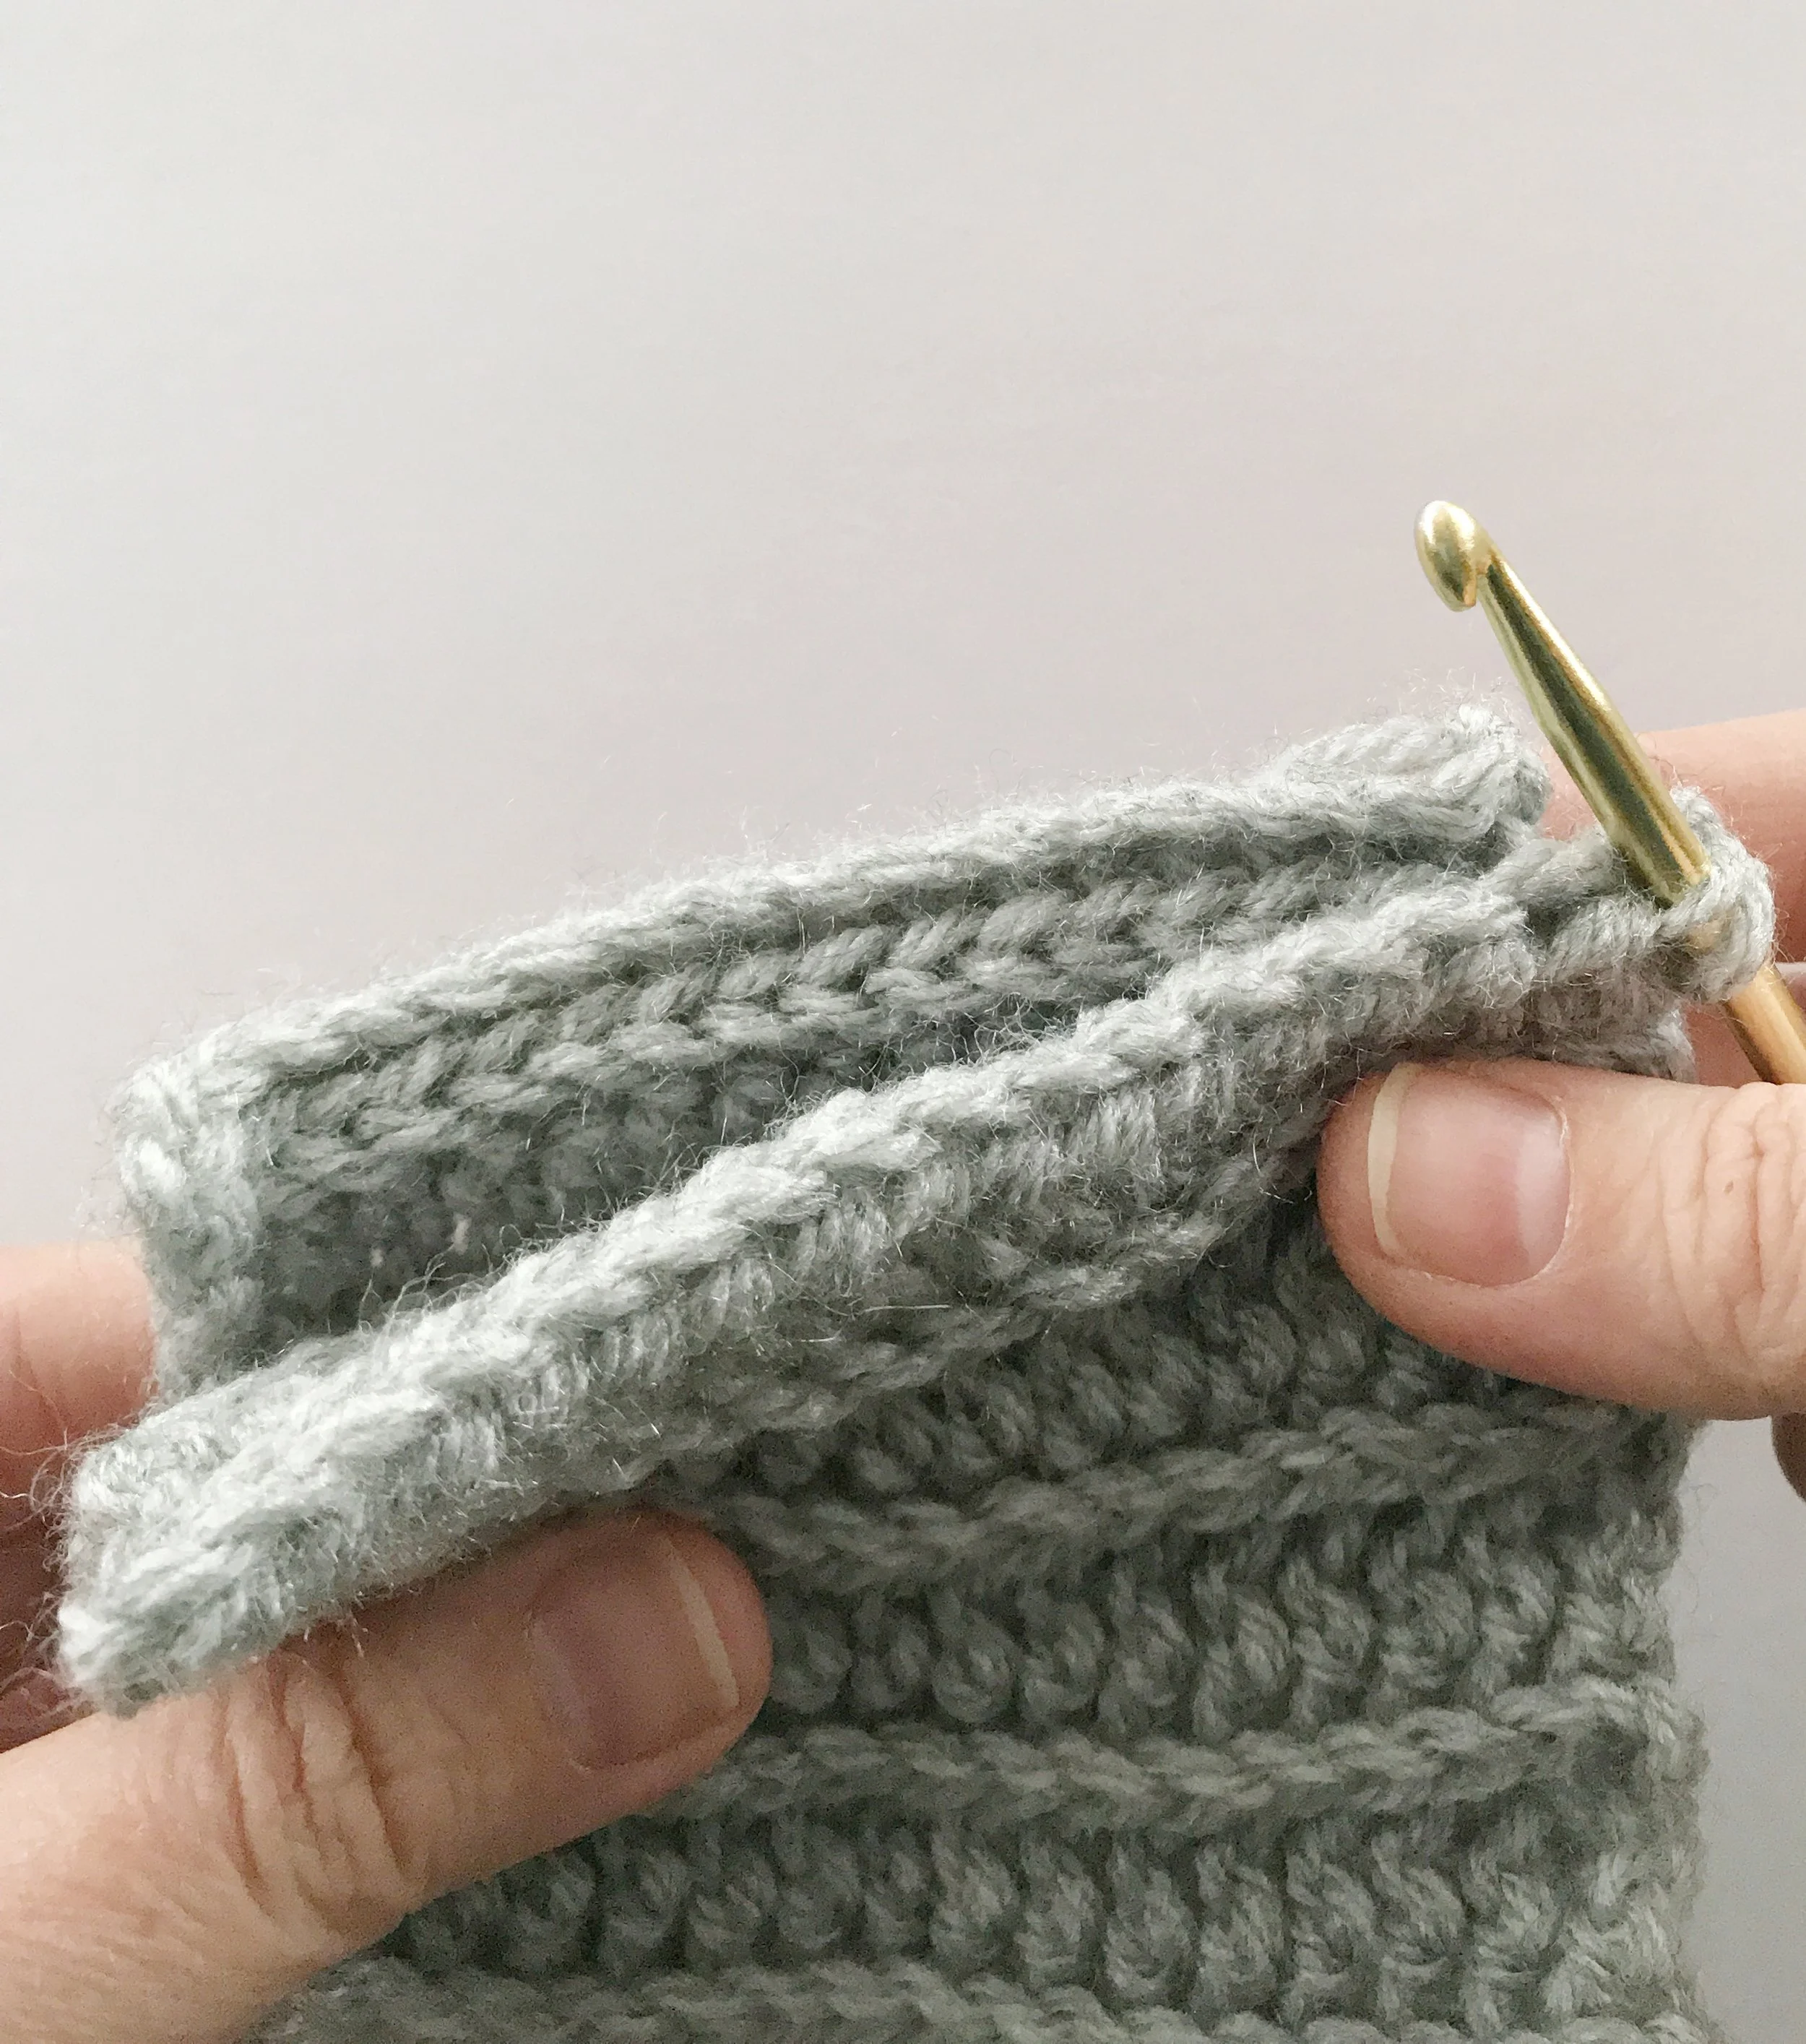
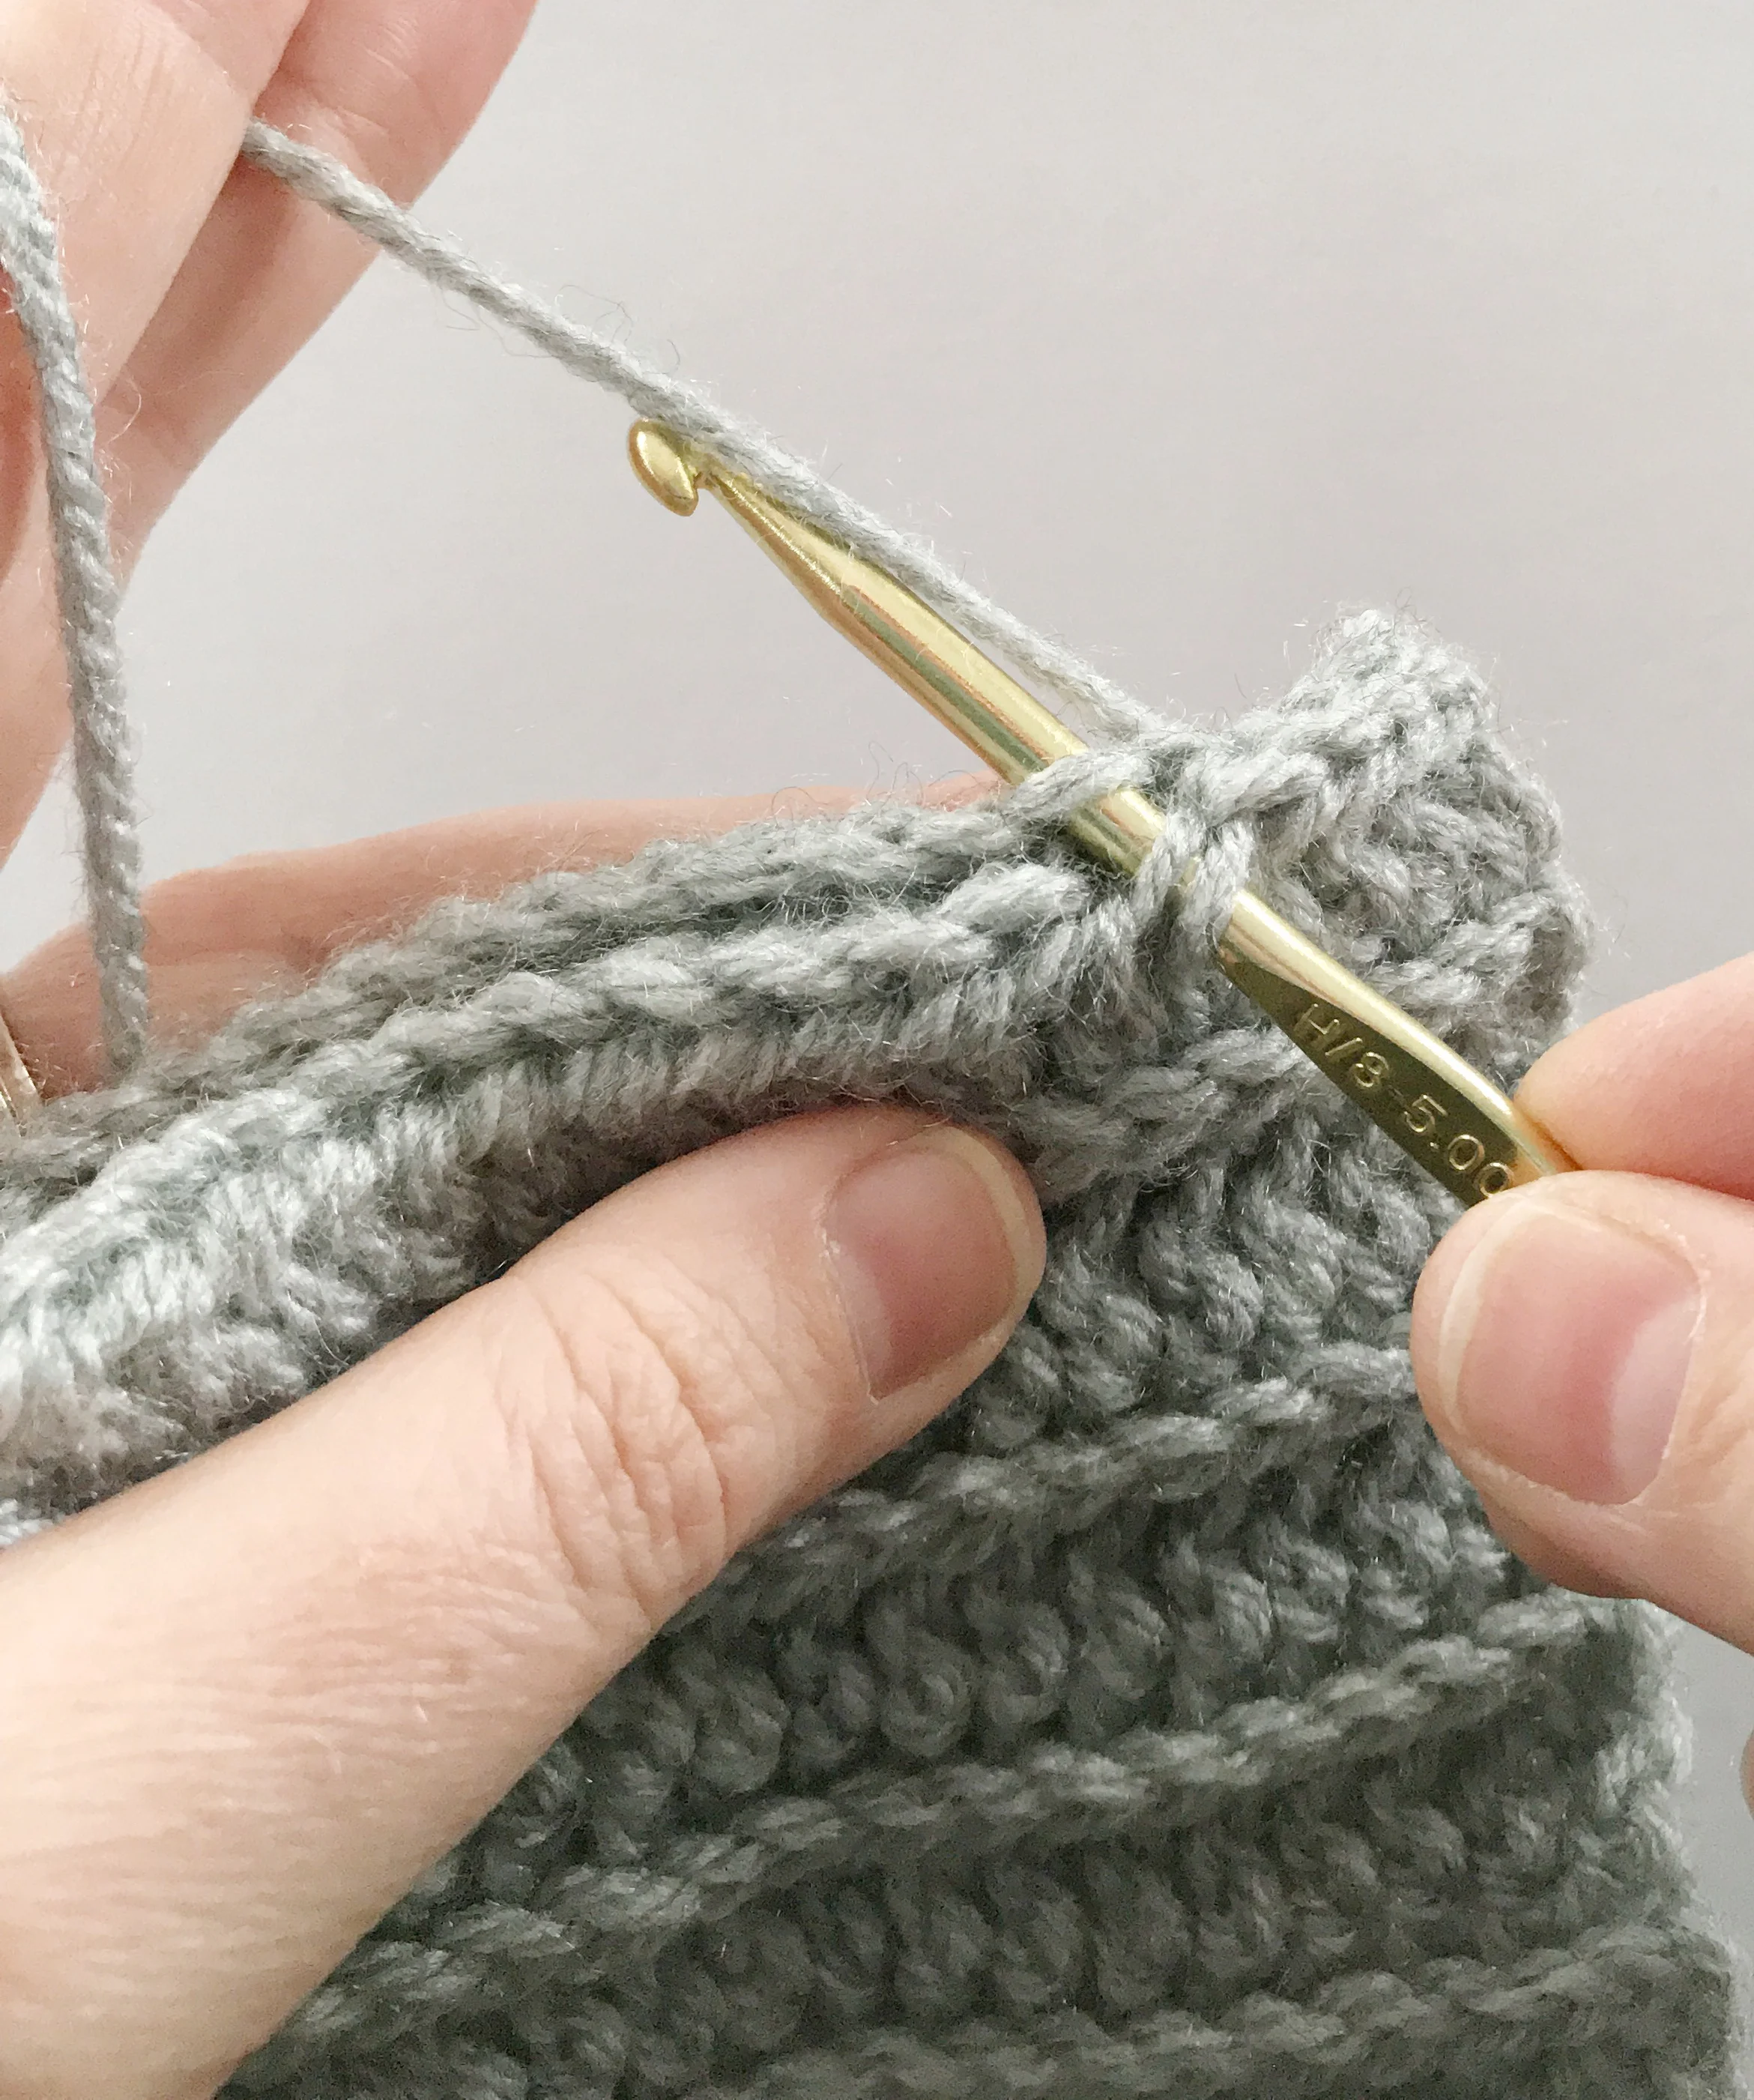
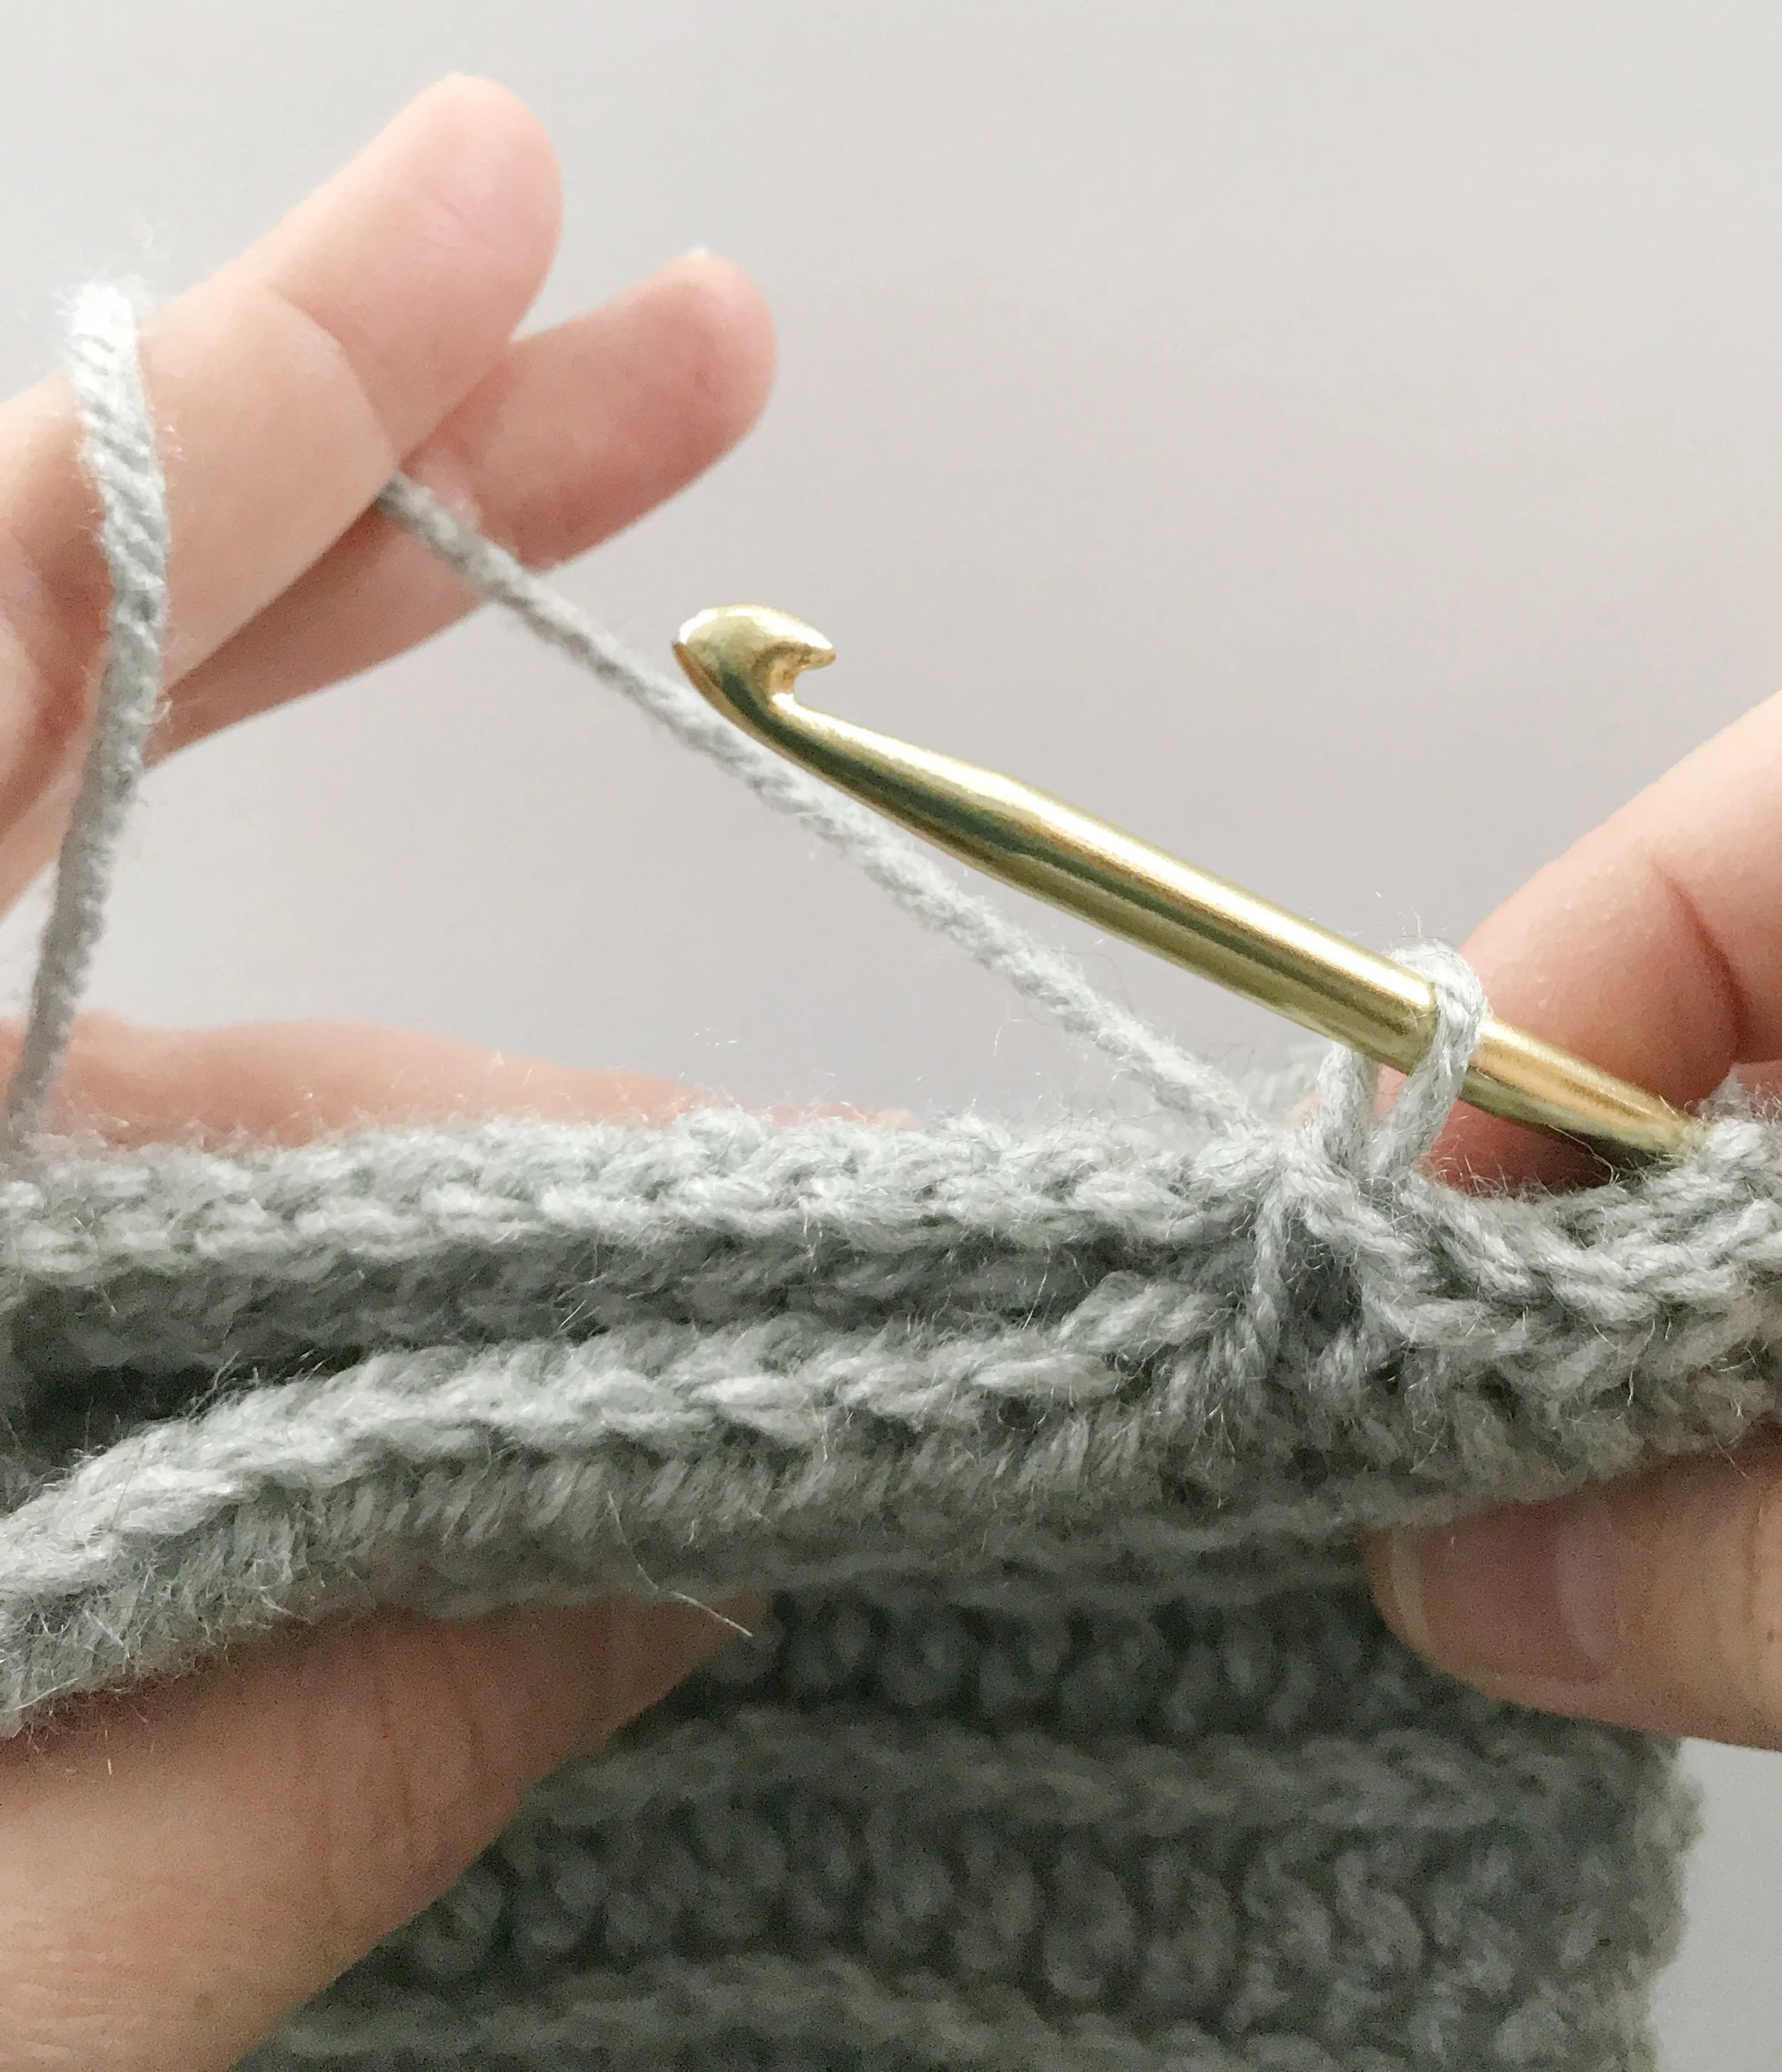
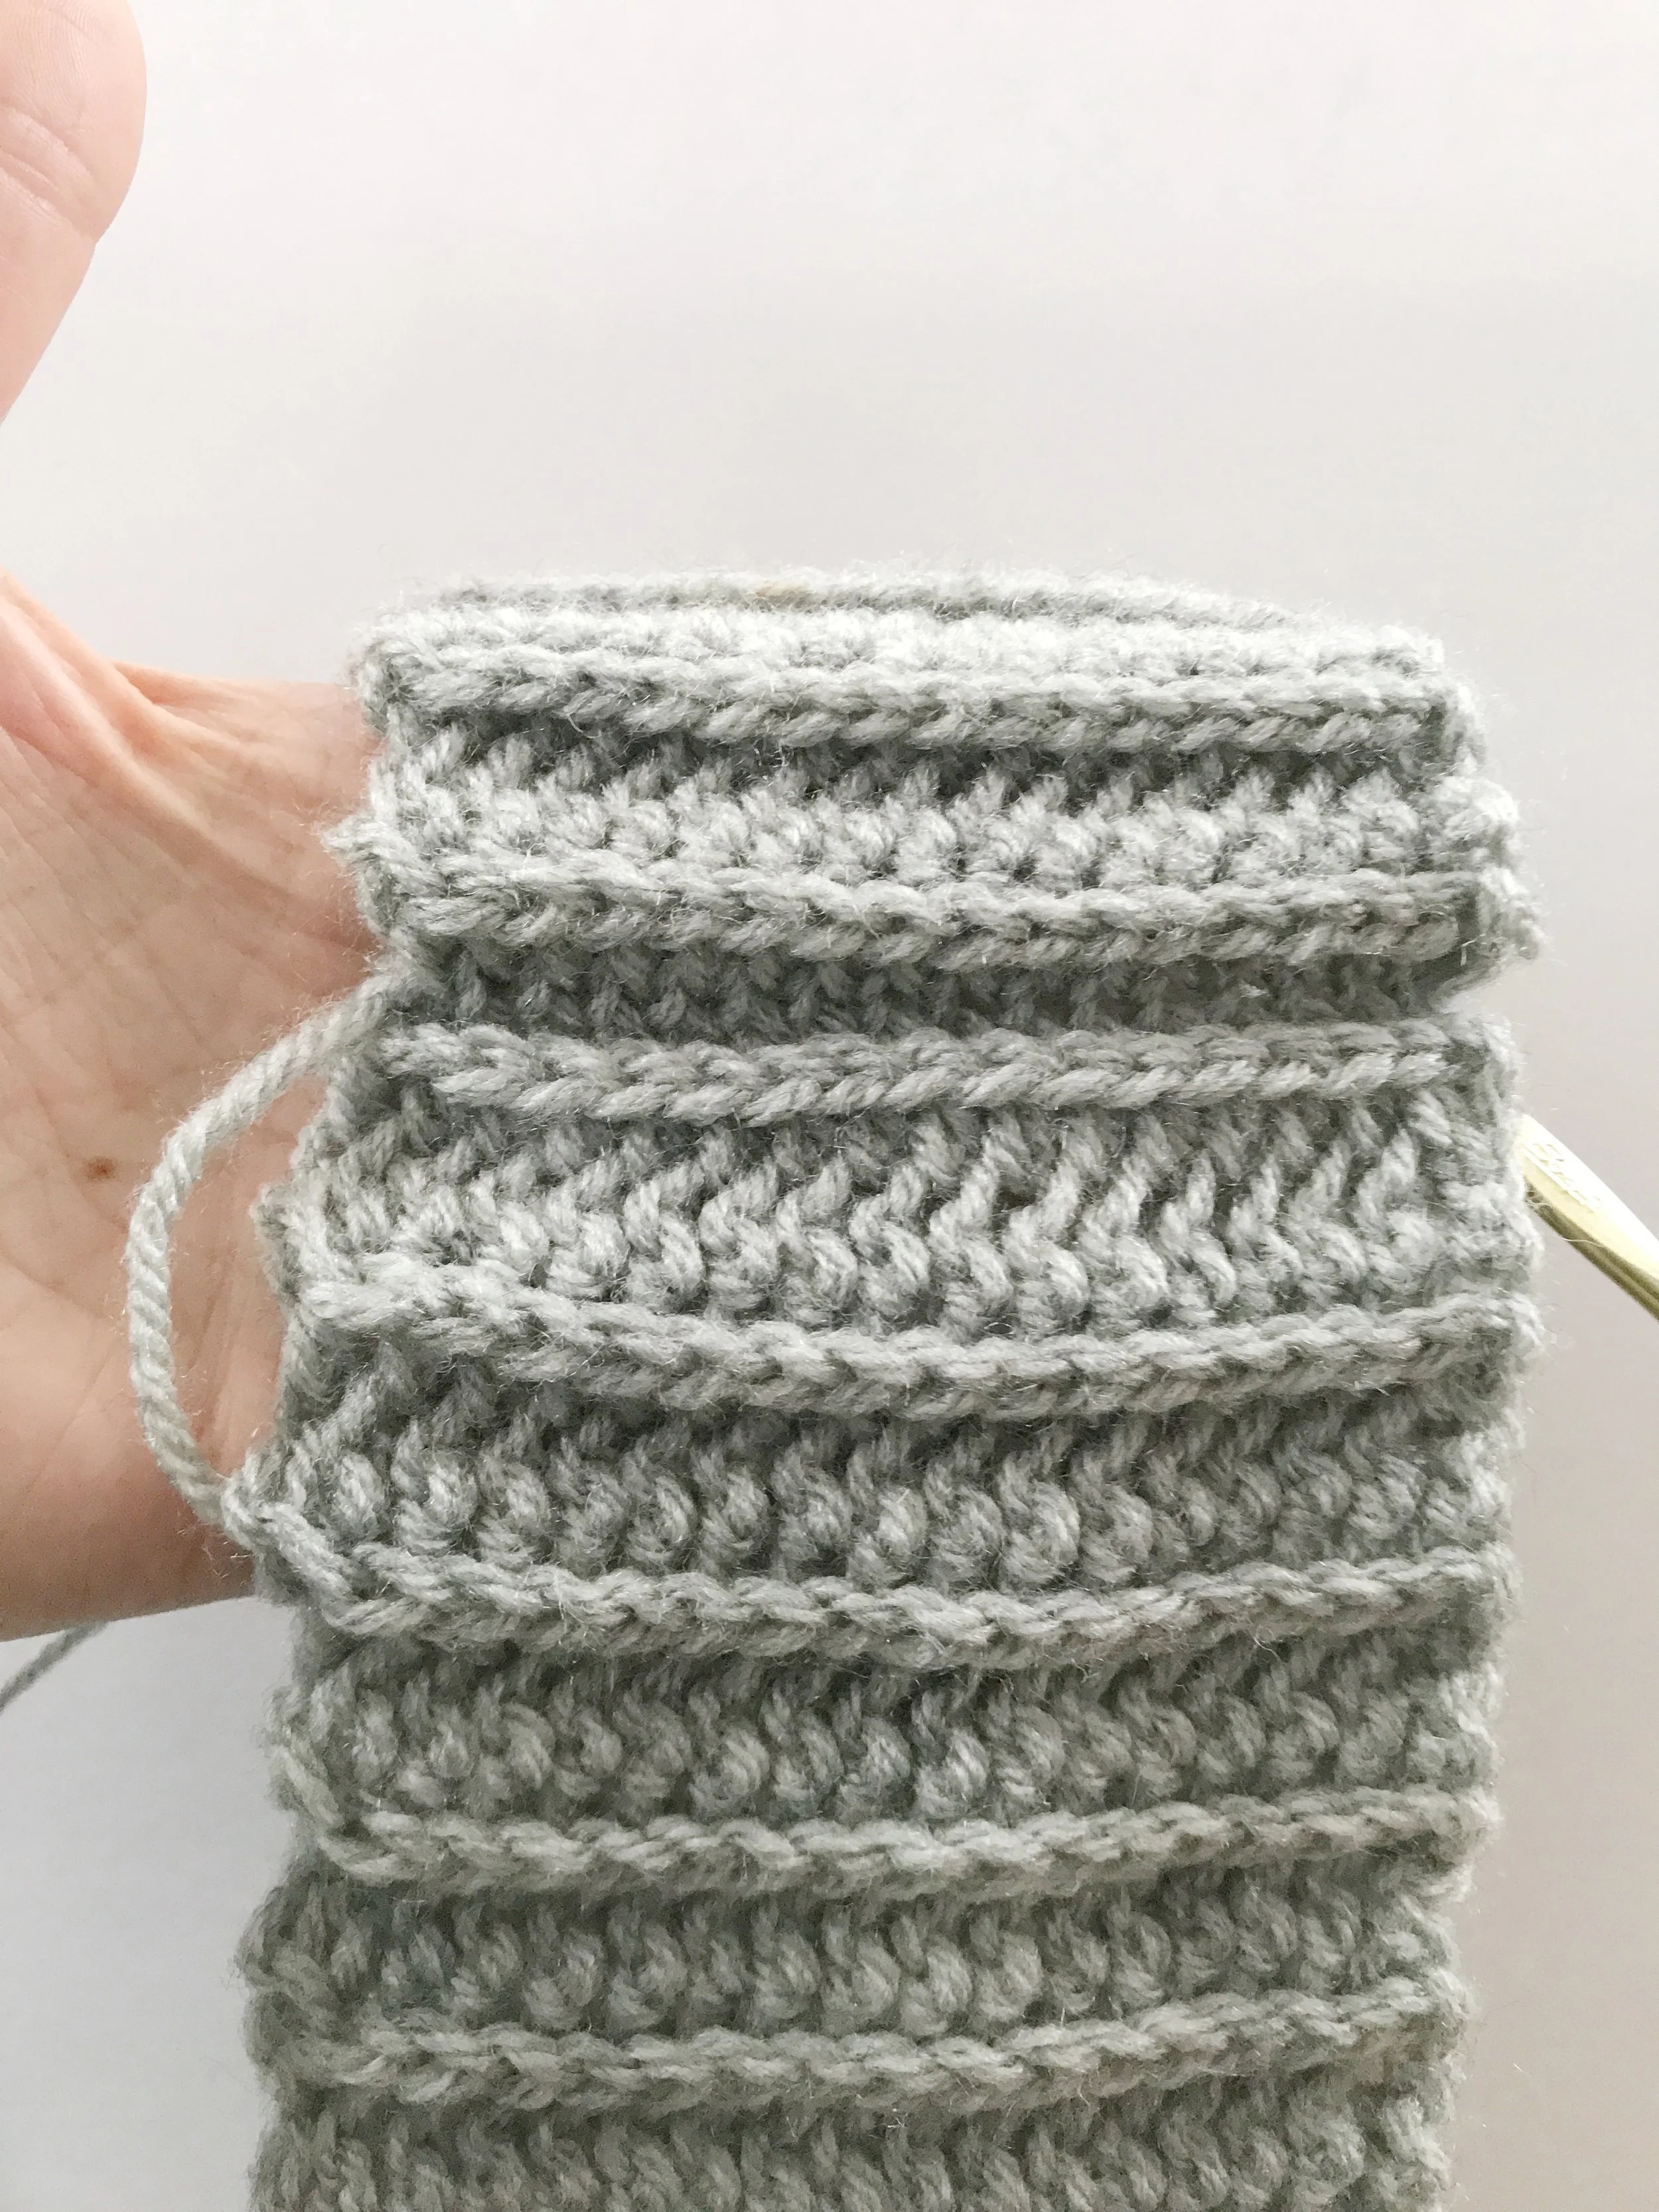
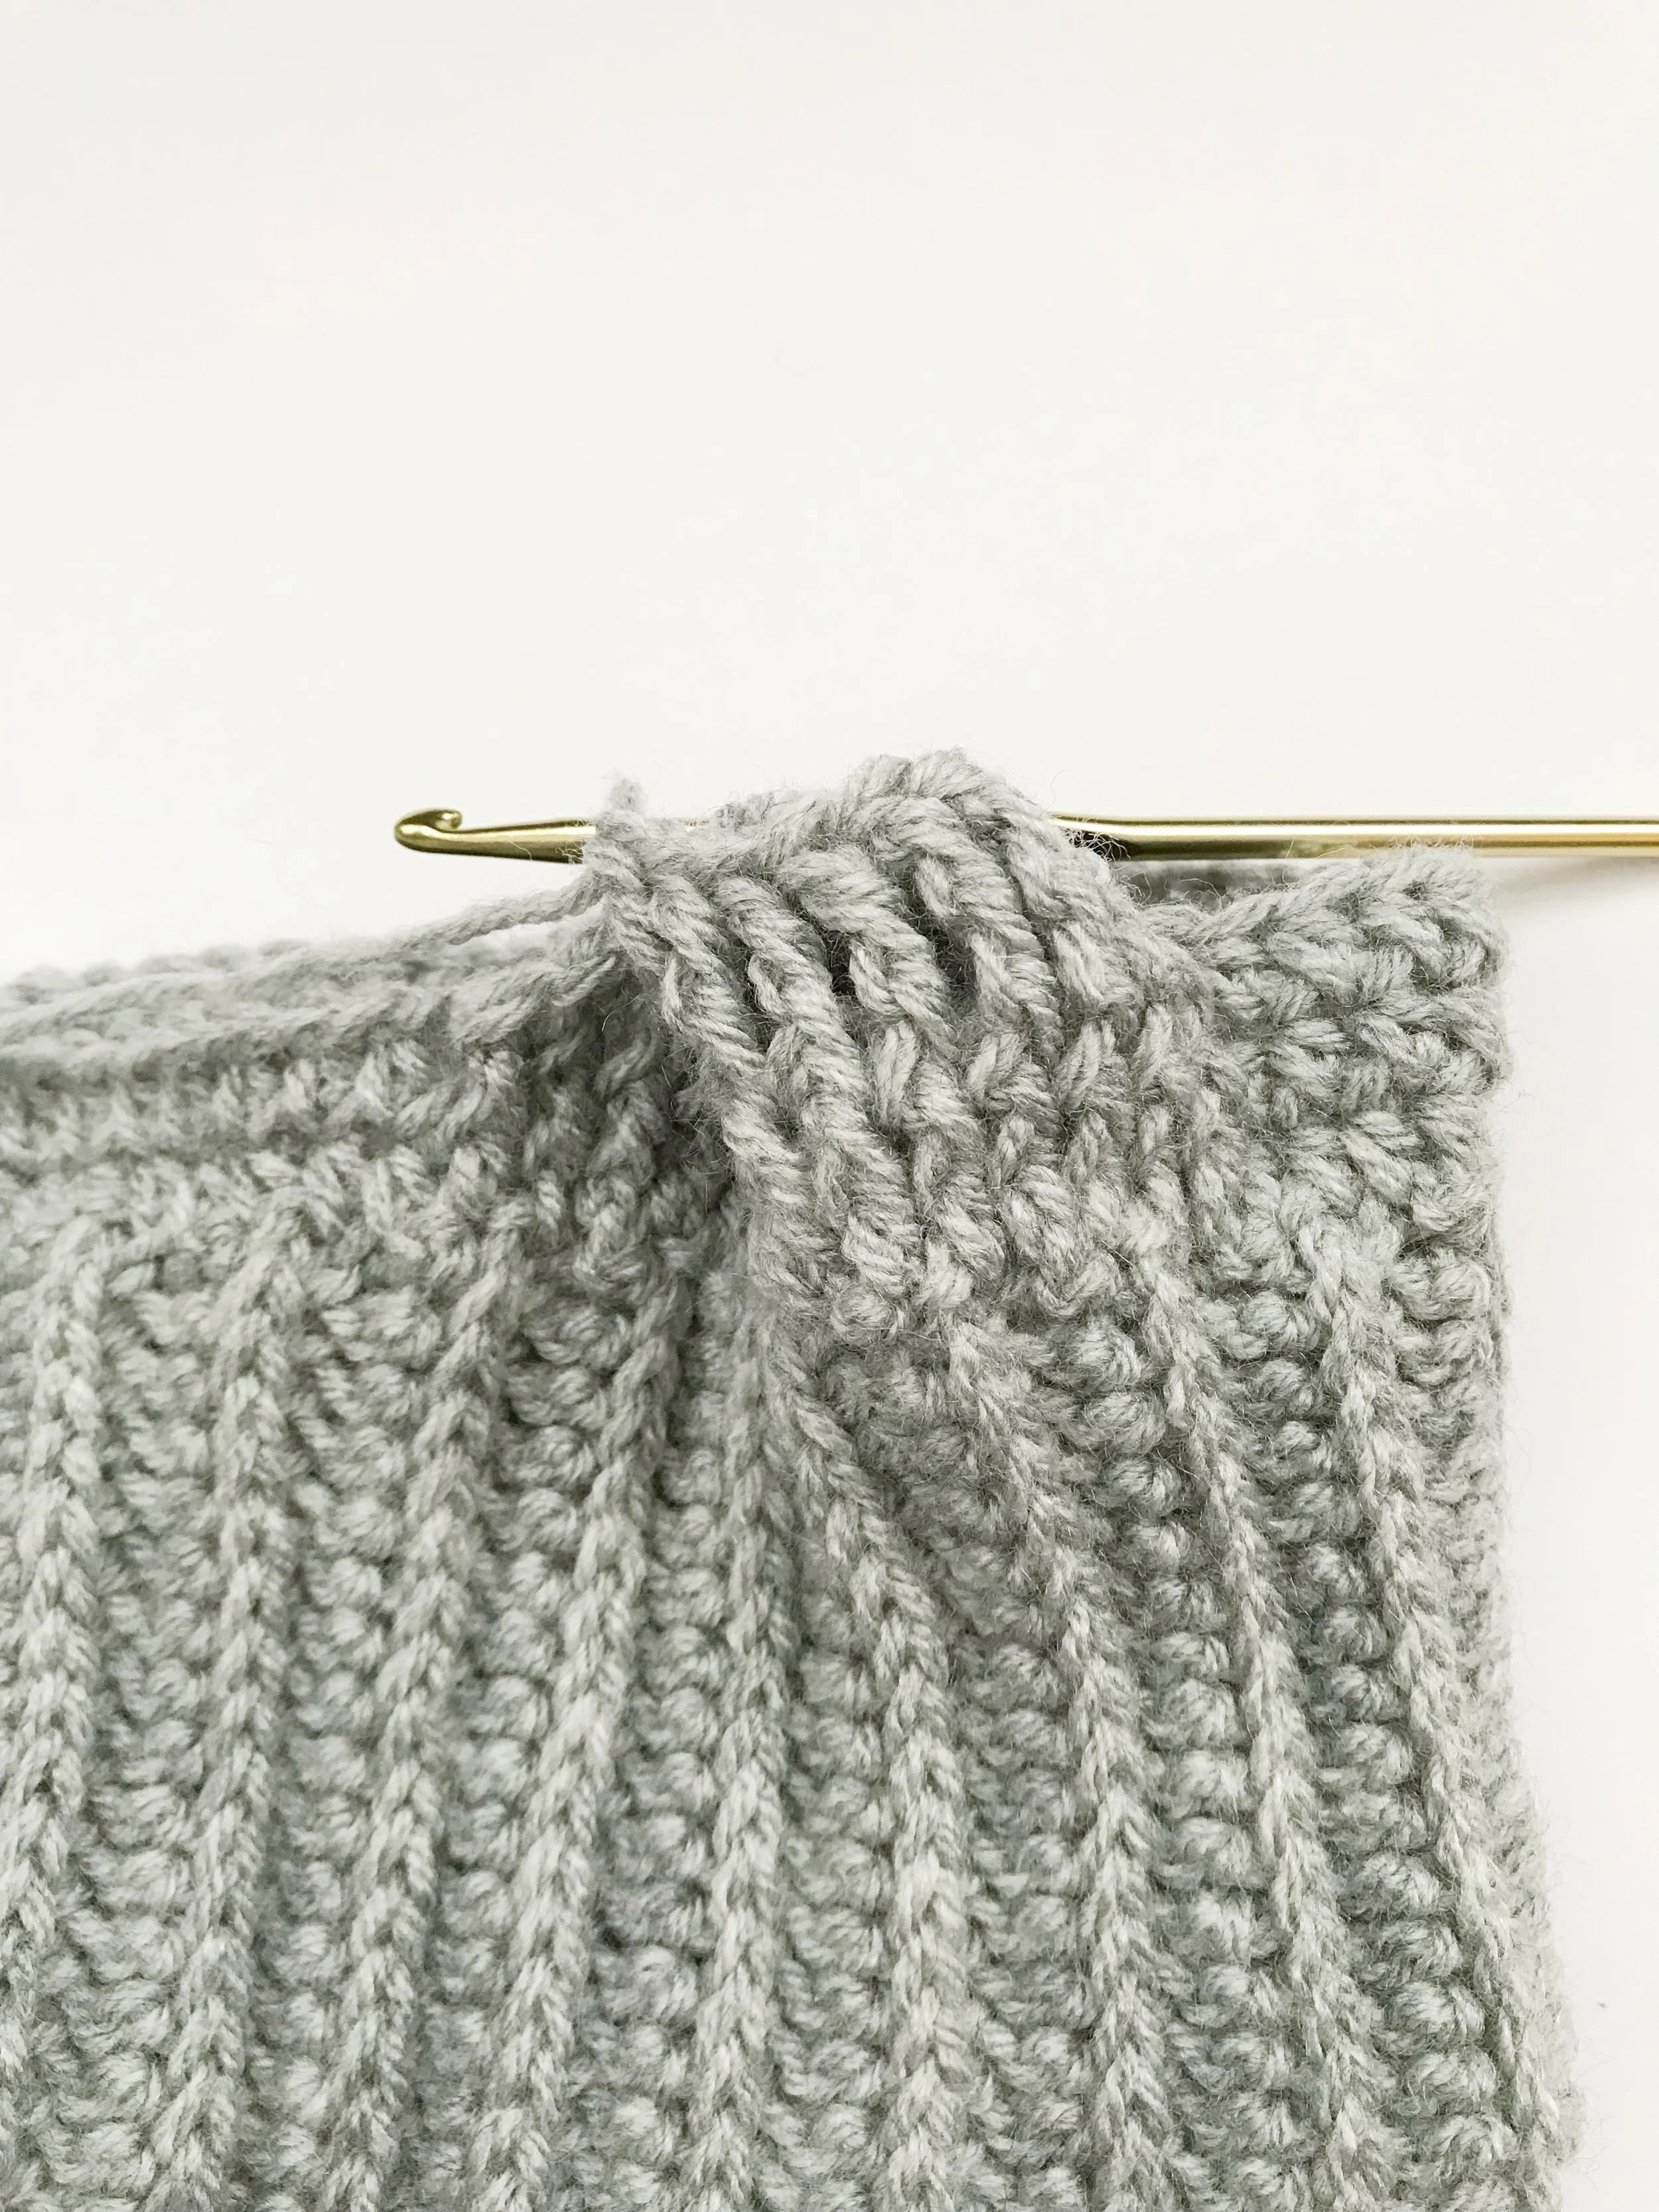
To make the ribbed brim you will be working in rows of hdc, but instead of working into the top of the stitch you will be working into the 3rd loop. The hdc stitch creates 3 loops; two on the top and a third loop behind the top two towards the back. When you turn your work the 3rd loop with be in the front just under the top two that make up the regular stitch. As you work the rows you will pushing the top stitches forward while crocheting in the 3rd loop. (see photos below for reference)
Ribbed Brim:
Ch 10
Row 1: hdc in second ch from hook and in each ch across. Ch 2, turn. (8)
Row 2: hdc in third loop and in each third loop across. Ch2, turn. (8)
Row 3: hdc in third loop across. Ch2, turn. (8)
Repeat row 3 until band reaches 19 inches when slightly stretched. The finished hat fits a typical adult head so feel free to make adjustments based on the size of your head.
Fold-Over Brim:
Ch 22
Row 1: hdc in second ch from hook and in each ch across. Ch 2, turn. (20)
Row 2: hdc in third loop and in each third loop across. Ch 2, turn. (20)
Row 3: hdc in third loop across. Ch 2, turn. (20)
Repeat row 3 until band reaches 19" slightly stretched
To finish band slip stitch ends together going through the third loop and the beginning chain stitches to create a seamless finish. By going through the third loops you will push the top stitches forward to create a ribbed edge like the rest of the brim.
Turn the band right side out and continue with the top of the hat.
Top of Hat:
Work in the round, joining at the end of each round. Do not turn.
Ch 2
Row 1: Work 78 hdc evenly across top edge of band. Slip stitch (sl st) into top of first stitch (NOT the ch 2) to join.
Row 2: ch 2, hdc 24. Work 16 fpdc around the hdc stitches in previous row. Hdc 38 sl st to join.
Row 3: ch 2, hdc 24. Work a cable across next 16 stitches. (Skip first 8 stitches, work 4 fptr then 4 fpdtr. Go back to the first 8 stitches and work 4 fpdtr then 4fptr to finish cable.) Sk next stitch, hdc 36, 2hdc in last stitch. Sl st to join. (see below for more details about the giant cable stitch)
Row 4: ch 2, hdc 24. Work 16 fpdc across the cable stitches from the previous row. Sk next stitch, hdc 36, 2hdc in last stitch. Sl st to join.
Row 5: ch 2, hdc 24. Fpdc 16, sk next stitch, hdc 36, 2hdc in last stitch. Sl st to join.
Row 6: ch 2, hdc 24. Fpdc 16, sk next stitch, hdc, 2hdc in last stitch. Sl st to join.
Repeat rows 3-6 until hat reaches desired height. Measure height from bottom of ribbed brim to top or bottom of fold-over brim to the top with the brim folded in half.
For a hat with a bit of slouch continue pattern until hat is 10" high. For more of a beanie style hat continue pattern until hat measures 8.5-9." You can easily adjust it to suit your style.
Making the Giant Cable:
The cable stitch is worked across 16 stitches. 8 stitches per side of the cable. You will work the left side of the cable first and the right side last.
Here you will see the completed fold-over brim with rows 1 & 2 already worked around the top. The stitches used for the cable are labeled above.
Work the cable over 16 stitches. (the 16 fpdc from the previous row)
Skip the first 8 stitches and work a fptr around stitch 9.
Work a fptr around the next 3 stitches. You will have four fptr starting in stitch 9 and going to stitch 12.
Work a fpdtr in the next four stitches. Stitches 13-16.
Pull the first 8 stitches forward. Starting with stitch number one make a fpdtr.
Work a fpdtr in the next 3 stitches. You will have four fpdtr across stitches 1-4.
Work four fptr across stitches 5-8 to complete the cable.
Finish the row by skipping the first stitch after the cable and working hdc to the end. Work 2 hdc in the last stitch and then join. When working hdc in the round the joins tend to create a slant to the right. By skipping the first stitch after the cable and making 2 hdc in the last stitch of each round it helps to keep the hat straight.
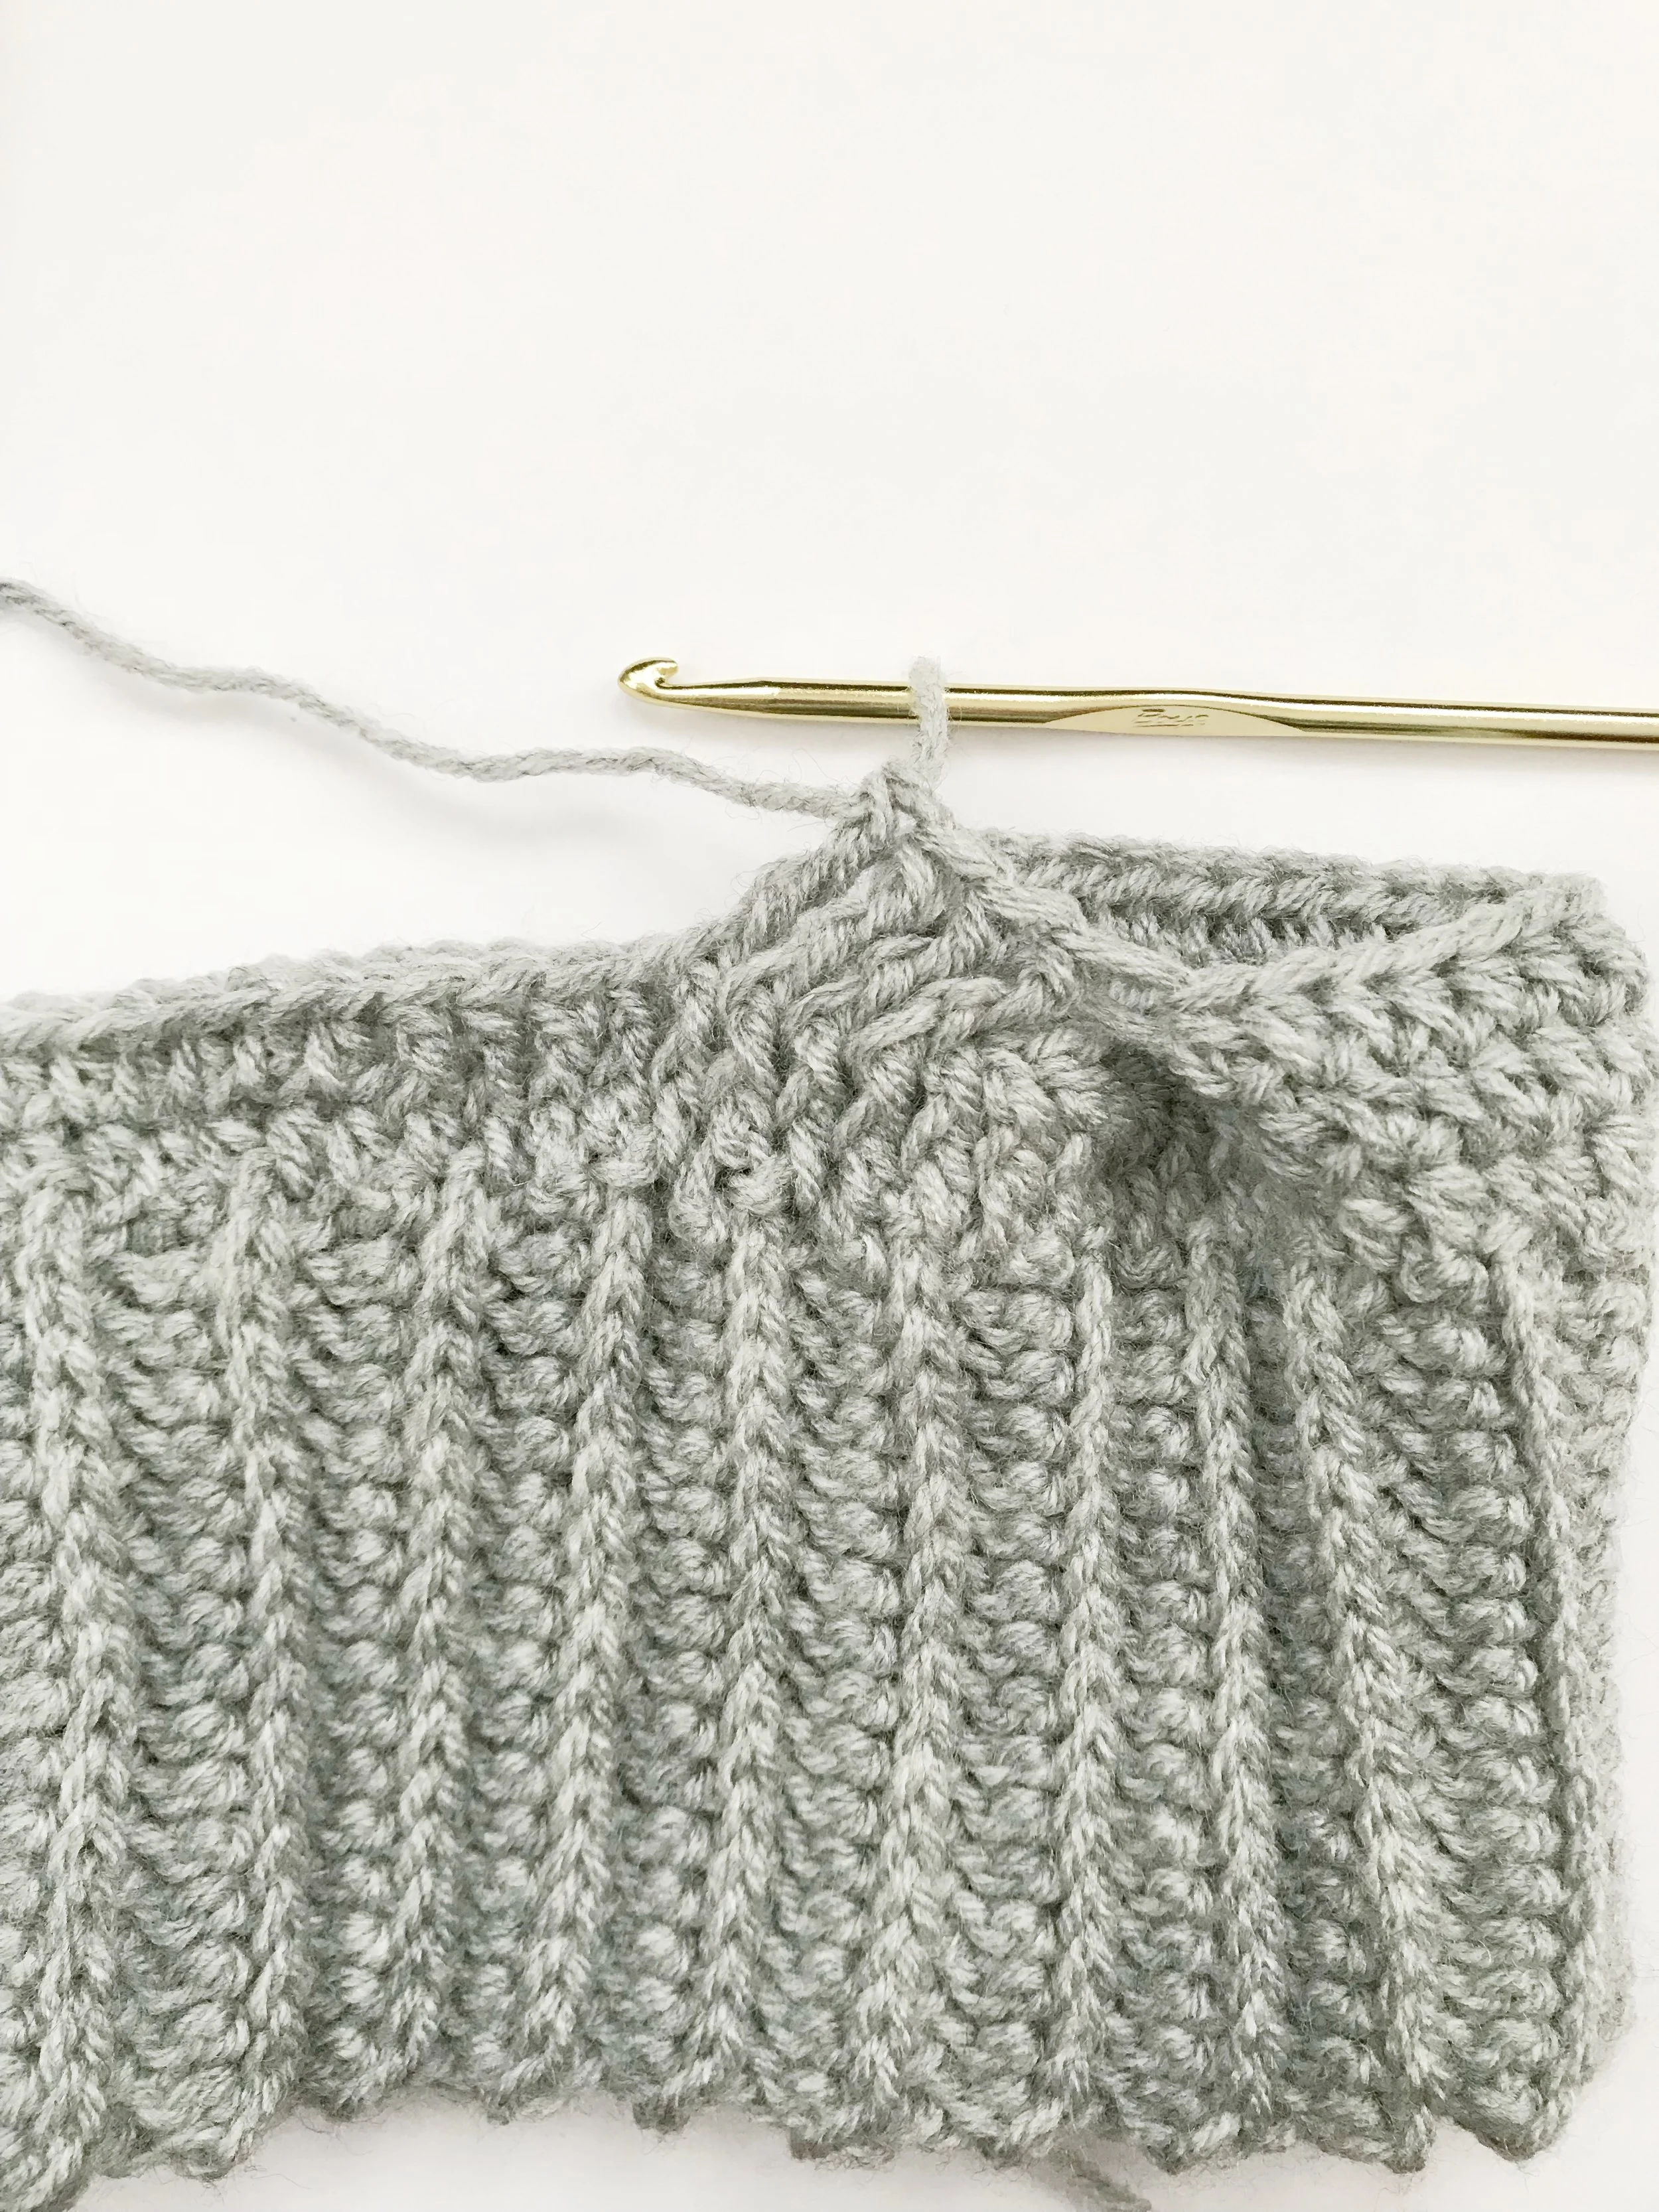
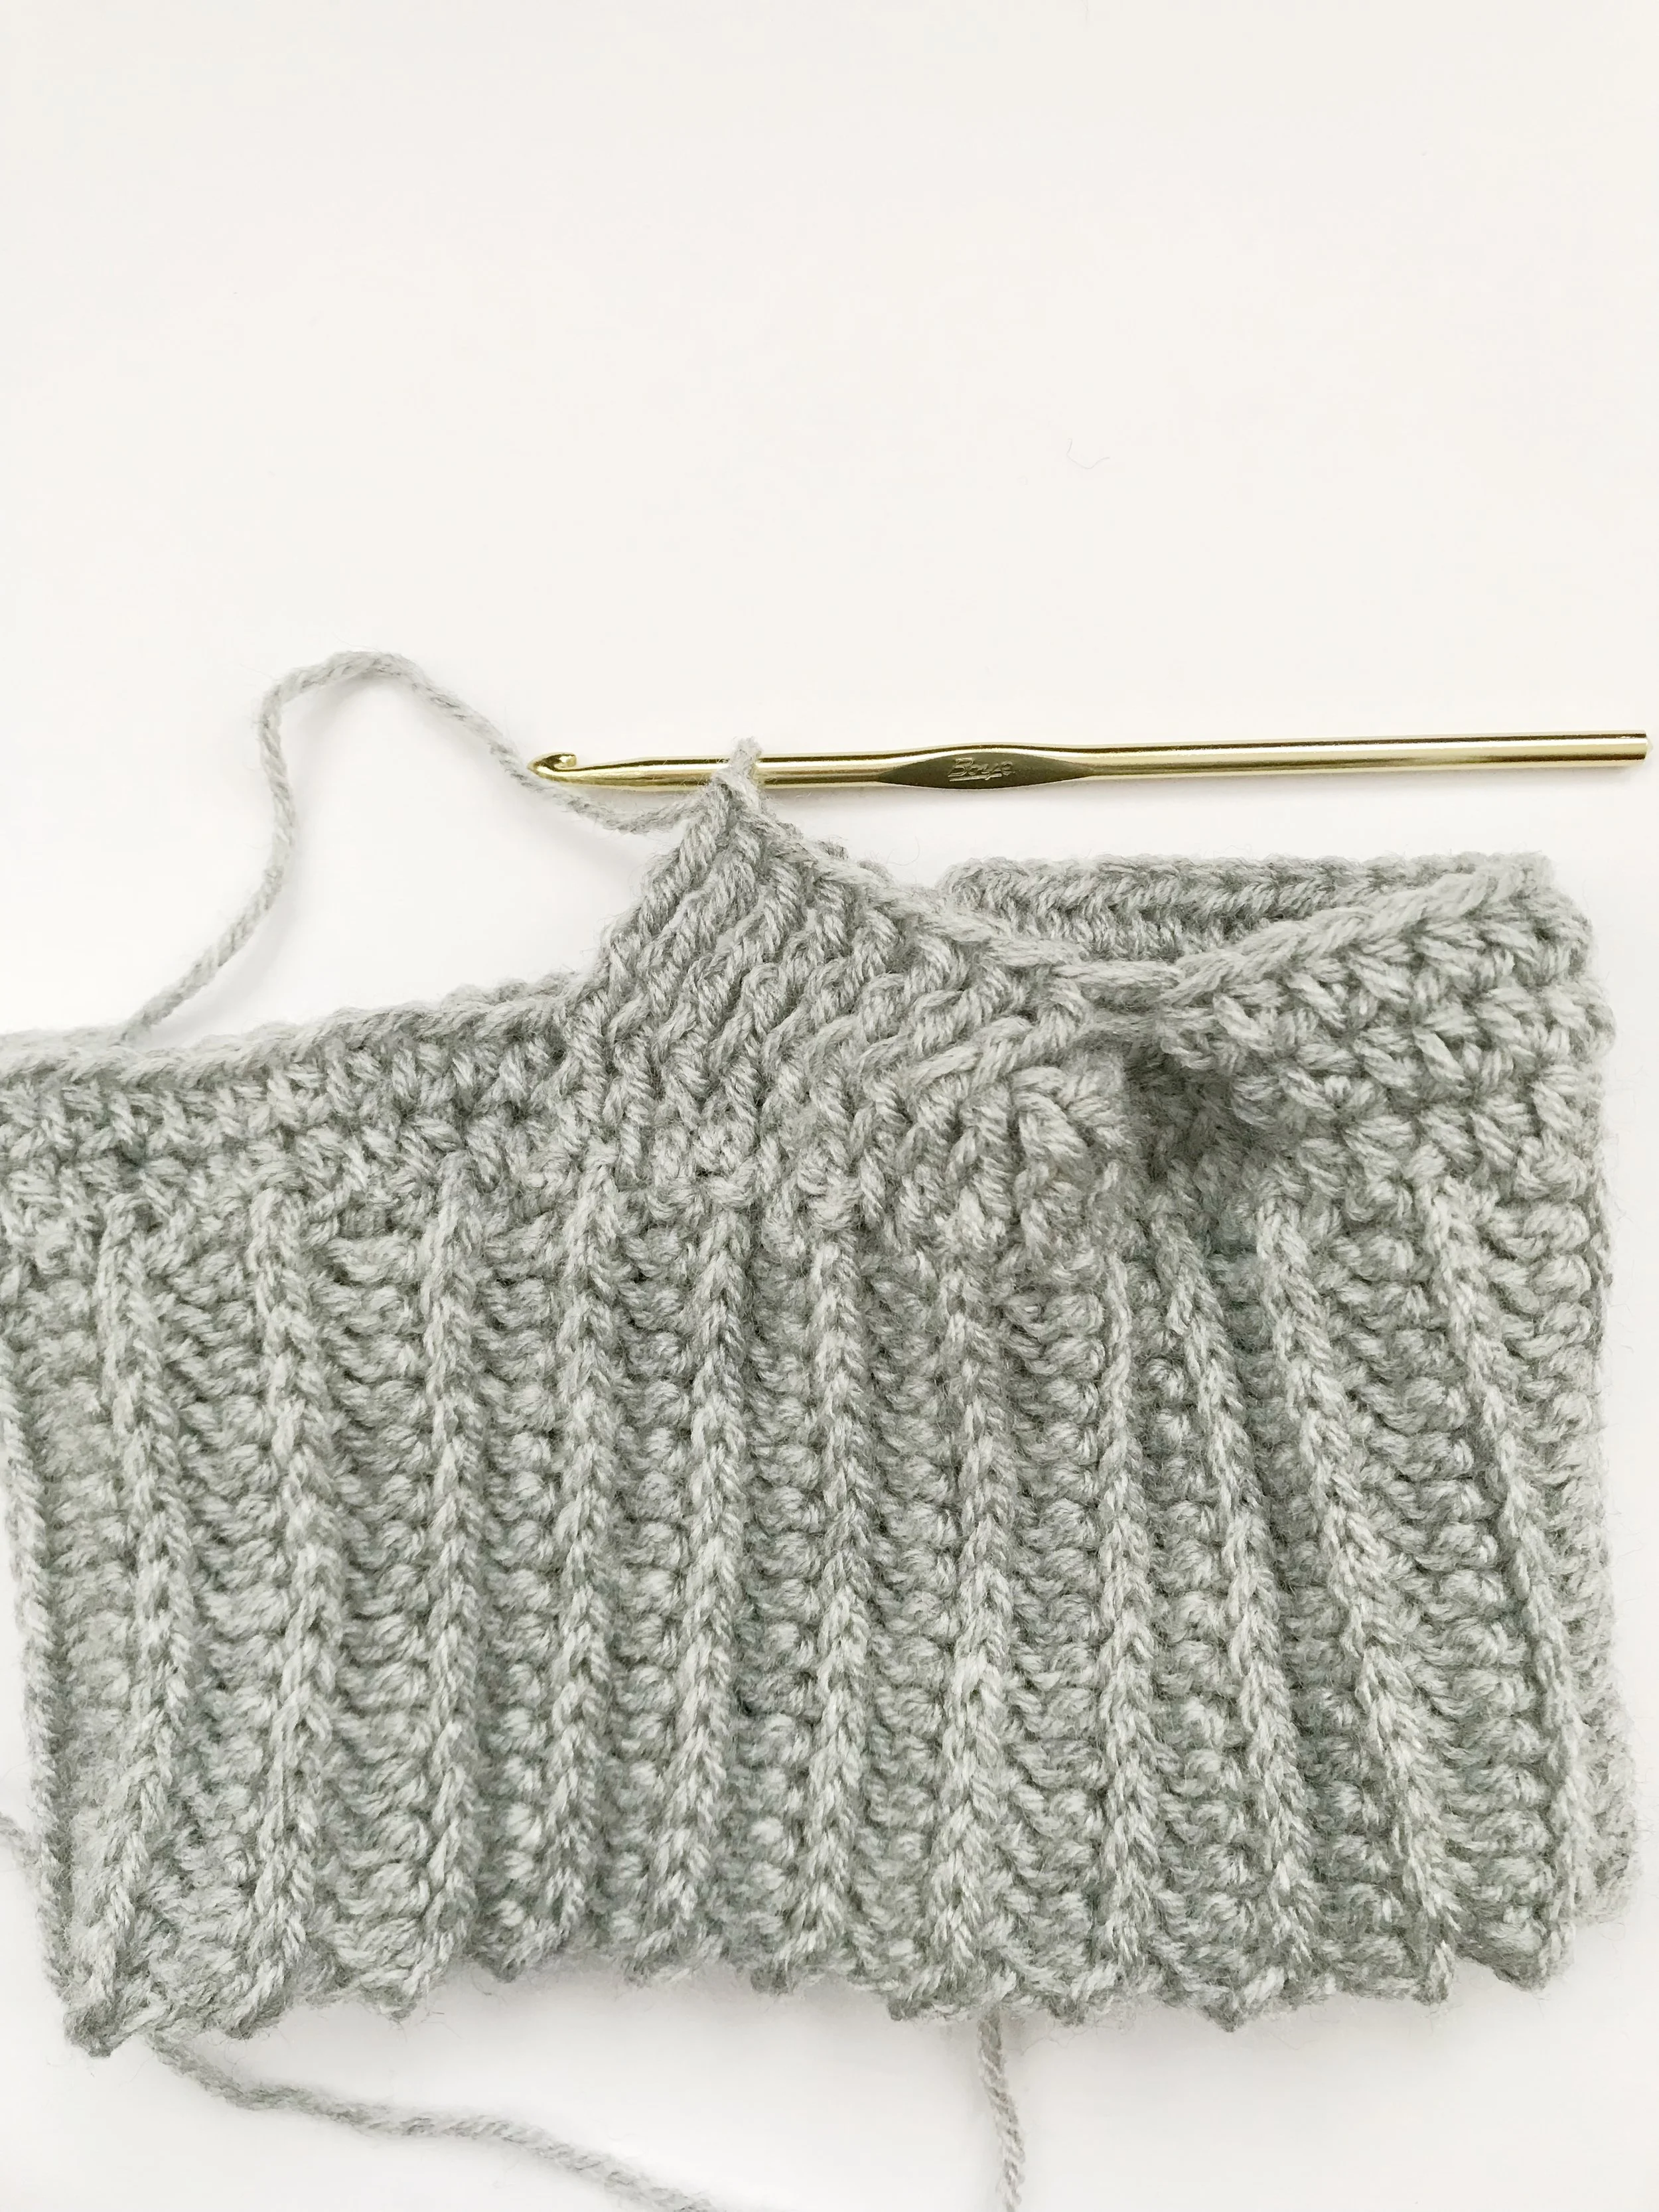
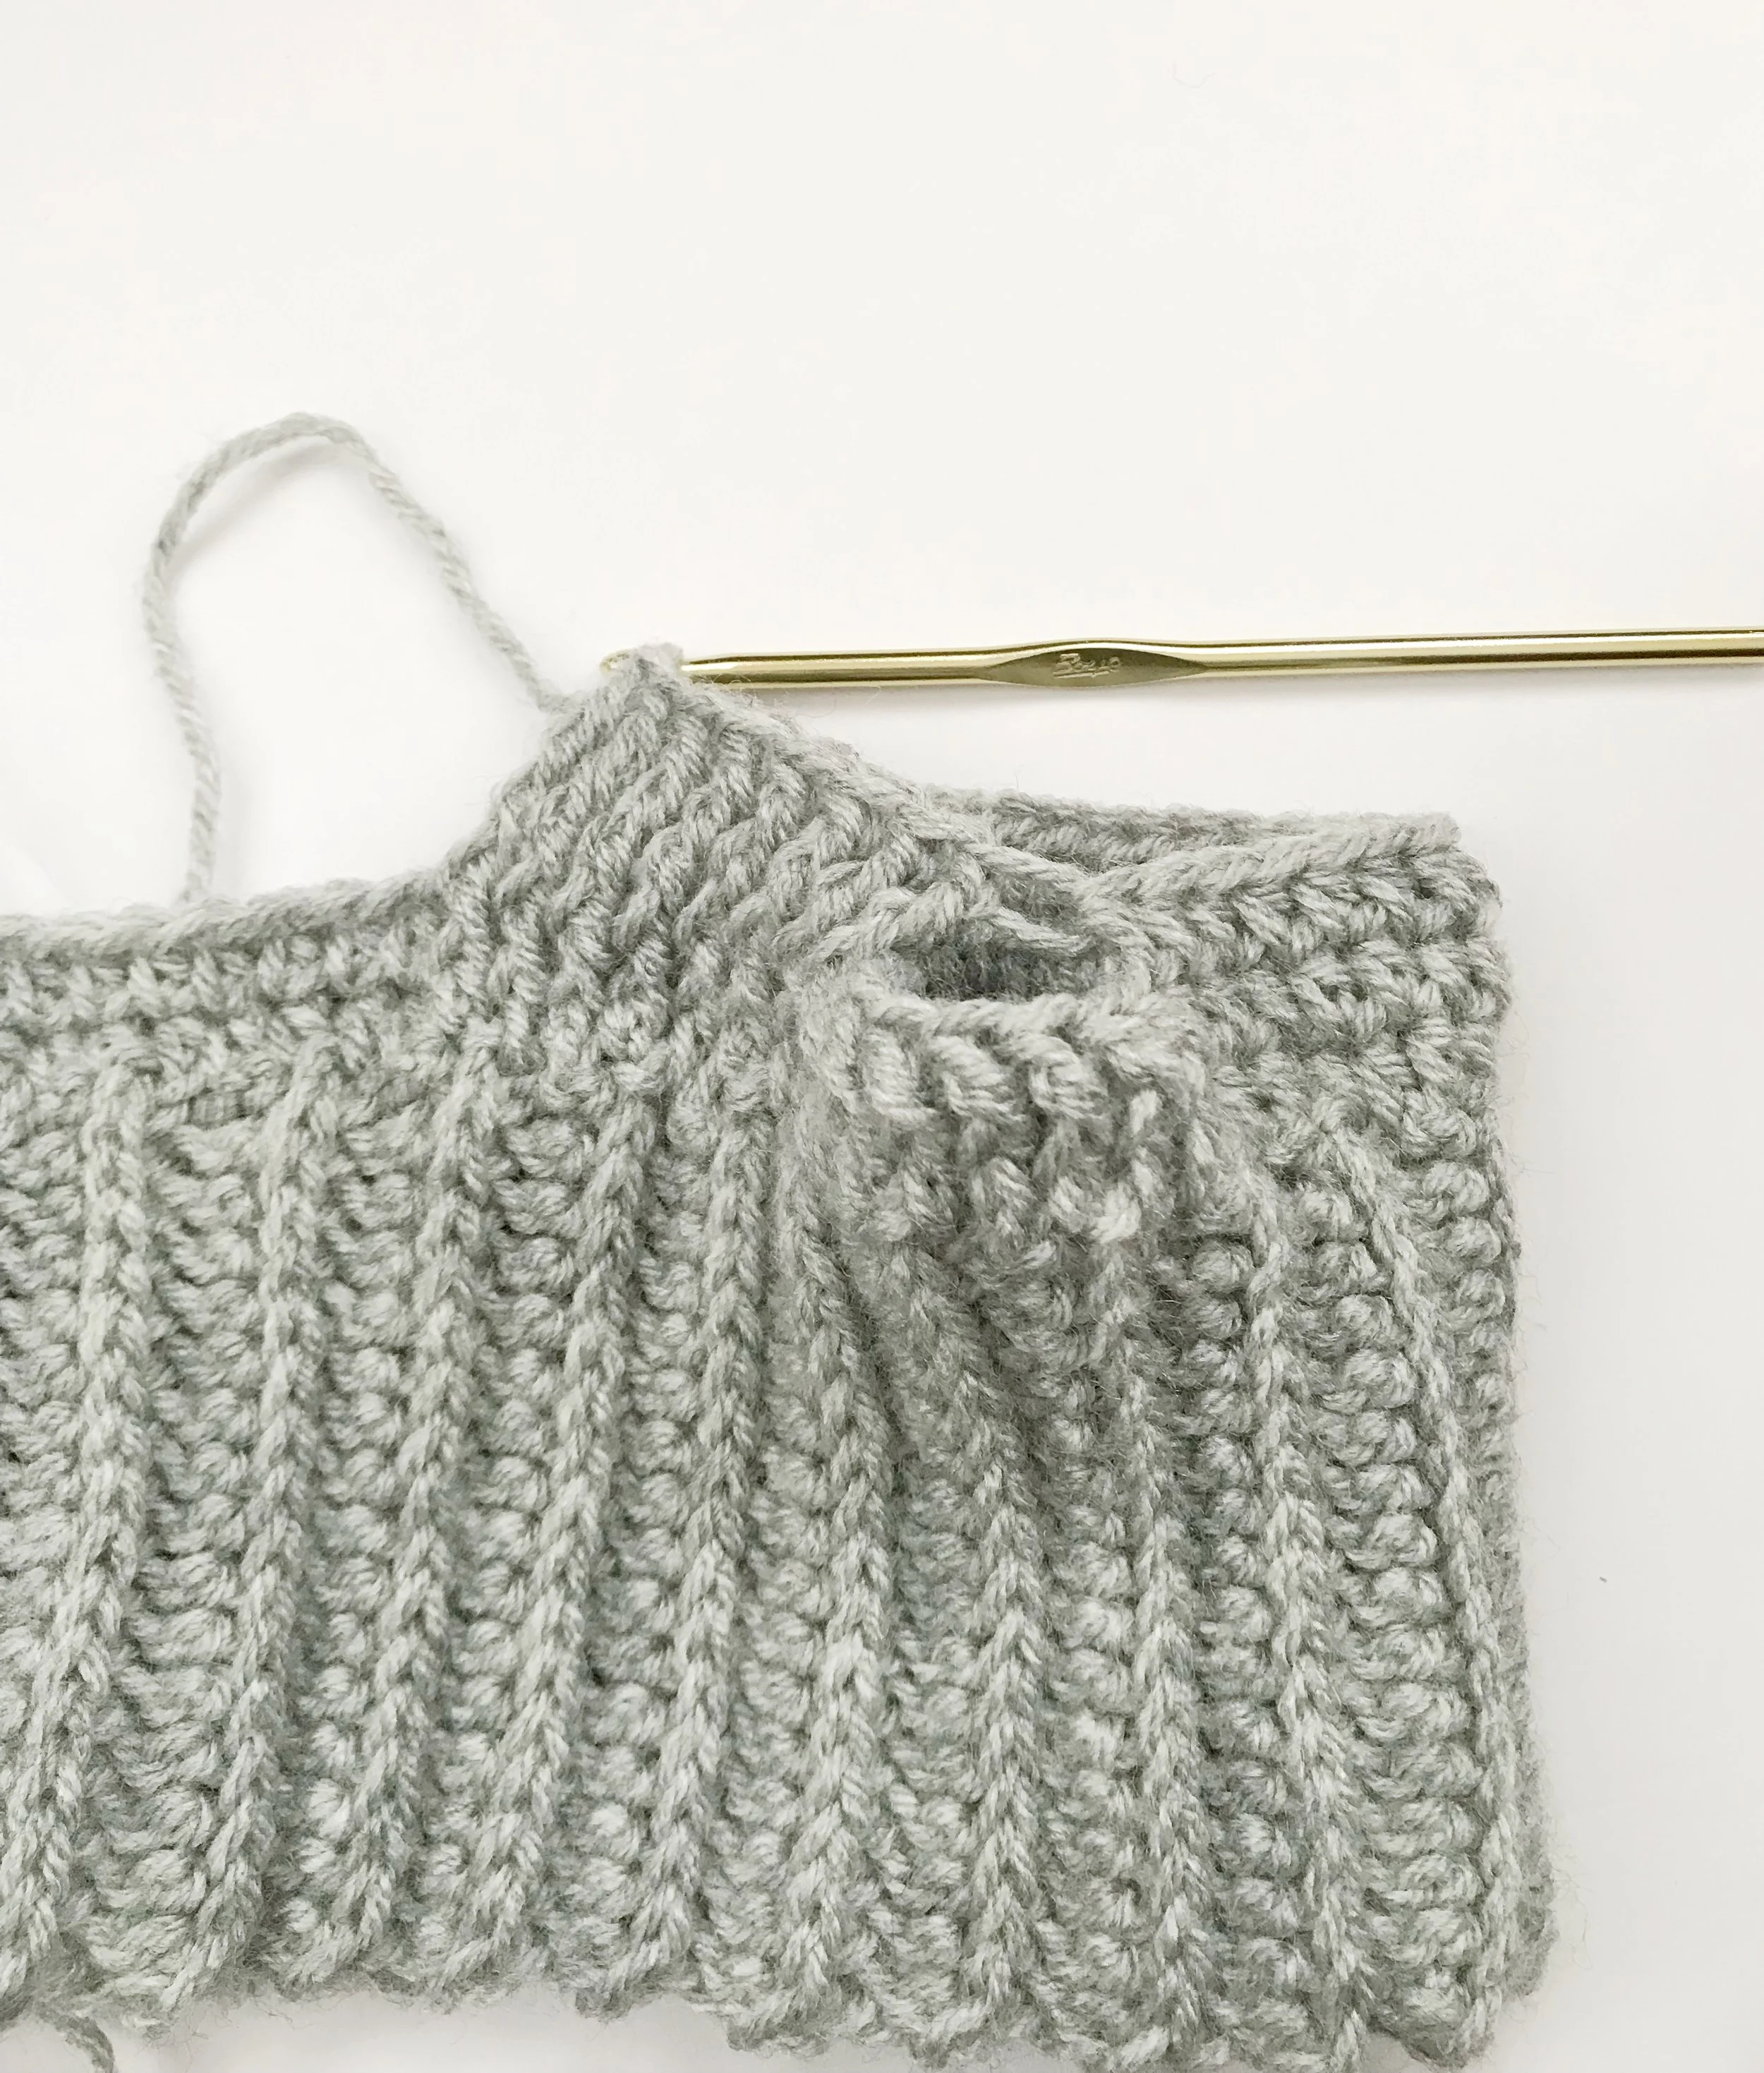
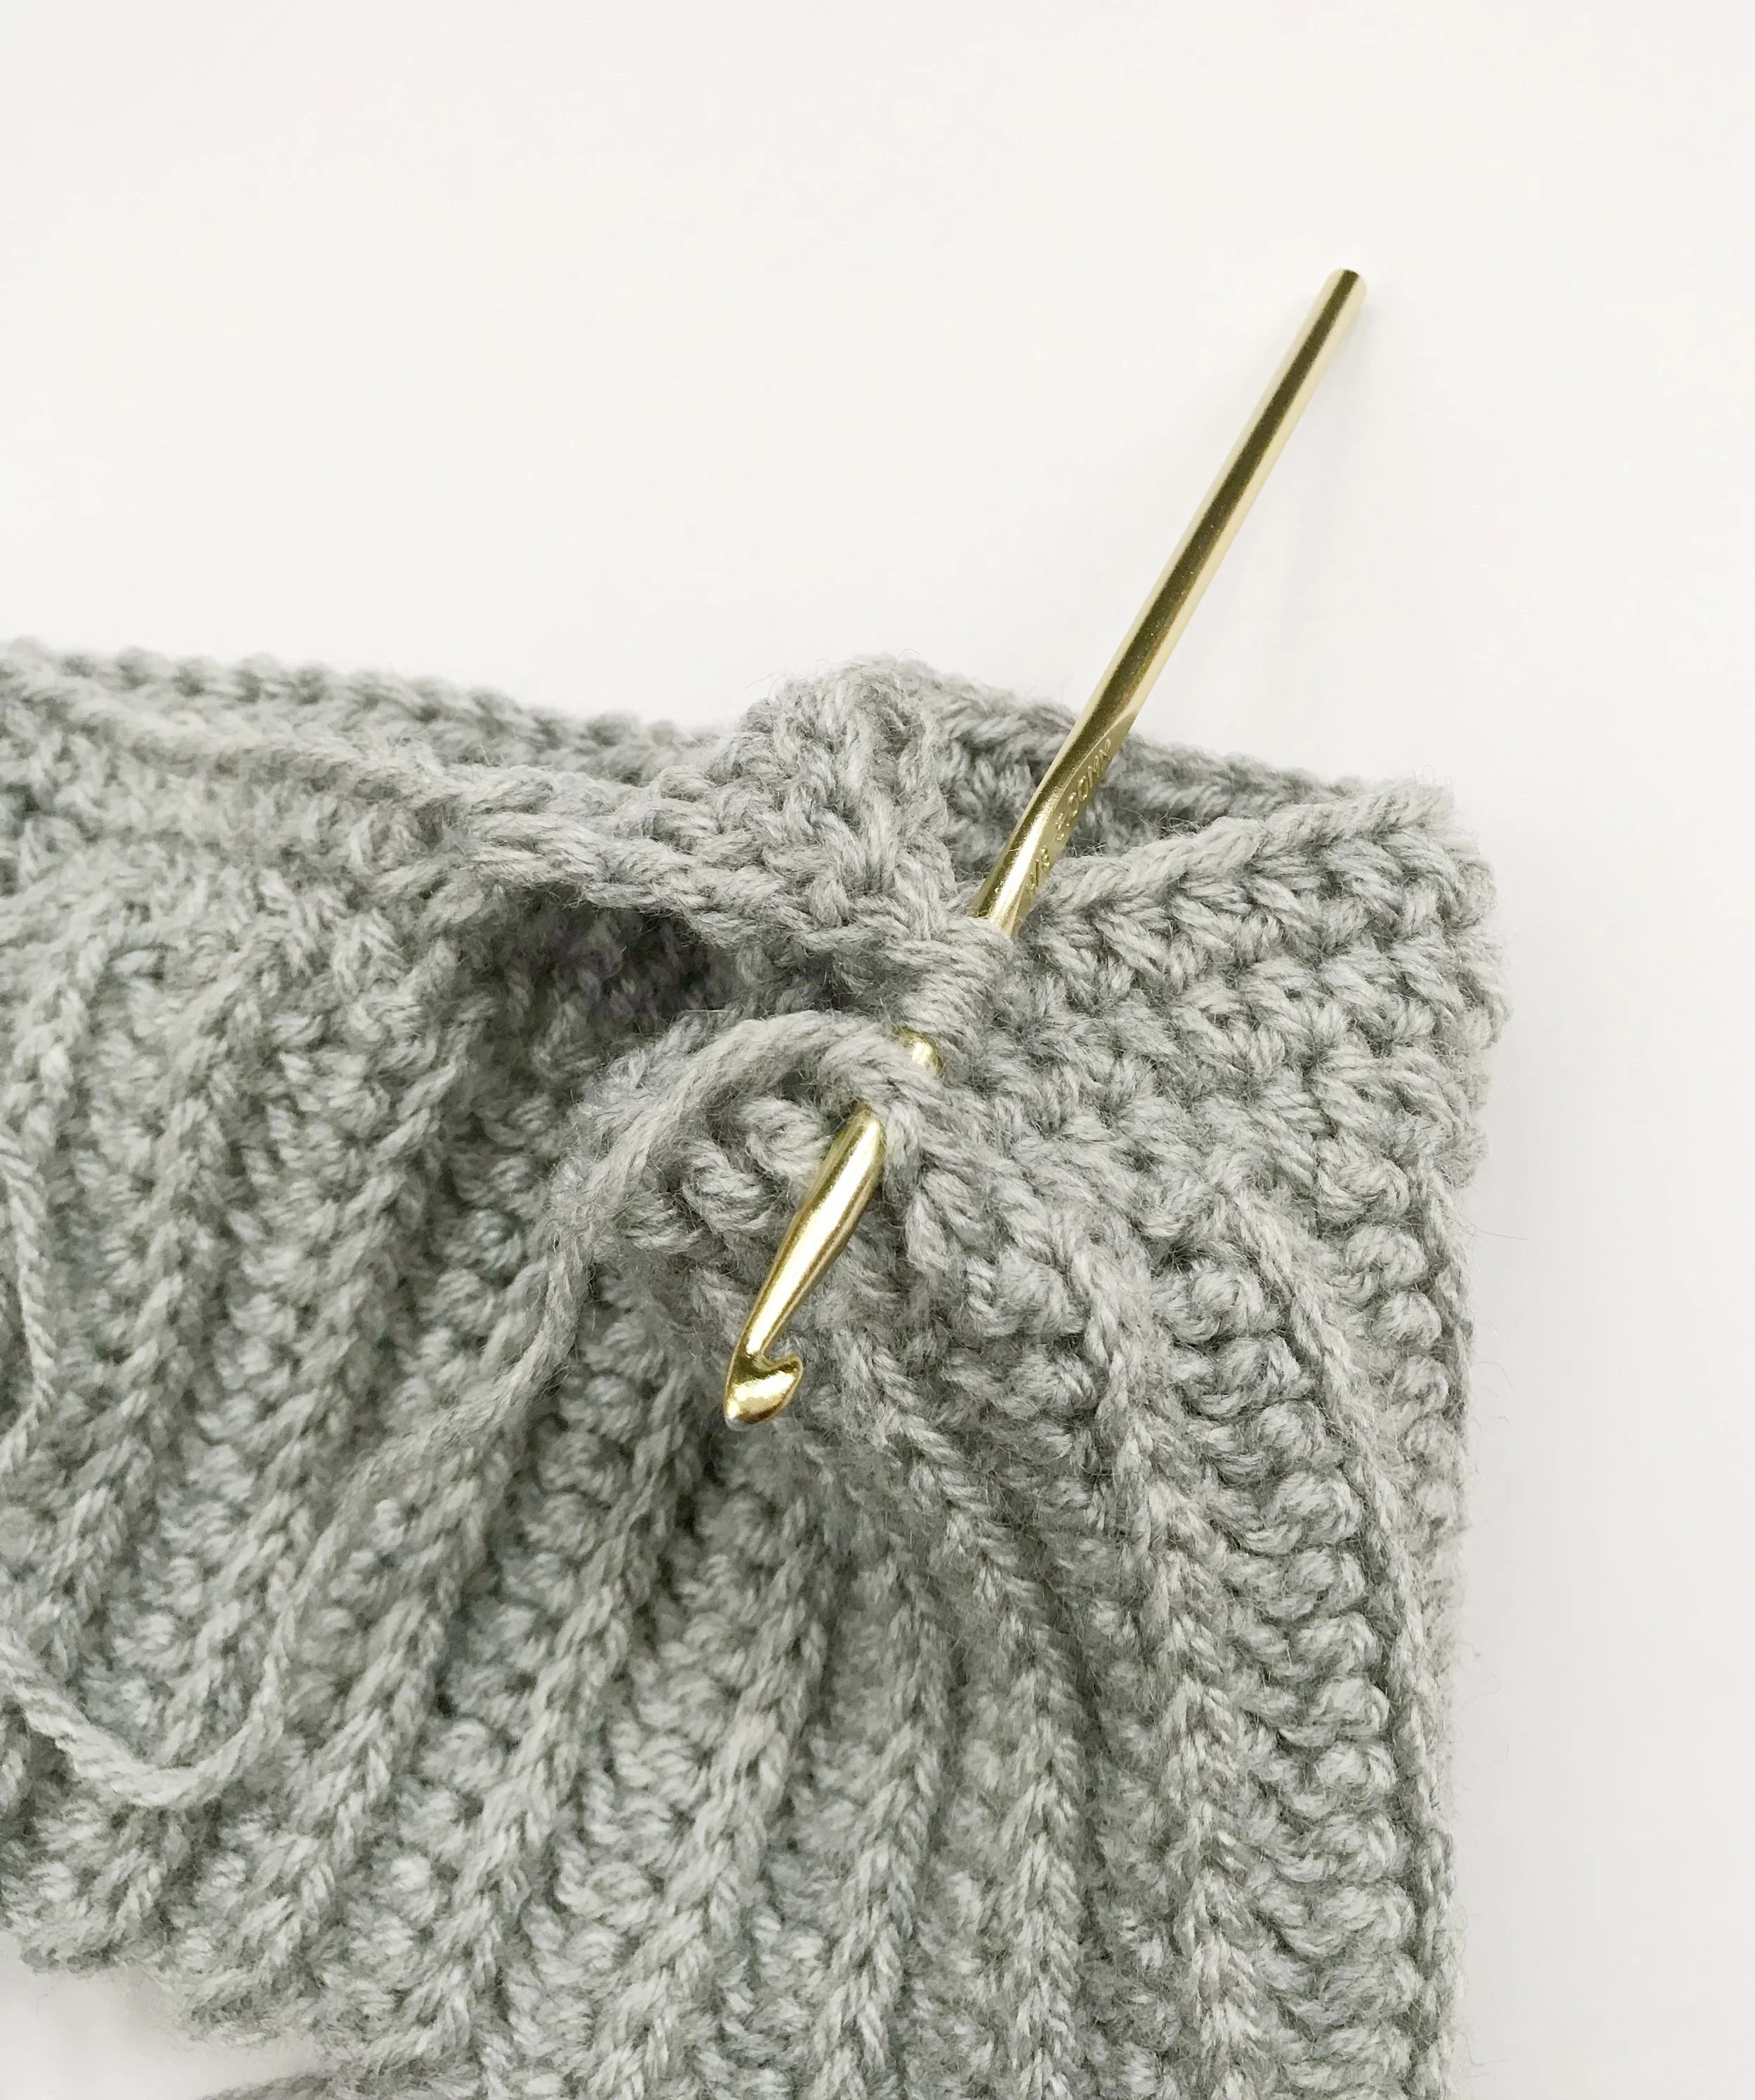
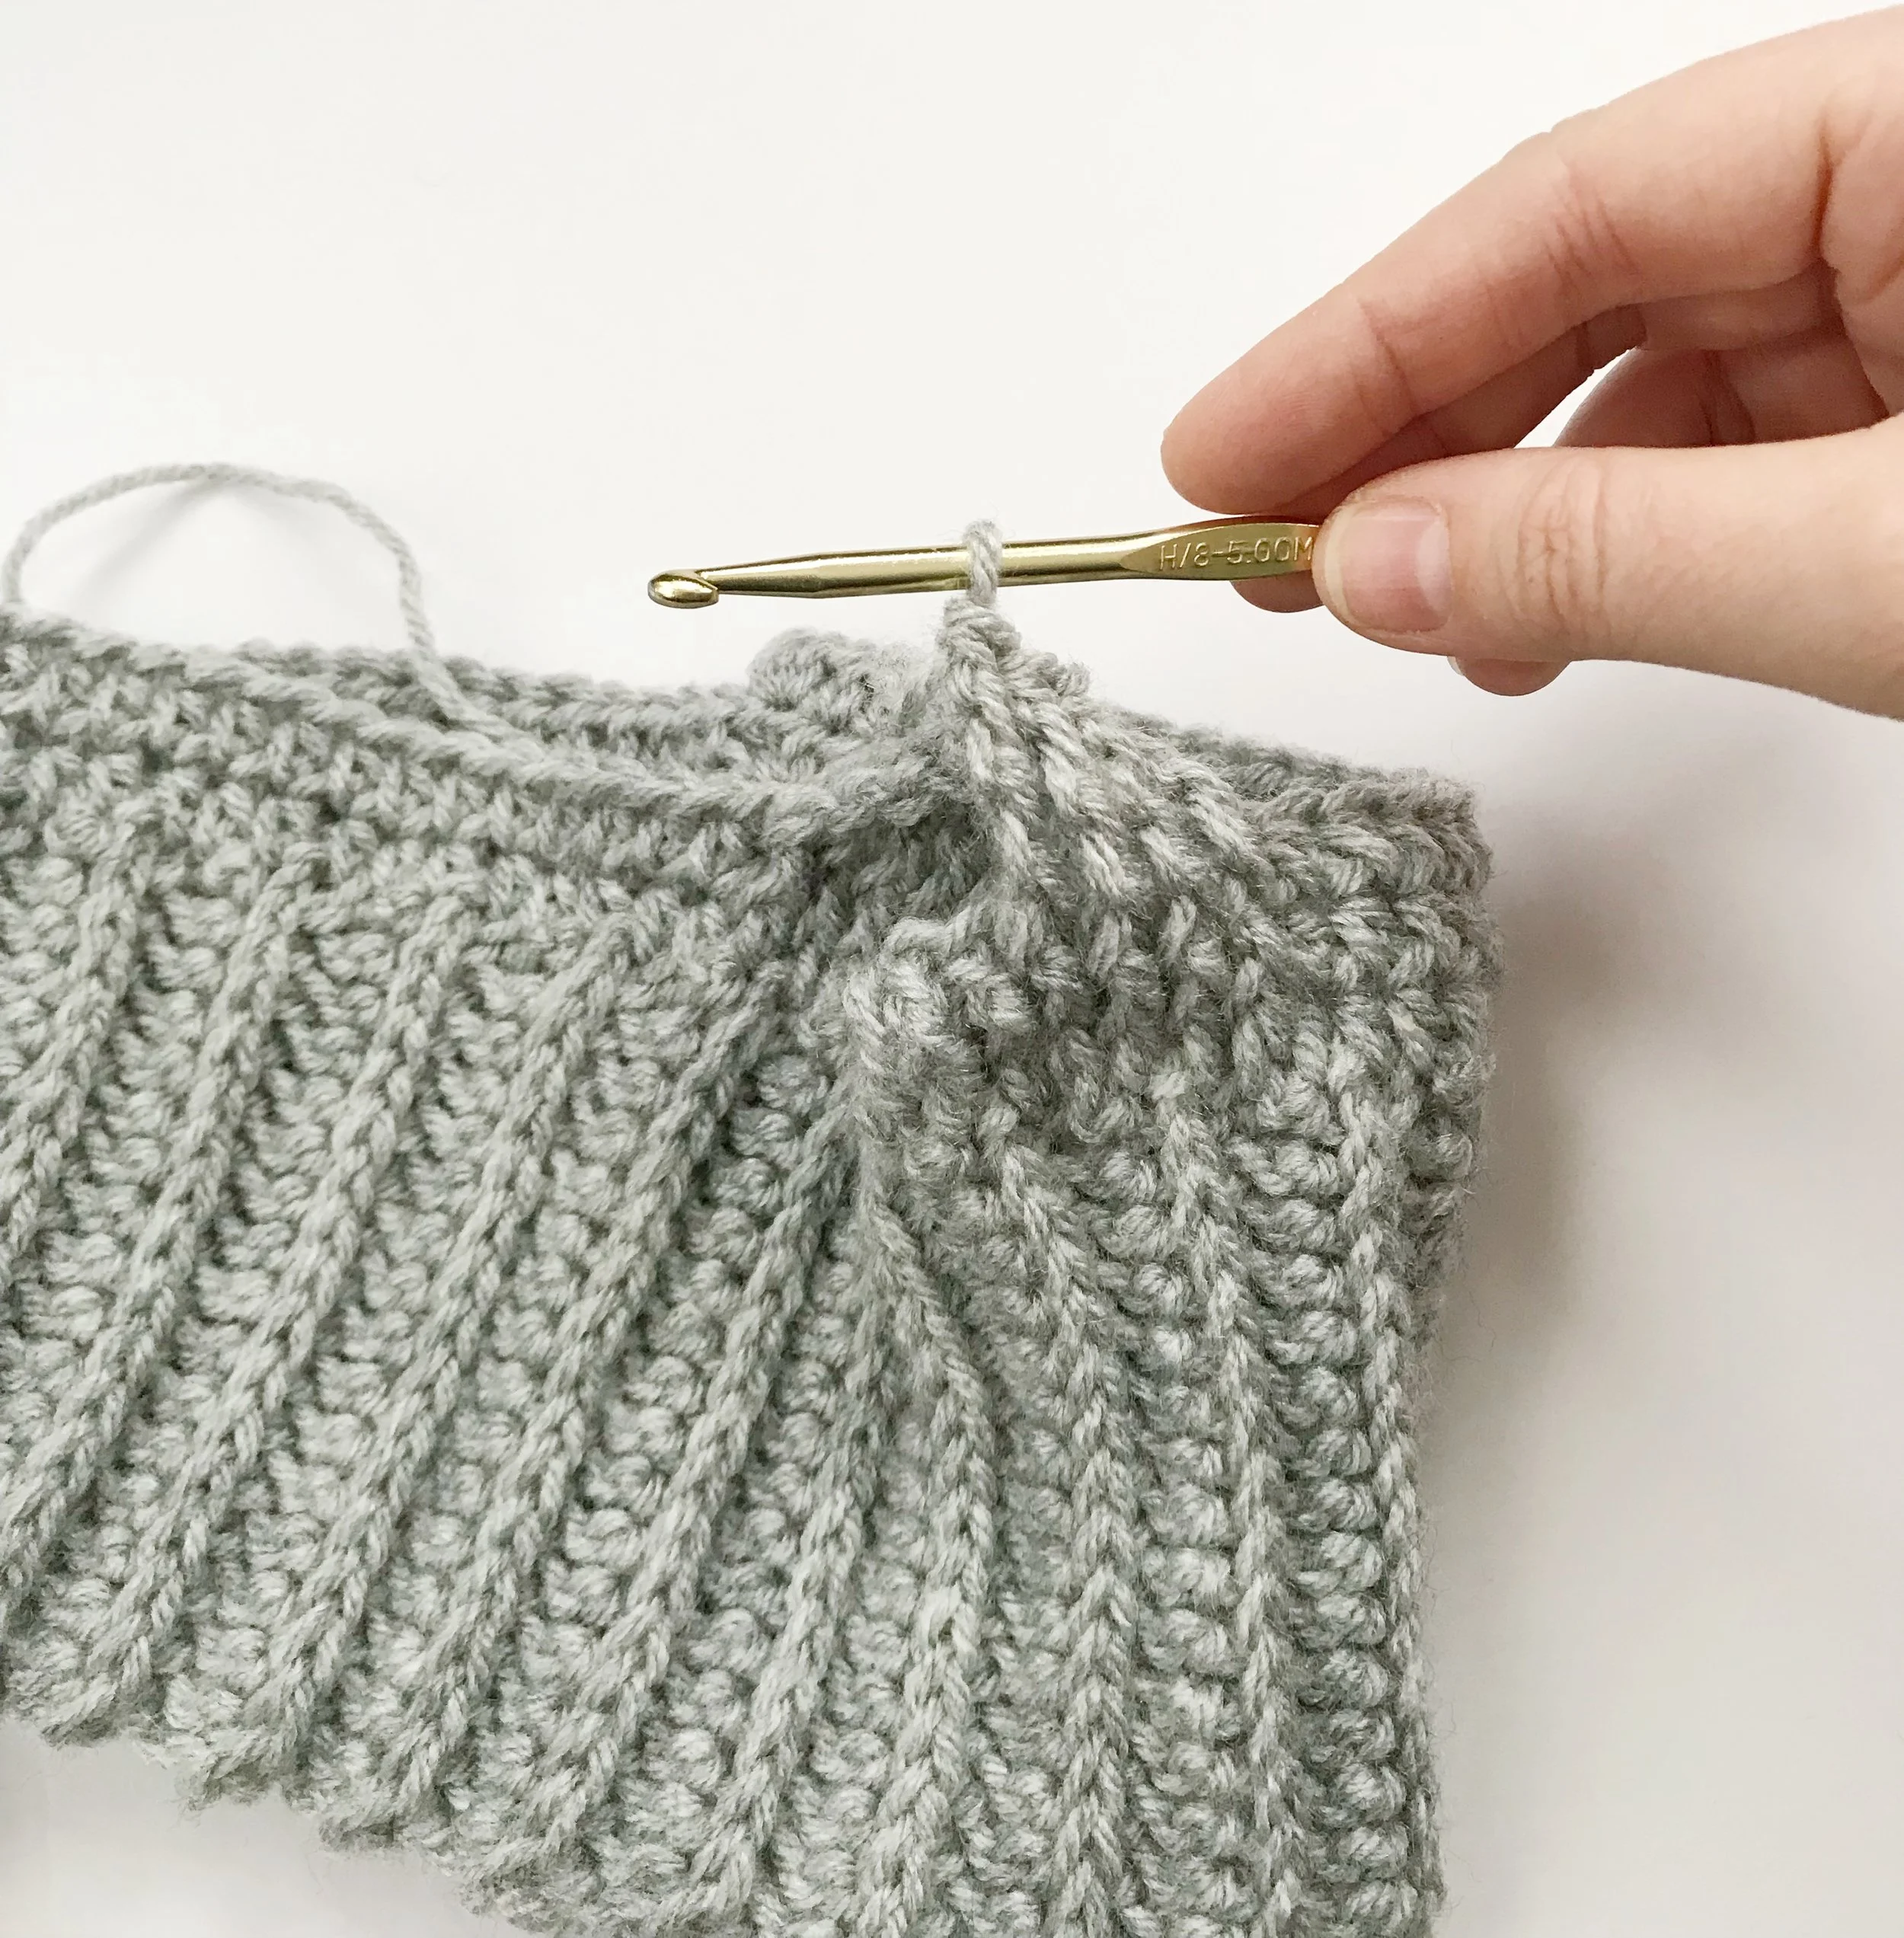
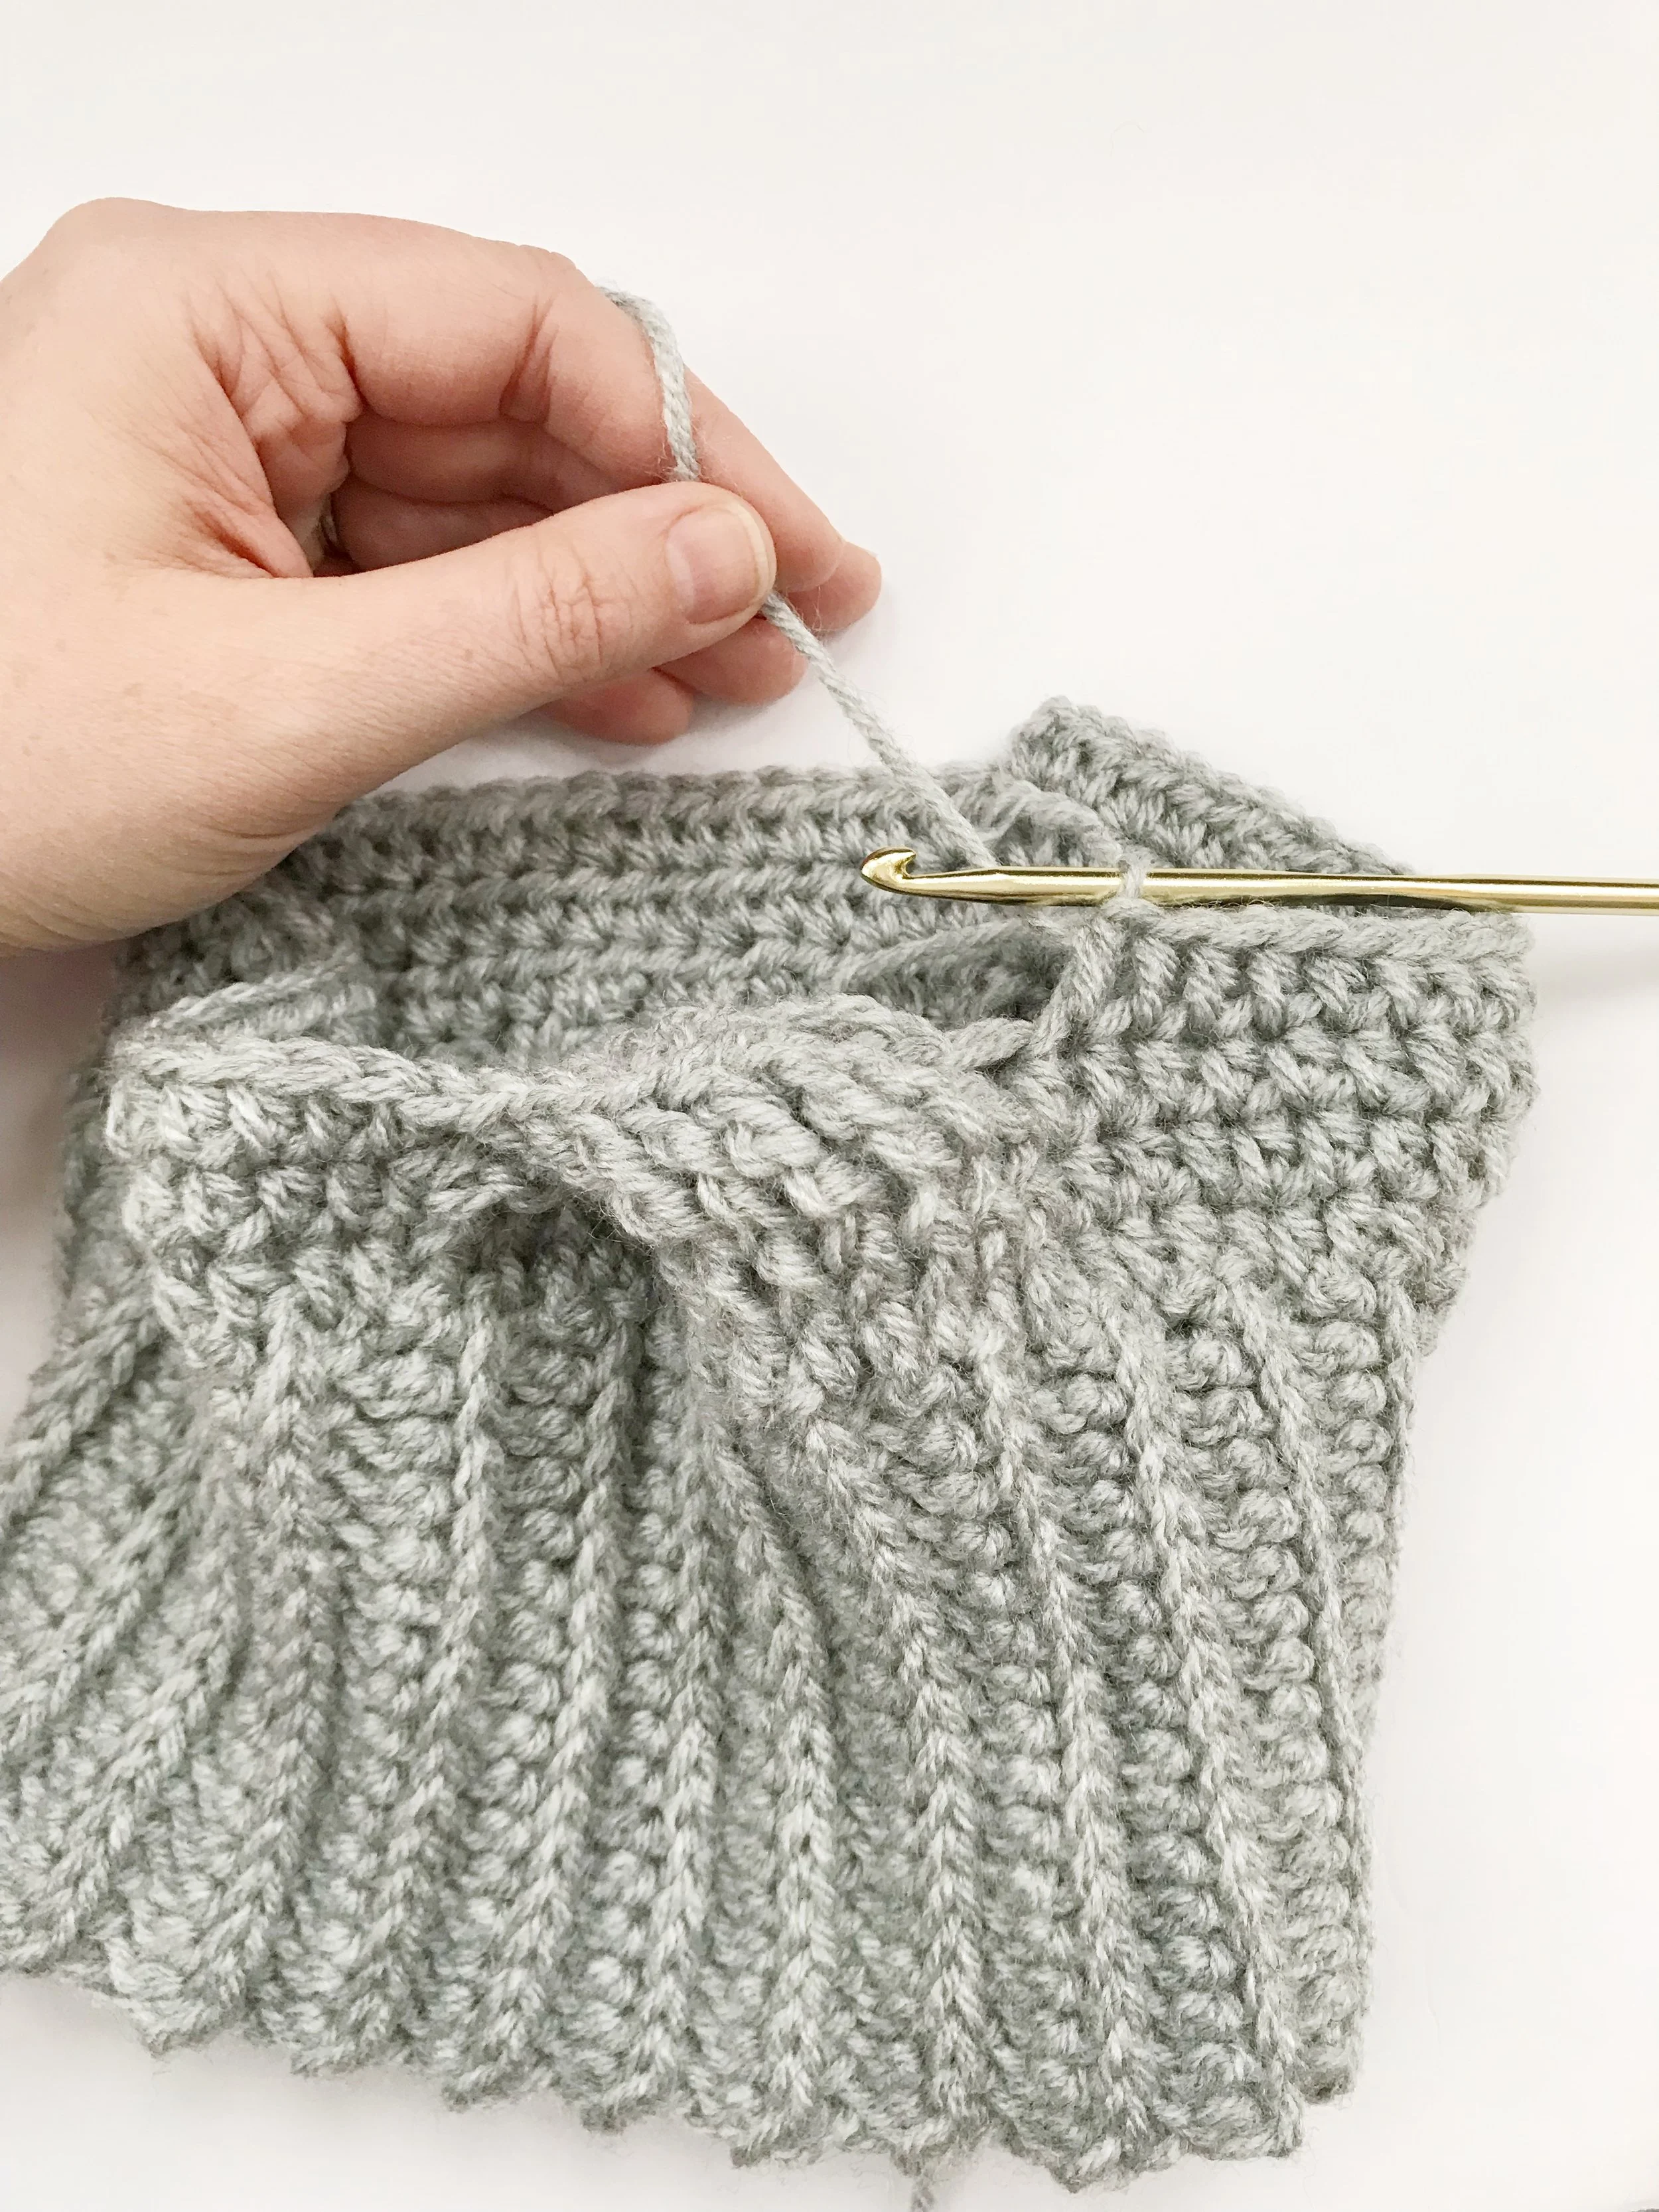
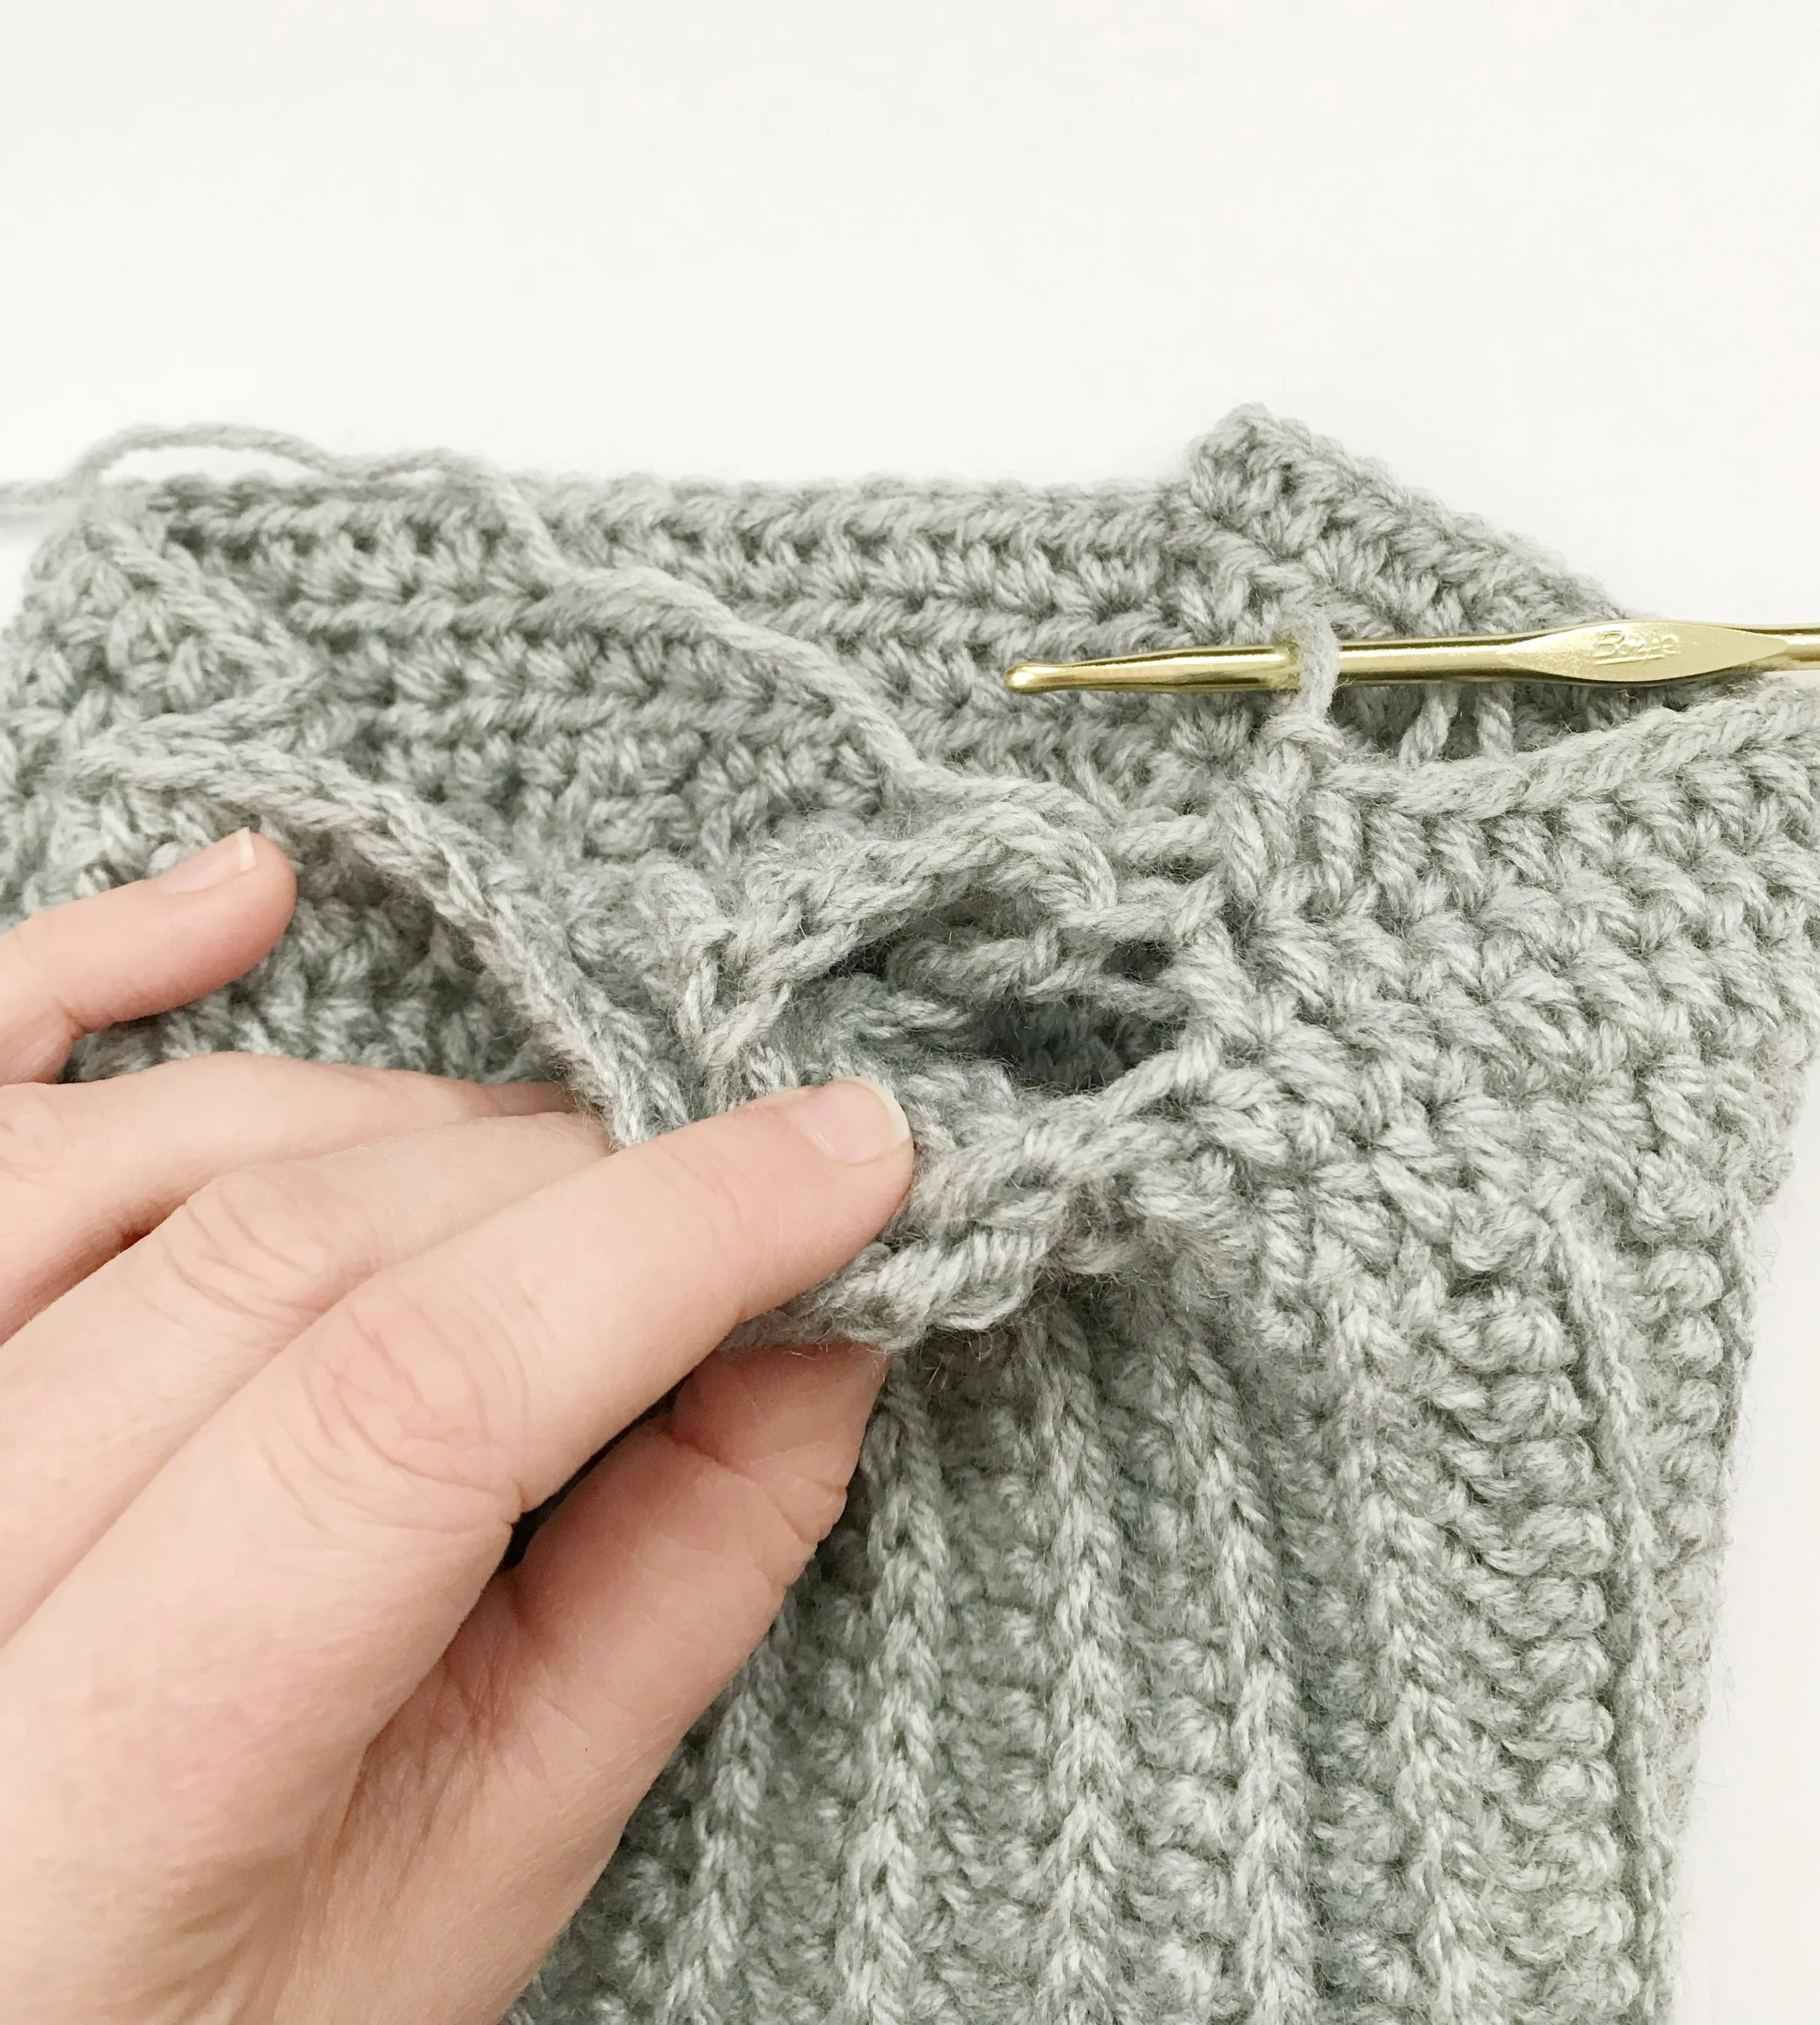
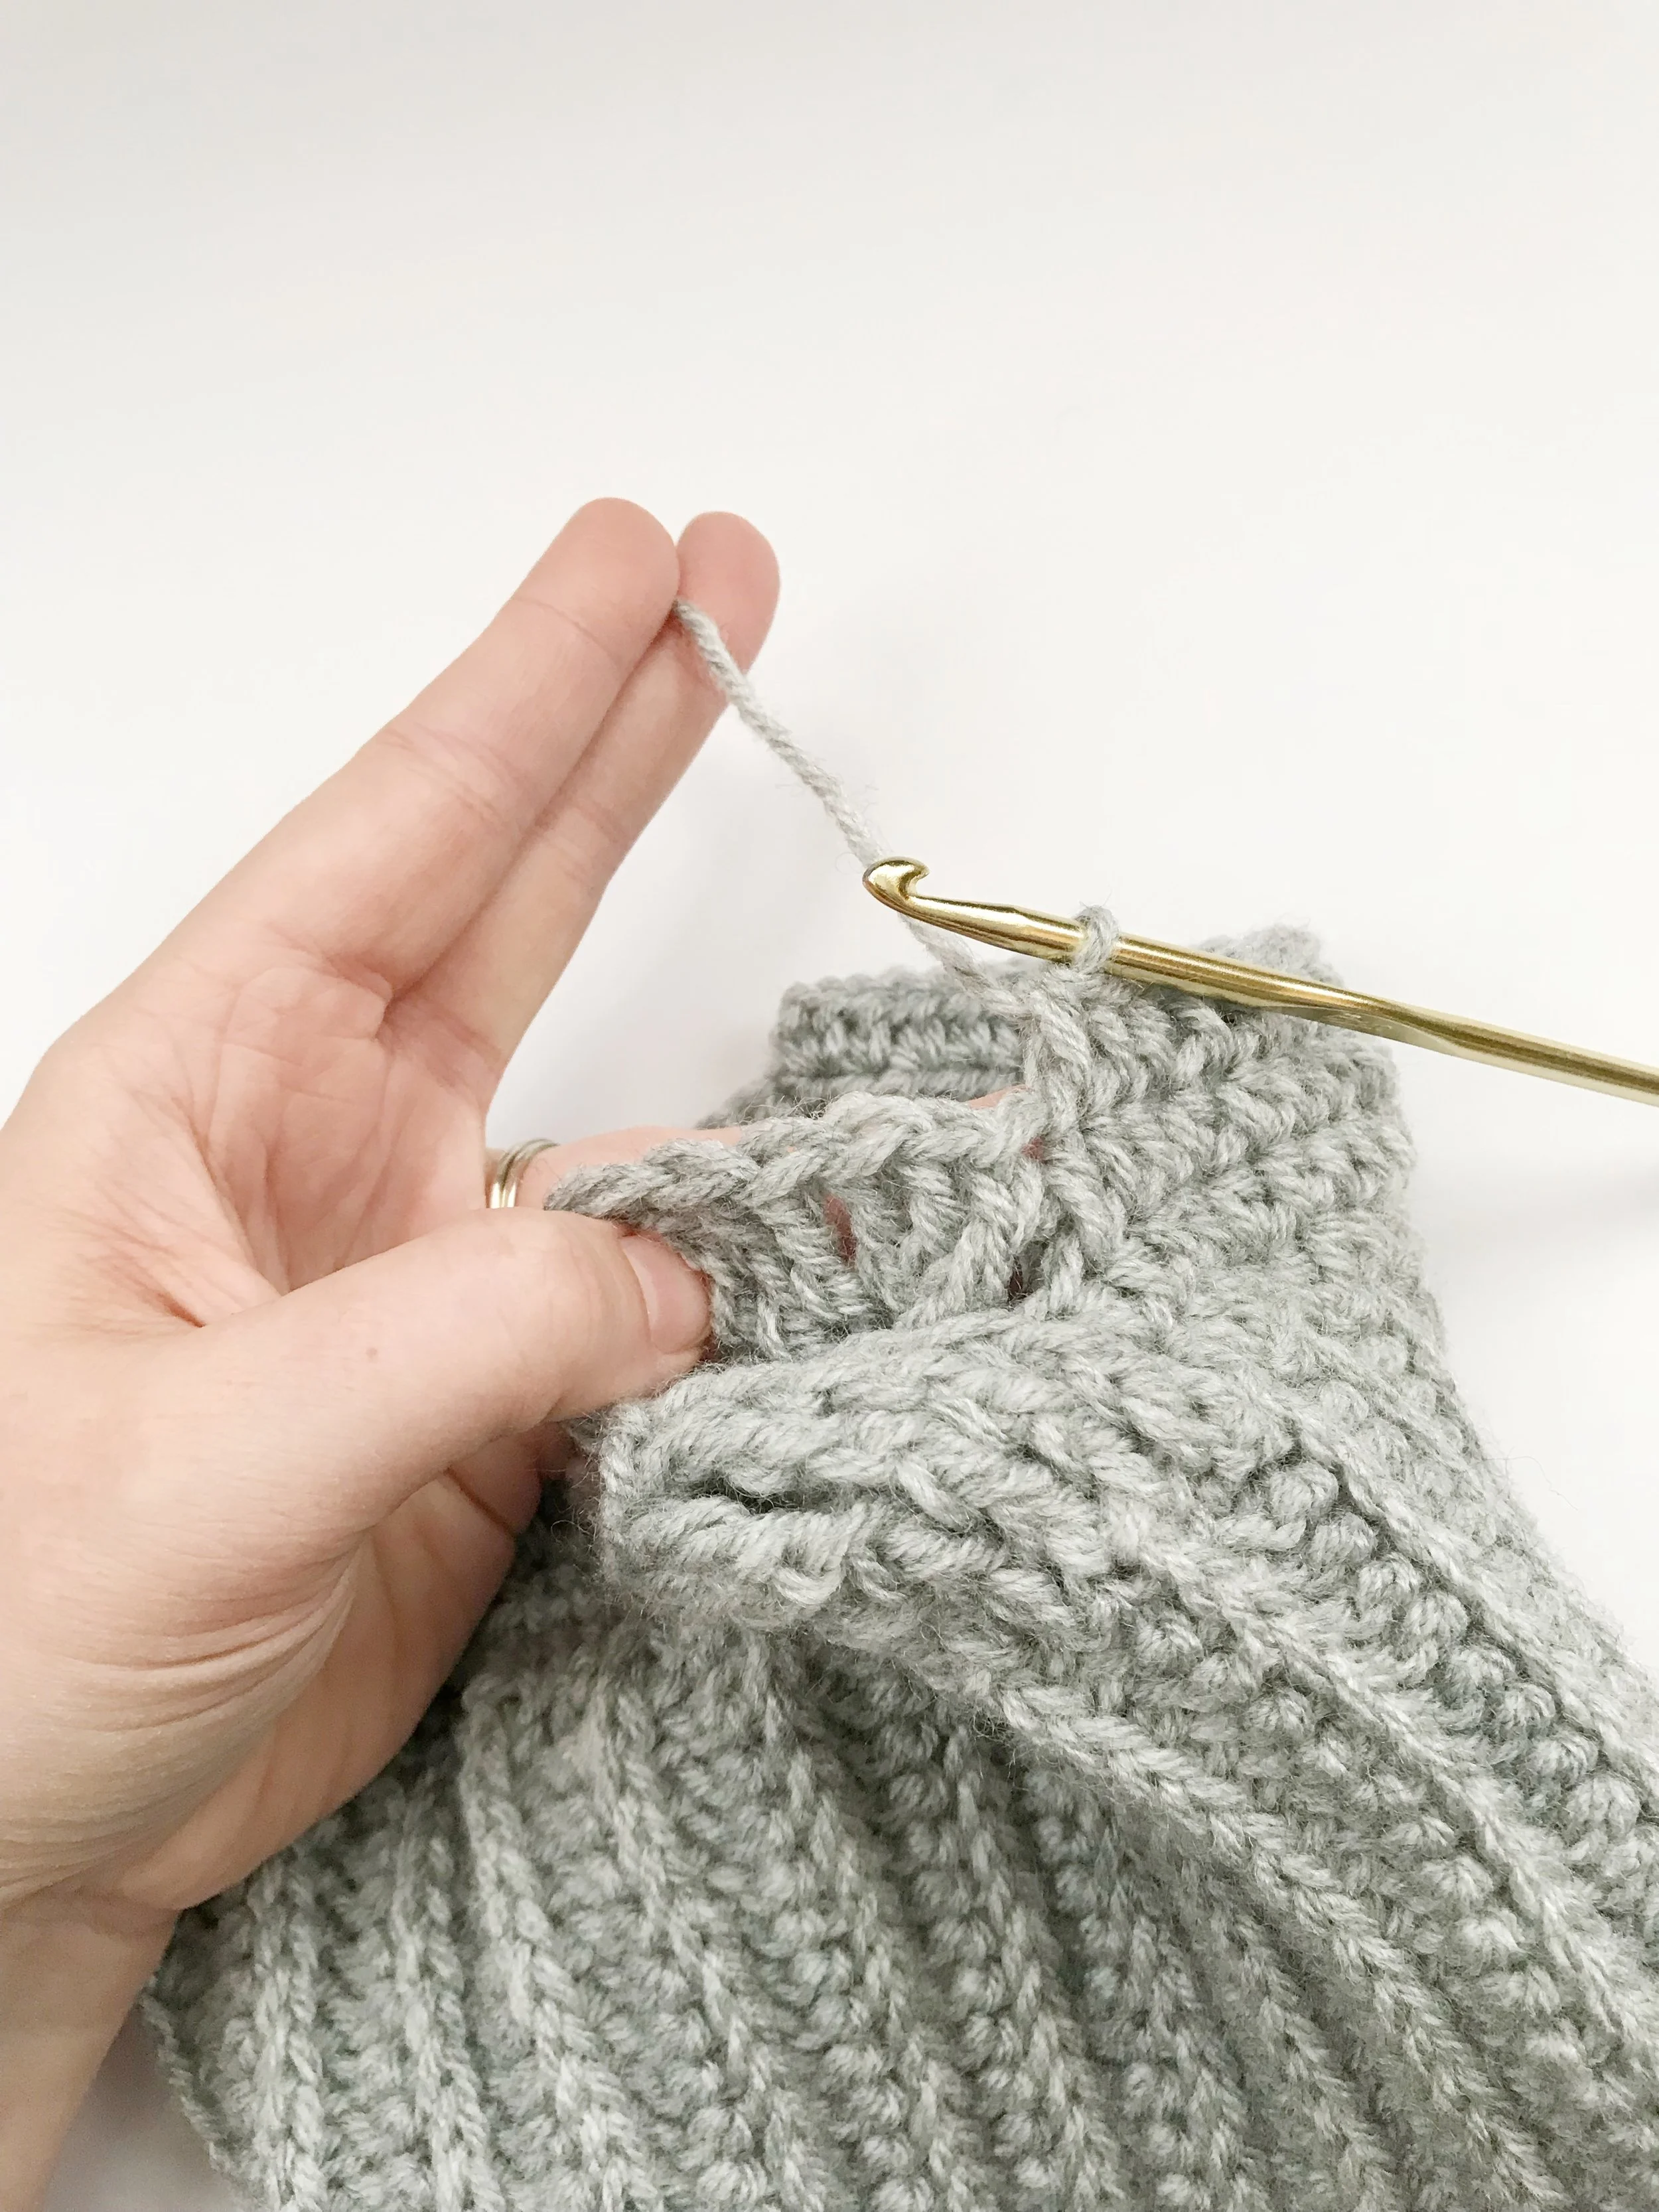
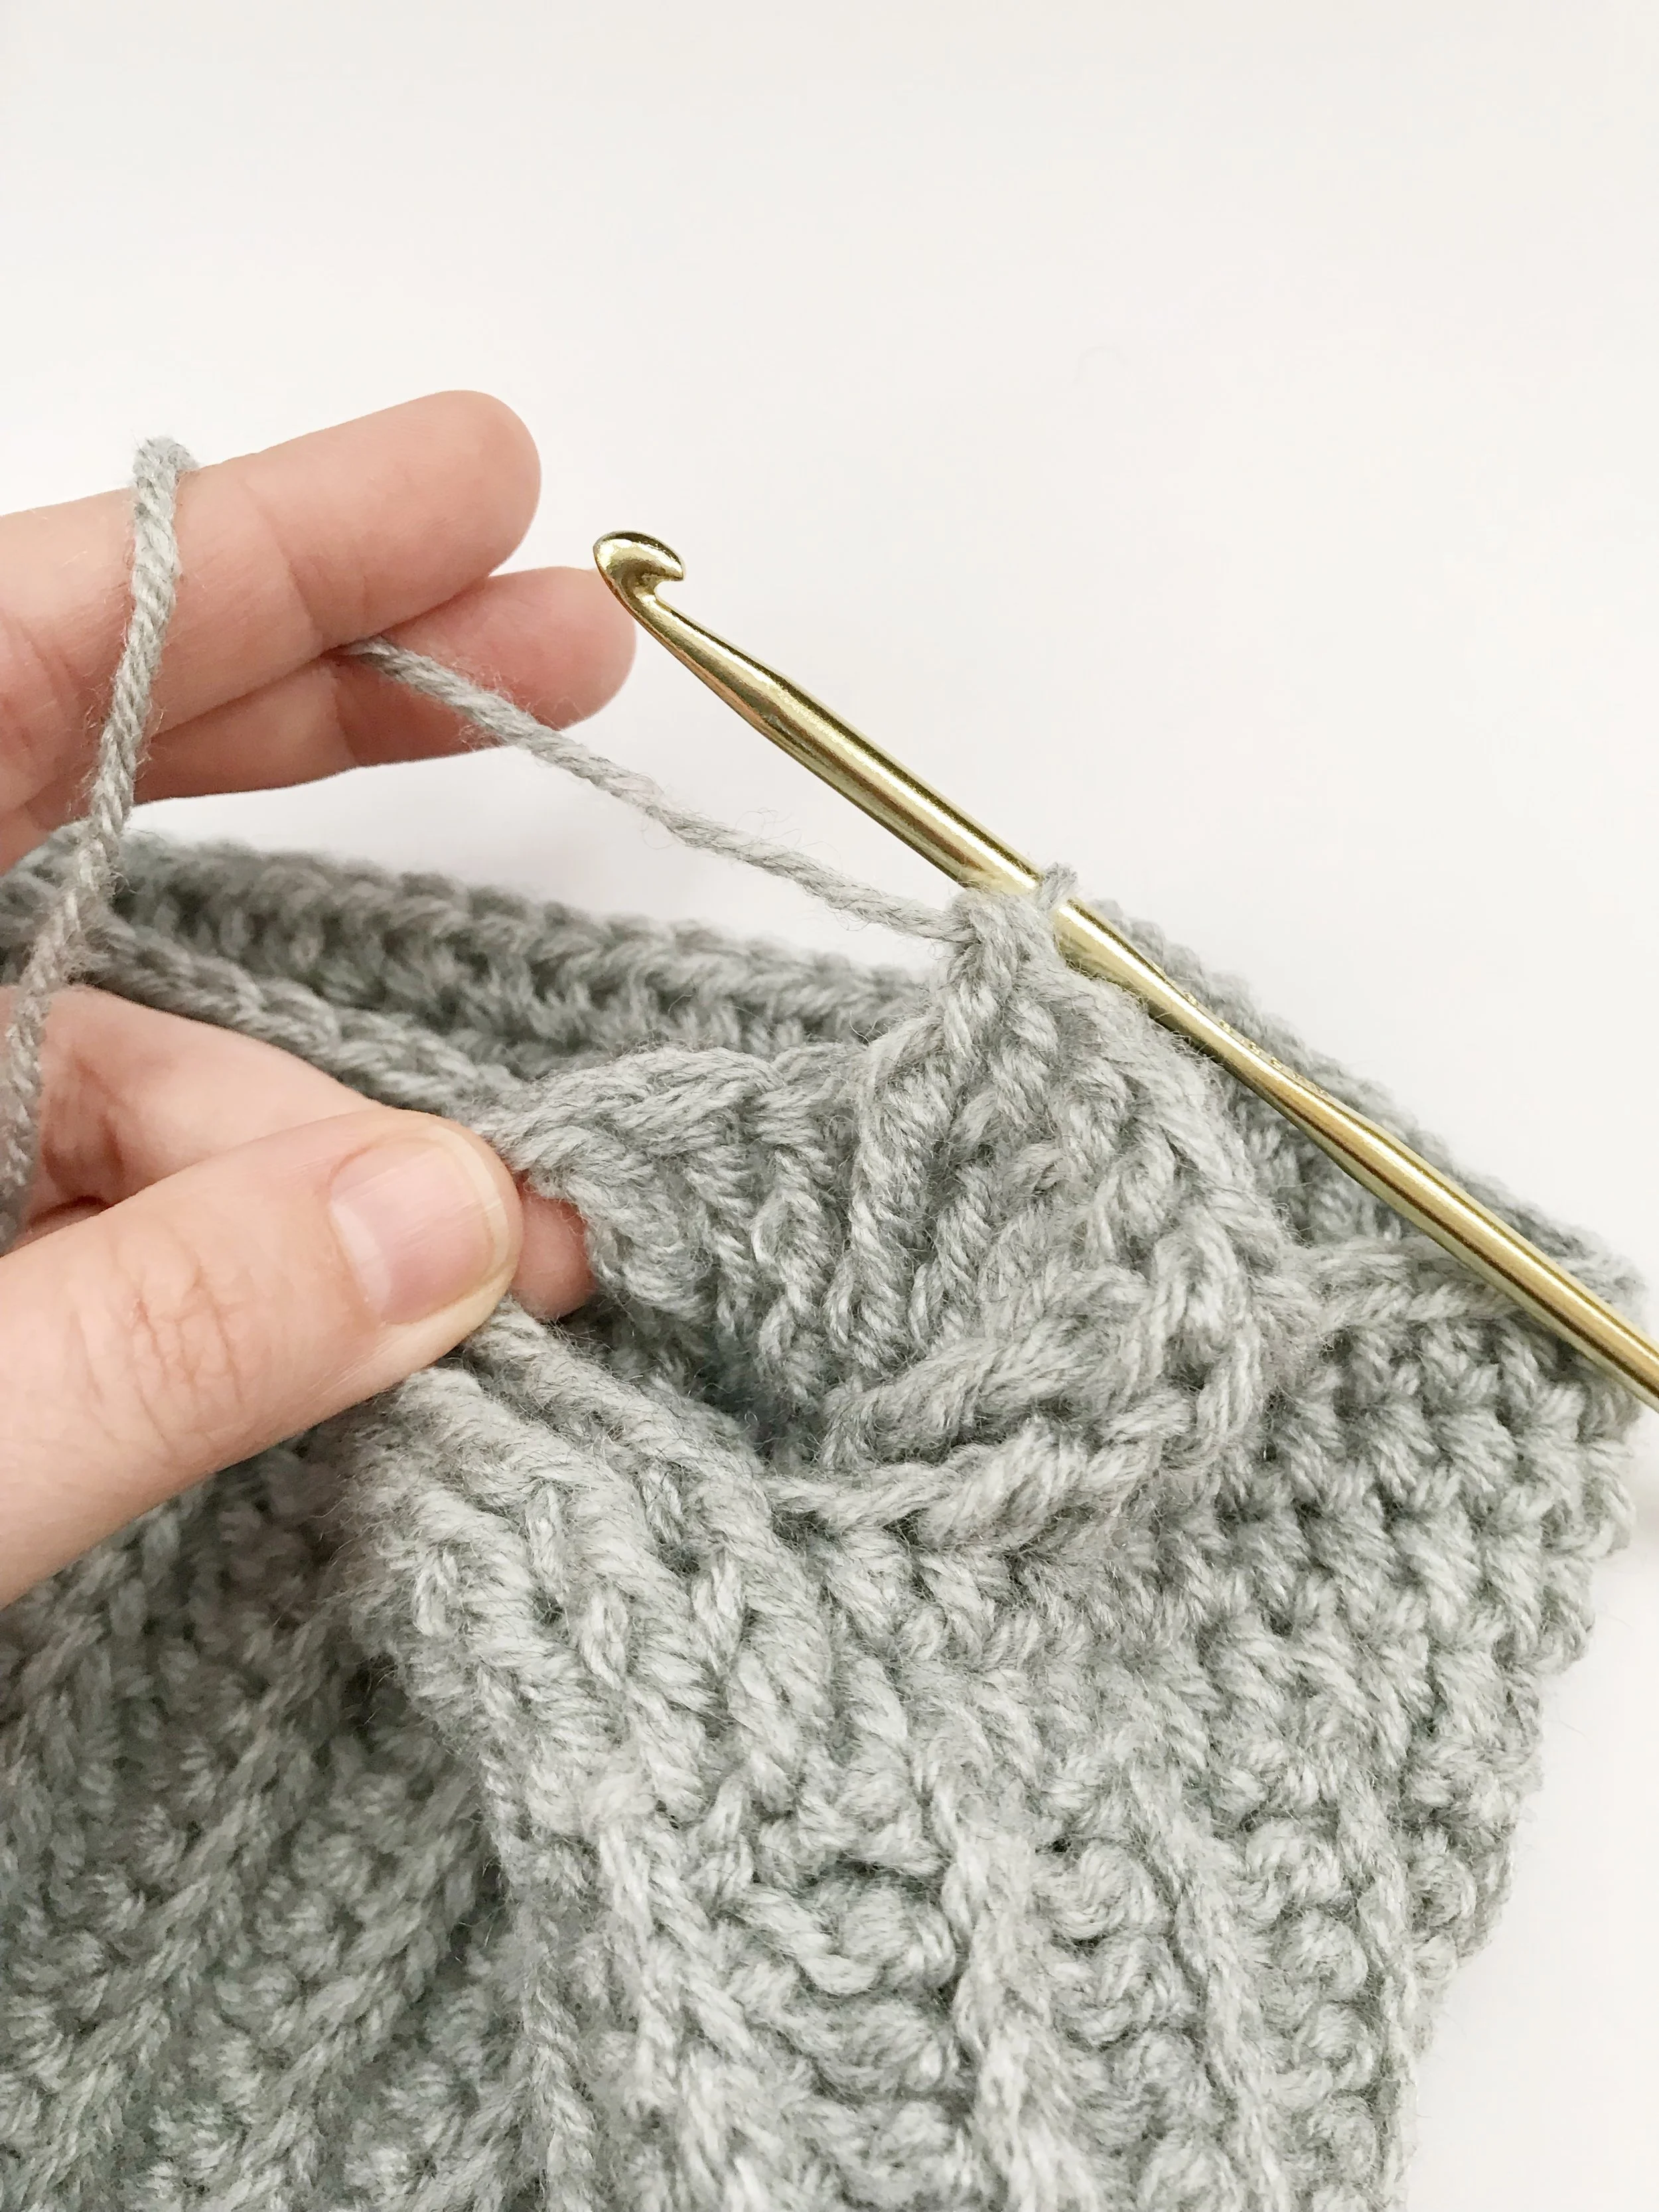
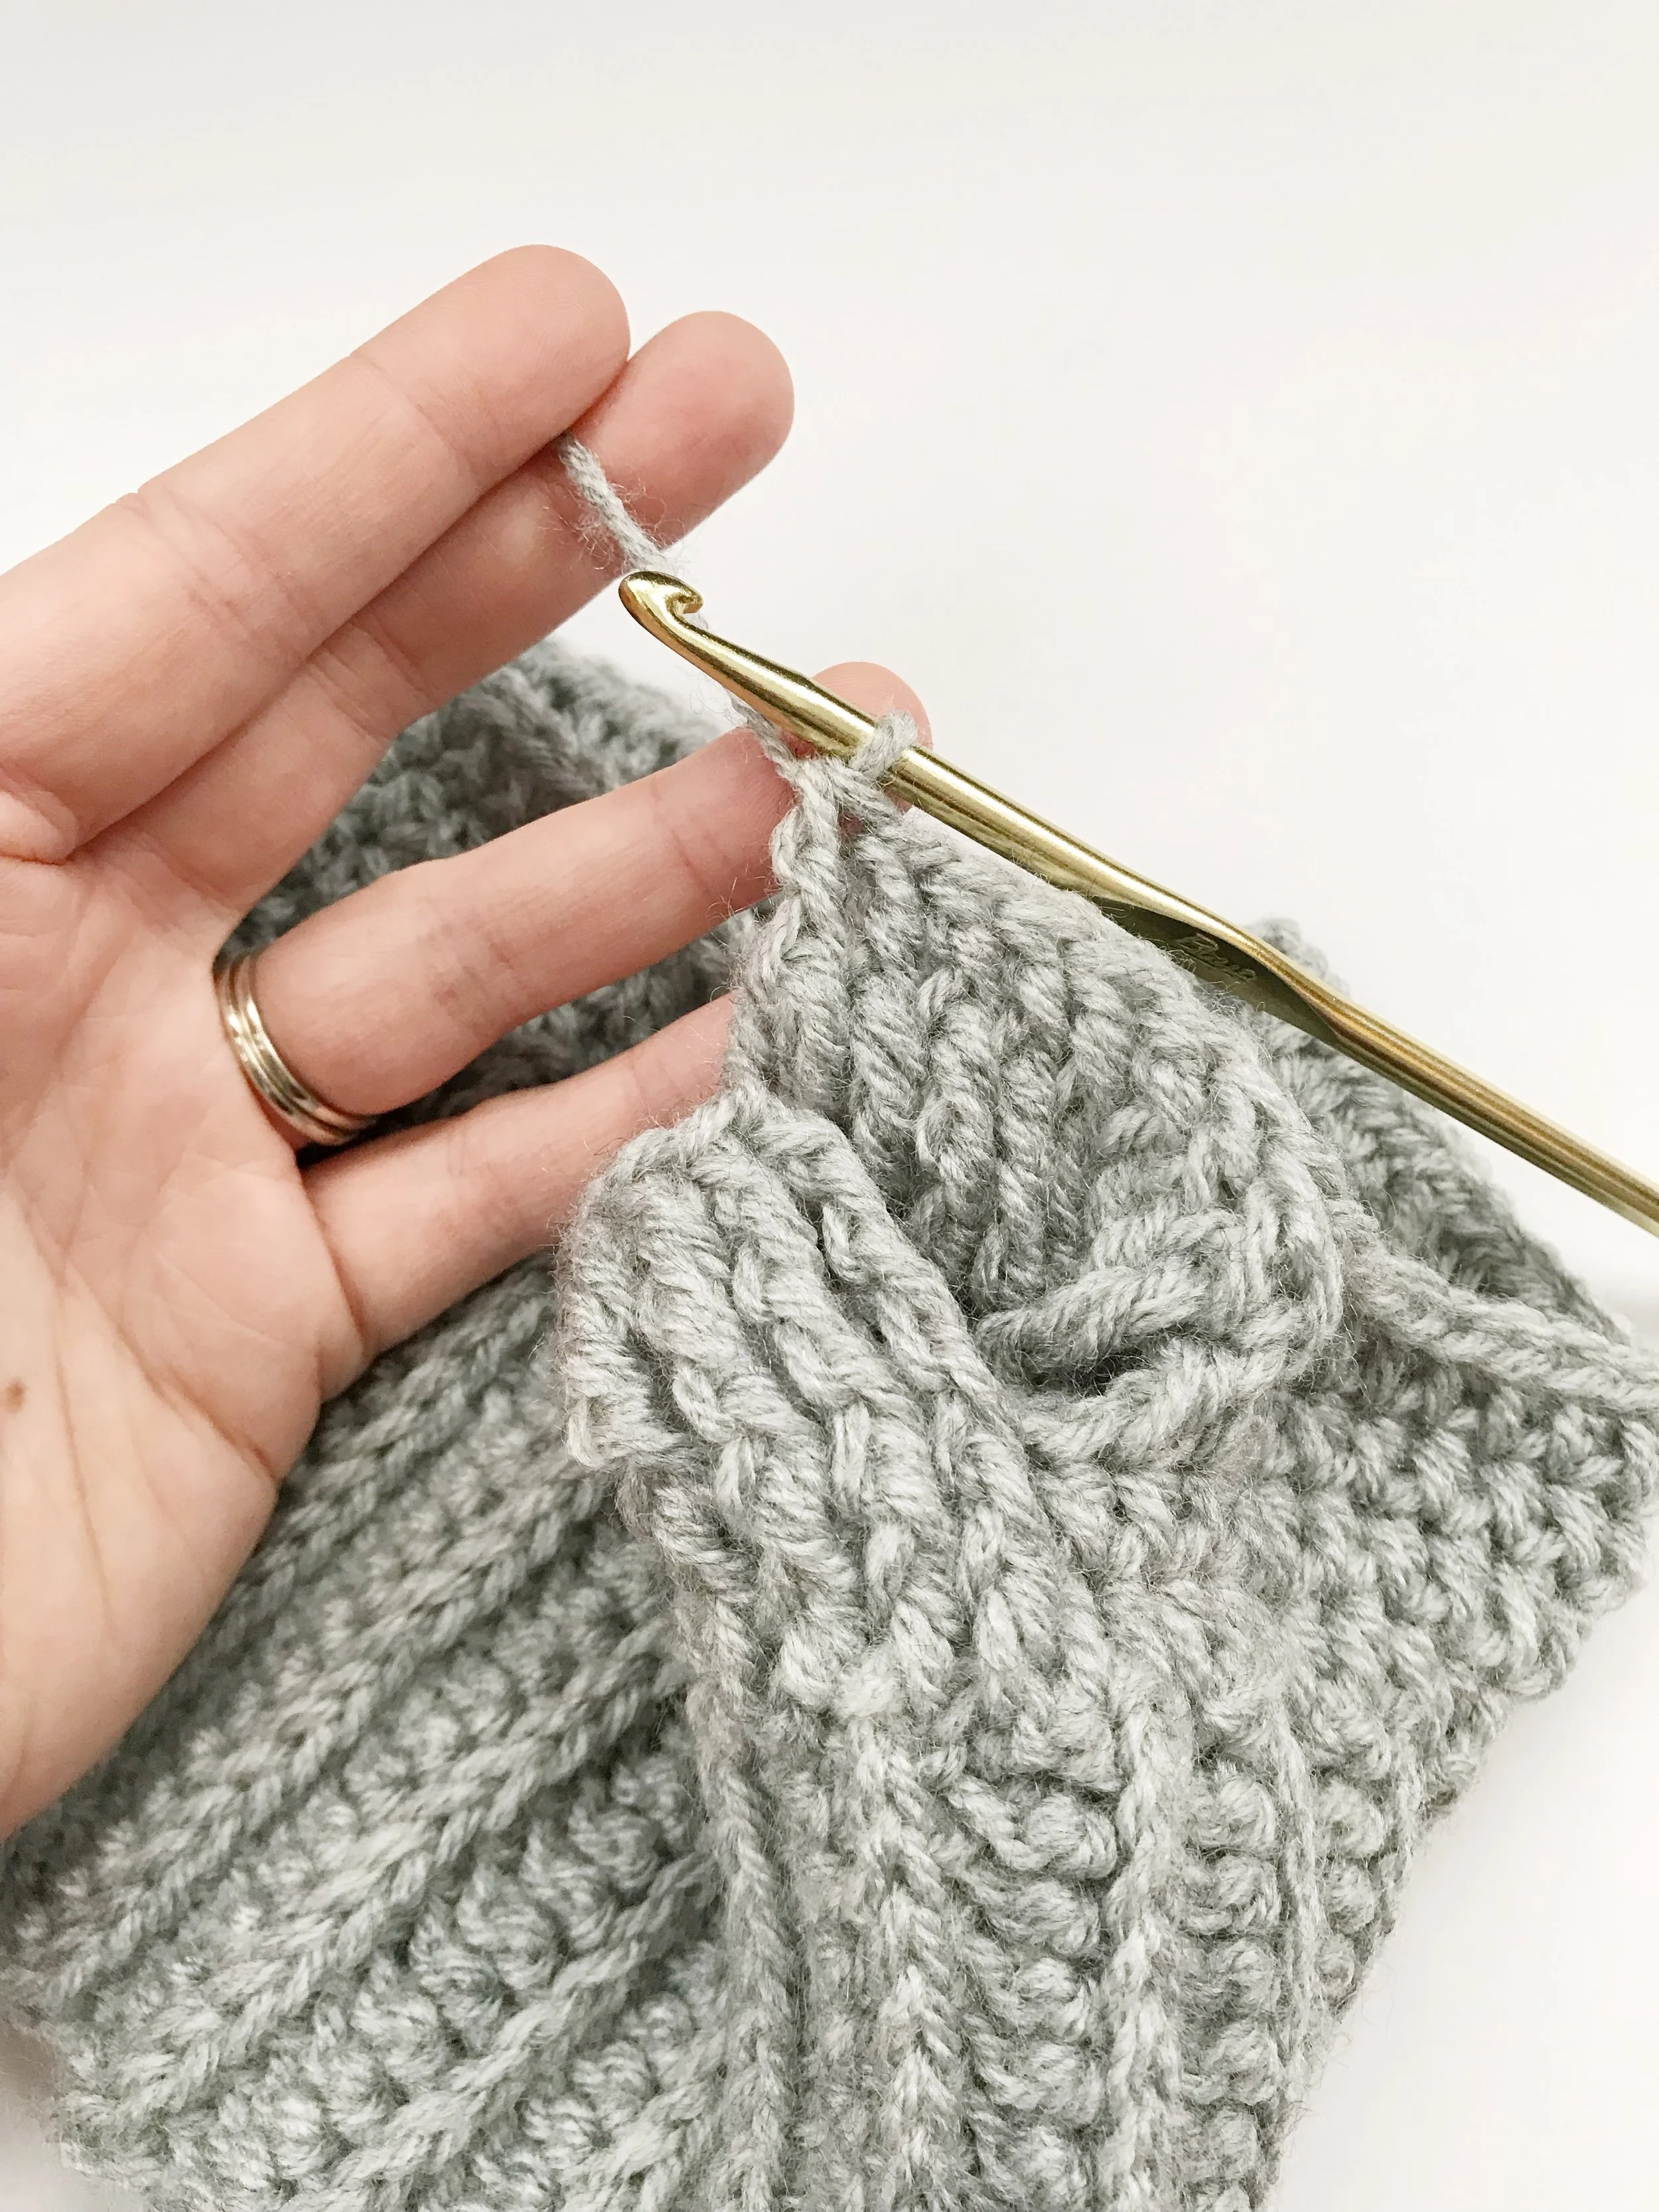
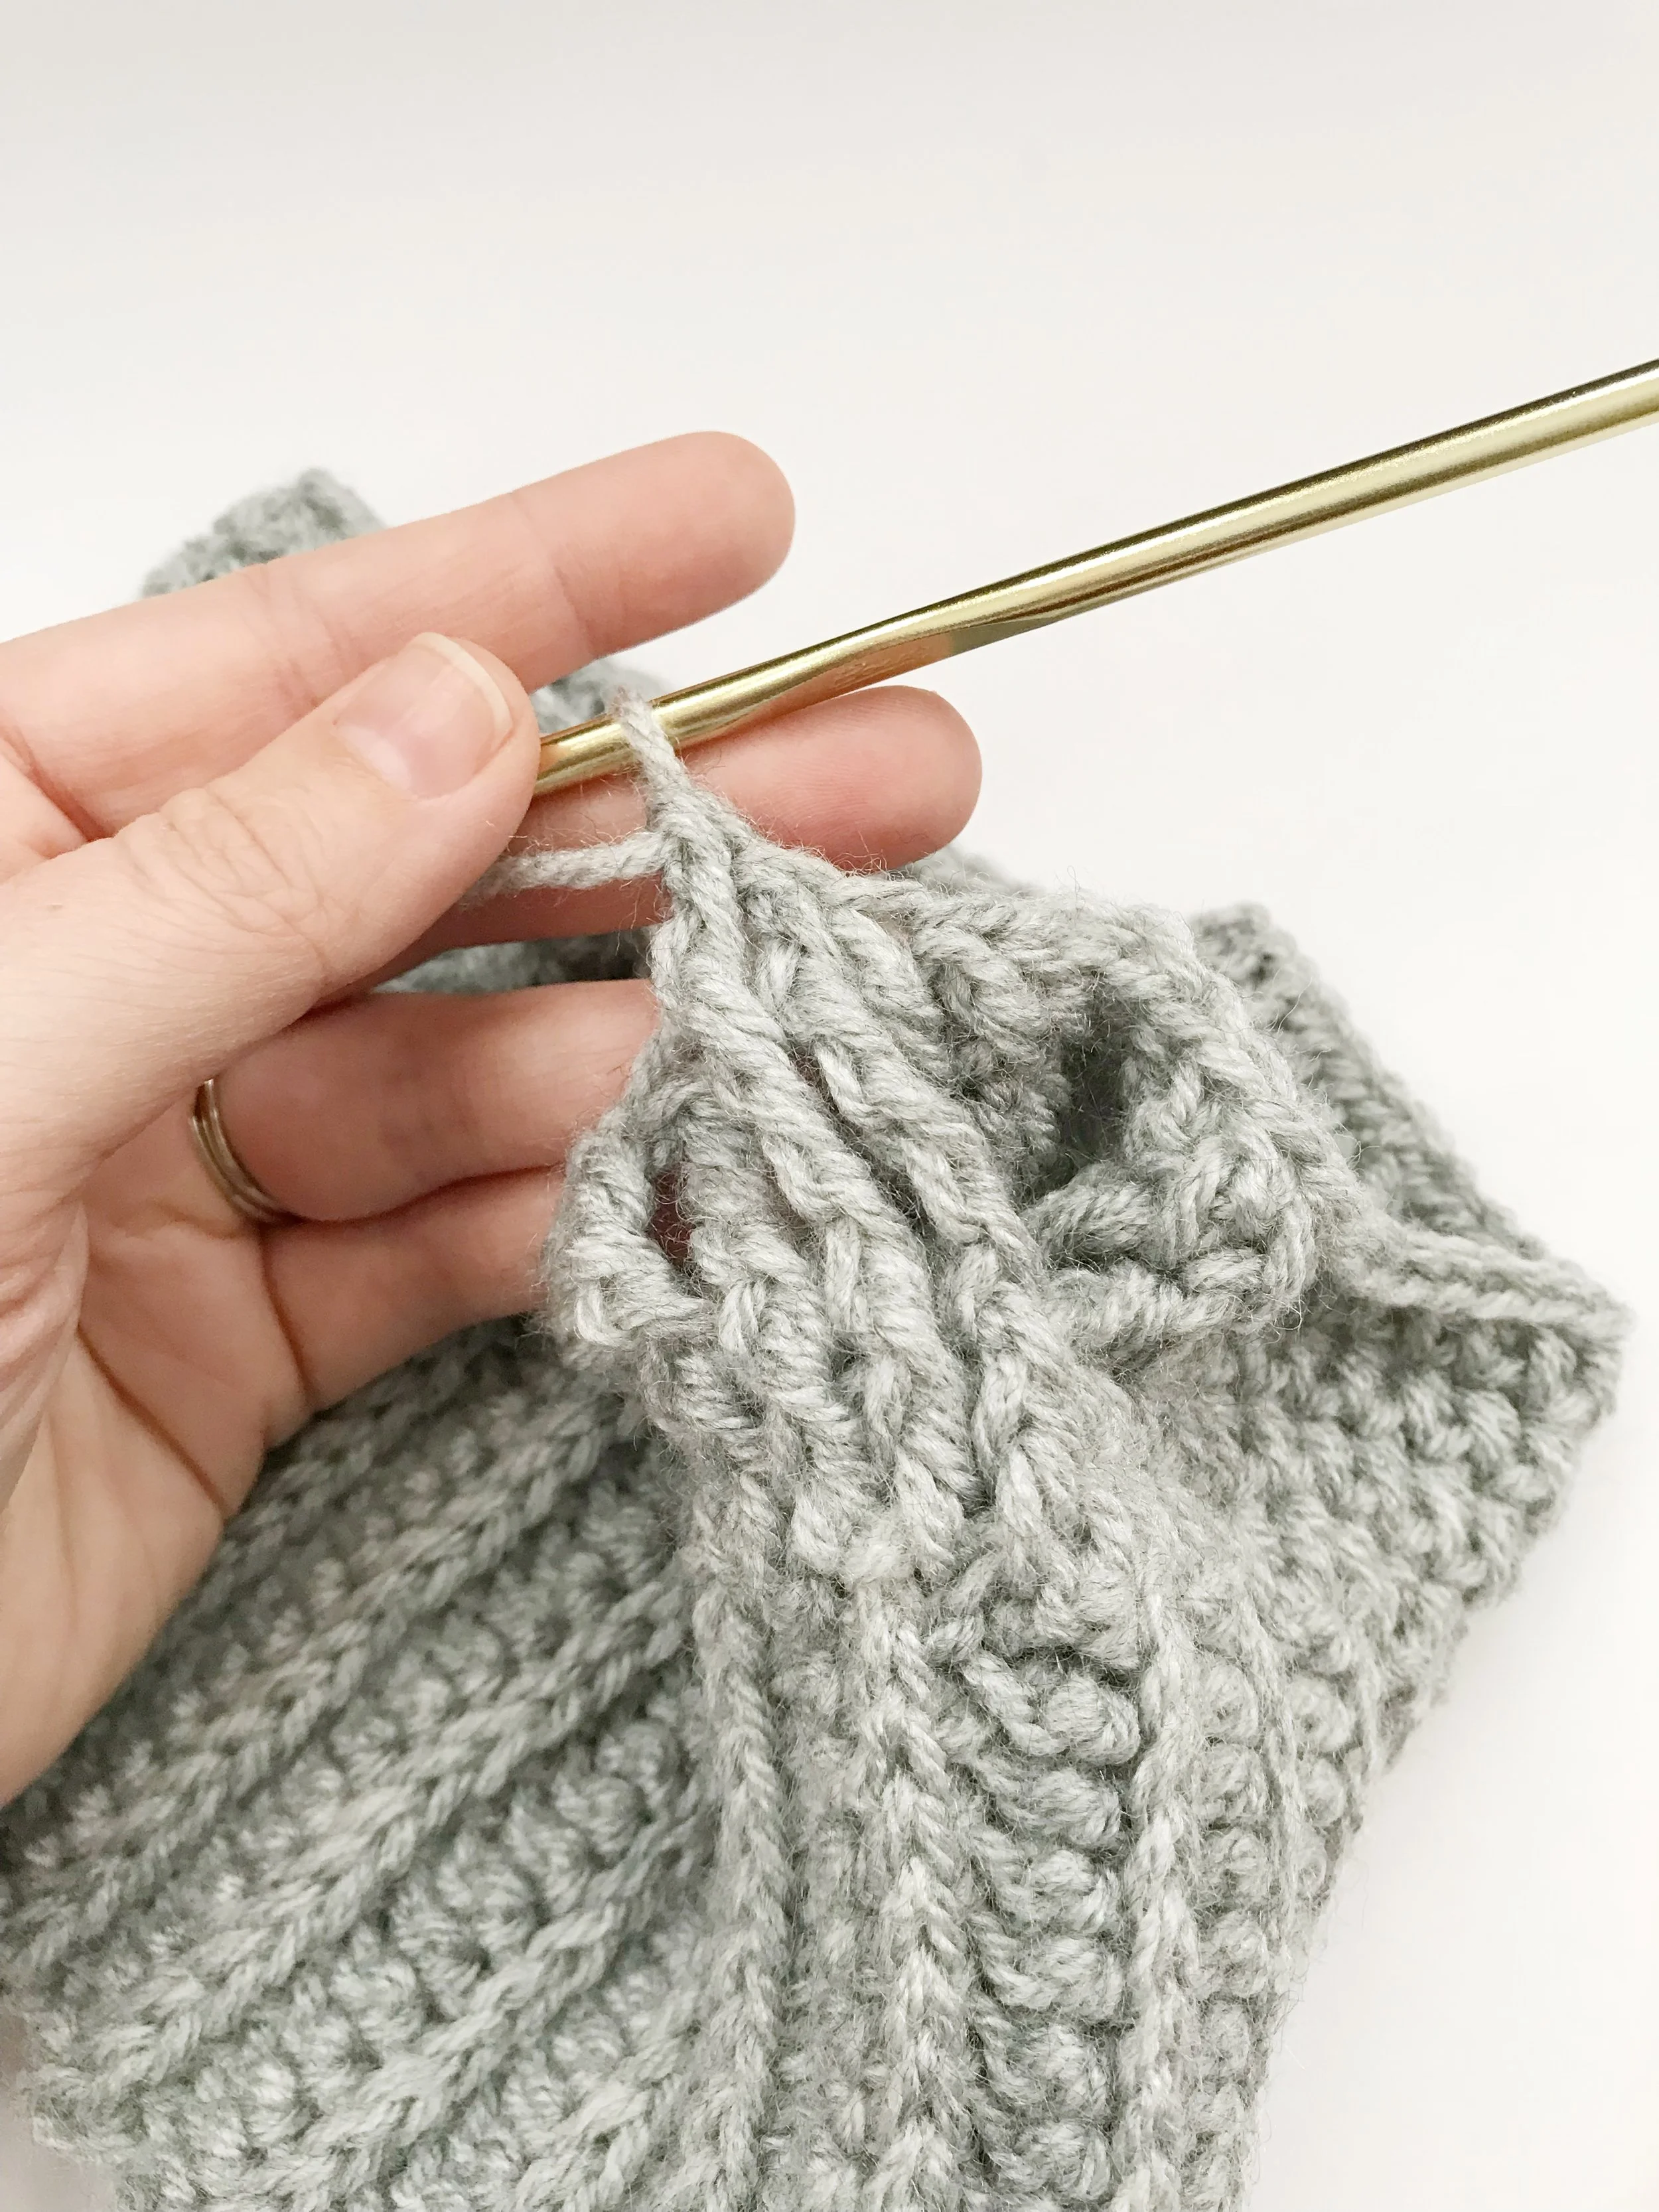
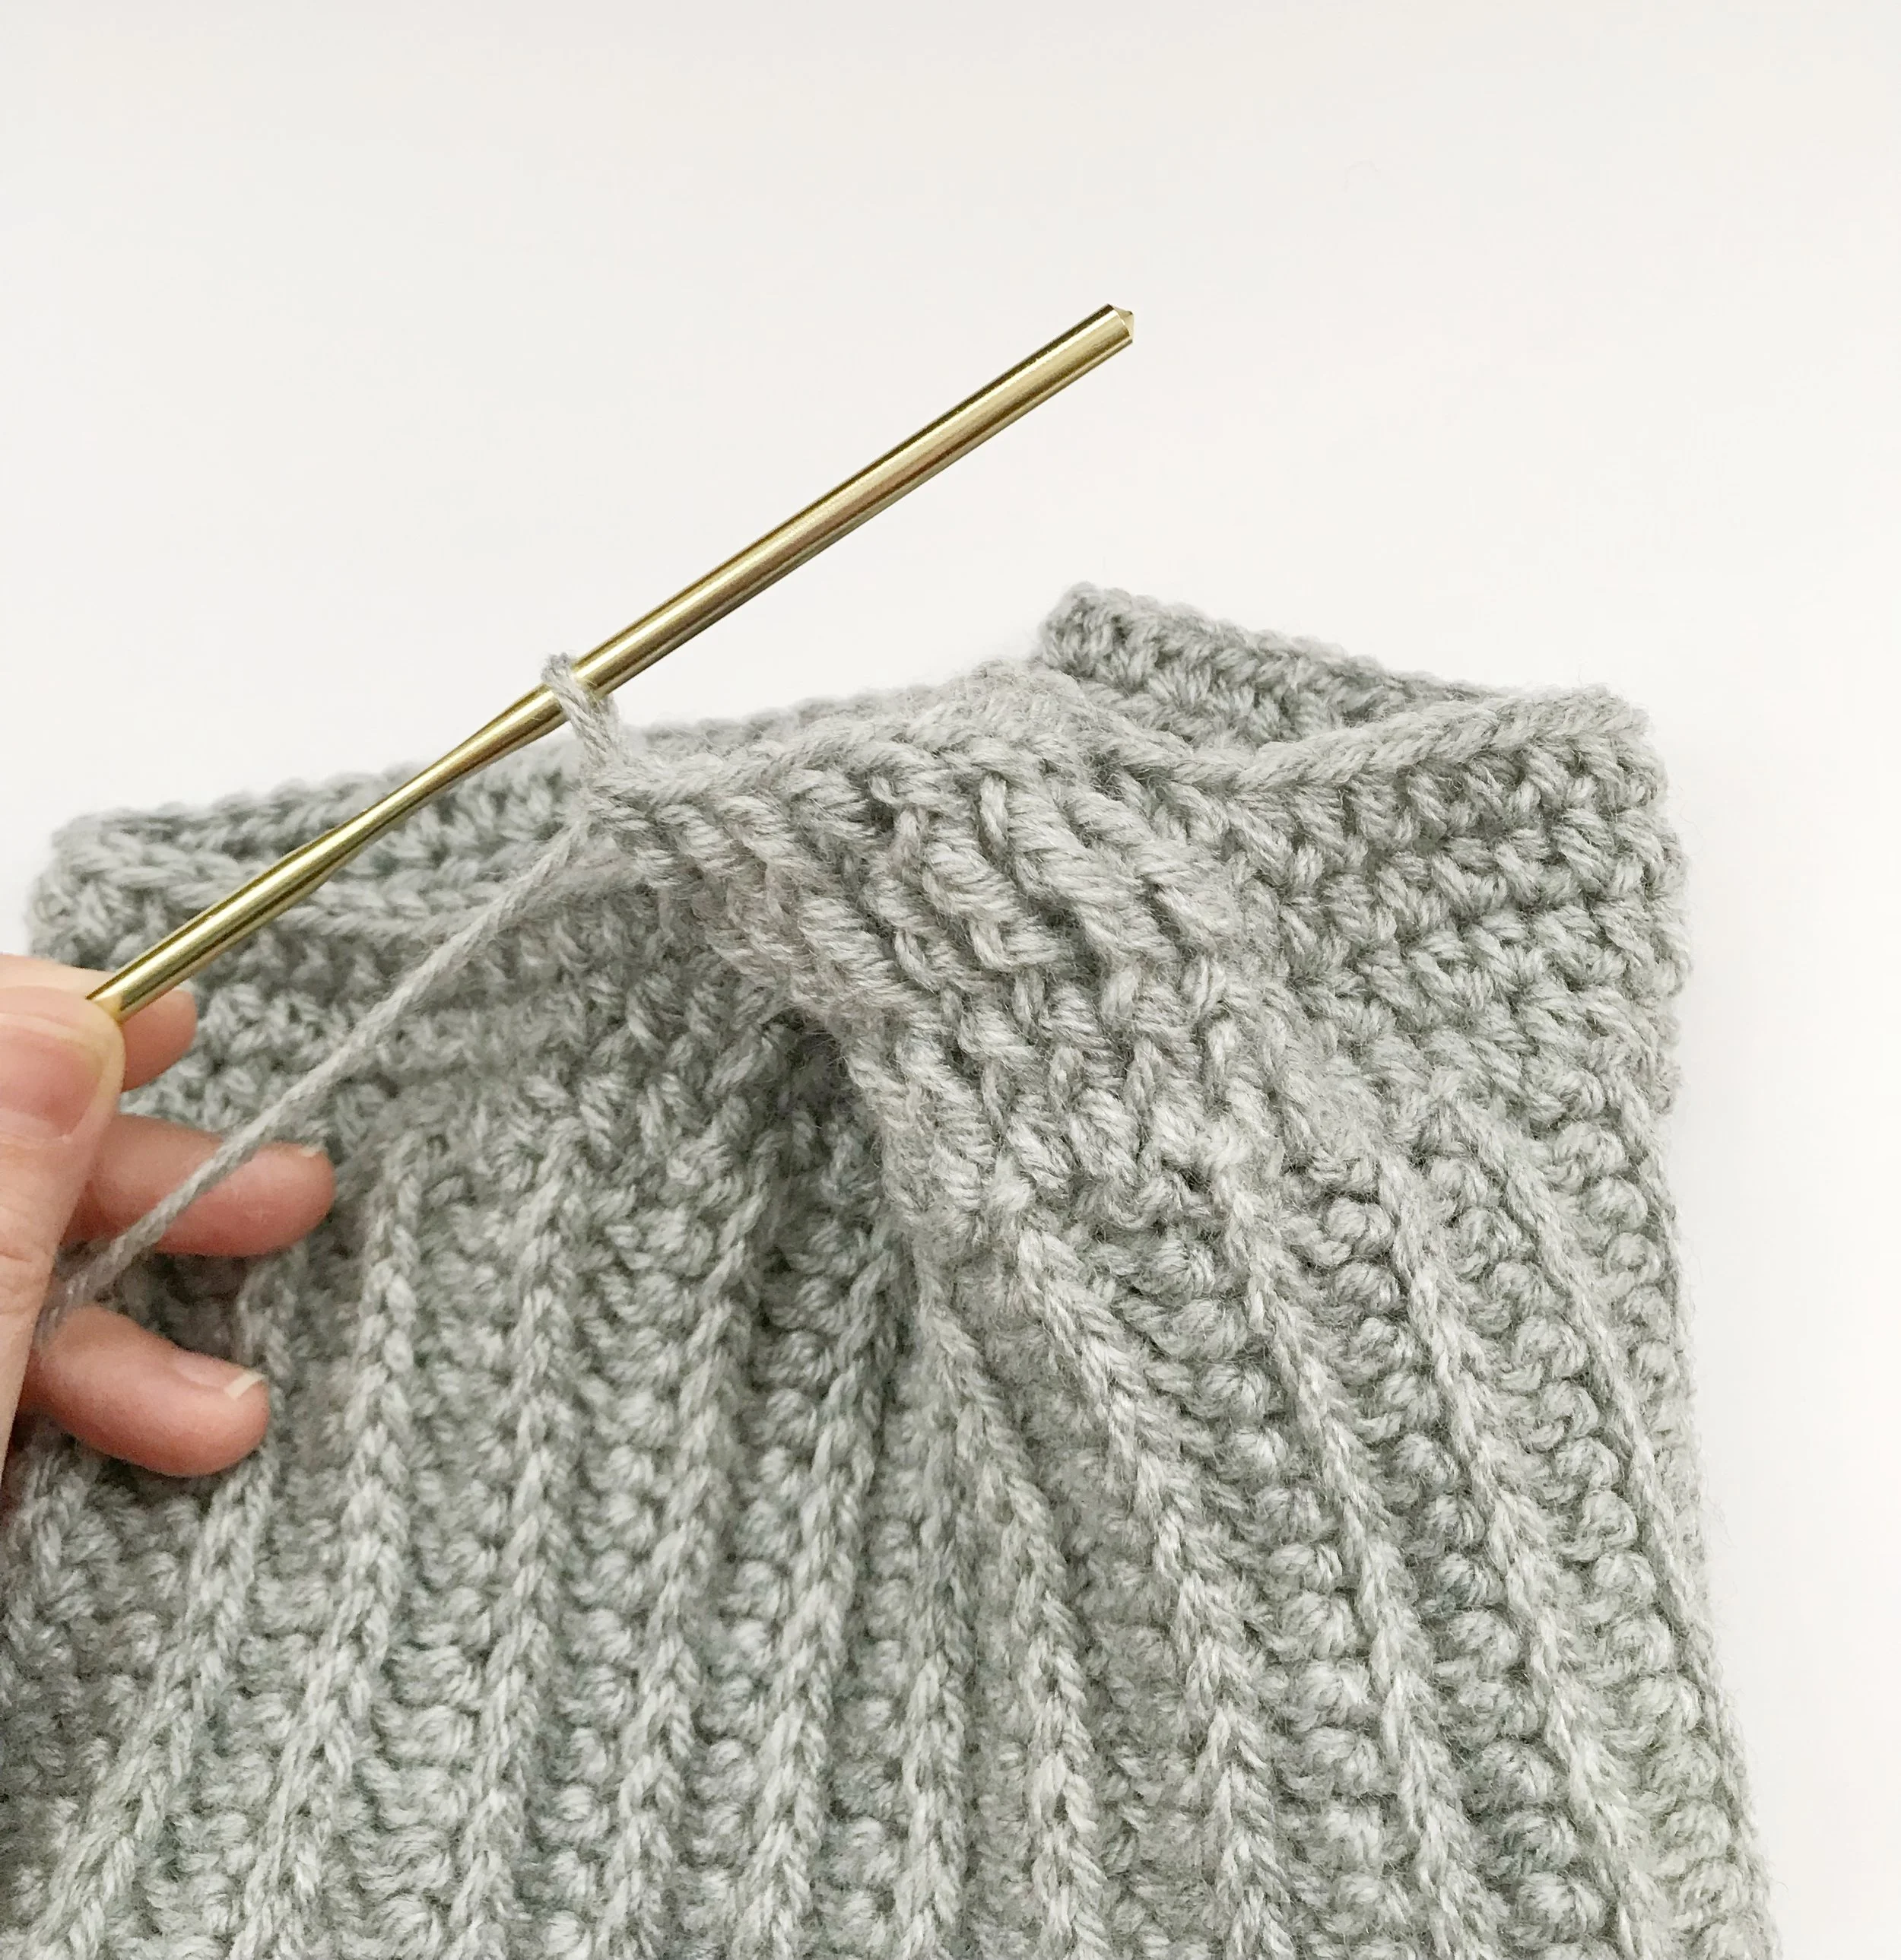
The next row can be a bit tricky when you get to the cabled area. You will be working hdc until you get to the 16 cable stitches. Then you will work fpdc across working the back set and then the front. See the pictures below for more details.
There will 8 stitches in the back and 8 stitches in the front. I find it helpful to pull the front stitches to the left a bit so you have better access to the back stitches.
Once you have made 8 fpdc across the back stitches you will work 8 fpdc across the front set of stitches from right to left. As you continue for the next two rows the cable section will be easier since it starts to untwist.
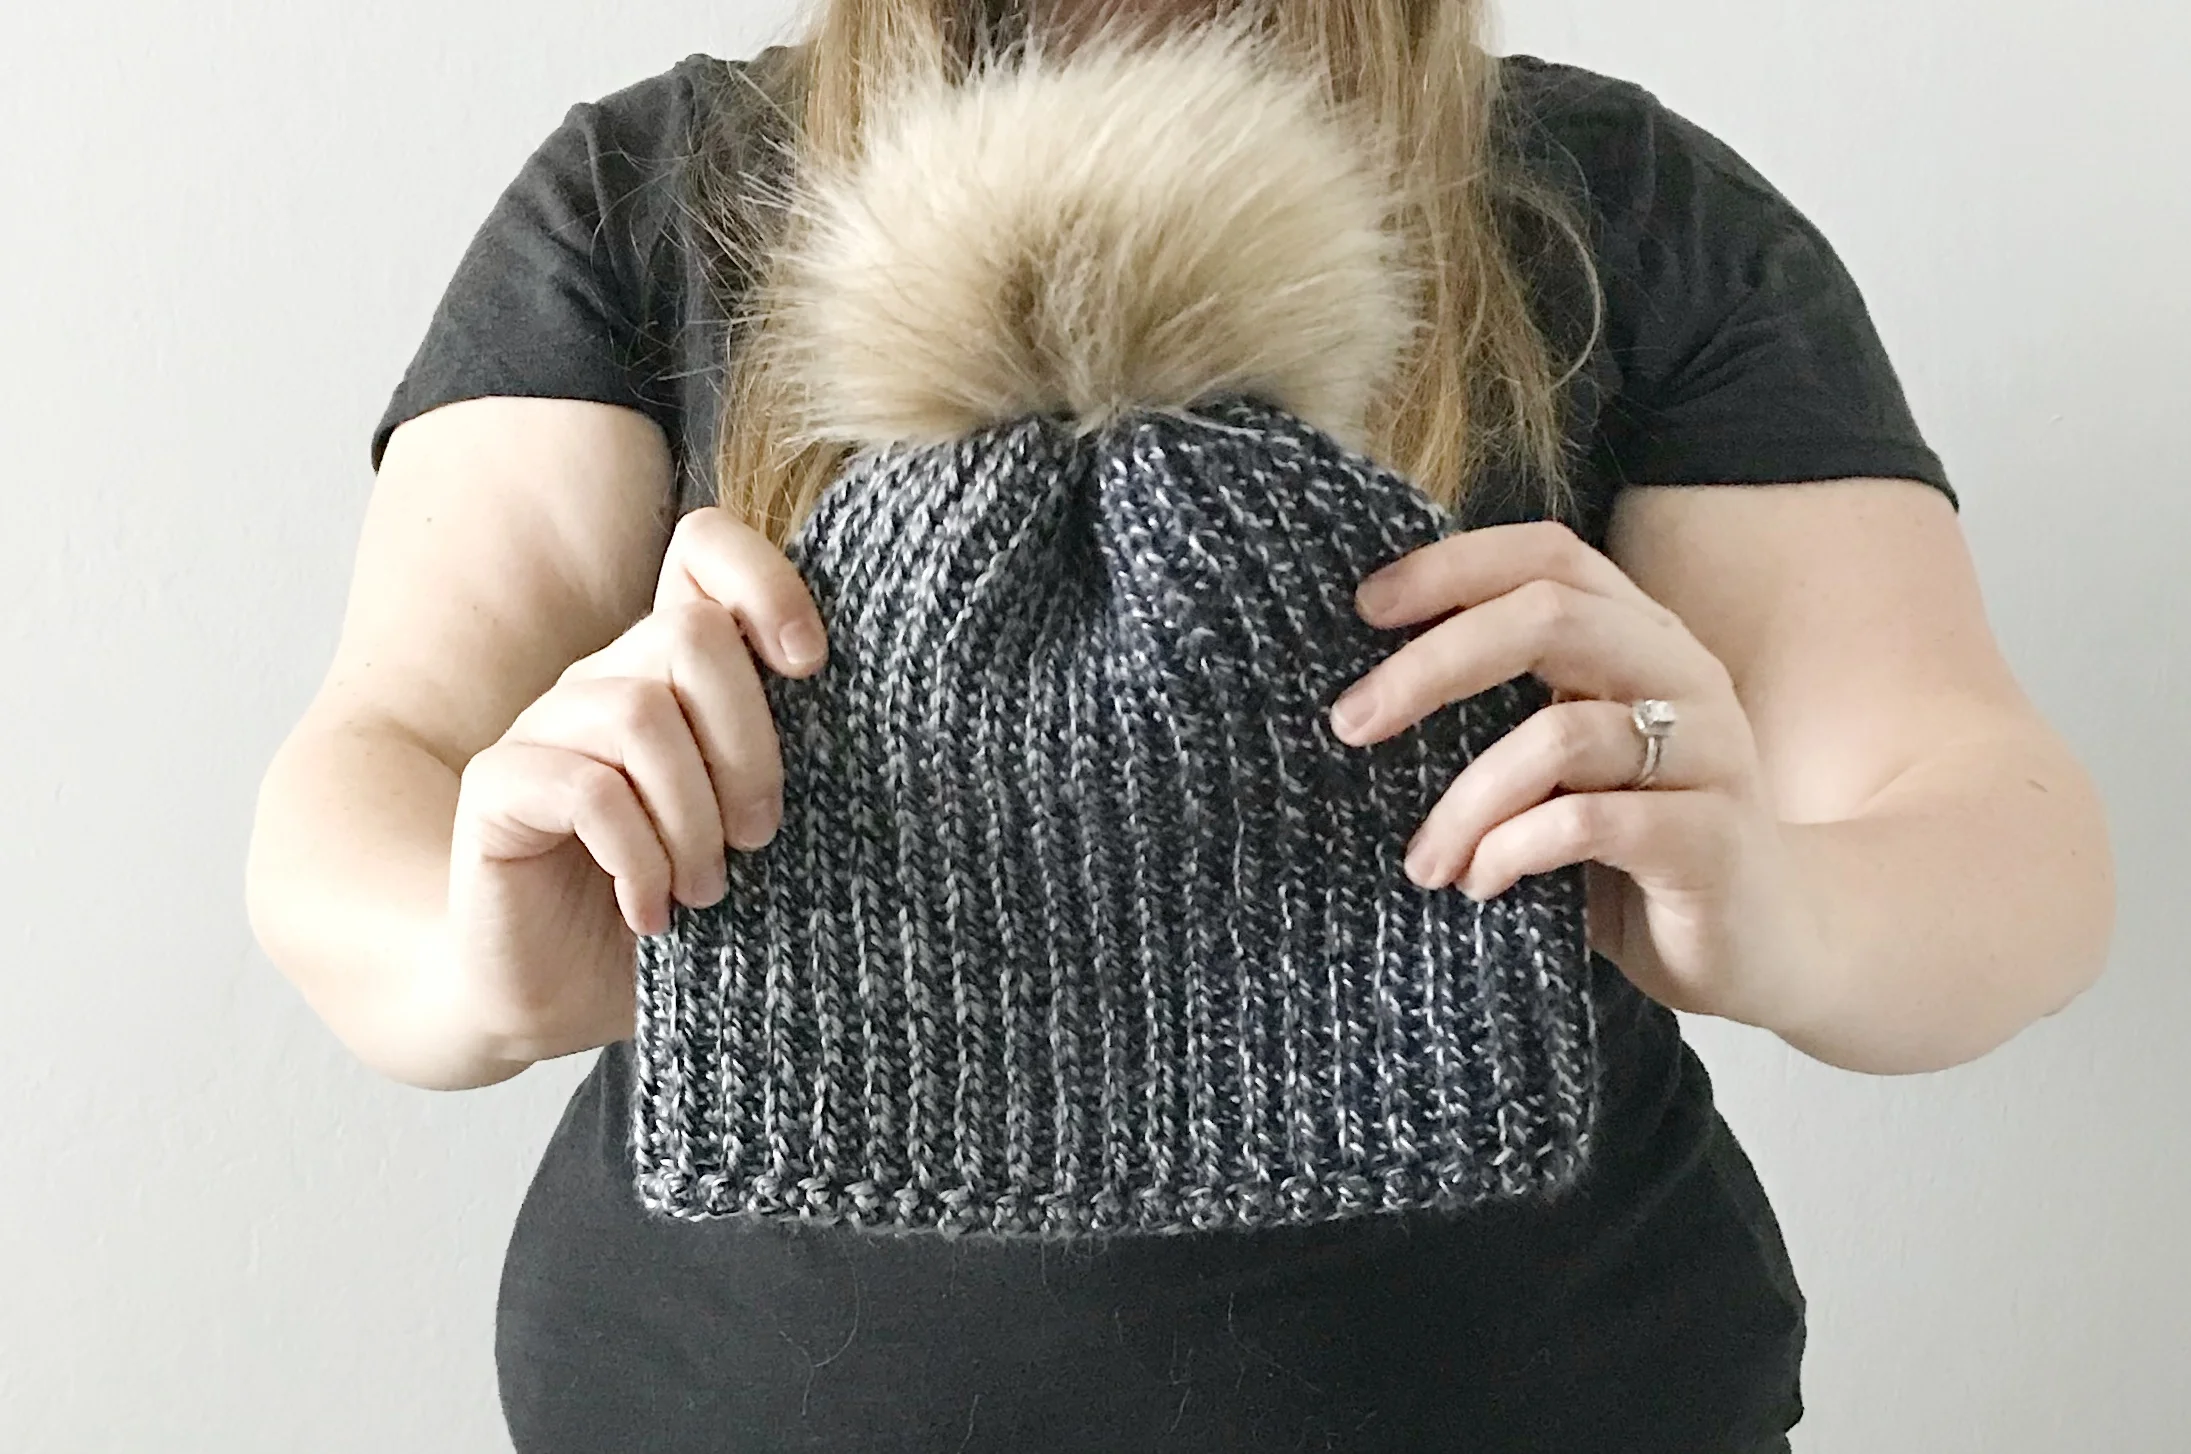
During my time in Ohio I was able to make a child sized Briar Beanie and had some fun taking pictures of Emerson, my nephew Bryson and my sister in it. Yes, my sister has a small head. I used Lion Brand's Vanna's Choice in Silver Heather. The Vanna's Choice seems a bit thicker than the Caron Simply Soft even though they are the same weight category. I love it in the silver heather color.
I hope you love the Briar Beanie as much as I do. As always you a free to sell your finished items. Just make sure to give credit to meghanmakesdo for the pattern. Do not copy, publish or redistribute the pattern or pictures in any way.
I would love to see what you make! Tag me on social media @meghanmakesdo or use #meghanmakesdo so I can see your work!
Enjoy!
-Meghan







![IMG_8590[1].JPG](https://images.squarespace-cdn.com/content/v1/5522f983e4b0b2e878096910/1516333776449-GNCIS3MTC68UOFP1BPDX/IMG_8590%5B1%5D.JPG)
![IMG_8589[1].JPG](https://images.squarespace-cdn.com/content/v1/5522f983e4b0b2e878096910/1516333818781-78VHC63QVCNFONOJJ6L6/IMG_8589%5B1%5D.JPG)
![IMG_8588[1].JPG](https://images.squarespace-cdn.com/content/v1/5522f983e4b0b2e878096910/1516333843093-AFE32QU4BFWU9MA4UMIW/IMG_8588%5B1%5D.JPG)
![IMG_8591[1].JPG](https://images.squarespace-cdn.com/content/v1/5522f983e4b0b2e878096910/1516333948349-8SBVIUGL6VGYWECJVU0C/IMG_8591%5B1%5D.JPG)
