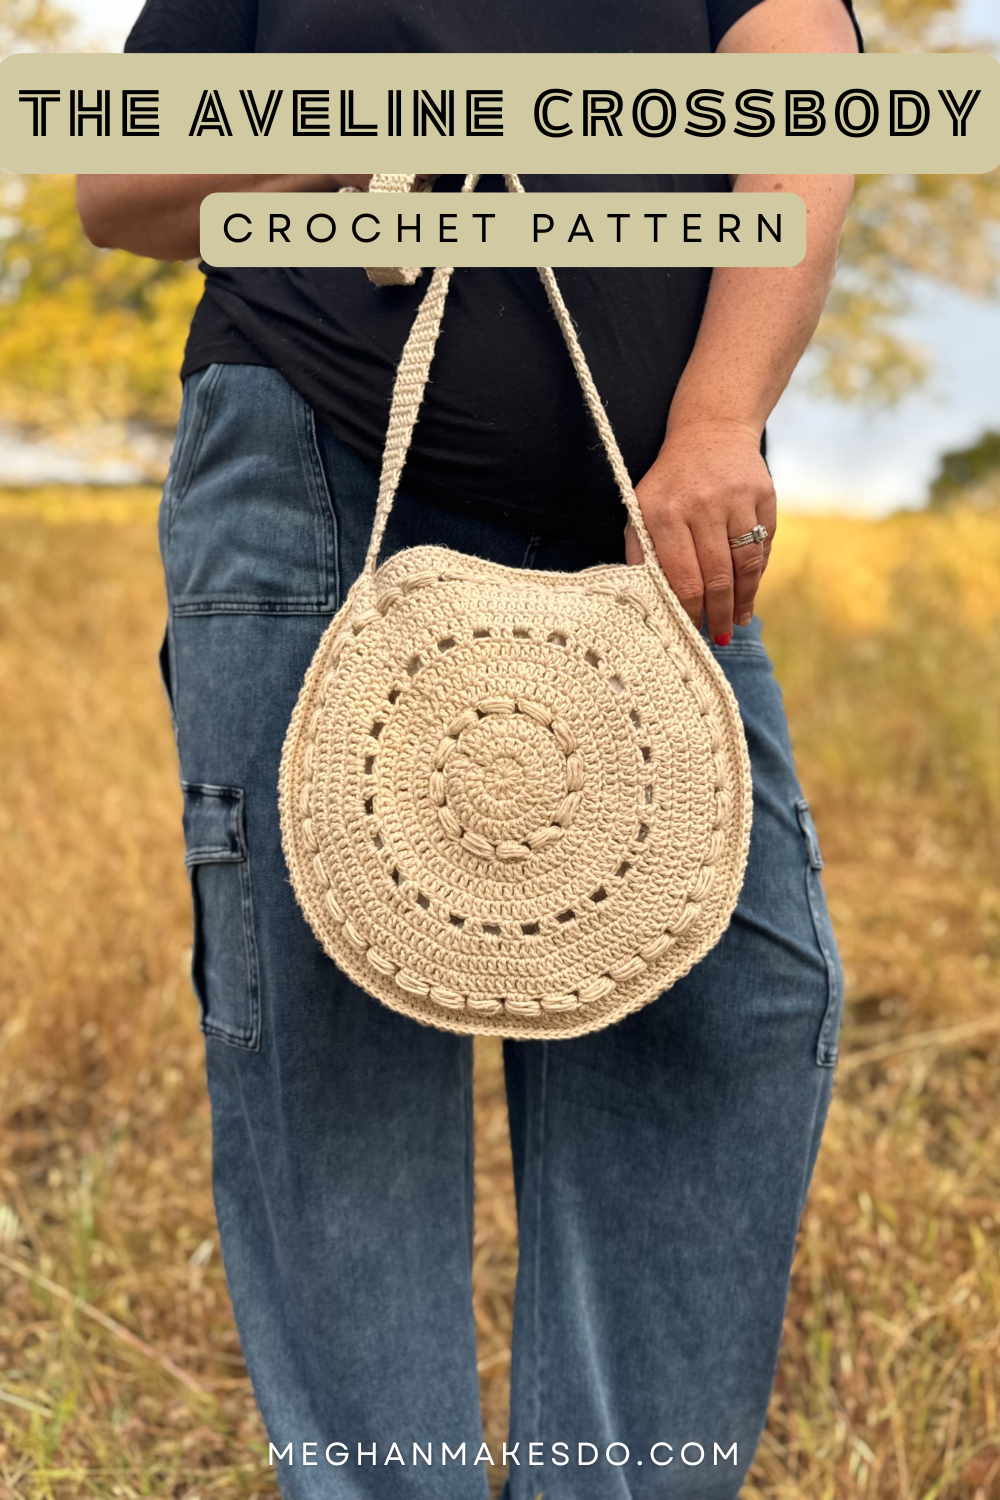
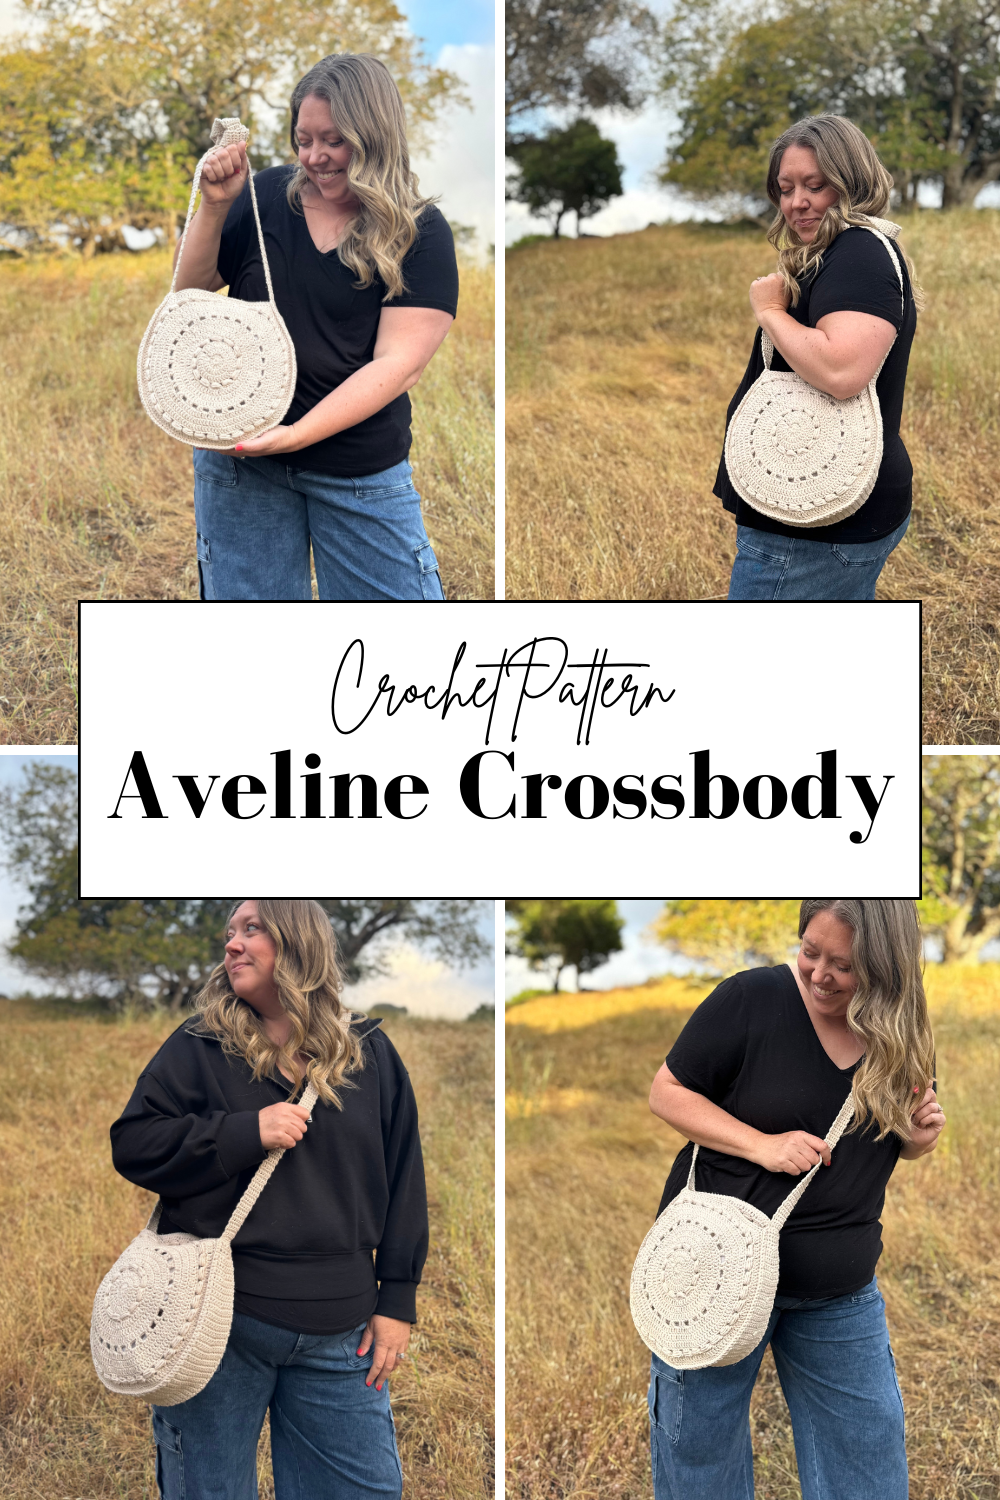
The Aveline Crossbody- Free Crochet Pattern
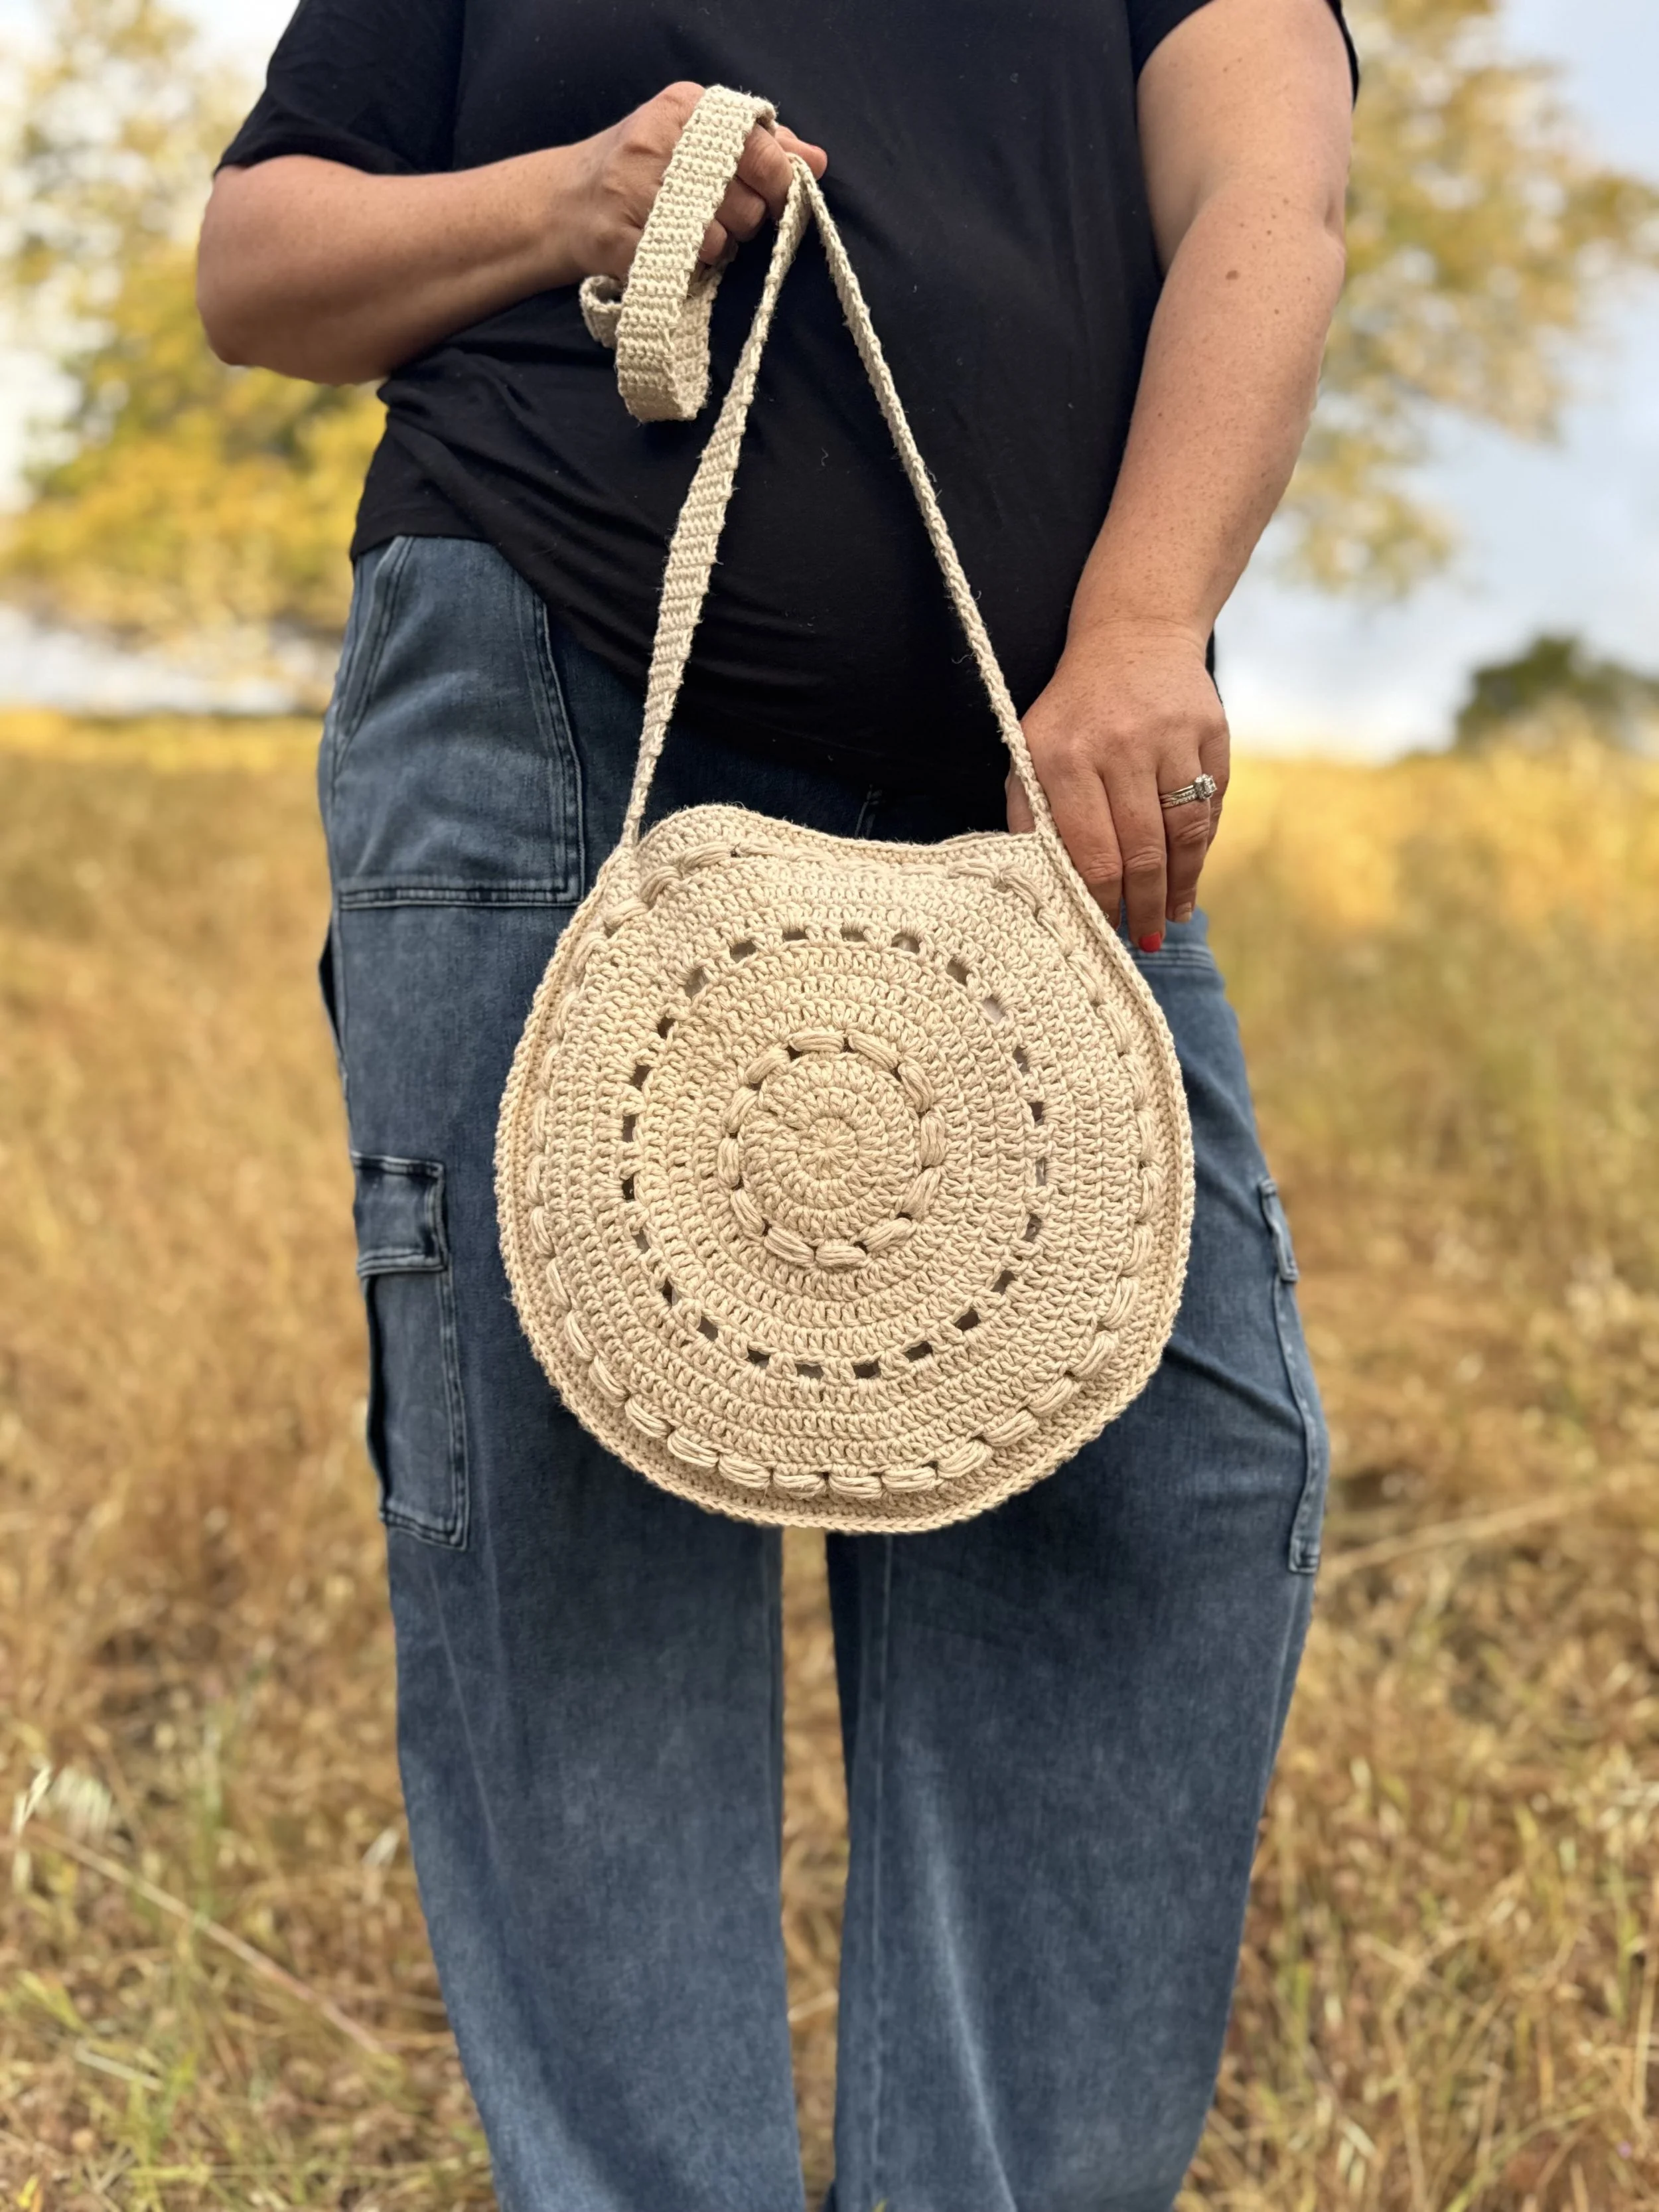
The Aveline Crossbody is a stunning, textured crochet pattern made using Lion Brand Cotton Hemp. It features a beautiful mix of bead stitch texture, solid double crochet rows, and airy filet crochet rounds for just the right balance of structure and detail. Perfect for adding a handmade touch to your summer accessories. It works up quickly and includes a video tutorial to help you with each step along the way. Keep scrolling for the free version or grab a digital PDF in my shop.
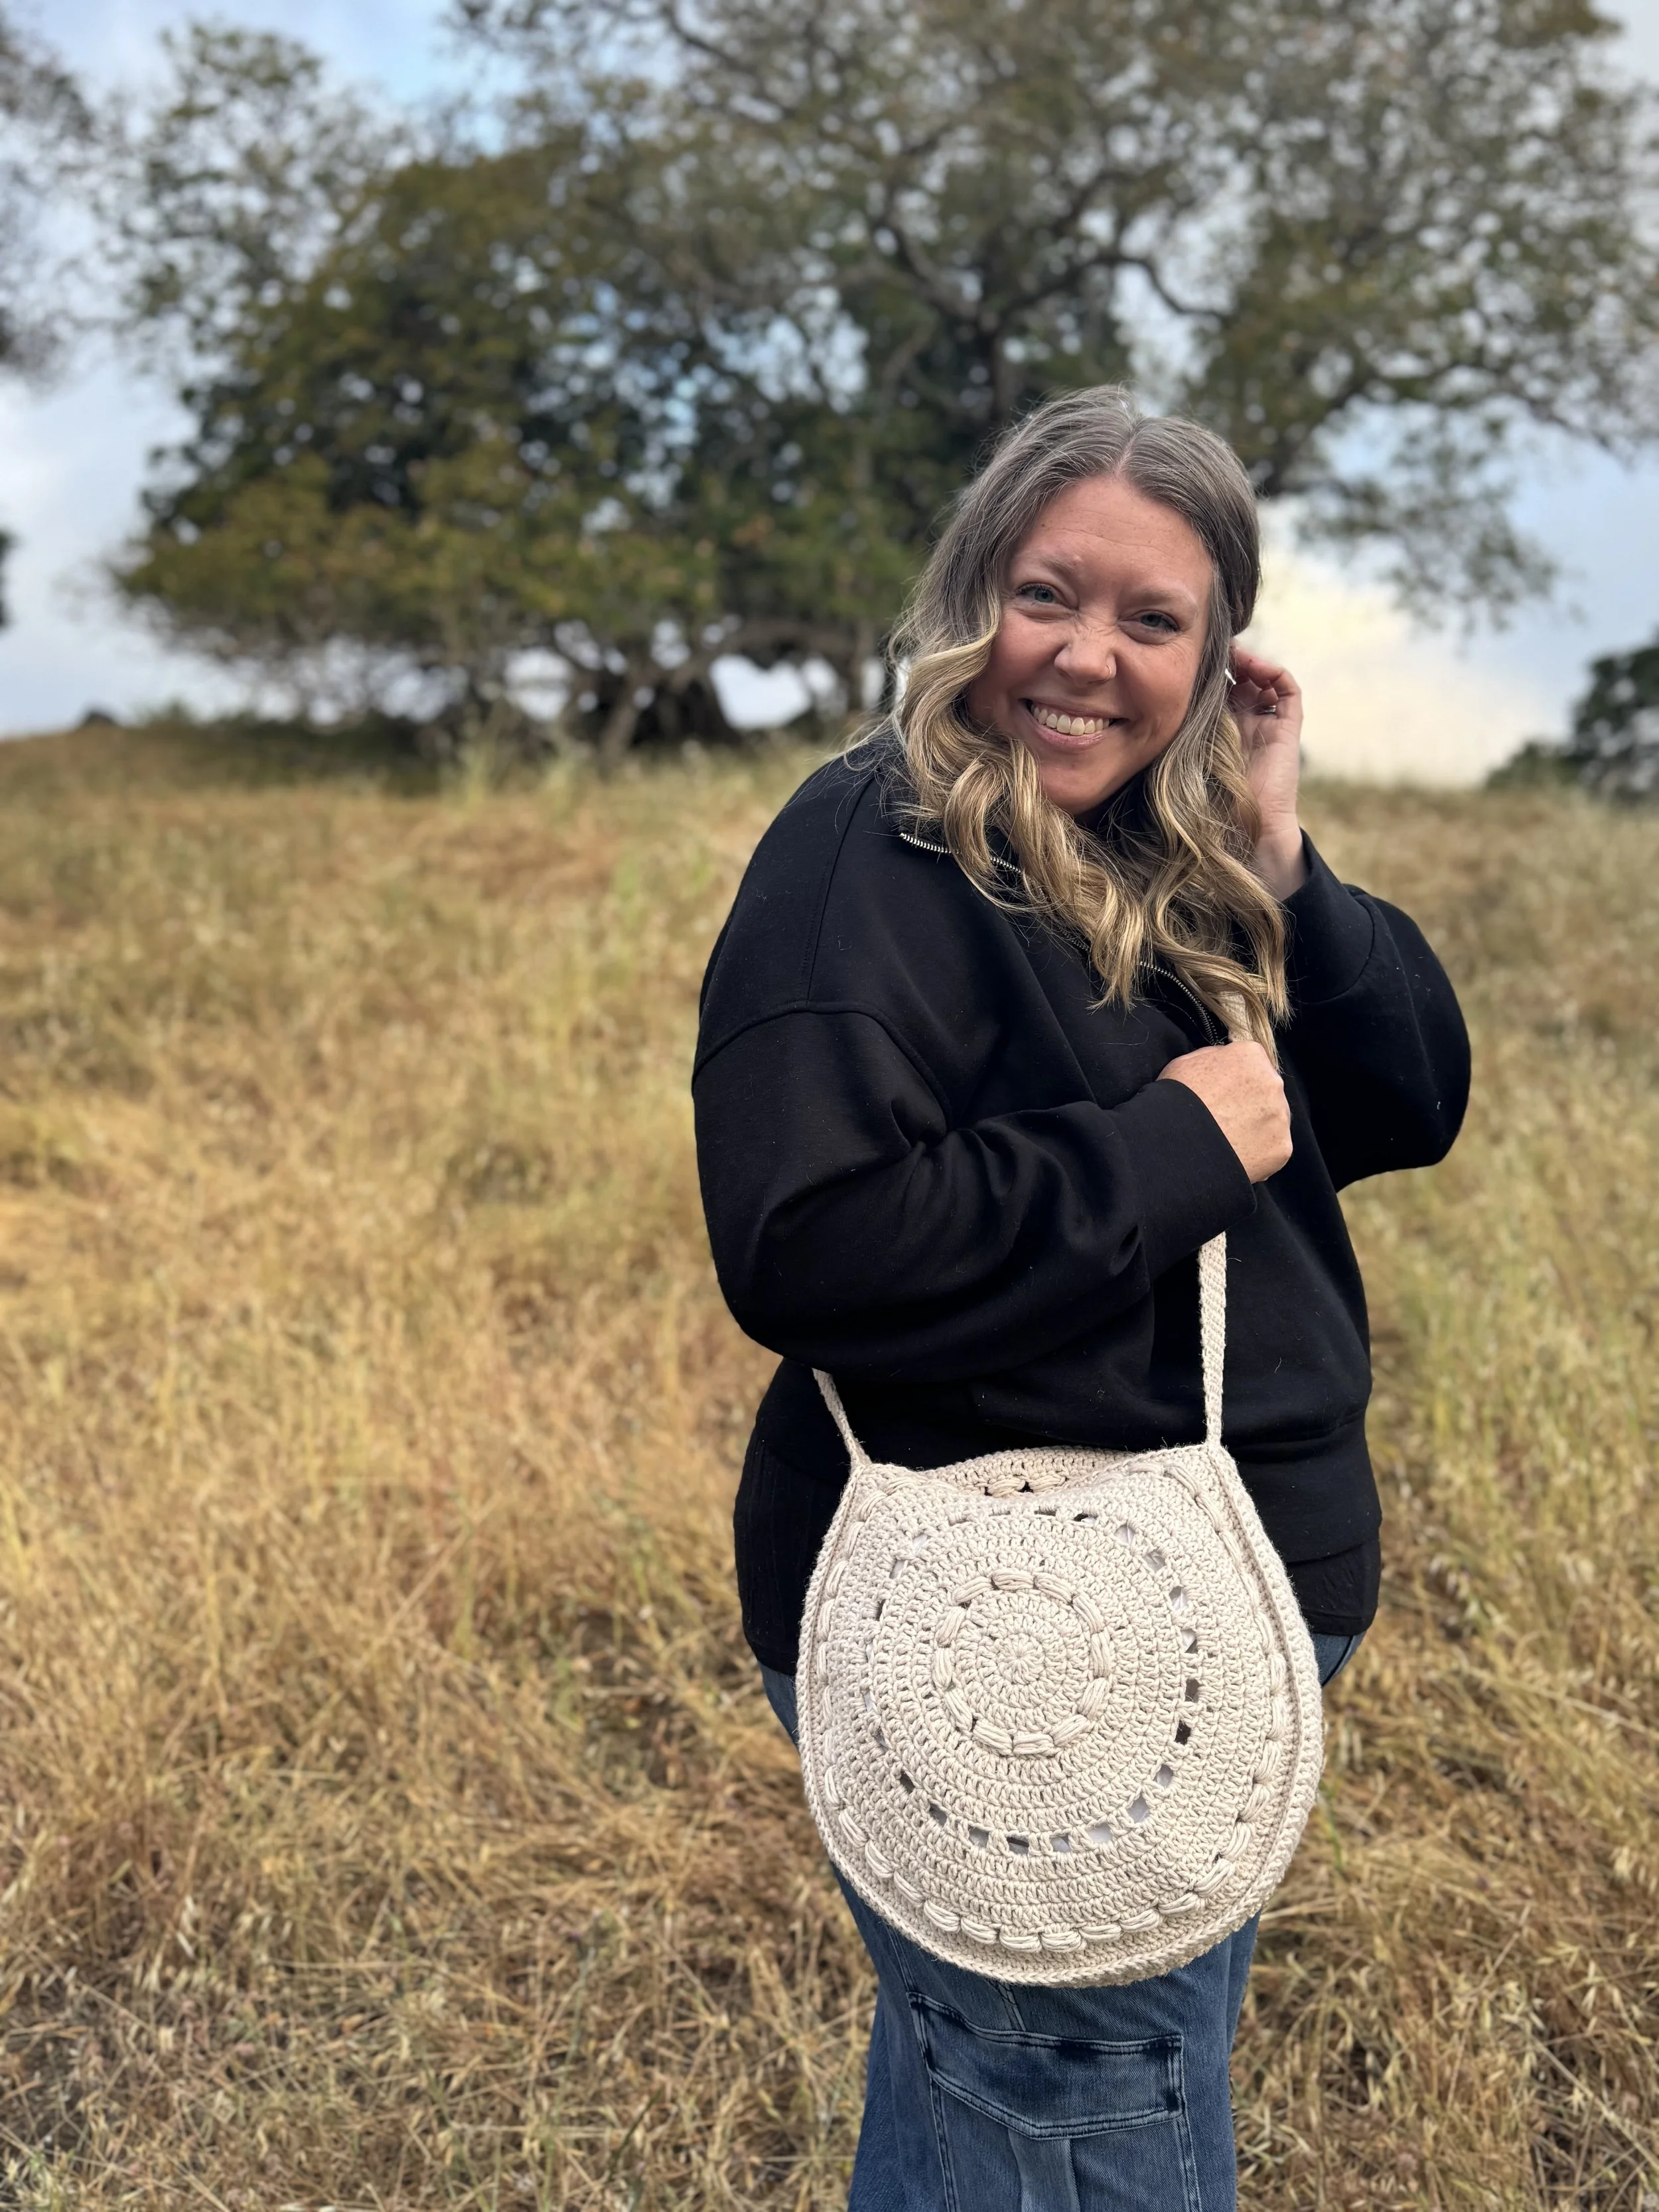
I’m thrilled to be bringing you a brand new bag pattern today. This one has been in my head ever since I made my Aveline Rug last year. I feel in love with this combination of stitches and knew I had to use it again for something else.
I had also been itching to try my hand at making a circle bag. Let me tell you, it was a lot more challenging than I anticipated. I probably frogged and remade the gusset at least 3 times. I also tried at least four different ways of attaching the gusset to the circles until I was able to get it just right. In the end it was all worth it though because I’m obsessed with this pretty little bag.
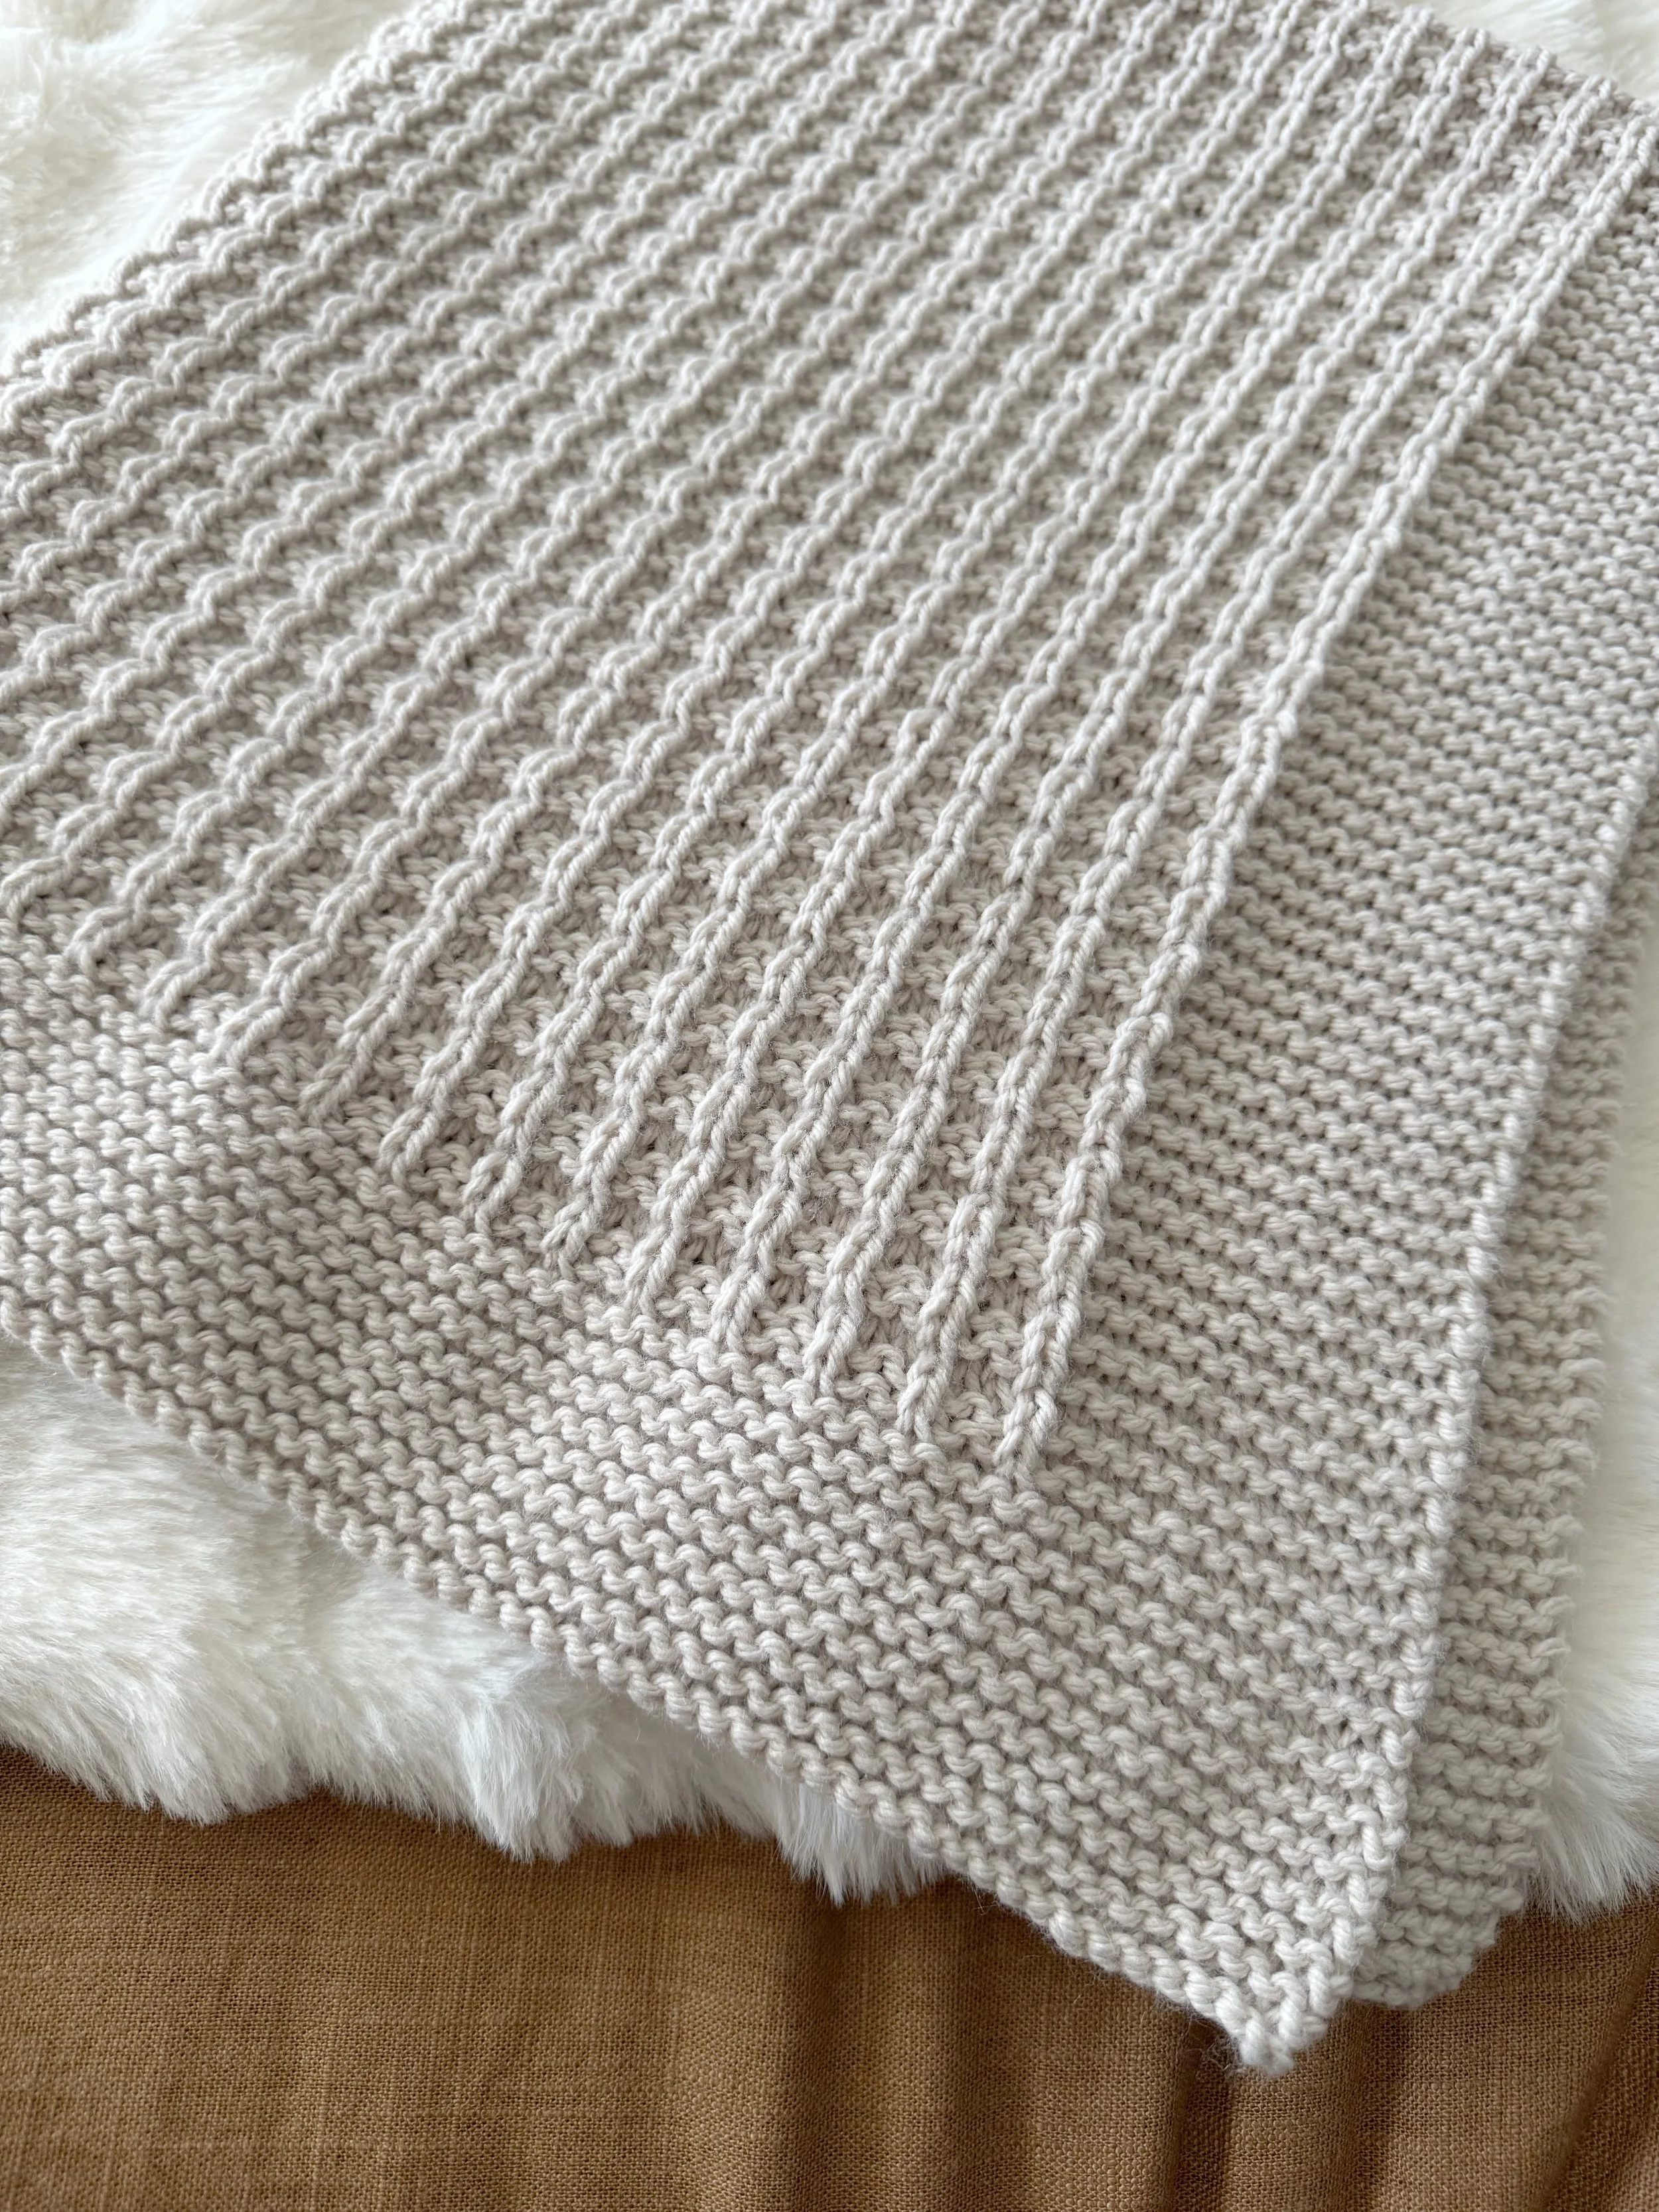
This was also my first time using Lion Brand’s Cotton Hemp. It was. a lot softer than I expected. It’s a splitty yarn so do make sure to slow down your stitches when working so you don’t accidentally miss a strand. It comes in some really beautiful colors too so you can pick one that suits you best.
I’ve included a full video tutorial as well so you’ll have guidance throughout the whole process. Make sure to check it out below.
The Aveline Crossbody Crochet Pattern
Materials:
472 yards (3 skeins) of Lion Brand Cotton Hemp worsted weight 70%Cotton/30%Hemp yarn (164yd/100g)in the color Husk
Crochet hook size E(3.5mm)
Crochet hook size G(4mm)
Tapestry needle, scissors, tape measure
locking stitch markers
Notes:
1.The bag is made in 3 pieces, 2 circles and a gusset. The strap is then made directly on the gusset.
2.ch(s) at beginning of rounds/rows do(es) not count as a stitch.
Size:
approx. 12” diameter x 3” depth
Gauge:
1st 4 rounds of pattern = 3” diameter circle
Abbreviations:
Ch(s)- chain(s)
St(s)- stitch(es)
sk- skip
sl st- slip stitch
sc- single crochet
sc3tog- single crochet 3 together
dc- double crochet
inc- increase (make 2 dc in one st)
sp- space
yo-yarn over
RS- right side
WS- wrong side
Video Tutorial:
Before we jump into the pattern, let’s go over some of the special stitches used.
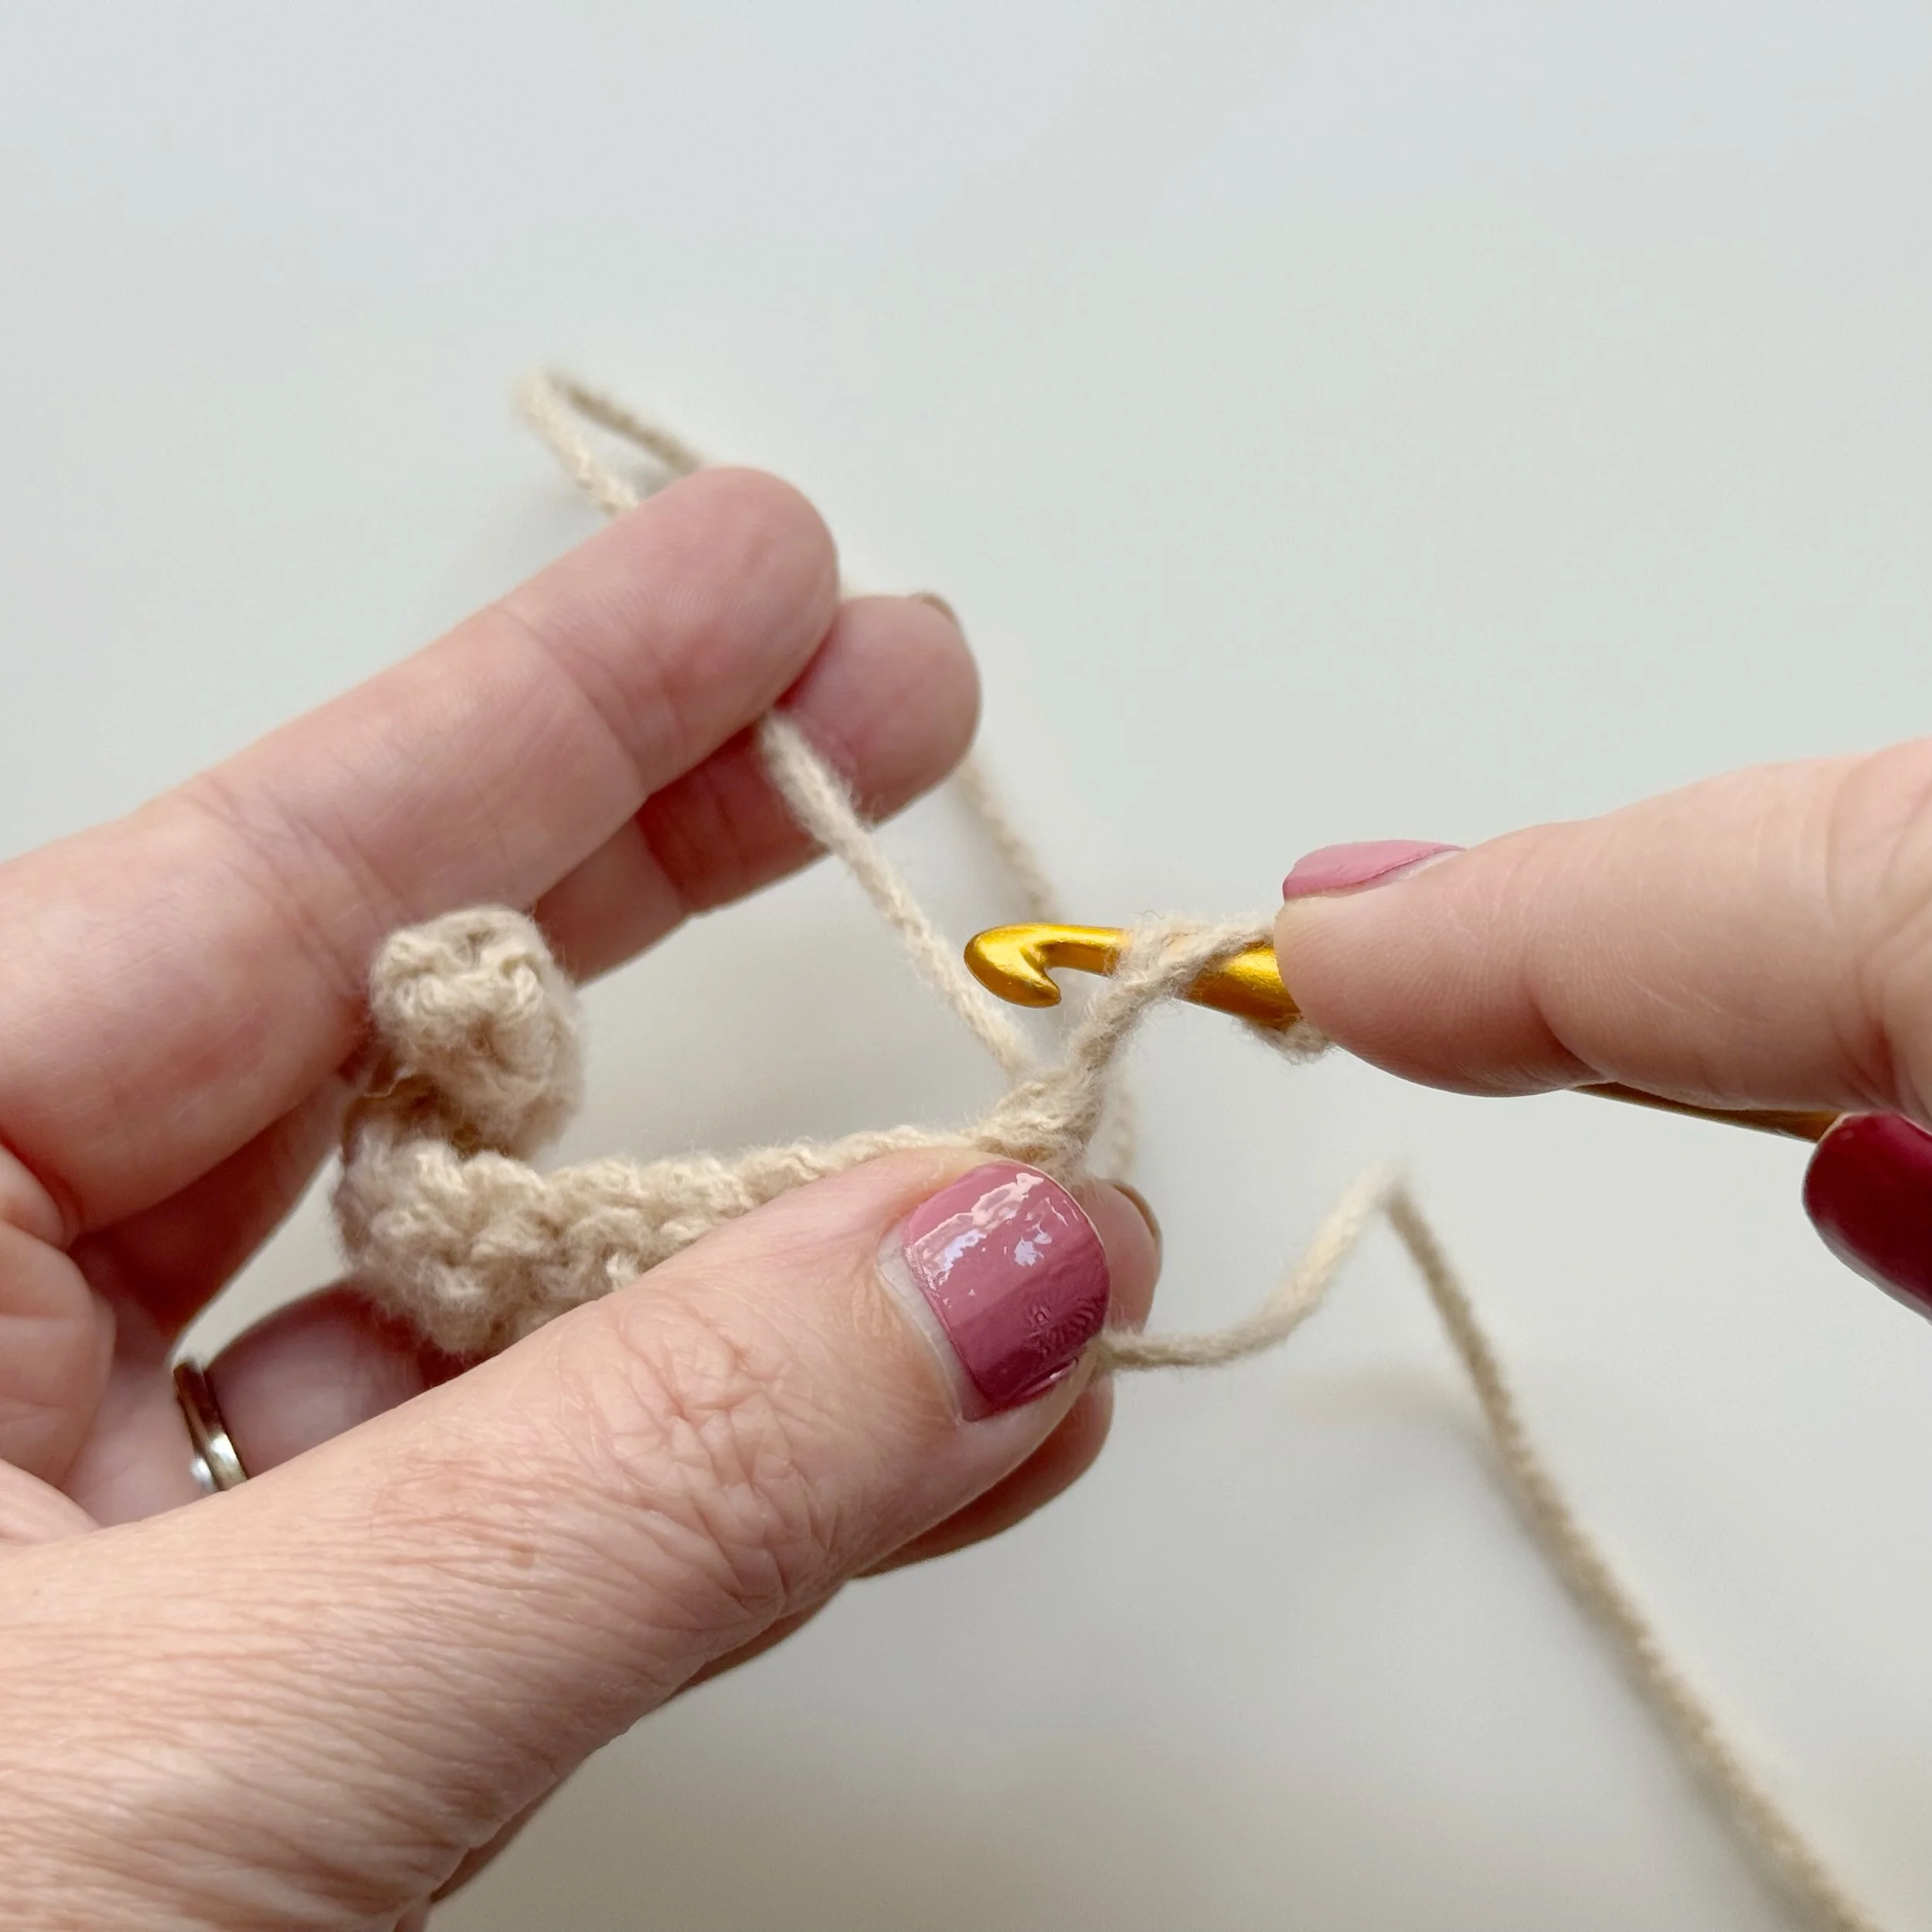
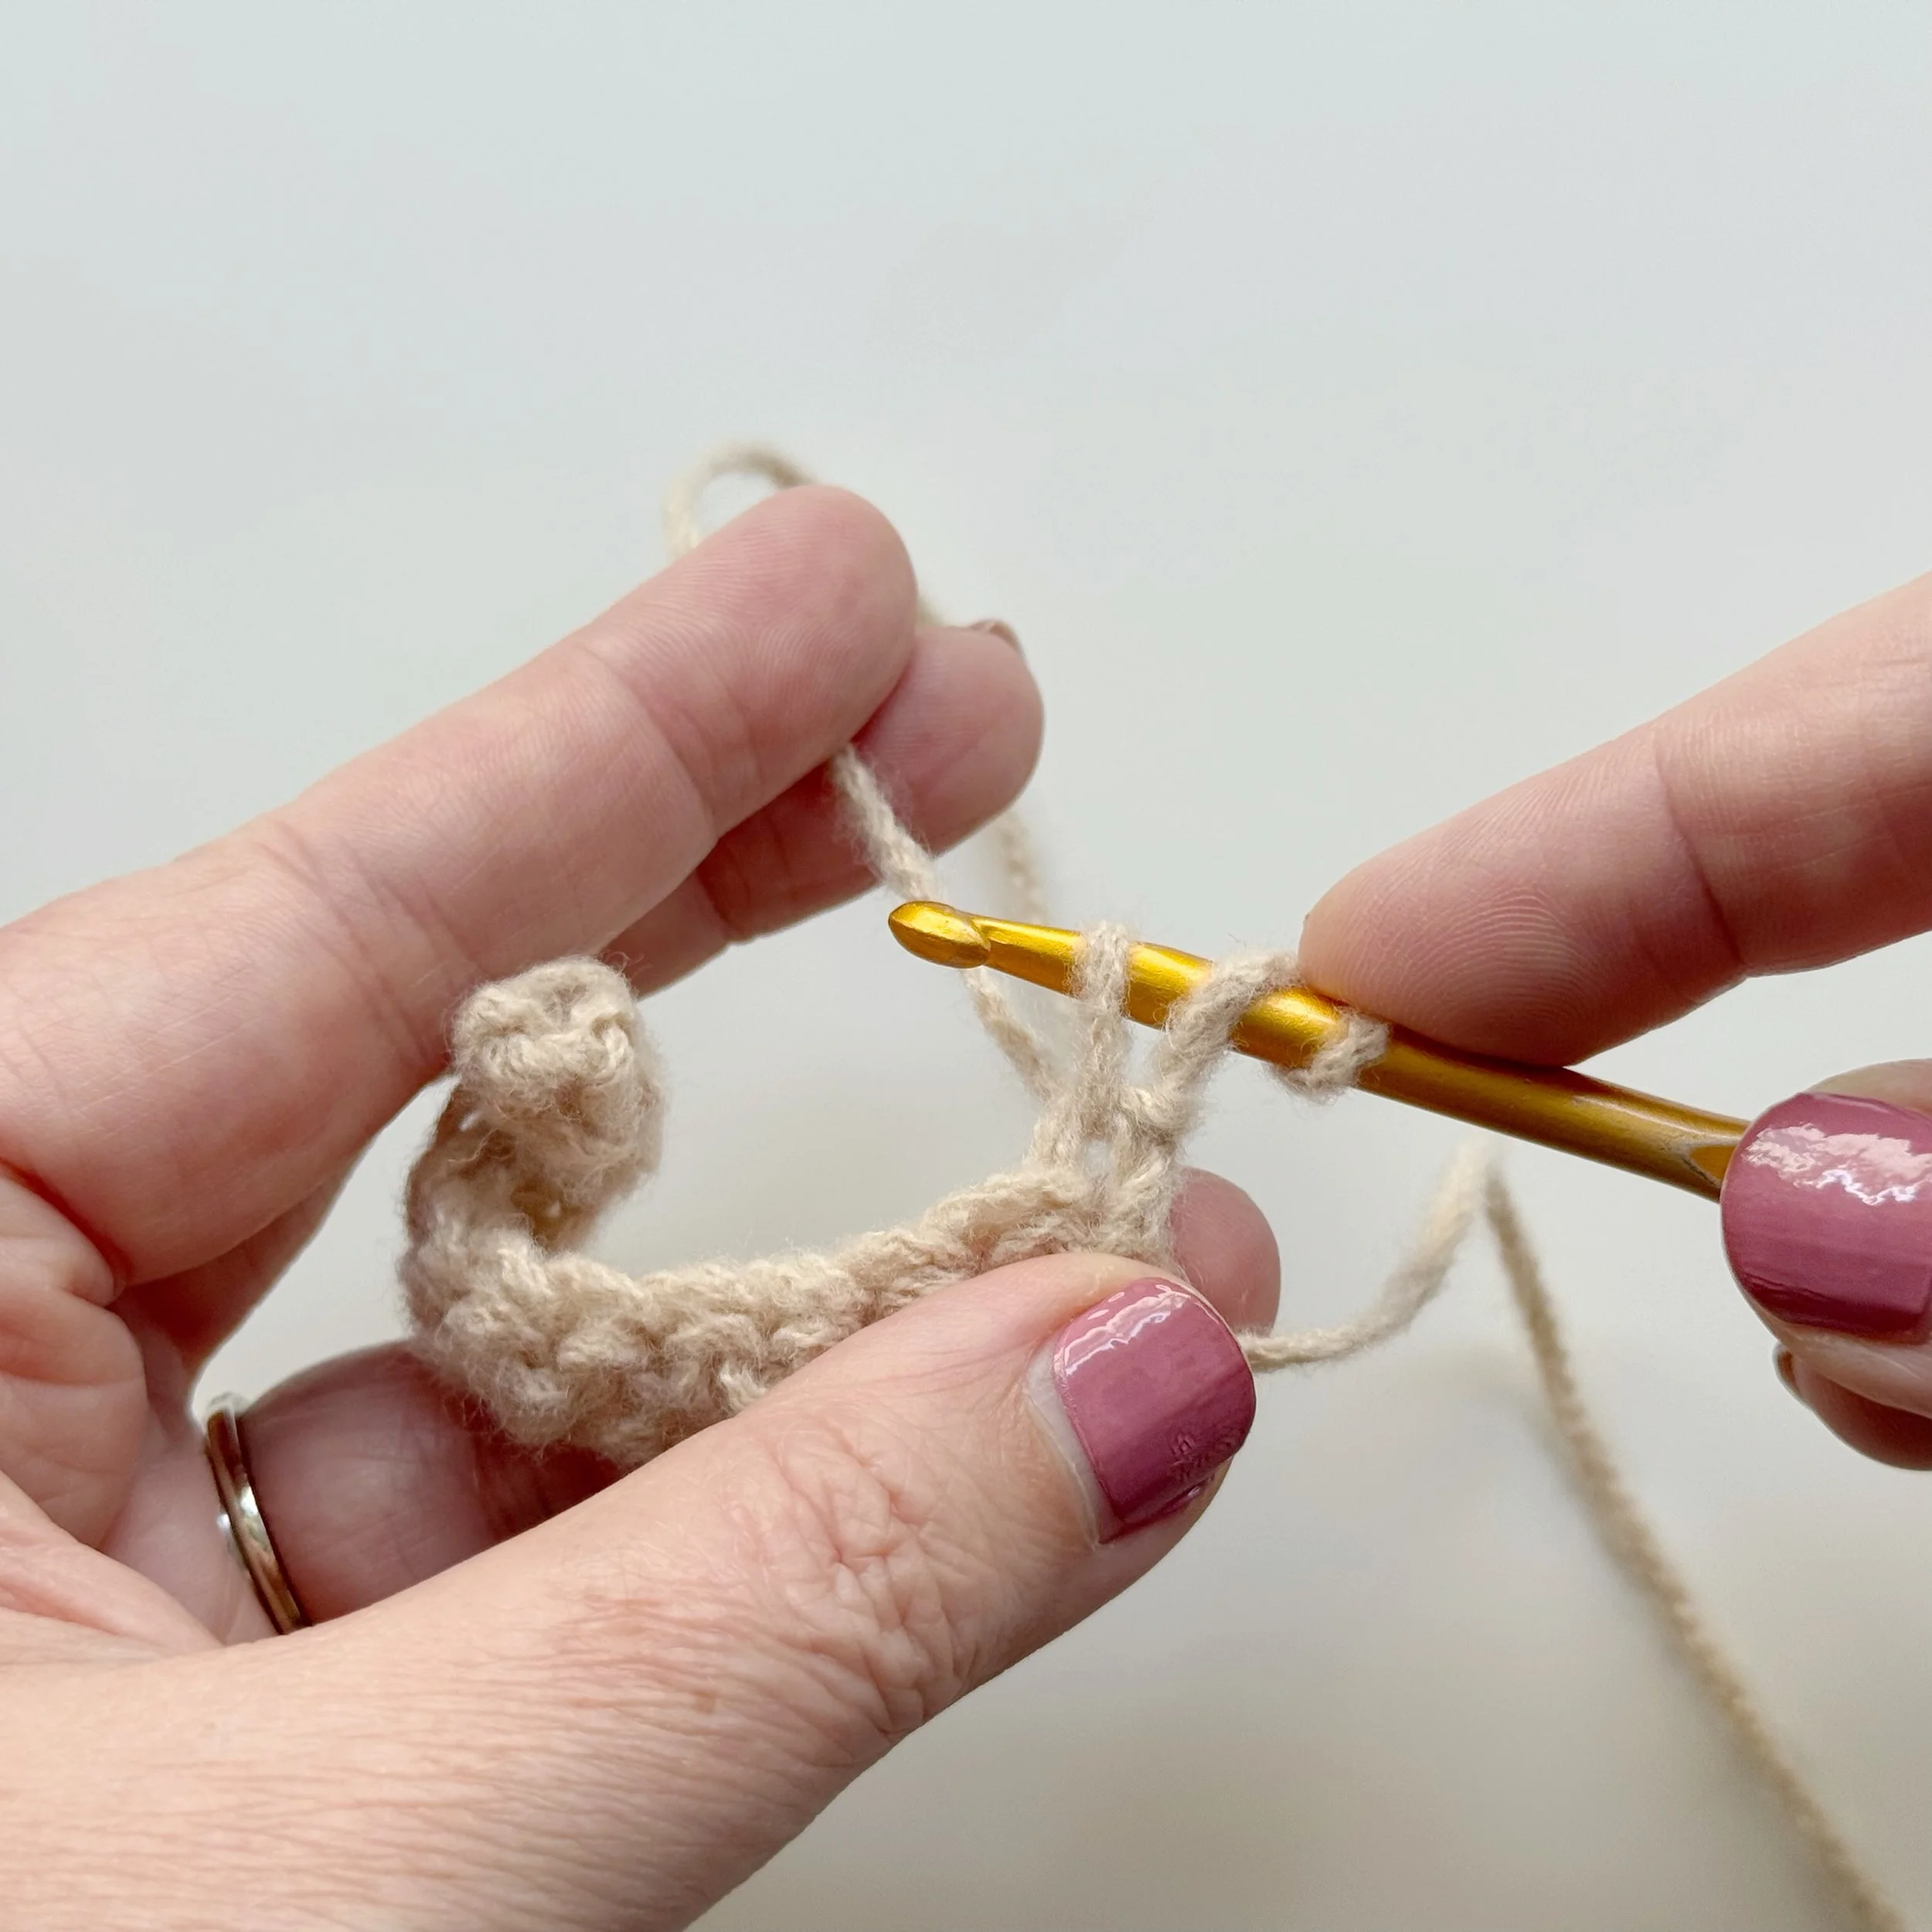
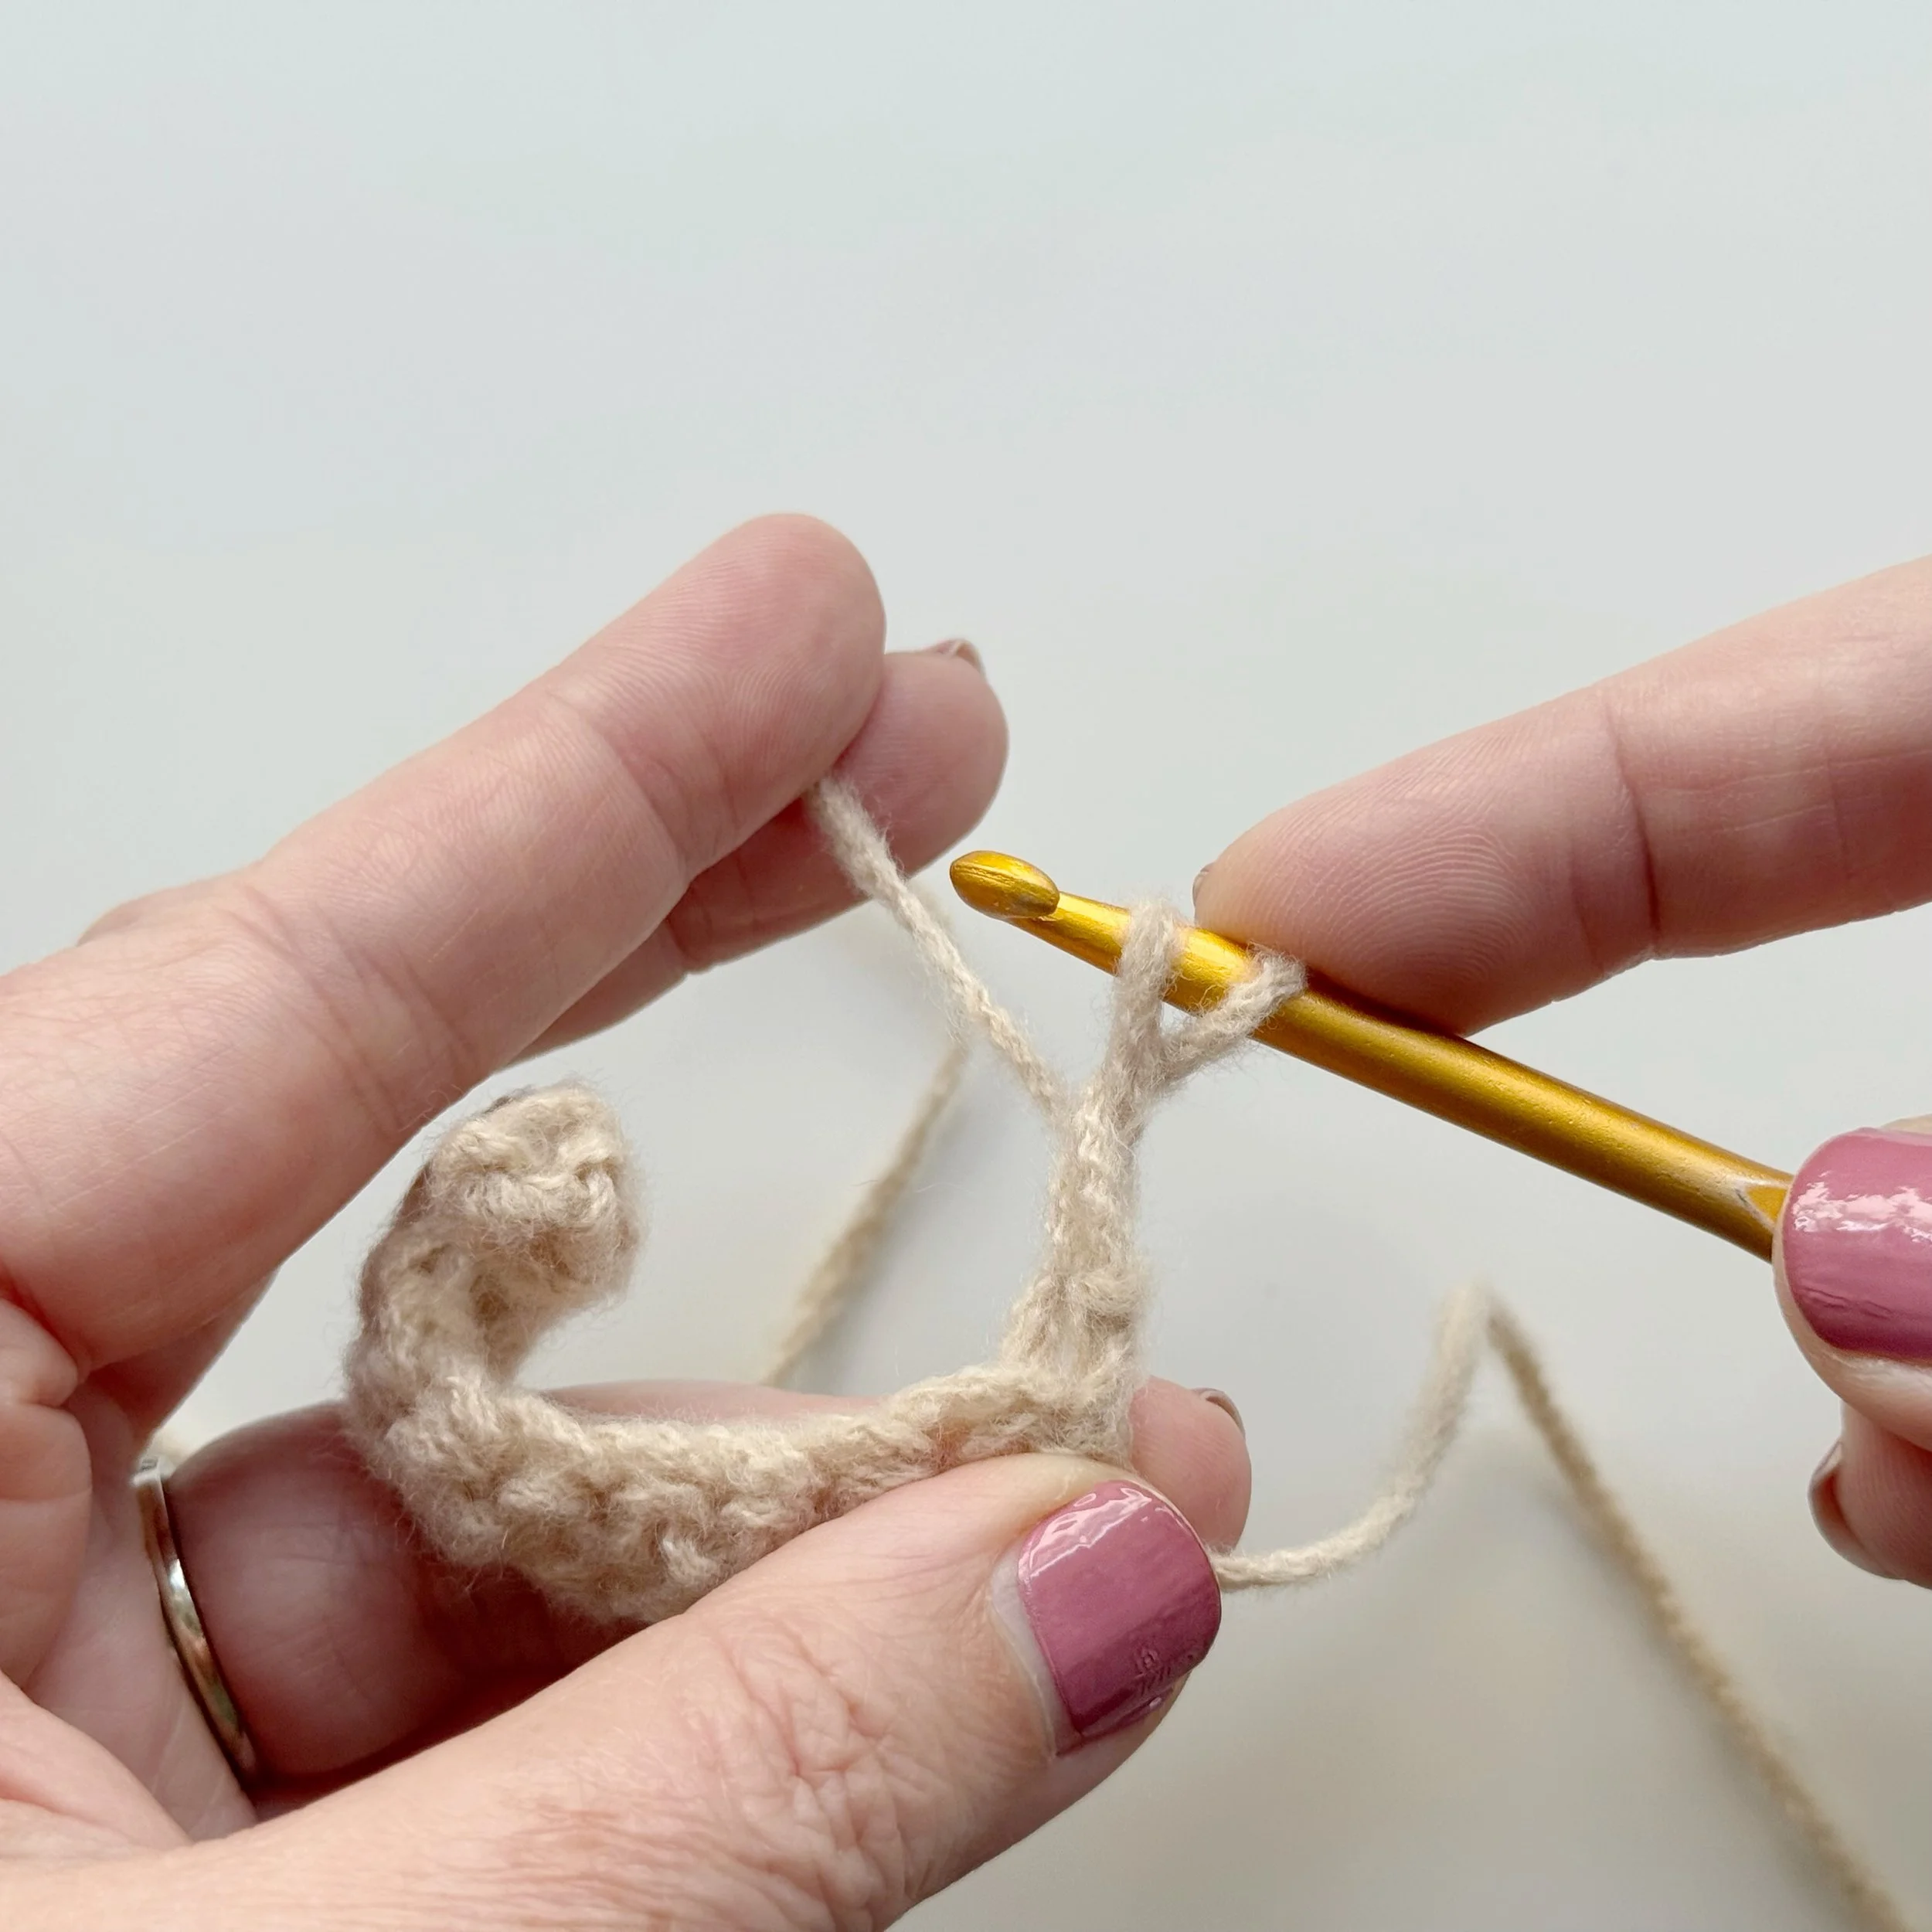
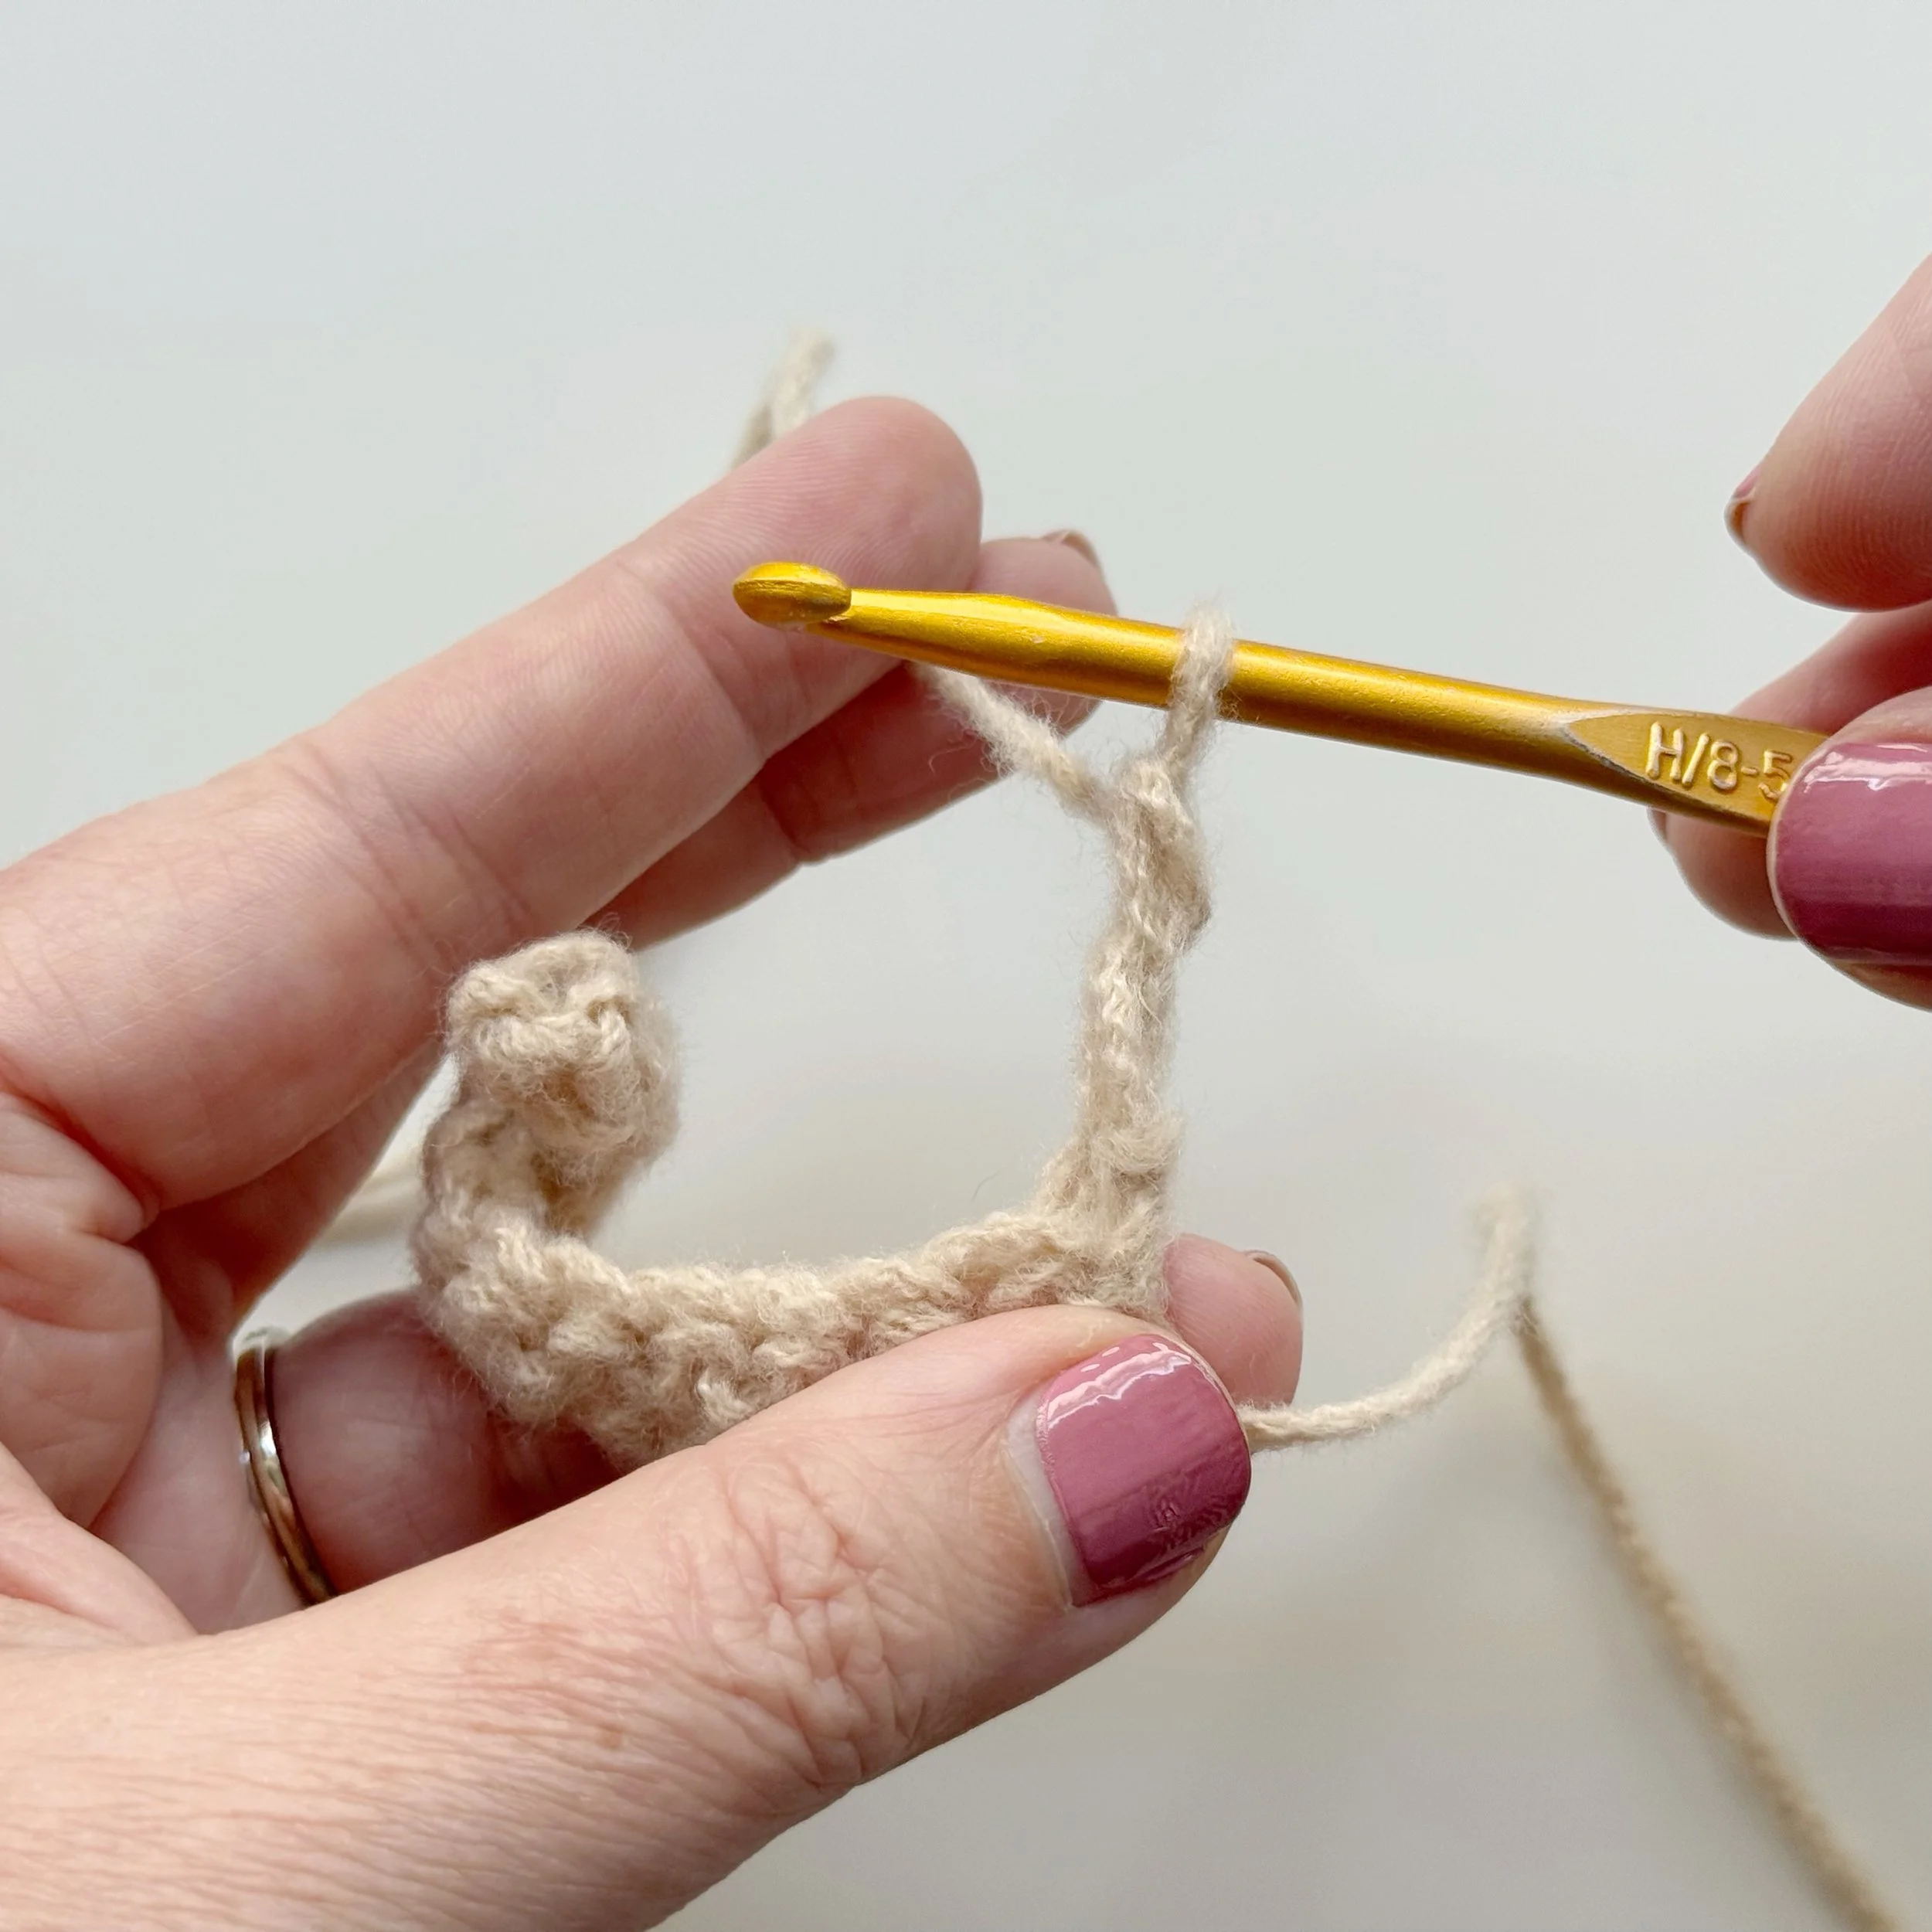
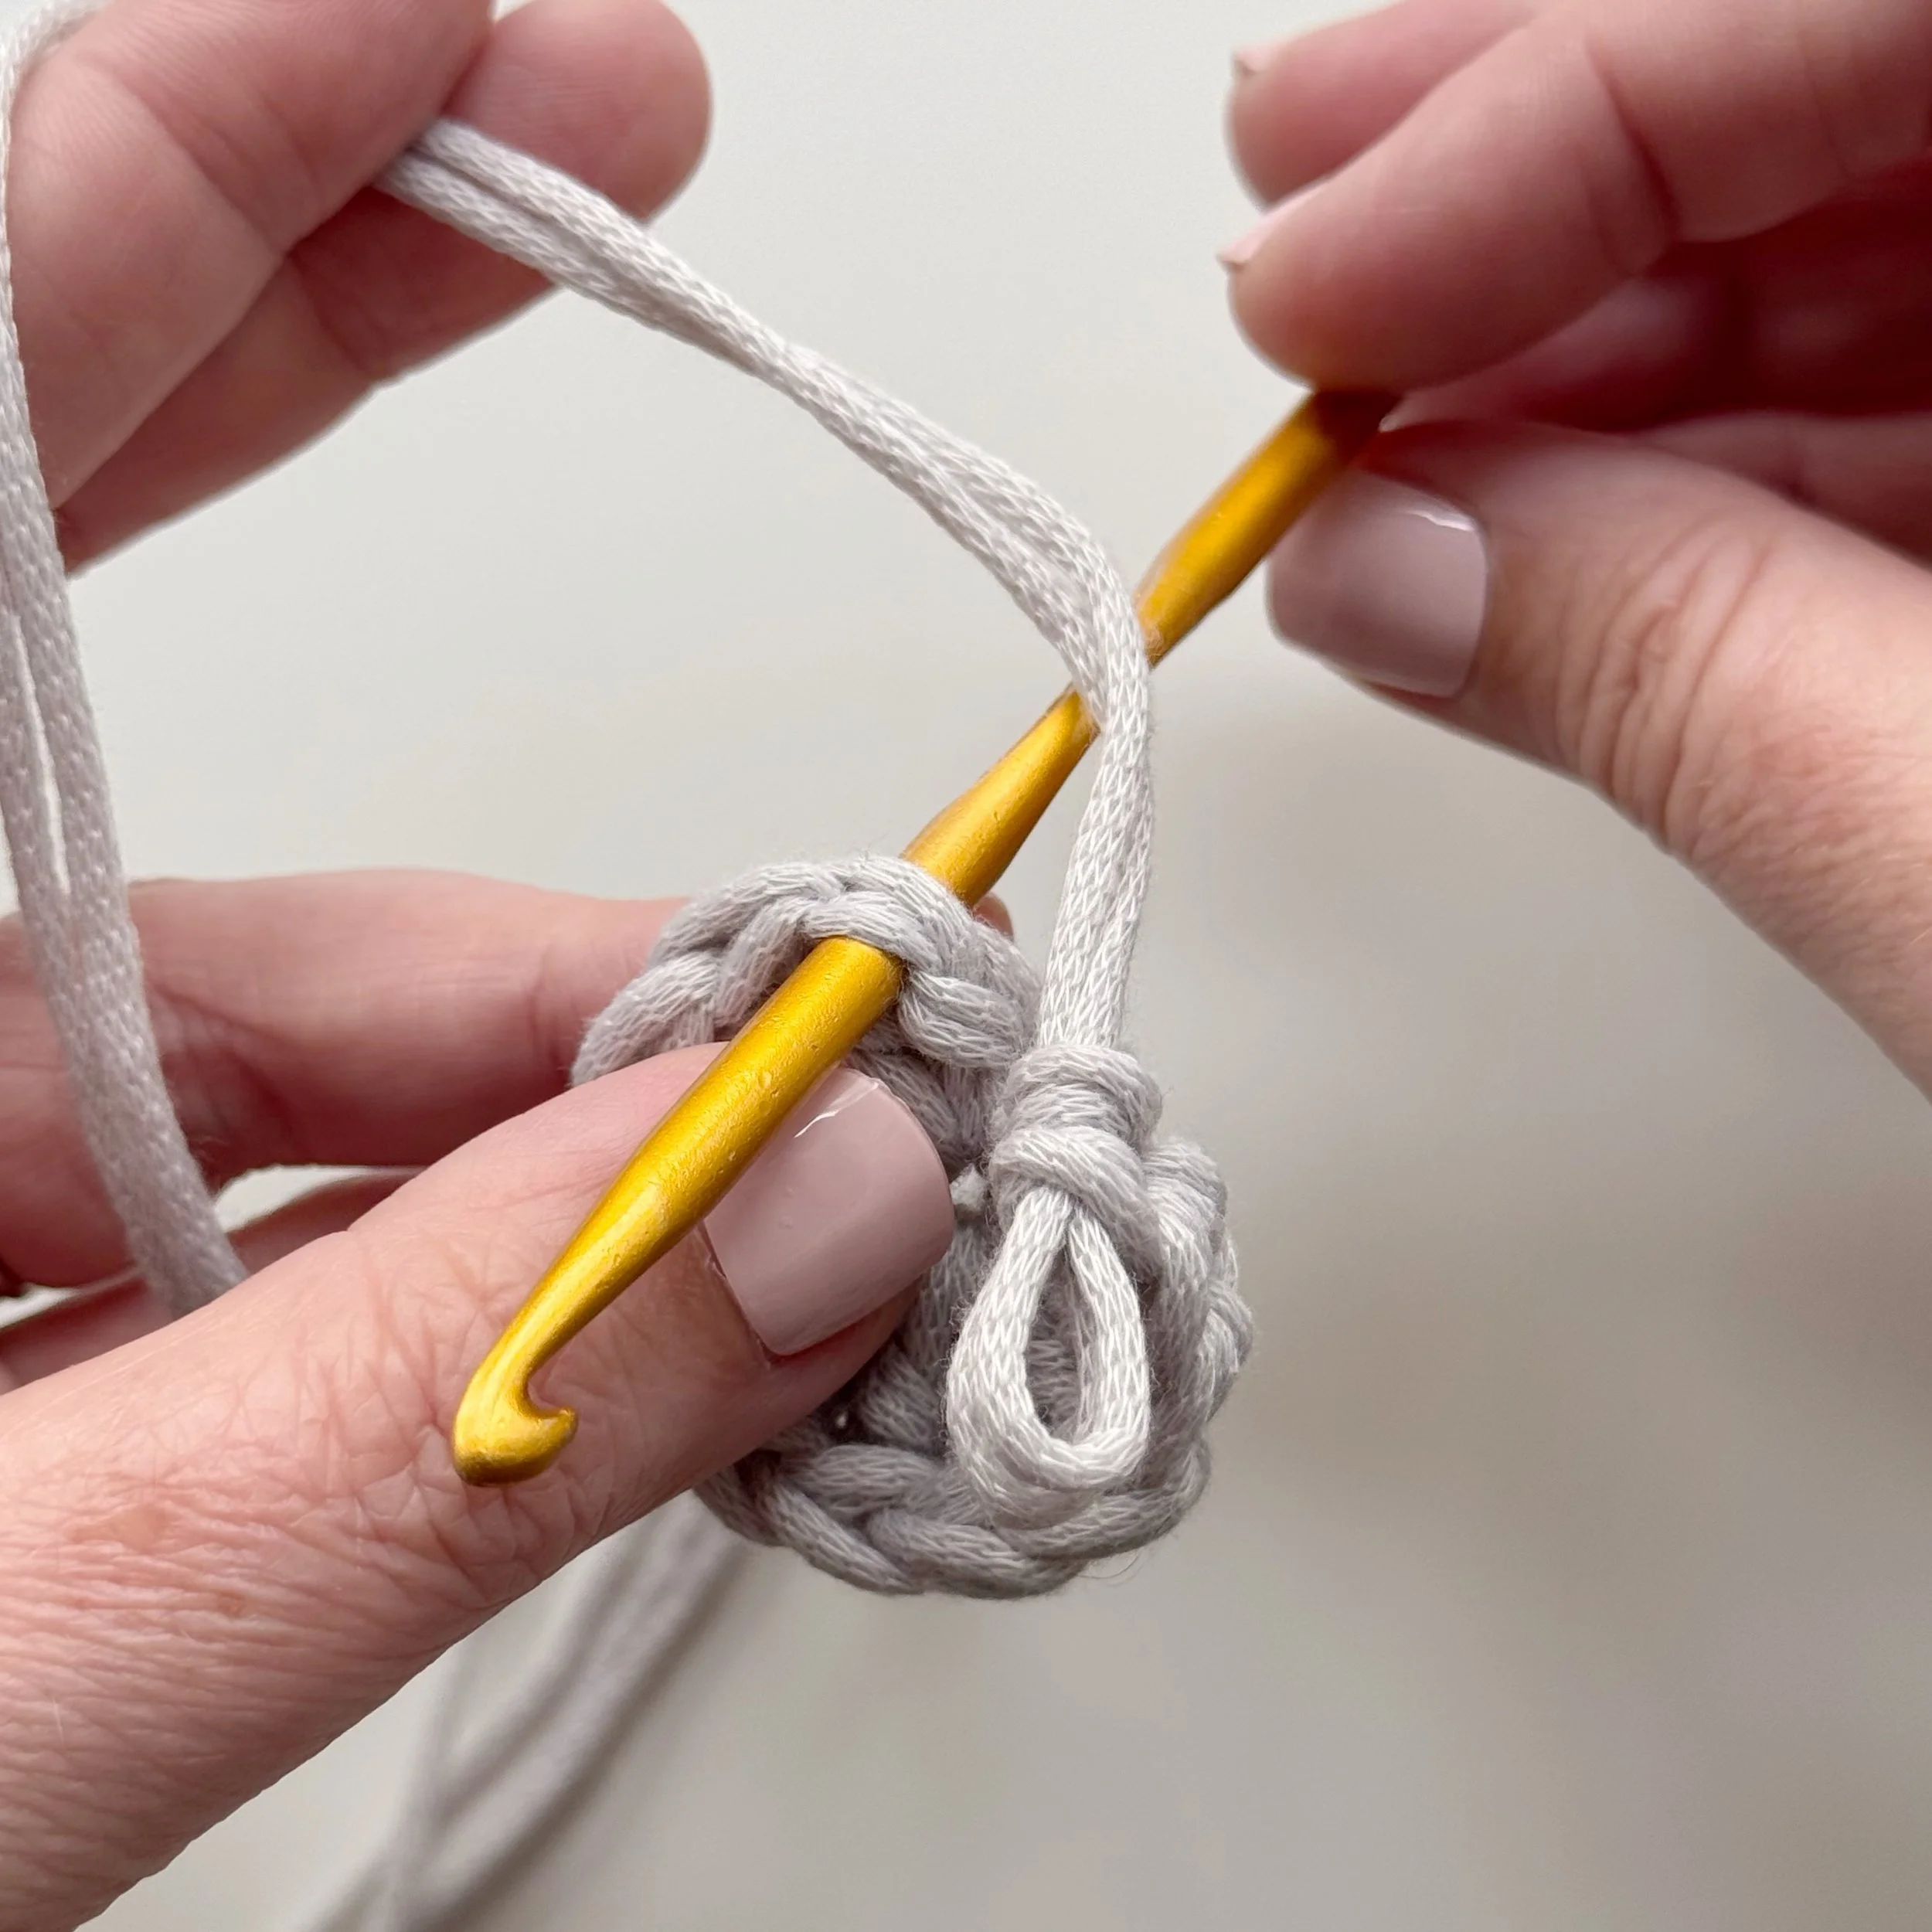
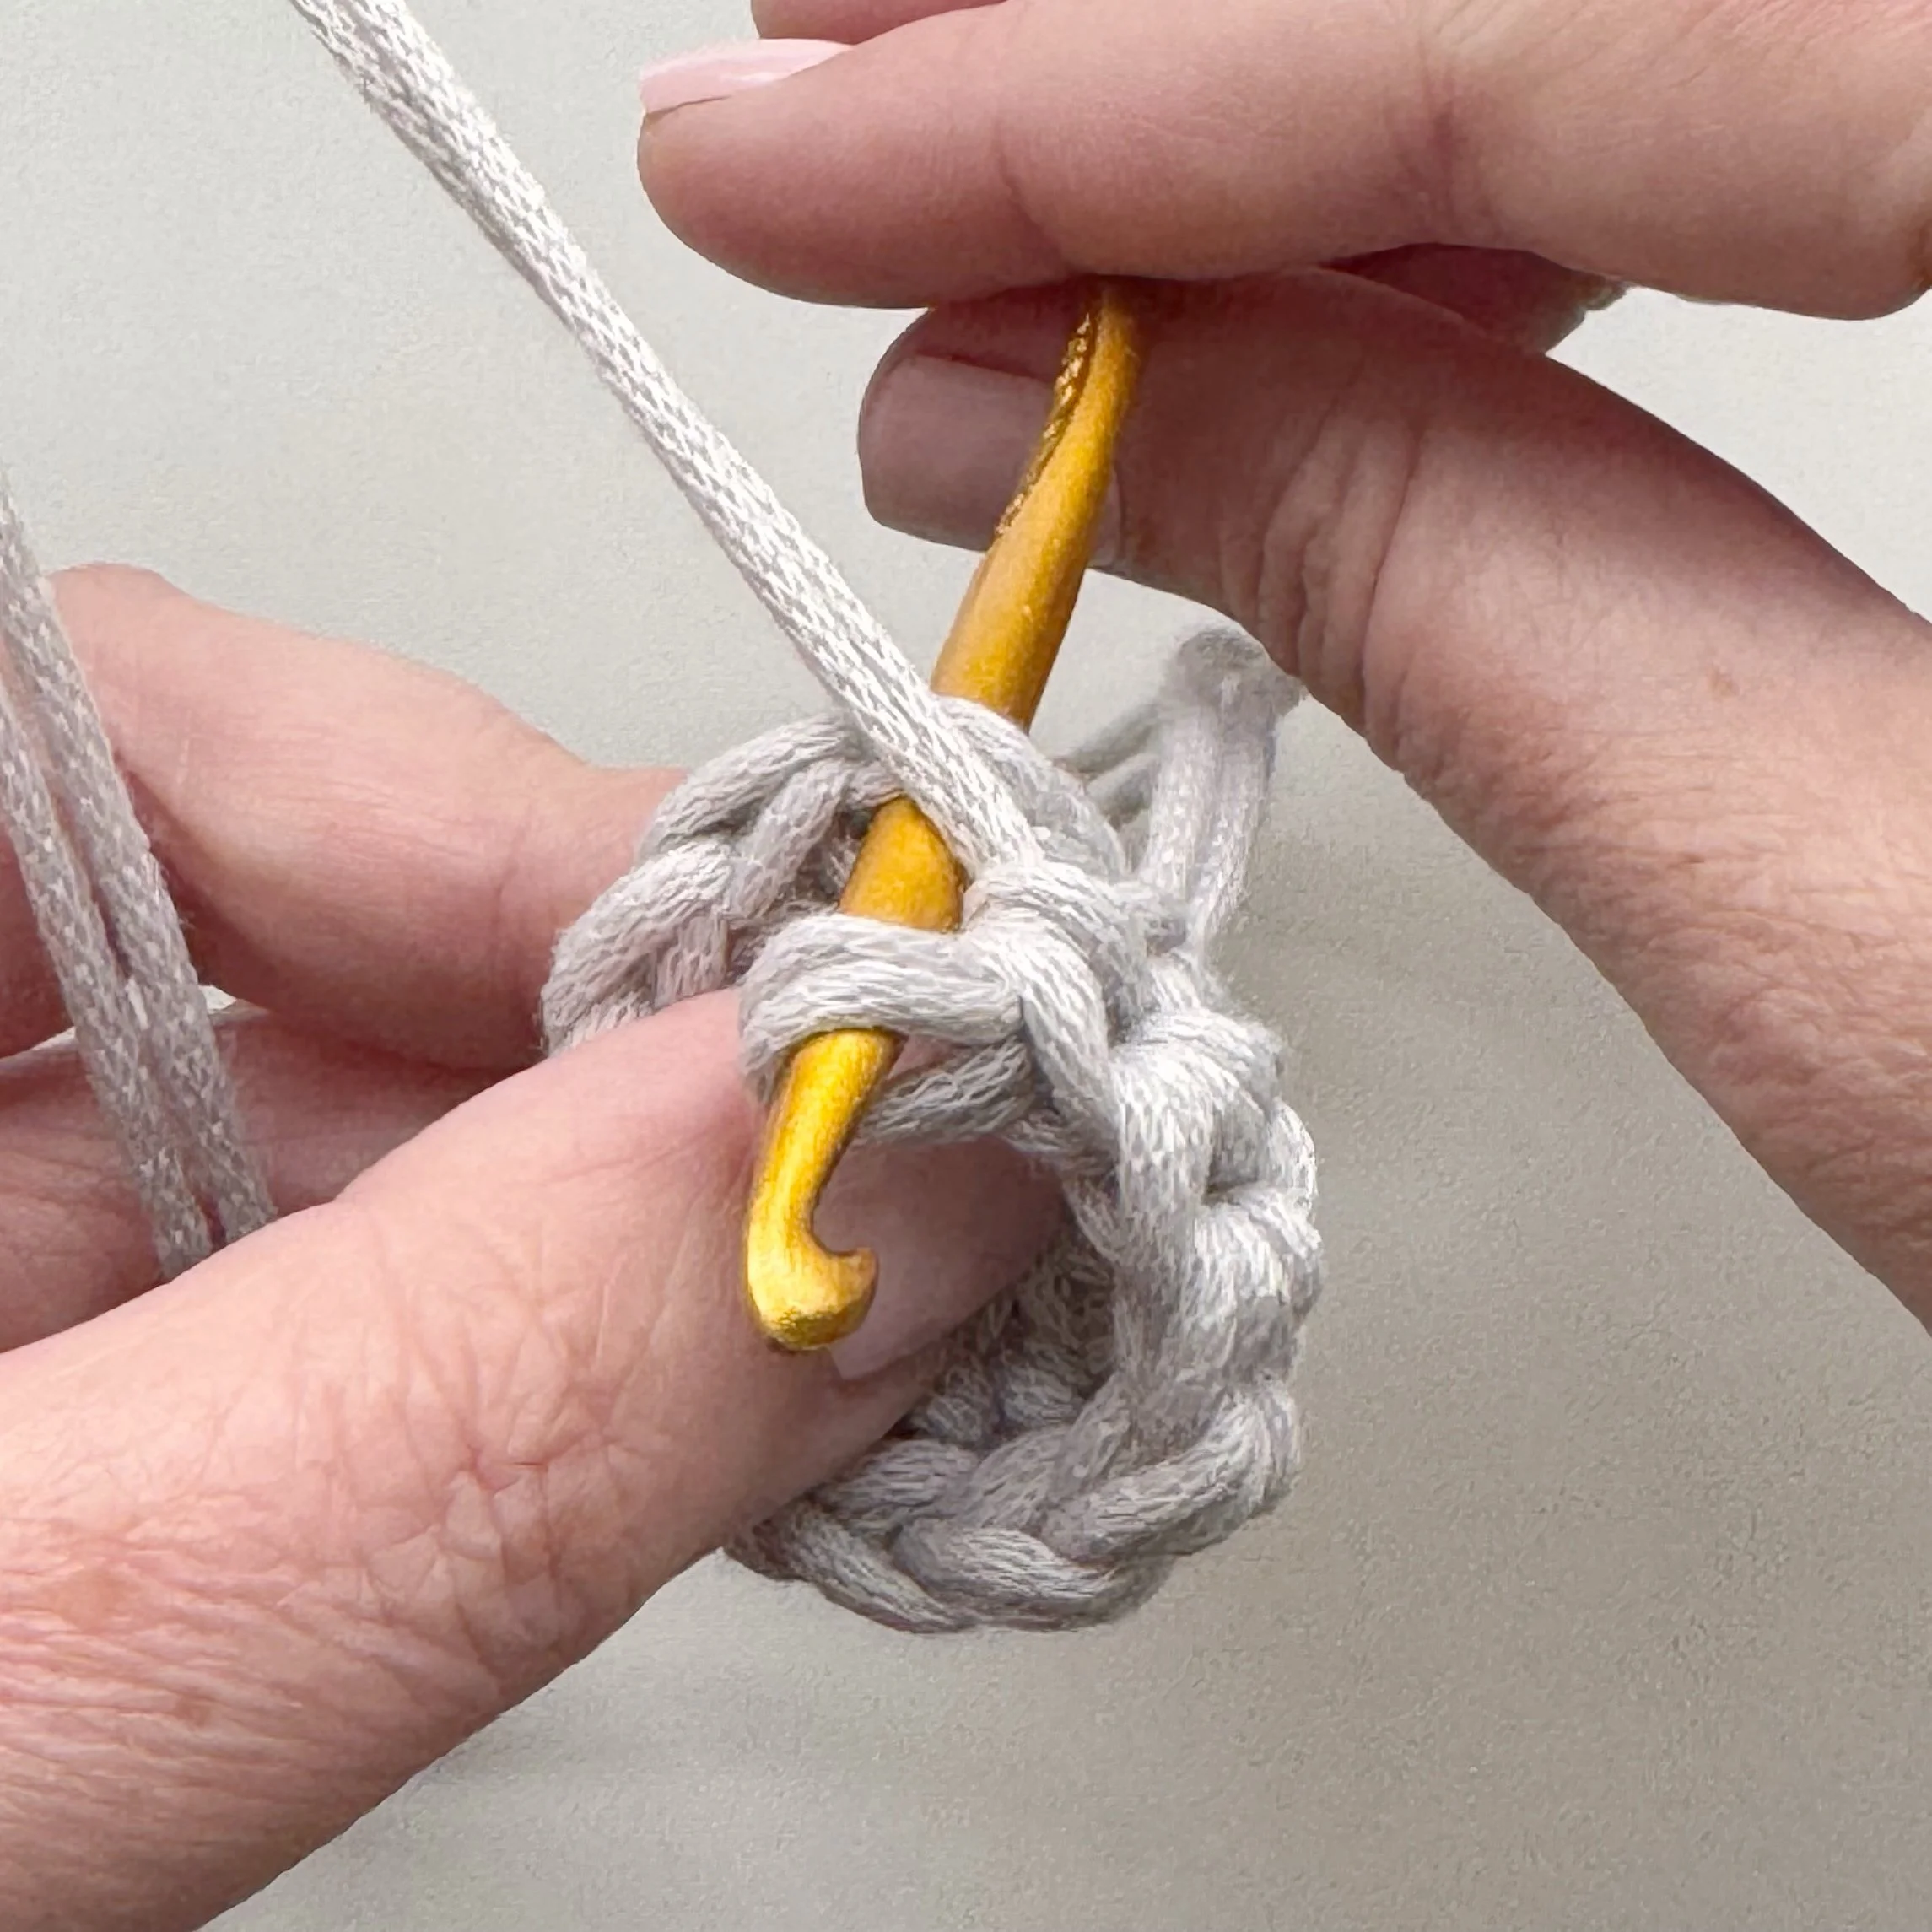
Chainless dc: Draw up a tall loop about the size of a double crochet. Hold the loop tight against the hook with your pointer finger and wrap the hook around the loop. Insert hook into indicated stitch, yo and draw up a loop. Yo and draw through two loops, yo and draw through last two loops. One chainless dc made.

Invisible Join: remove hook from working loop, insert hook from back to front through joining st, put working loop back on hook and pull through joining st. Move working yarn to the back of work.
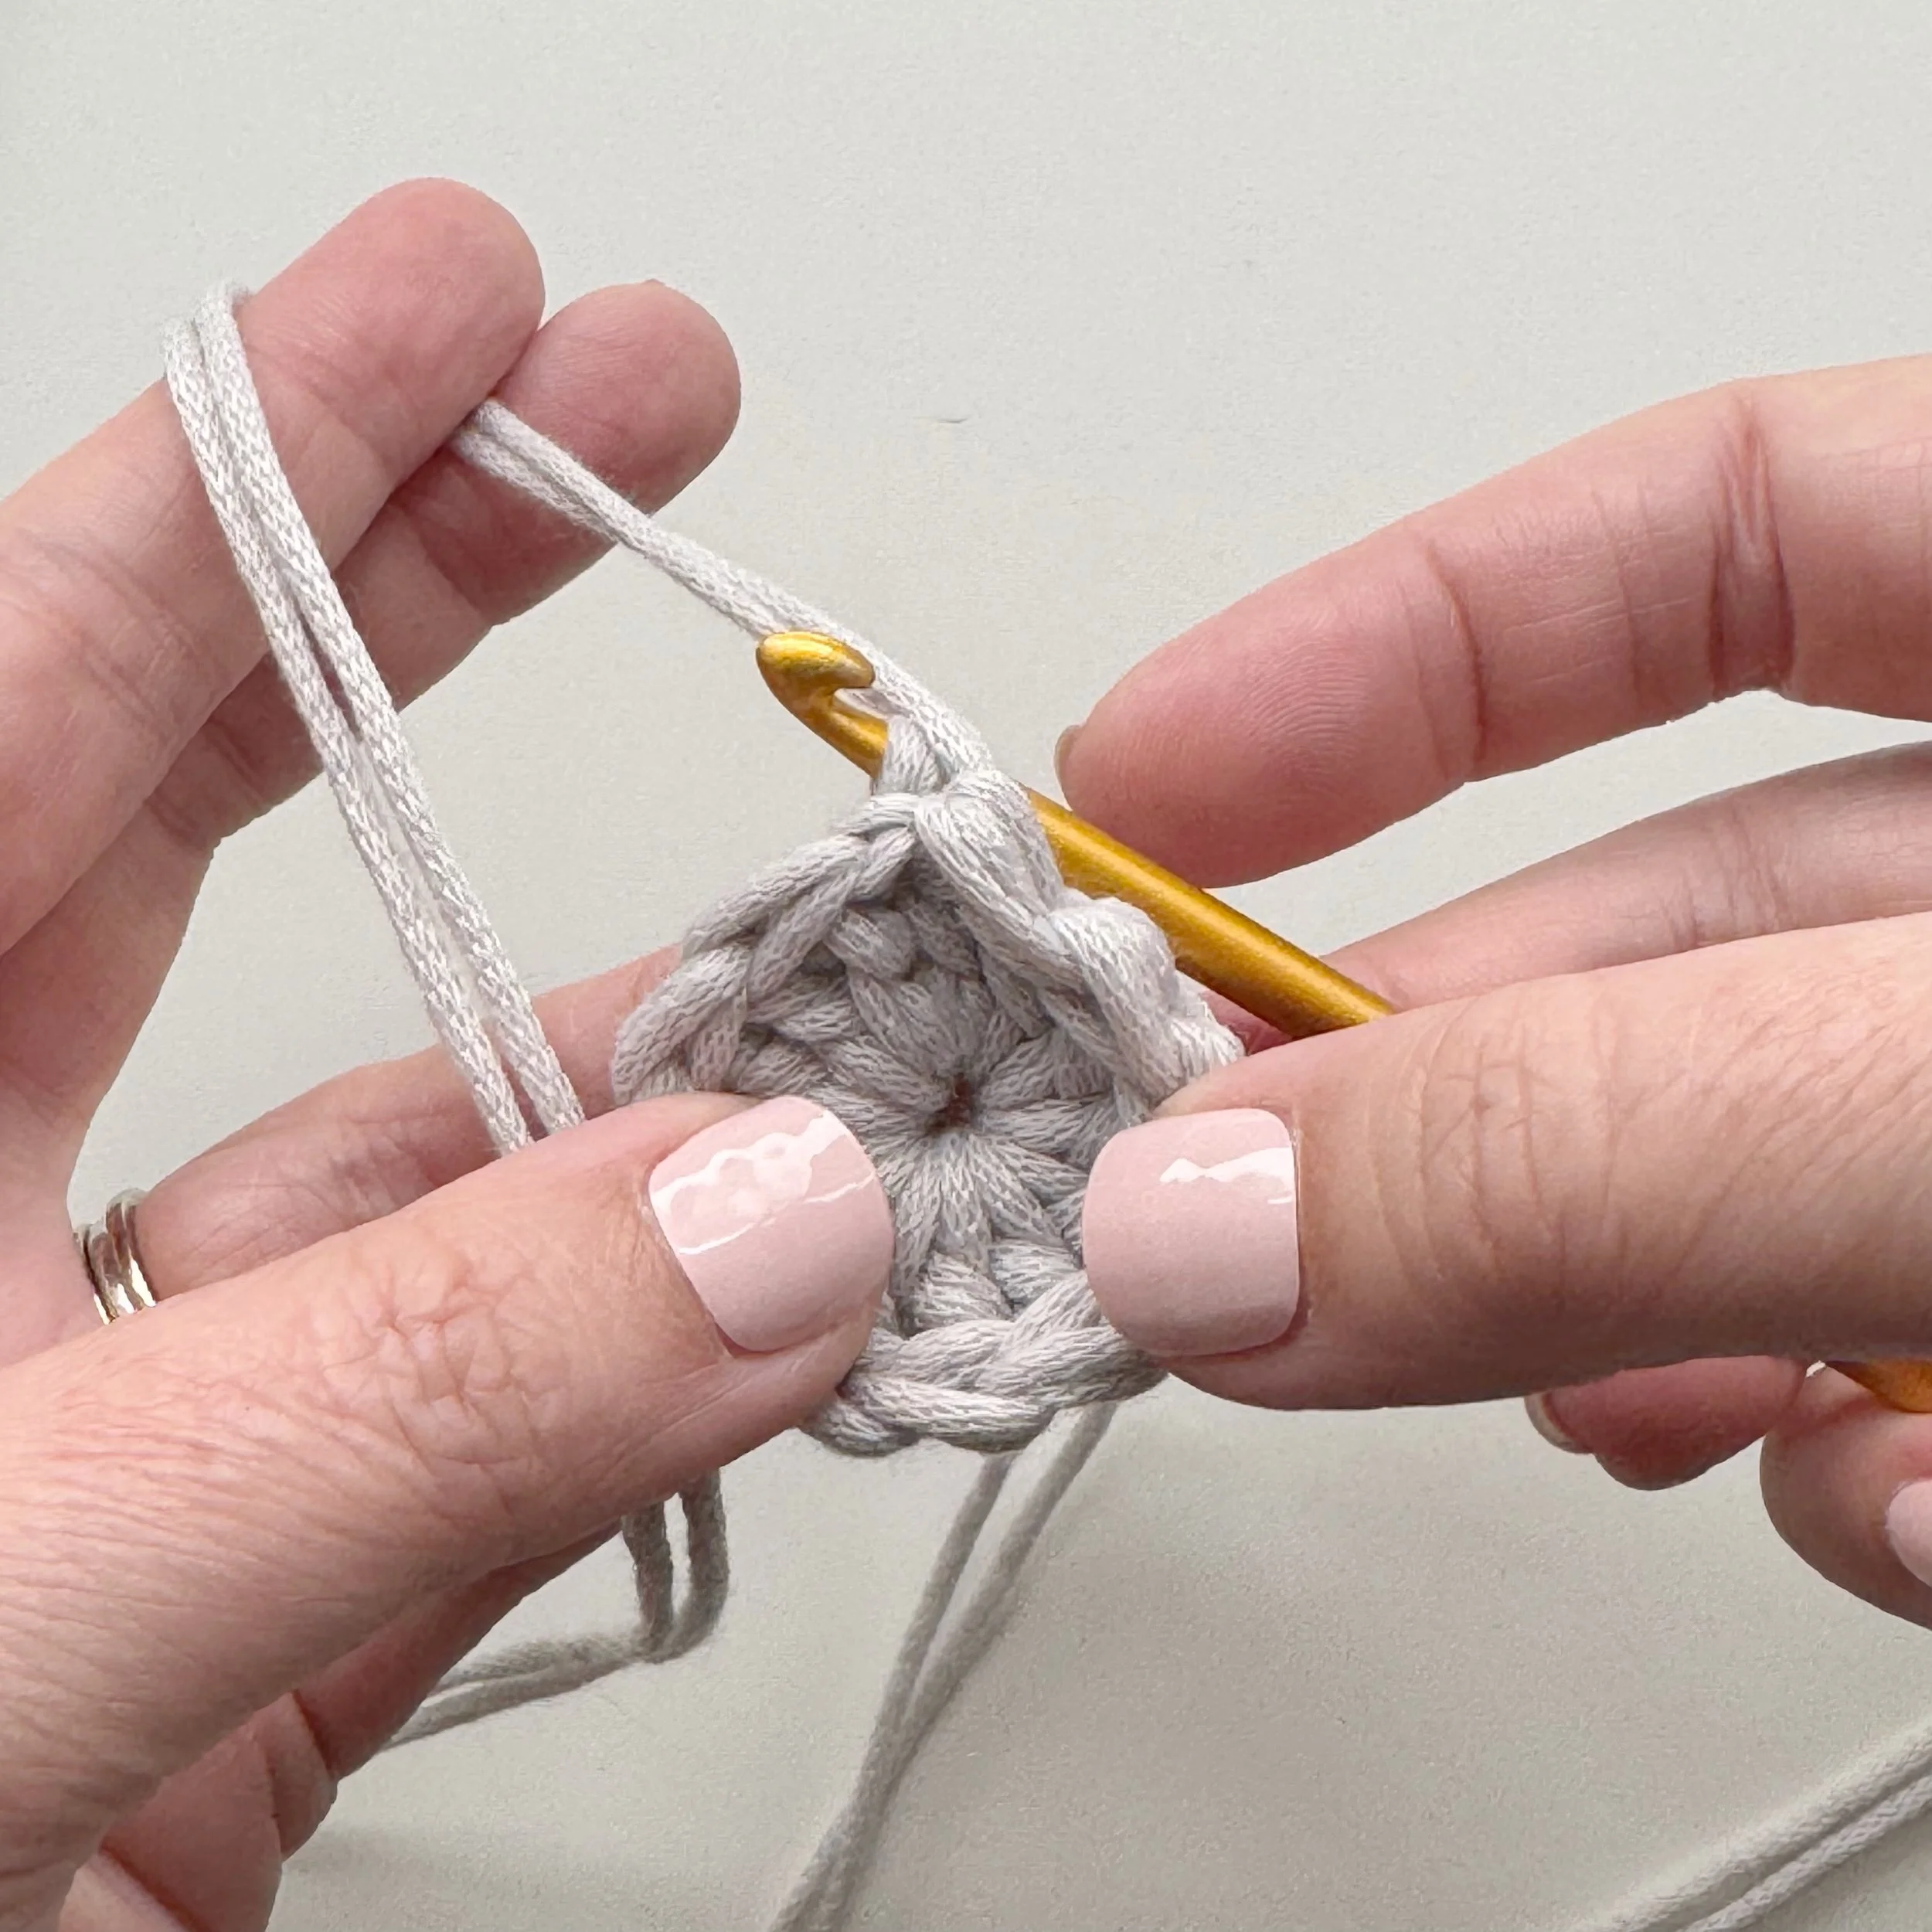
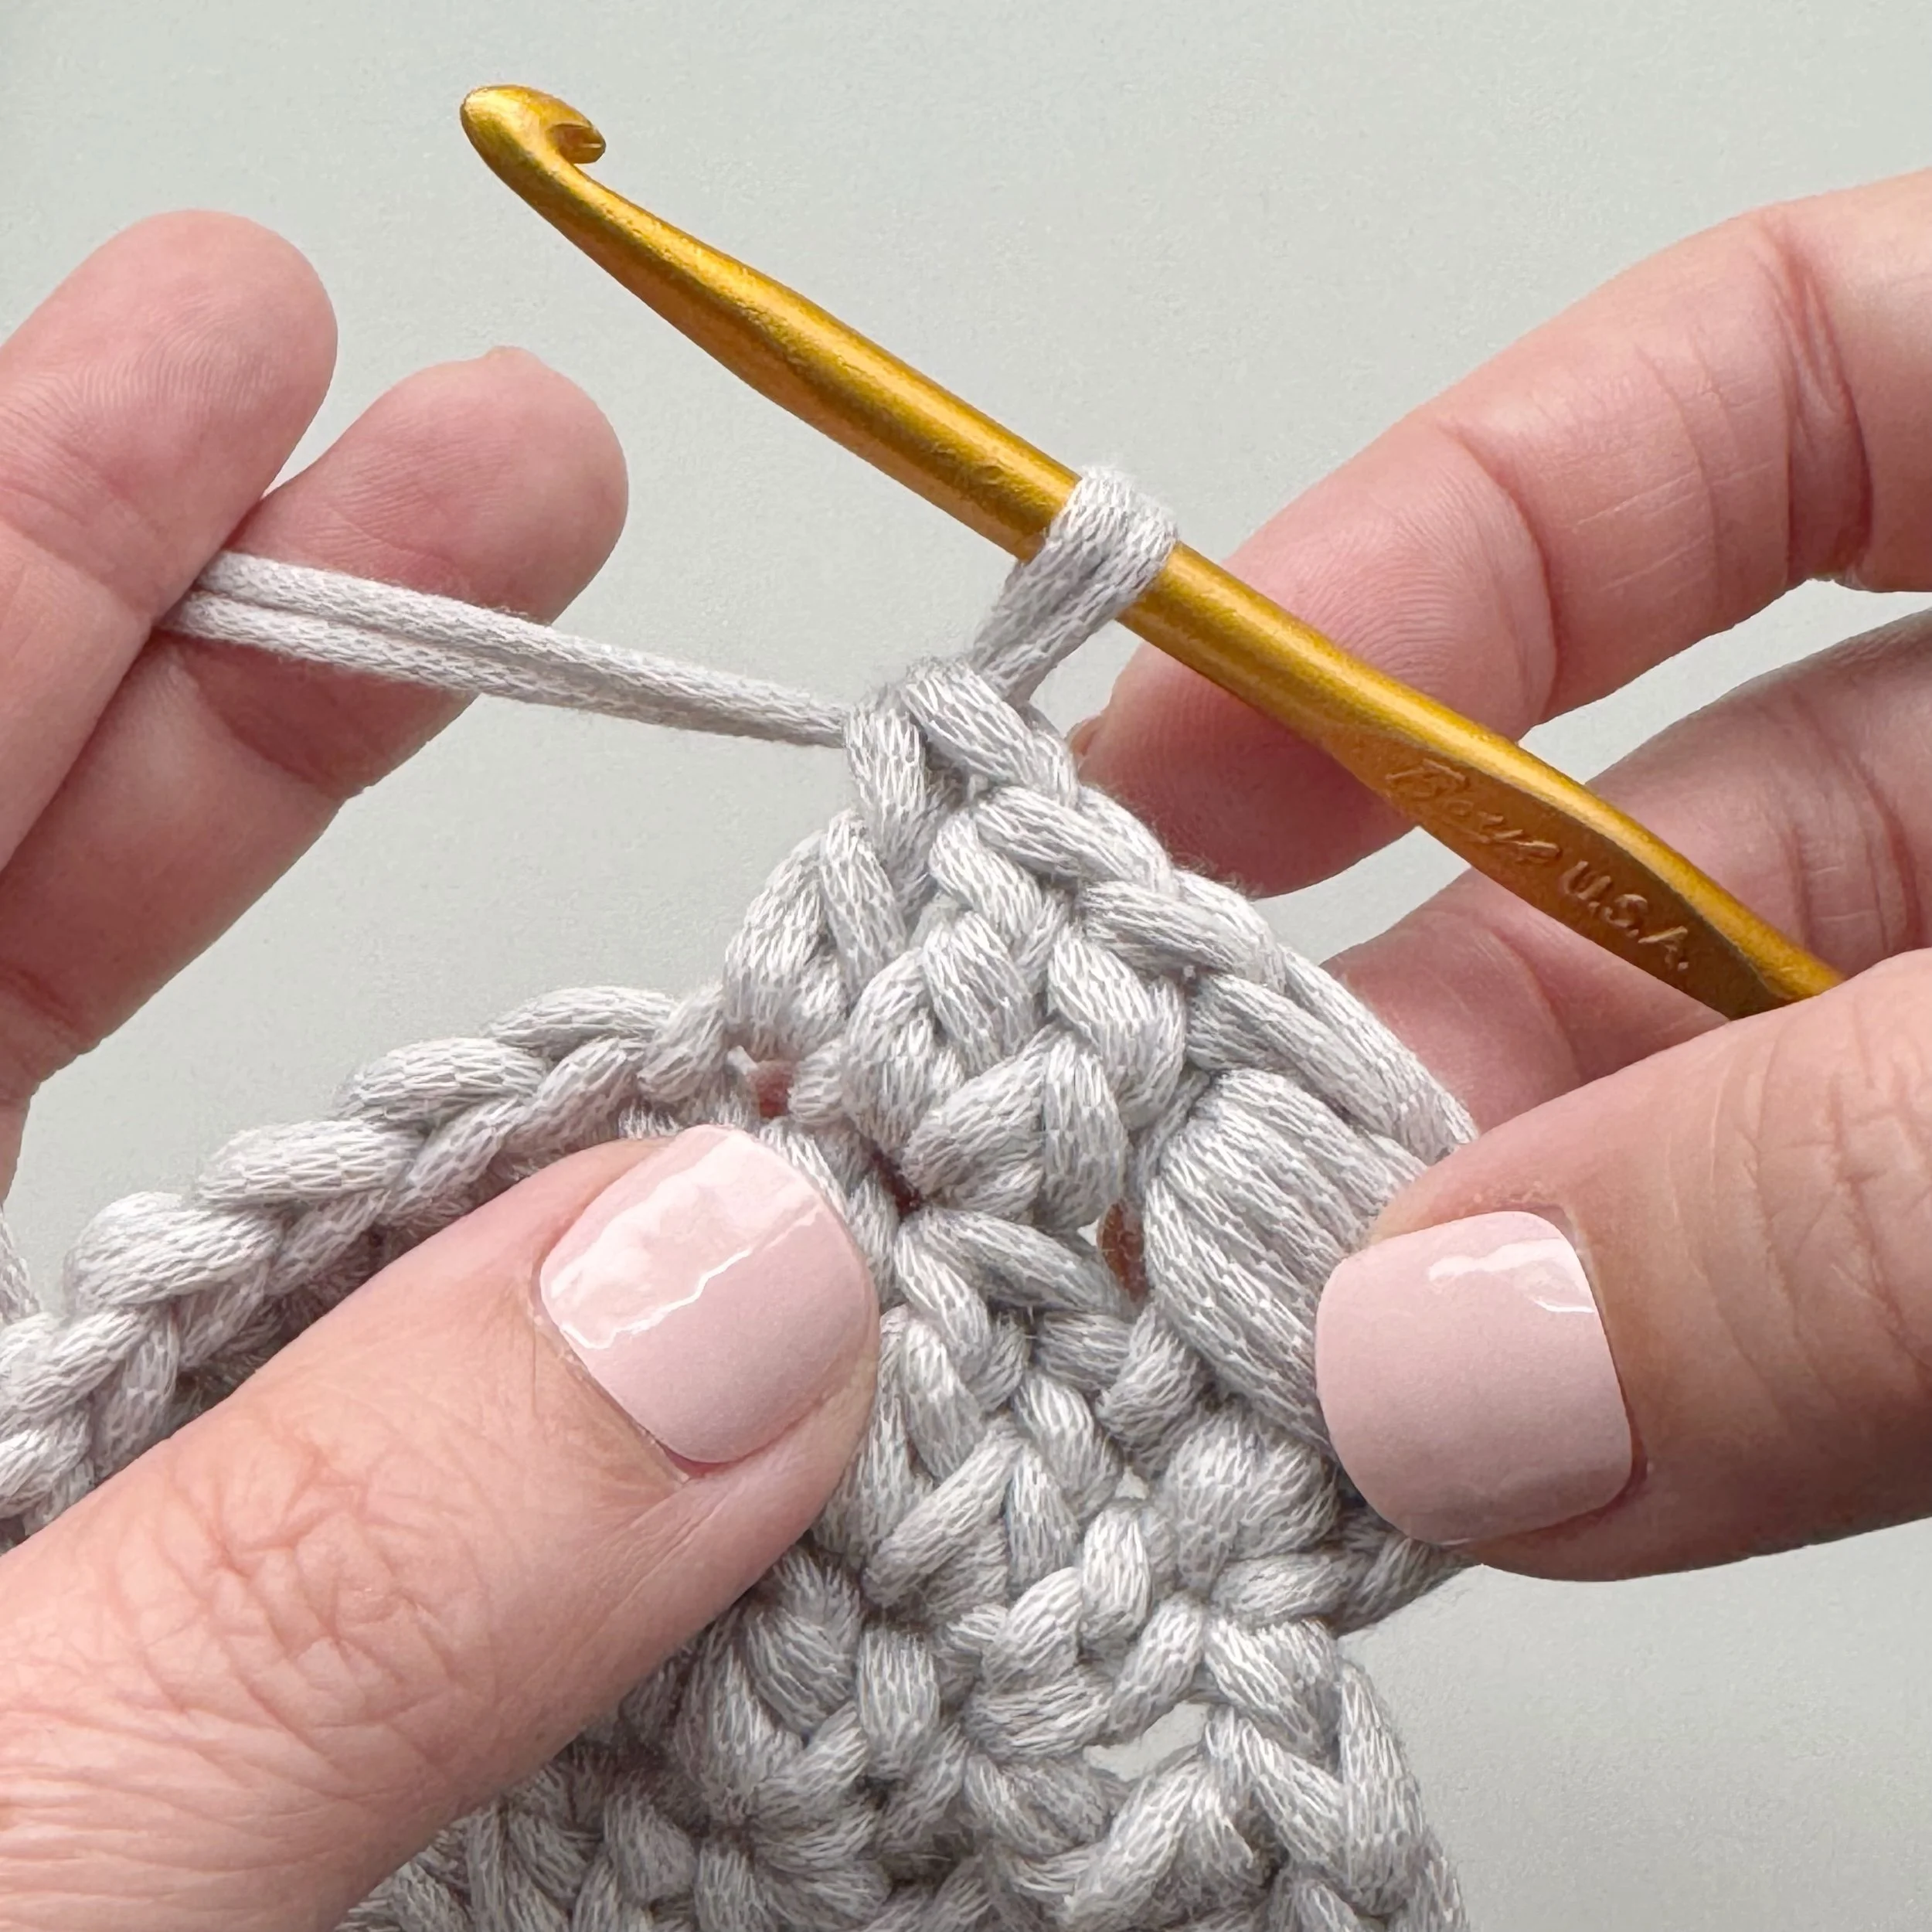
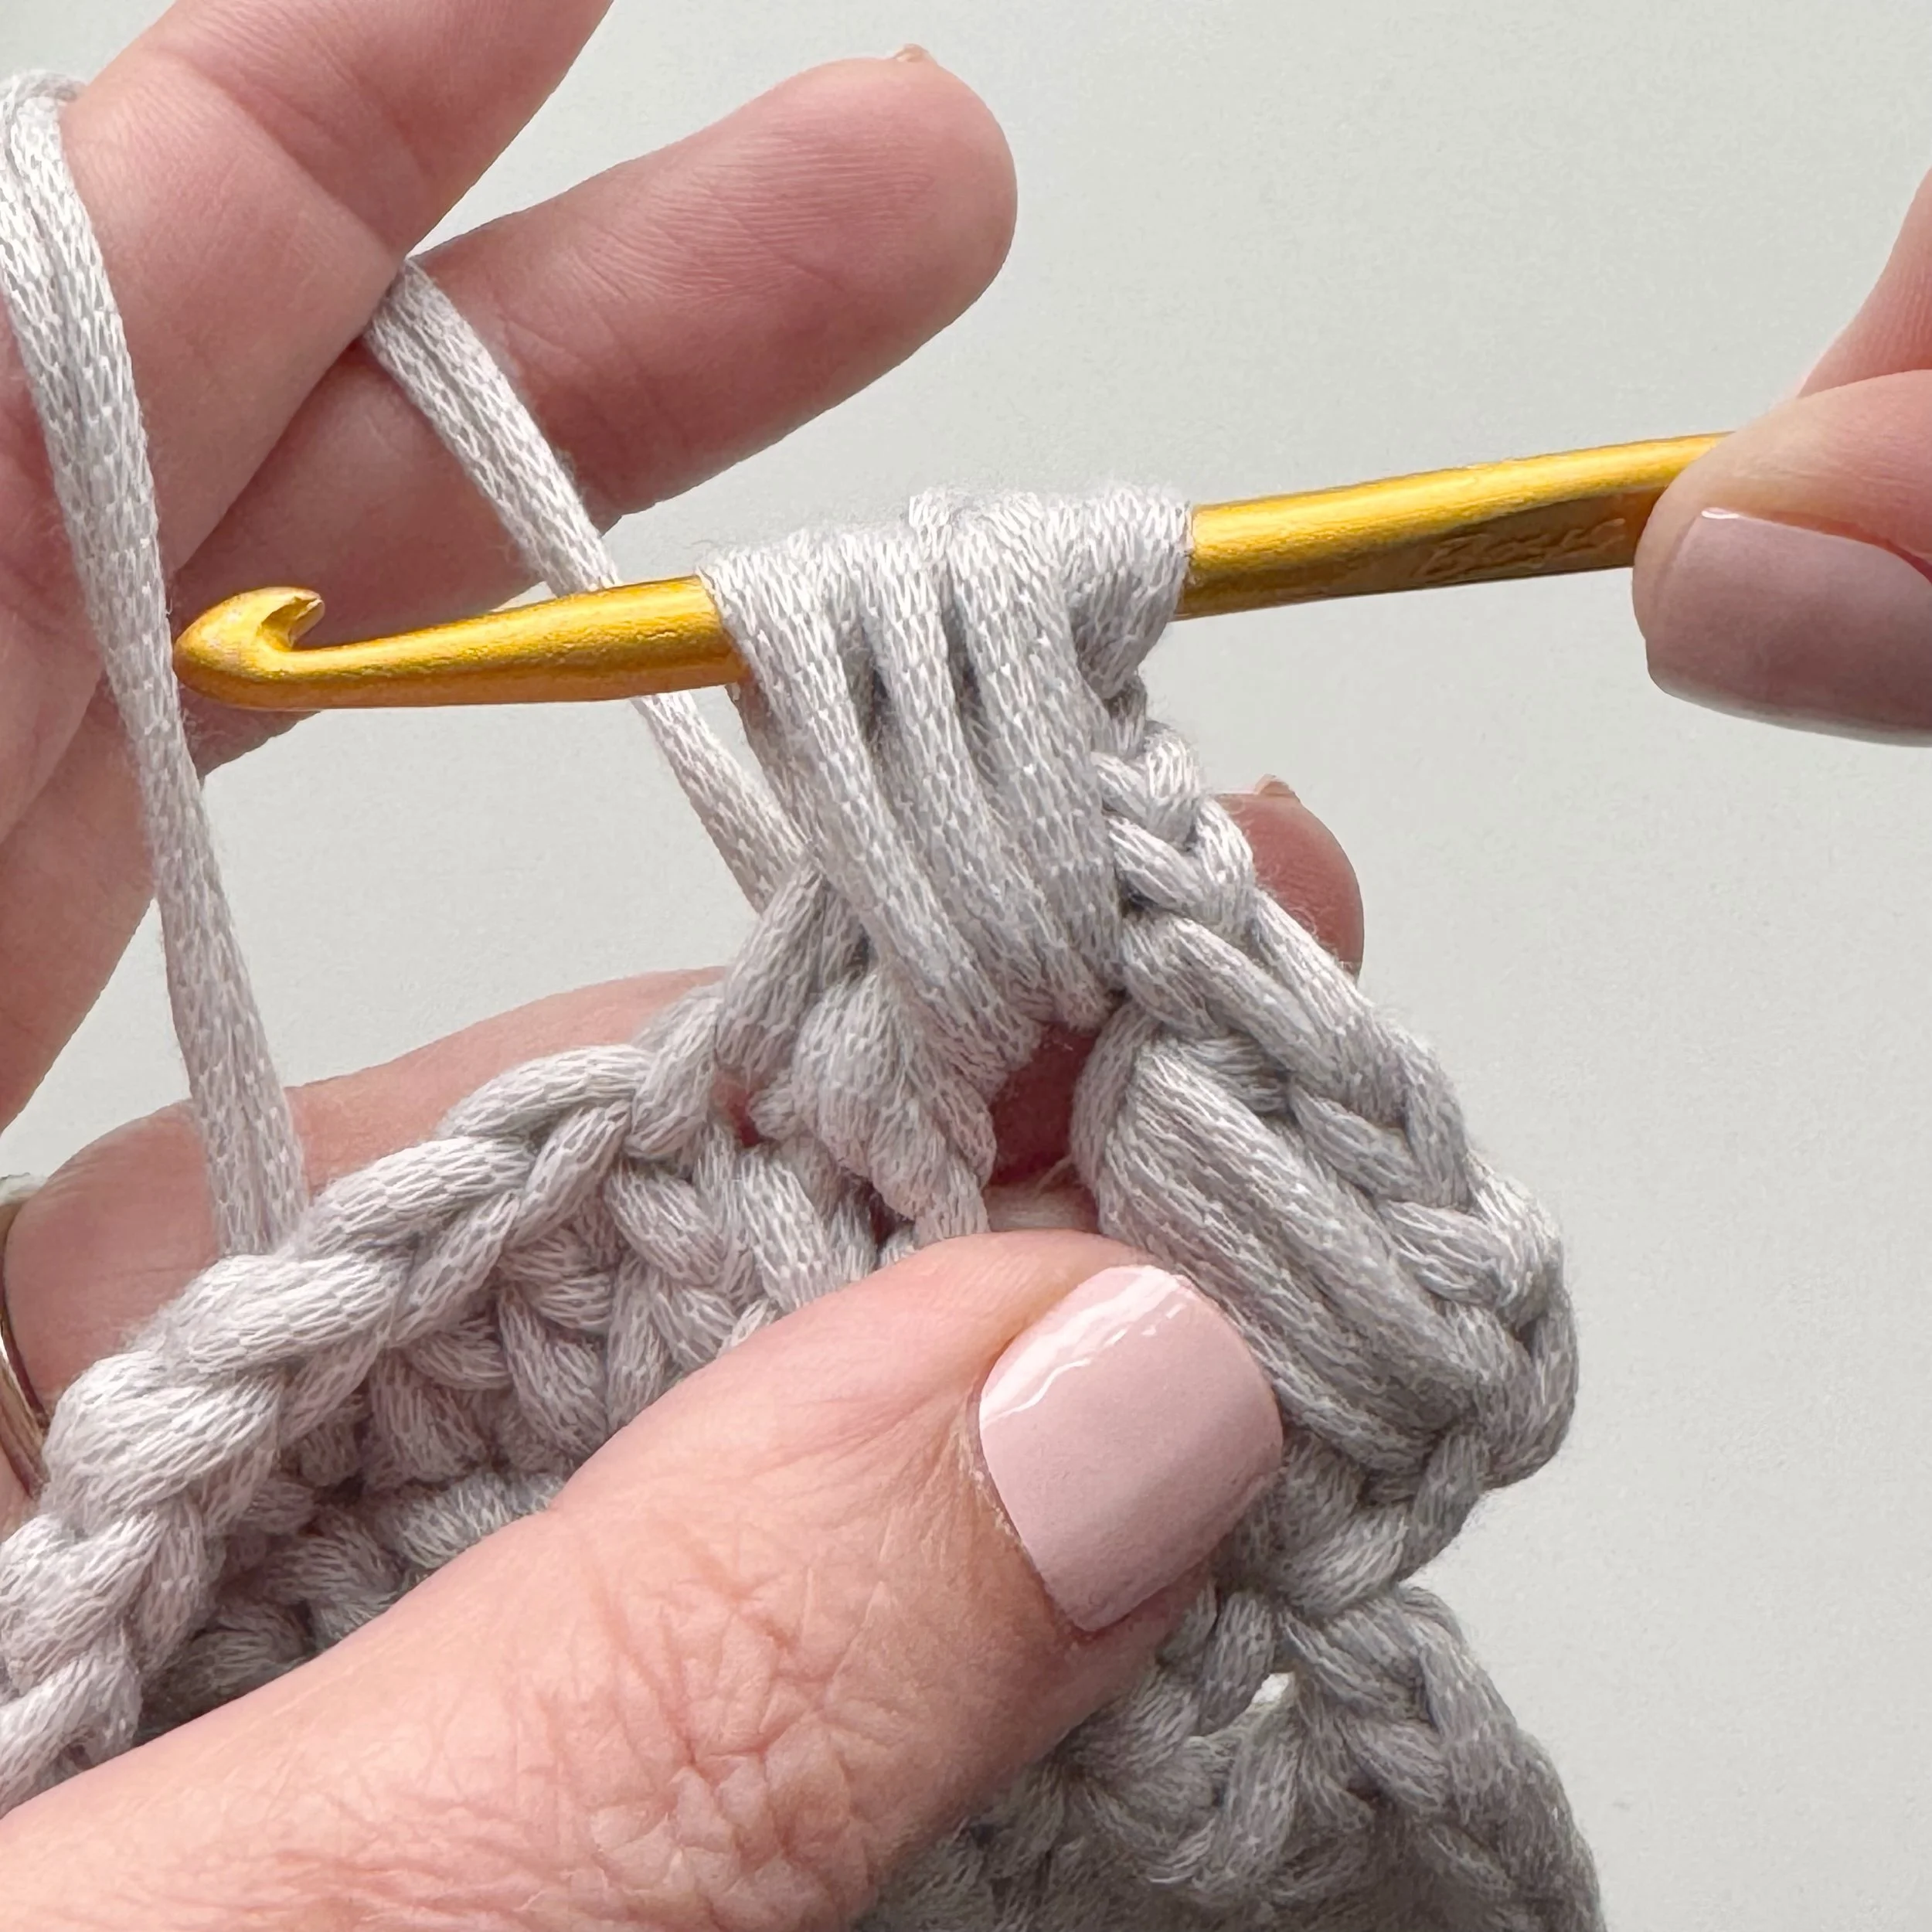
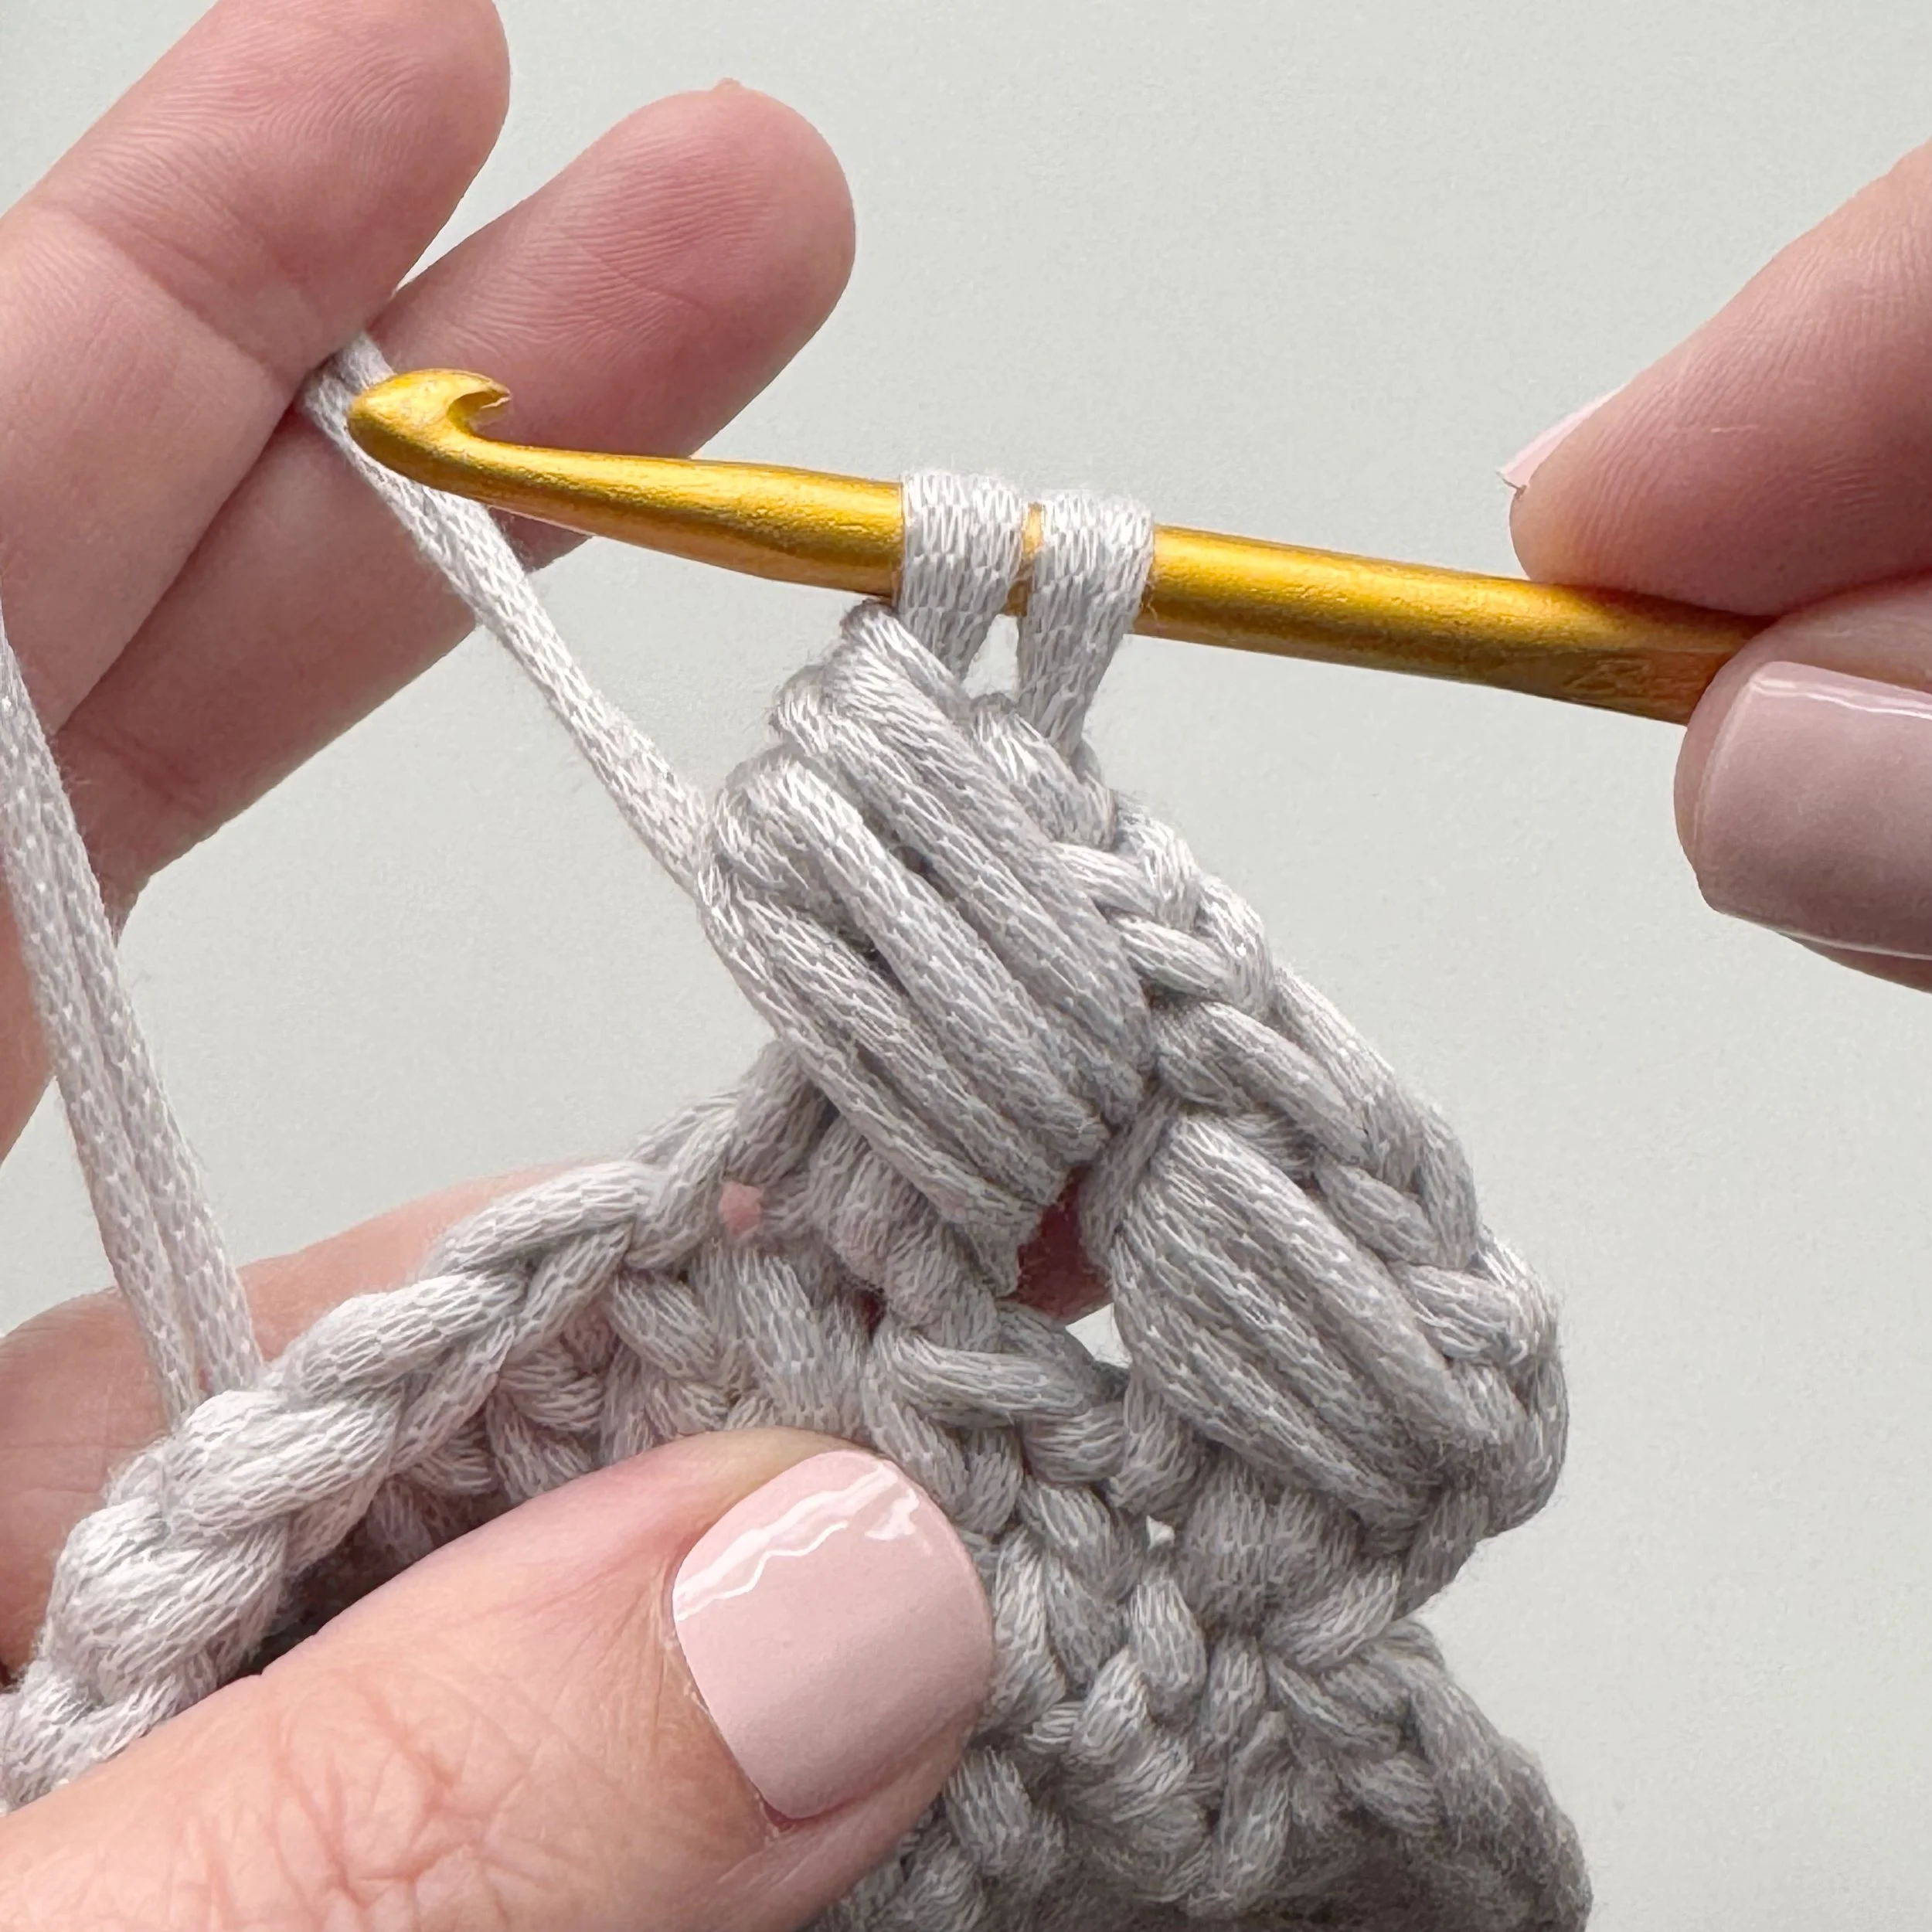
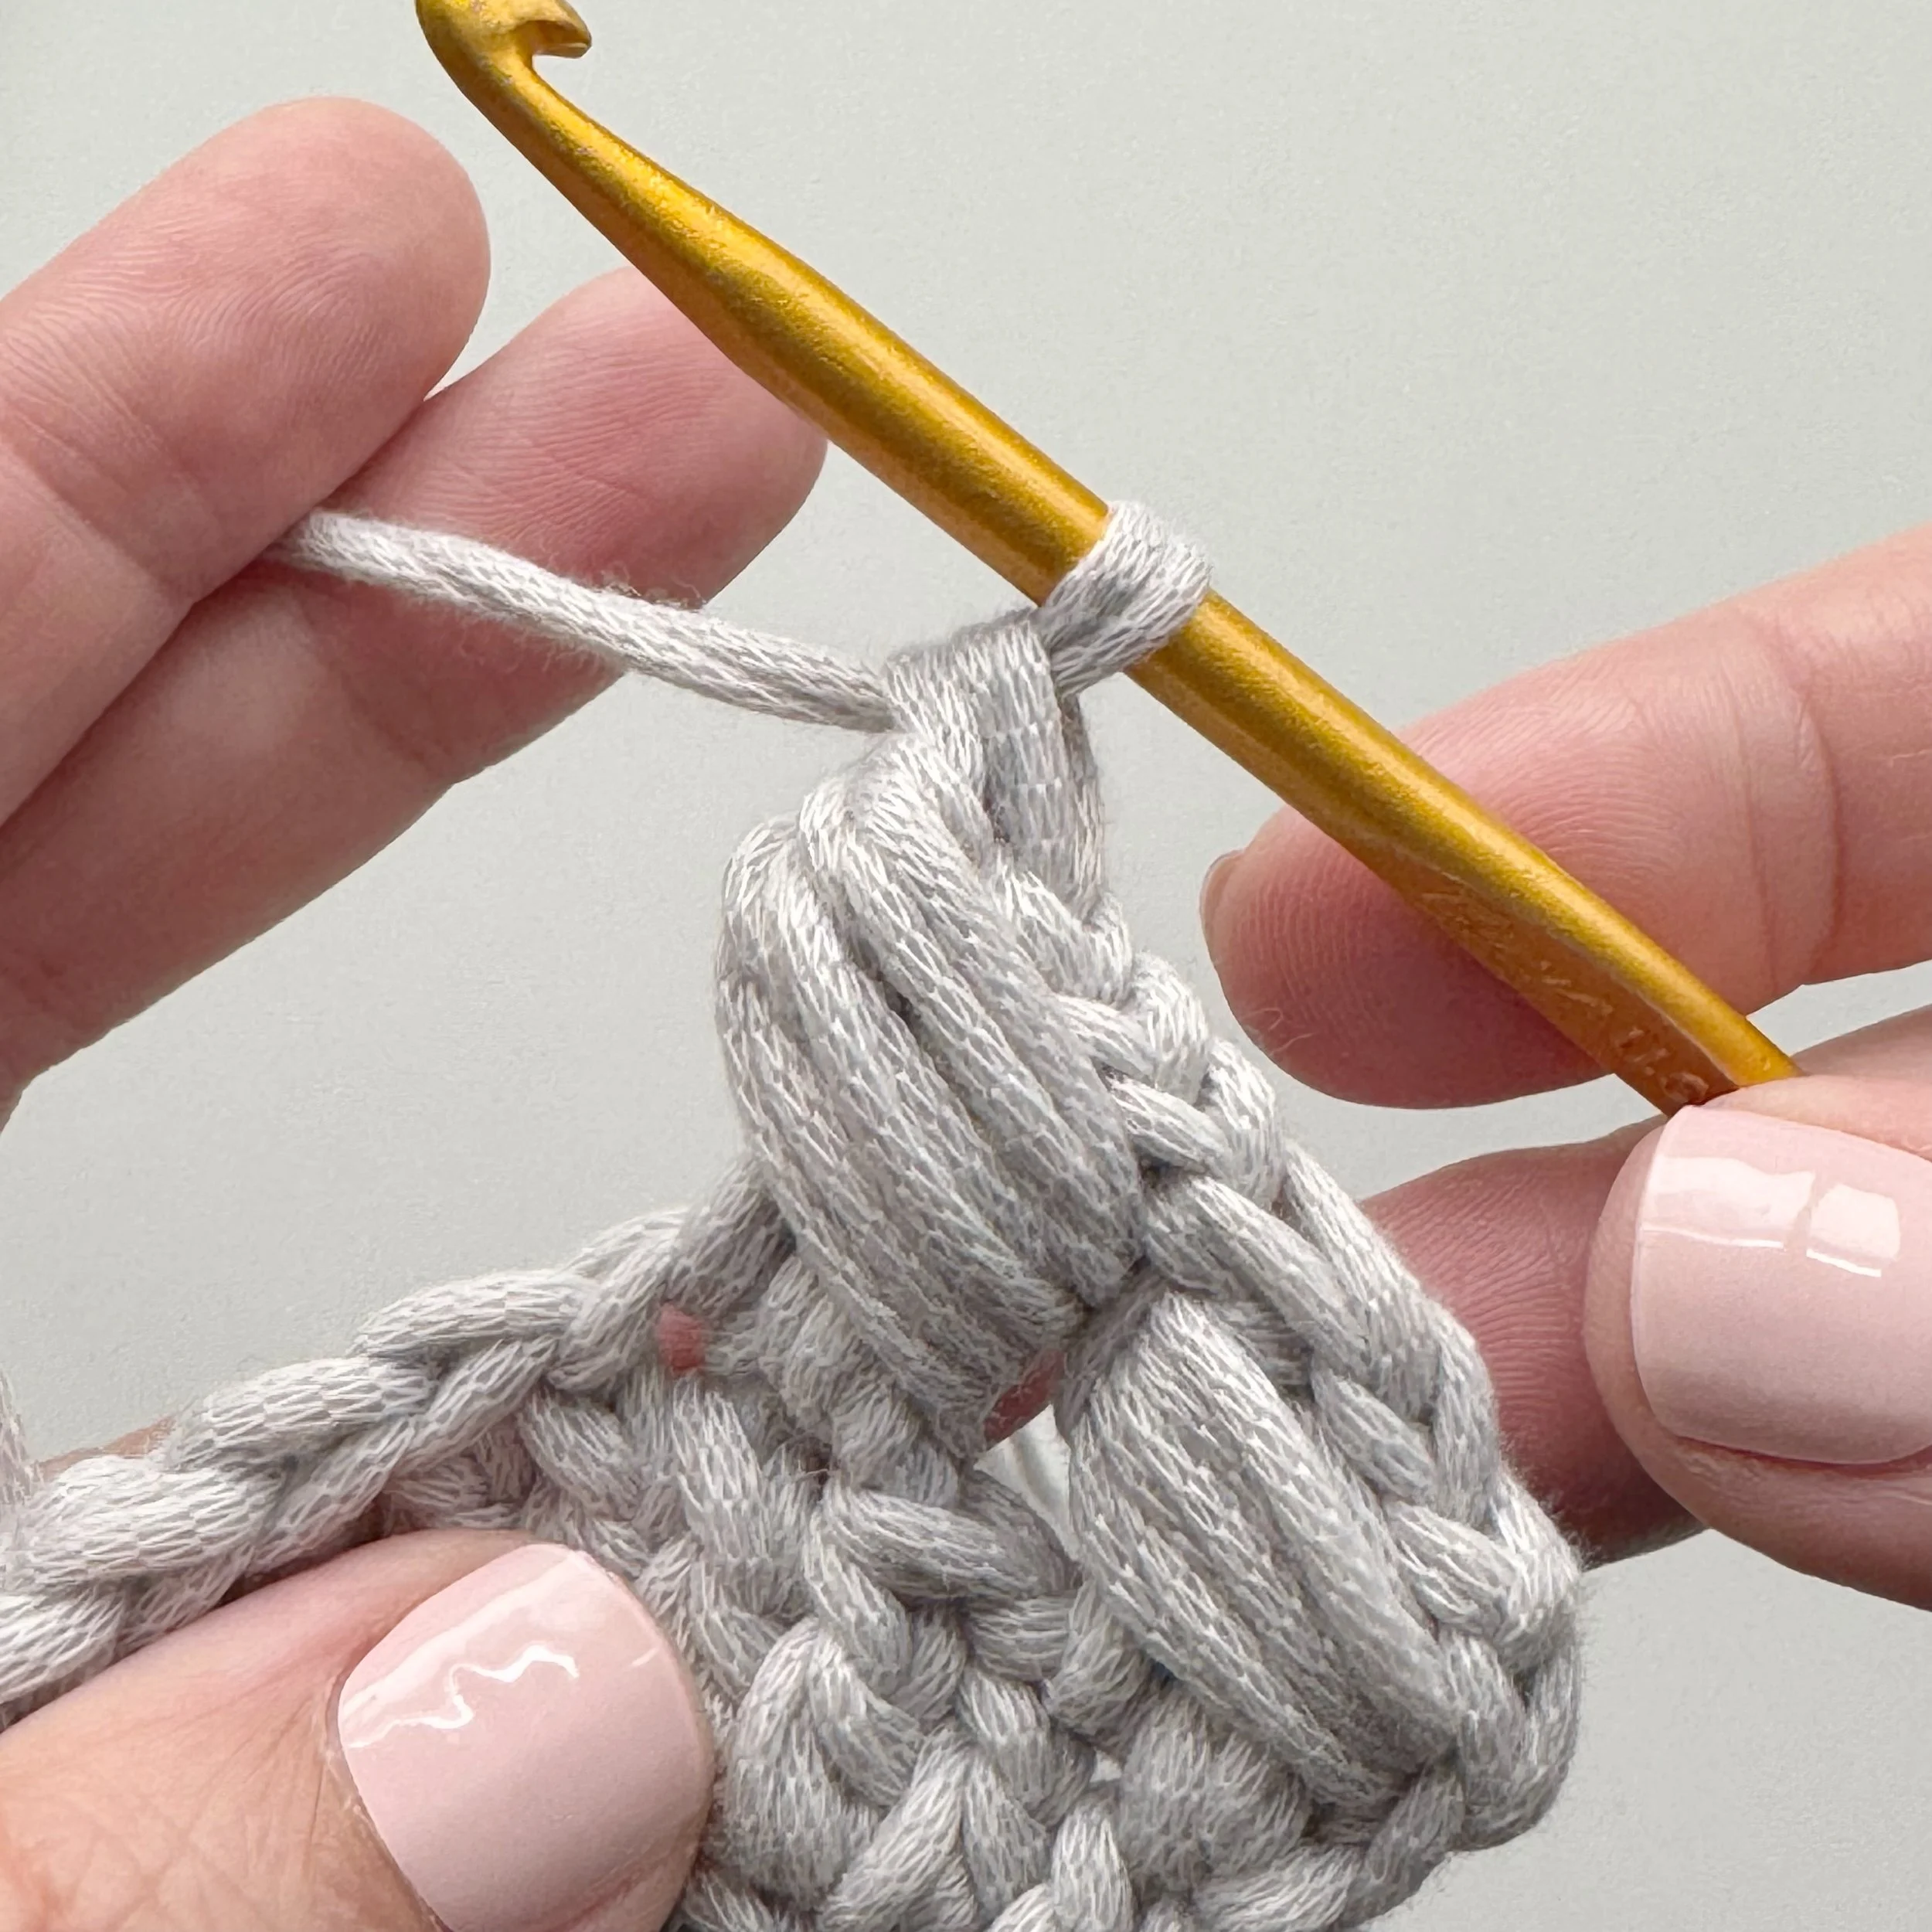
Bead Stitch: work 3 dc as indicated in pattern, yo and draw up a long loop 3 times around the 3 dc, yo and draw through all but one loop on hook, yo and draw through both loops.
Pattern:
Circles (make two)
With 3.5mm hook
Round 1: make a magic ring, ch 2, work 12 dc into the ring, join to first dc. (12 dc)
Round 2: work a chainless dc into 1st st, 1dc into same st, inc into each st around, join. (24 dc)
Round 3: work a chainless dc into 1st st, 1dc in same st, dc in next st *inc, 1dc into next st, repeat from * around, join. (36 dc)
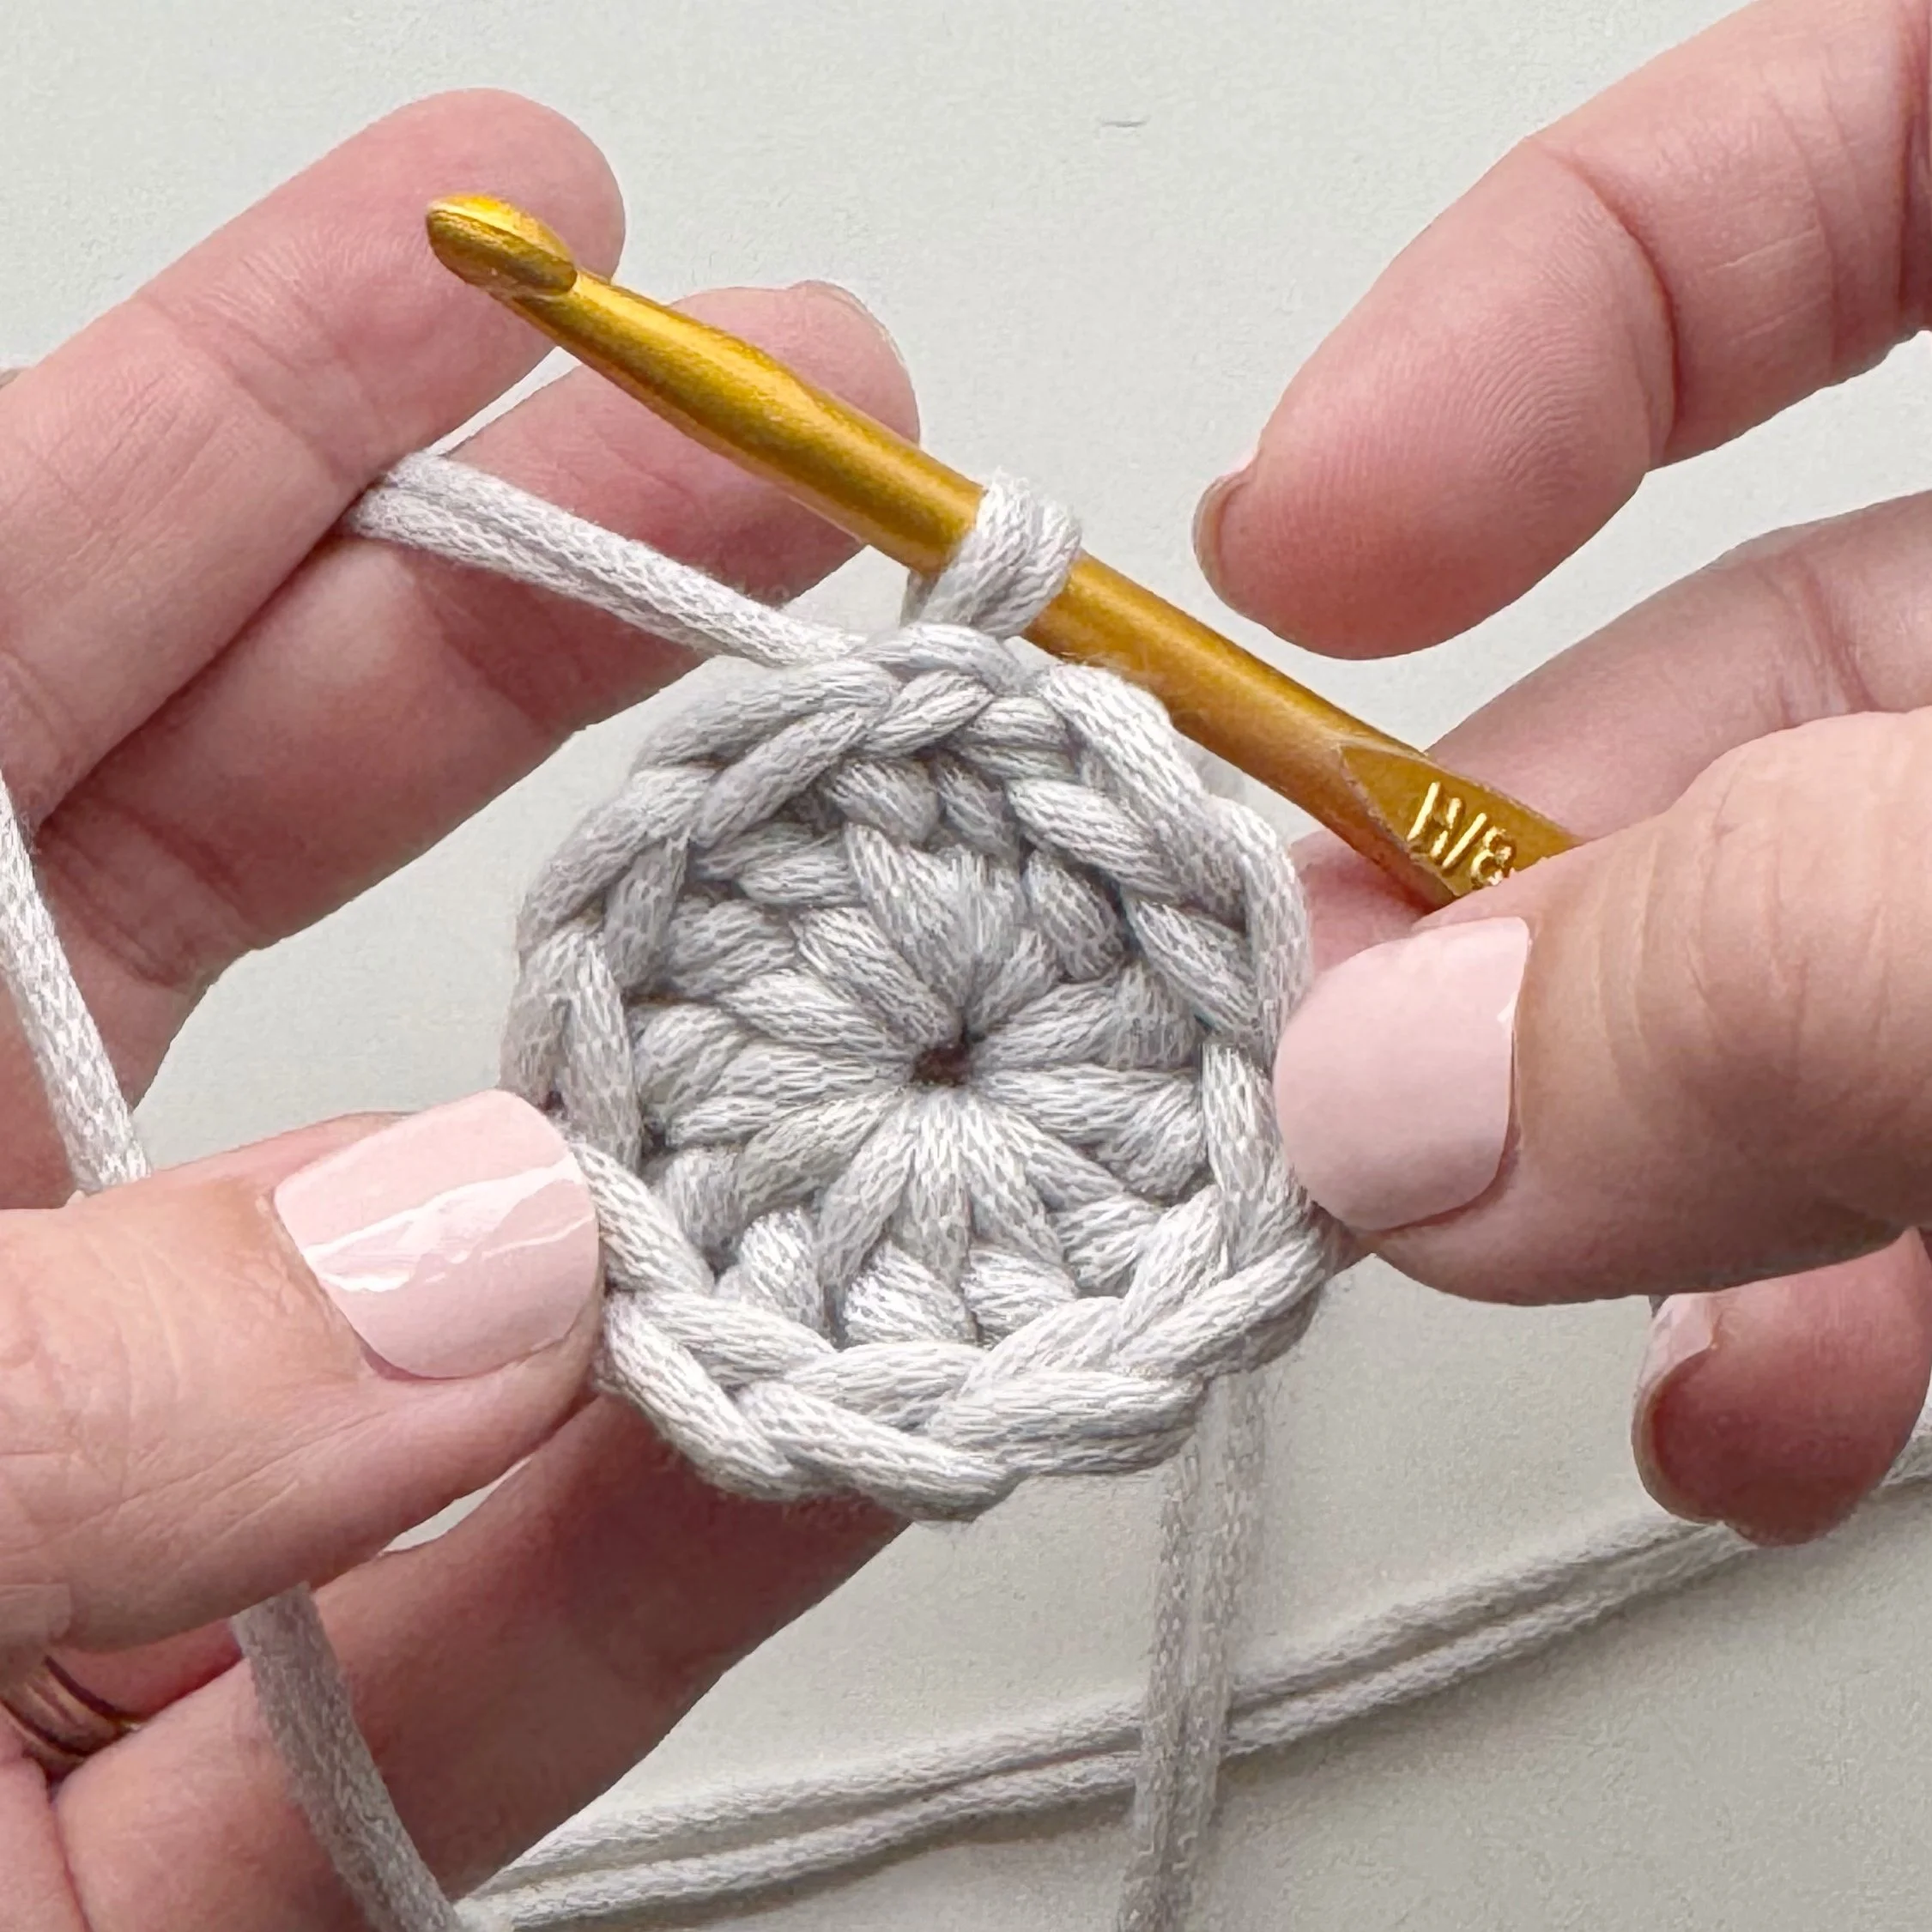
Round 4: work a chainless dc into 1st st, inc in next, work a bead stitch around those 3 sts, sk 1, *1dc, inc, bead stitch around those 3 sts, sk 1, repeat from * around, join. (12 bead stitches)
Round 5: work a chainless dc into 1st st, dc 1, *inc, dc 3, repeat from * around until 2 sts remain, inc, dc 1, join. (60 dc)
Round 6: work a chainless dc into 1st st, dc 1 into same st, dc 4, *inc, dc 4, repeat from * around, join. (72 dc)
Round 7: work a chainless dc into 1st st, dc 2, *inc, dc 5, repeat from * around until 3 sts remain, inc, dc 2, join. (84 dc)
Round 8: work a chainless dc into 1st st, dc 1 into same st, *ch 2, sk 2, dc 2, ch 2, sk 2, ** inc, repeat from * around ending last repeat at the ** join. (96 sts)
Round 9: work a chainless dc into 1st st, dc 3, *inc, dc 7, repeat from * around until 4 sts remain, inc, dc 3, join. (108 dc)
Round 10: work a chainless dc into 1st st, dc 1 into same st, dc 8, *inc, dc 8, repeat from * around, join. (120 dc)
Round 11: work a chainless dc into 1st st, dc 4, *inc, dc 9, repeat from * around until 5 sts remain, inc, dc 4, join. (132 dc)
Round 12: work a chainless dc into 1st st, 1dc into same st, 1dc in next, work a bead stitch around those 3 sts, sk 1, *[dc 3, bead st around those 3 sts, sk 1] twice**, inc, dc 1, bead st around those 3 sts, repeat from * around, ending last repeat at the ** , join. (36 bead stitches)
Round 13: work a chainless dc into 1st st, dc 5, *inc, dc 11, repeat from * around until 6 sts remain, inc, dc 5, join. (156 dc)
Change to 4mm crochet hook.
Round 14: ch 1, sc in same st as join and in each st around, join. (156 sc)
Do not fasten off. Leave the rest of the skein attached, place a locking stitch marker in the live loop and move on to Gusset.
Side Gusset
With 4mm hook, ch 6.
Row 1: sc in 2nd back bump from hook and in each back bump across, ch 1, turn. (5)
Rows 2-4: sc in each st across, ch 1, turn. (5)
Row 5: sc 2, 3sc in next st, sc 2, ch 1, turn. (7)
Rows 6-10: sc in each st across, ch 1, turn. (7)
Row 11: sc 3, 3sc in next st, sc 3, ch 1, turn. (9)
Row 12-18: sc in each st across, ch 1, turn. (9)
Row 19: sc 4, 3sc in next st, sc 4, ch 1, turn. (11)
Rows 20-28: sc in each st across, ch 1, turn. (11)
Row 29: sc 5, 3sc in next st, sc 5, ch 1, turn. (13)
Rows 30-97: sc in each st across, ch 1, turn. (13)
Row 98: sc 5, sc3tog, sc 5, ch 1, turn. (11)
Rows 99-107: sc in each st across, ch 1, turn. (11)
Row 108: sc 4, sc3tog, sc 4, ch 1, turn. (9)
Row 109-115: sc in each st across, ch 1, turn. (9)
Row 116: sc 3, sc3tog, sc 3, ch 1, turn. (7)
Row 117-121: sc in each st across, ch 1, turn. (7)
Row 122: sc 2, sc3tog, sc 2, ch 1, turn. (5)
Row 123-125: sc in each st across, ch 1, turn. (5)
Do NOT fasten off. Place a stitch marker in the live loop and move on to attaching Gusset to the Circles.
Attach Gusset to Circles
Using the 4mm hook and the yarn still attached to the first circle, ch 1, then insert hook into join st of circle and first row edge of gusset and sc. Continue to sc through the next st of the circle and next row edge of the gusset counterclockwise all the way around. (125 sc)
Fasten off leaving a tail for weaving in.
Repeat this process with the other circle and working into the opposite side of the gusset.
Fasten off leaving a tail for weaving in.
Strap
With 4mm hook and yarn still attached to gusset, ch 1 and turn.
Rows 1-200: sc in each st across, ch 1, turn. (5)
Adjust strap length to suit your preference by adding or subtracting rows here.
Fasten off leaving a long tail for sewing.
Making sure to keep the strap straight, line up the ending row of the strap with the beginning row of the gusset. Use a mattress stitch to join the strap to the gusset.
Weave in all ends.
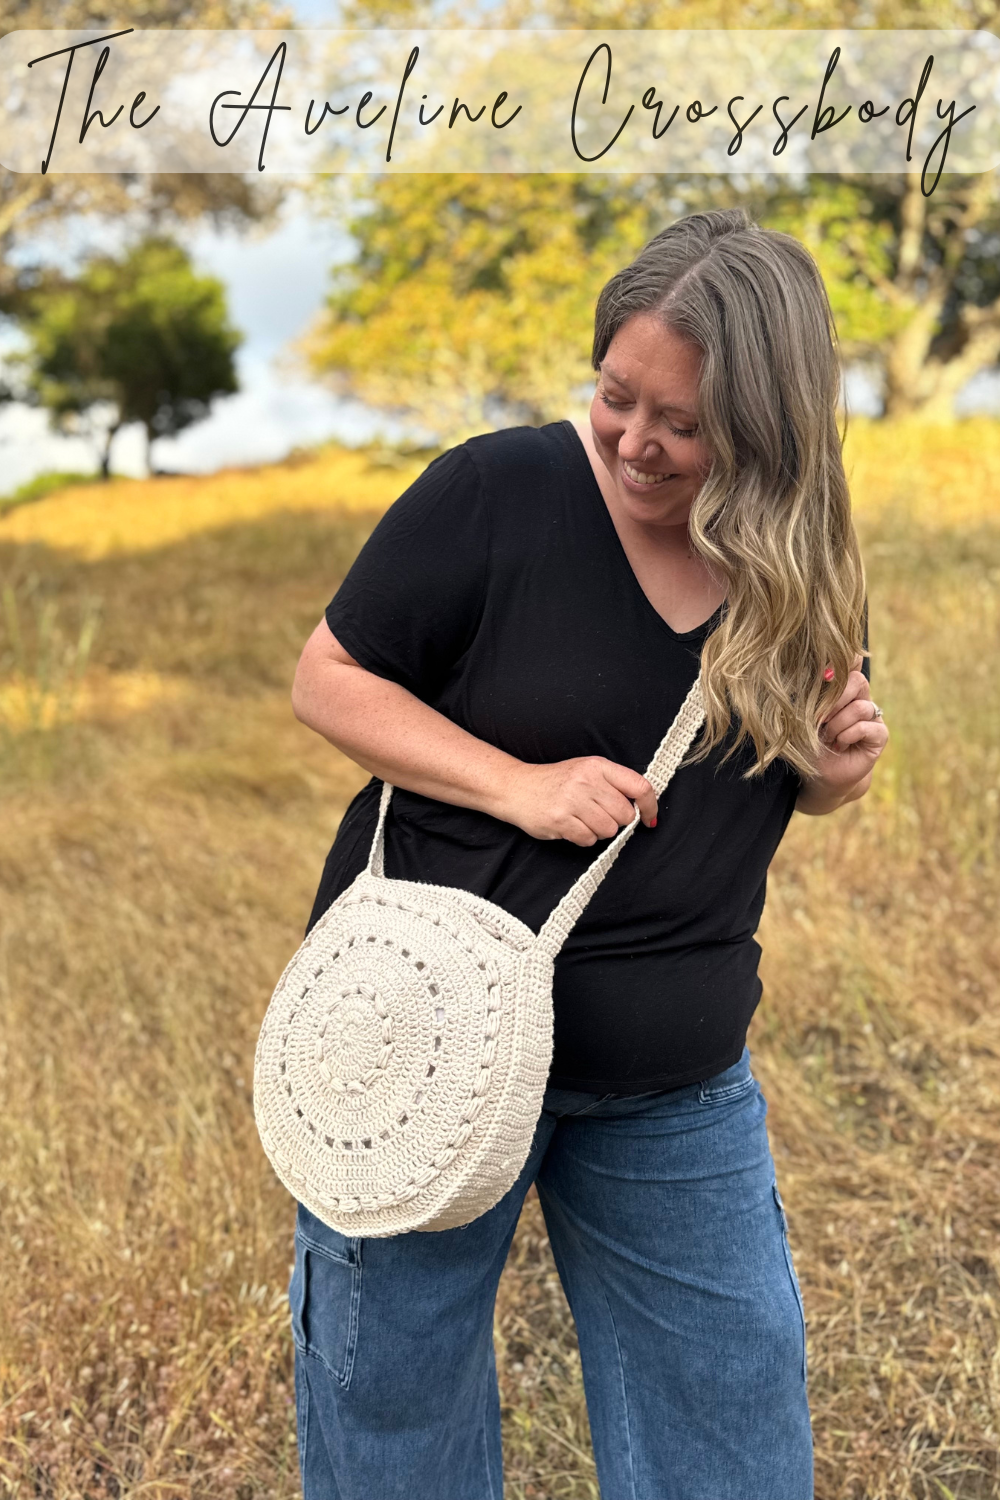
Now you can enjoy your new Aveline Crossbody bag this Summer. If you make one I’d love to see it. Make sure to tag me @meghanmakesdo on socials and use #theavelinecrossbody so I can see and share.
As always you can find a digital PDF of this pattern in my shop, Etsy and Ravelry or as a complete kit from Lion Brand Yarn.
Happy Crocheting,
Meghan