

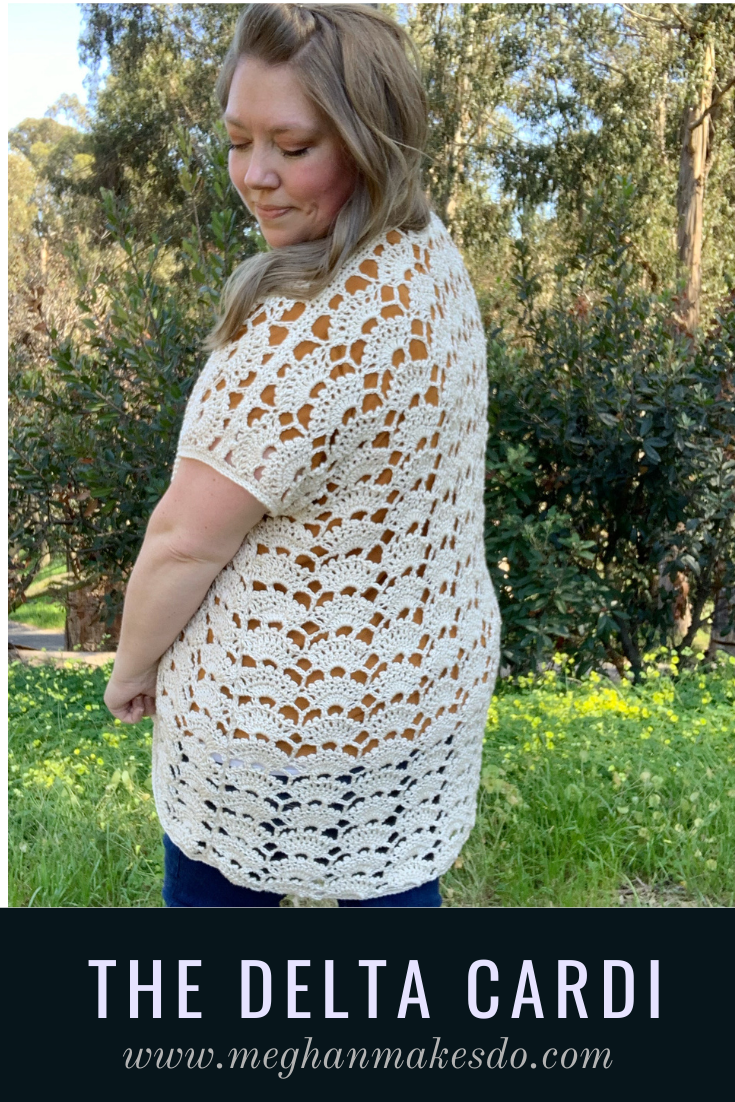
The Delta Cardi-Free Crochet Pattern
Fall in love with the picot fan stitch as you make the Delta Cardi. This goregous cardigan made with light weight Nuboo yarn is sure to be a summer staple. Find the free pattern below or grab a digital PDF in my shop.
I love trying out new yarns, especially ones for the Summer, so when I saw Nuboo from Lion Brand I knew I had to give it a try. It’s 100% Lyocell which is made from bamboo pulp and is sustainably harvested. It’s super soft and produces the most amazing drape. It’s very similar to their Truboo yarn and is perfect for all your Summer garments and accessories.
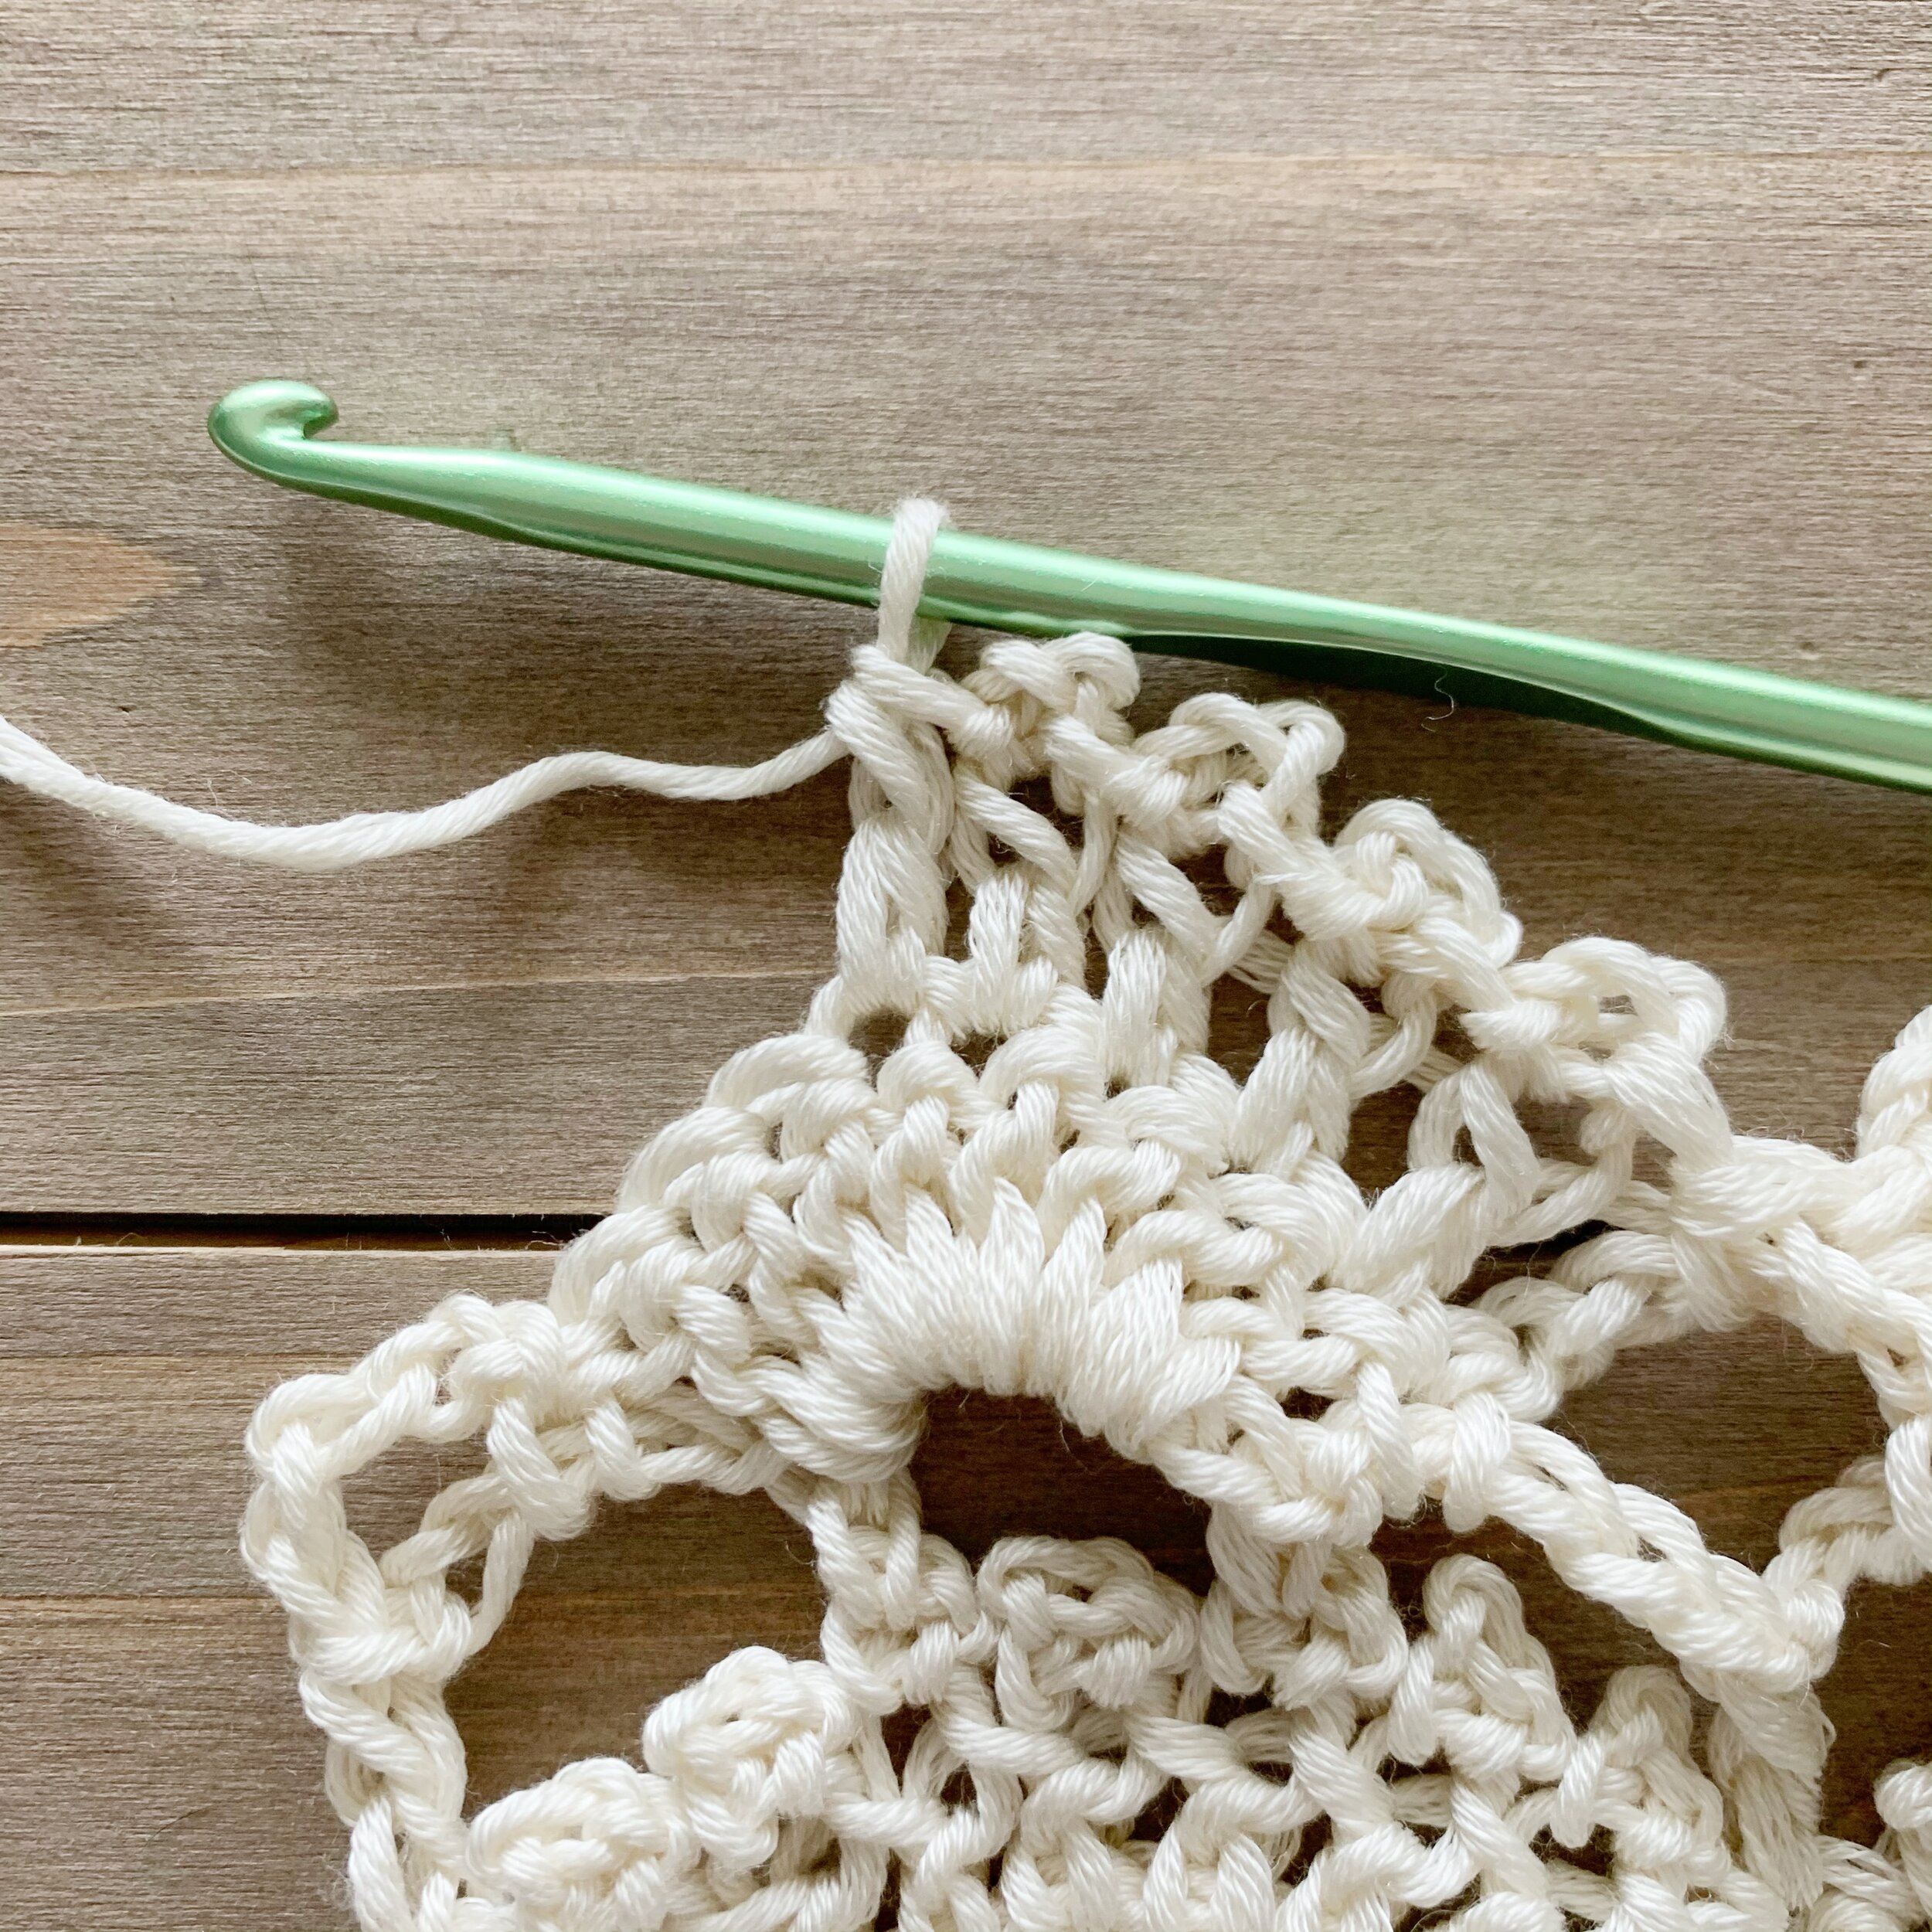
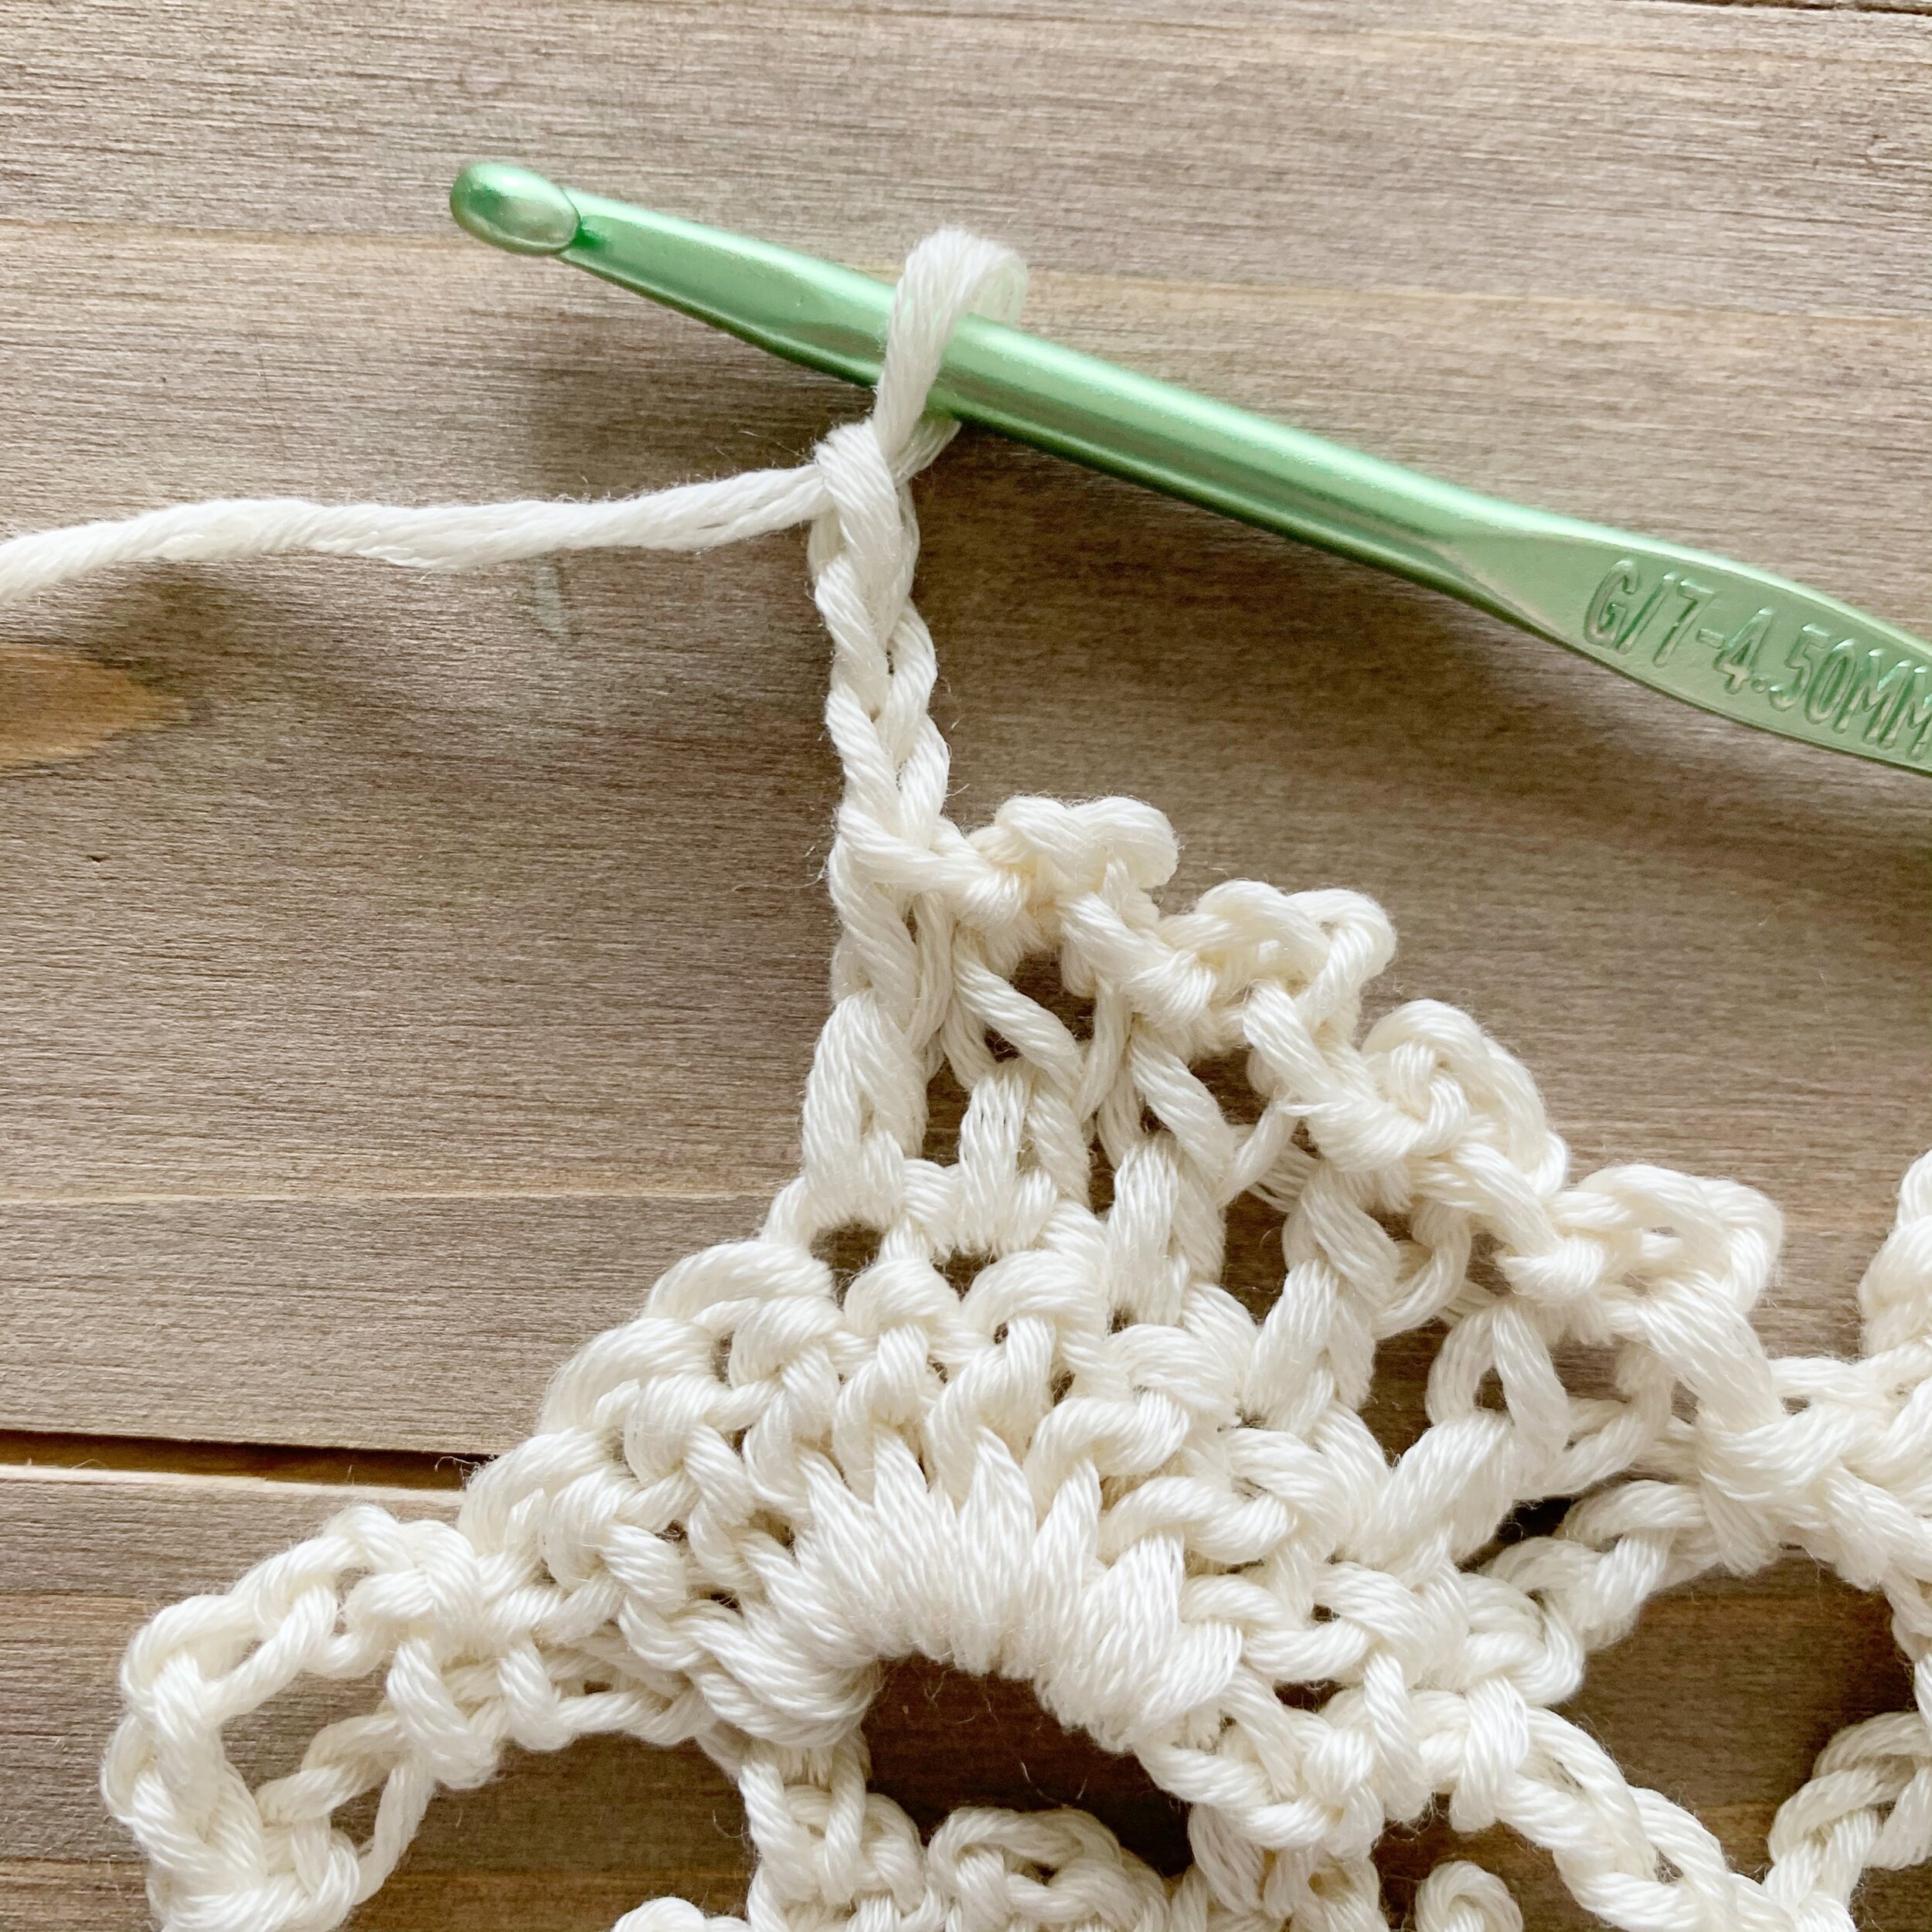
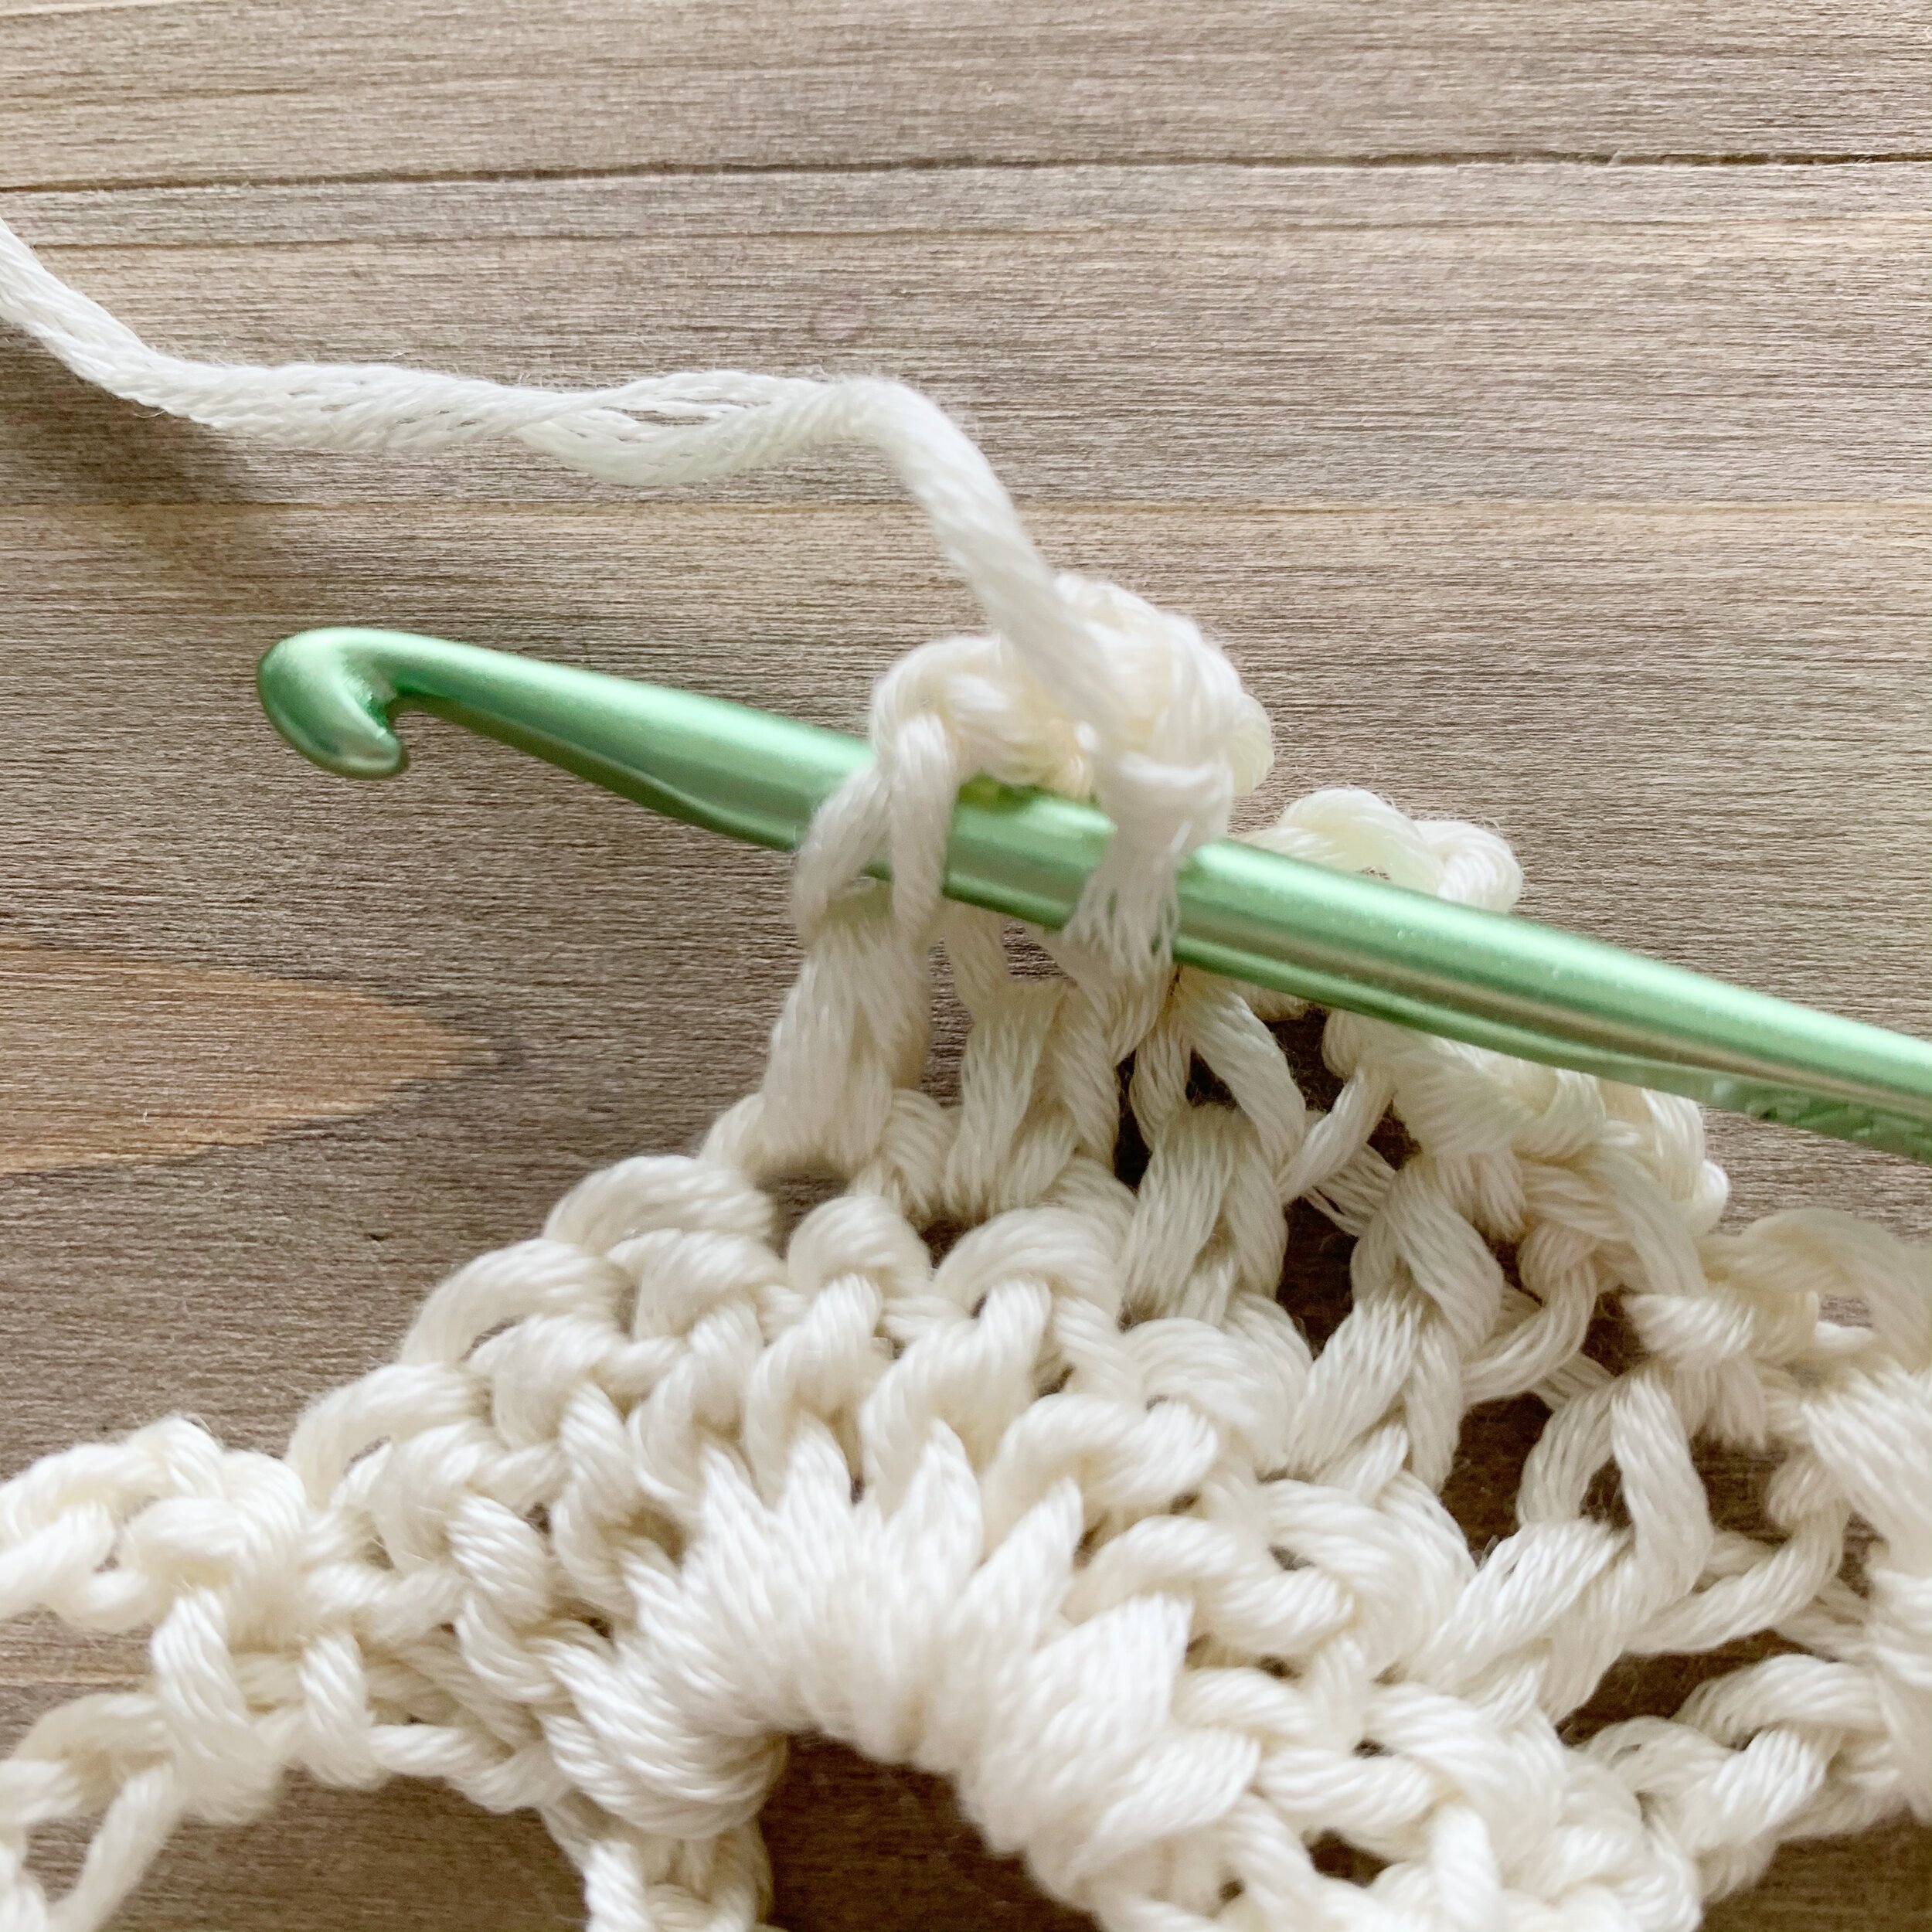
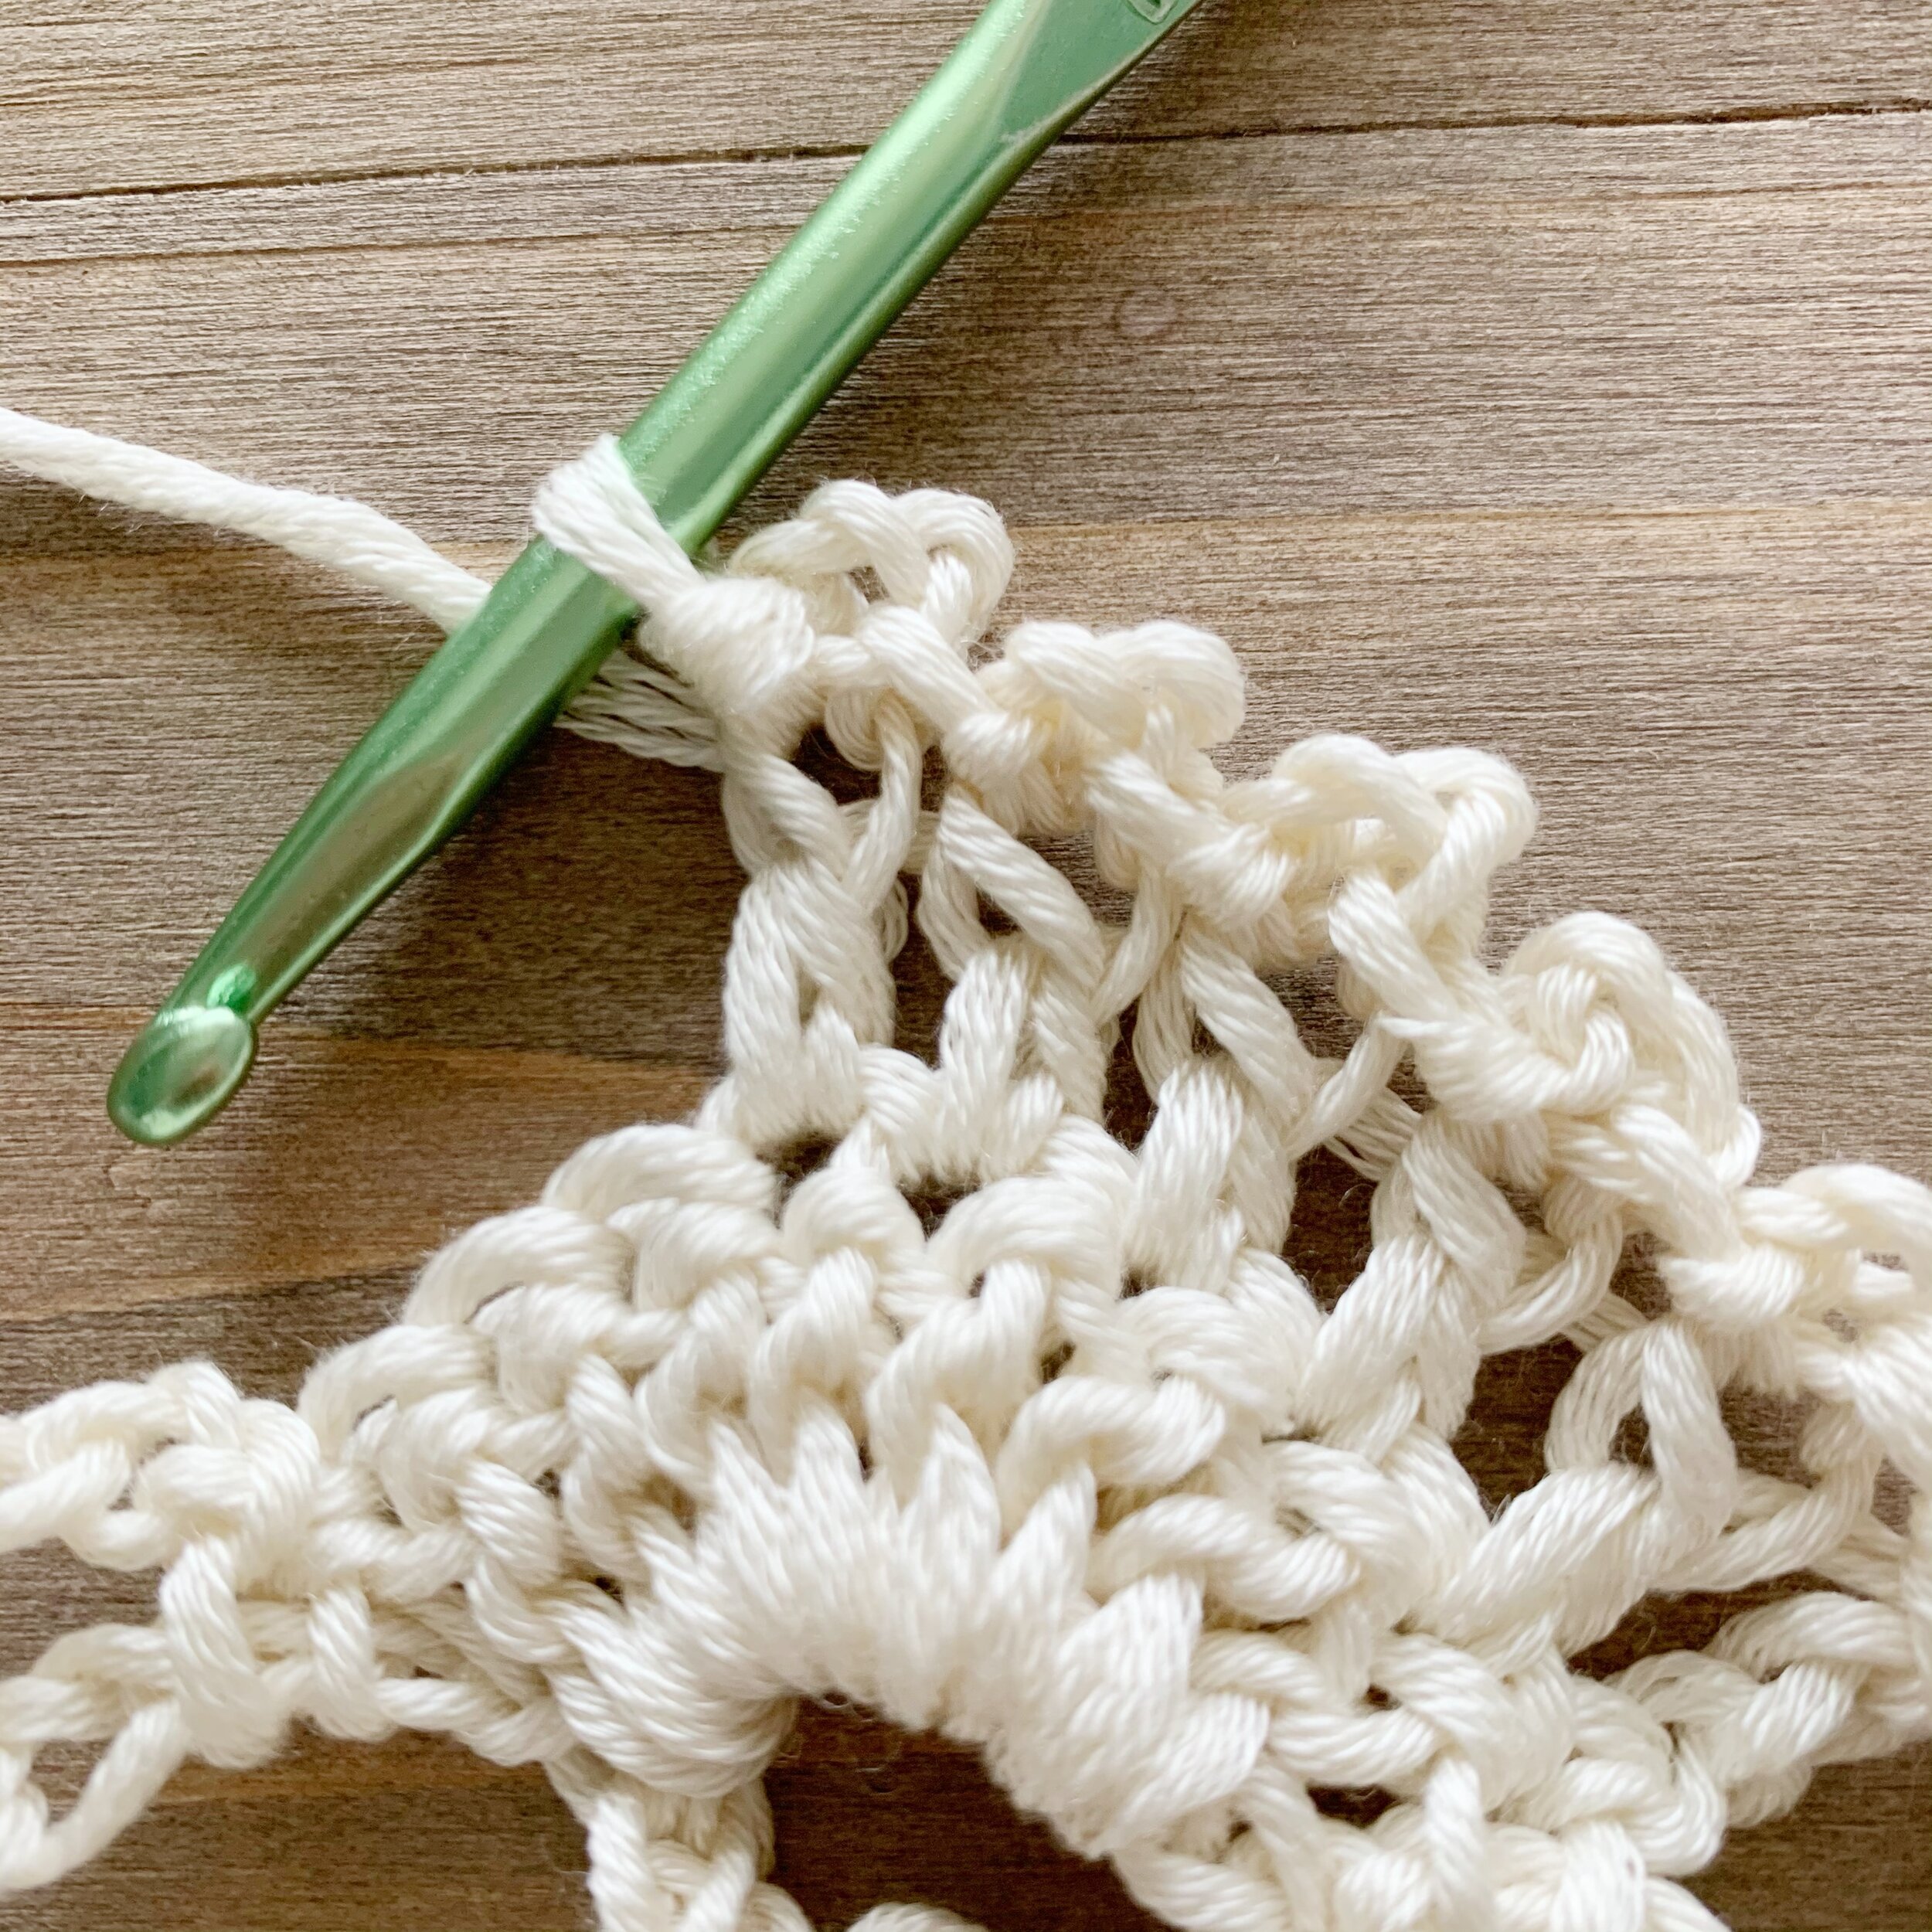
Along with trying new yarns, I’m always on the look out for new stitches too. I checked out an amazing stitch book from the library and started swatching. I wanted a lacey stitch and after a few failed attempts, I landed on the Picot Fan Stitch. It was a match made in heaven with the Nuboo yarn. Once you master the 3 row repeat it becomes a really relaxing stitch to make. I’ve included a detailed video tutorial for the Picot Fan Stitch as well so you’ll be working up your cardi in no time.
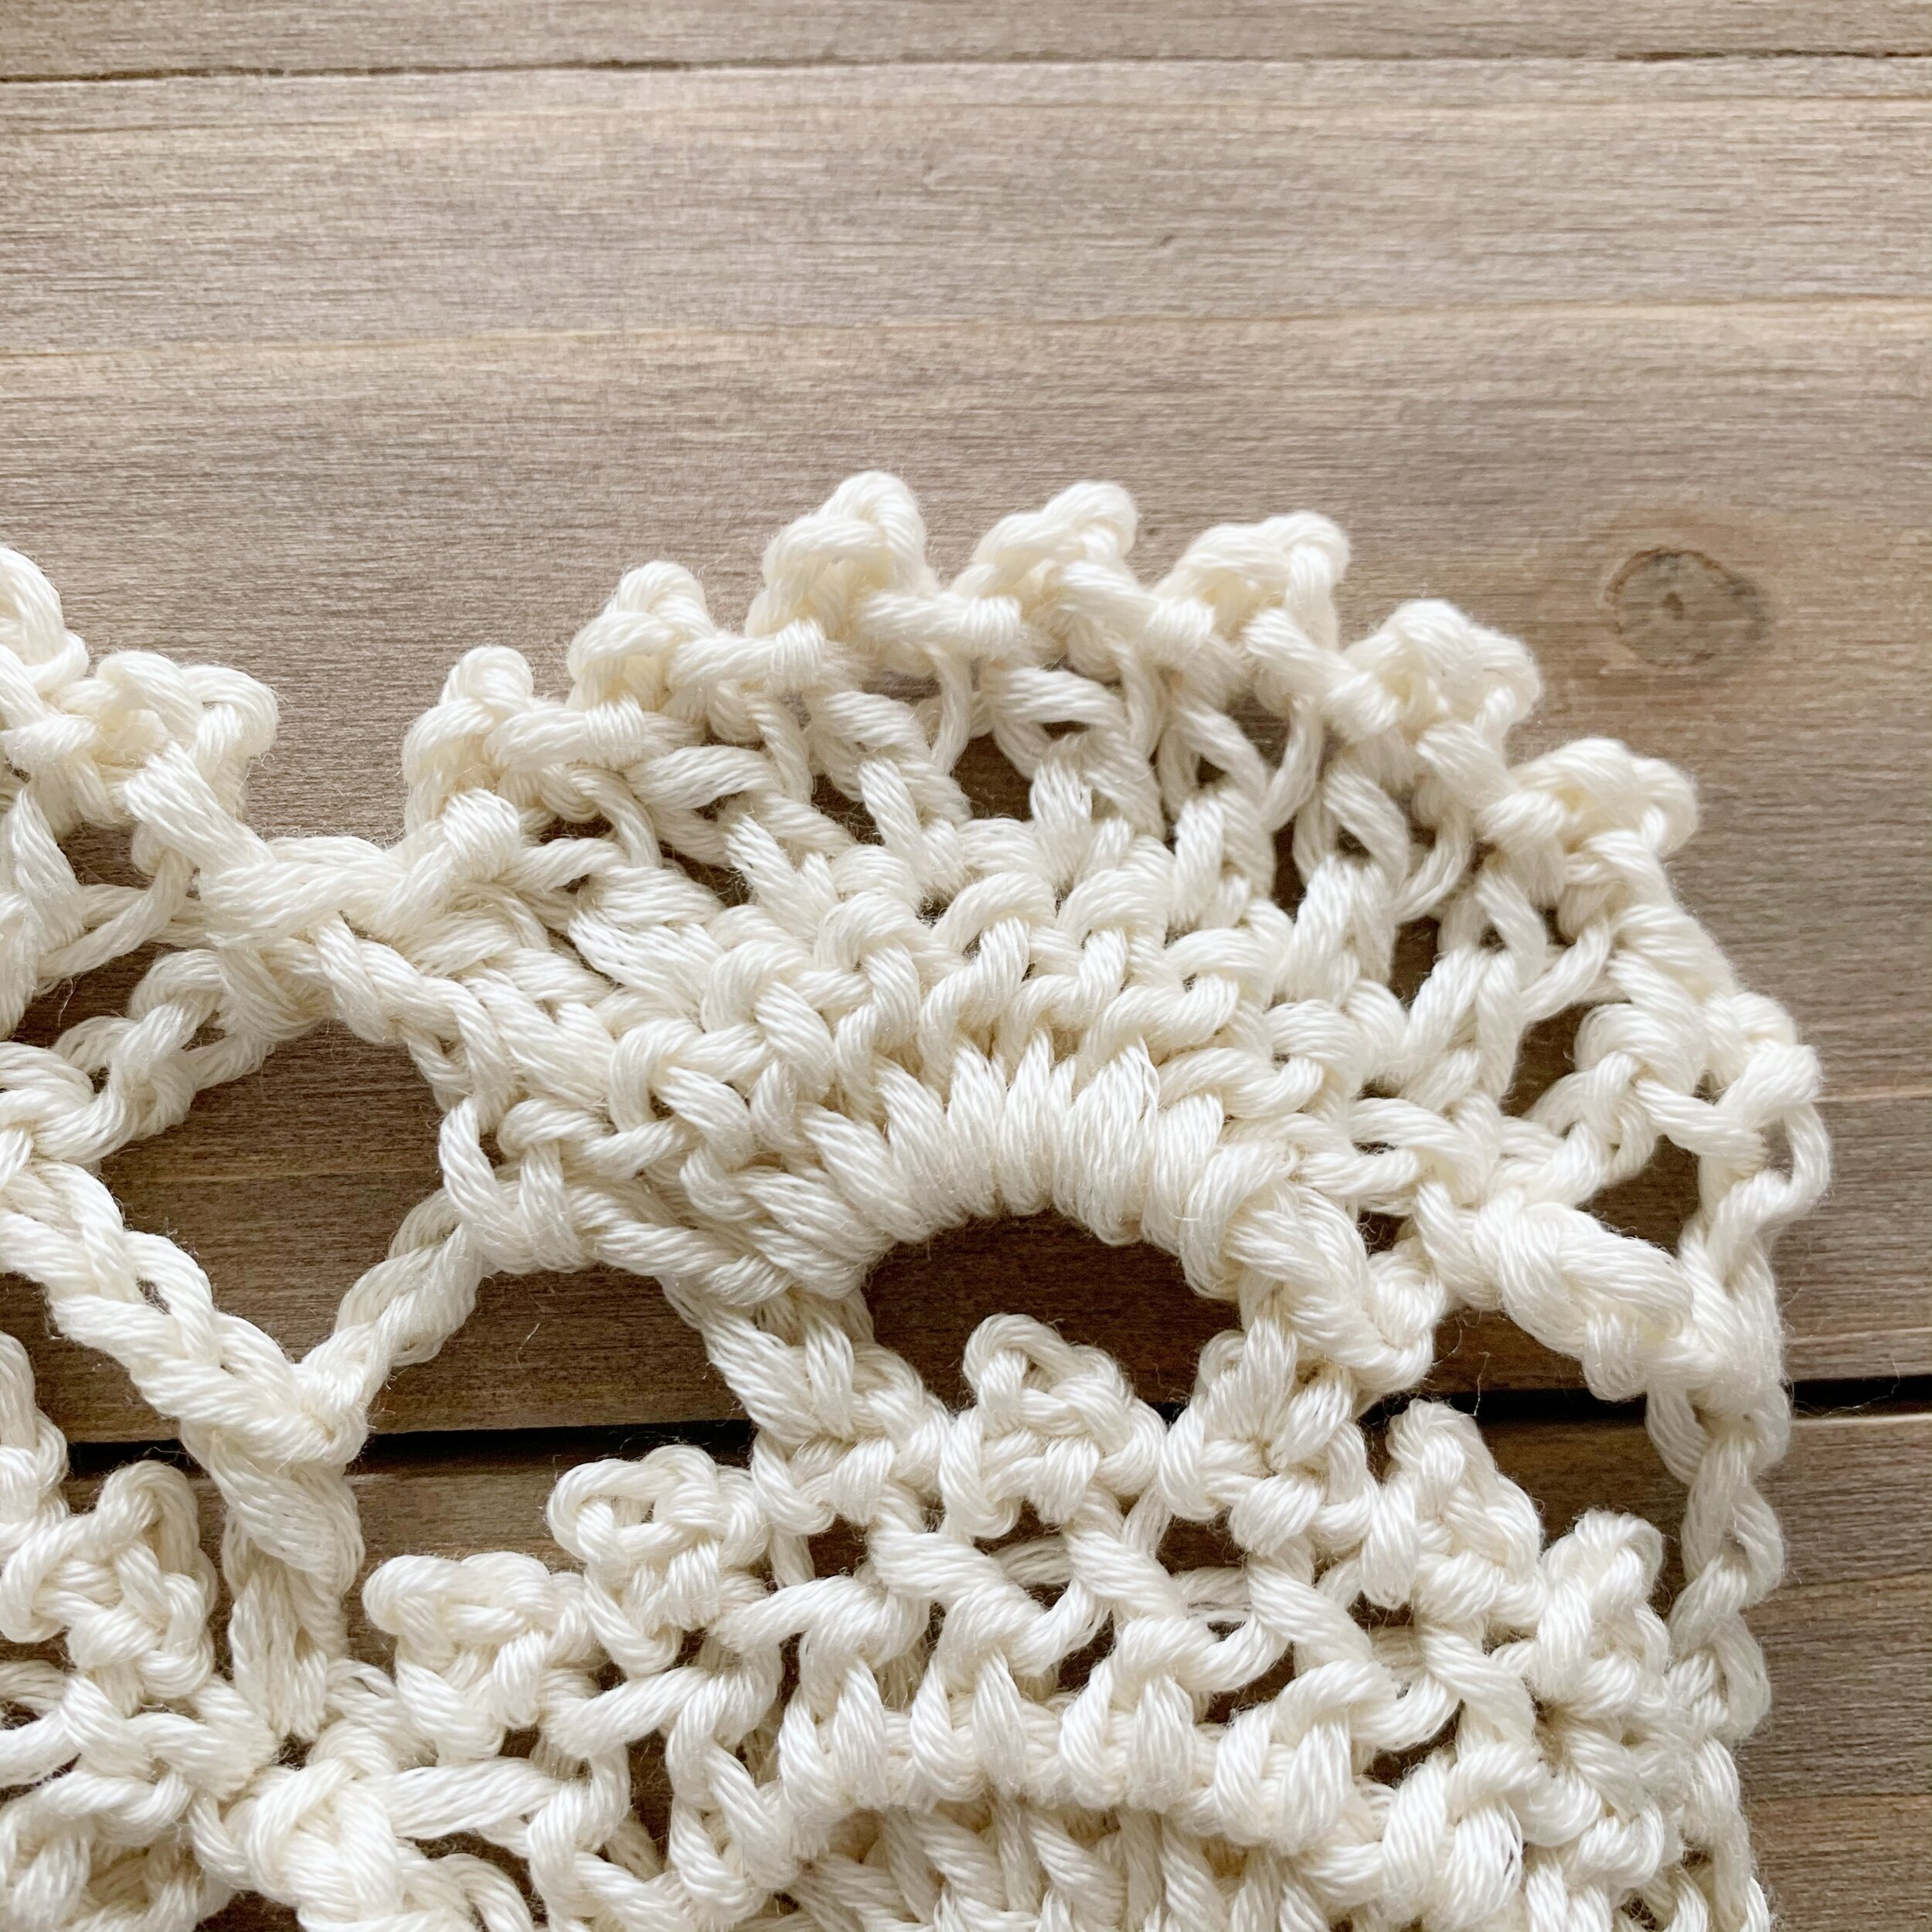
I love the little picots on the end of the fan stitches. It gives it such a romantic look and makes the Delta Cardi a great layering piece. I’ve paired mine with jeans and a t-shirt, dresses and as a swimsuit cover up.

The Delta Cardi Crochet Pattern
Materials:
785-1,602 yards of Lion Brand Nuboo yarn in Cream or similar worsted weight yarn.
Tapestry needle
Scissors
Abbreviations:
ch(s)- chain(s) st(s)- stitch(es)
yo- yarn over RS- right side
sl- slip WS- wrong side
sc- single crochet dc-double crochet
Dc picot- make a double crochet st, then ch 3 and sl st into top side of dc just made (see special stitches)
Gauge:
25 sts and 7 rows in pattern repeat = 6” wide and 4” tall swatch.
(Ch 26 and work rows 1-7 for gauge.)
Notes:
1.Pattern is worked bottom up for all panels. The back and front panels are seamed at the shoulders. Then sides are seamed leaving room for the arm holes.
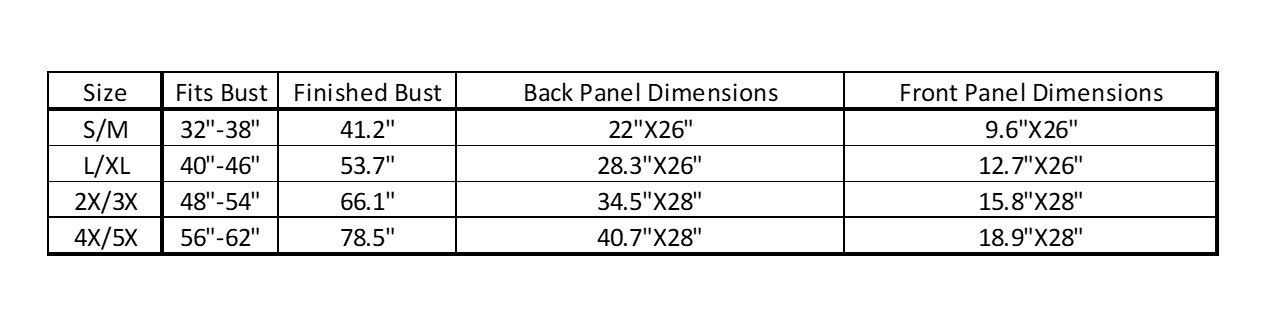
2.Pattern is made with 2-4” of positive ease. See size chart for help determining the size you need to make.
3.Pattern is written for S/M with other sizes in parenthesis. Ex. S/M(L/XL, 2X/3X, 4X/5X)
Size:
S/M: fits bust 32-38” (approx. 785 yards)
L/XL: fits bust 40-46” (approx. 1089 yards)
2X/3X: fits bust 48-54” (approx. 1346 yards)
4X/5X: fits bust 56-62” (approx. 1602 yards)
Special Stitches:
Double Crochet Picot (dc picot): make a double crochet st, then ch 3 and sl st into top side of dc just made.
Pattern:
Back:
Ch 86(110, 134, 158)
Row 1(RS): sc in 2nd ch from hook, *ch 5, sk 3 chs, sc in next ch, repeat from * across, turn. (21(27, 33, 39)ch-5 arches)
Row 2: ch 5 (counts as dc, ch 2), *sc into next ch-5 sp, 8dc into next ch-5 sp, sc into next ch-5 sp**, ch 5, repeat from * ending last repeat at ** sc in last ch-5 sp, ch 2, dc into last st, turn. (7(9, 11, 13) dc fans)
Row 3: ch 1, sc into 1st st, sk ch-2 and 1 sc, * dc picot 7, dc, sc into ch-5 sp, repeat from * working last sc into the 3rd ch of turning ch, turn. (7(9, 11, 13) dc fans)
Row 4: ch 8(counts as dc, ch 5), sk 2 picots, *sc in next picot, ch 5, sk 1 picot, sc into next picot, ch 5, sk 2 picots, dc into next sc**, ch 5, sk 2 picots, repeat from * ending last repeat at **, turn. (21(27, 33, 39)ch-5 arches)
Row 5: ch 5(counts as dc, ch 2), *sc into next ch-5 sp, 8dc into next ch-5 sp, sc into next ch-5 sp**, ch 5, repeat from * ending last repeat at ** sc in last ch-5 sp, ch 2, dc into 3rd ch of turning ch, turn. (7(9, 11, 13) dc fans)
Repeat Rows 3-5 for a total of 49(49, 52, 52) rows. You will end on a Row 4 repeat.
Row 50(50, 53, 53): ch 1, sc in first st, *3 sc in next ch-5 sp, sc in next st, repeat from * across, working last st into the 3rd turning ch. (85(109, 133, 157)(16(16, 17, 17) total fan rows.
Fasten off leaving a long tail for seaming.
Front Panels: make two
Ch 38(50, 62, 74)
Row 1(RS): sc in 2nd ch from hook, *ch 5, sk 3 chs, sc in next ch, repeat from * across, turn. (9(12, 15, 18)ch-5 arches)
Row 2: ch 5 (counts as dc, ch 2), *sc into next ch-5 sp, 8dc into next ch-5 sp, sc into next ch-5 sp**, ch 5, repeat from * ending last repeat at ** sc in last ch-5 sp, ch 2, dc into last st, turn. (3(4, 5, 6) dc fans)
Row 3: ch 1, sc into 1st st, sk ch-2 and 1 sc, * dc picot 7, dc, sc into ch-5 sp, repeat from * working last sc into the 3rd ch of turning ch, turn. (3(4, 5, 6) dc fans)
Row 4: ch 8(counts as dc, ch 5), sk 2 picots, *sc in next picot, ch 5, sk 1 picot, sc into next picot, ch 5, sk 2 picots, dc into next sc**, ch 5, sk 2 picots, repeat from * ending last repeat at **, turn. (9(12, 15, 18)ch-5 arches)
Row 5: ch 5(counts as dc, ch 2), *sc into next ch-5 sp, 8dc into next ch-5 sp, sc into next ch-5 sp**, ch 5, repeat from * ending last repeat at ** sc in last ch-5 sp, ch 2, dc into 3rd ch of turning ch, turn. (3(4, 5, 6) dc fans)
Repeat Rows 3-5 for a total of 49(49, 52, 52) rows. You will end on a Row 4 repeat.
Row 50(50, 53, 53): ch 1, sc in first st, *3 sc in next ch-5 sp, sc in next st, repeat from * across, working last st into the 3rd turning ch. (37(49, 61, 73)(16(16, 17, 17) total fan rows.
Fasten off leaving a long tail for seaming.
Assembly:
Lay back panel and front panels down with RS together. Seam using your preferred seaming method along the shoulders and the sides as shown below (blue lines). Leave a 8(8.5, 9.5, 10) inch opening on each side for the armholes.

Finishing:
Armholes:
With RS facing you, attach yarn to center of side seam of underarm and ch 1.
Round 1: sc in same st as join and evenly all the way around the edge of the armhole, sl st to 1st st to join.
Round 2: ch 1, sc in same st as join and in each st around, sl st to 1st st to join.
Round 3: ch 1, sl st loosely in each st around, sl st to 1st st to join.
Repeat for second armhole.
Outer band:
With RS facing you, attach yarn to center of back and ch 1.
Round 1: sc in same st as join and evenly across back panel, down first front panel, work 3 sc into the corner of the front panel, sc evenly along bottom, 3 sc into the corner of 2nd front panel, sc evenly along 2nd front panel and across the back, sl st to 1st st to join.
Round 2: ch 1, sc in same st as join and in each st around, again working 3sc into each bottom corner of the front panels, sl st to 1st st to join.
Round 3: ch 1, sl st loosely in each st around, sl st to 1st st to join.
Fasten off and weave in all ends. Block if needed.


