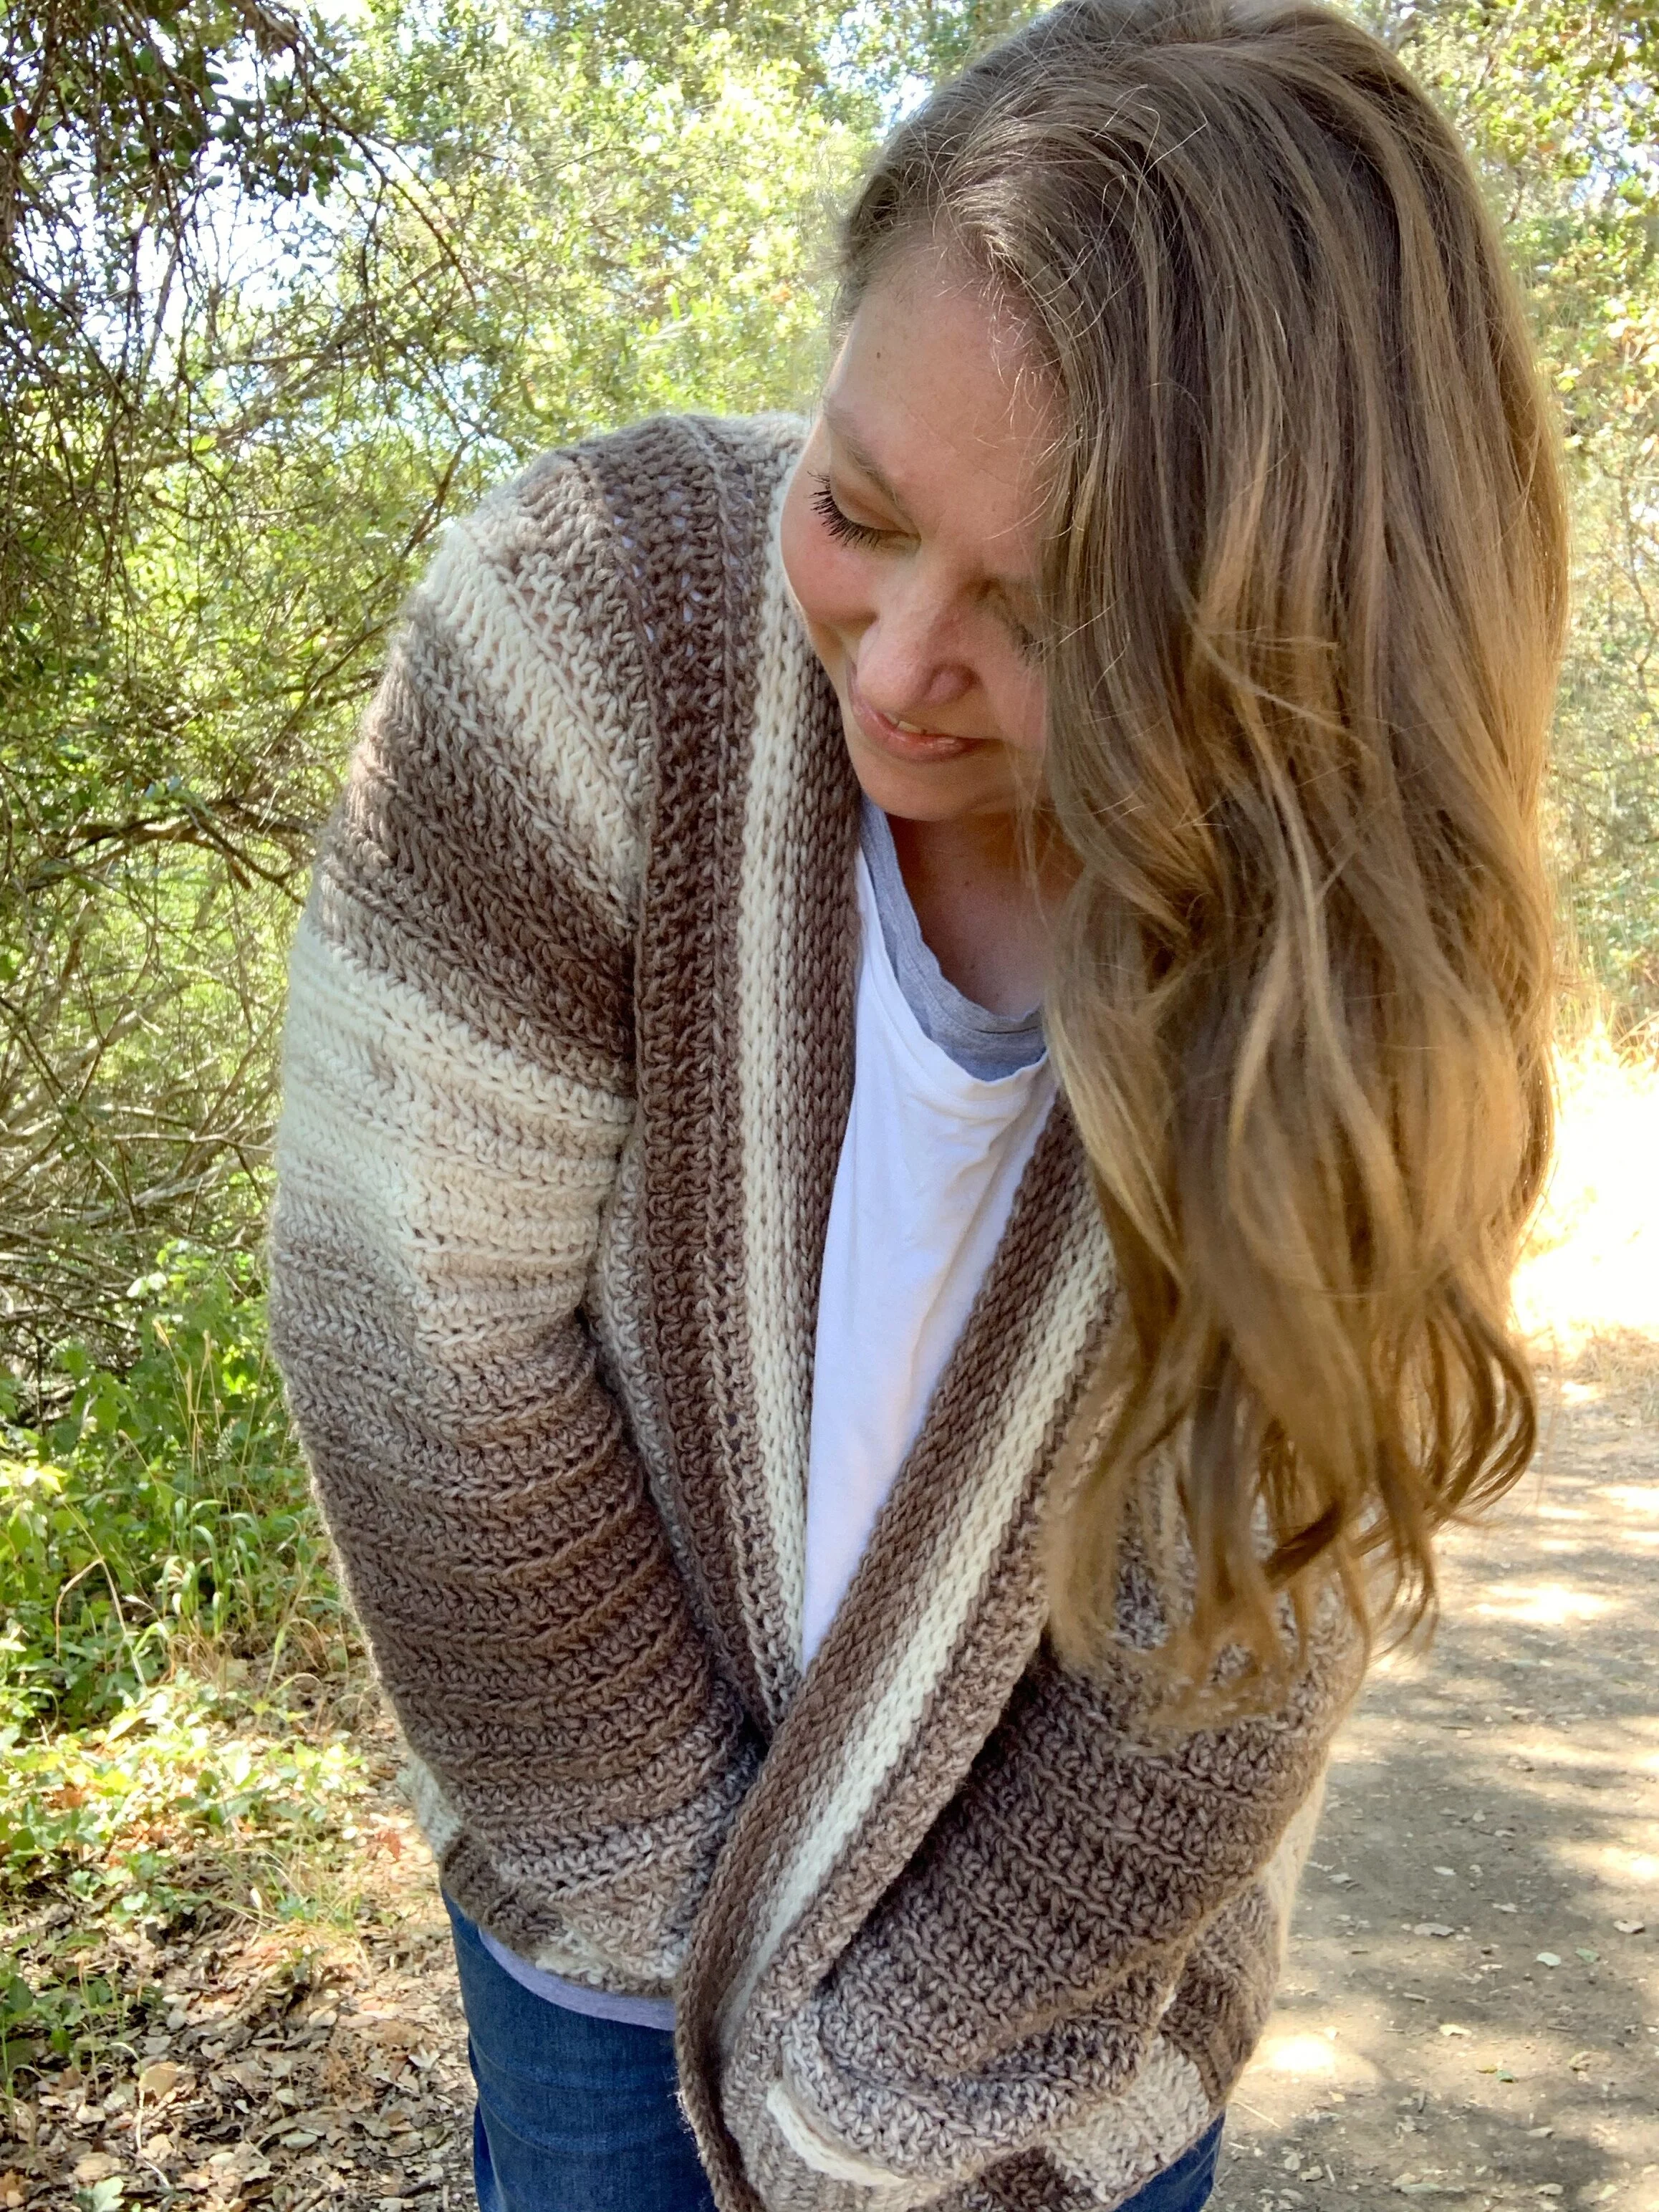
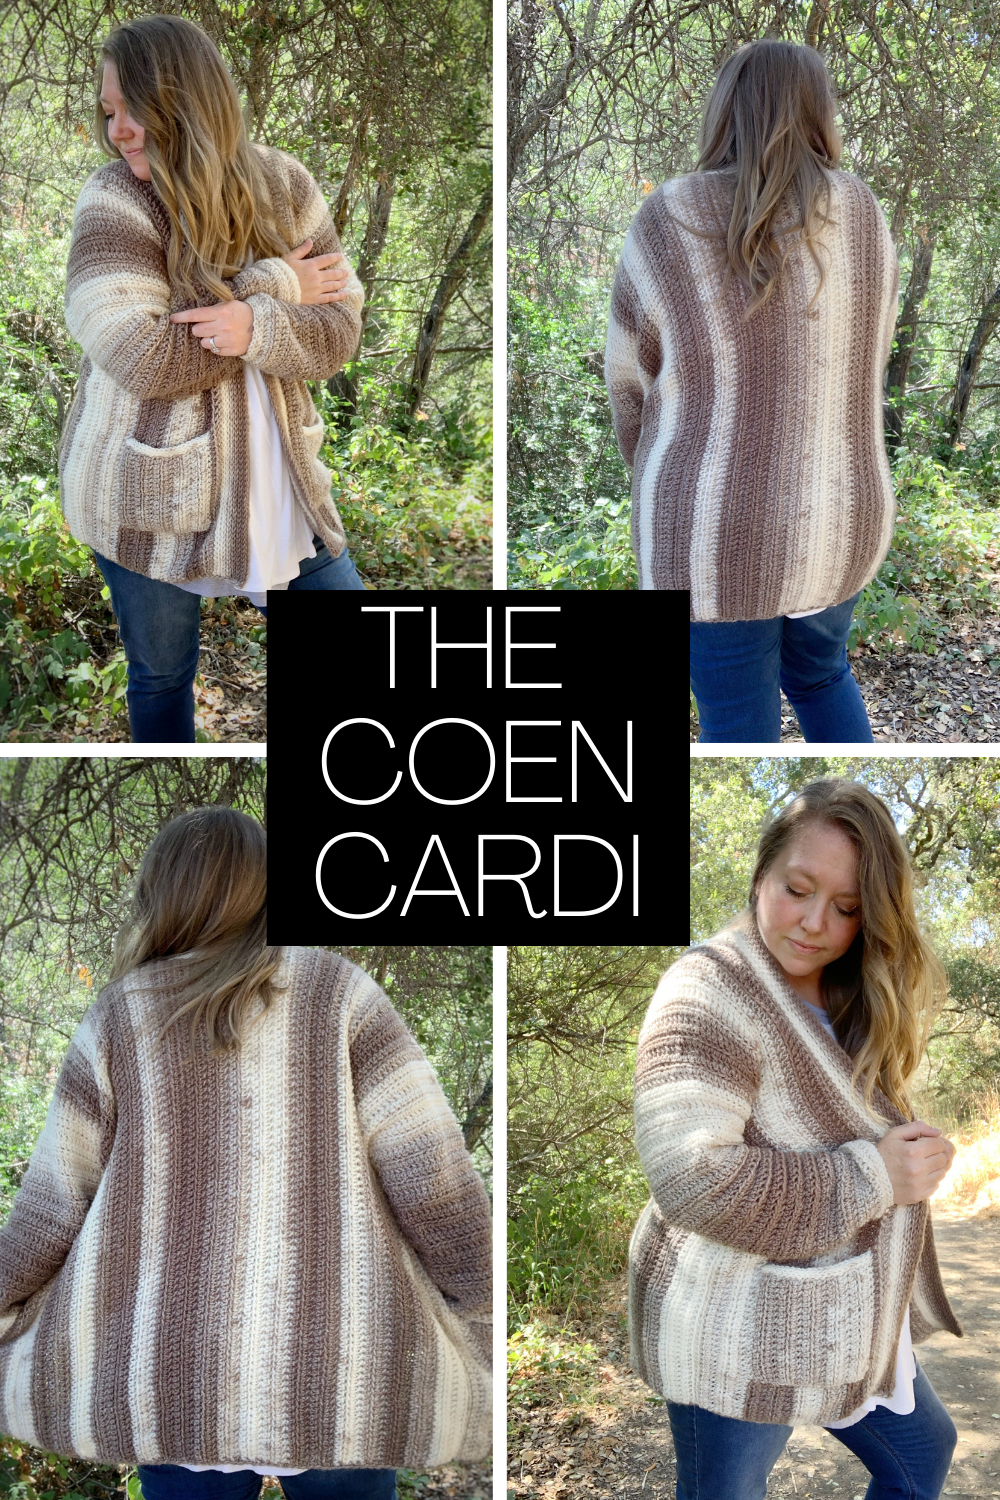
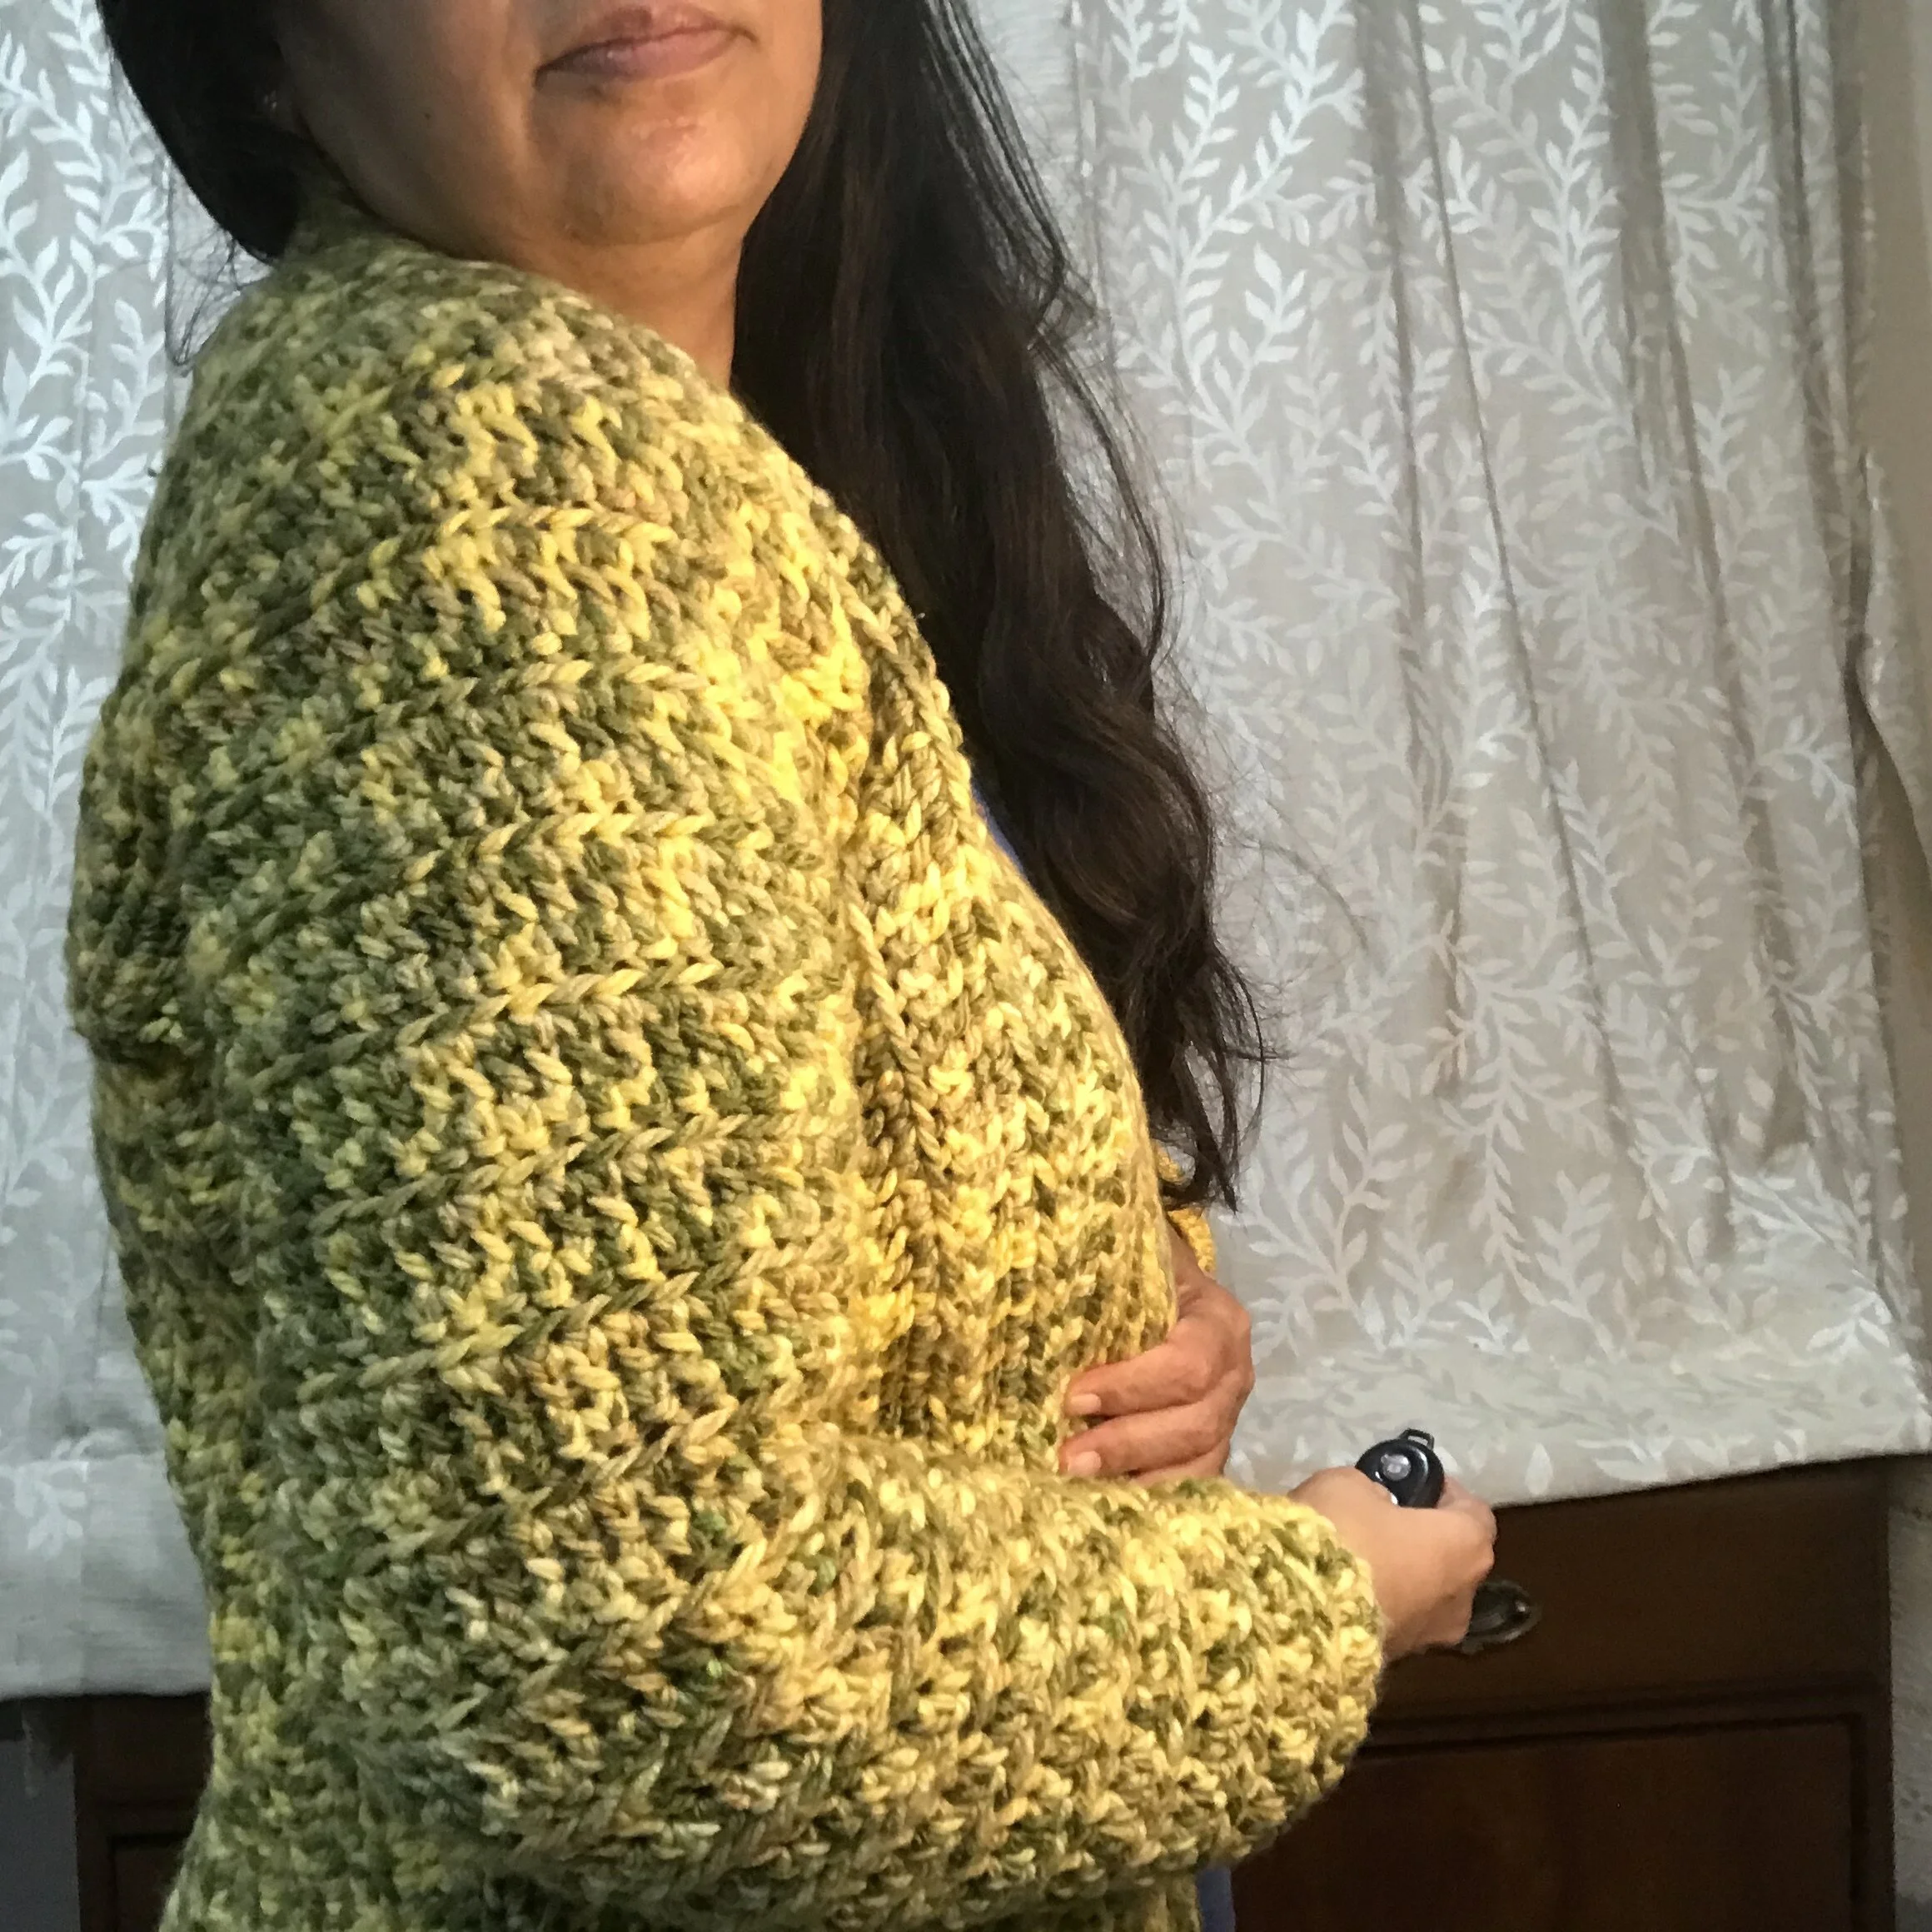
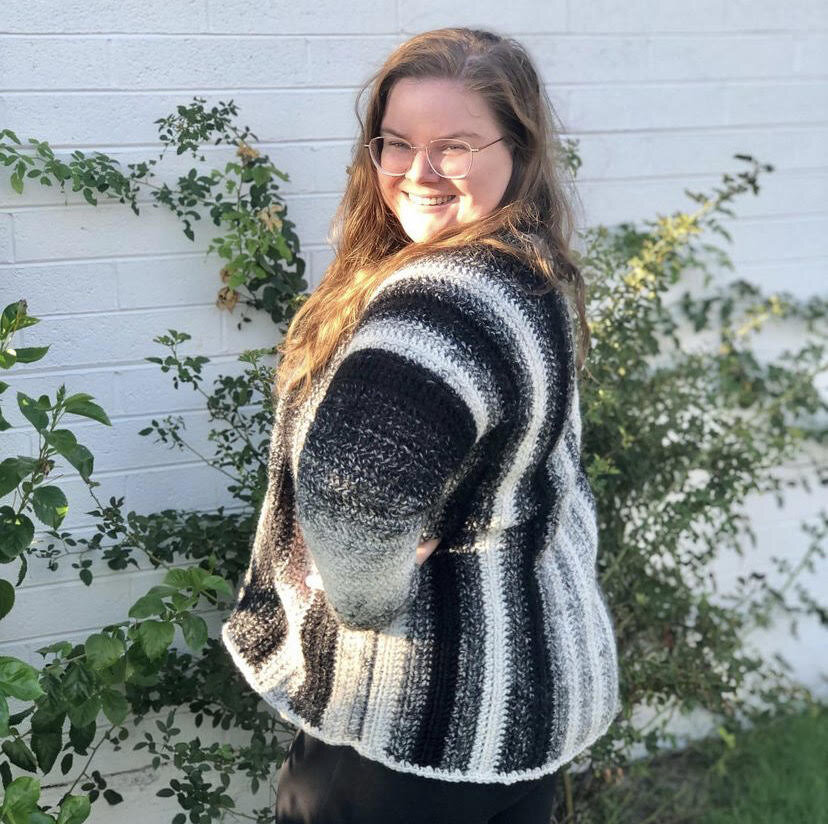
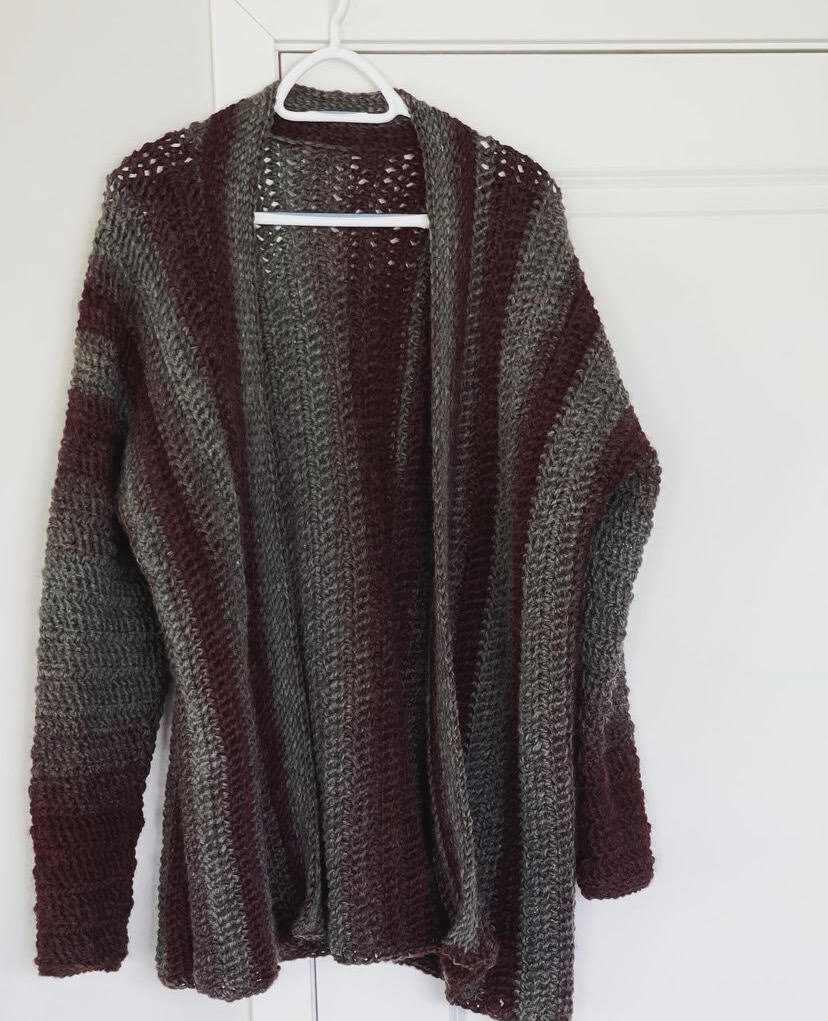
The Coen Cardigan-Free Crochet Pattern
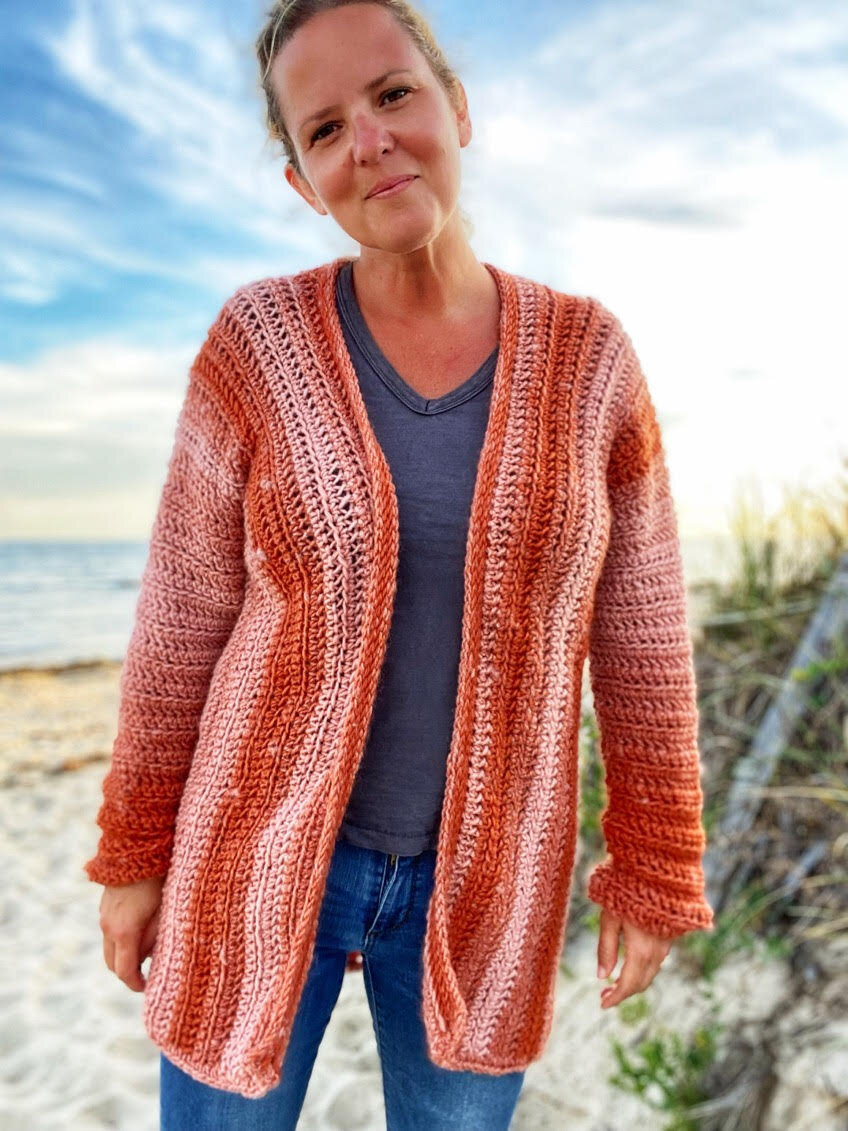
Get ready for a comfy cozy fall season with The Coen Cardigan! The unique construction and simple stitches work up quickly. This is the perfect pattern for the advanced beginner that wants to try making a garment. Find the free pattern below, grab a digital PDF in my shop or get the complete kit from Lion Brand Yarn.

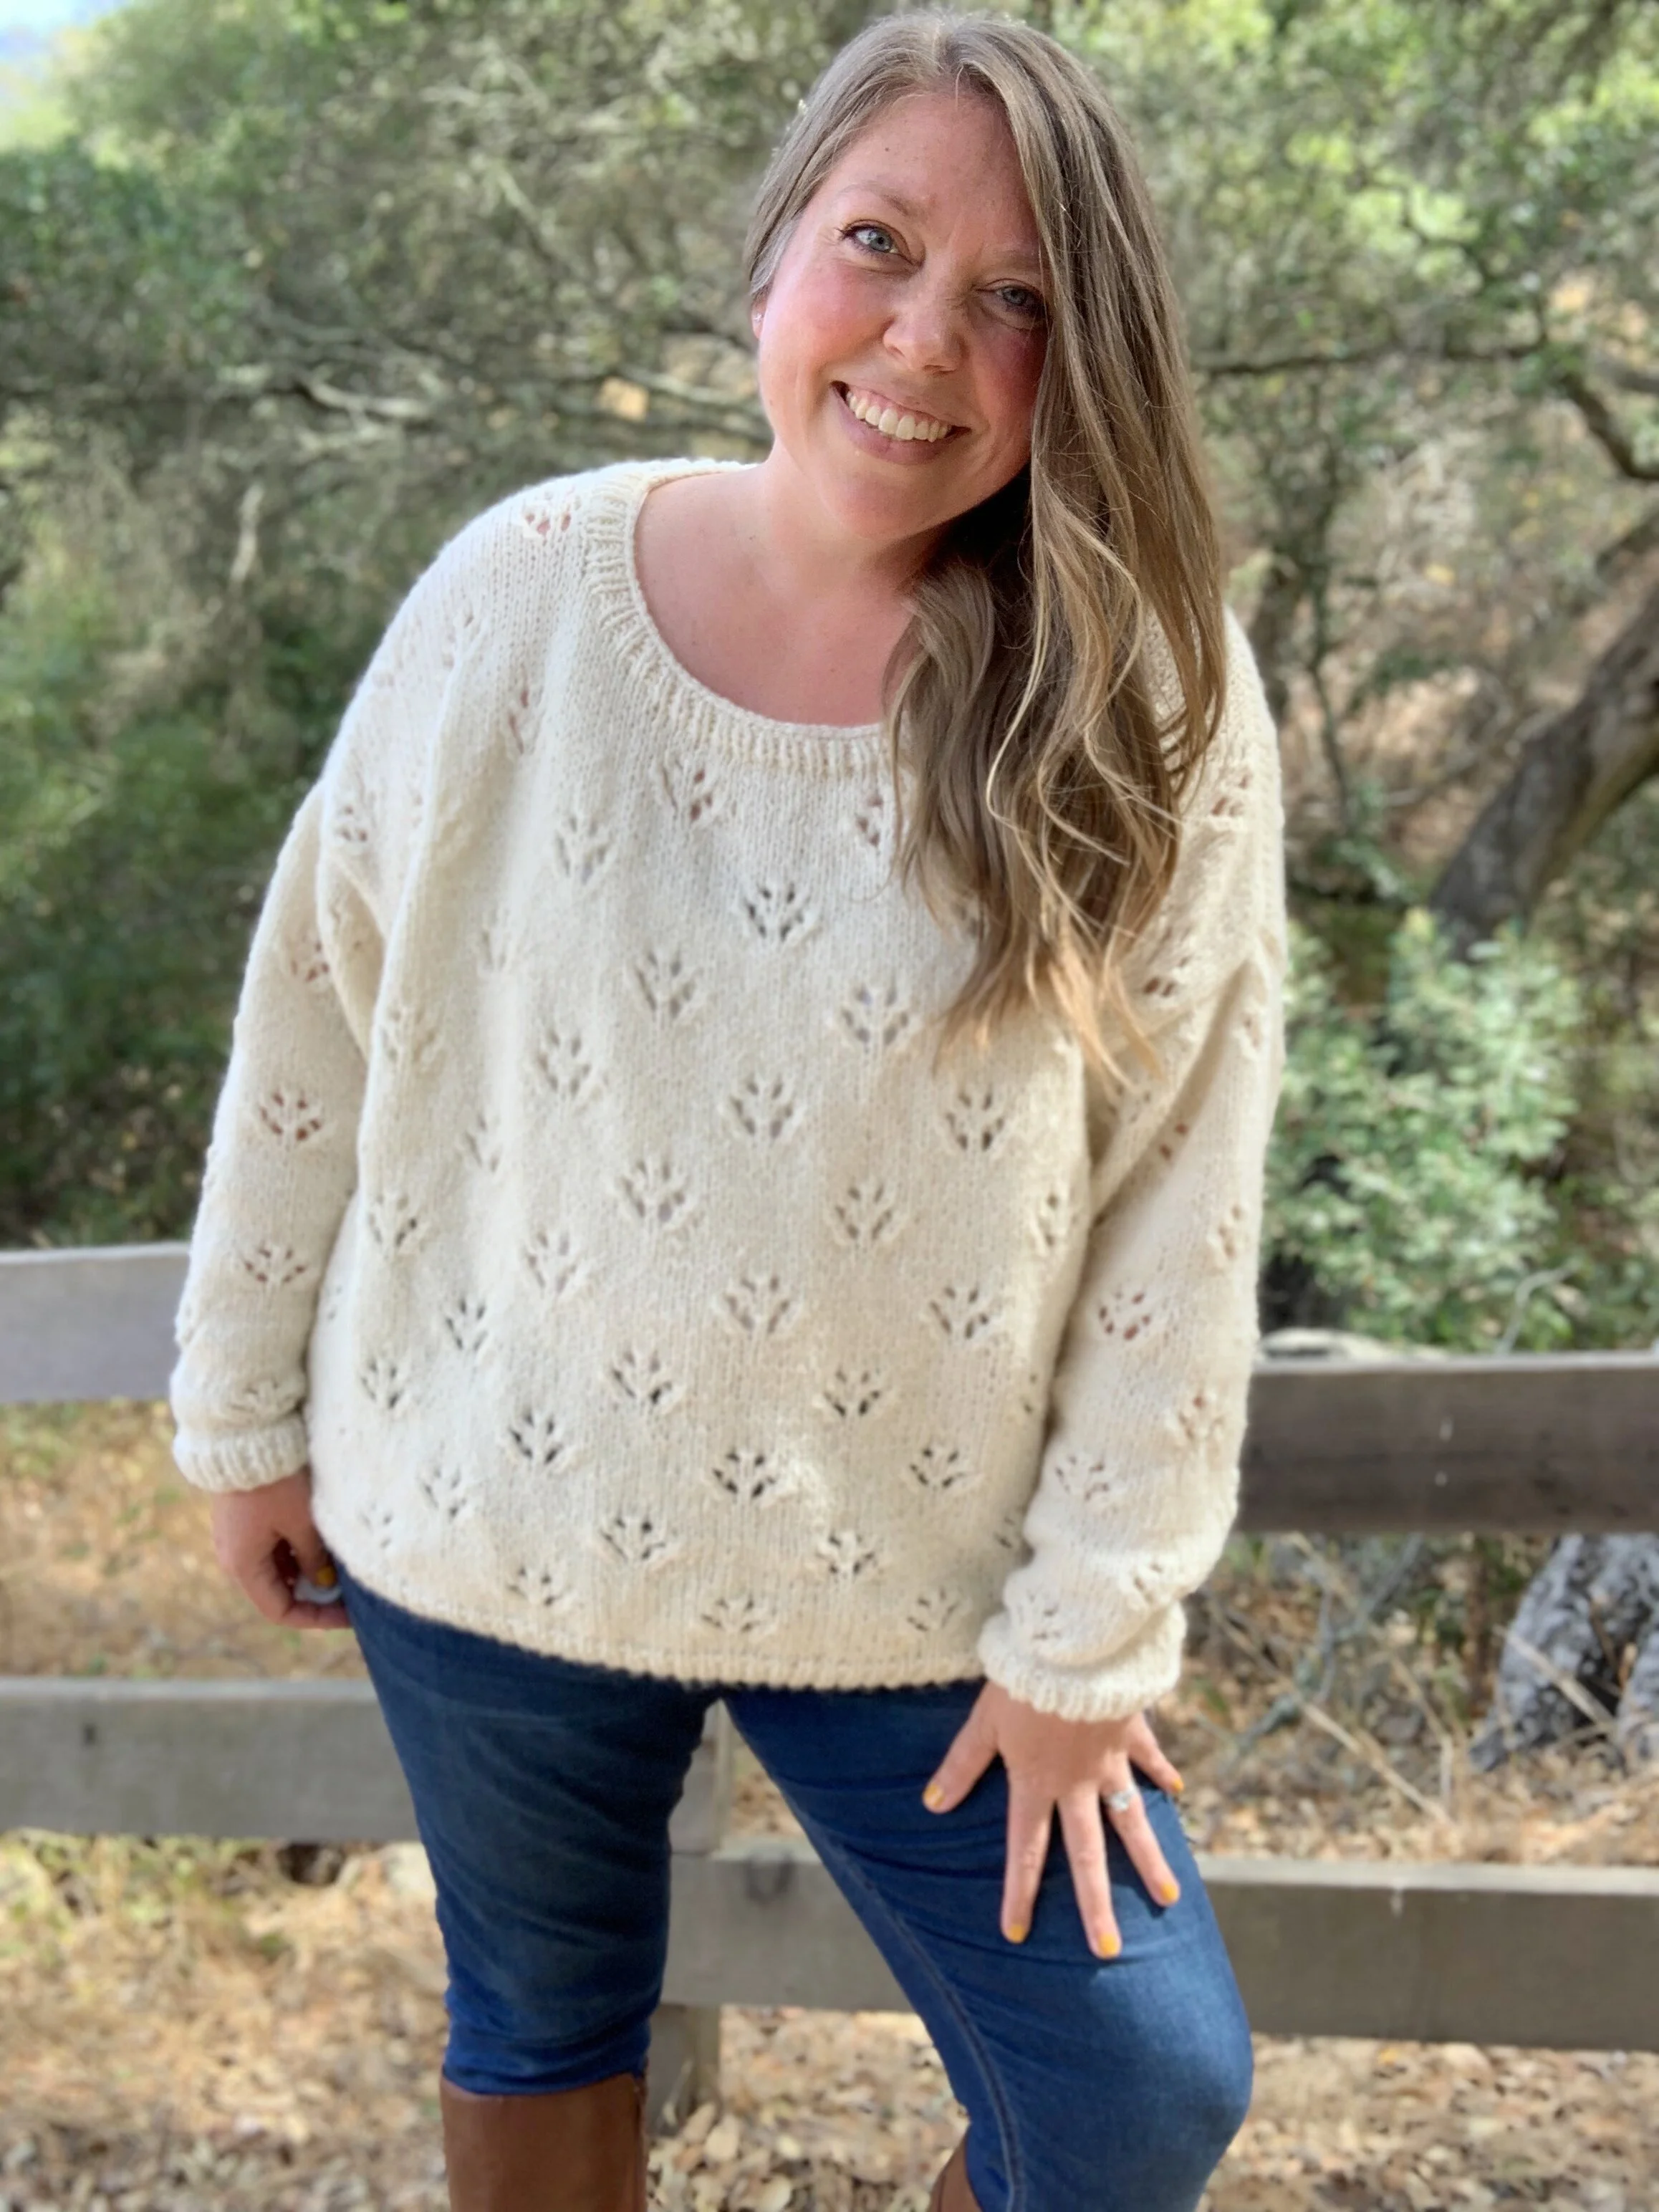
The nights are getting cooler, pumpkin cream cold brews are back and I’ve got an apple scented candle going. You know what that means right? Fall is just around the corner and it’s time to bust out all the cozy cardigans.
The Coen is the perfect project to get you in the mood for fall. It’s made with Lion Brand Scarfie yarn which is a bulky self striping yarn. It comes in so many gorgeous colors that you may not be able to make just one. It uses simple stitches and is constructed side to side in one piece for the front and back. The sides are then seamed and sleeves are added directly into the arm holes, making it perfect for those who are new to garments.
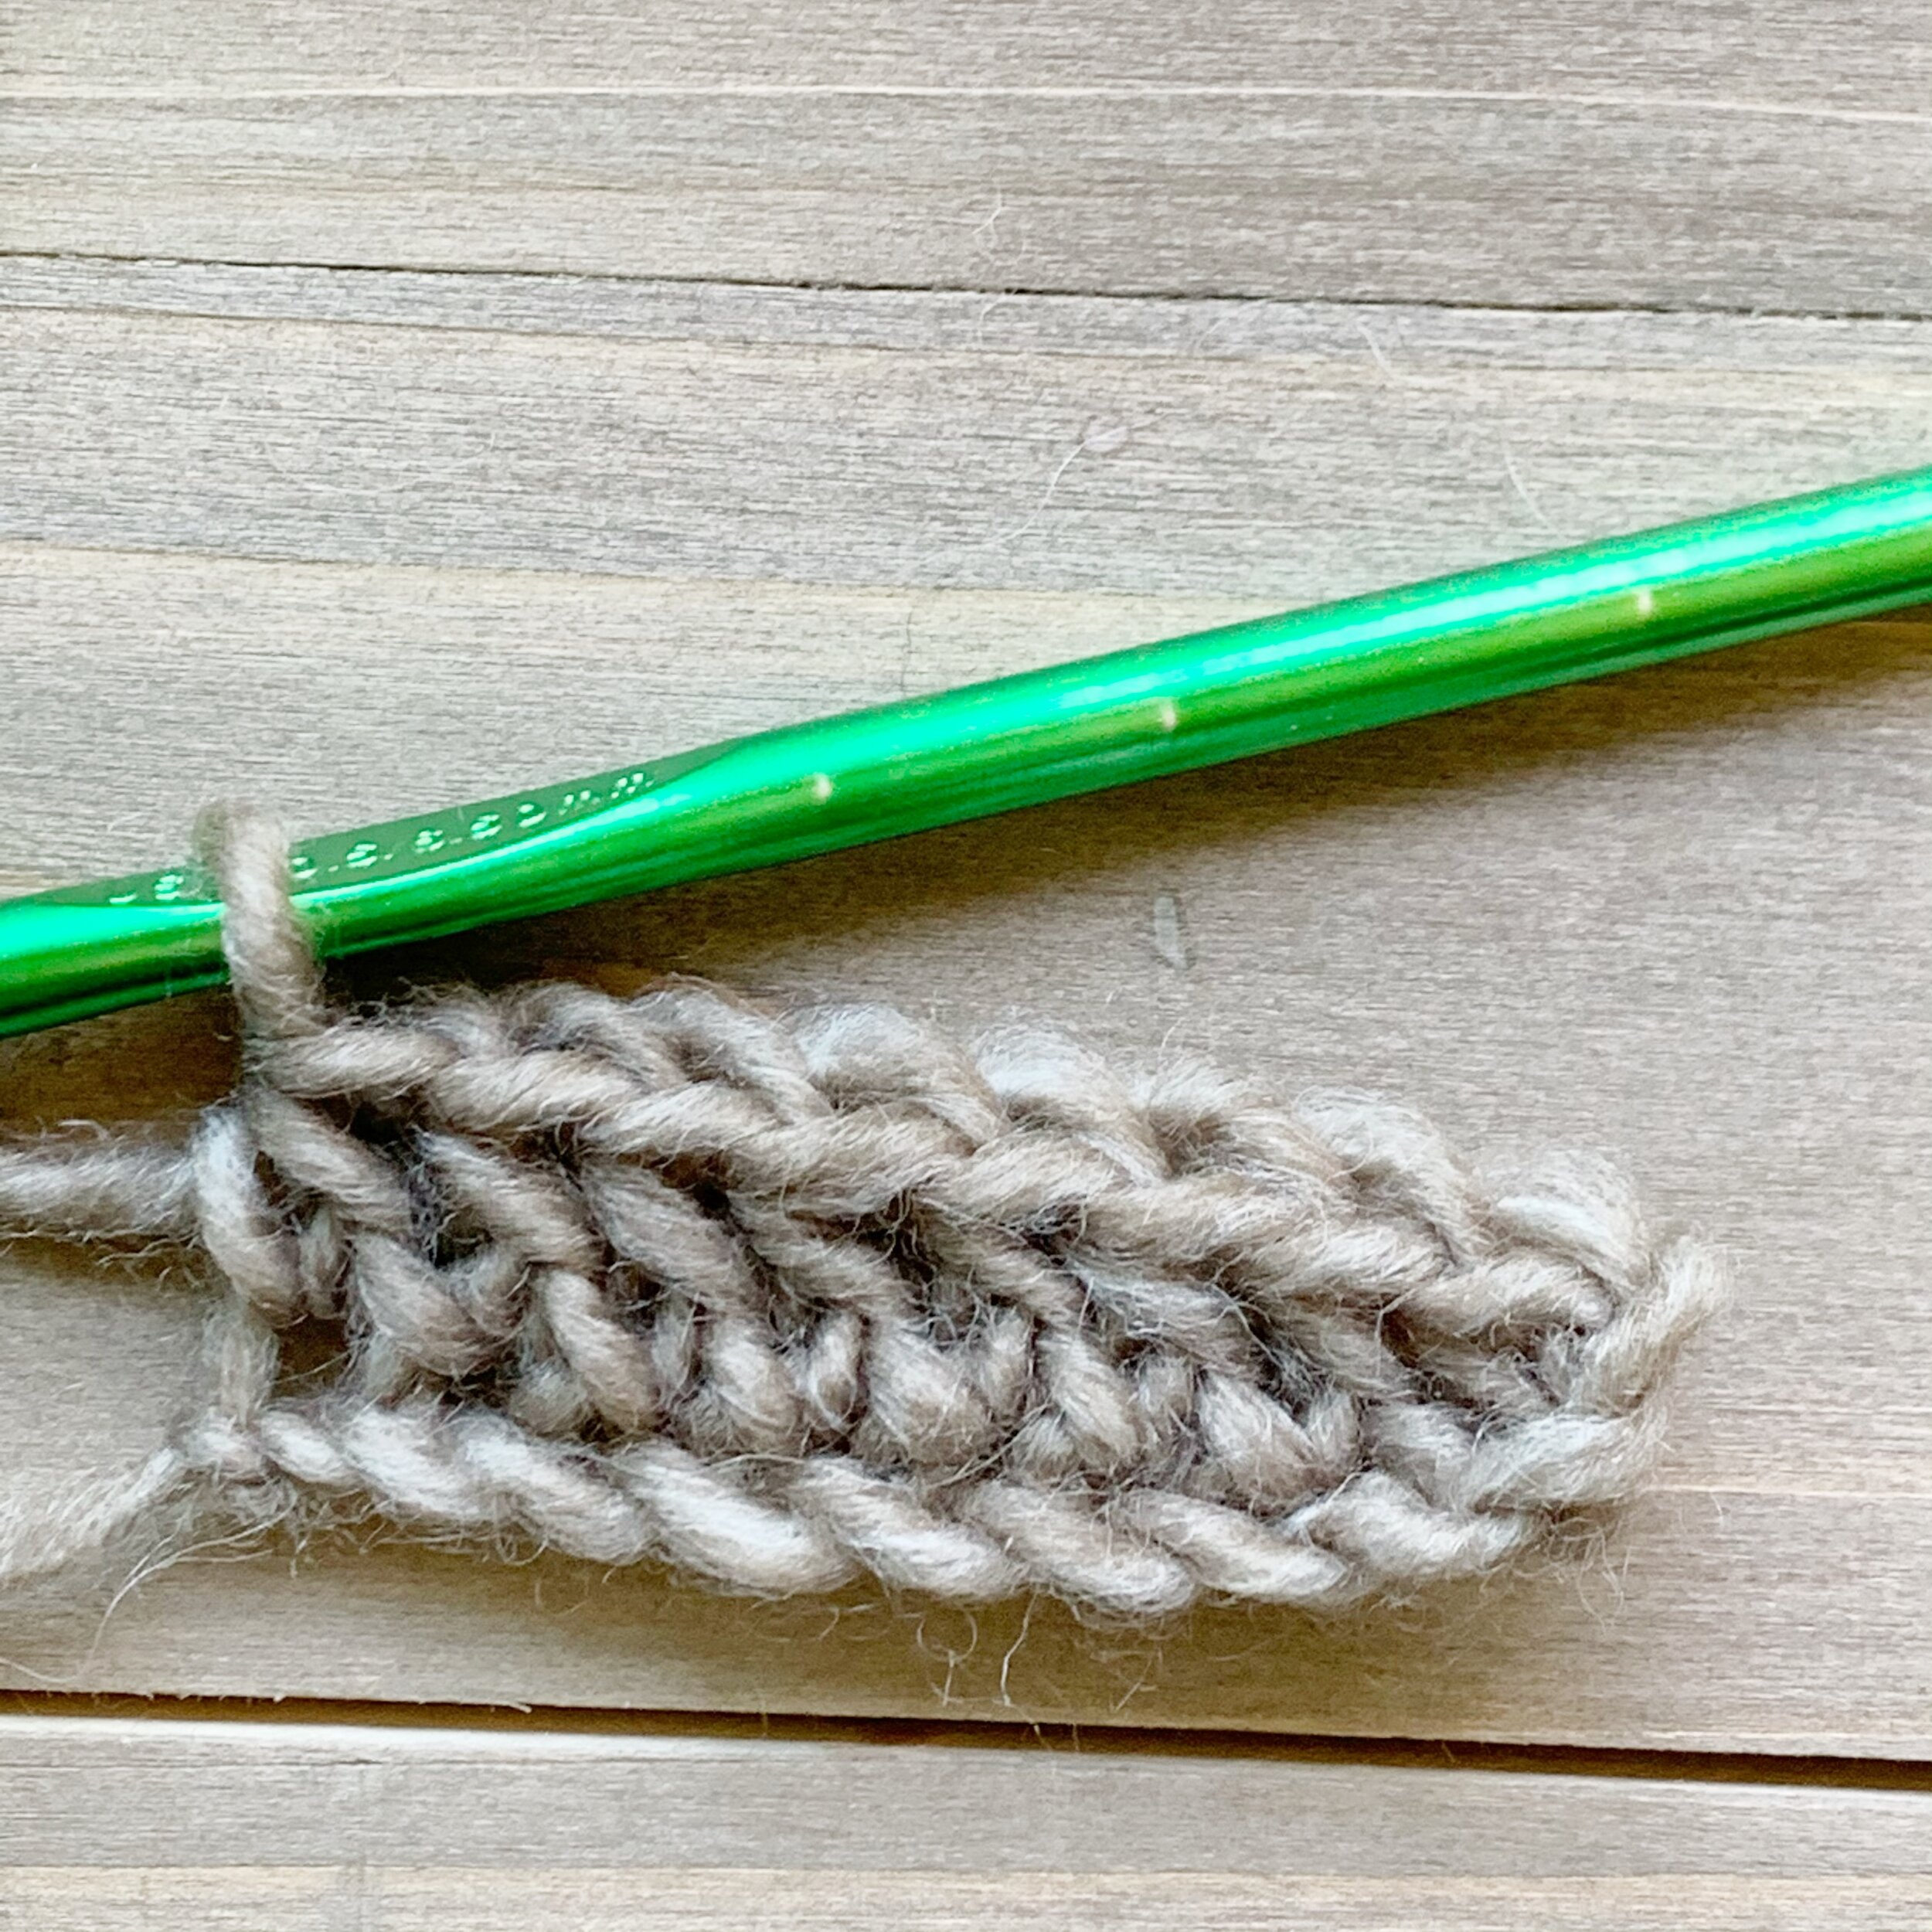
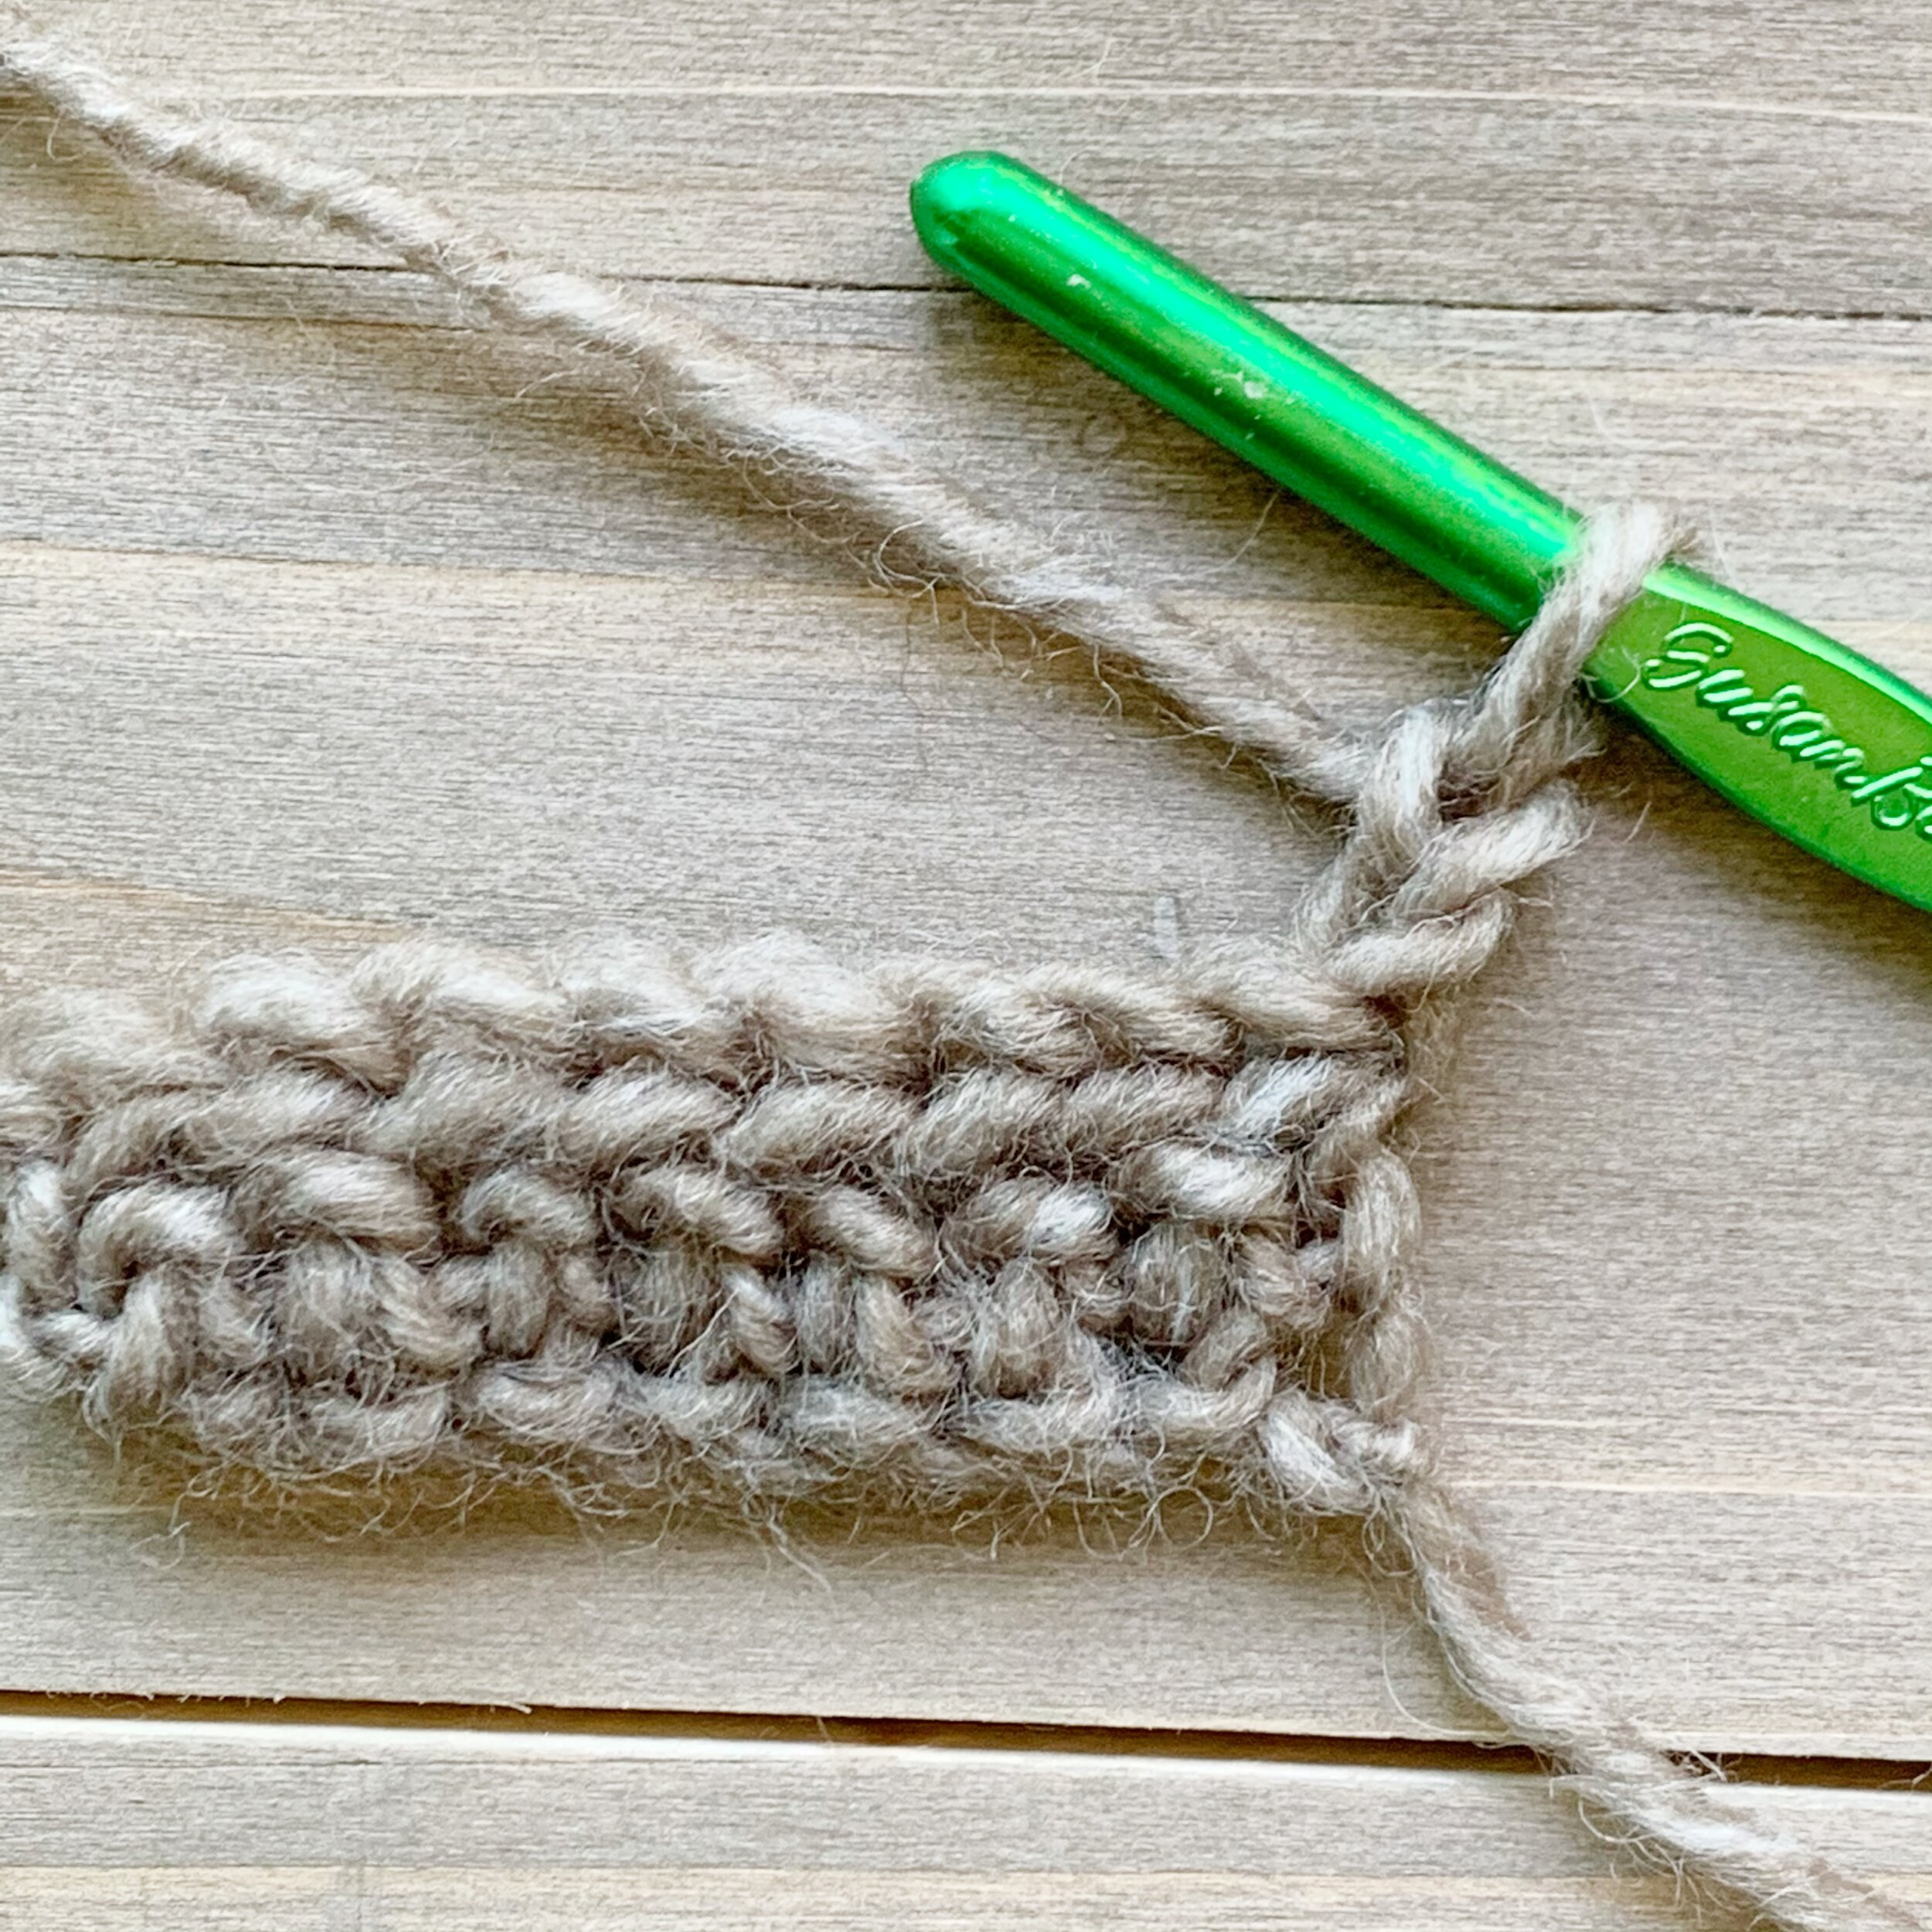
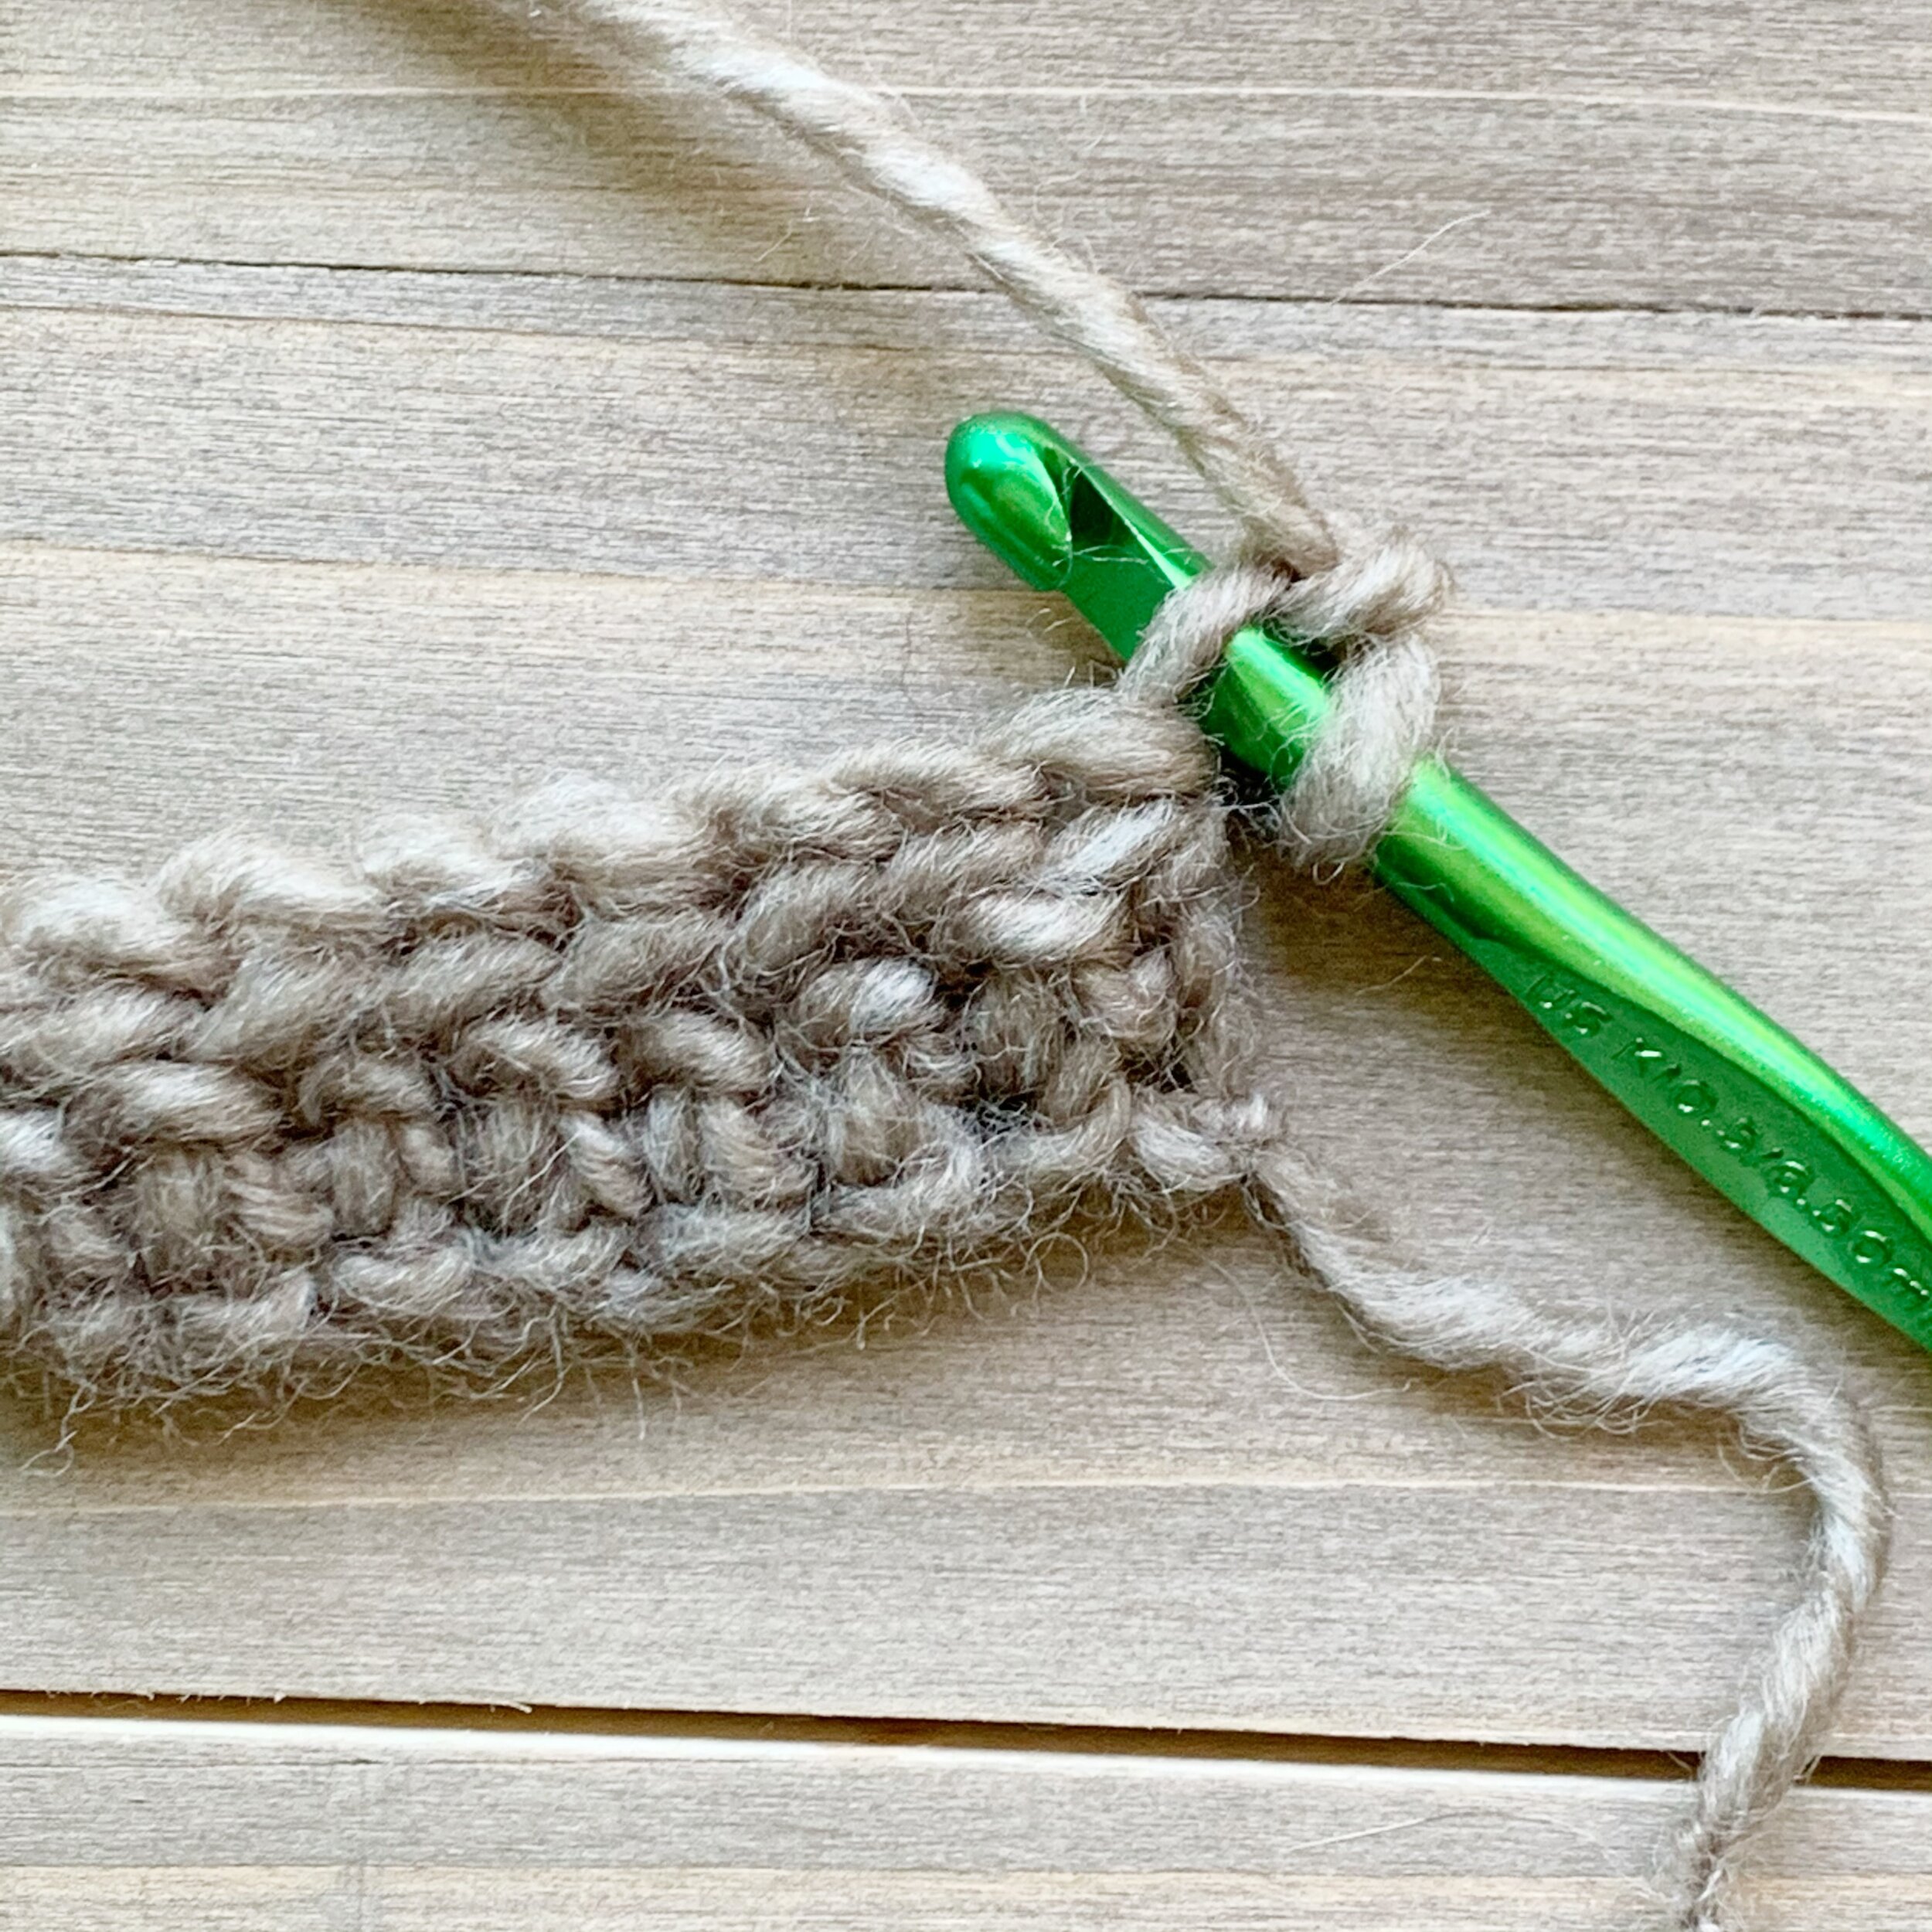
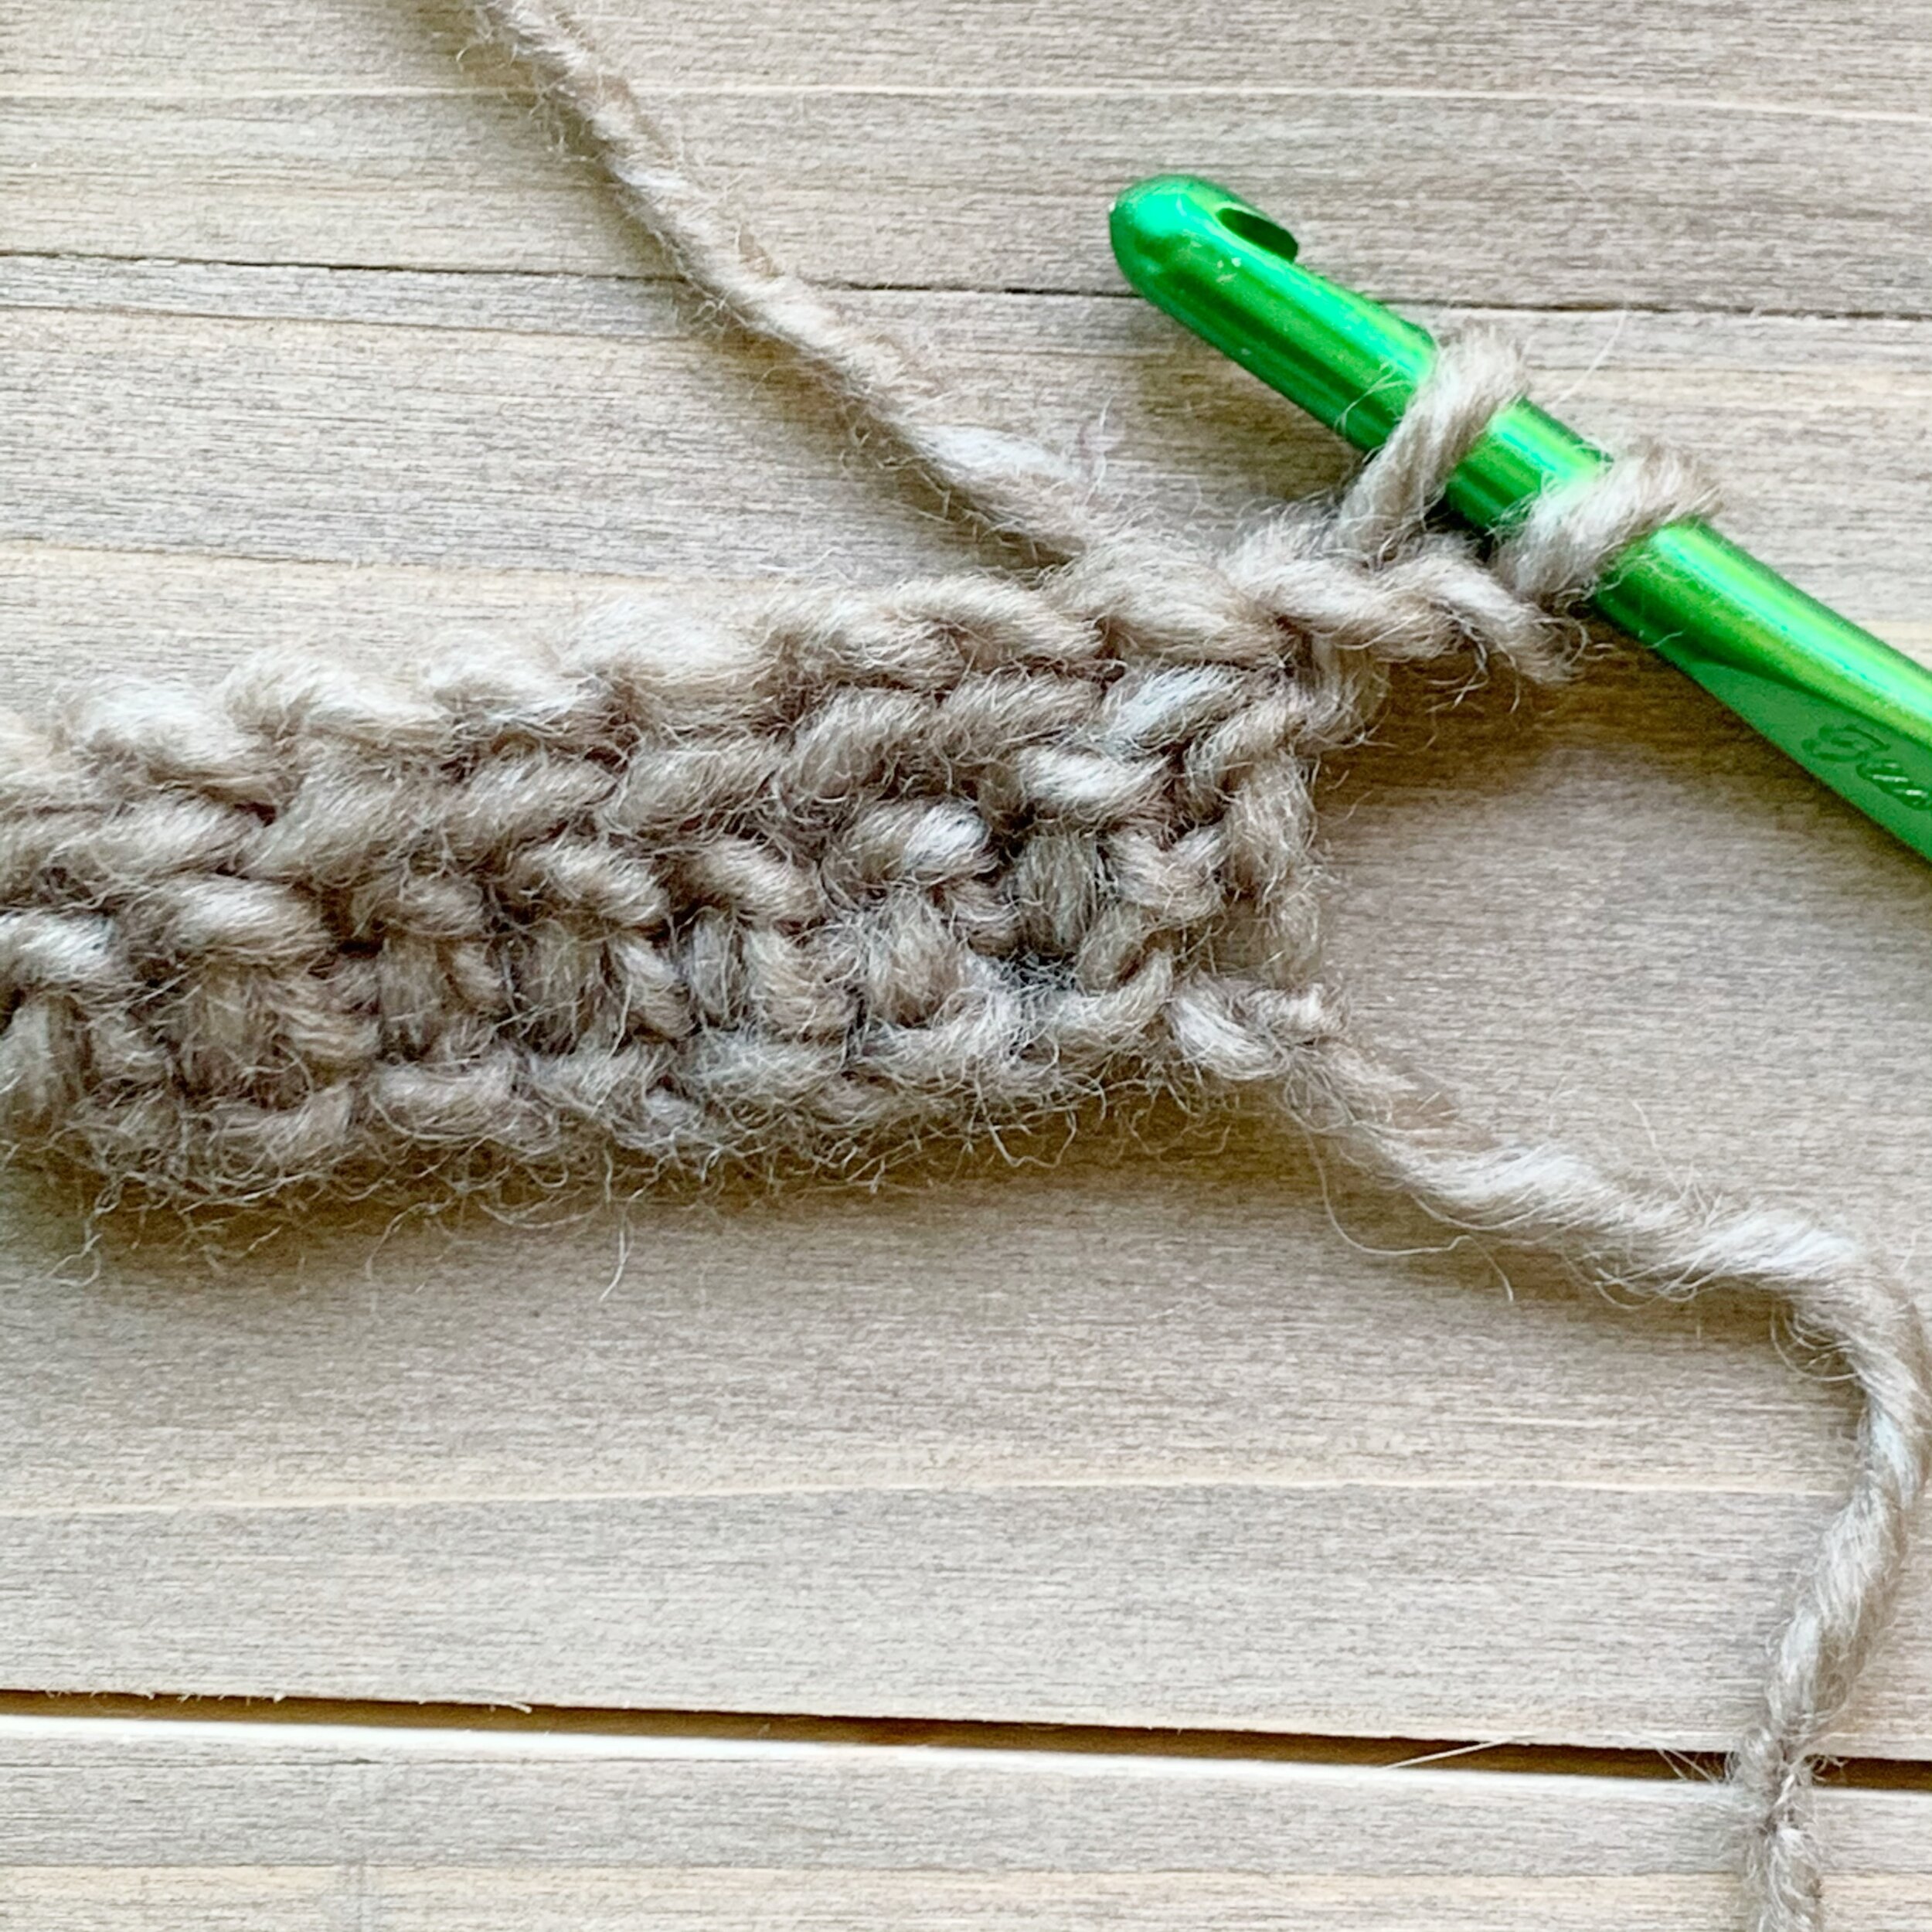
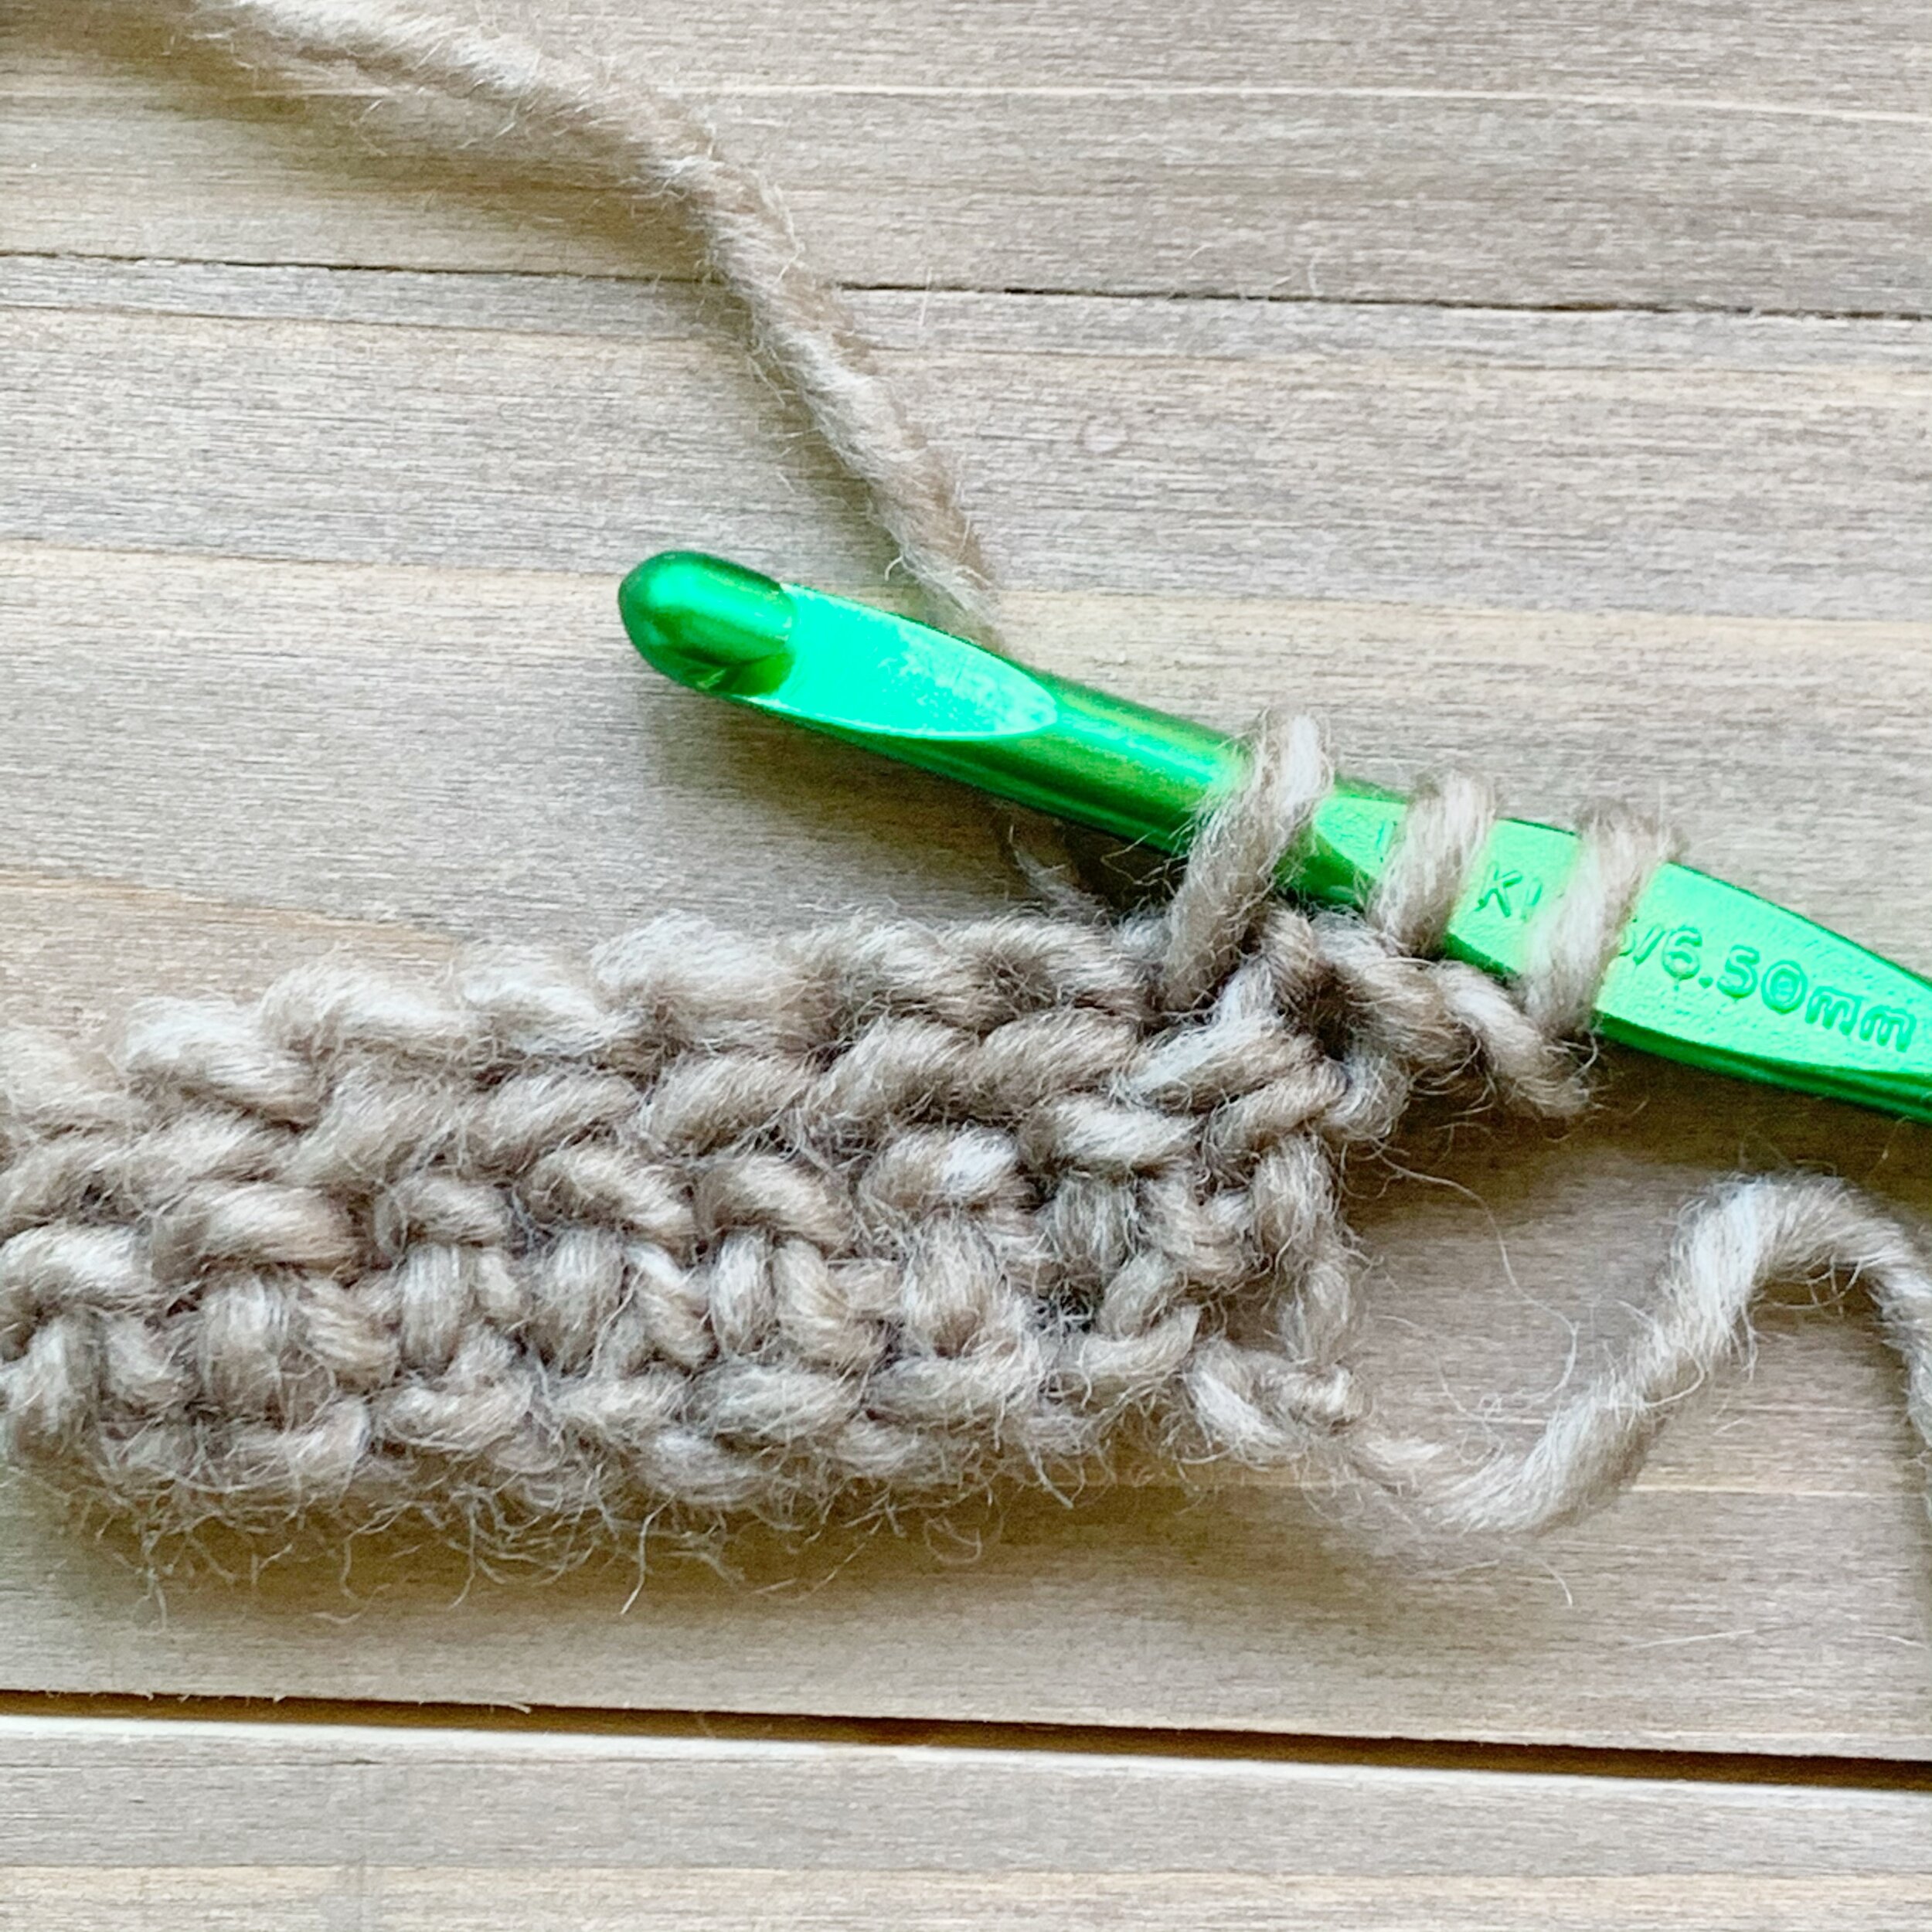
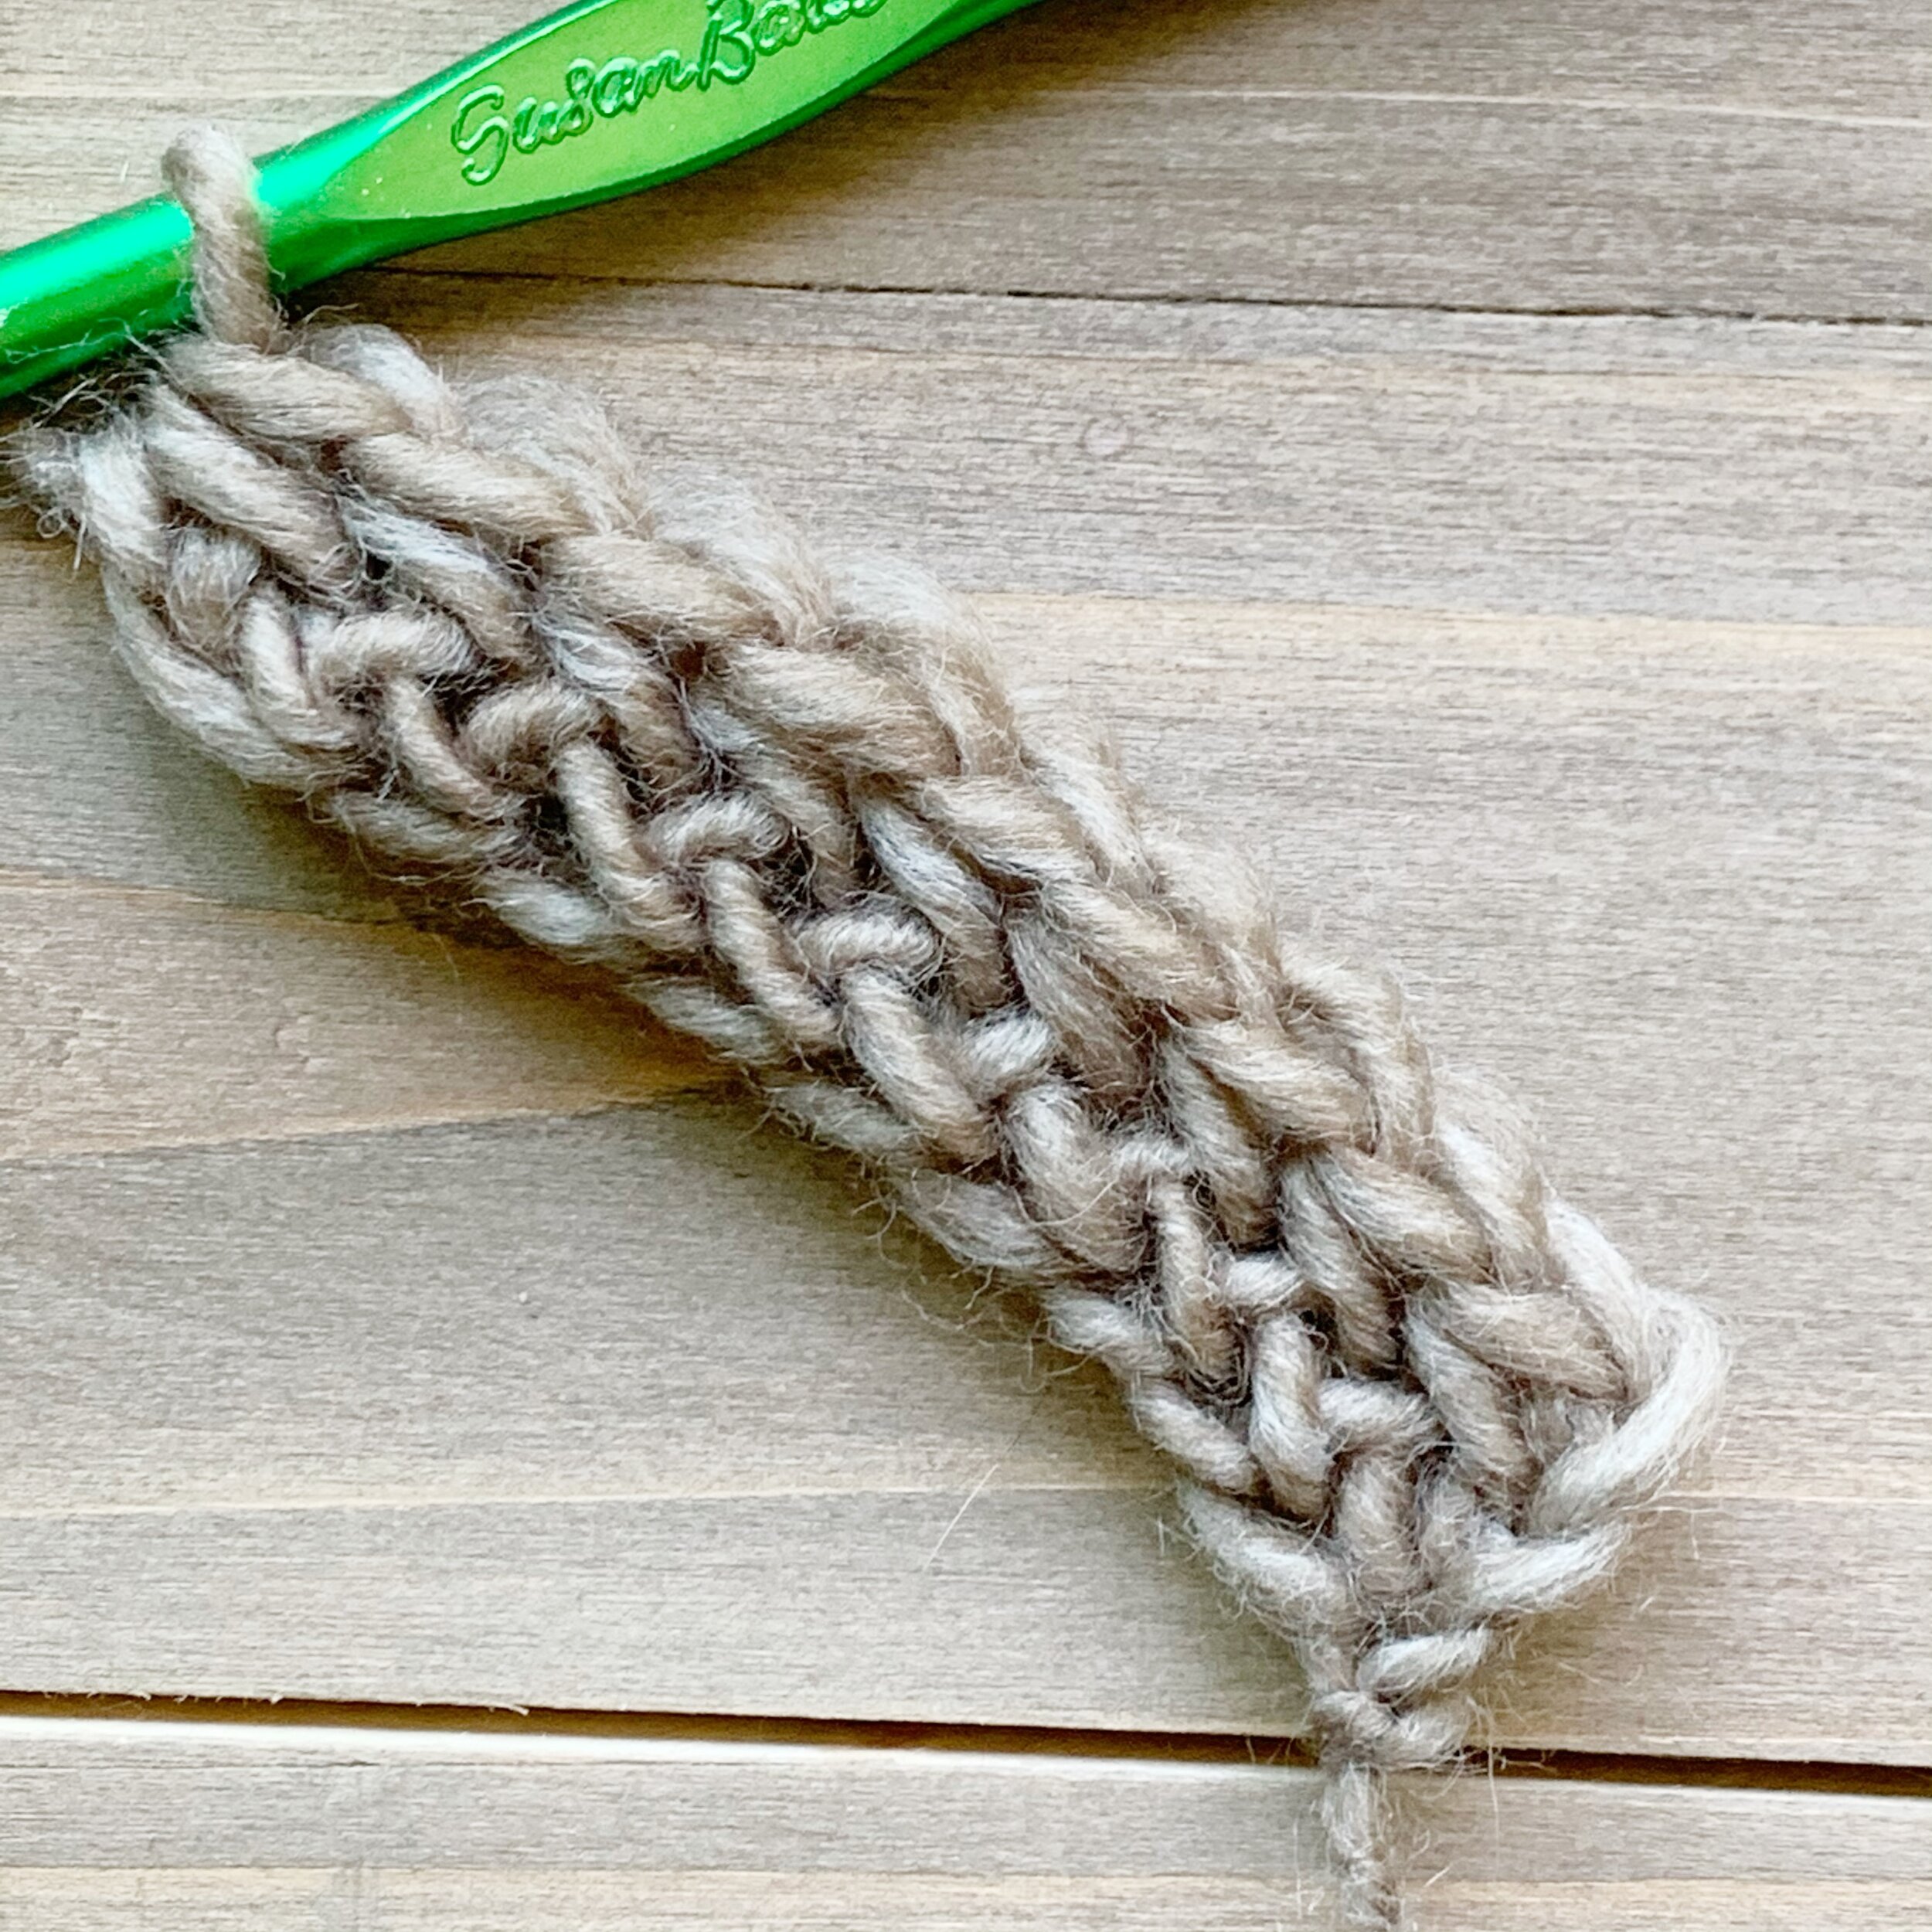
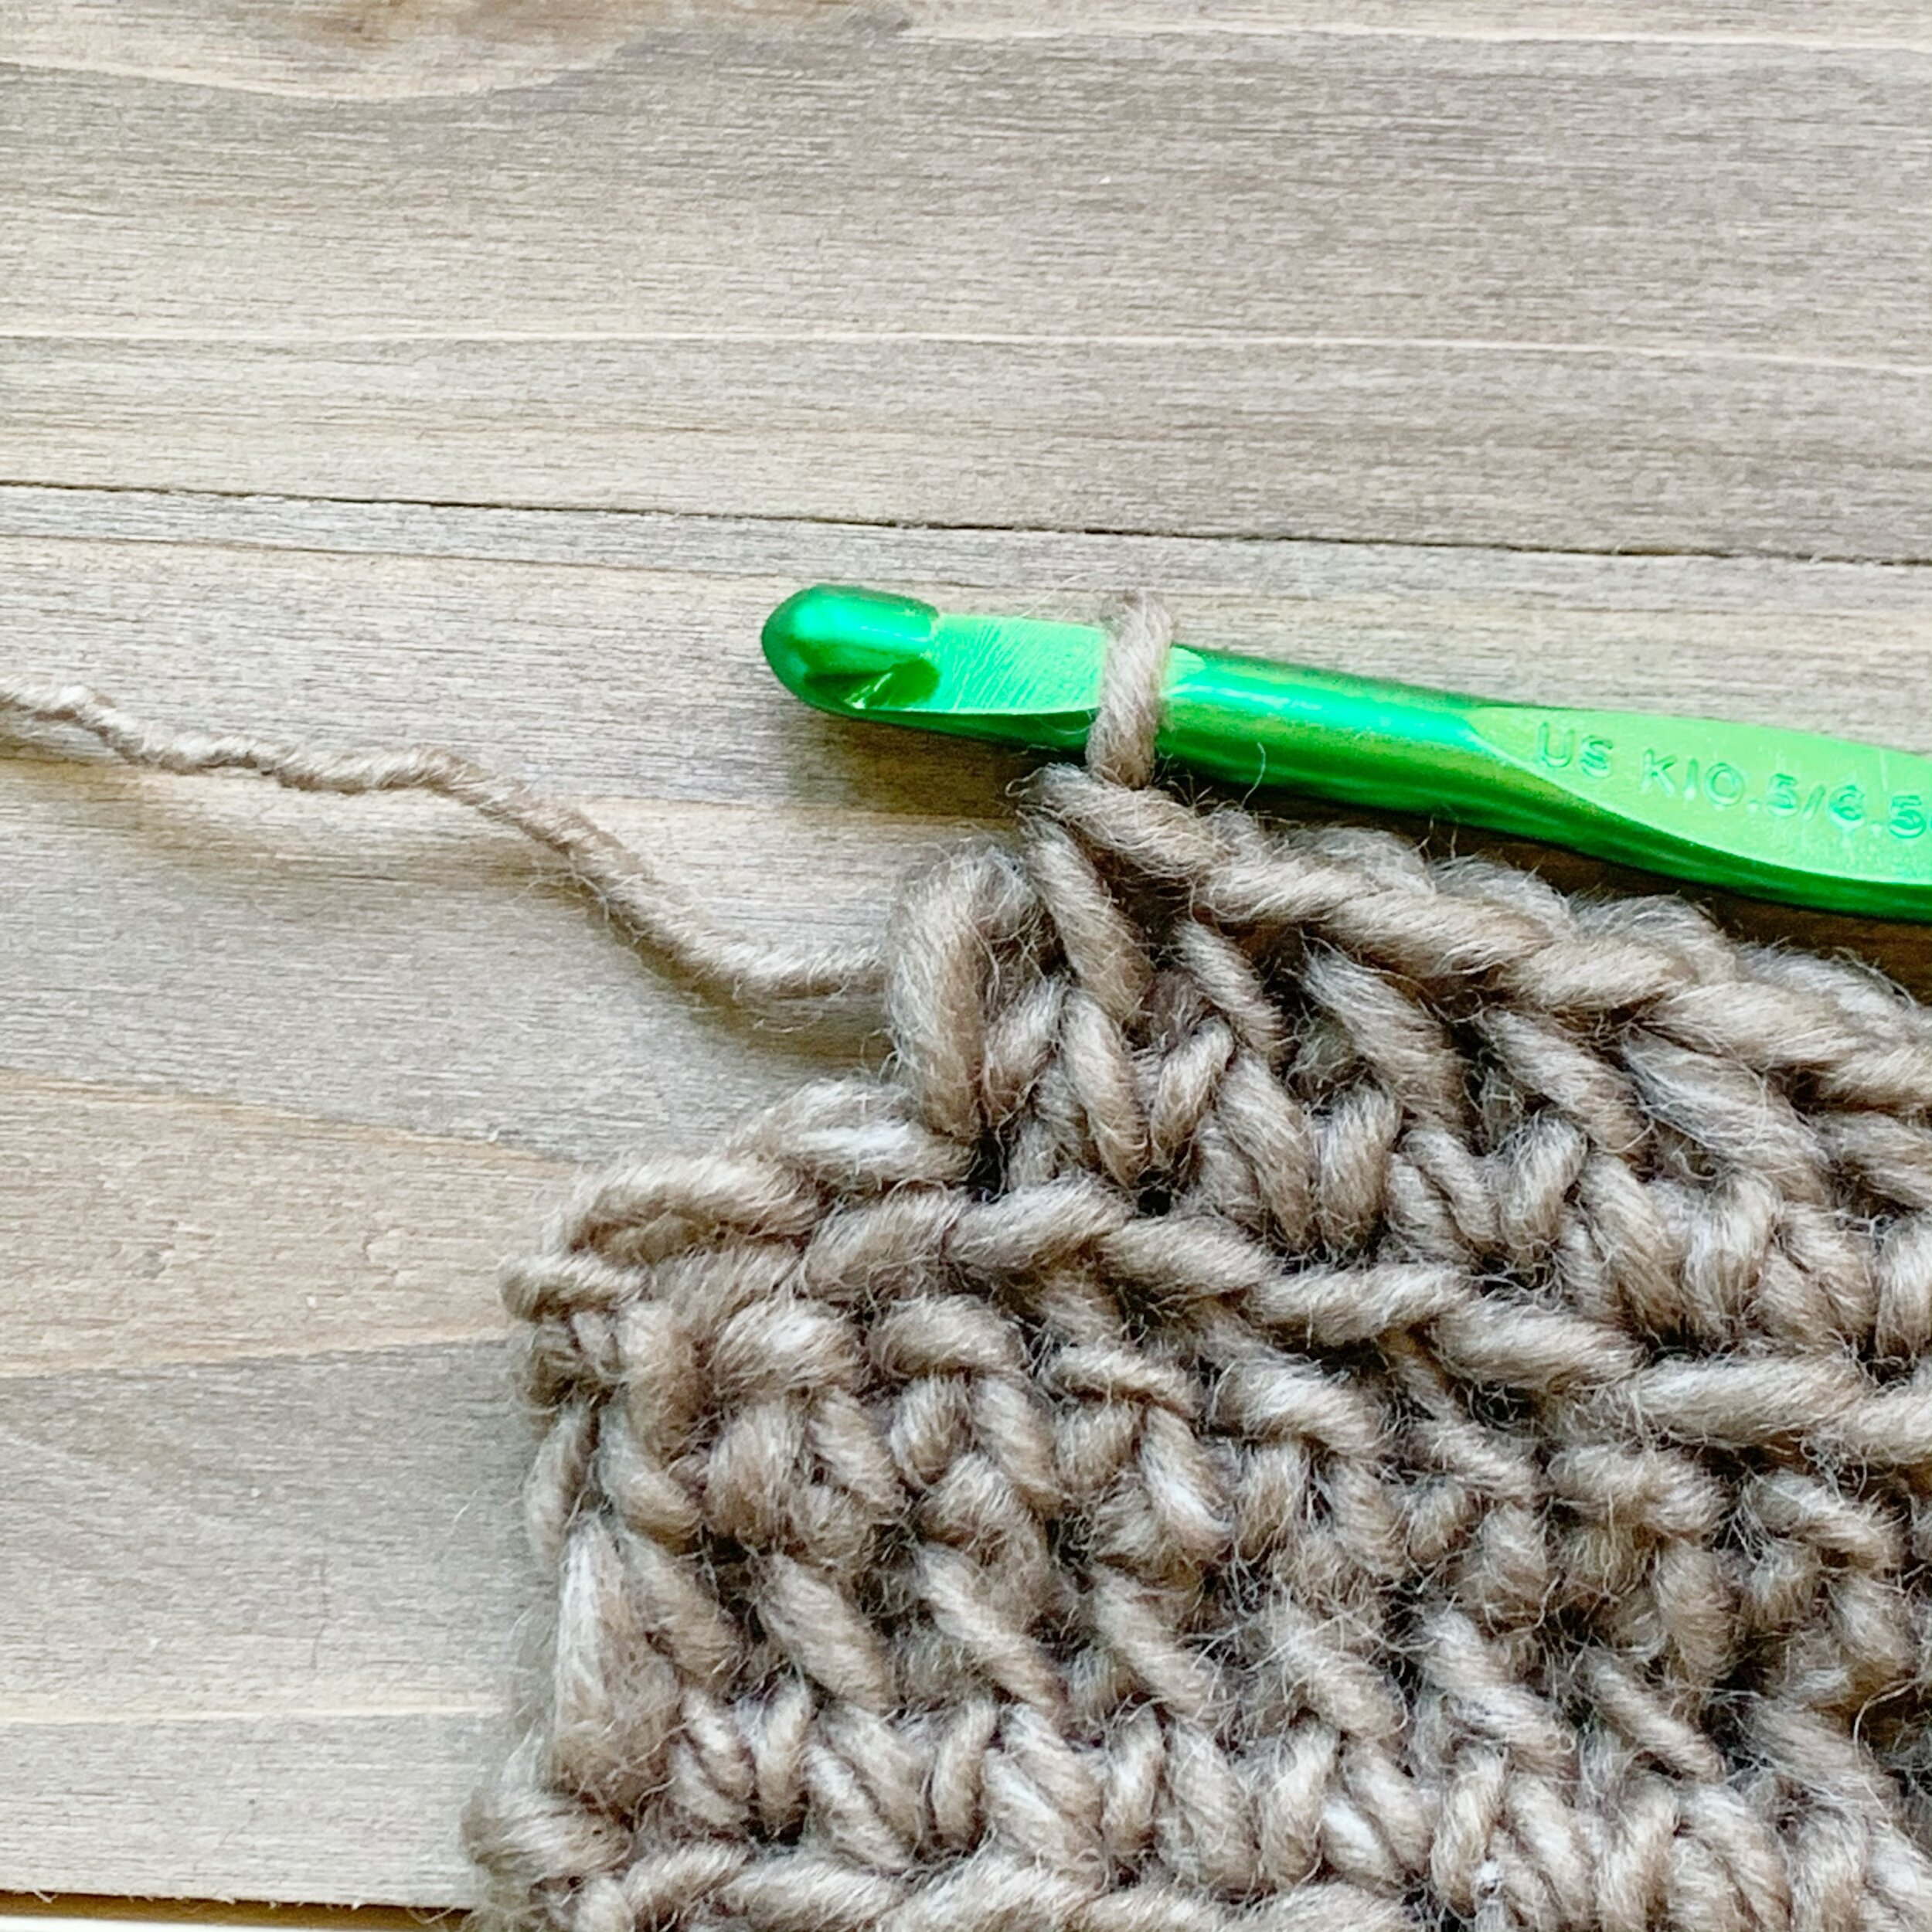
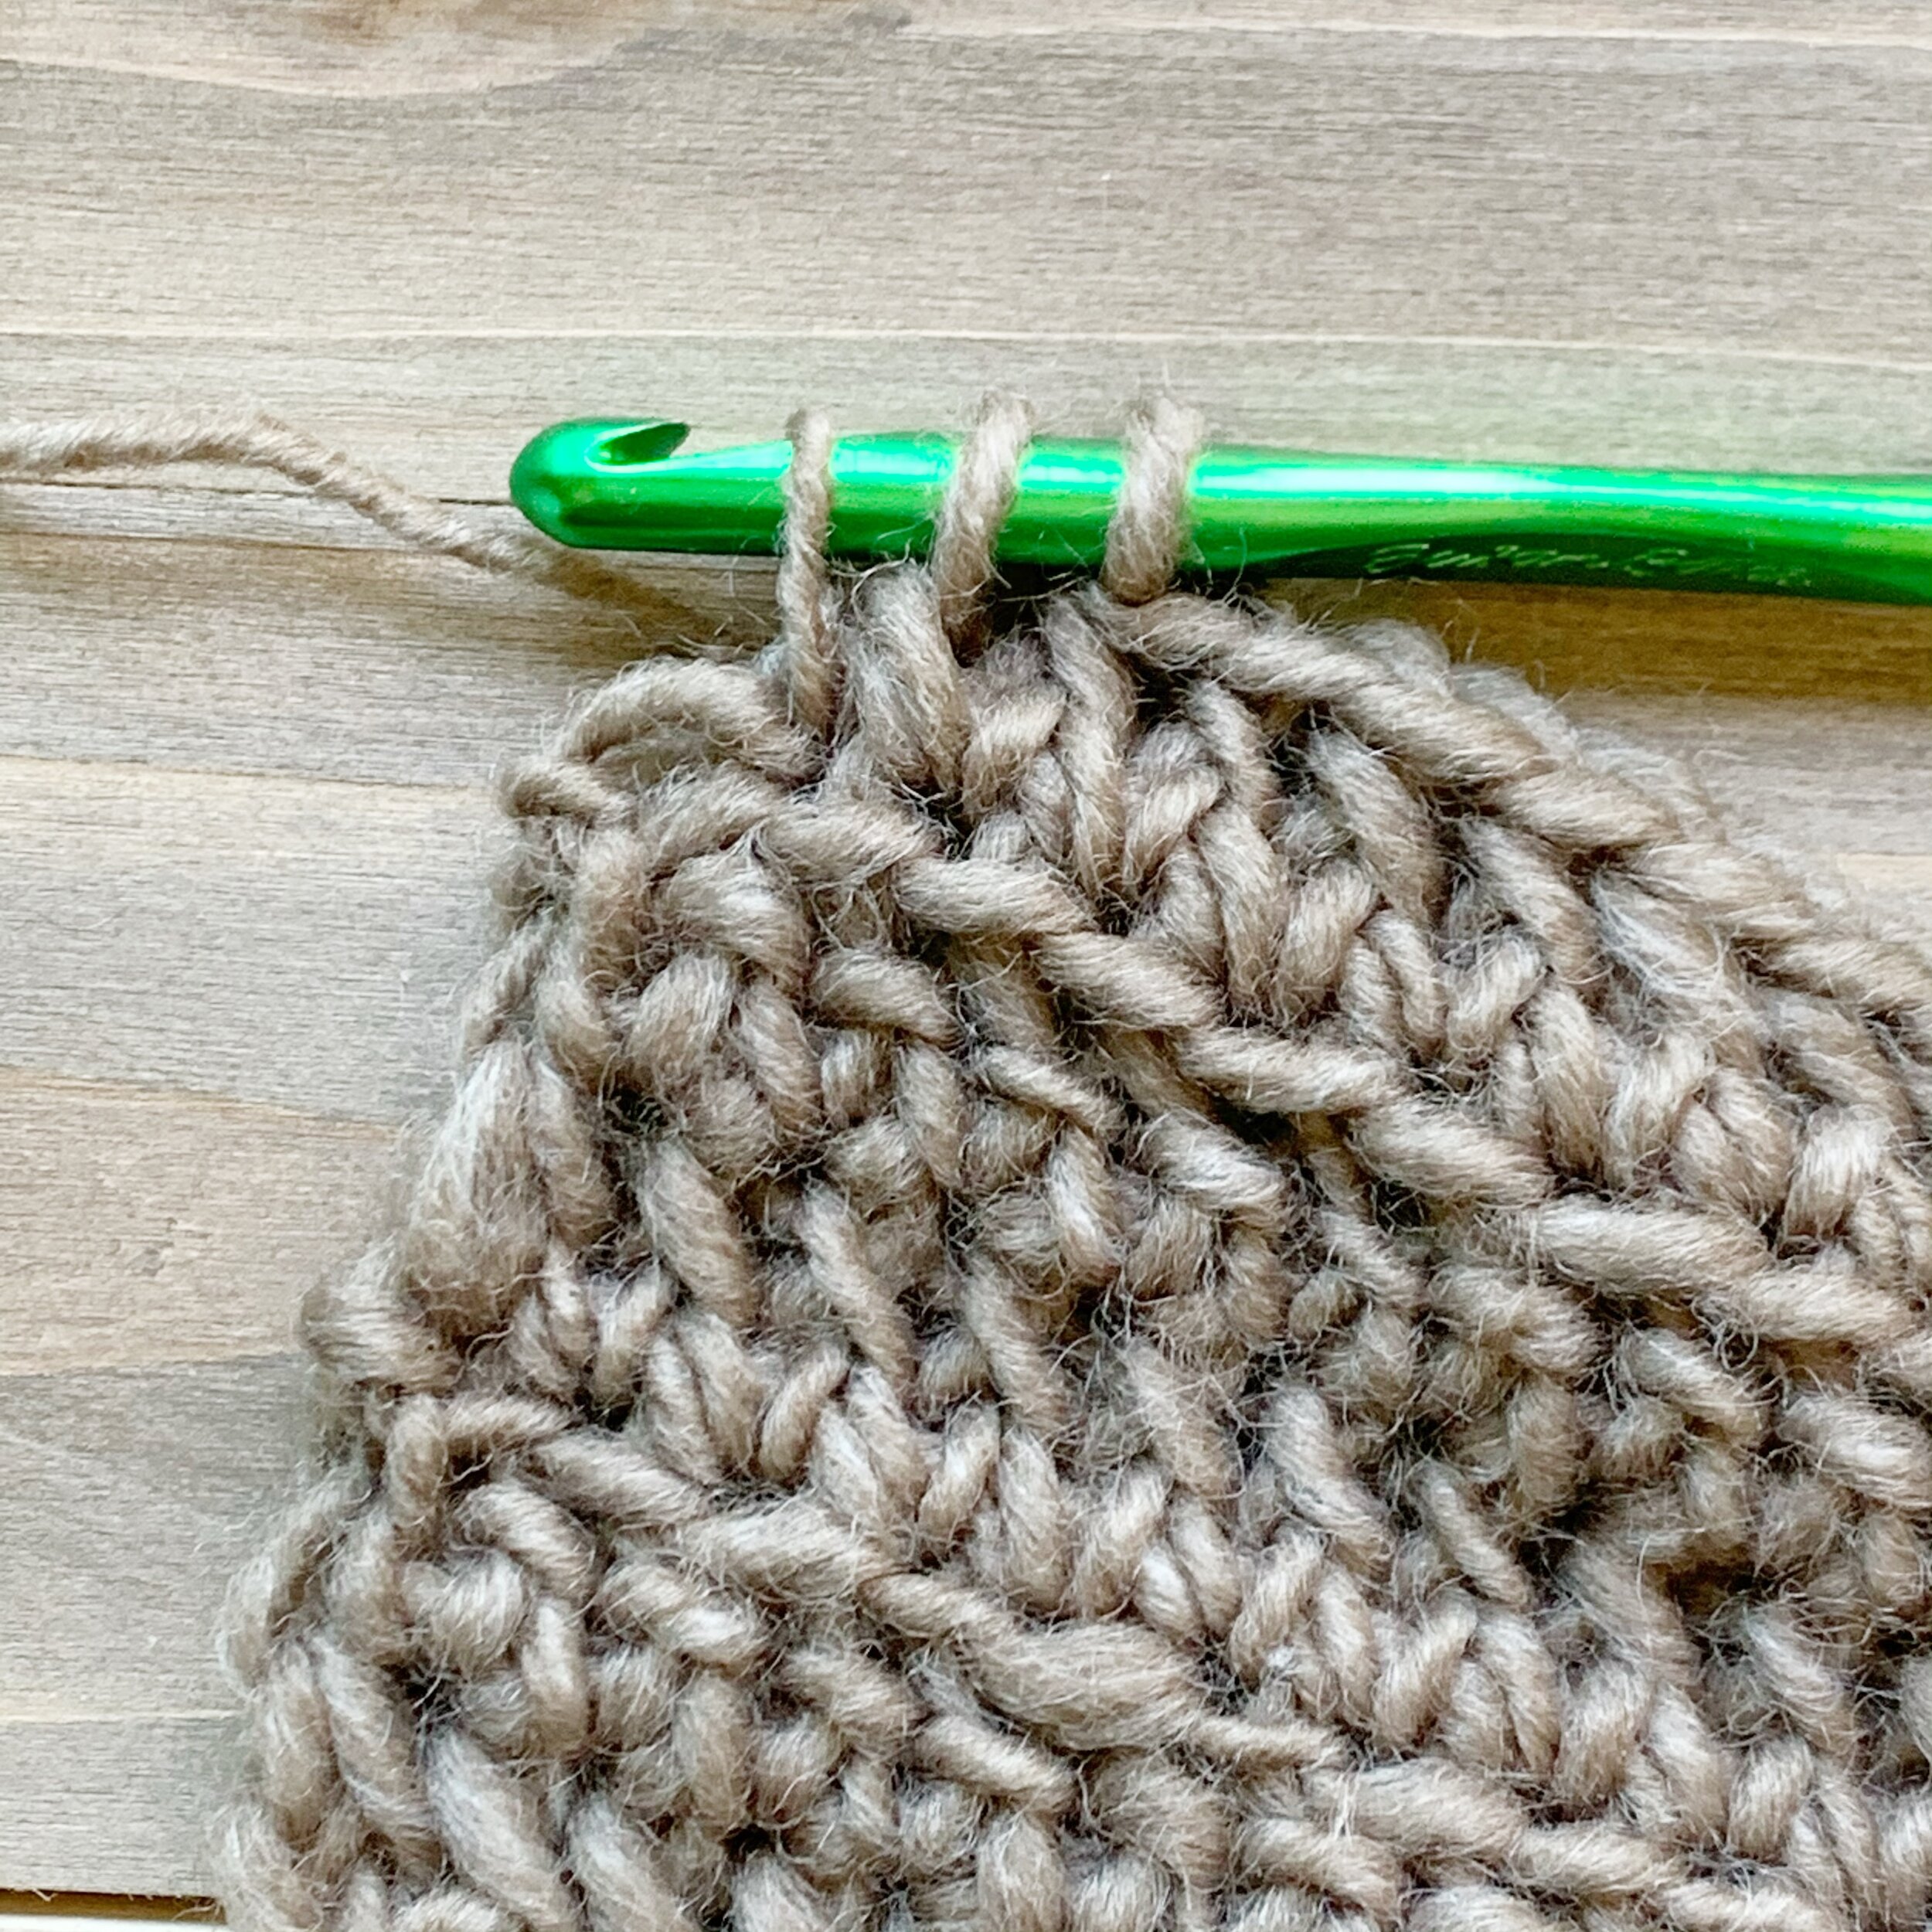
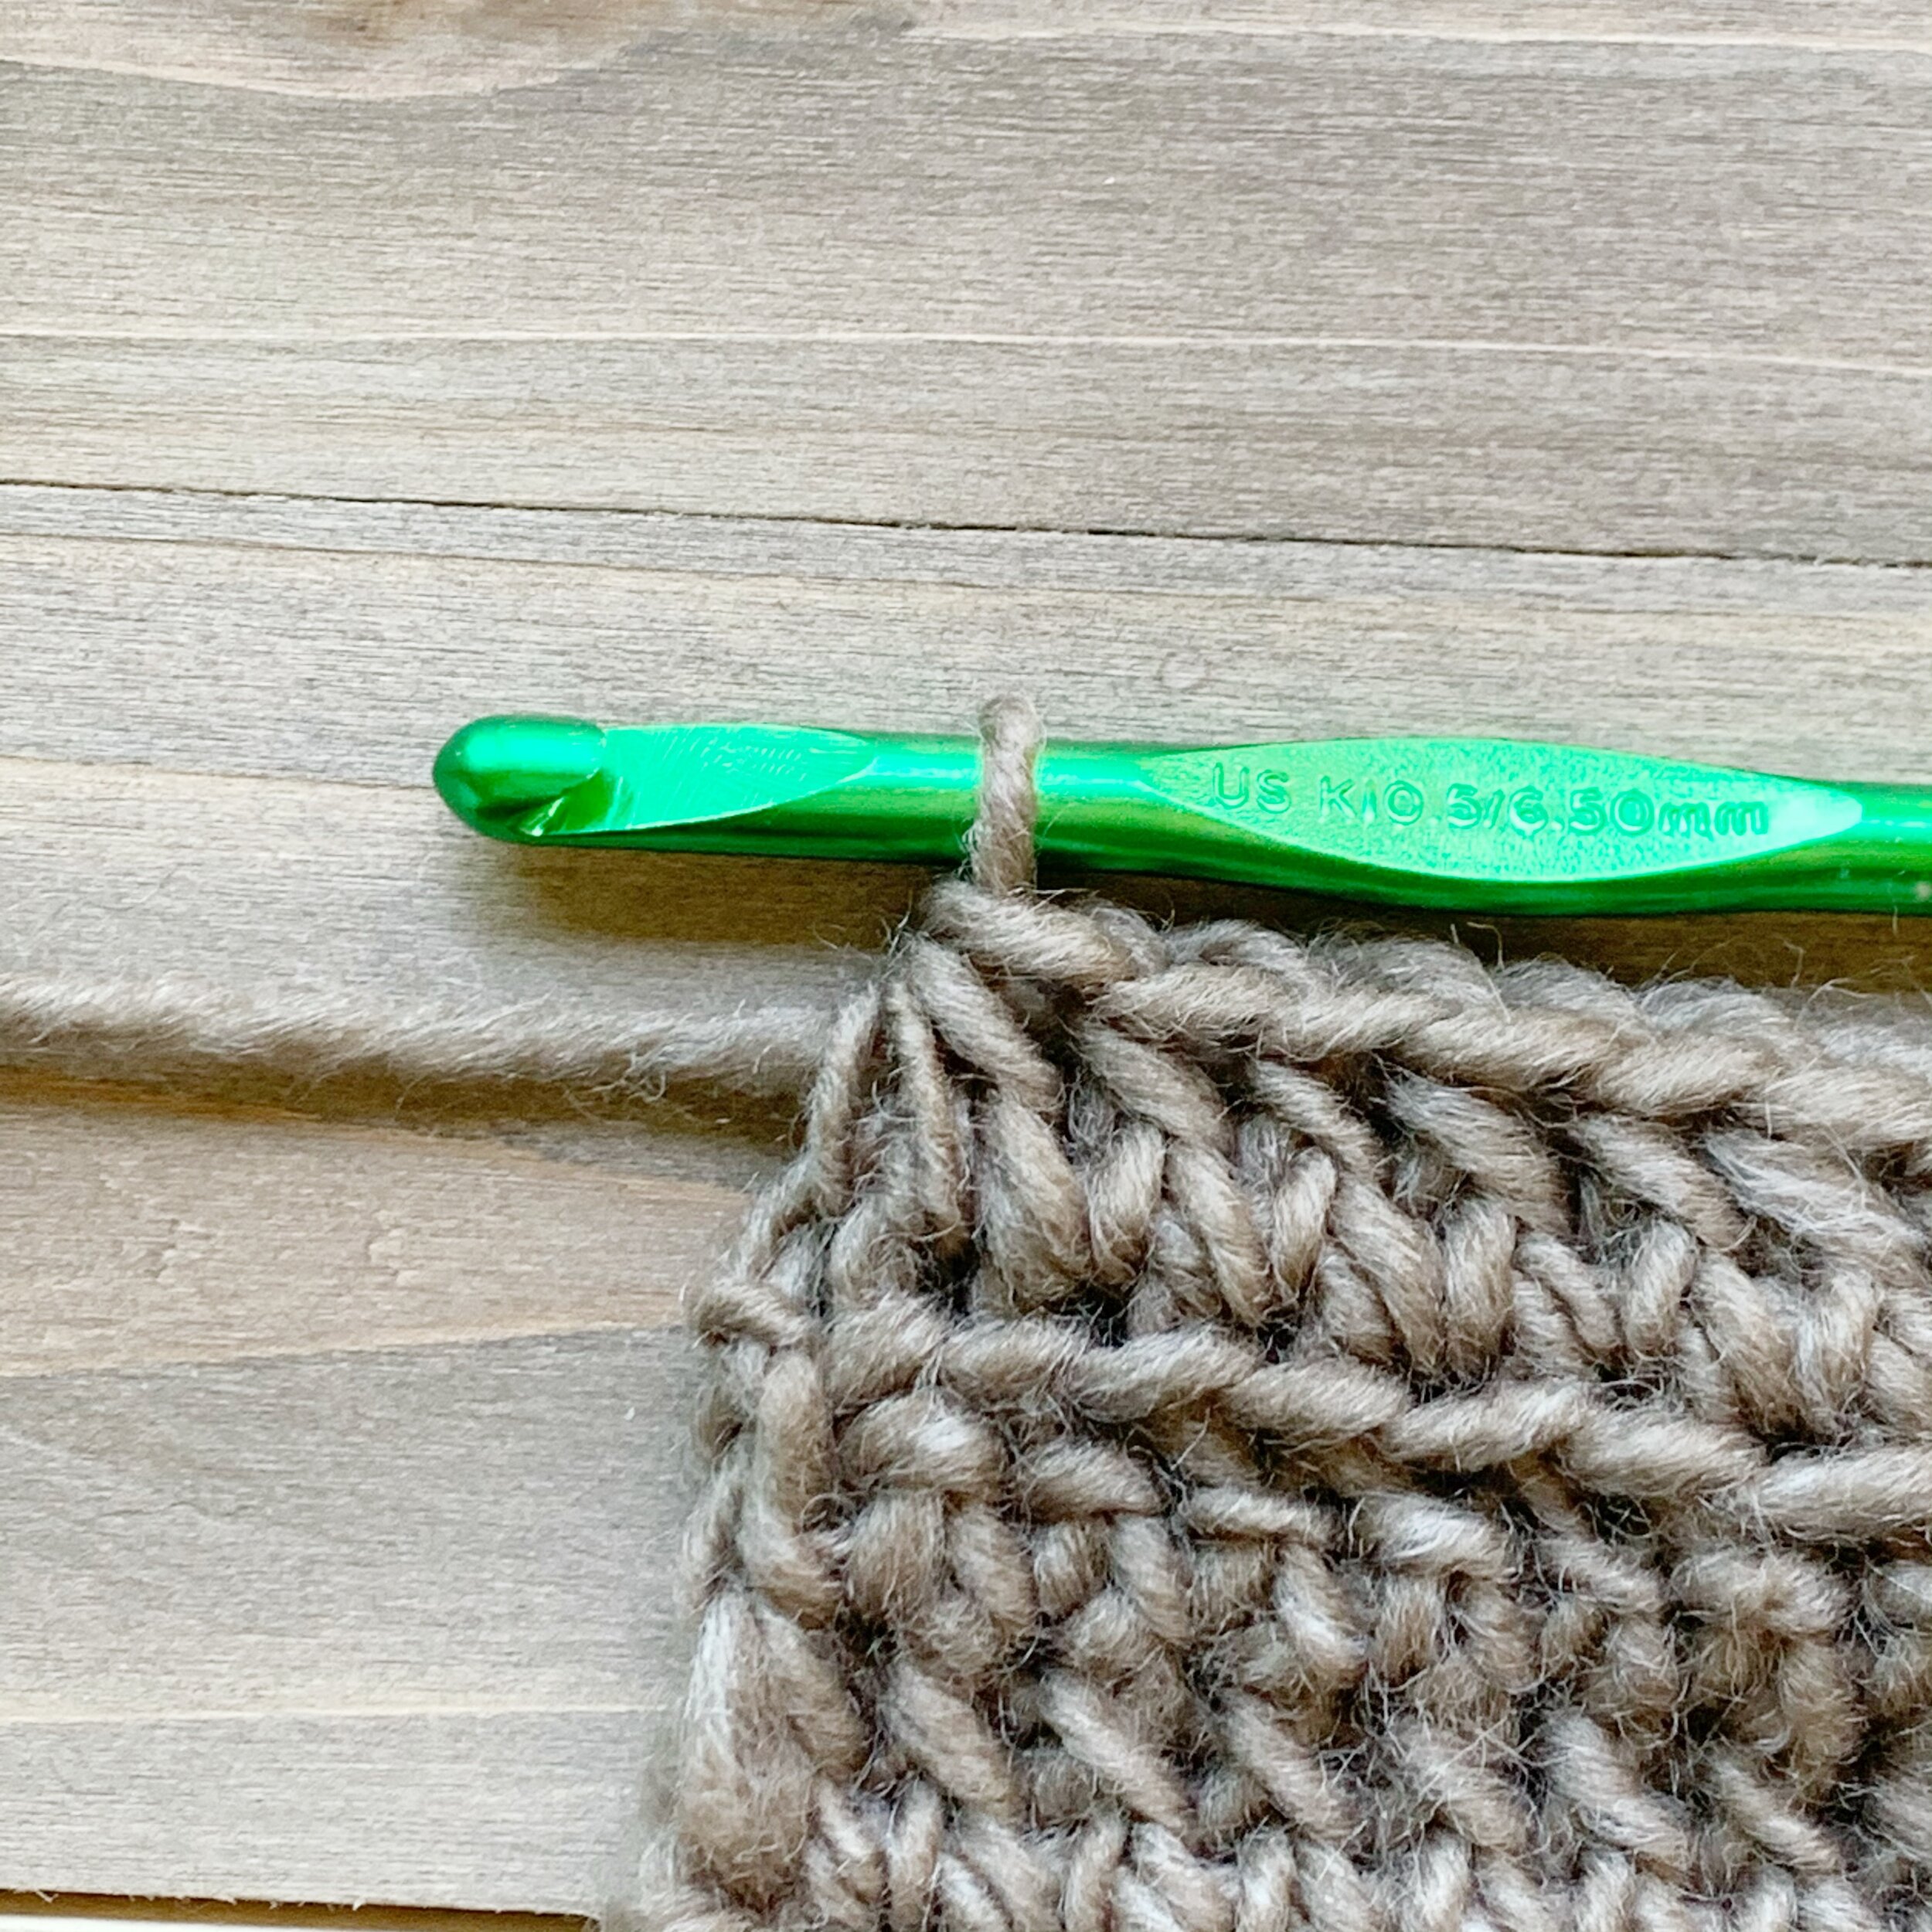
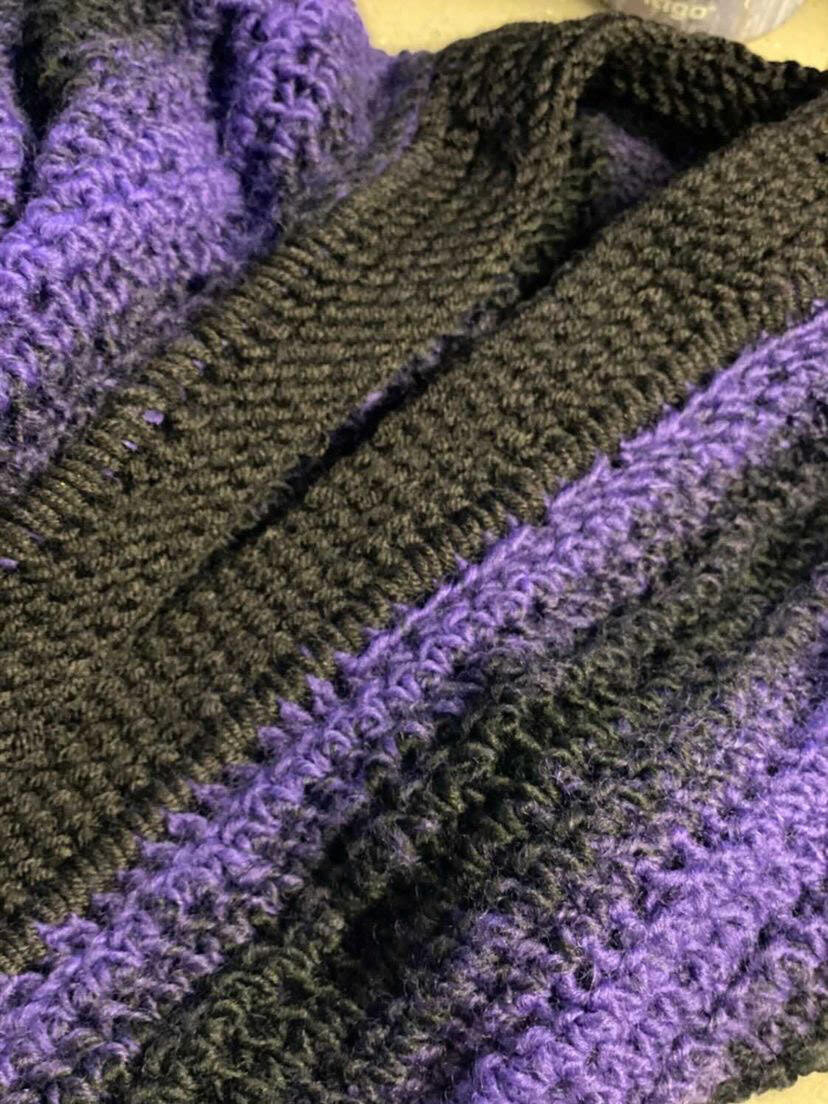
The linked half double crochet is a unique twist on the traditional half double crochet that we all love. By inserting the hook into the bottom of the previous stitch you create a more solid look to your piece. If you haven’t tried linked half double crochet before, don’t worry, I’ve included a photo and digital tutorial below.
This piece is easily adjustable too so you know you’ll be able to get the perfect fit. If you ever need help please feel free to reach out directly by emailing meghan@meghanmakesdo.com I’m always happy to help answer questions and suggest edits so that you are happy with your finished Coen Cardigan.
The Coen Cardigan Crochet Pattern
Materials:
789-1525 yards of Lion Brand Scarfie Yarn in Cream/Taupe or similar bulky weight yarn
Tapestry needle
Scissors
Gauge:
10 sts and 6 rows in Lhdc = 4” square.
Abbreviations:
ch(s)- chain(s)
st(s)- stitch(es)
RS- right side
WS- wrong side
sl st- slip stitch
yo-yarn over
sc- single crochet
Lhdc- linked half double crochet (see special stitches)
Lhdc2tog- linked half double crochet two together (see special stitches)
FLhdc- foundation linked half double crochet (see special stitches)
BLO- back loop only
Notes:
1.Pattern is worked side to side in one panel. The sides are then seamed, leaving room for arm holes. Sleeves are made in turned rounds directly into armholes. Collar is then directly worked onto the cardigan.
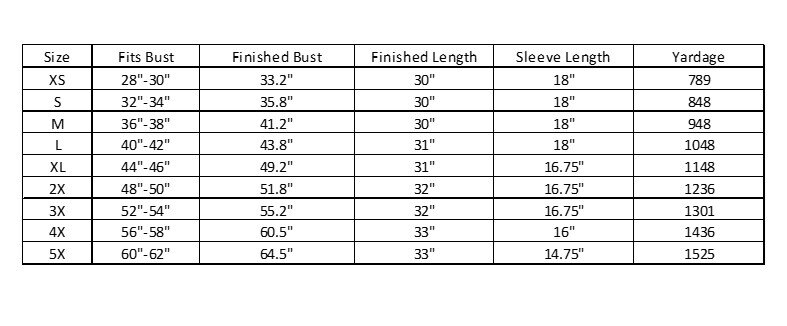
2.Pattern is made with 3-5” of positive ease. See size chart for help determining the size you need to make.
3.Pattern is written for XS with other sizes in parenthesis. Ex. XS(S, M, L, XL, 2X, 3X, 4X, 5X)
4.Chs at the beginning of rounds and rows do not count as a stitch.
Size Chart:
Special Stitches:
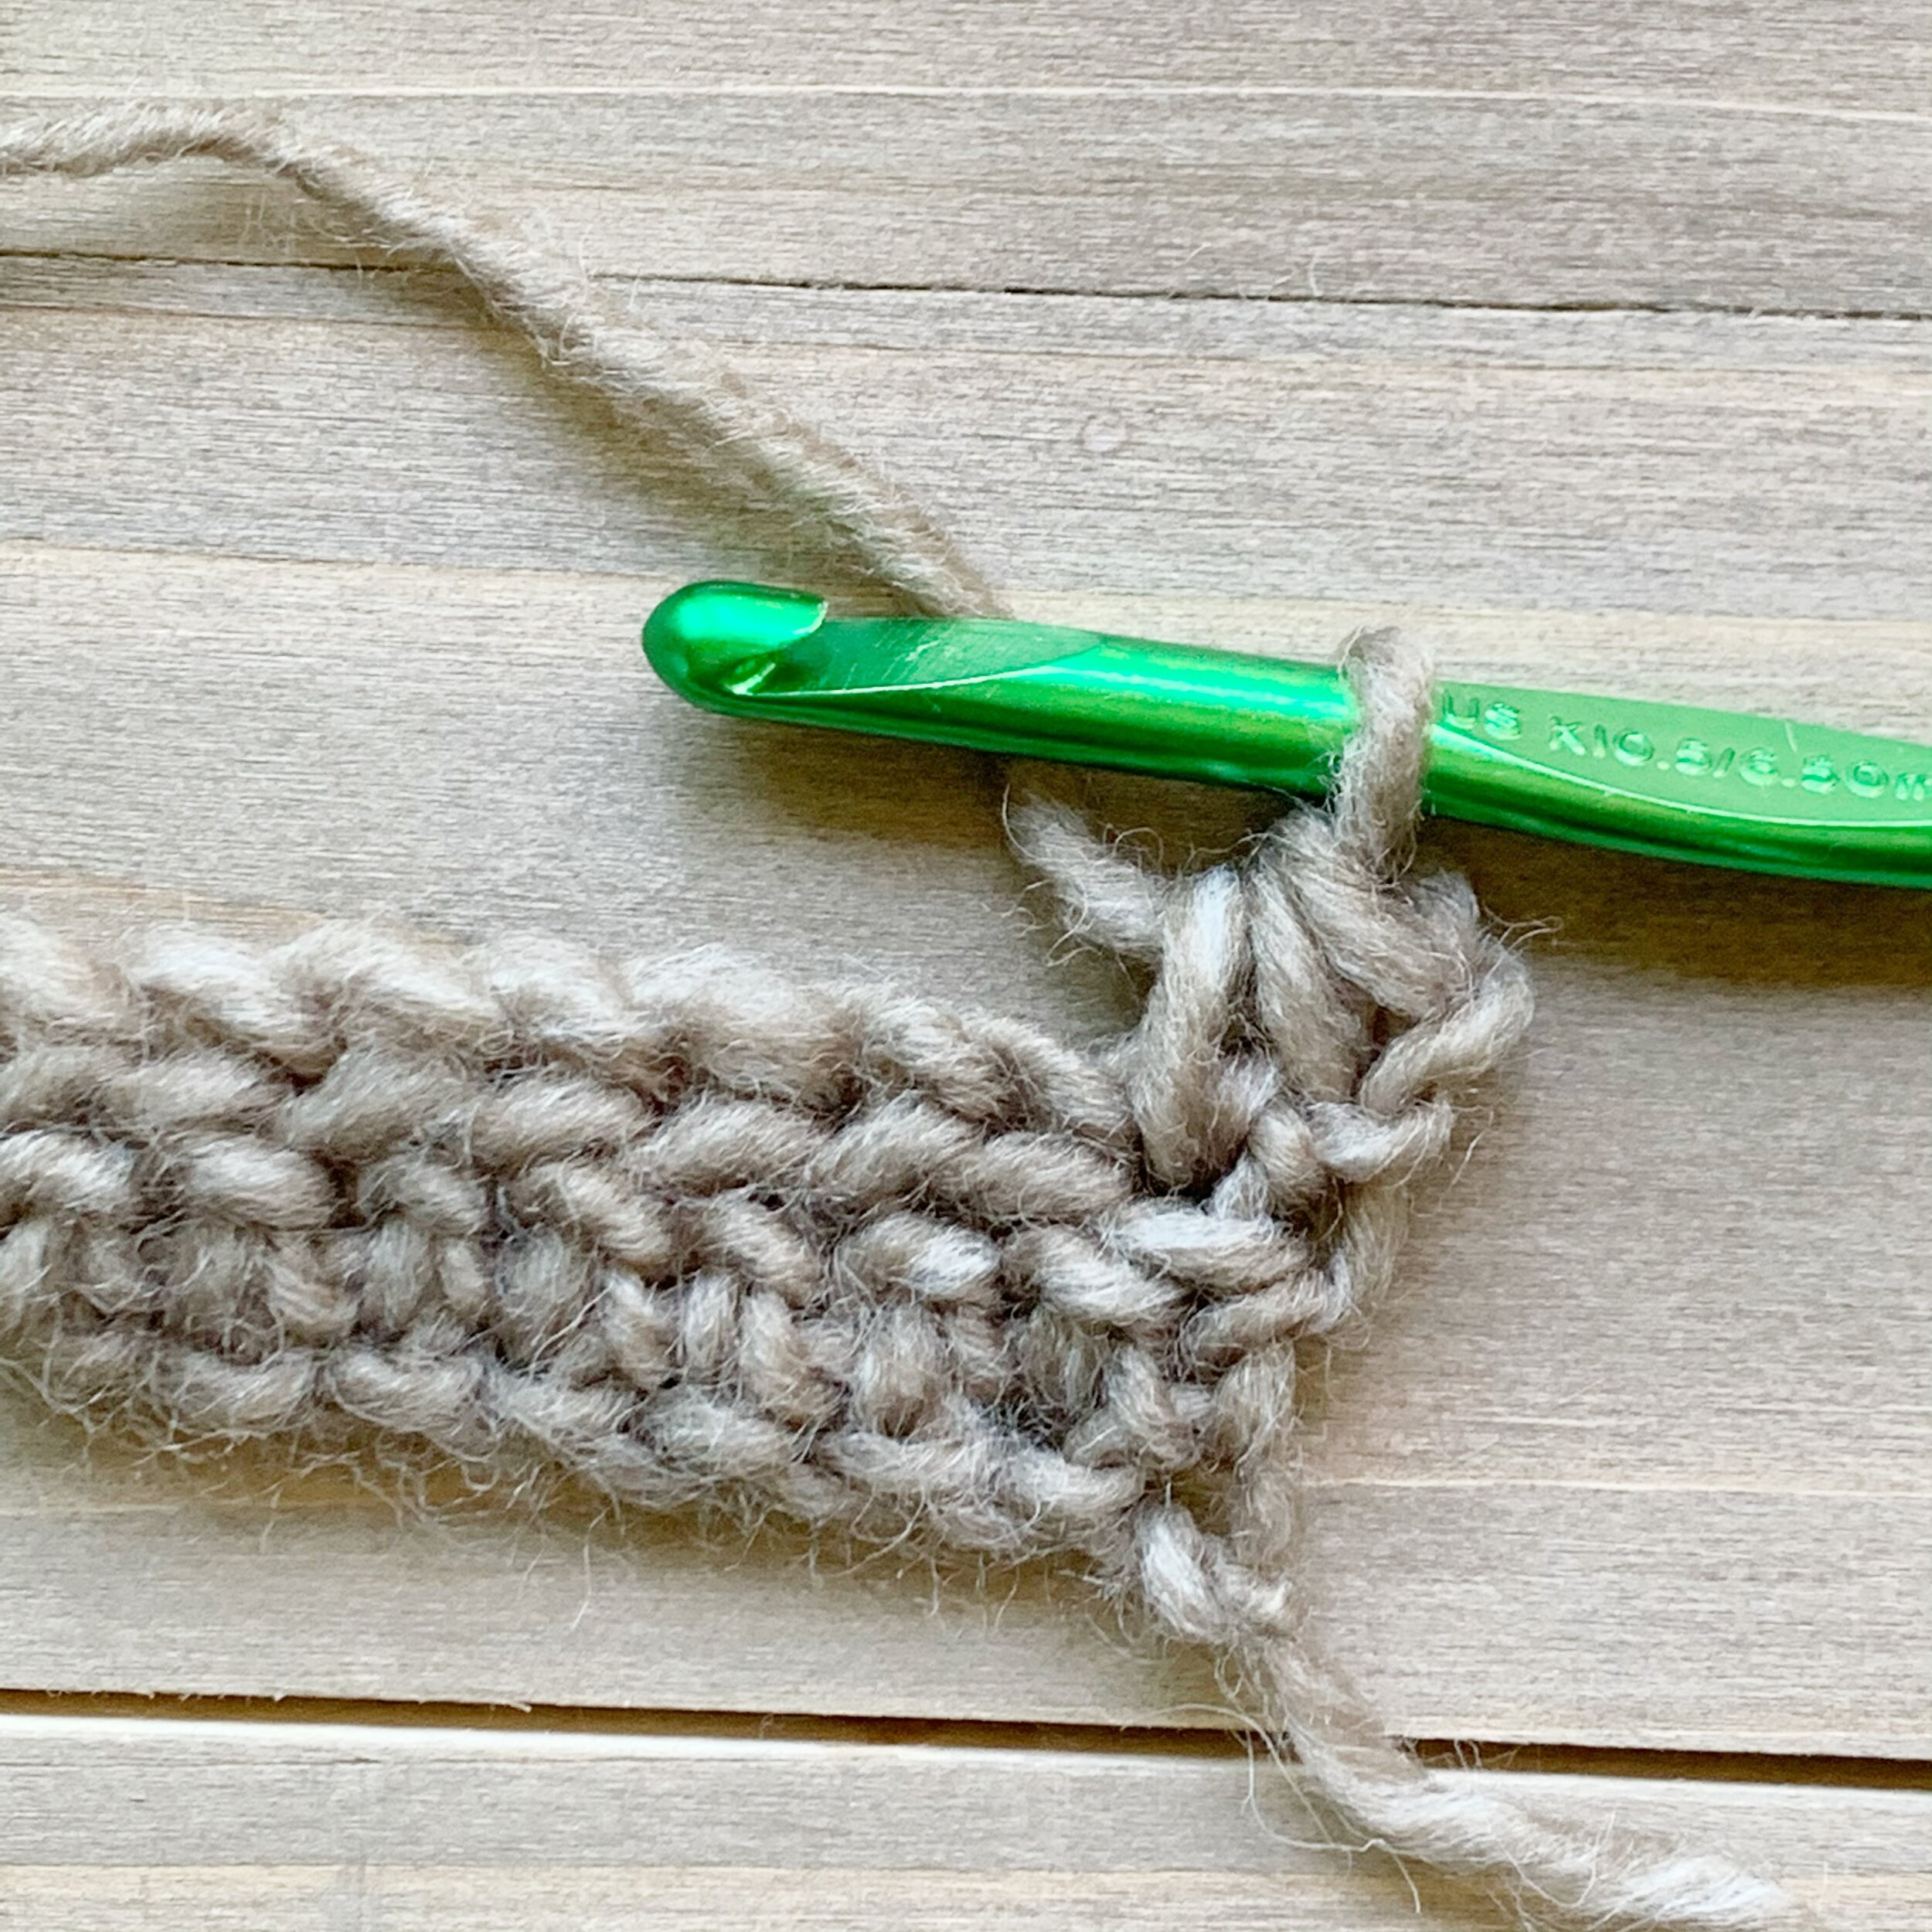
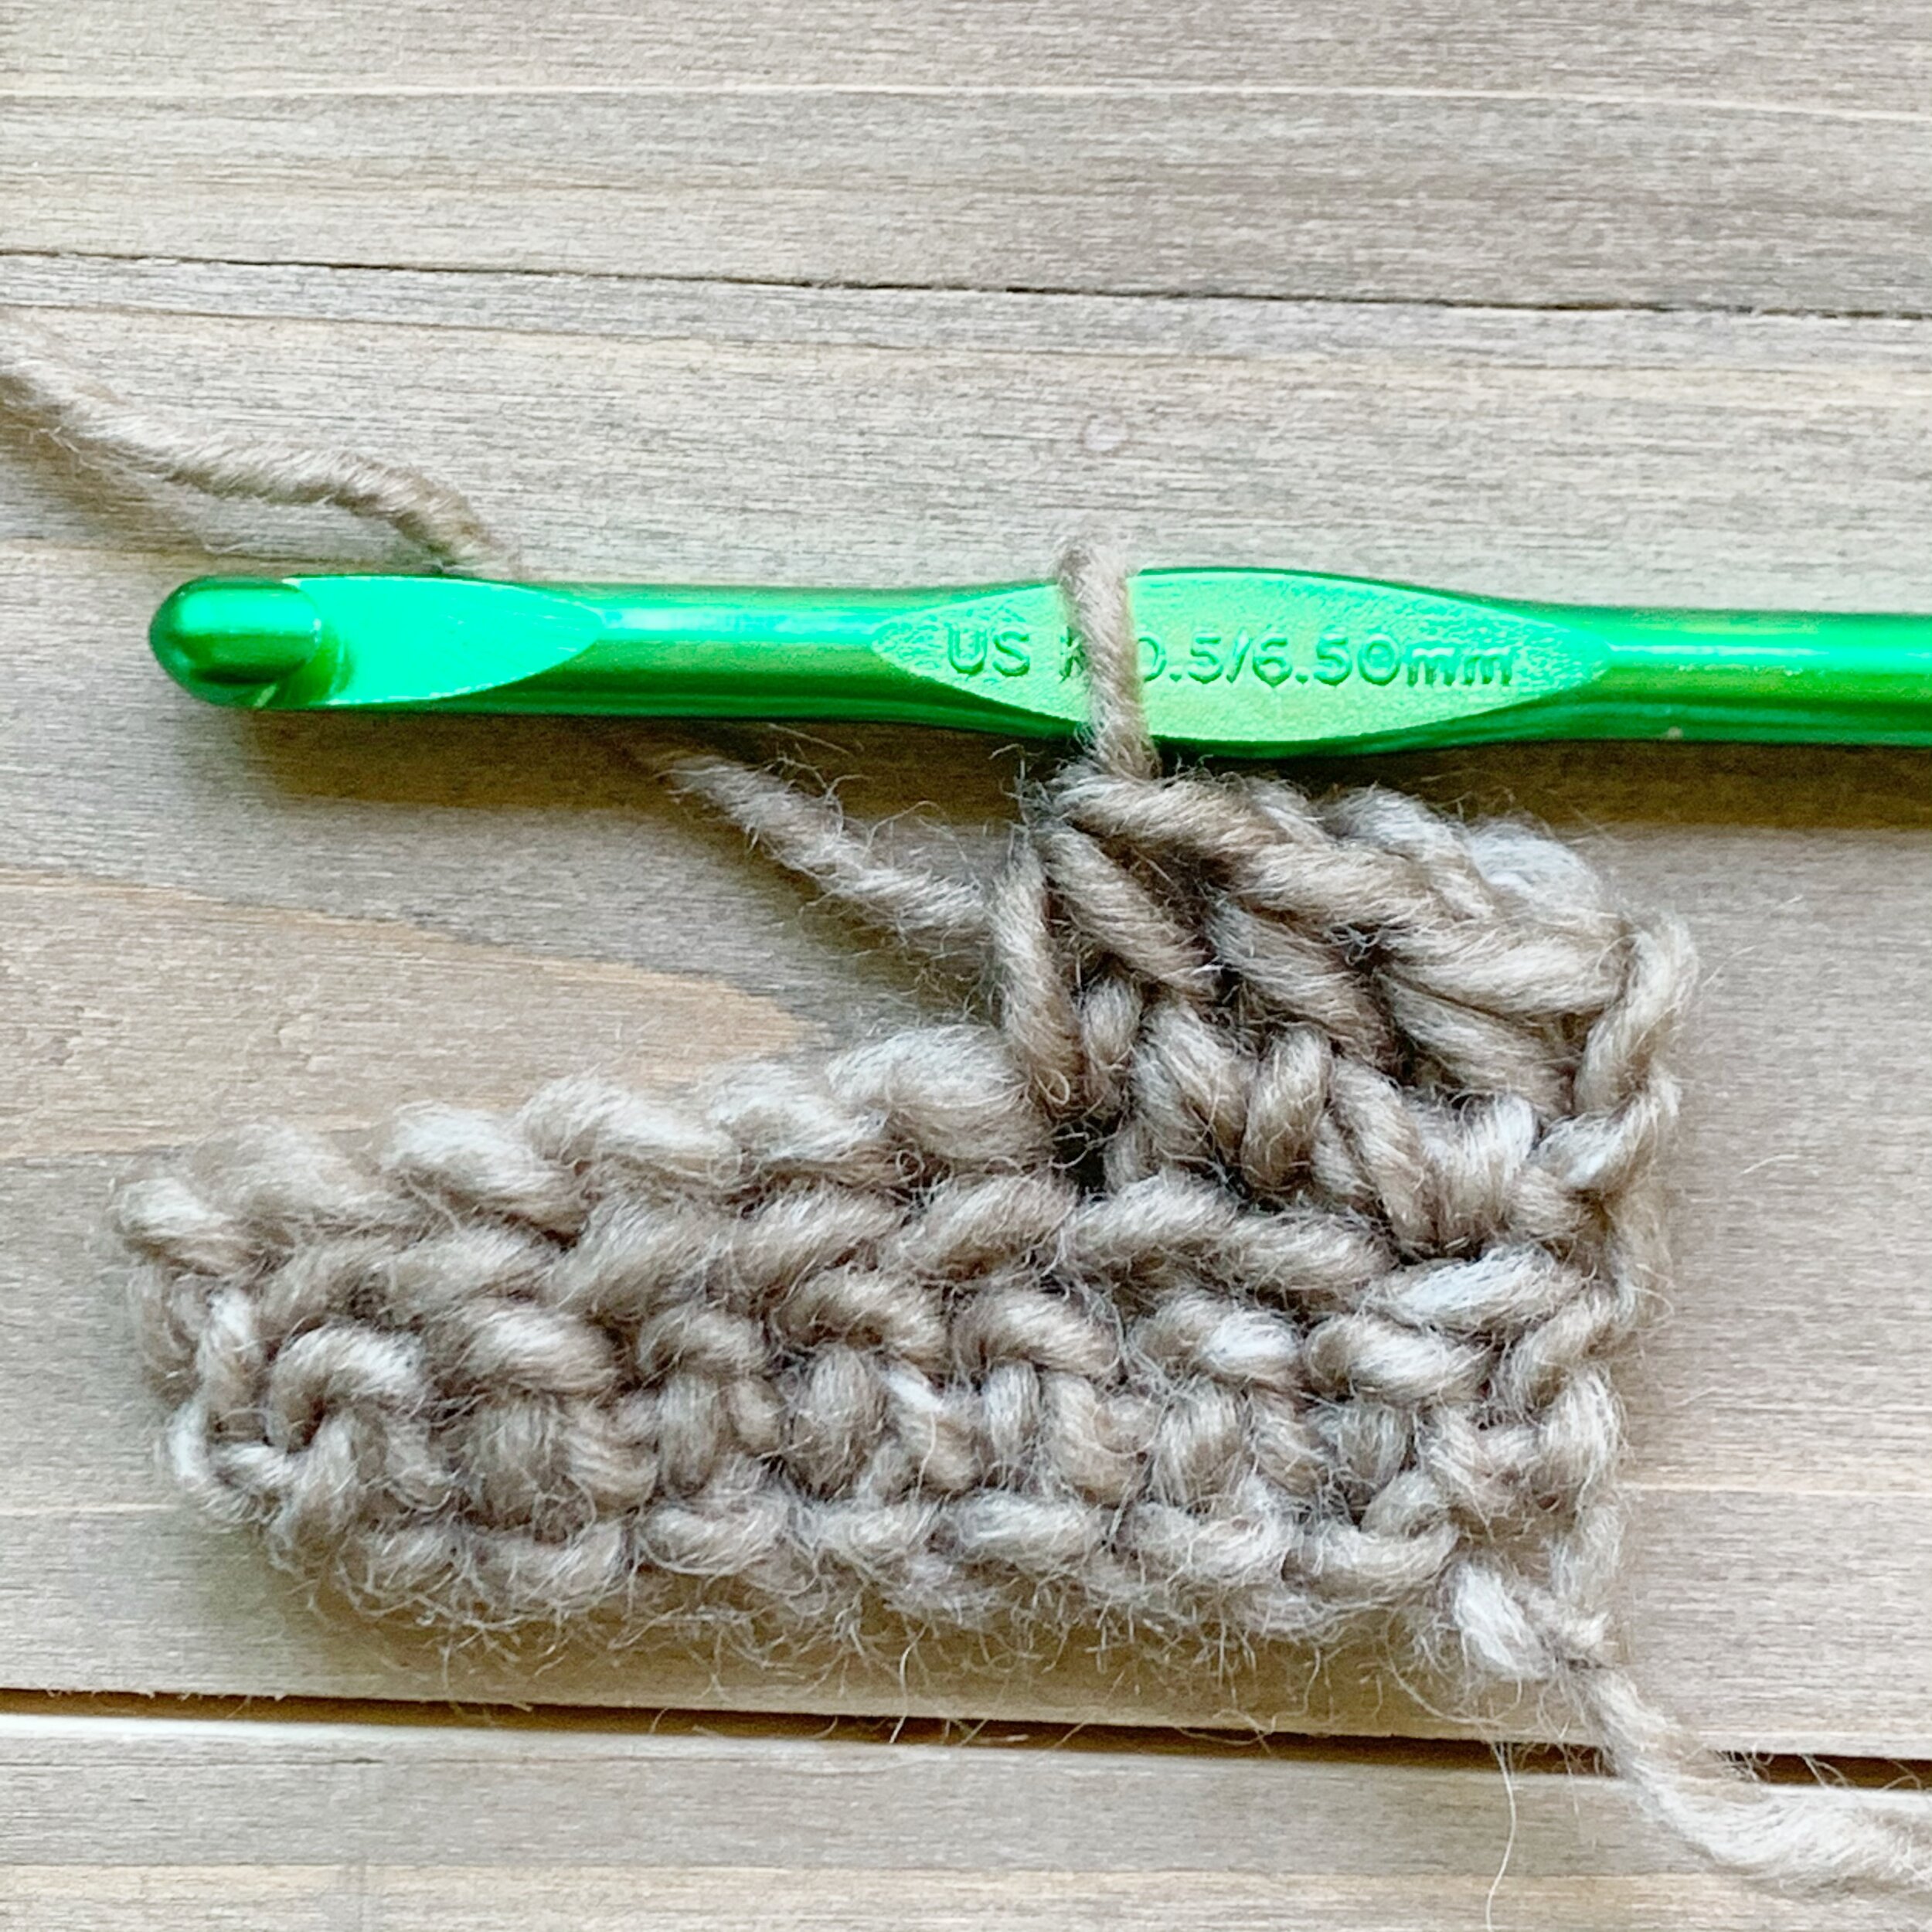
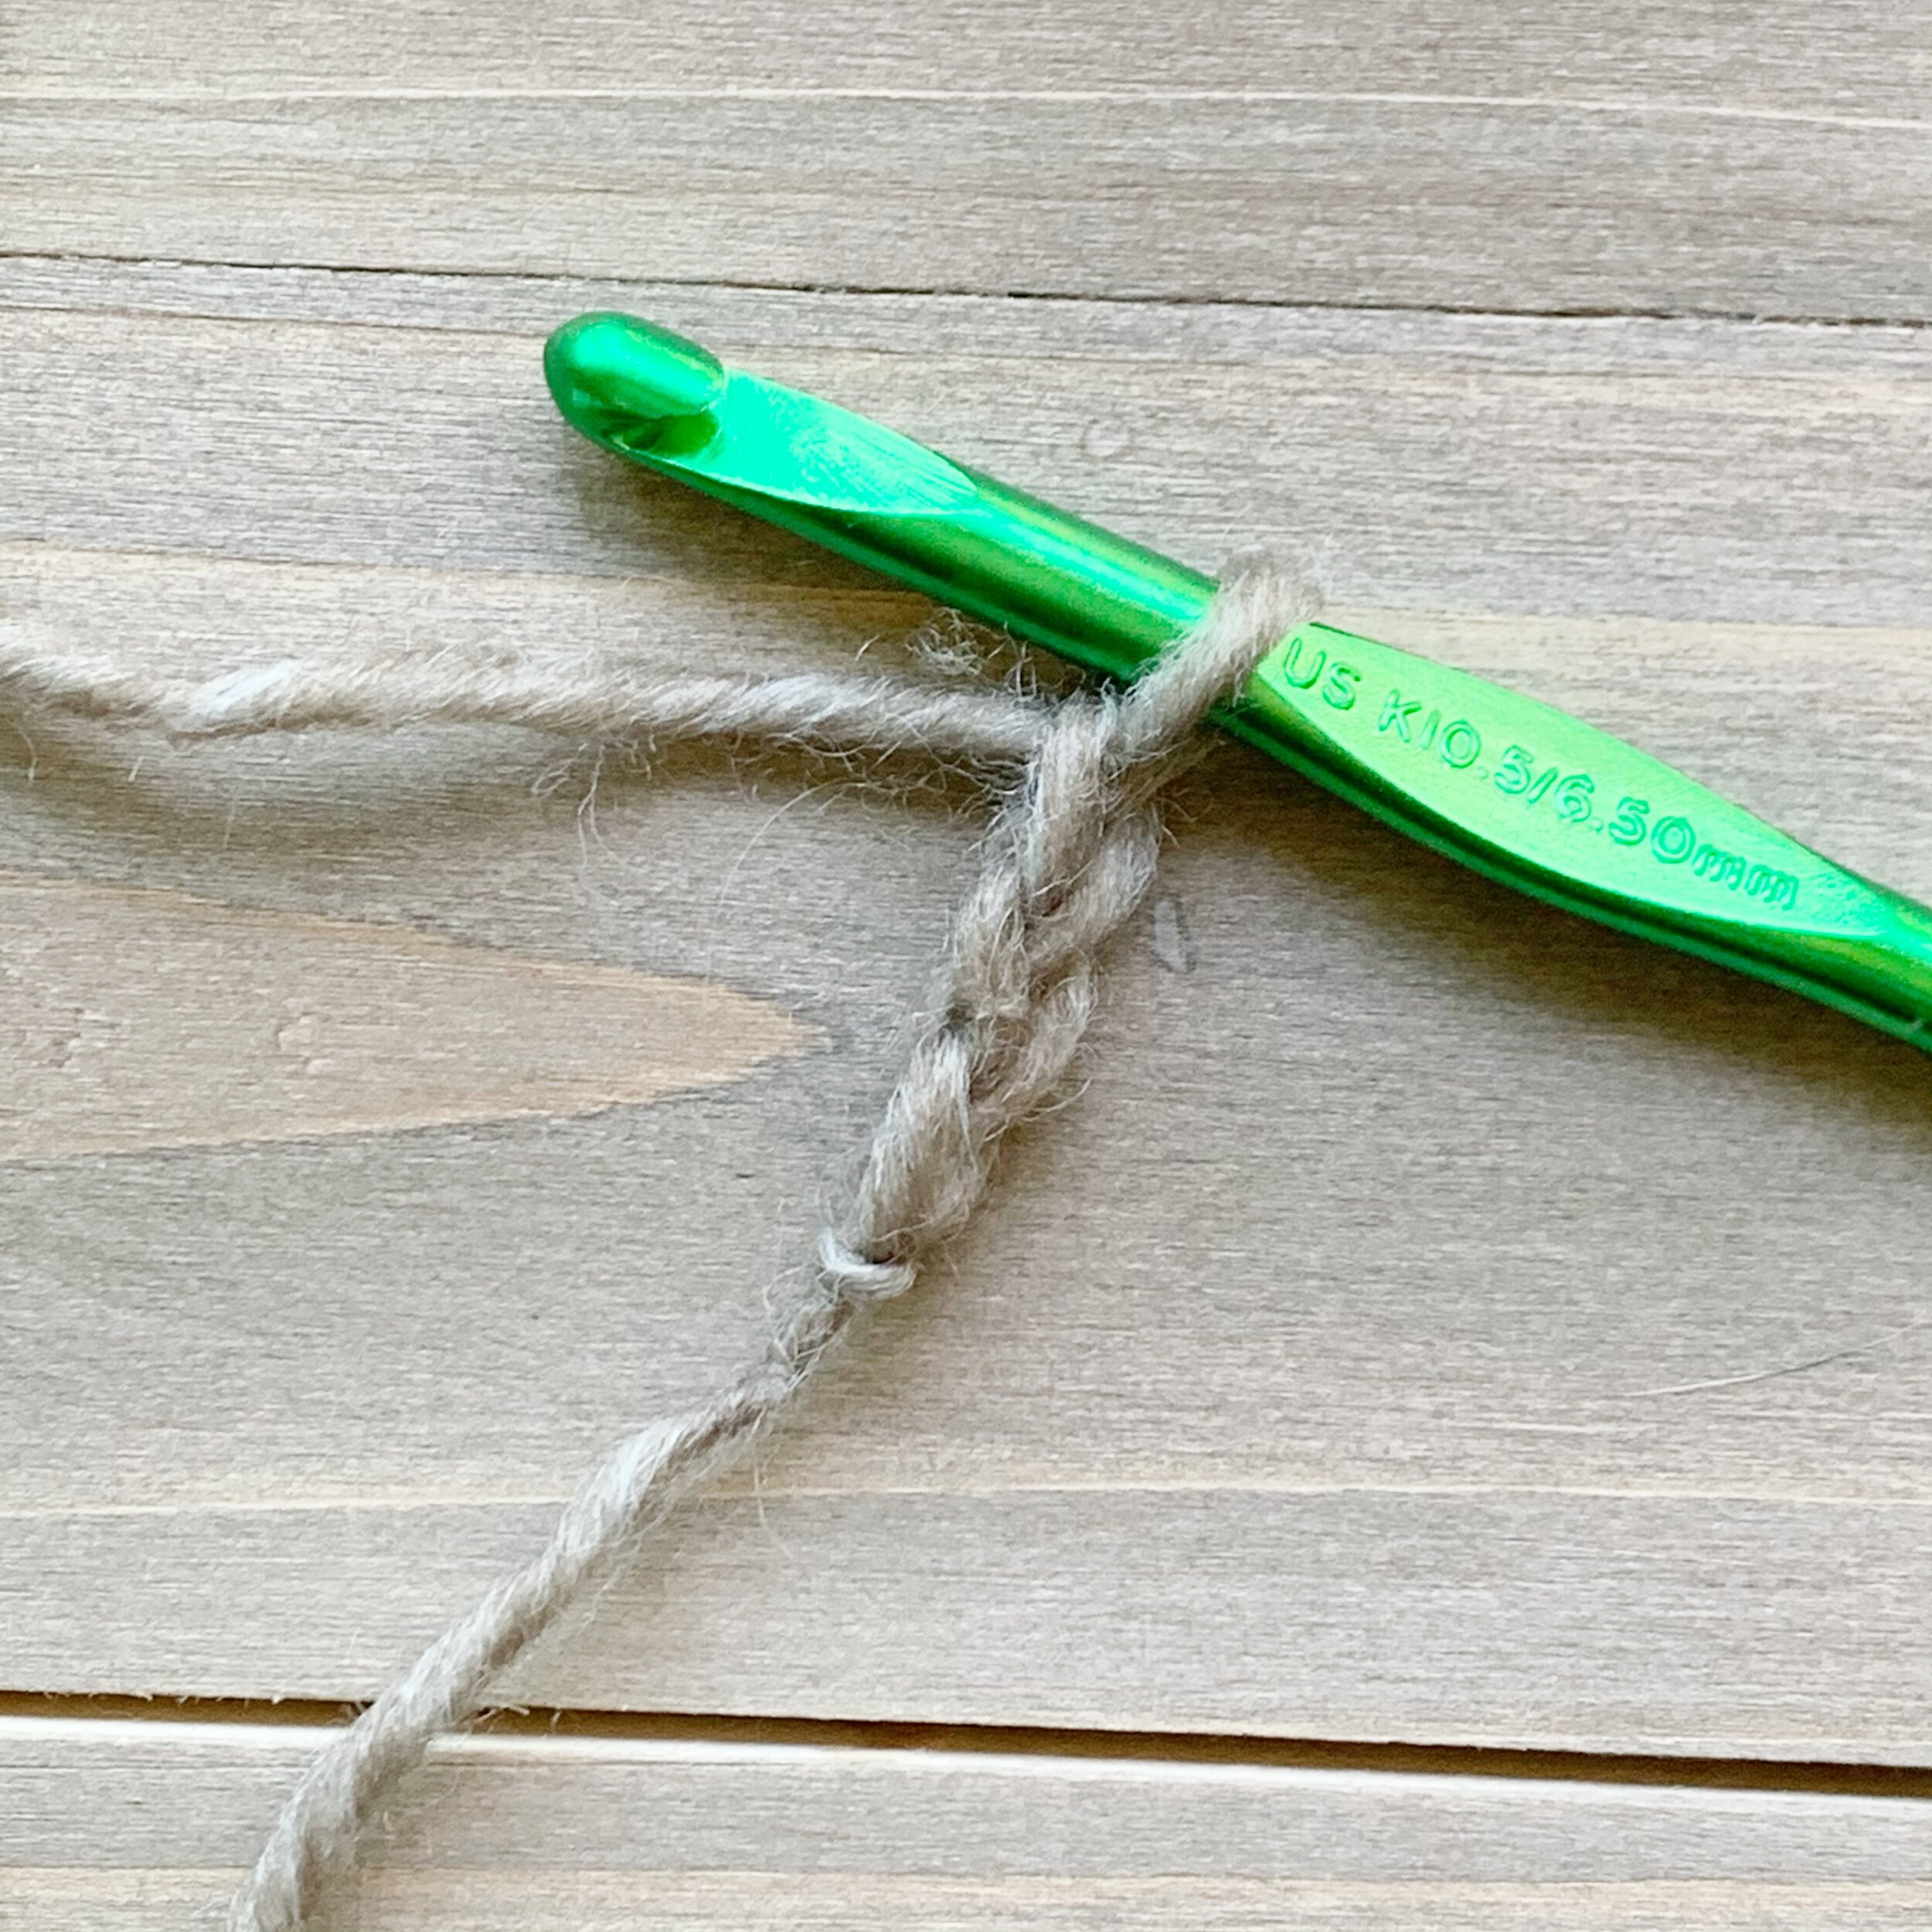
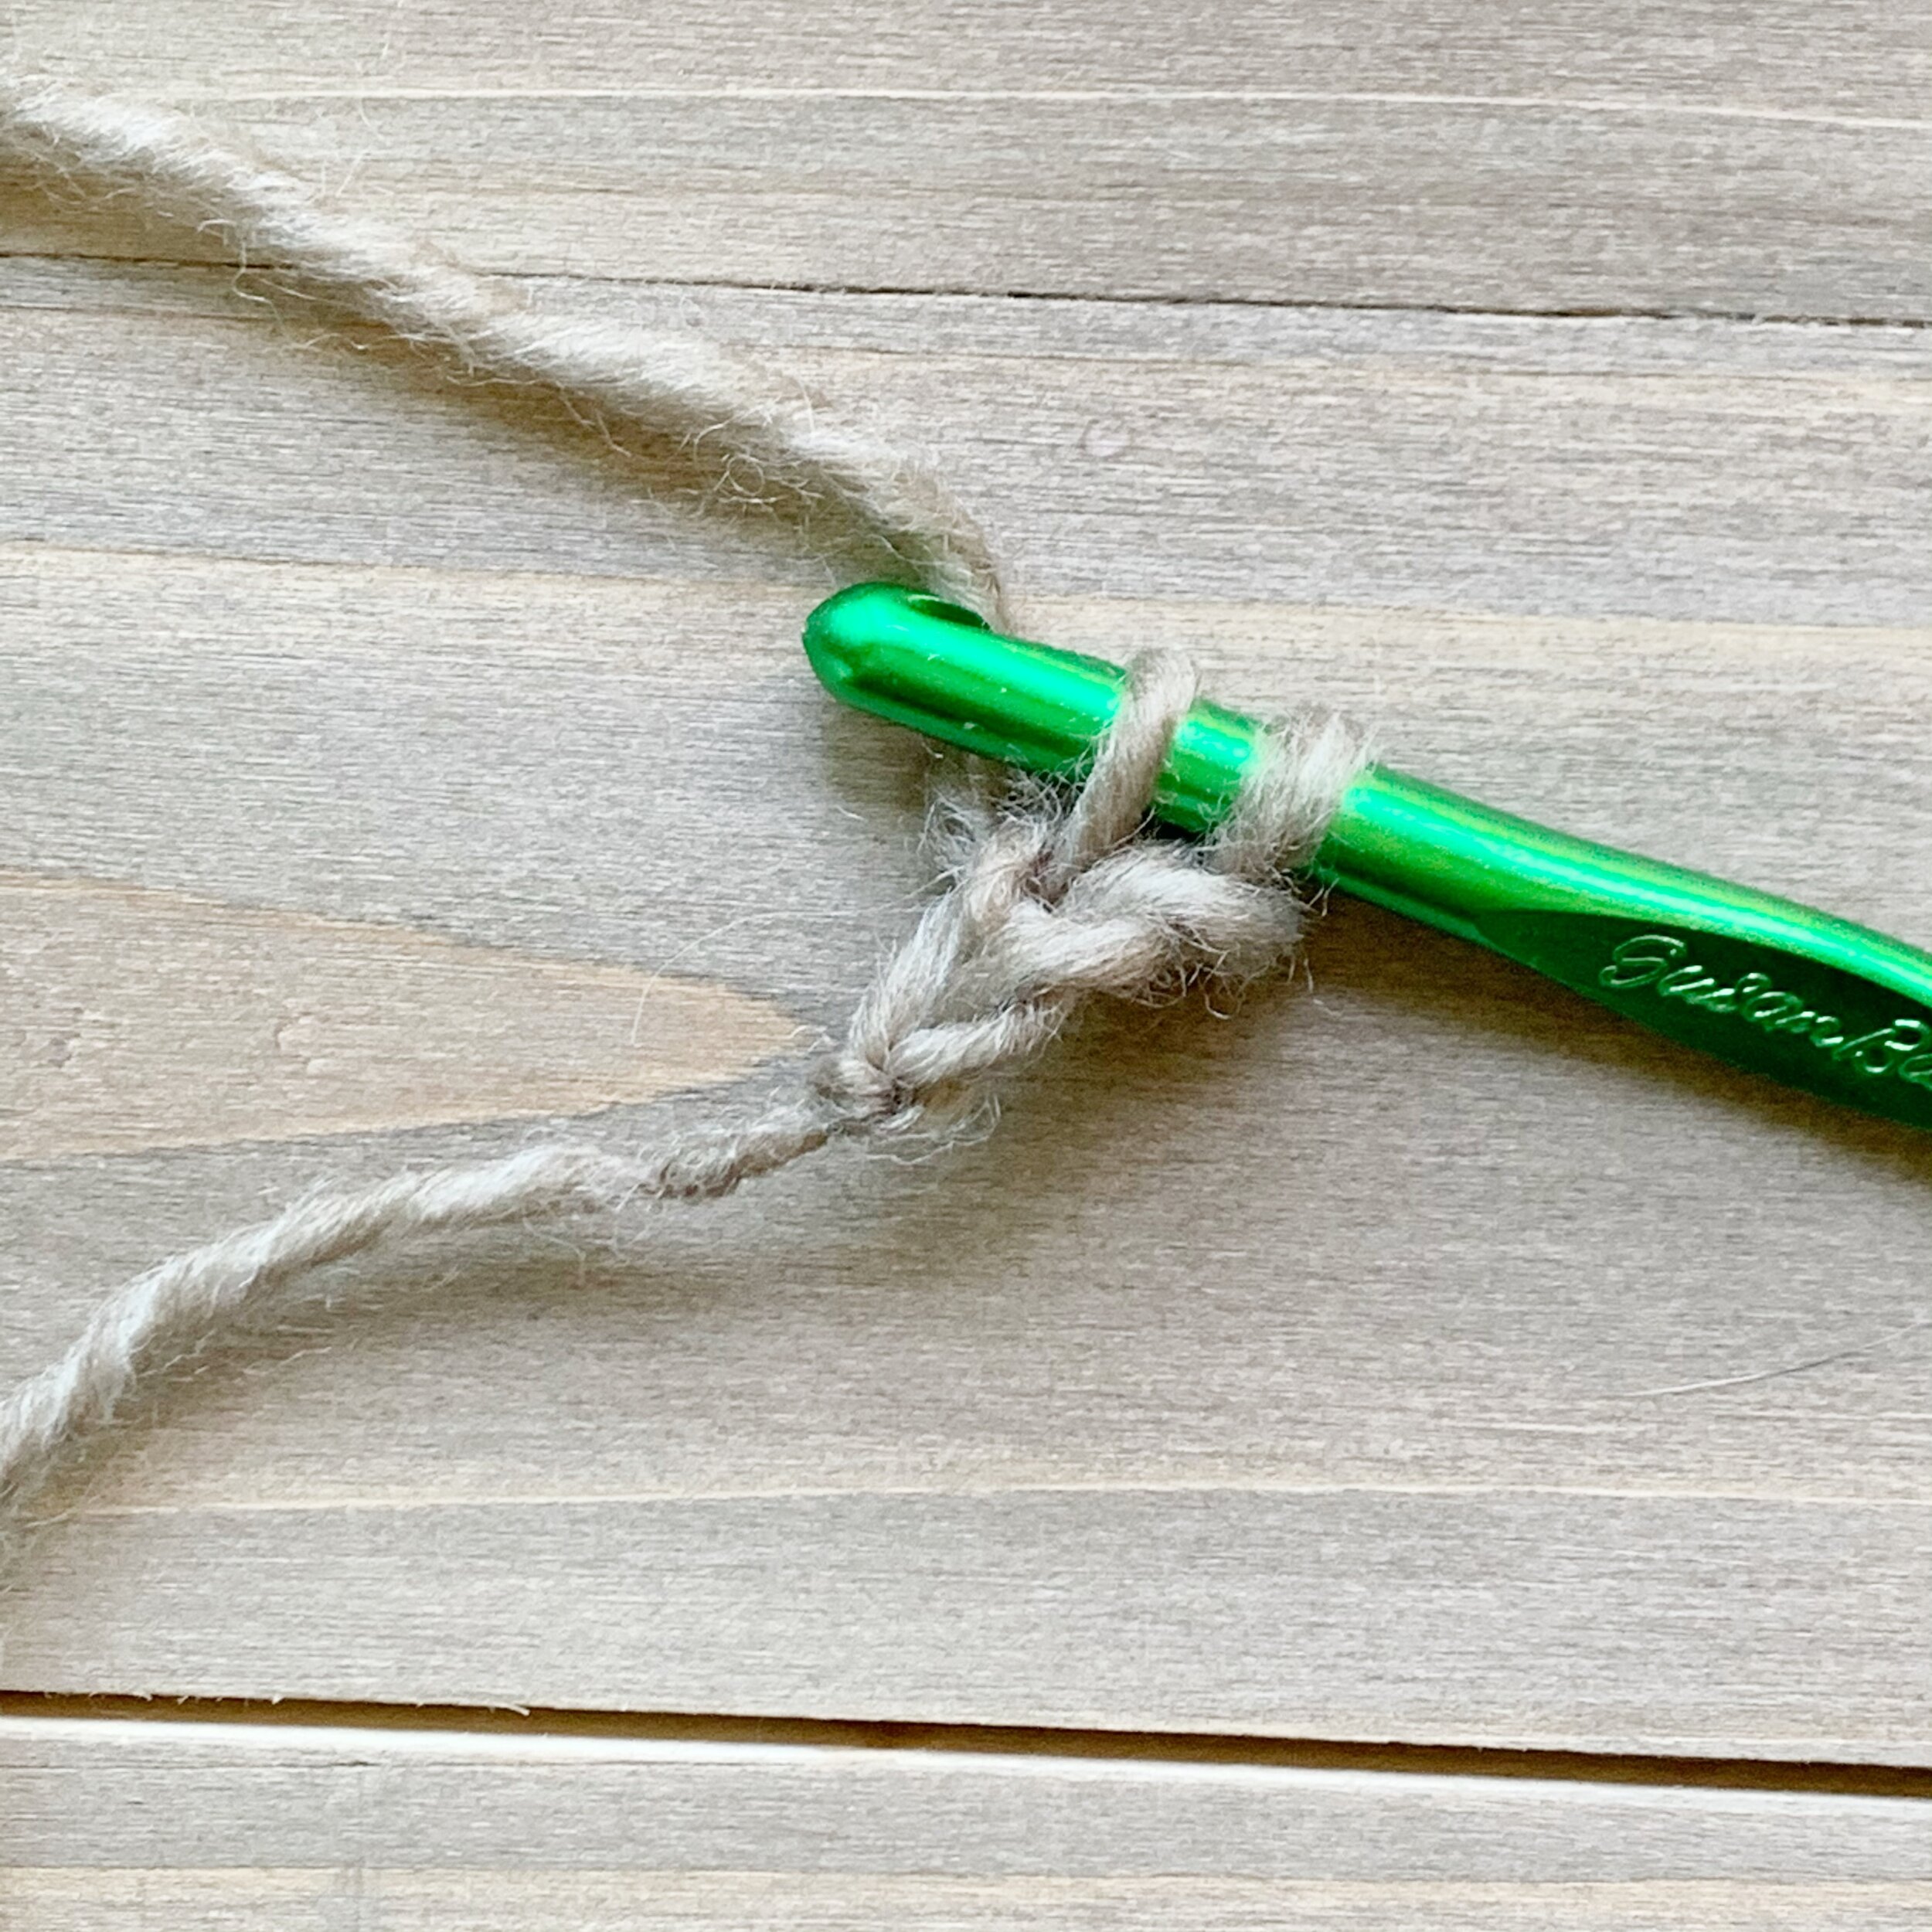
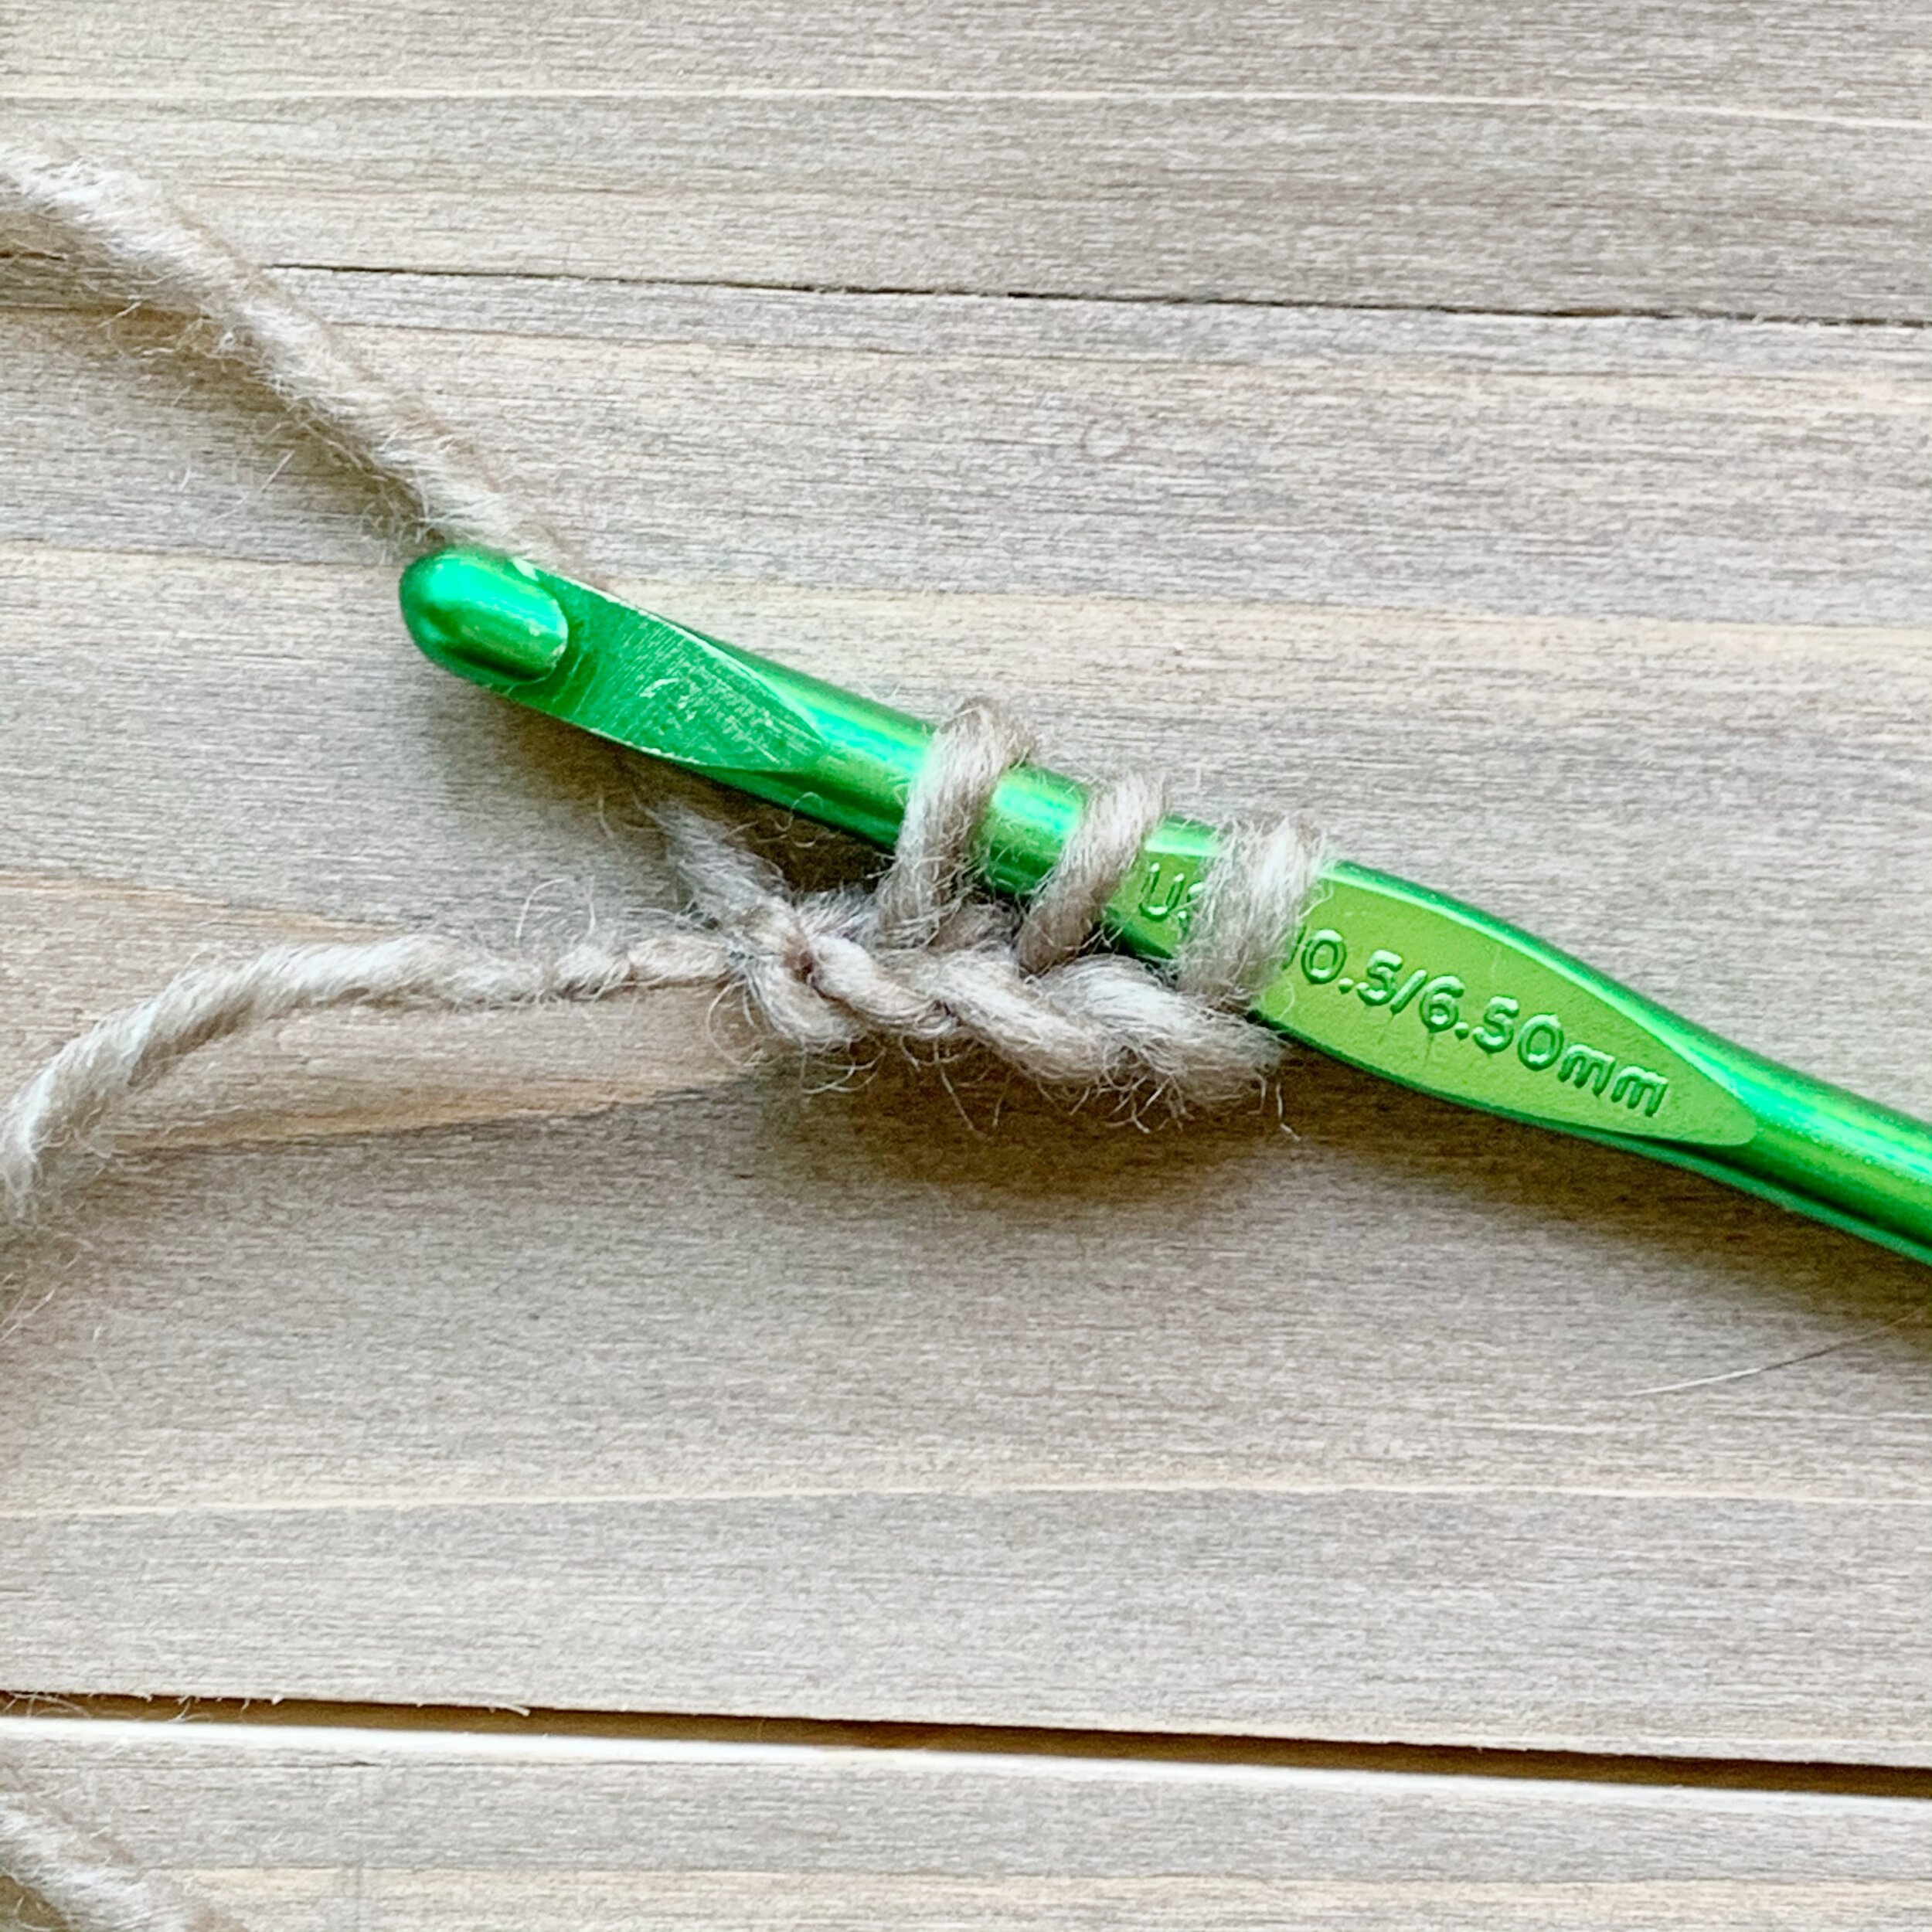
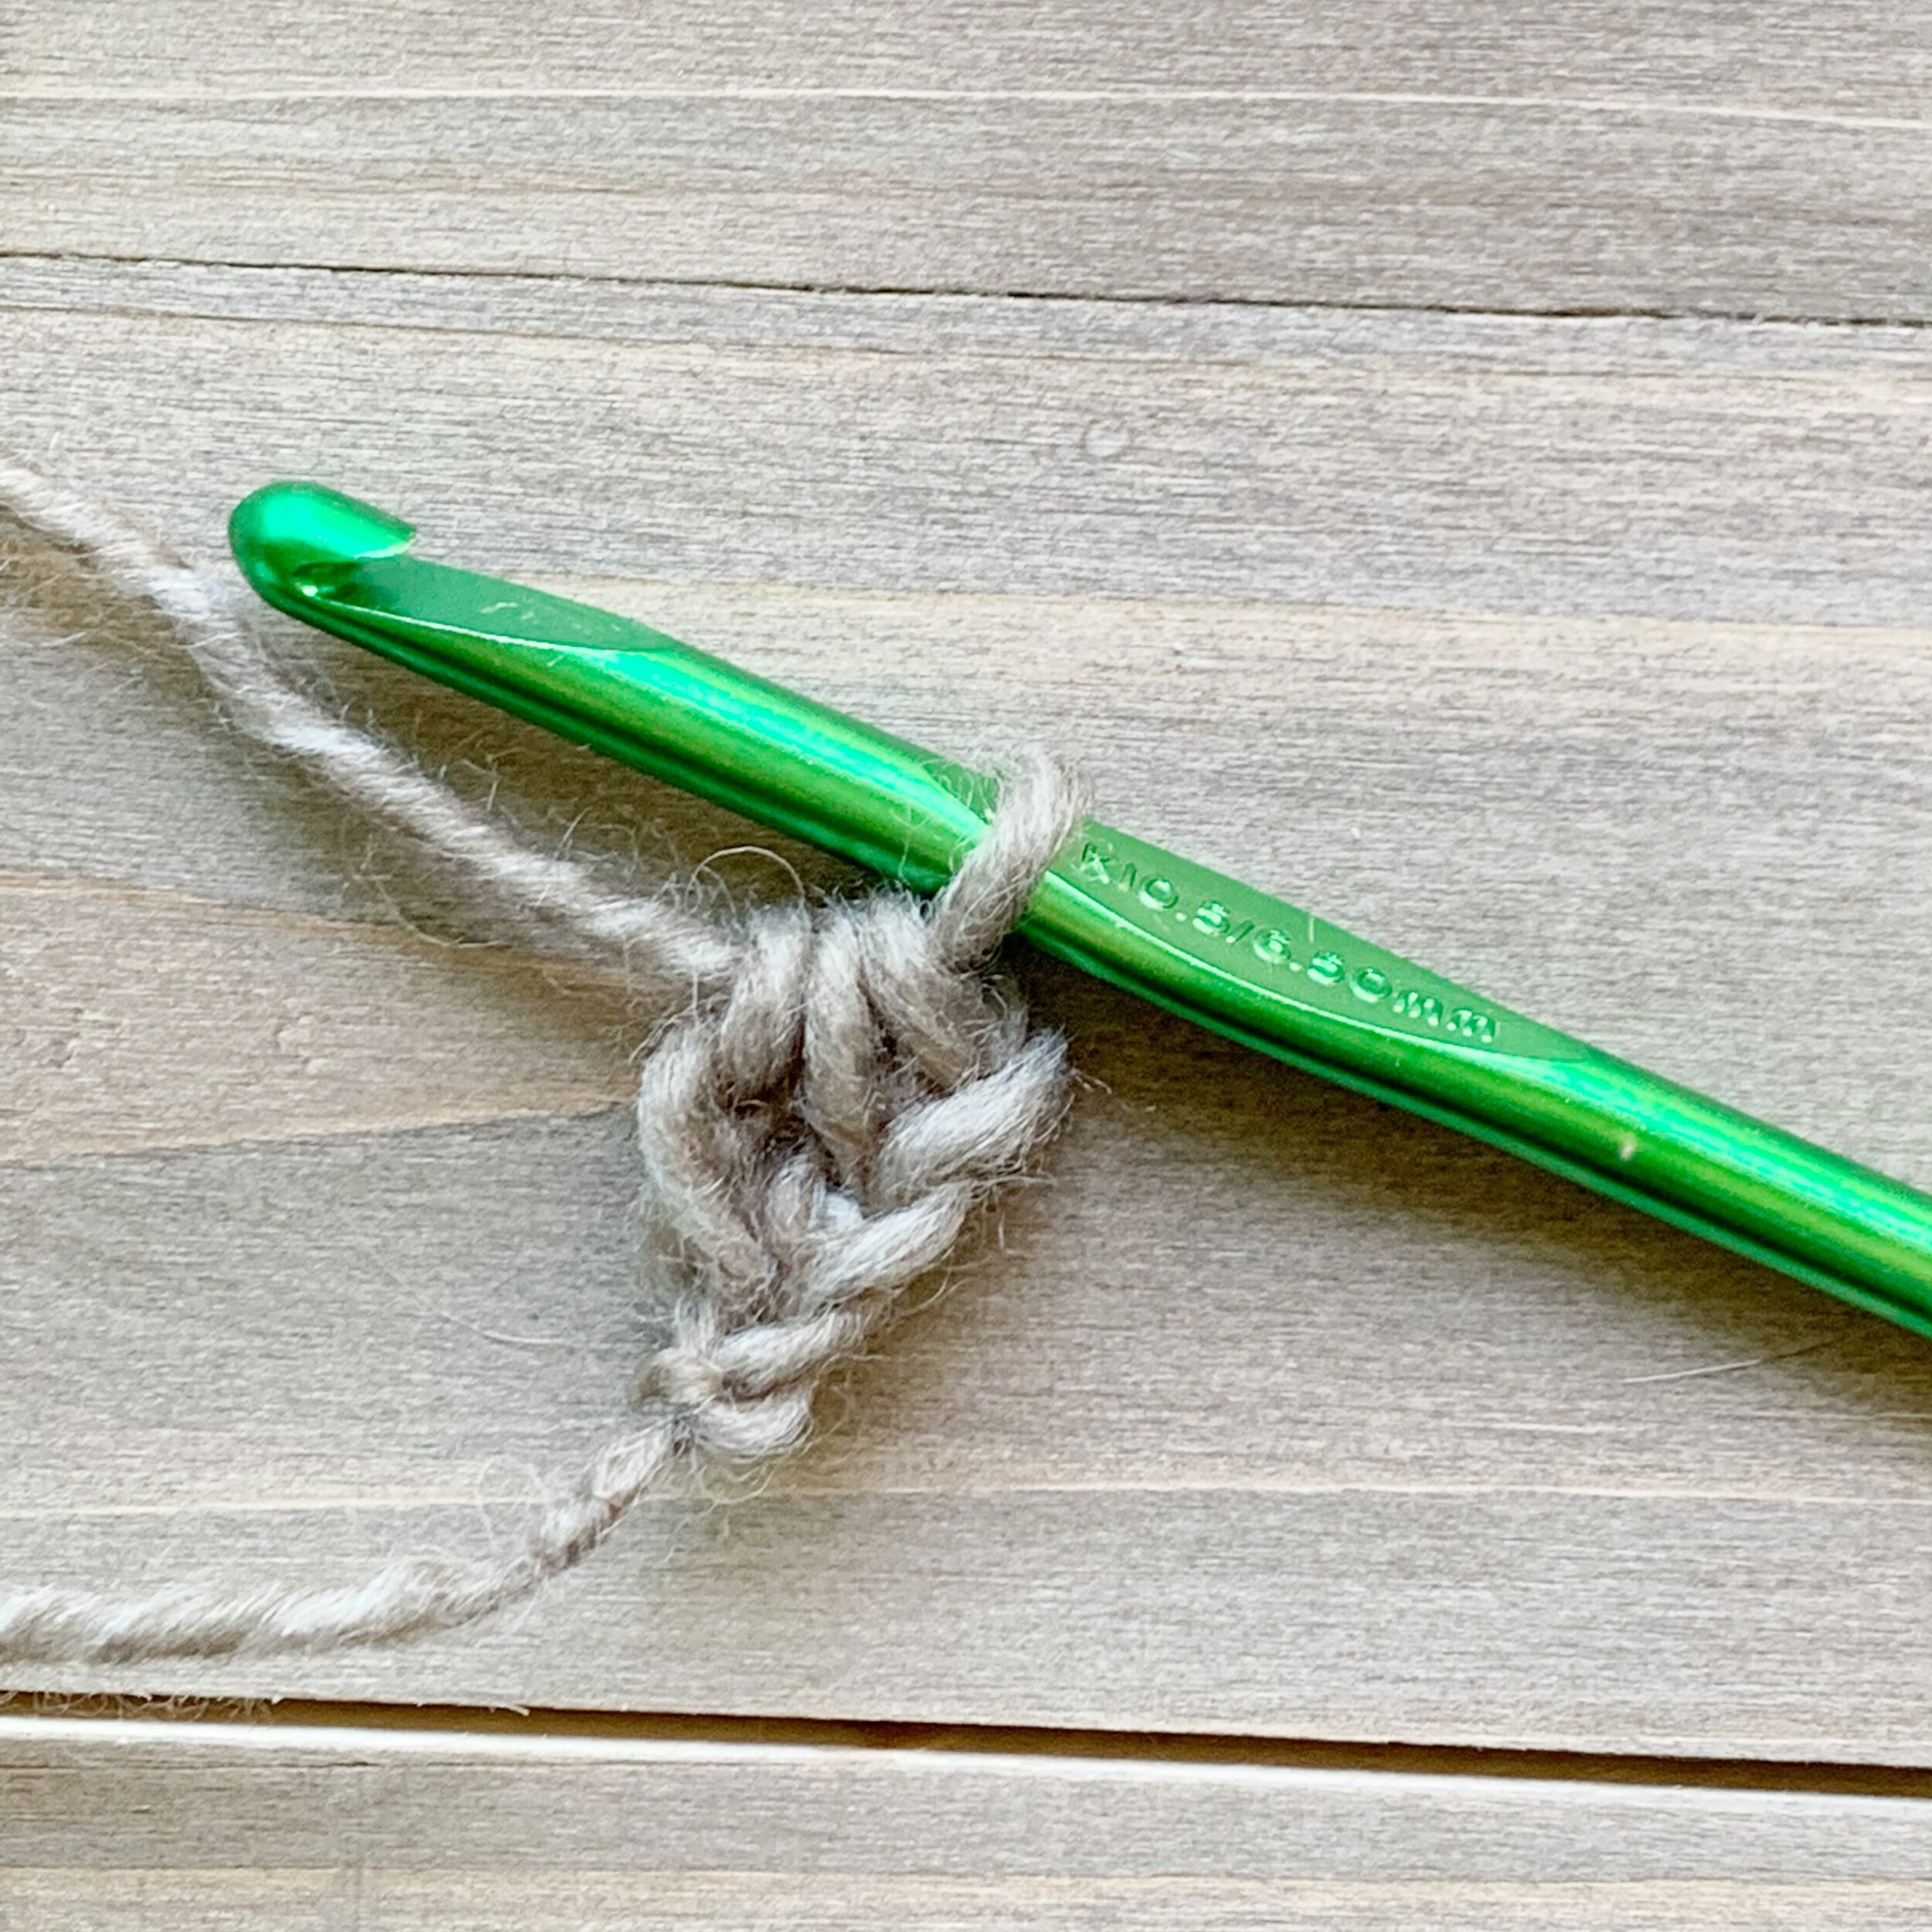
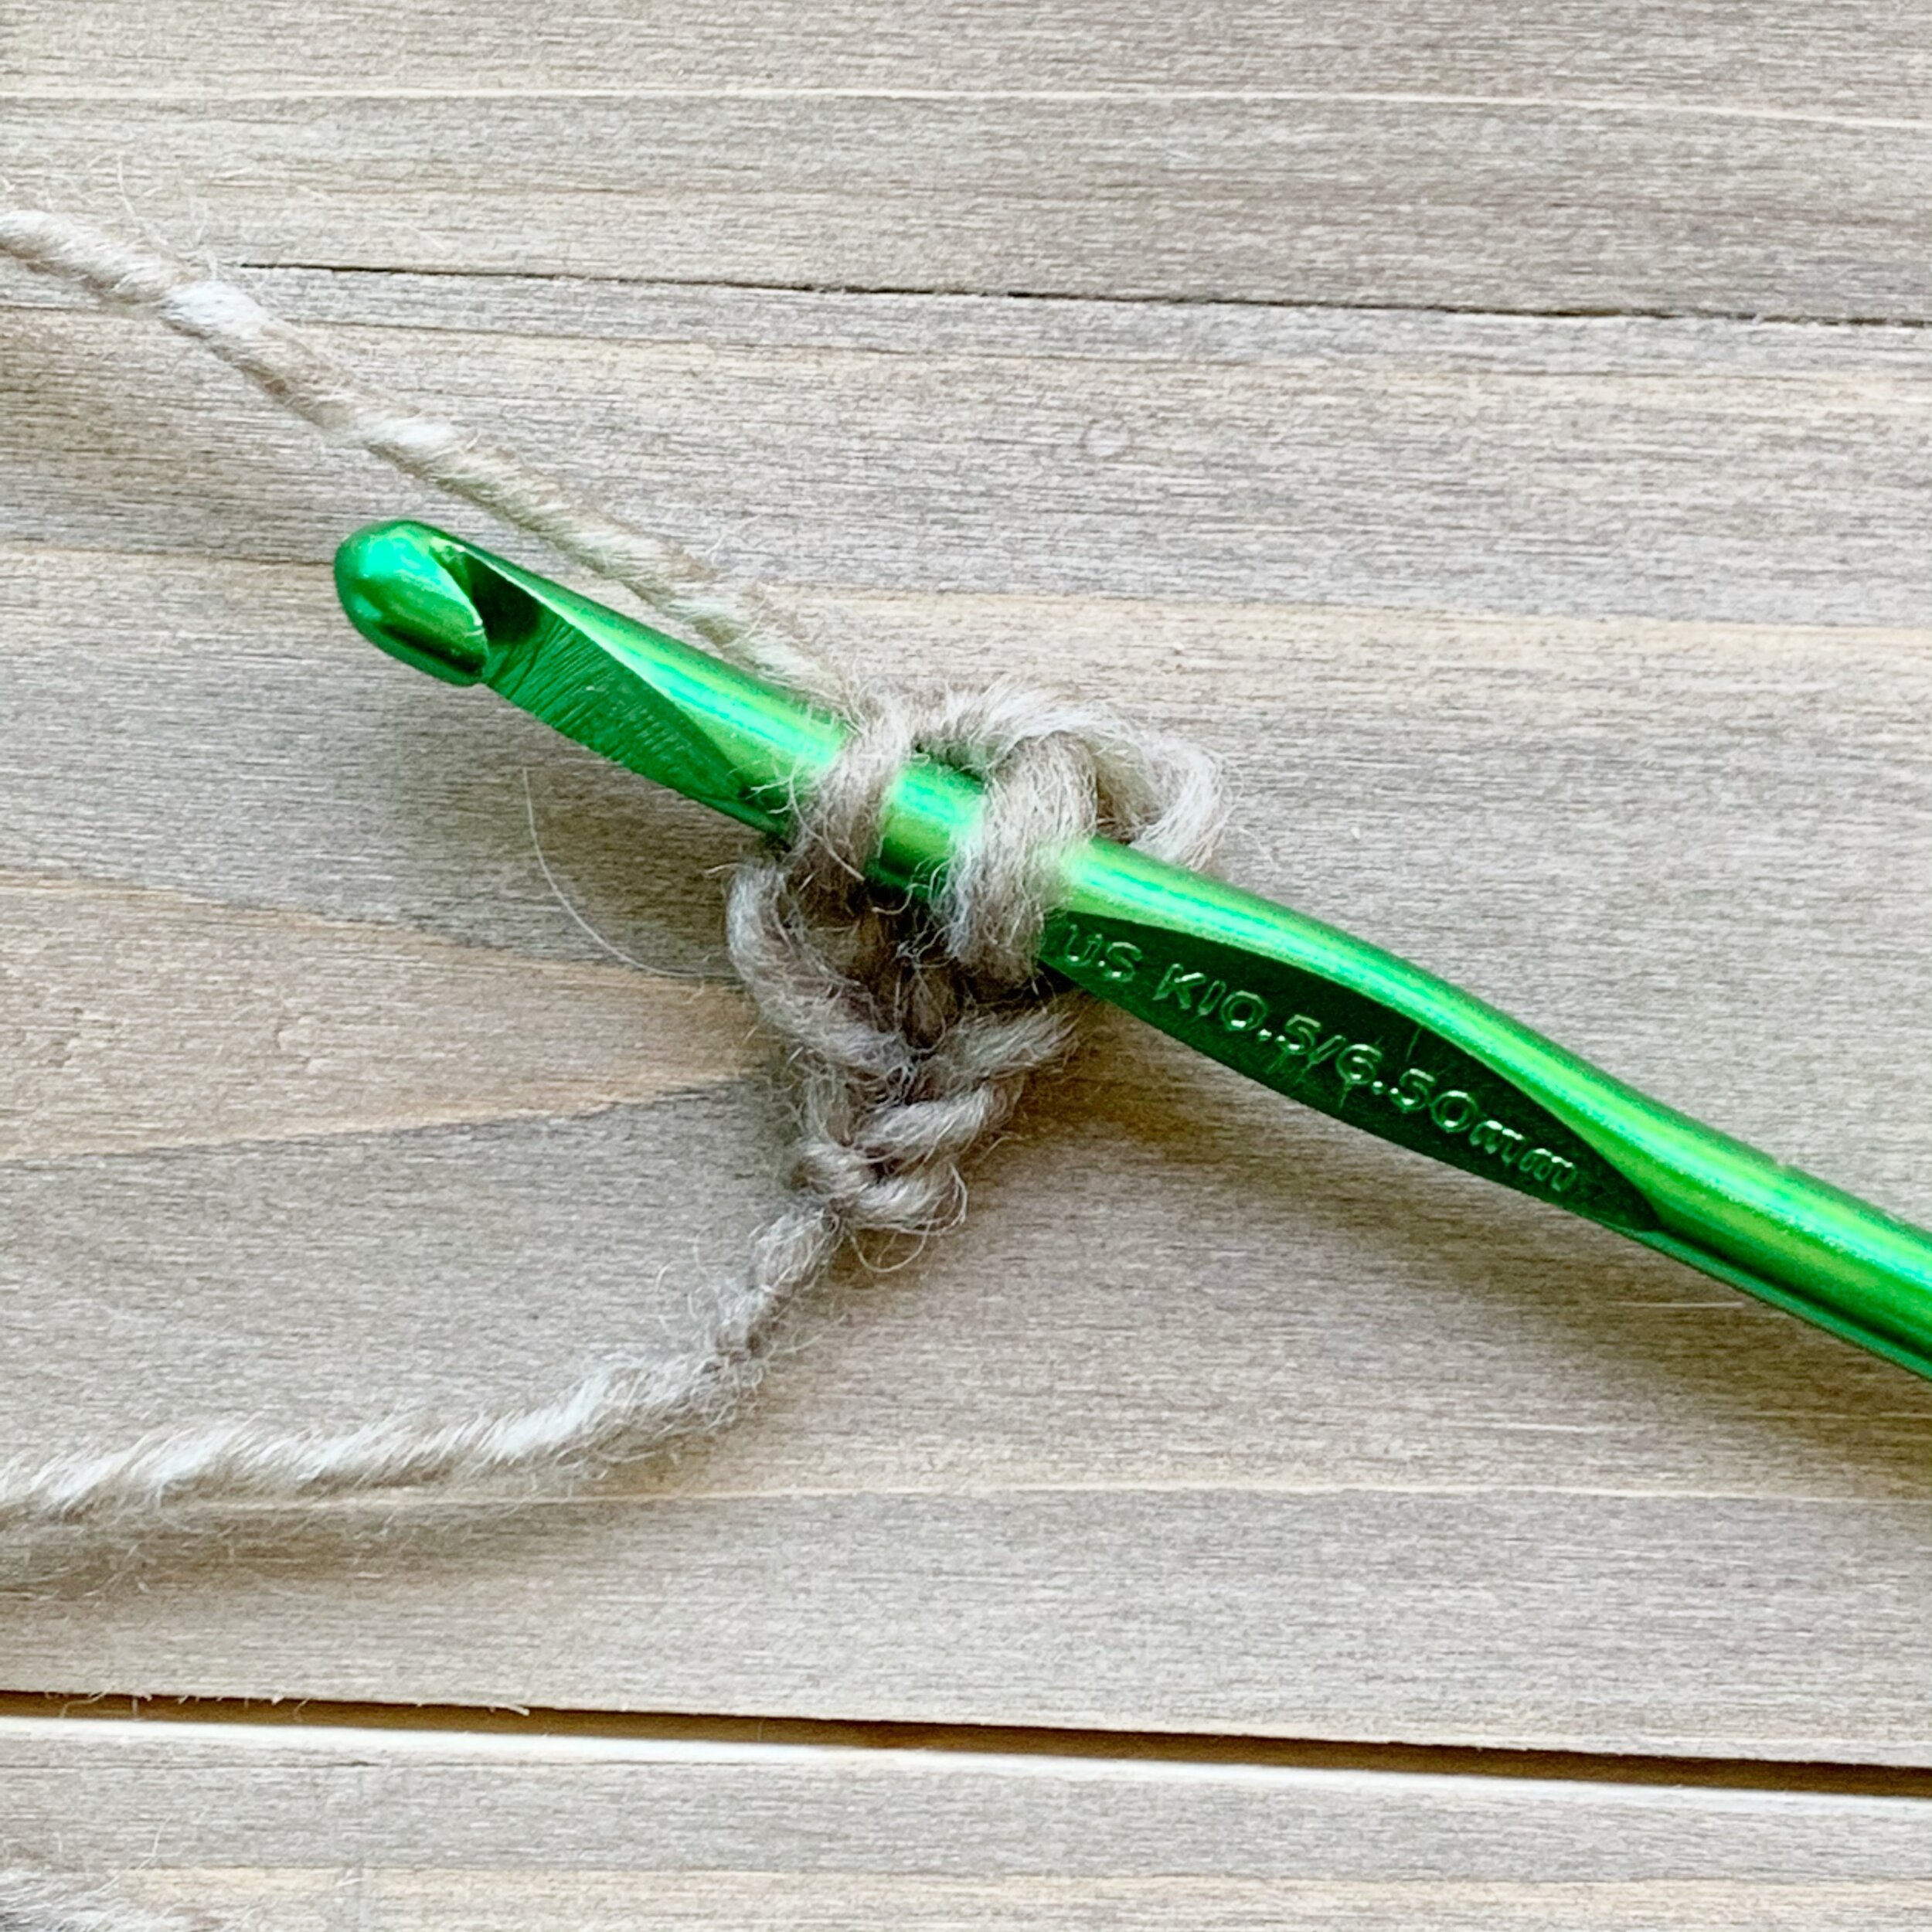
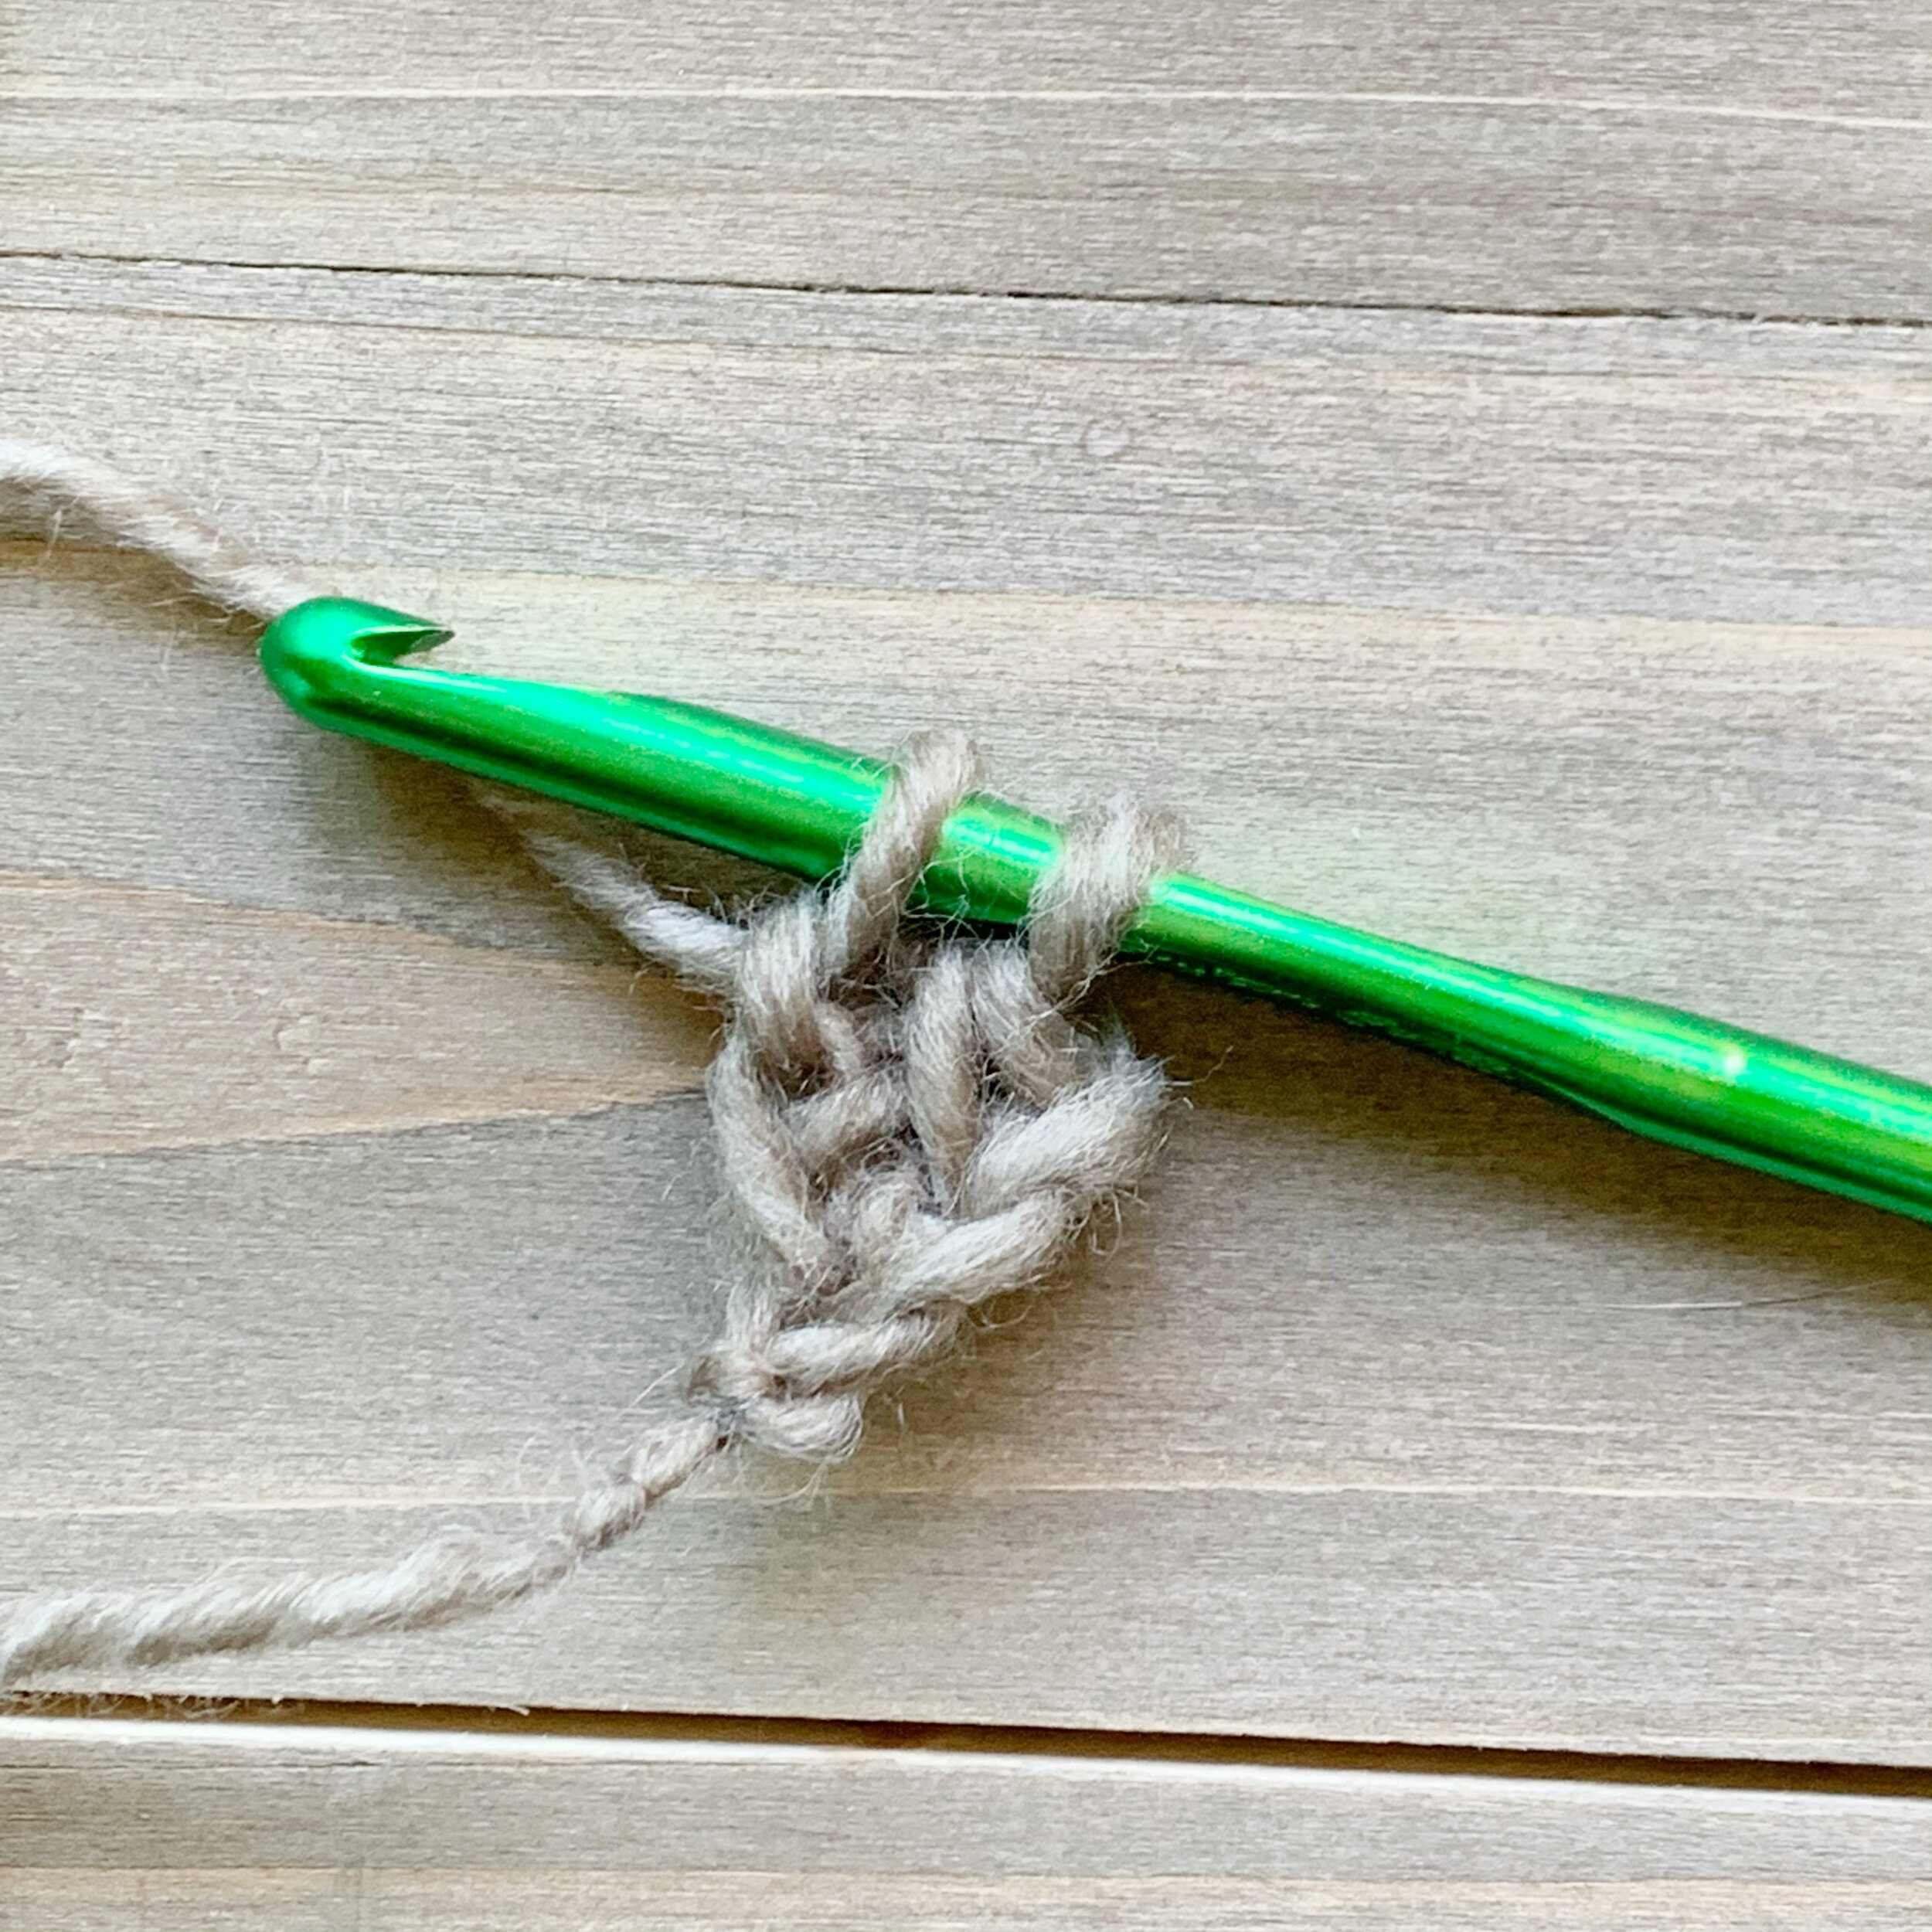
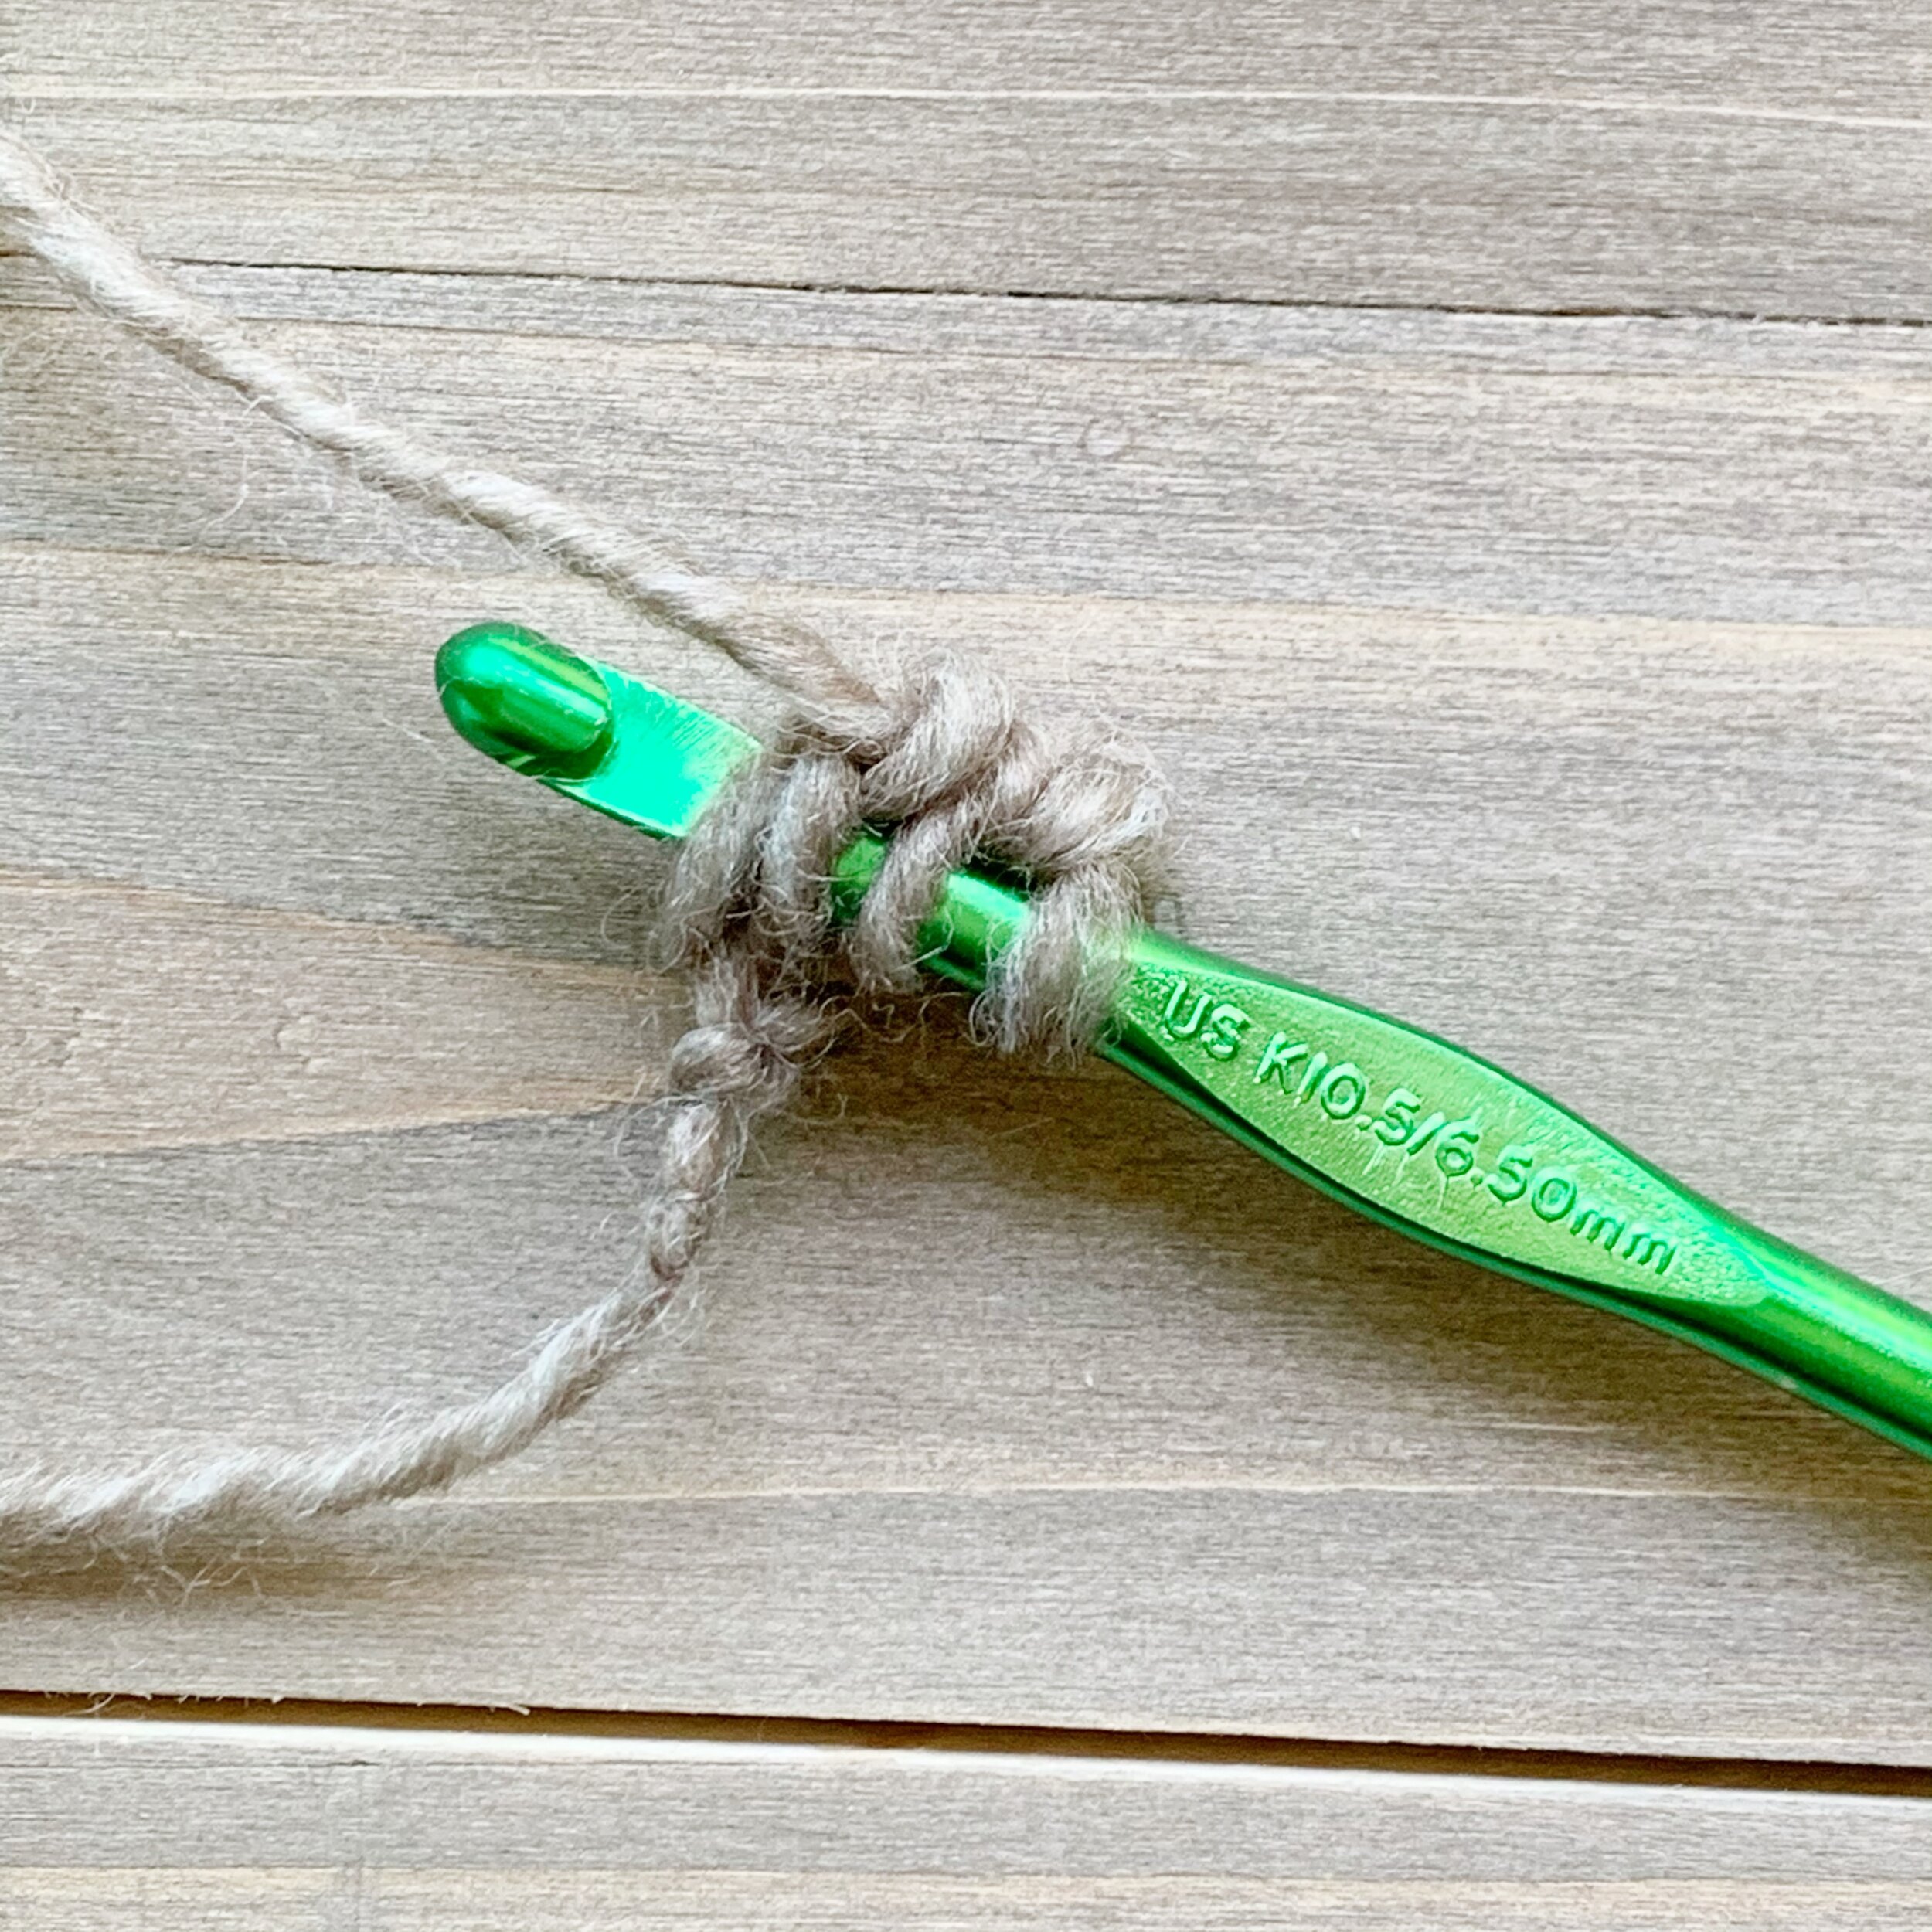
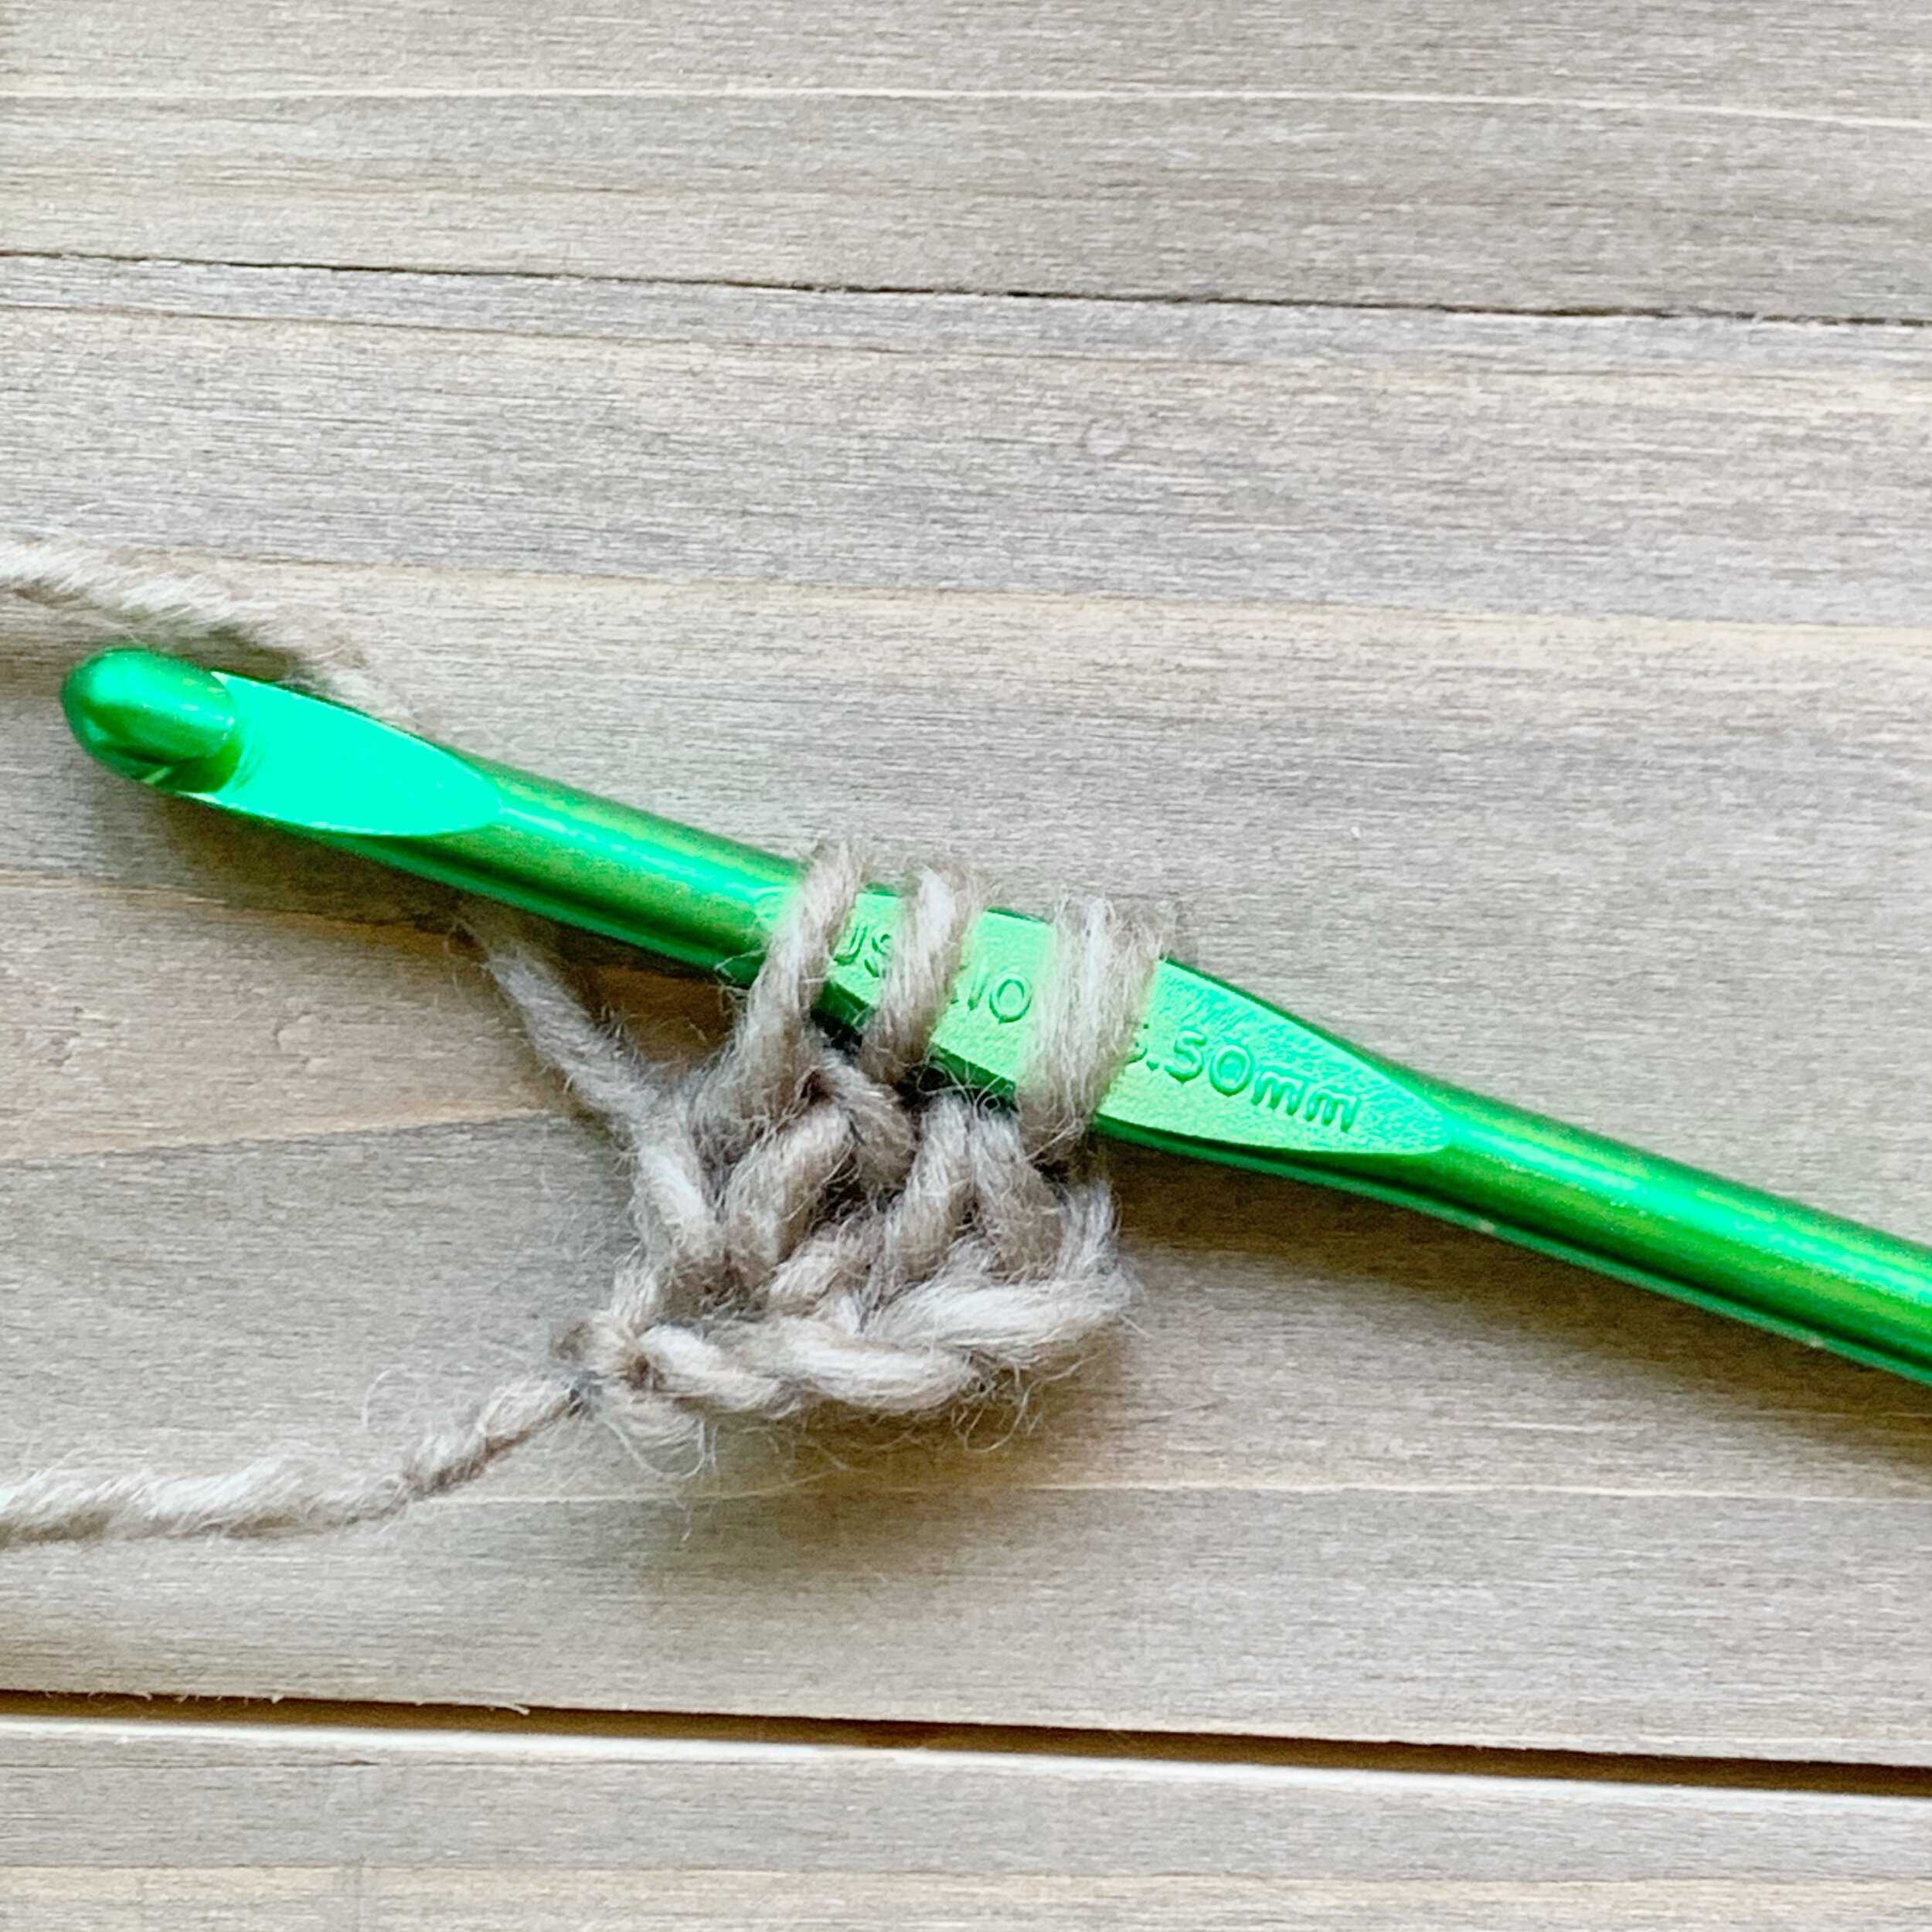
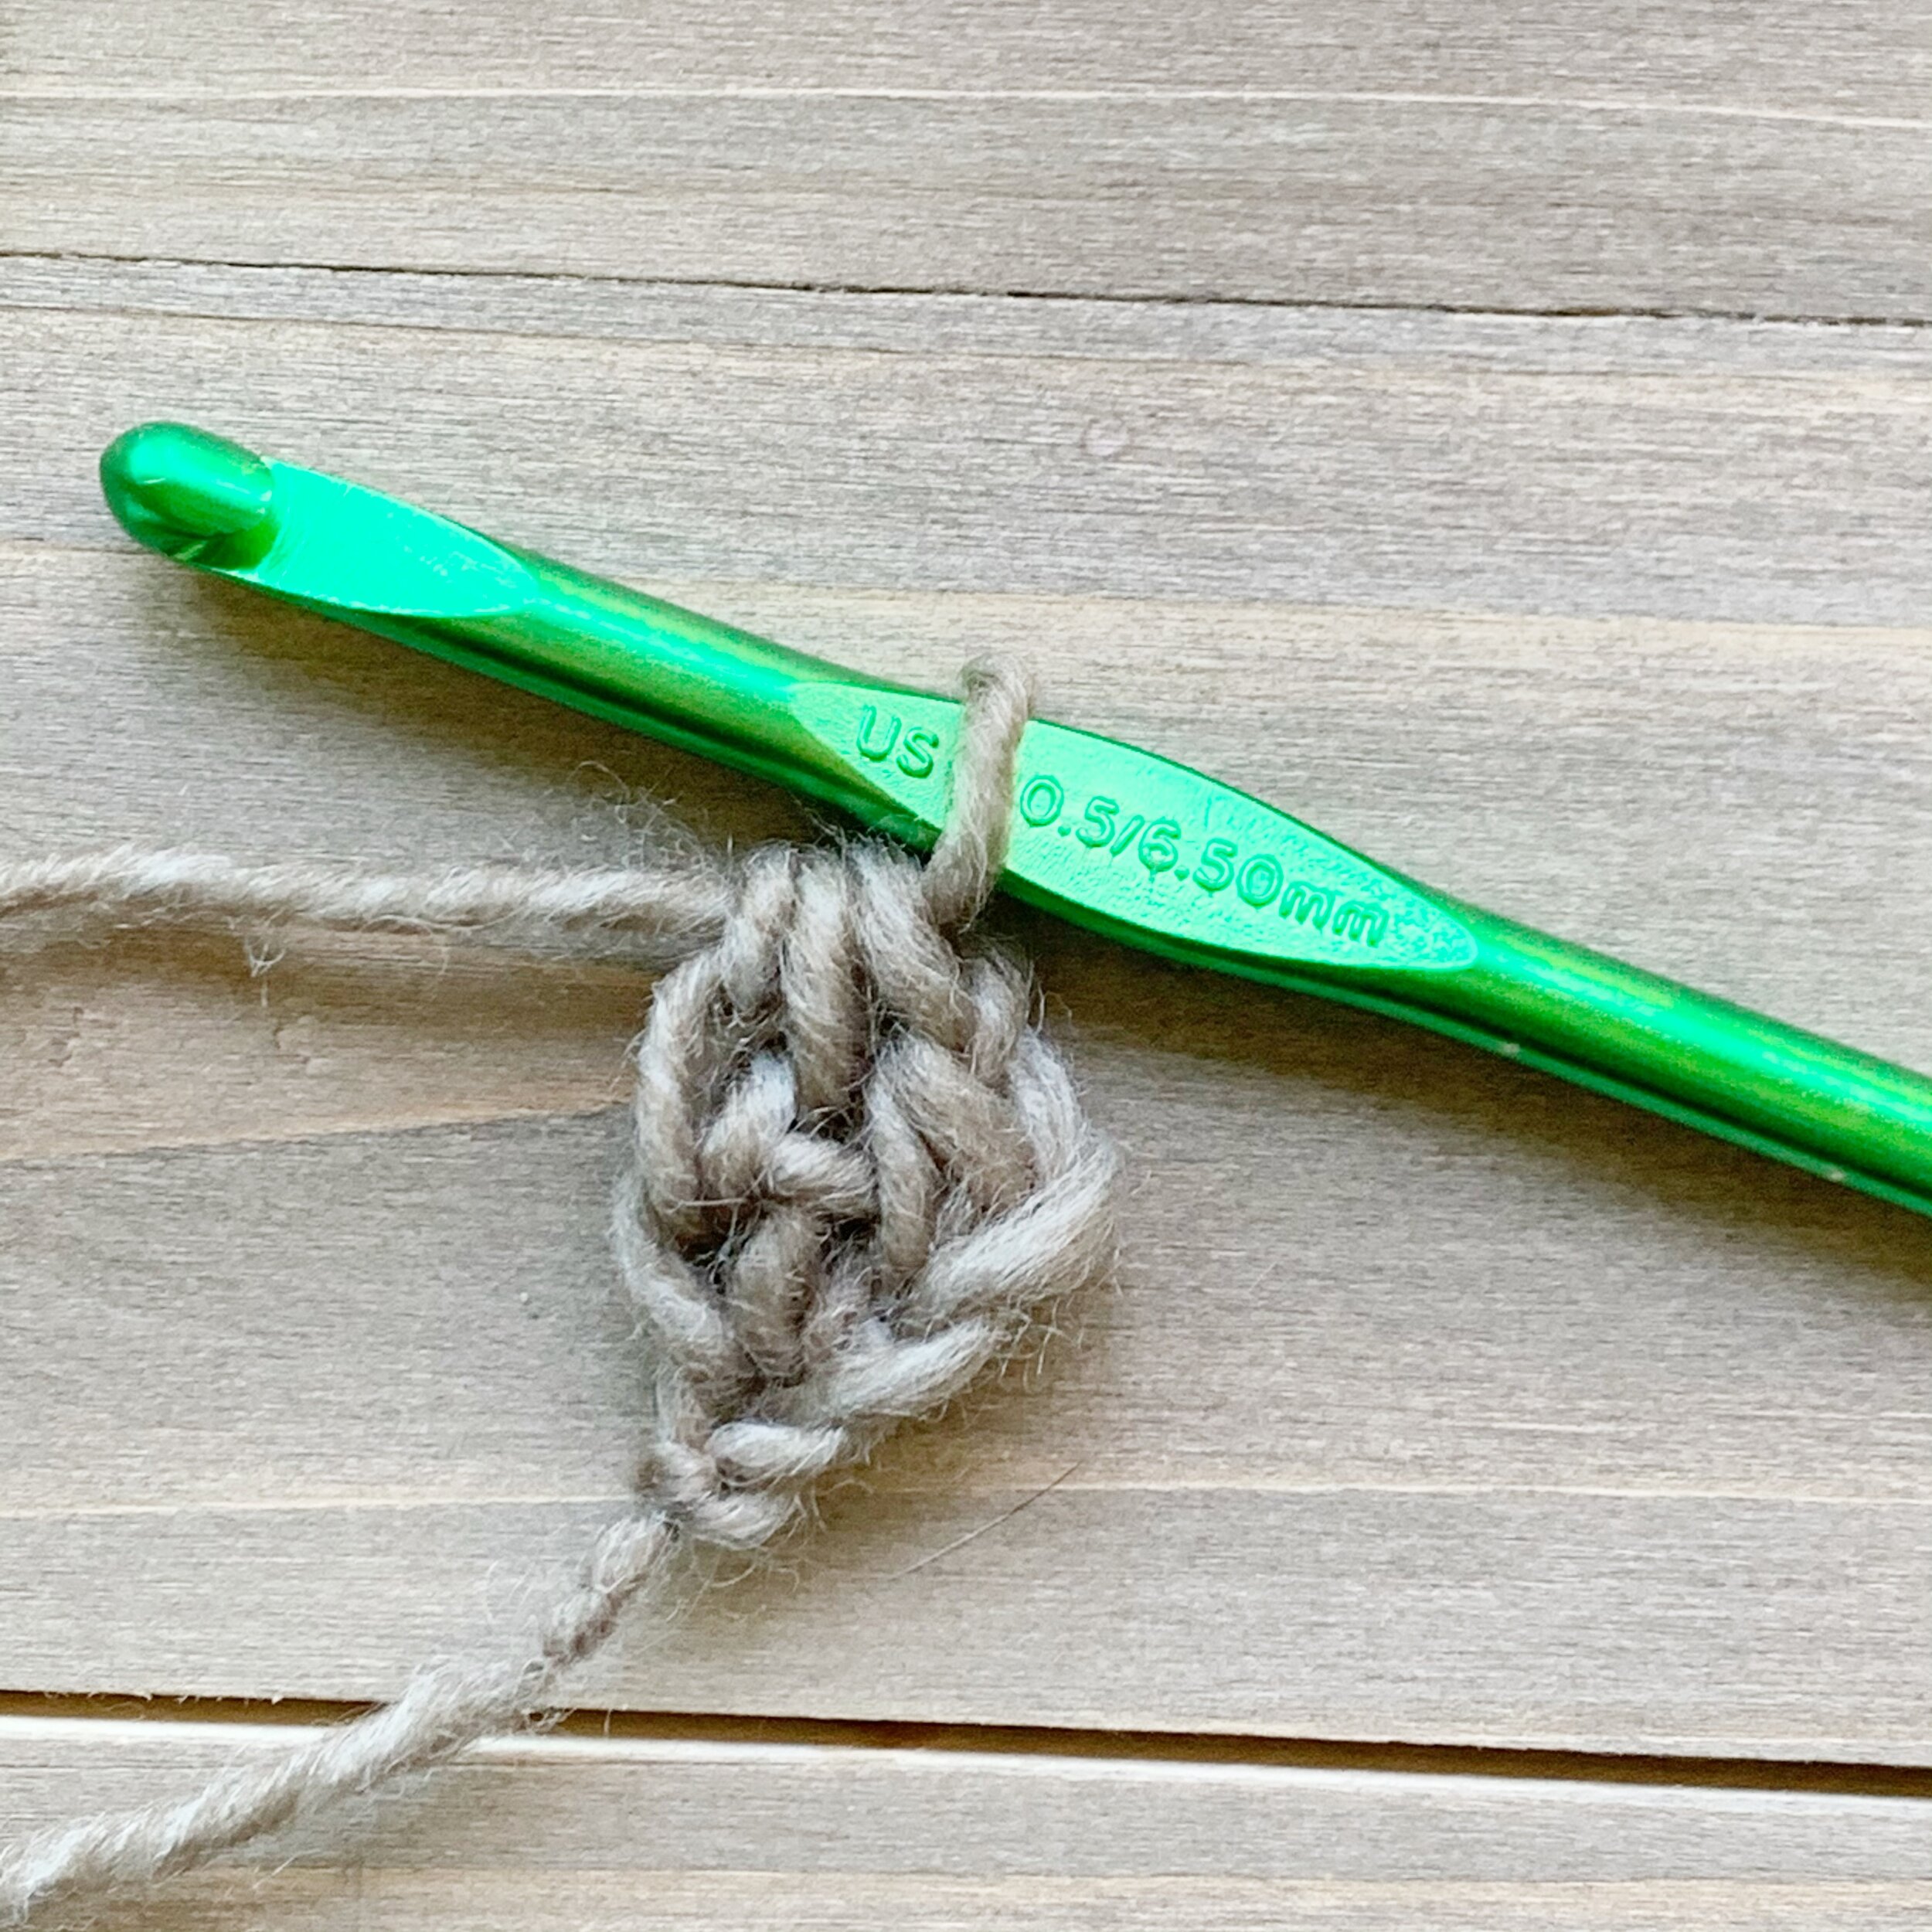
Linked Half Double Crochet (Lhdc): start with any number of chs plus 2. Insert hook into 2nd ch from hook, yo and draw up a loop. Insert hook into 3rd ch from hook, yo and draw up a loop (3 loops on hook), yo and draw through all 3 loops to create your first st.
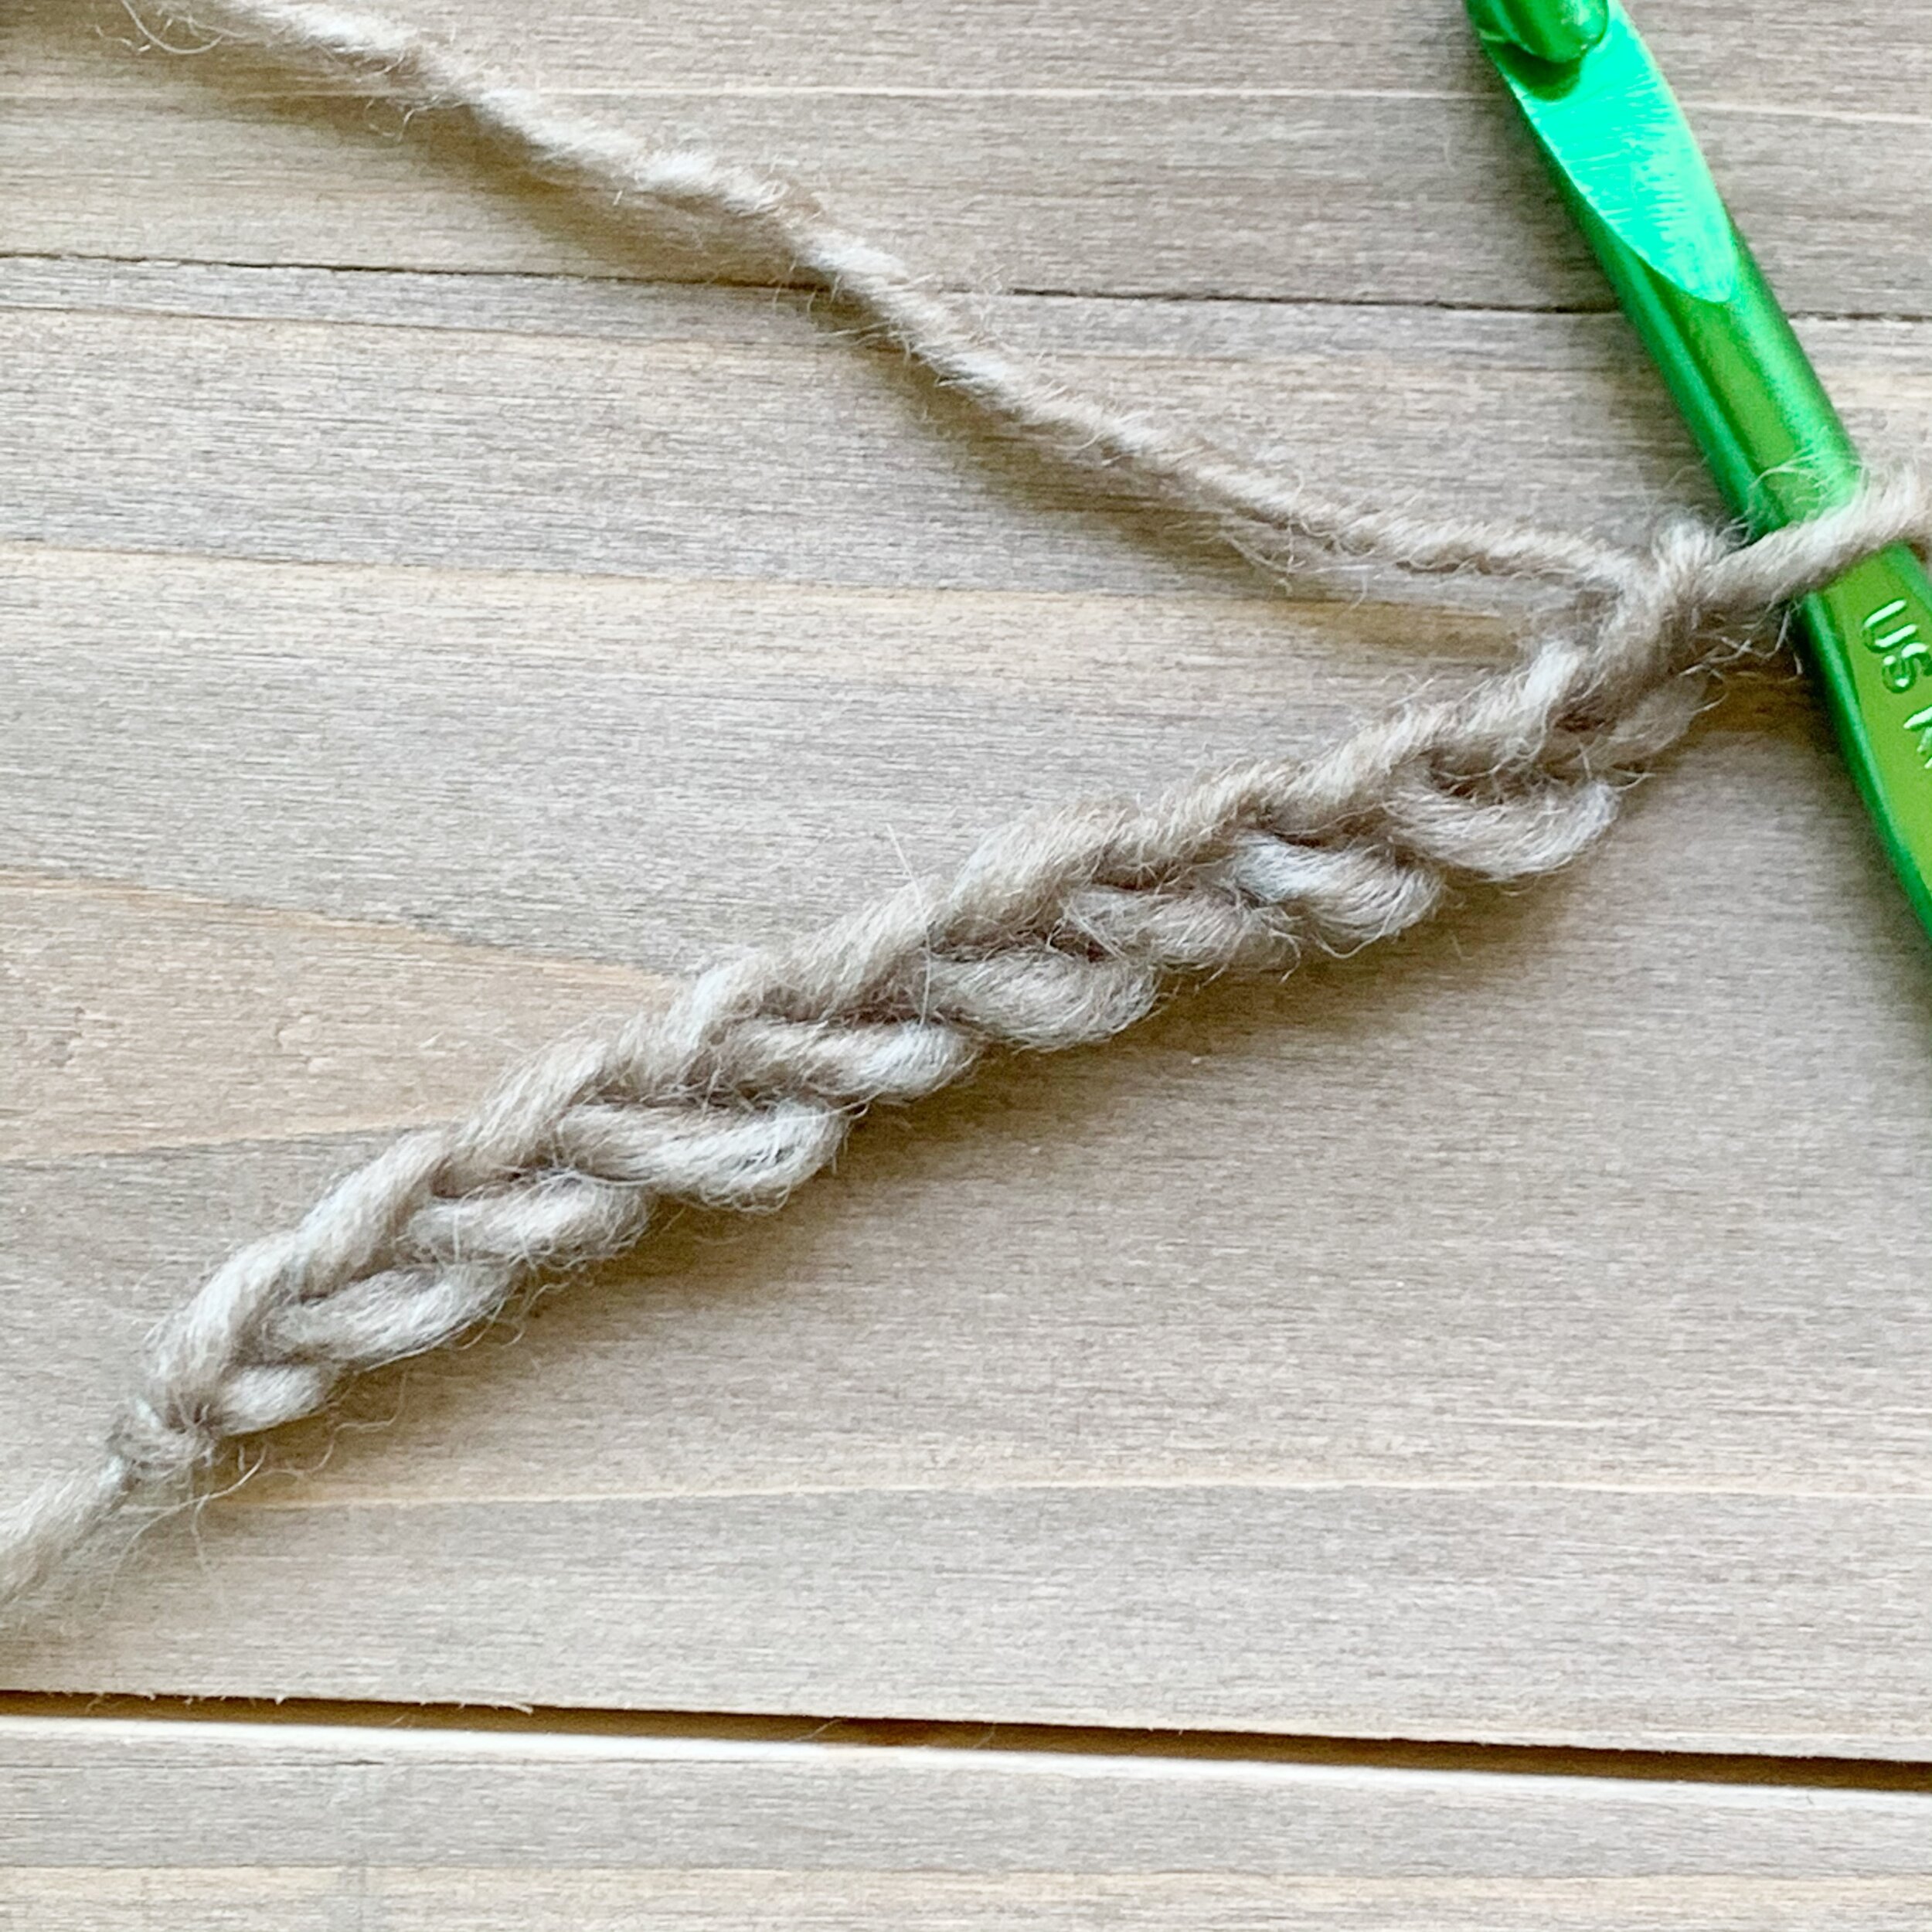
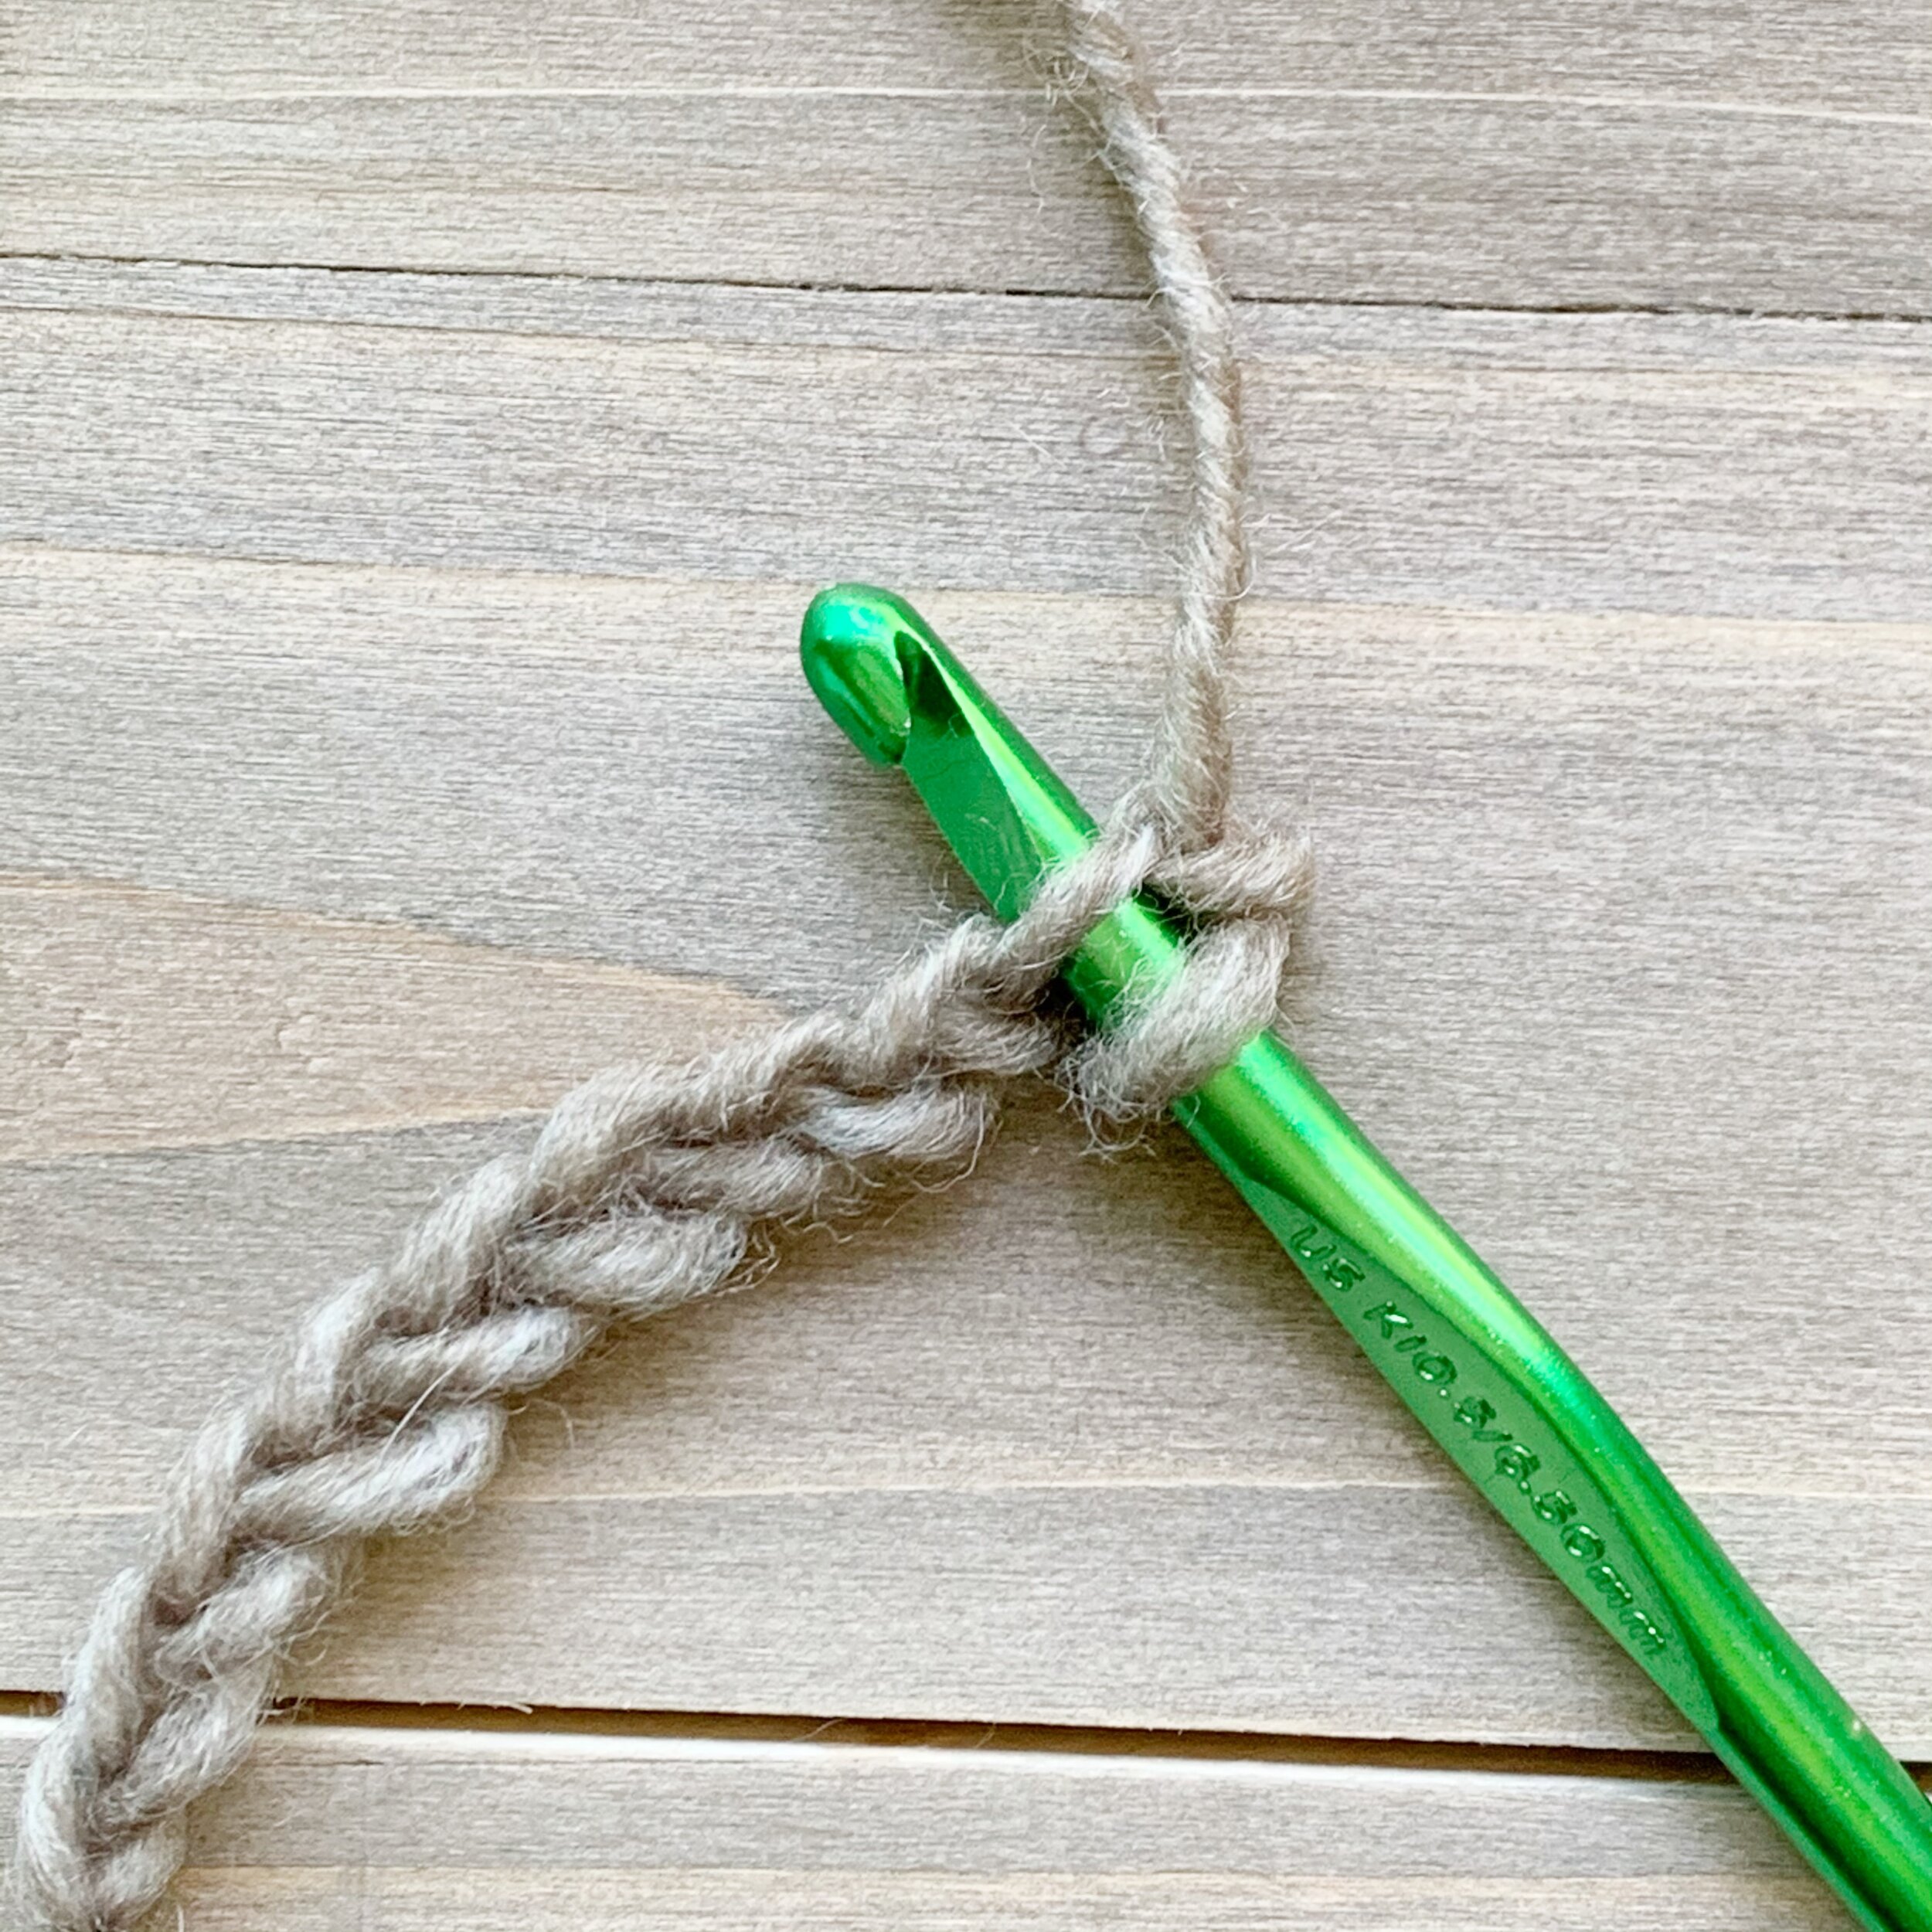
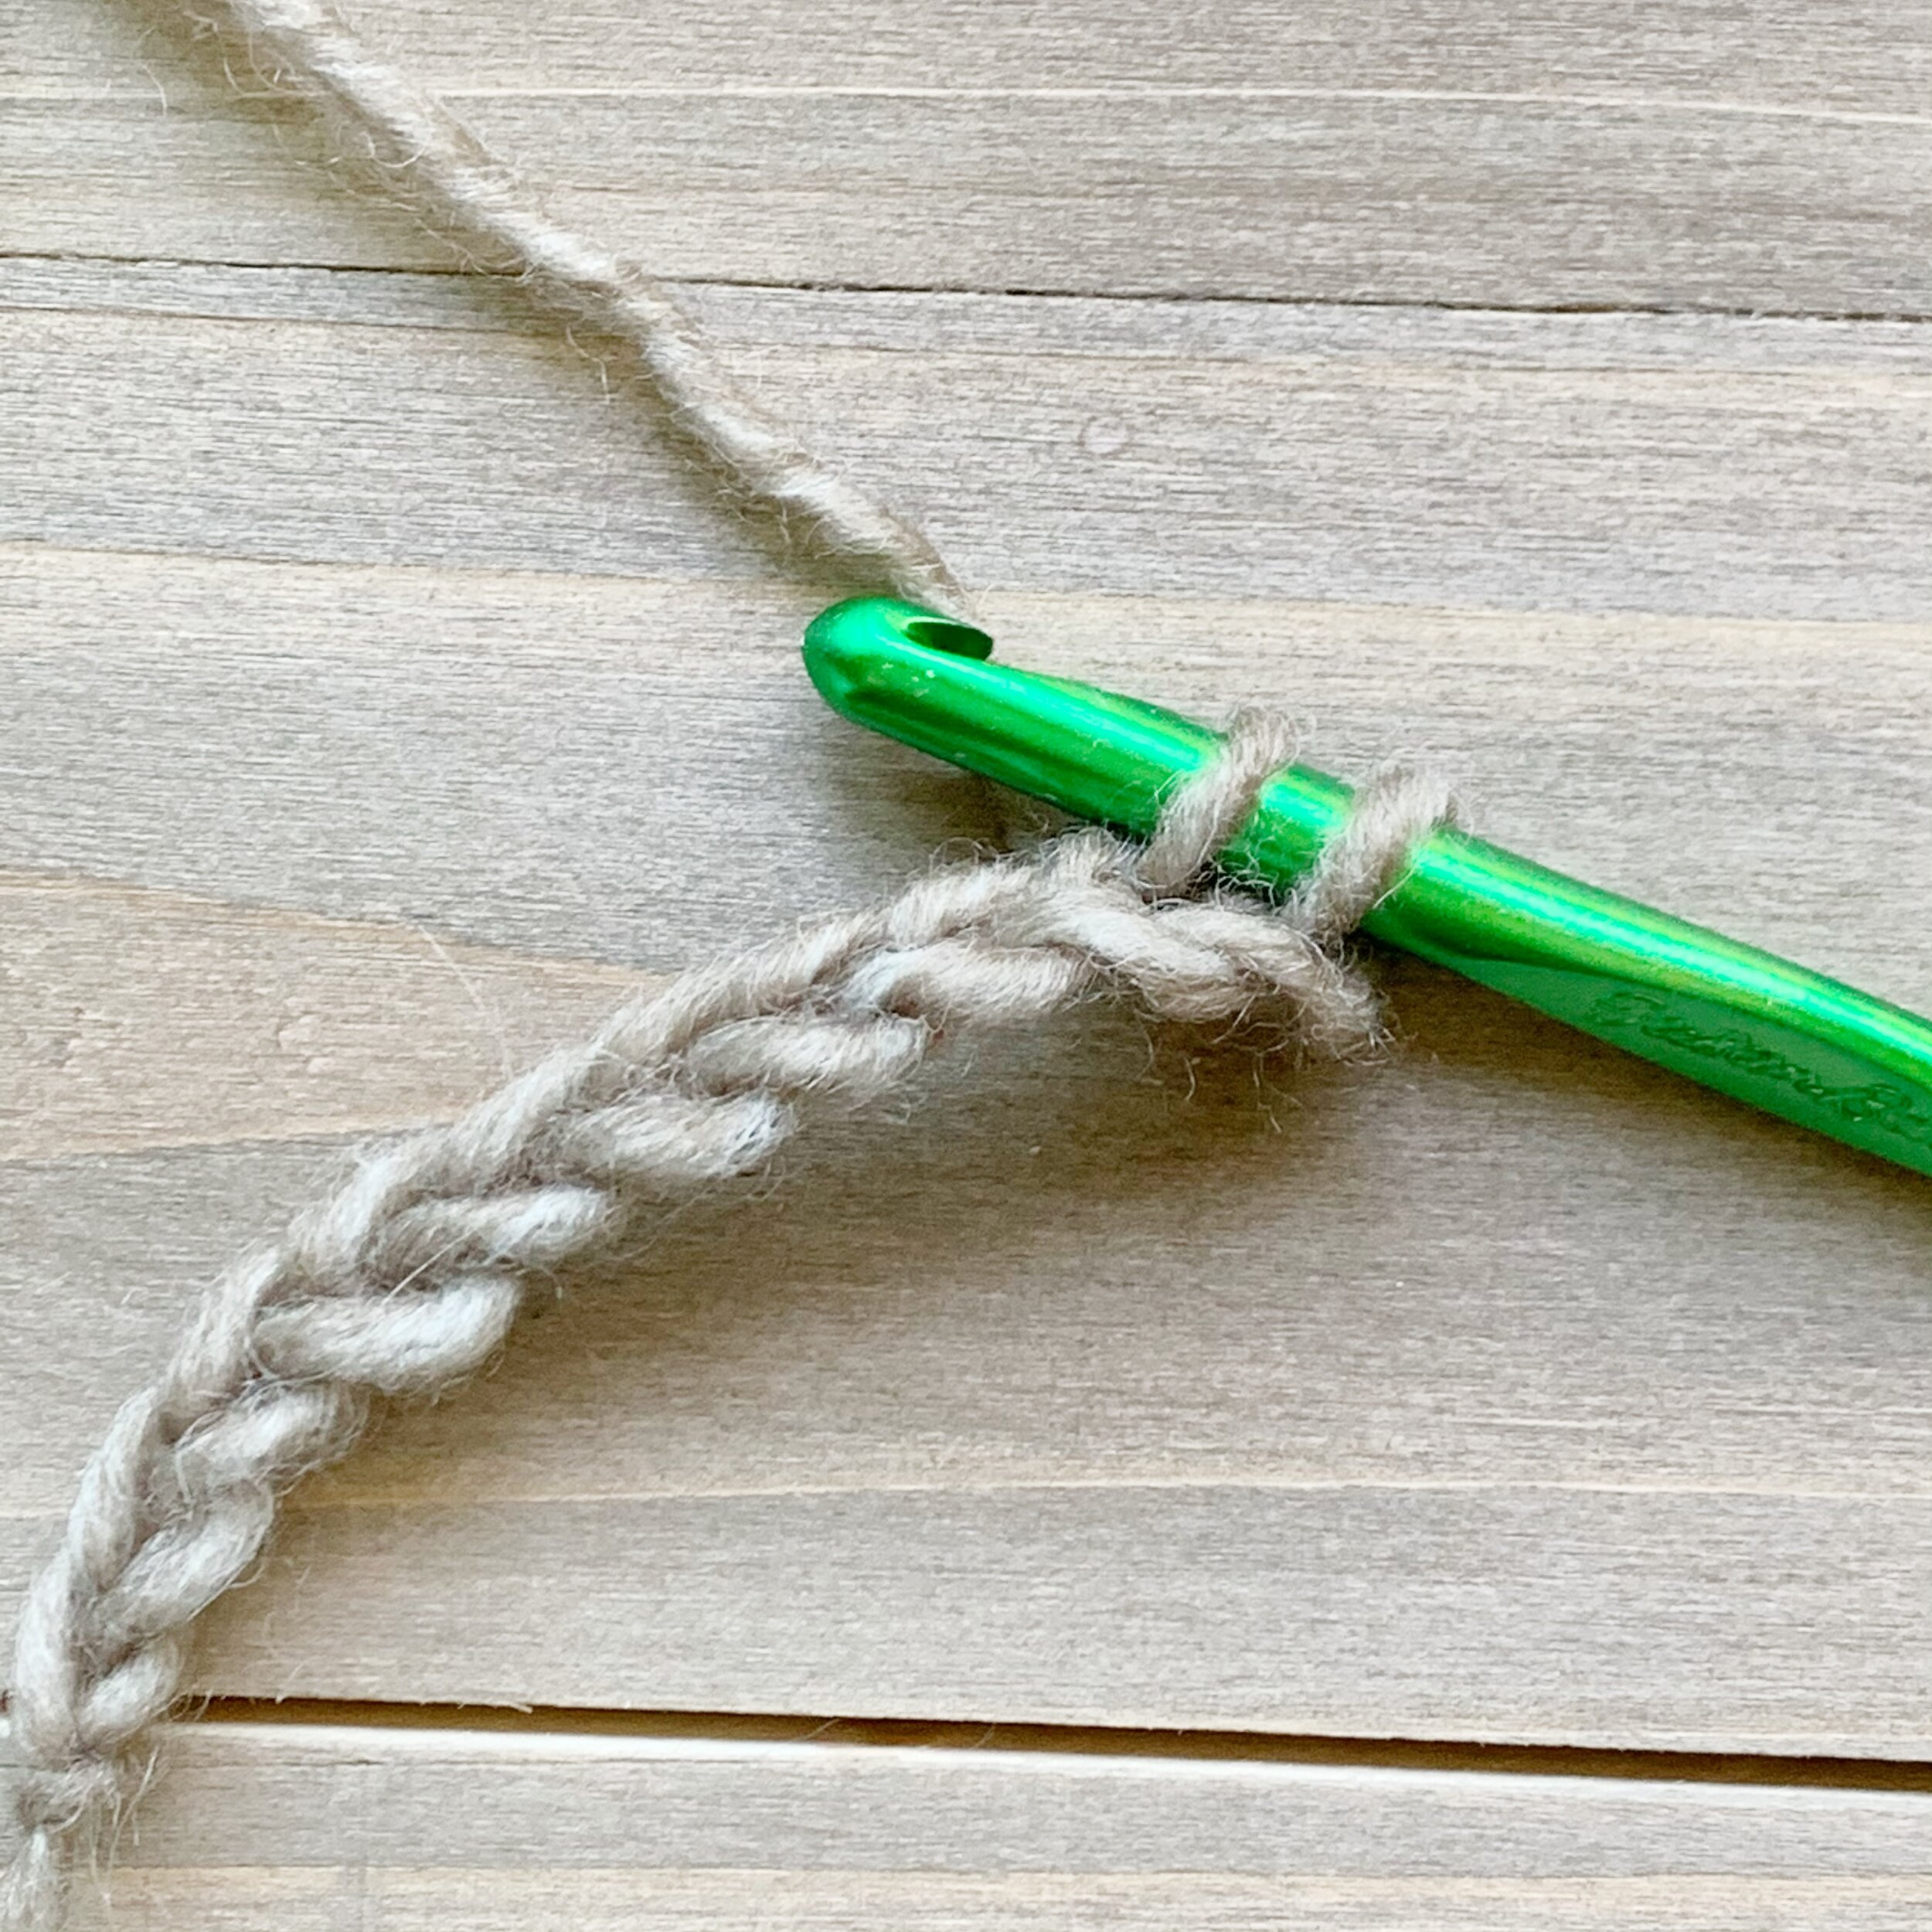
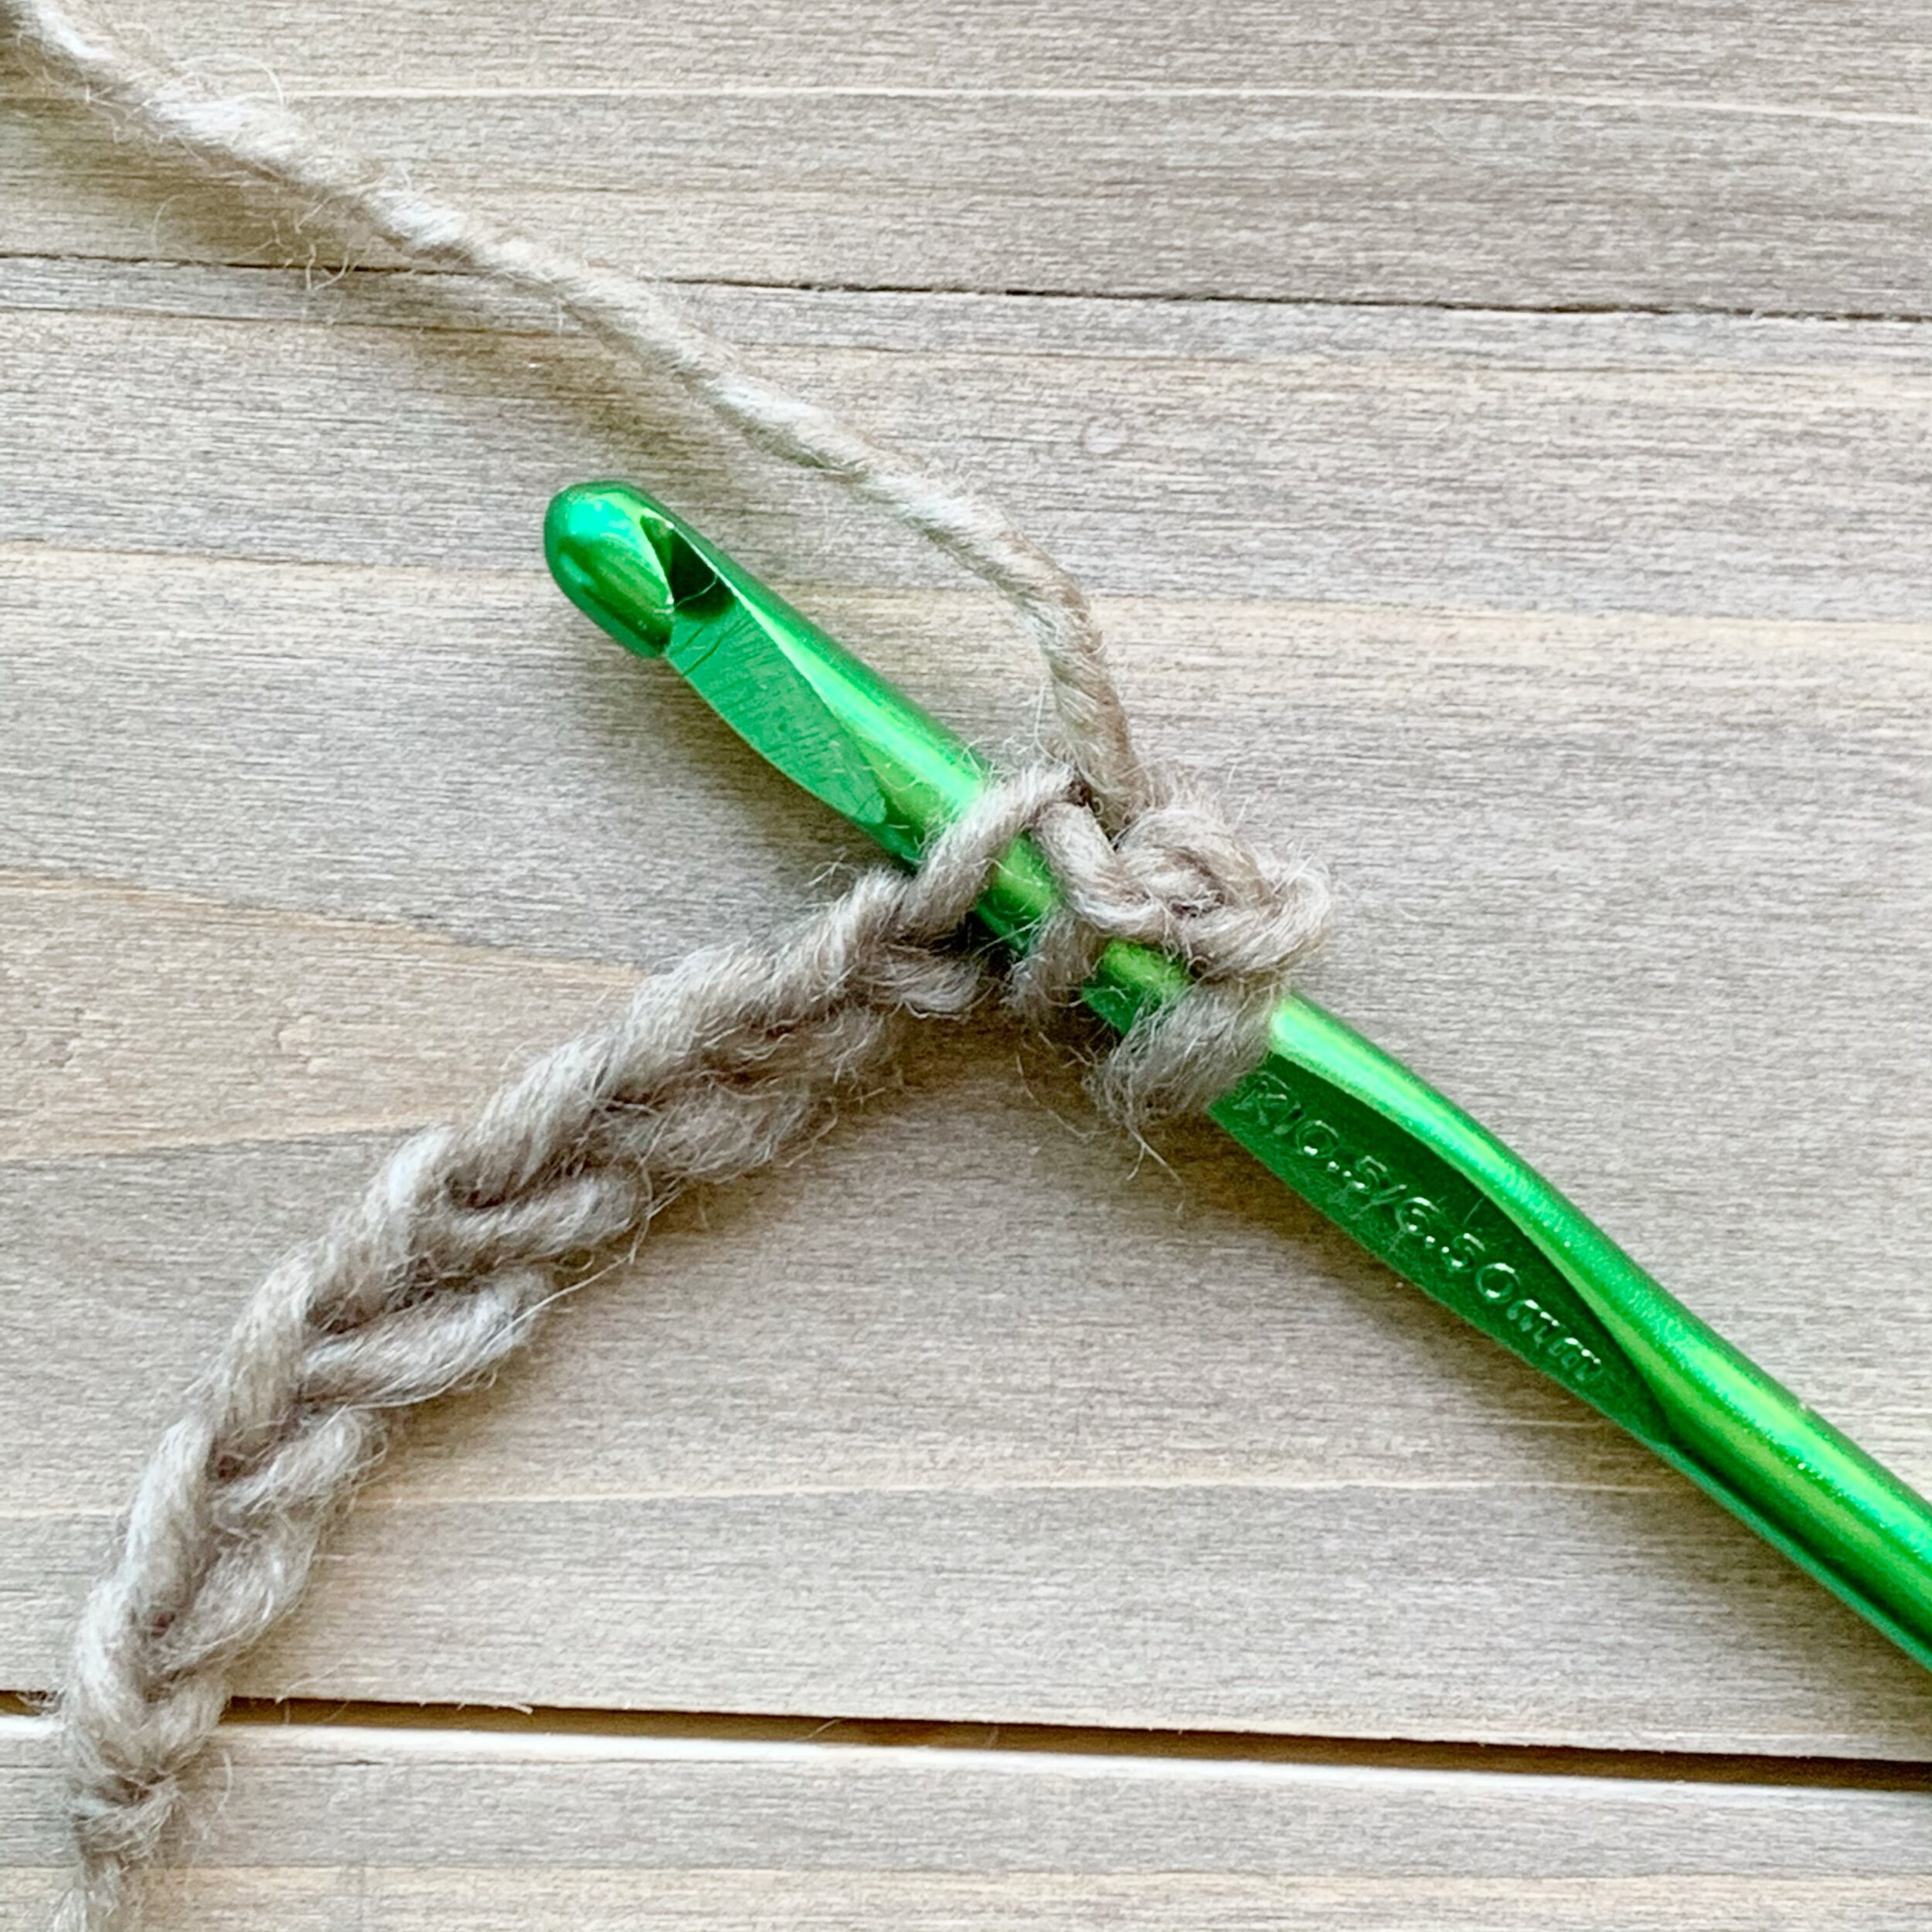
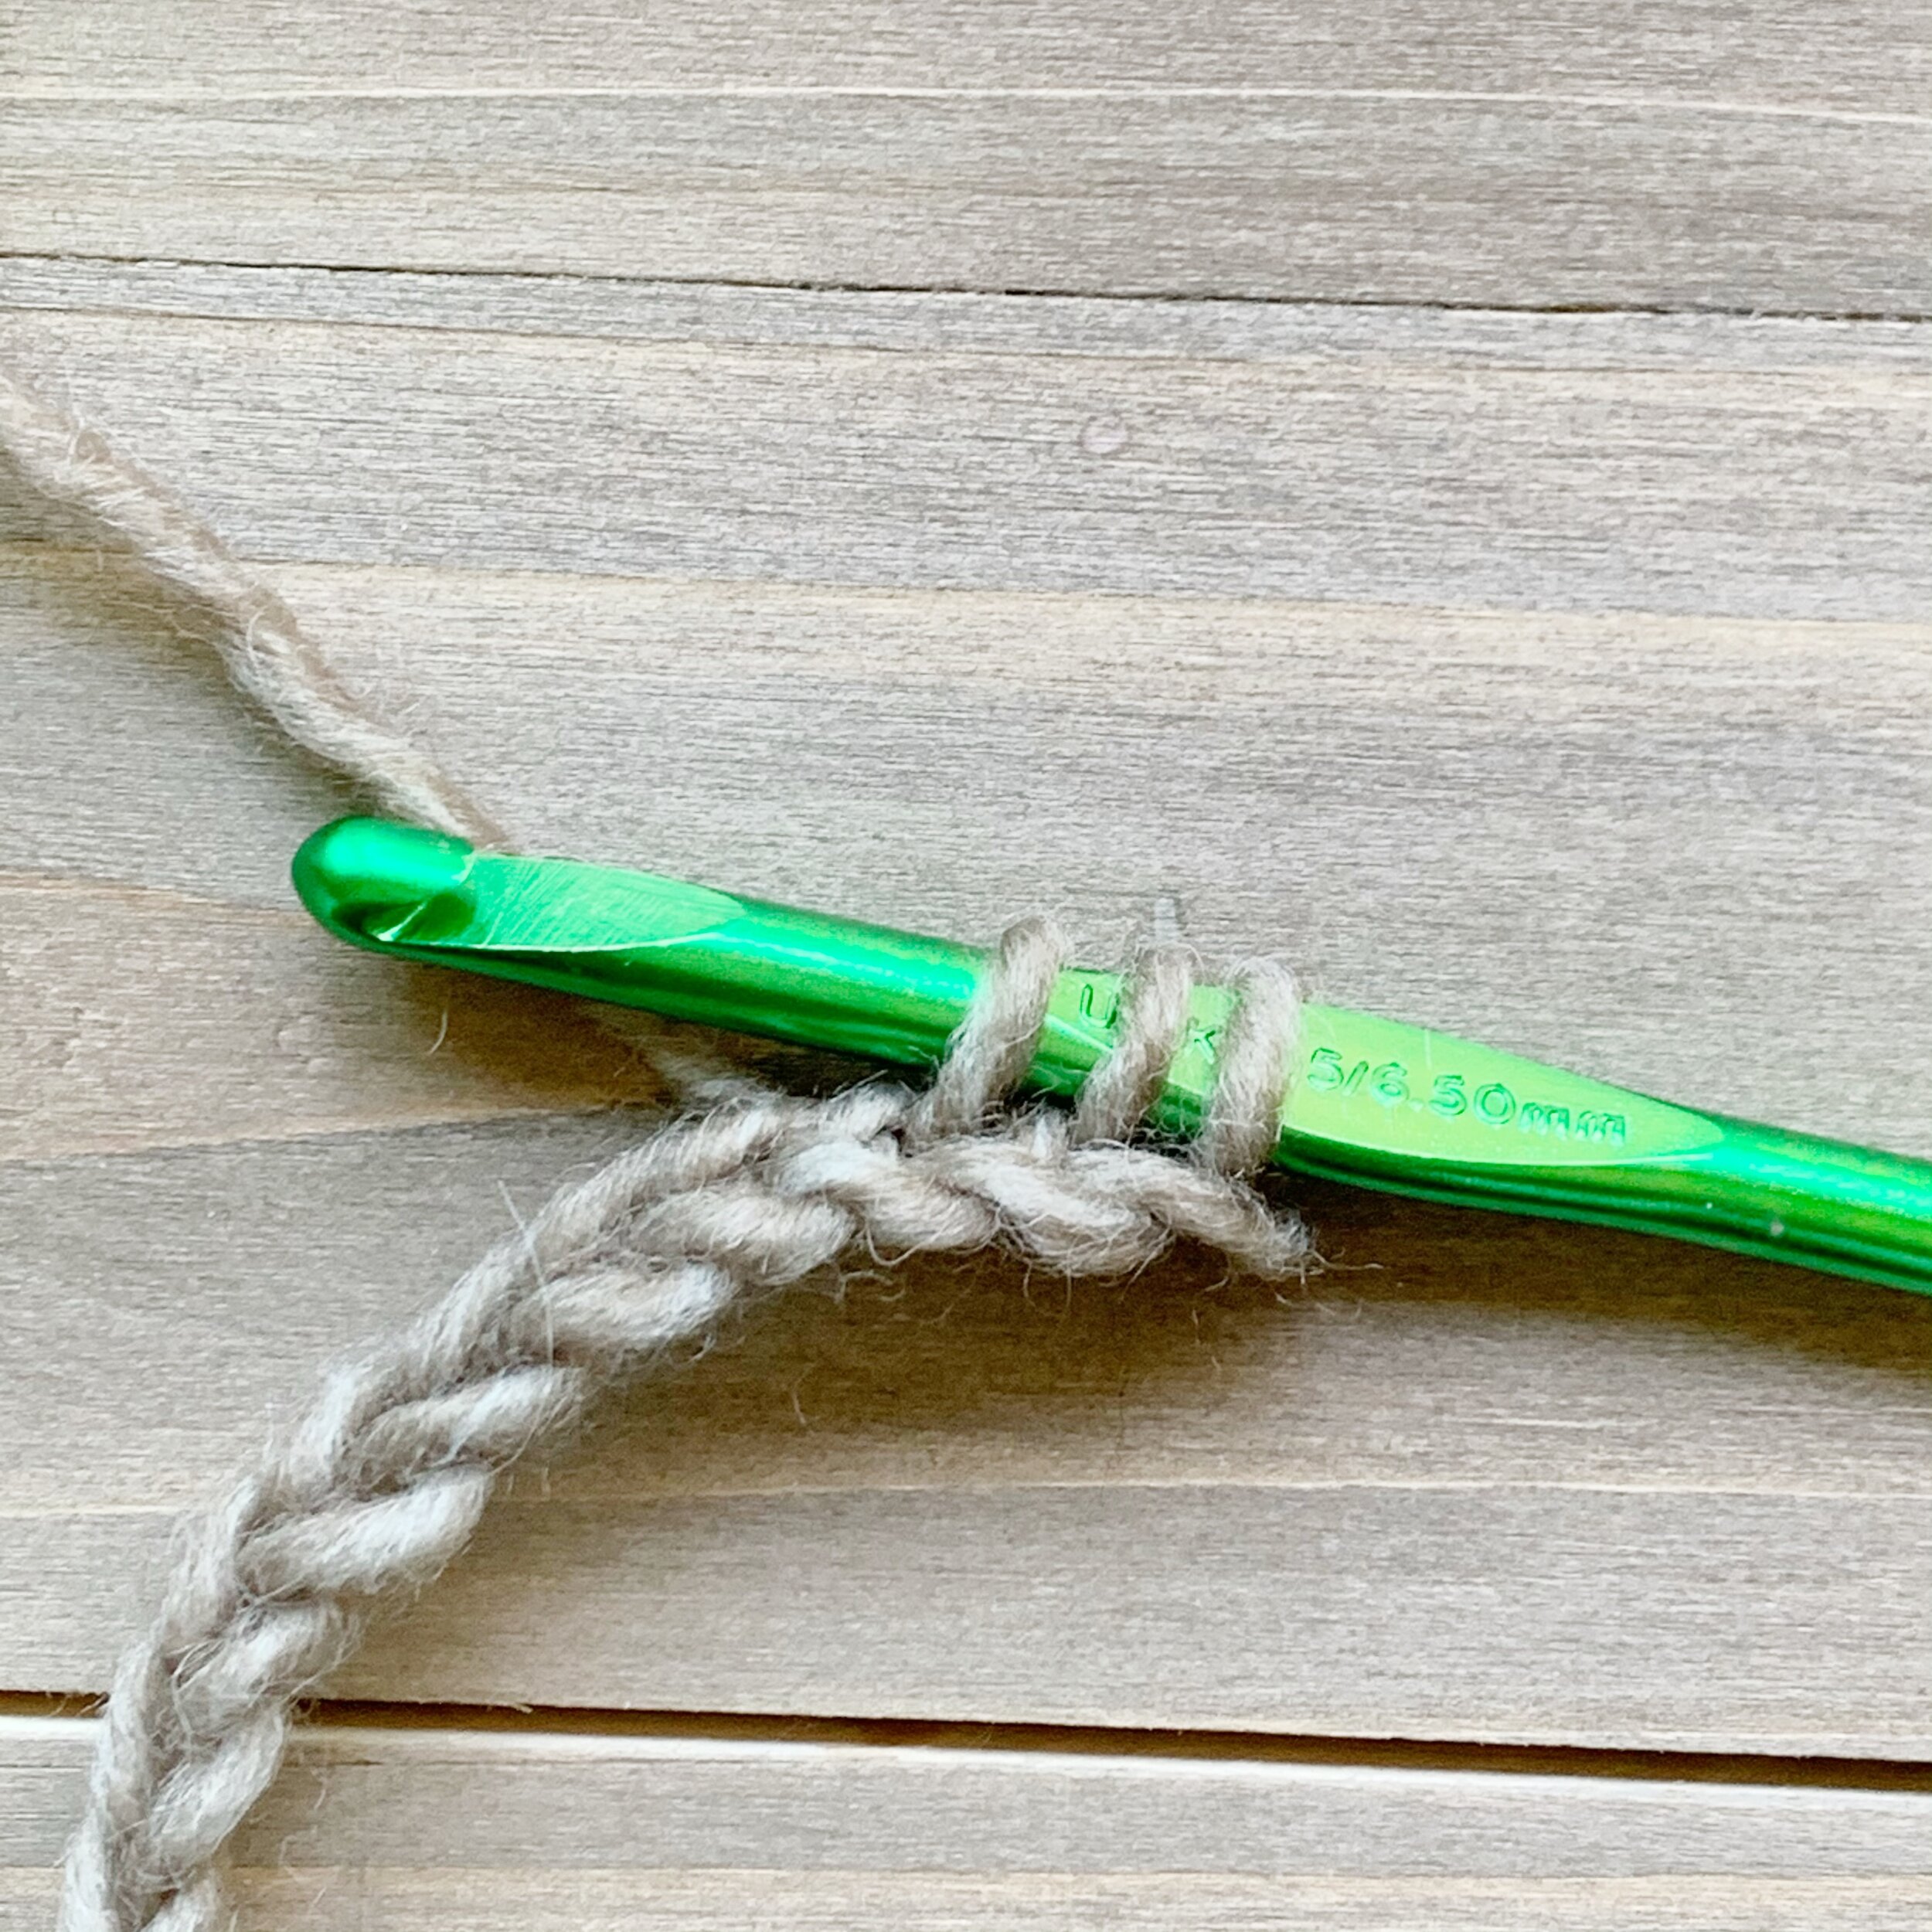
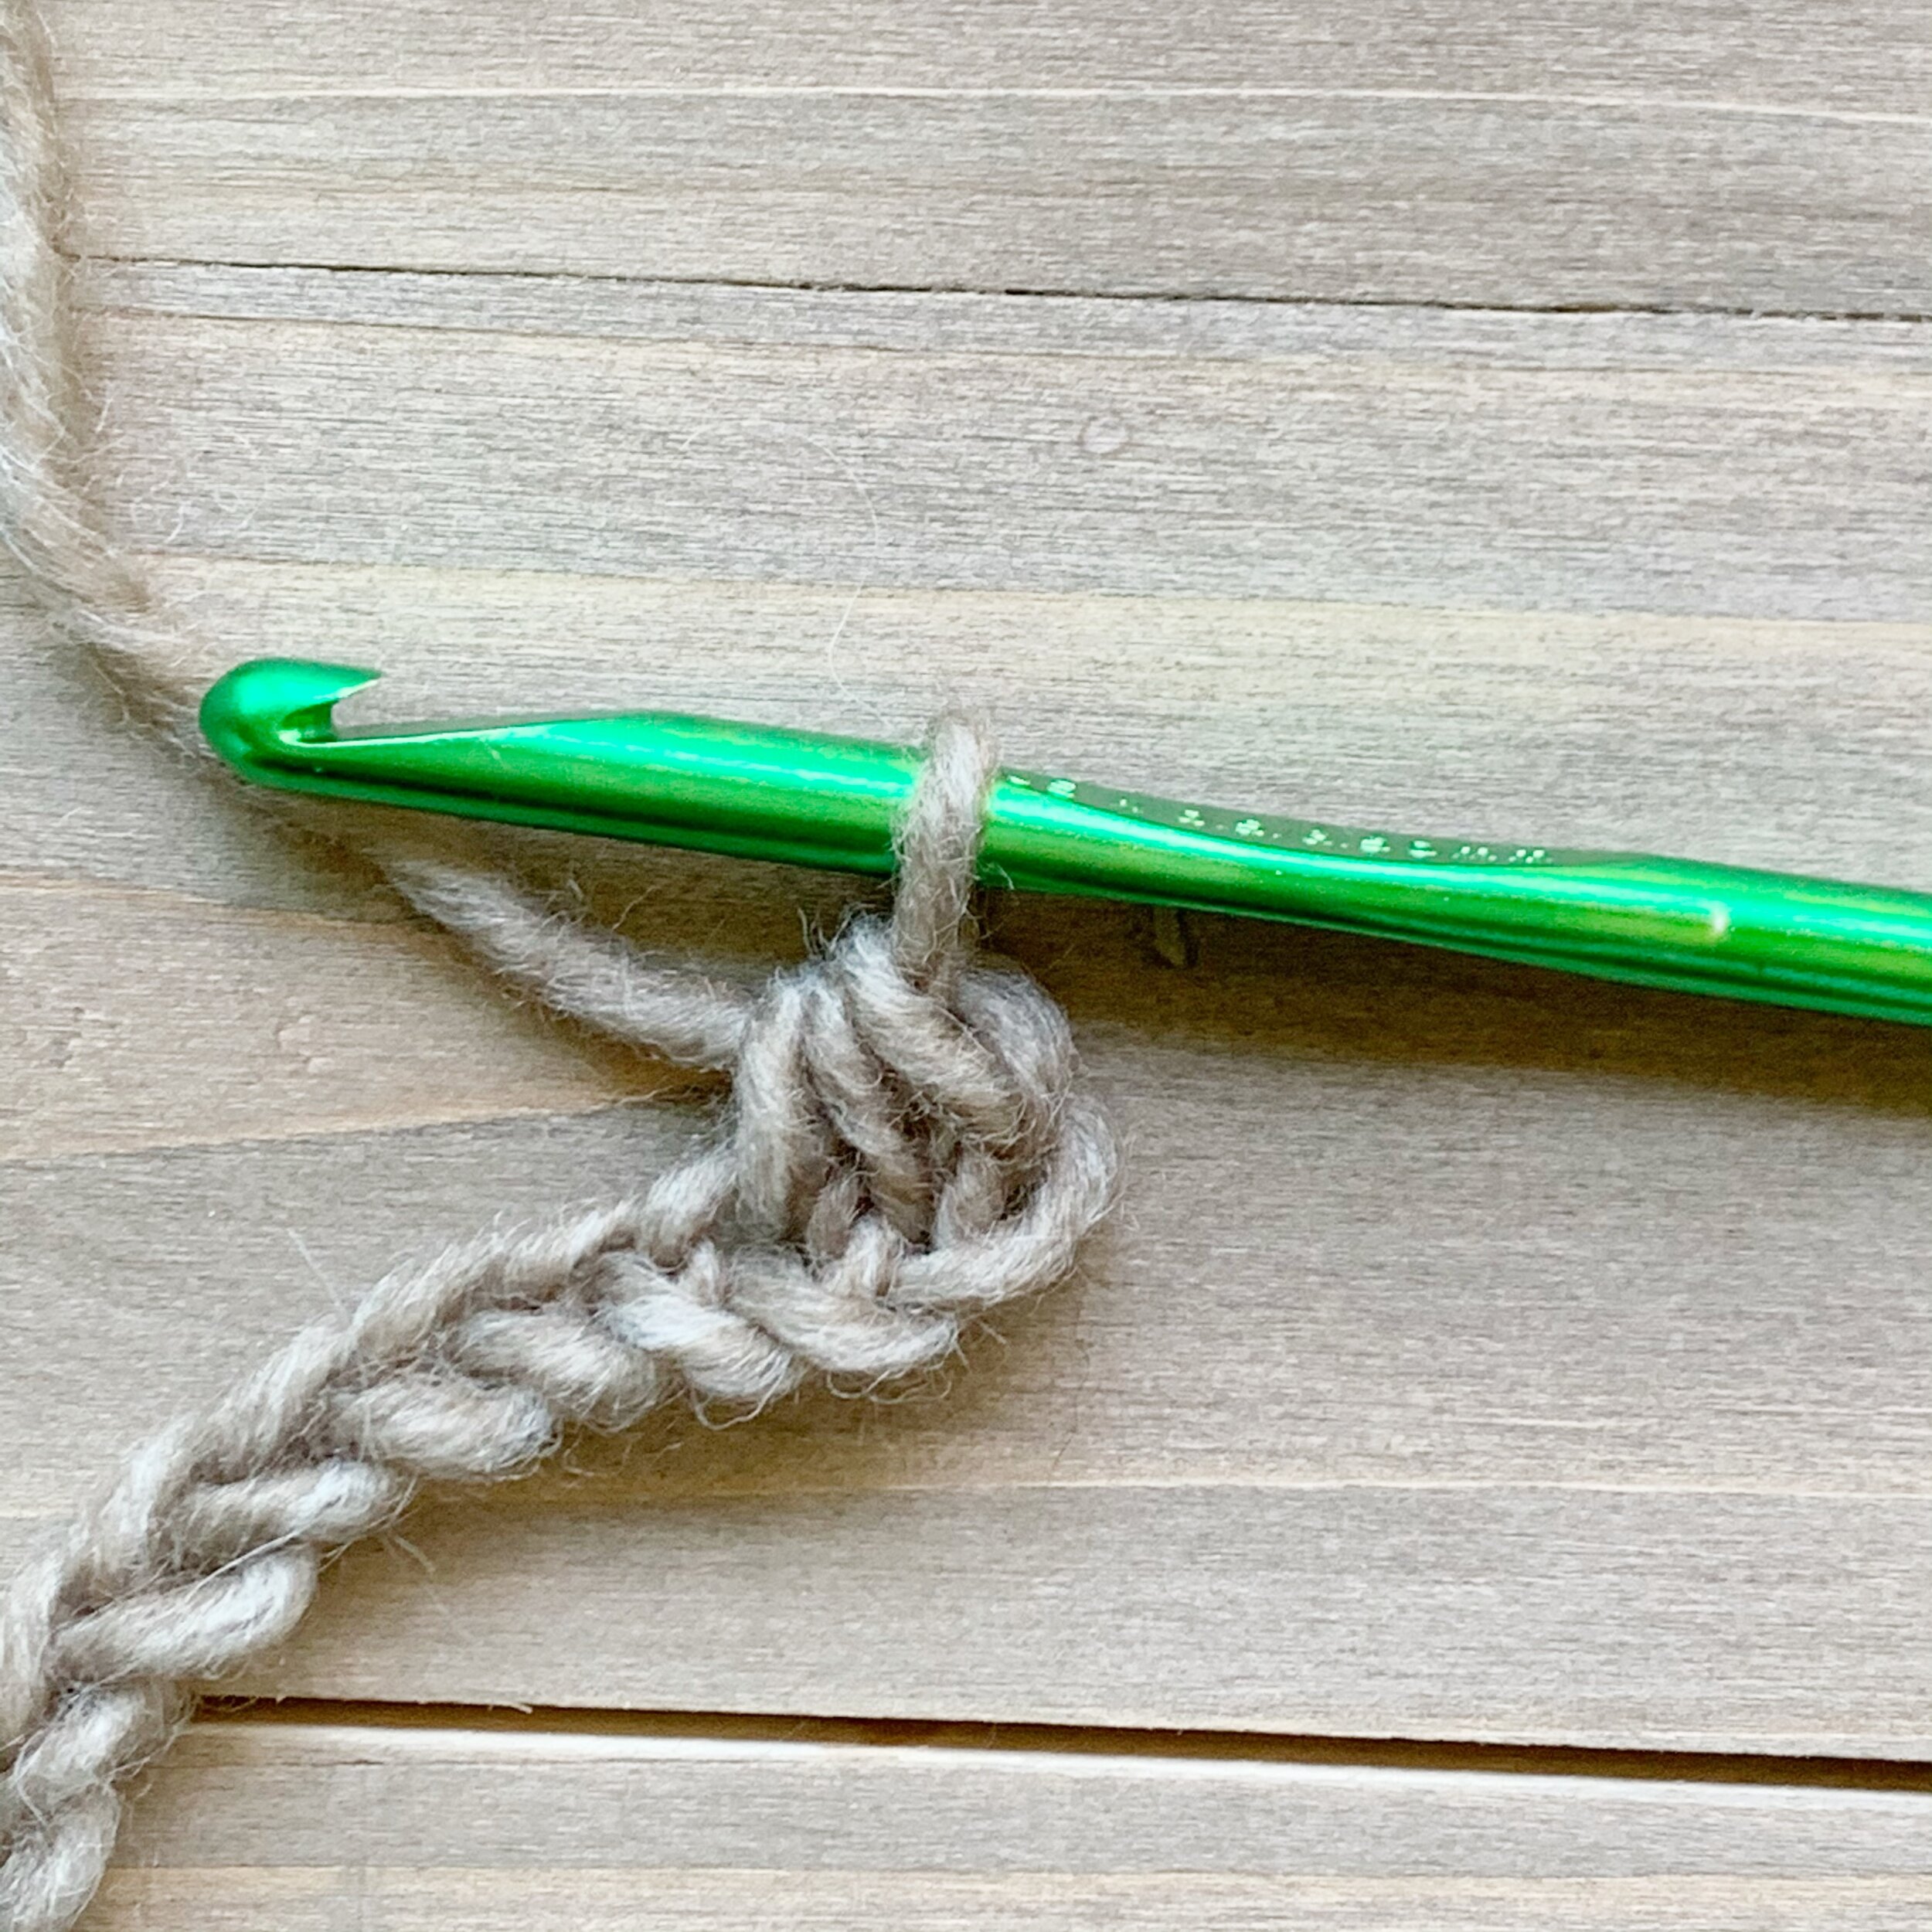
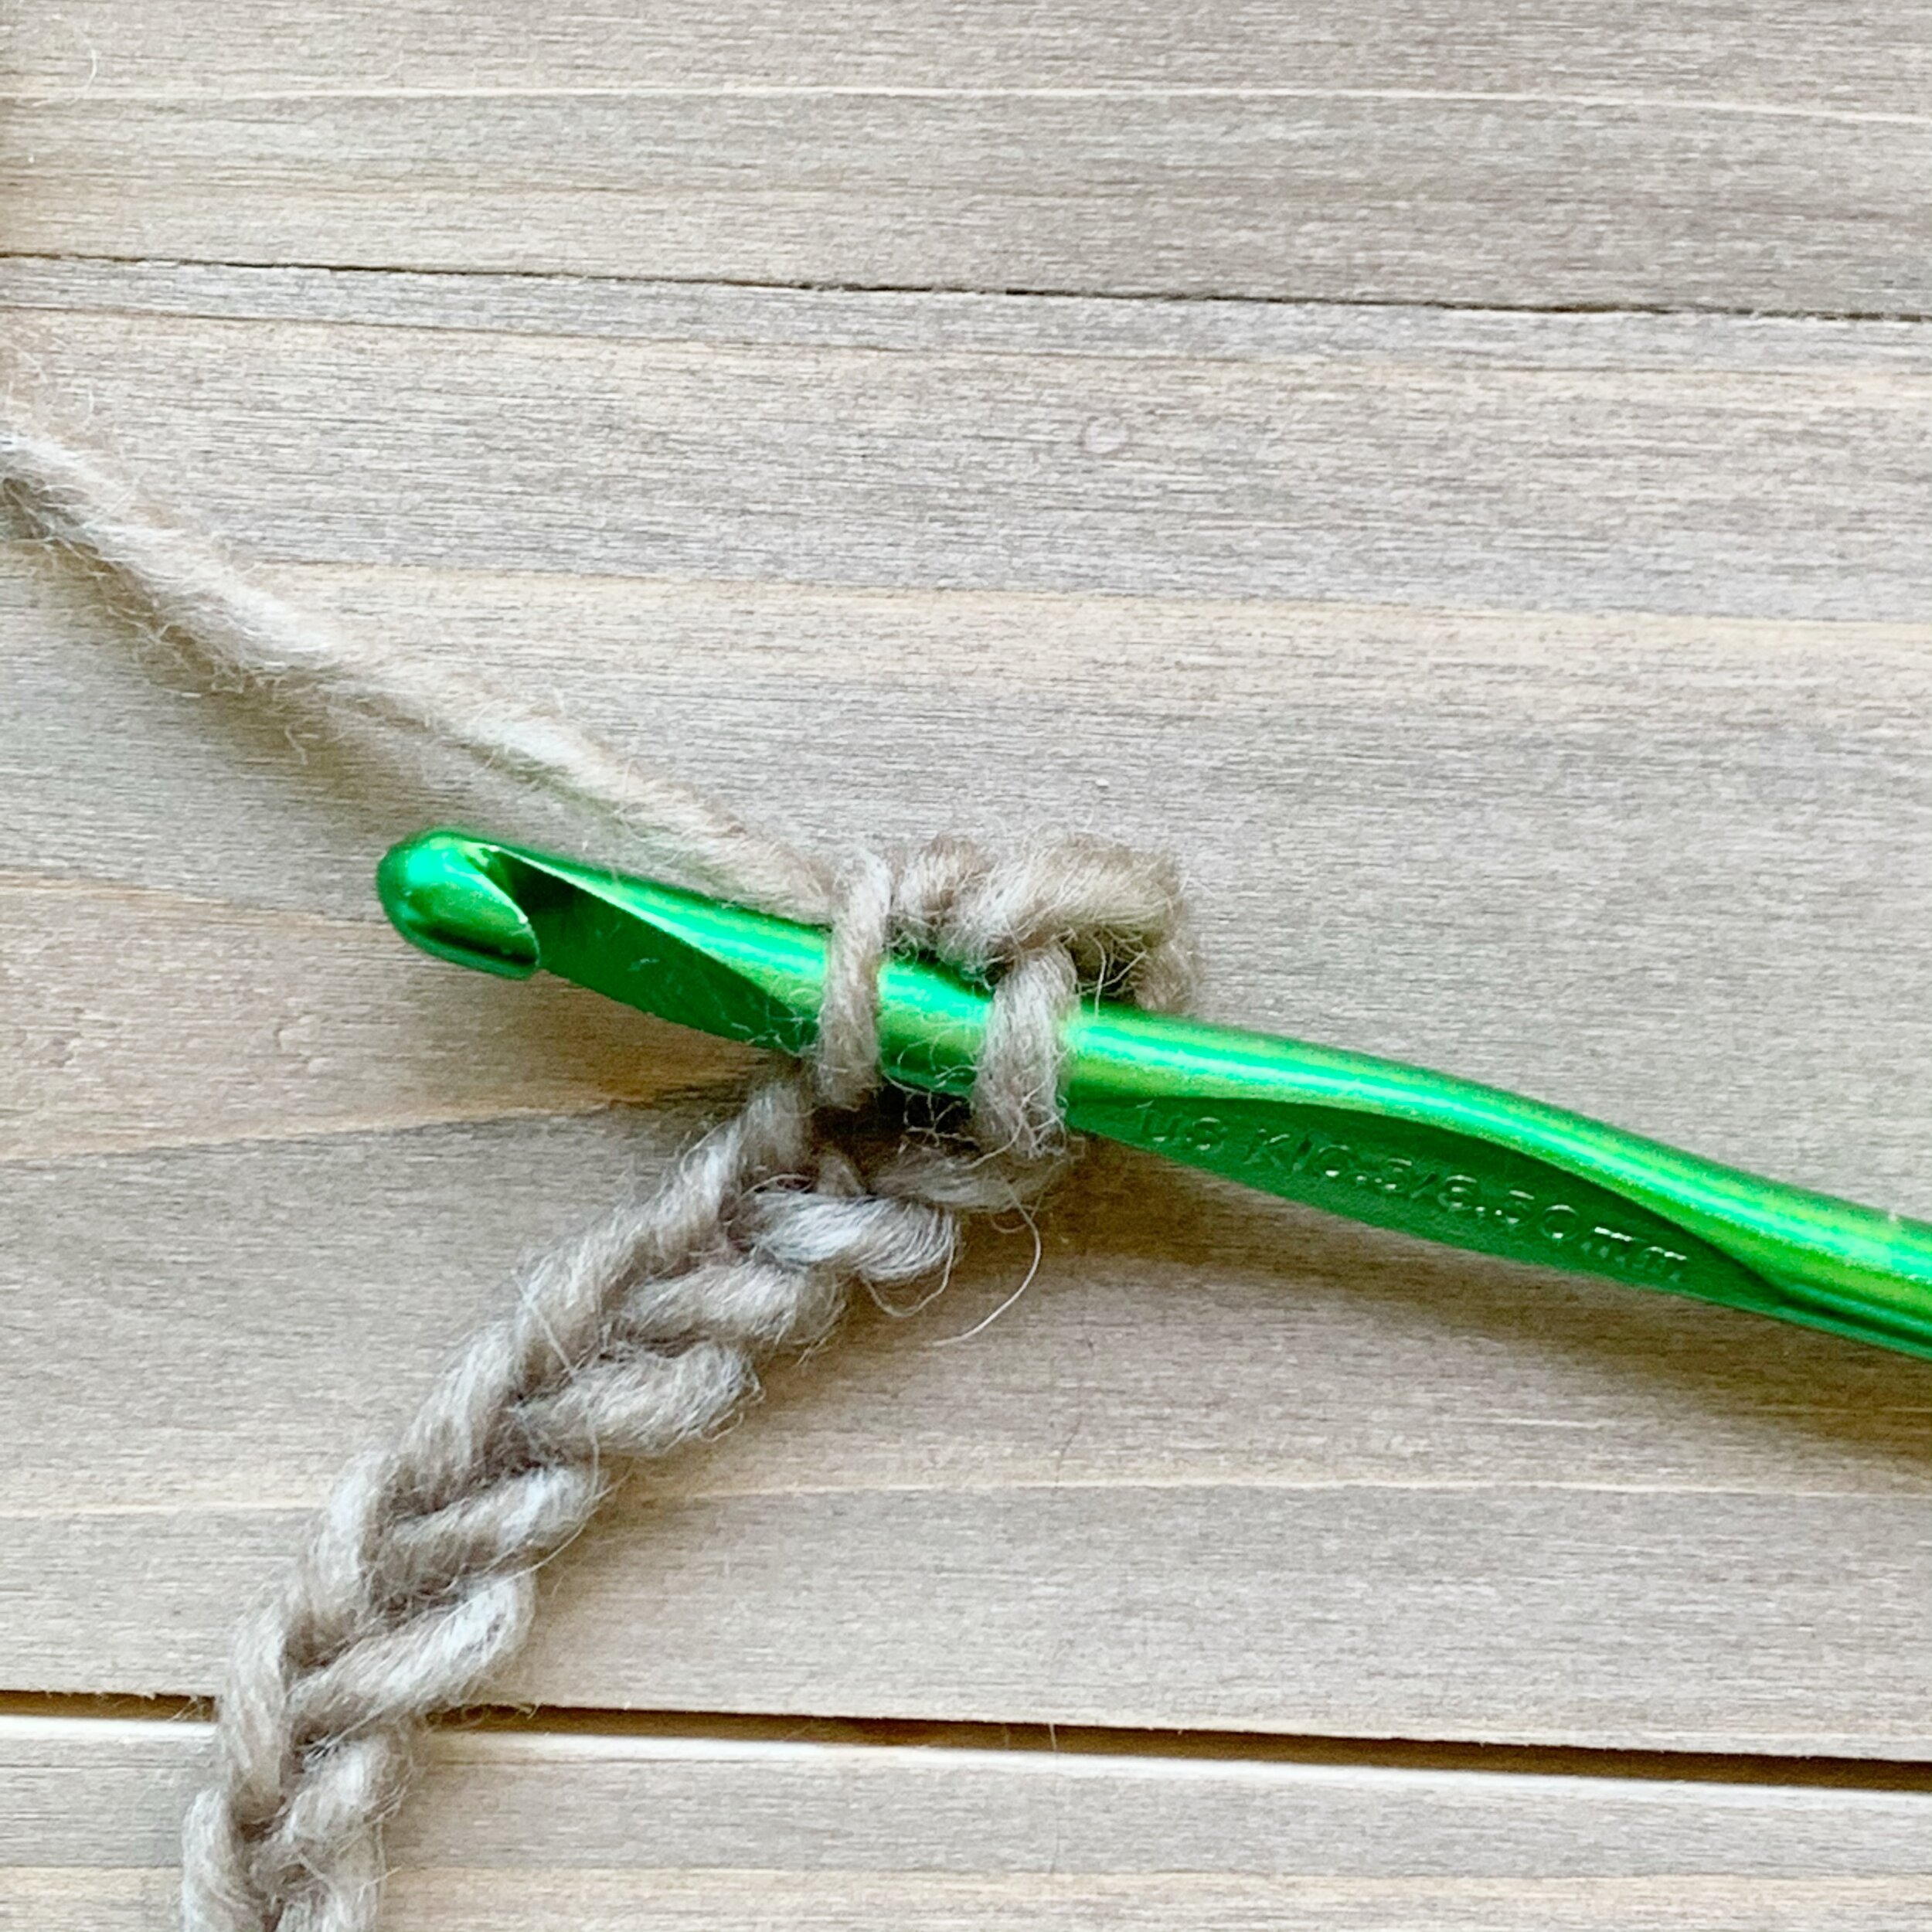
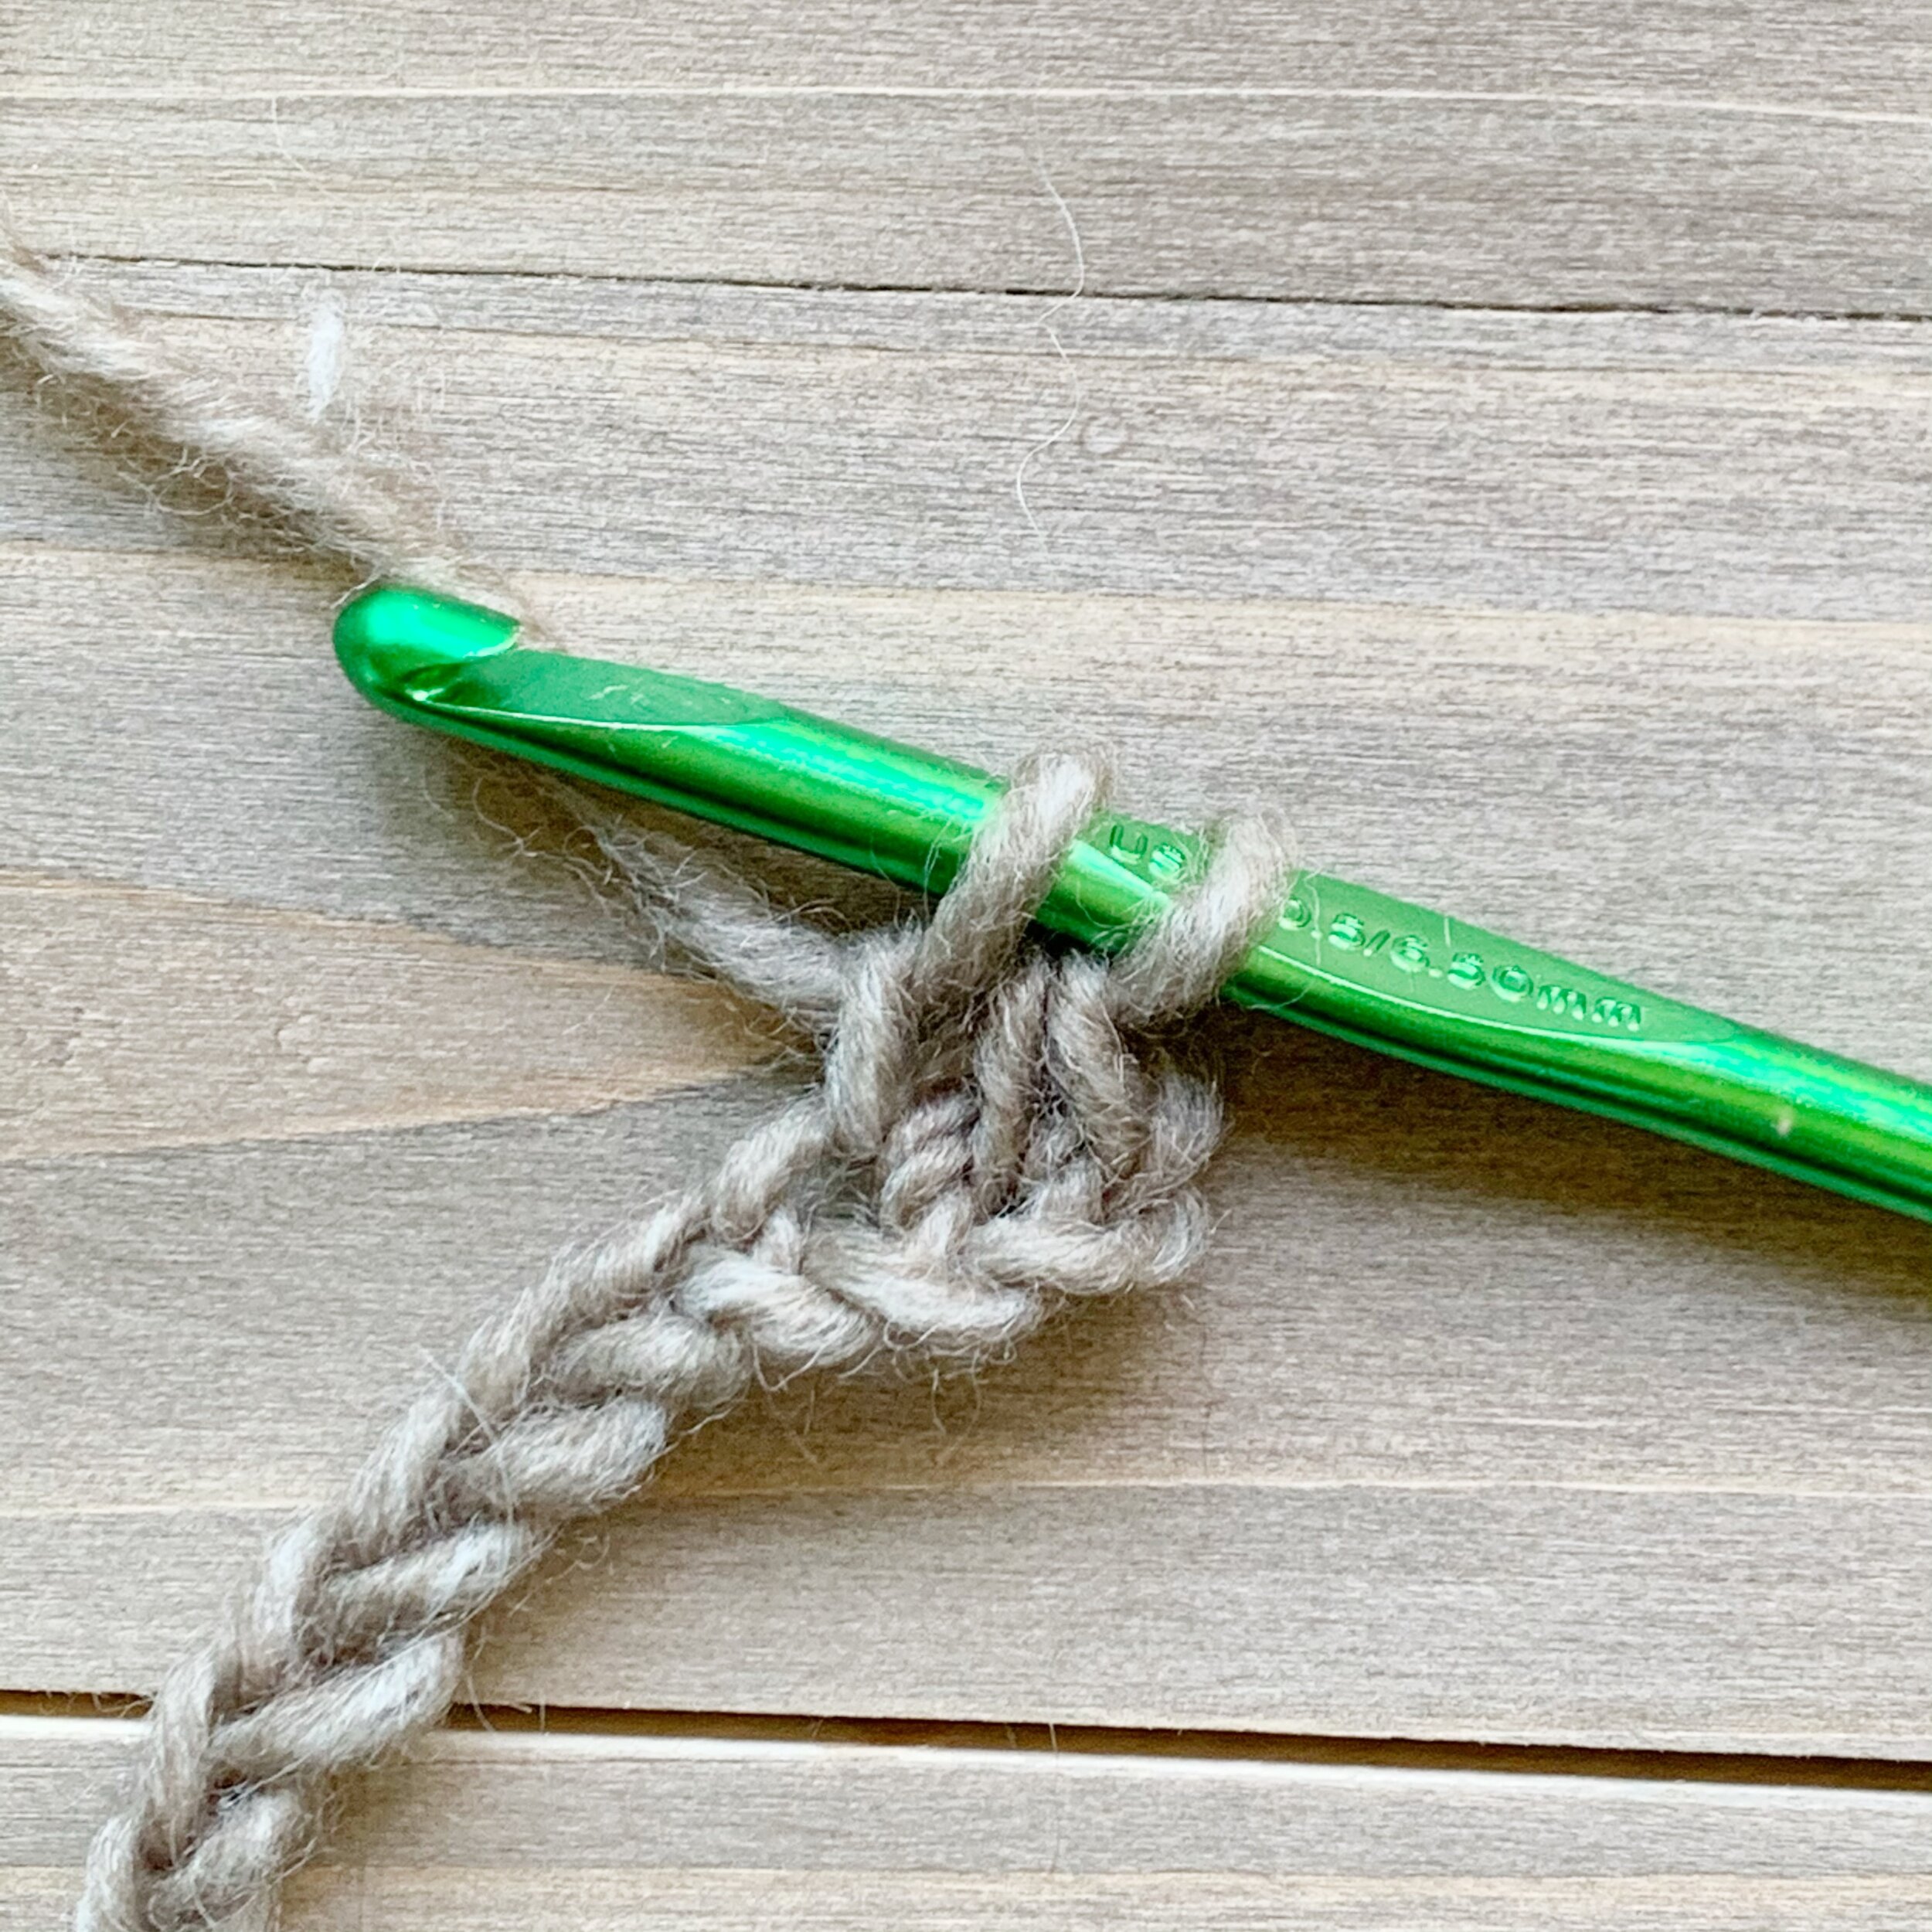
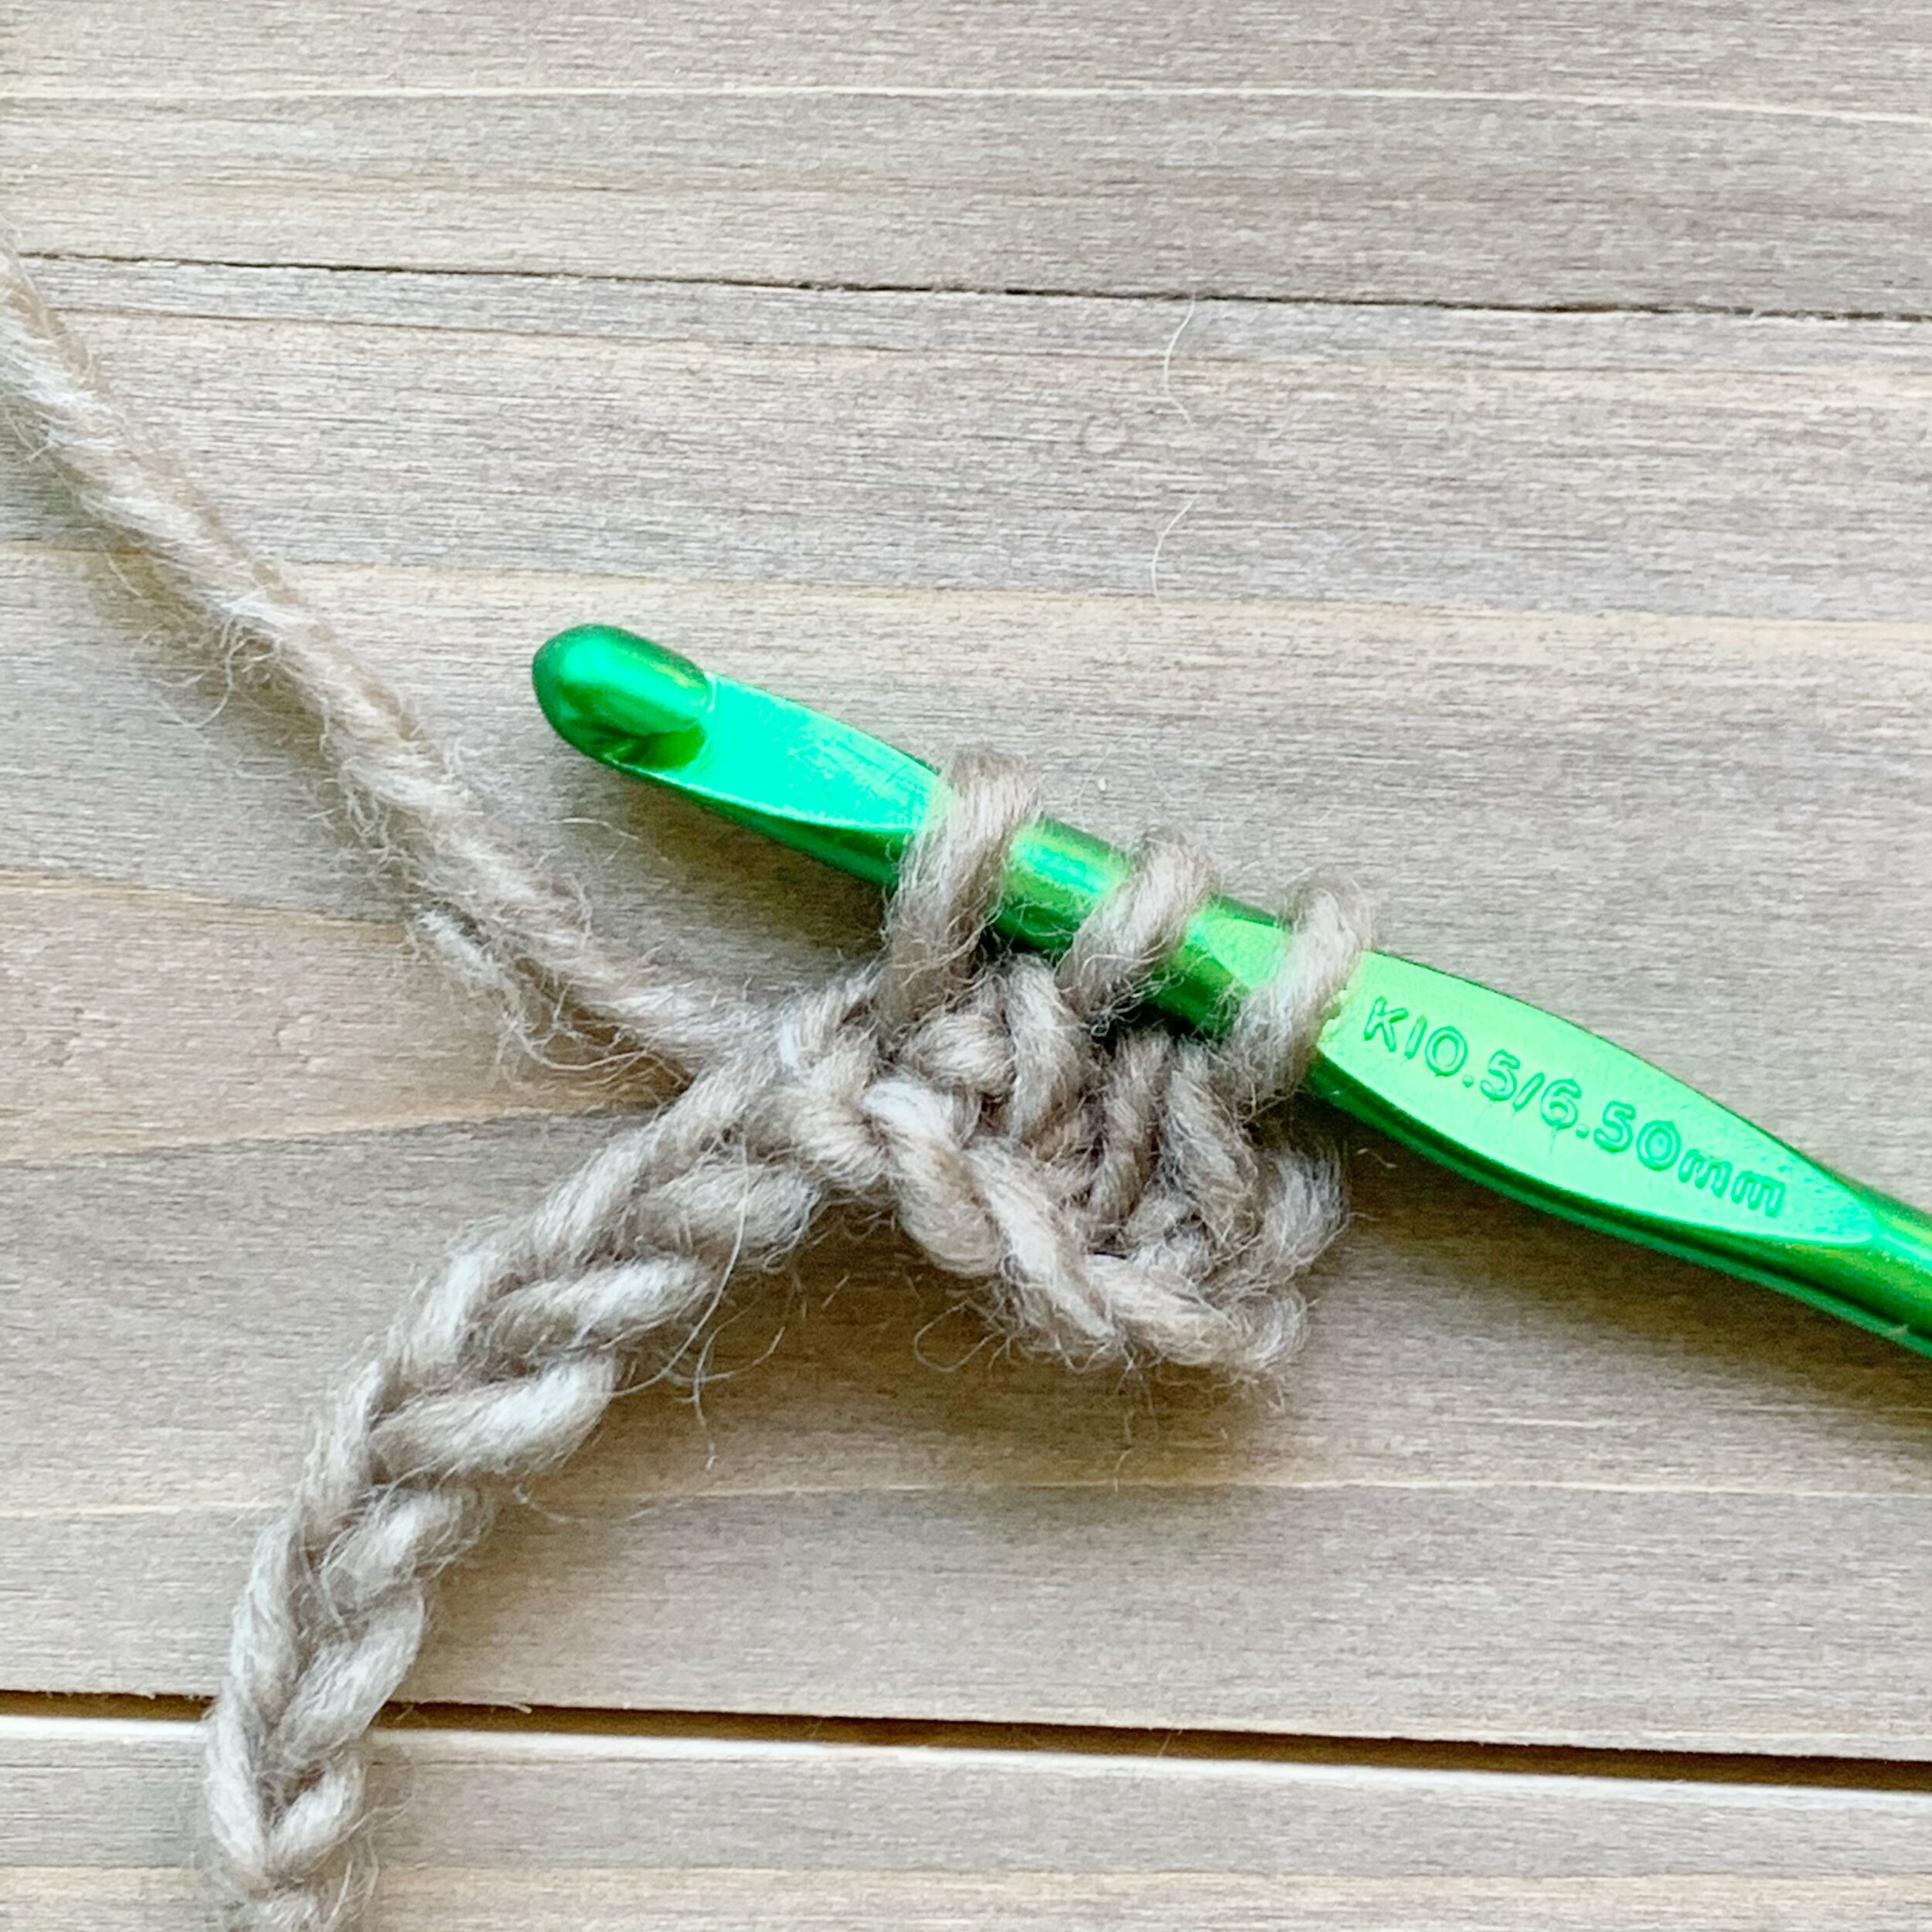
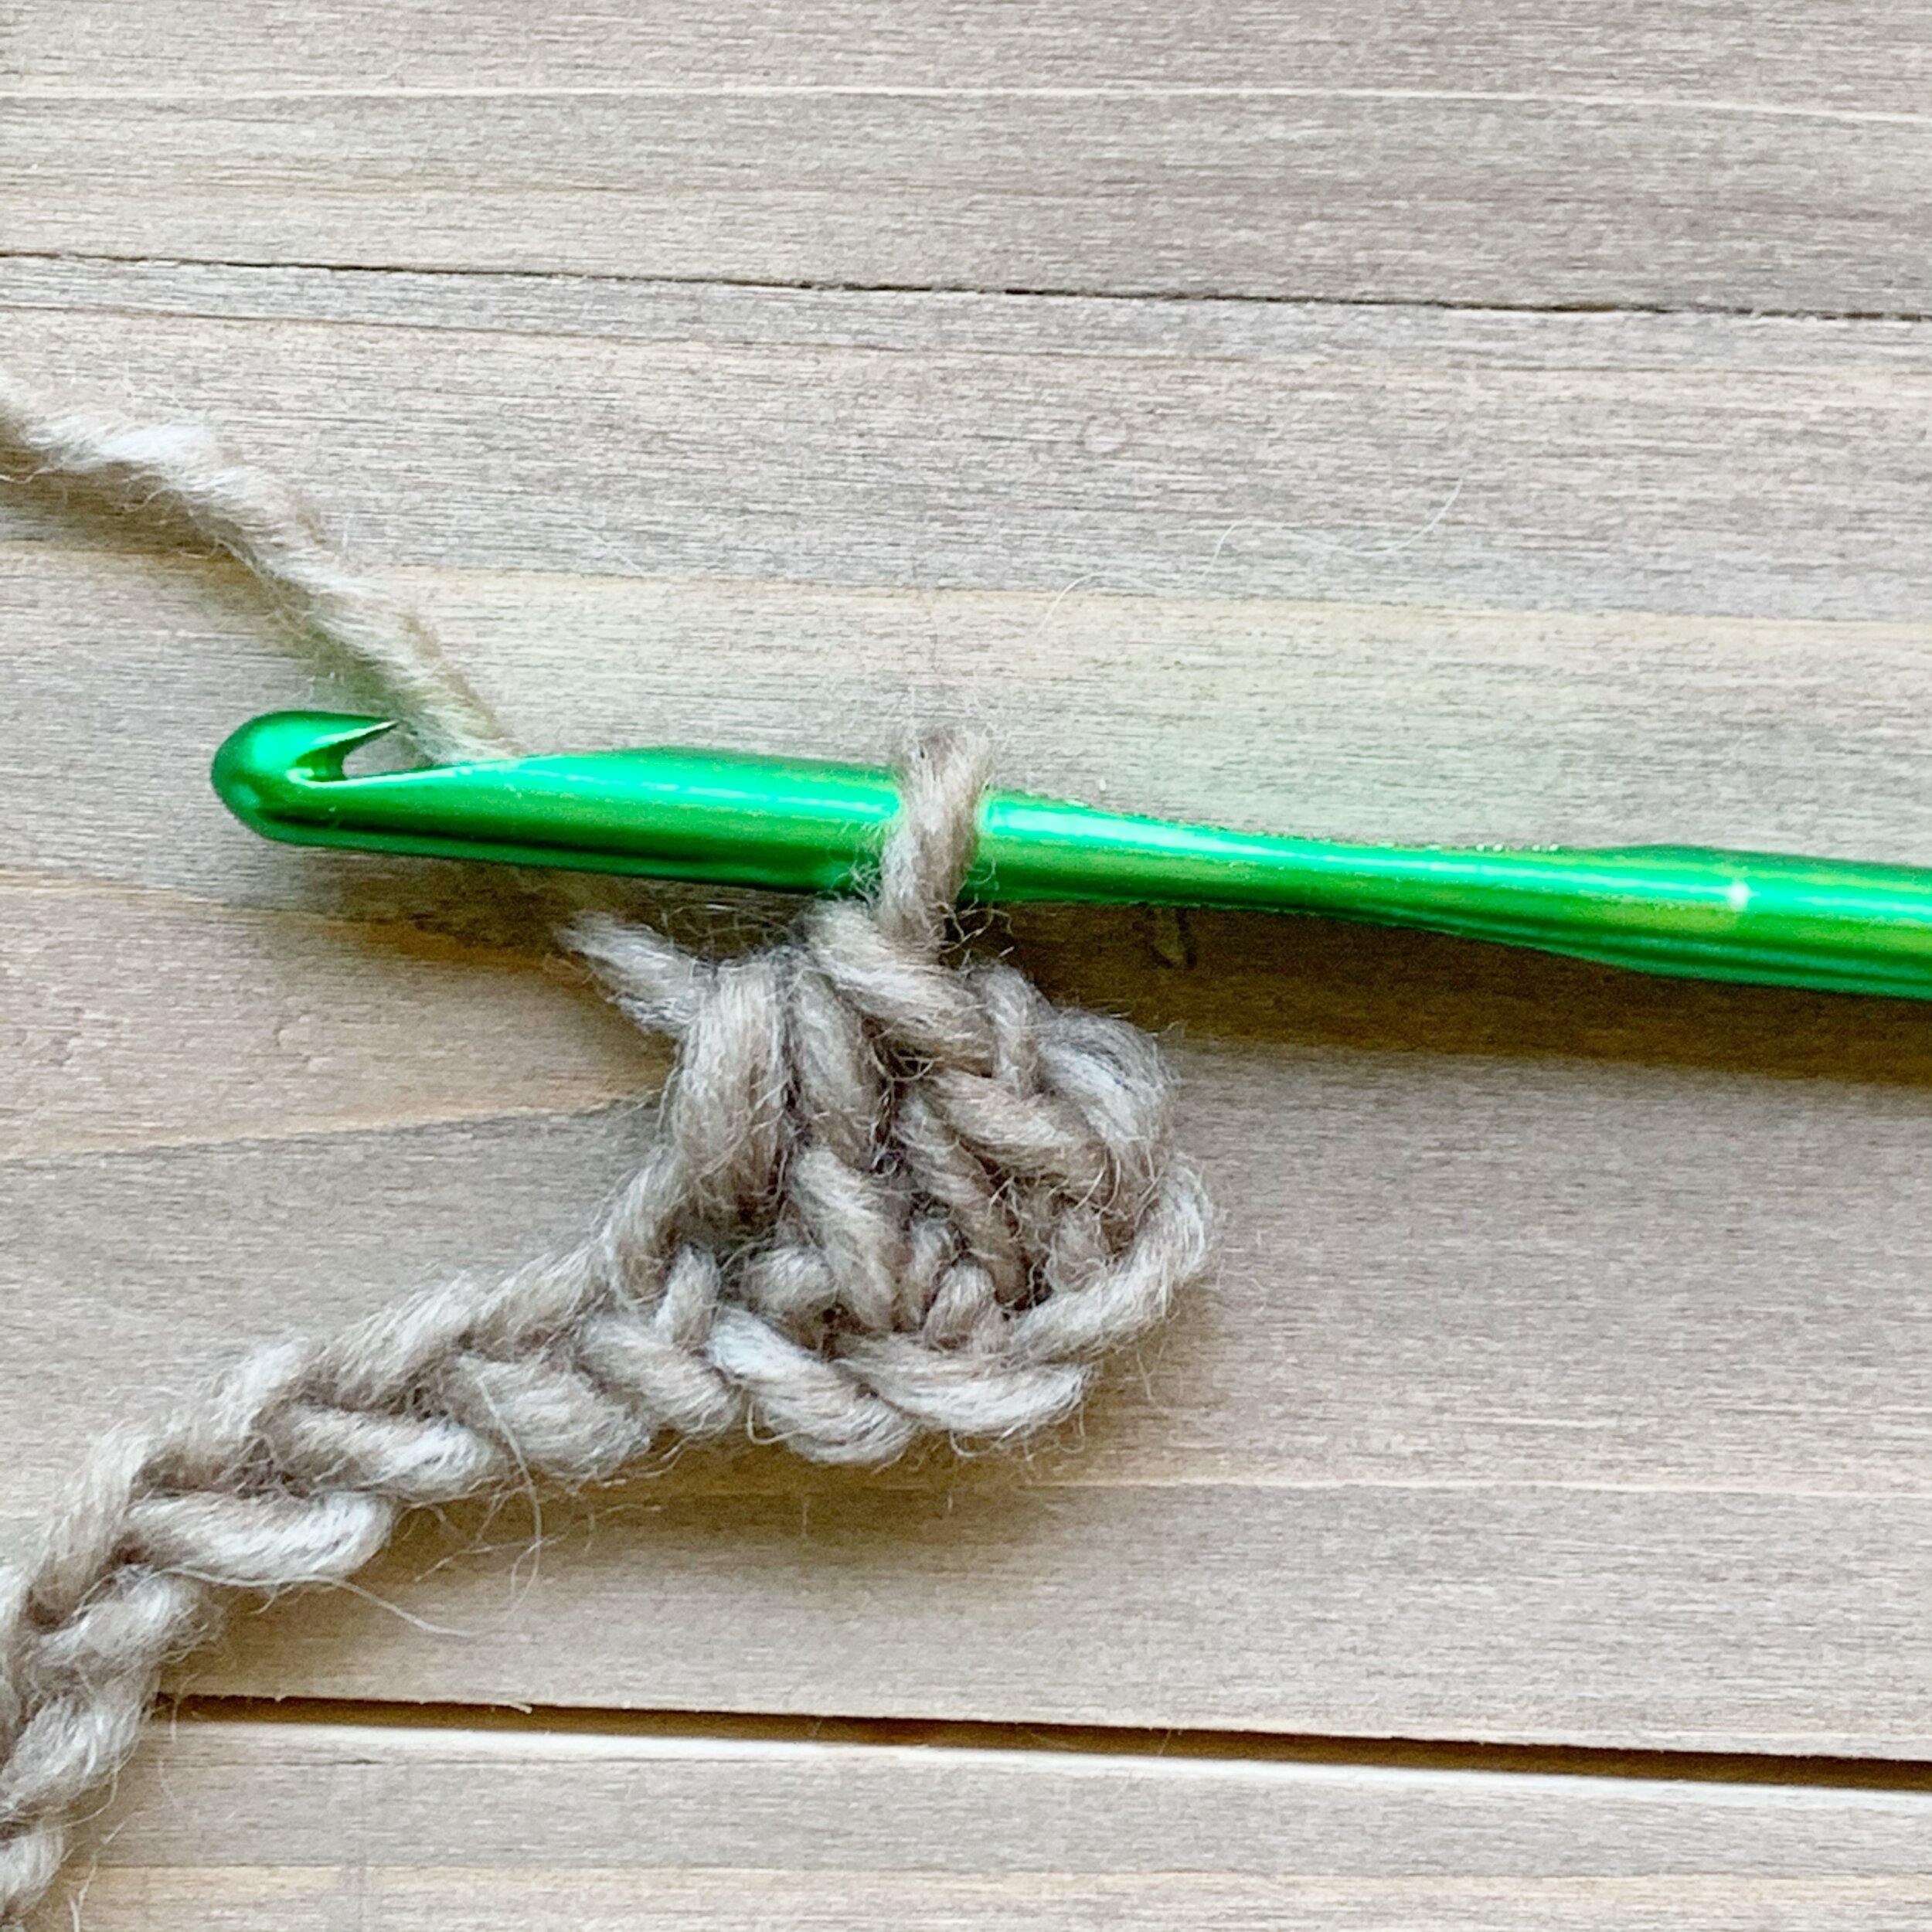
For the next st and each additional stitch, insert hook into the bottom loop of the previous st, then yo and draw up a loop, insert hook into next ch, yo and draw up a loop, yo and draw through all 3 loops on hook. Ch 2, and turn. Use the 2nd ch from hook as your loop for the 1st Lhdc, then continue as normal for all other stitches.
Foundation Linked Half Double Crochet (FLhdc): To create a foundation linked half double crochet start with a ch 3. Insert hook into 2nd ch and draw up a loop, then insert hook into 3rd ch and draw up a loop. Yo and draw through 1st loop on hook (ch 1), then yo and draw through all 3 loops on hook.

For each additional stitch, insert hook into bottom loop of previous st, yo and draw up a loop, insert hook into ch 1, yo and draw up a loop (3 loops on hook), yo and draw through 1st loop (ch 1), then yo and draw through all 3 loops on hook.

Linked Half Double Crochet Two Together (Lhdc2tog): Insert hook into bottom loop of previous st, yo and draw up a loop (2 loops on hook), insert hook into next st, yo and draw up a loop (3 loops on hook), insert hook into next st, yo and draw up a loop (4 loops on hook), yo and draw through all 4 loops on hook.


Pattern:
Side One:
This first section will be the front and back of the cardigan worked as one long strip.
Ch 152(152, 152, 158, 158, 162, 162, 168, 168)
Row 1(RS): starting in the 2nd ch from the hook, Lhdc in each ch across, ch 2, turn. (150(150, 150, 156, 156, 160, 160, 166, 166)
Rows 2-8(9, 11, 12, 14, 15, 16, 18, 19) : Lhdc in each st across, ch 2, turn. (150(150, 150, 156, 156, 160, 160, 166, 166)
DO NOT fasten off. Move on to back neckline shaping.
Back Neckline Shaping:
You will now be working the back section and doing some shaping at the beginning and end of this section.
Row 1: Lhdc 73(73, 73, 76, 76, 78, 78, 81, 81), Lhdc2tog, ch 2, turn. (74(74, 74, 77, 77, 79, 79, 82, 82)
Row 2: Lhdc2tog, Lhdc in each st across, ch 2, turn. (73(73, 73, 76, 76, 78, 78, 81, 81)
Row 3: Lhdc until 2 sts remain, Lhdc2tog, ch 2, turn. (72(72, 72, 75, 75, 77, 77, 80, 80)
Rows 4-8(8, 8, 8, 8, 8, 9, 9, 11): Lhdc in each st across, ch 2, turn. (72(72, 72, 75, 75, 77, 77, 80, 80)
XS/S/M/L/XL/2X
Row 9: Lhdc until 1 st remains, 2Lhdc in last st, ch 2, turn. (73(73, 73, 76, 76, 78)
Row 10: 2Lhdc in 1st st, Lhdc in each st across, ch 2, turn. (74(74, 74, 77, 77, 79)
Row 11: Lhdc until 1 st remains, 2Lhdc in last st. (75(75, 75, 78, 78, 80, 80)
DO NOT fasten off, move on to Side Two.
3X/4X/5X
Row 10(10, 12): 2Lhdc in 1st st, Lhdc in each st across, ch 2, turn. (78(81, 81)
Row 11(11, 13): Lhdc until 1 st remains, 2Lhdc in last st, ch 2, turn. (79(82, 82)
Row 12(12, 14): 2Lhdc in 1st st, Lhdc across, ch 2, turn. (80(83, 83)
DO NOT fasten off, move on to Side Two.
Side Two:
You will now be adding ch stitches for sizes XS/S/M/L/XL/2X and foundation stitches for sizes 3X/4X/5X to create the second side which is the front and back panel.
XS/S/M/L/XL/2X
Row 1: ch 77(77, 77, 80, 80, 82), starting in the 3rd ch from hook, Lhdc in each ch and st across, ch 2, turn. (150(150, 150, 156, 156, 160)
3X/4X/5X
Row 1: Lhdc in each st across, then FLhdc 80(83, 83), ch 2, turn. (160(166, 166)
All Sizes
Rows 2-8(9, 11, 12, 14, 15, 16, 18, 19) : Lhdc in each st across, ch 2, turn. (150(150, 150, 156, 156, 160, 160, 166, 166)
DO NOT fasten off, move on to Seaming.
Seaming:
Fold cardigan in half so that the ends of rows are touching at the bottom and the front sections are laying on top.

Starting on the side where the yarn is still attached, sl st the sides together (blue lines on diagram). You will need to sl st 57(57, 56, 58, 56, 57, 57, 59, 56) sts, then stop and move on to the sleeves.
Sleeves:
Special Tips:
When working the sleeves, if you are finding they are fitting too tight you can easily adjust them to make sure you get the perfect fit.
Take out a few sl sts from the seam so you end up with a wider armhole. Just make sure you have an even number of stitches around the arm hole. Then follow the sleeve instructions as written noting that your stitch counts will be higher than listed.
To adjust the length of your sleeves add or subtract lhdc rows at the end until you have the desired length.
With yarn still attached and the WS facing you, start working around the armhole to create the sleeves. You will be working in turned rounds. Adjust the number or rounds to add or subtract length as needed.
XS/S
Round 1: ch 2, Lhdc in each st around arm hole, sl st to 1st st to join, turn. (36(36)
Rounds 2-4: ch 2, Lhdc in each st around, sl st to 1st st to join, turn. (36(36)
Round 5: ch 2, Lhdc2tog, Lhdc around until 2 sts remain, Lhdc2tog, sl st to 1st st to join, turn. (34(34)
Rounds 6-9: ch 2, Lhdc in each st around, sl st to 1st st to join, turn. (34(34)
Round 10: ch 2, Lhdc2tog, Lhdc around until 2 sts remain, Lhdc2tog, sl st to 1st st to join, turn. (32(32)
Repeat Rounds 6-10 three more times for a total of 25 rounds and ending with 26 sts.
Rounds 26-27: ch 2, Lhdc in each st around, sl st to 1st st to join, turn. (26(26)
Round 28: ch 1, sl st in each st around, sl st to 1st st to join, turn. (26(26)
Rounds 29-30: ch 1, sl st in BLO of each st around, sl st to 1st st to join, turn. (26(26)
M/L
Round 1: ch 2, Lhdc in each st around arm hole, sl st to 1st st to join, turn. (38(40)
Rounds 2-3: ch 2, Lhdc in each st around, sl st to 1st st to join, turn. (38(40)
Round 4: ch 2, Lhdc2tog, Lhdc around until 2 sts remain, Lhdc2tog, sl st to 1st st to join, turn. (36(38)
Rounds 5-7: ch 2, Lhdc in each st around, sl st to 1st st to join, turn. (36(38)
Round 8: ch 2, Lhdc2tog, Lhdc around until 2 sts remain, Lhdc2tog, sl st to 1st st to join, turn. (34(36)
Repeat Rounds 5-8 four more times for a total of 24 rounds and ending with 26(28) sts.
Rounds 25-27: ch 2, Lhdc in each st around, sl st to 1st st to join, turn. (26(28)
Round 28: ch 1, sl st in each st around, sl st to 1st st to join, turn. (26(28)
Rounds 29-30: ch 1, sl st in BLO of each st around, sl st to 1st st to join, turn. (26(28)
XL/2X/3X
Round 1: ch 2, Lhdc in each st around arm hole, sl st to 1st st to join, turn. (44(46, 46)
Rounds 2-3: ch 2, Lhdc in each st around, sl st to 1st st to join, turn. (44(46, 46)
Round 4: ch 2, Lhdc2tog, Lhdc around until 2 sts remain, Lhdc2tog, sl st to 1st st to join, turn. (42(44, 44)
Rounds 5-6: ch 2, Lhdc in each st around, sl st to 1st st to join, turn. (42(44, 44)
Round 7: ch 2, Lhdc2tog, Lhdc around until 2 sts remain, Lhdc2tog, sl st to 1st st to join, turn. (40(42, 42)
Repeat Rounds 5-7 six more times for a total of 25 rounds and ending with 28(30, 30) sts.
Round 26: ch 1, sl st in each st around, sl st to 1st st to join, turn. (28(30, 30)
Rounds 27-28: ch 1, sl st in BLO of each st around, sl st to 1st st to join, turn. (28(30, 30)
4X
Round 1: ch 2, Lhdc in each st around arm hole, sl st to 1st st to join, turn. (48)
Rounds 2-3: ch 2, Lhdc in each st around, sl st to 1st st to join, turn. (48)
Round 4: ch 2, Lhdc2tog, Lhdc around until 2 sts remain, Lhdc2tog, sl st to 1st st to join, turn. (46)
Round 5: ch 2, Lhdc in each st around, sl st to 1st st to join, turn. (46)
Round 6: ch 2, Lhdc2tog, Lhdc around until 2 sts remain, Lhdc2tog, sl st to 1st st to join, turn. (44)
Repeat Rounds 2-6 four more times, ending on a Row 4 repeat for a total of 24 rounds and ending with 30 sts.
Round 25: ch 1, sl st in each st around, sl st to 1st st to join, turn. (26(28)
Rounds 26-27: ch 1, sl st in BLO of each st around, sl st to 1st st to join, turn. (26(28)
5X
Round 1: ch 2, Lhdc in each st around arm hole, sl st to 1st st to join, turn. (54)
Round 2: ch 2, Lhdc in each st around, sl st to 1st st to join, turn. (54)
Round 3: ch 2, Lhdc2tog, Lhdc around until 2 sts remain, Lhdc2tog, sl st to 1st st to join, turn. (52)
Round 4: ch 2, Lhdc in each st around, sl st to 1st st to join, turn. (52)
Repeat Rounds 3-4 nine more times for a total of 22 rounds and ending with 34 sts.
Round 23: ch 1, sl st in each st around, sl st to 1st st to join, turn. (34)
Rounds 24-25: ch 1, sl st in BLO of each st around, sl st to 1st st to join, turn. (34)
Fasten off. Repeat seaming and sleeve instructions for second side.
Collar:
Turn cardigan RS out. Attach yarn to the bottom right side of cardigan. The collar is worked directly around the inside edges of the cardigan and along the neckline in turned rows. (If collar starts to pull too tight, go up a hook size or two)
Row 1: ch 1, sl st into each st up the right side of the cardigan, then 2 sl sts into each end of rows of the neckline and one sl st into each st down the left side of the cardigan, turn. (approx. 172(172, 172, 178, 178, 182, 184, 190, 194)
Row 2-13: ch 1, sl st in BLO of each st across, turn. (approx. 172(172, 172, 178, 178, 182, 184, 190, 194)

Once finished with Row 13 of collar, ch 1 and turn. Work 1sc into the ends of the sl st rows and 2 sc sts into the ends of the lhdc rows around the bottom of the cardigan. Fasten off and weave in all ends.
Pockets: (optional)
Make two.
Ch 20
Row 1: Lhdc in 3rd ch from hook and in each ch across, turn. (18)
Row 2-10: ch 2, Lhdc in each st across, turn. (18)
Turn piece 90 degrees, ch 1,
Row 11: work 2 sl sts in each end of row along the edge of the pocket, turn. (20)
Row 12-13: ch 1, sl st in BLO of each st across, turn. (20)
Fasten off leaving a long tail for seaming.
Attach pockets to outside of cardigan 4” from the bottom and 3.25” from the edge of the collar.
Weave in all ends. Block if needed.
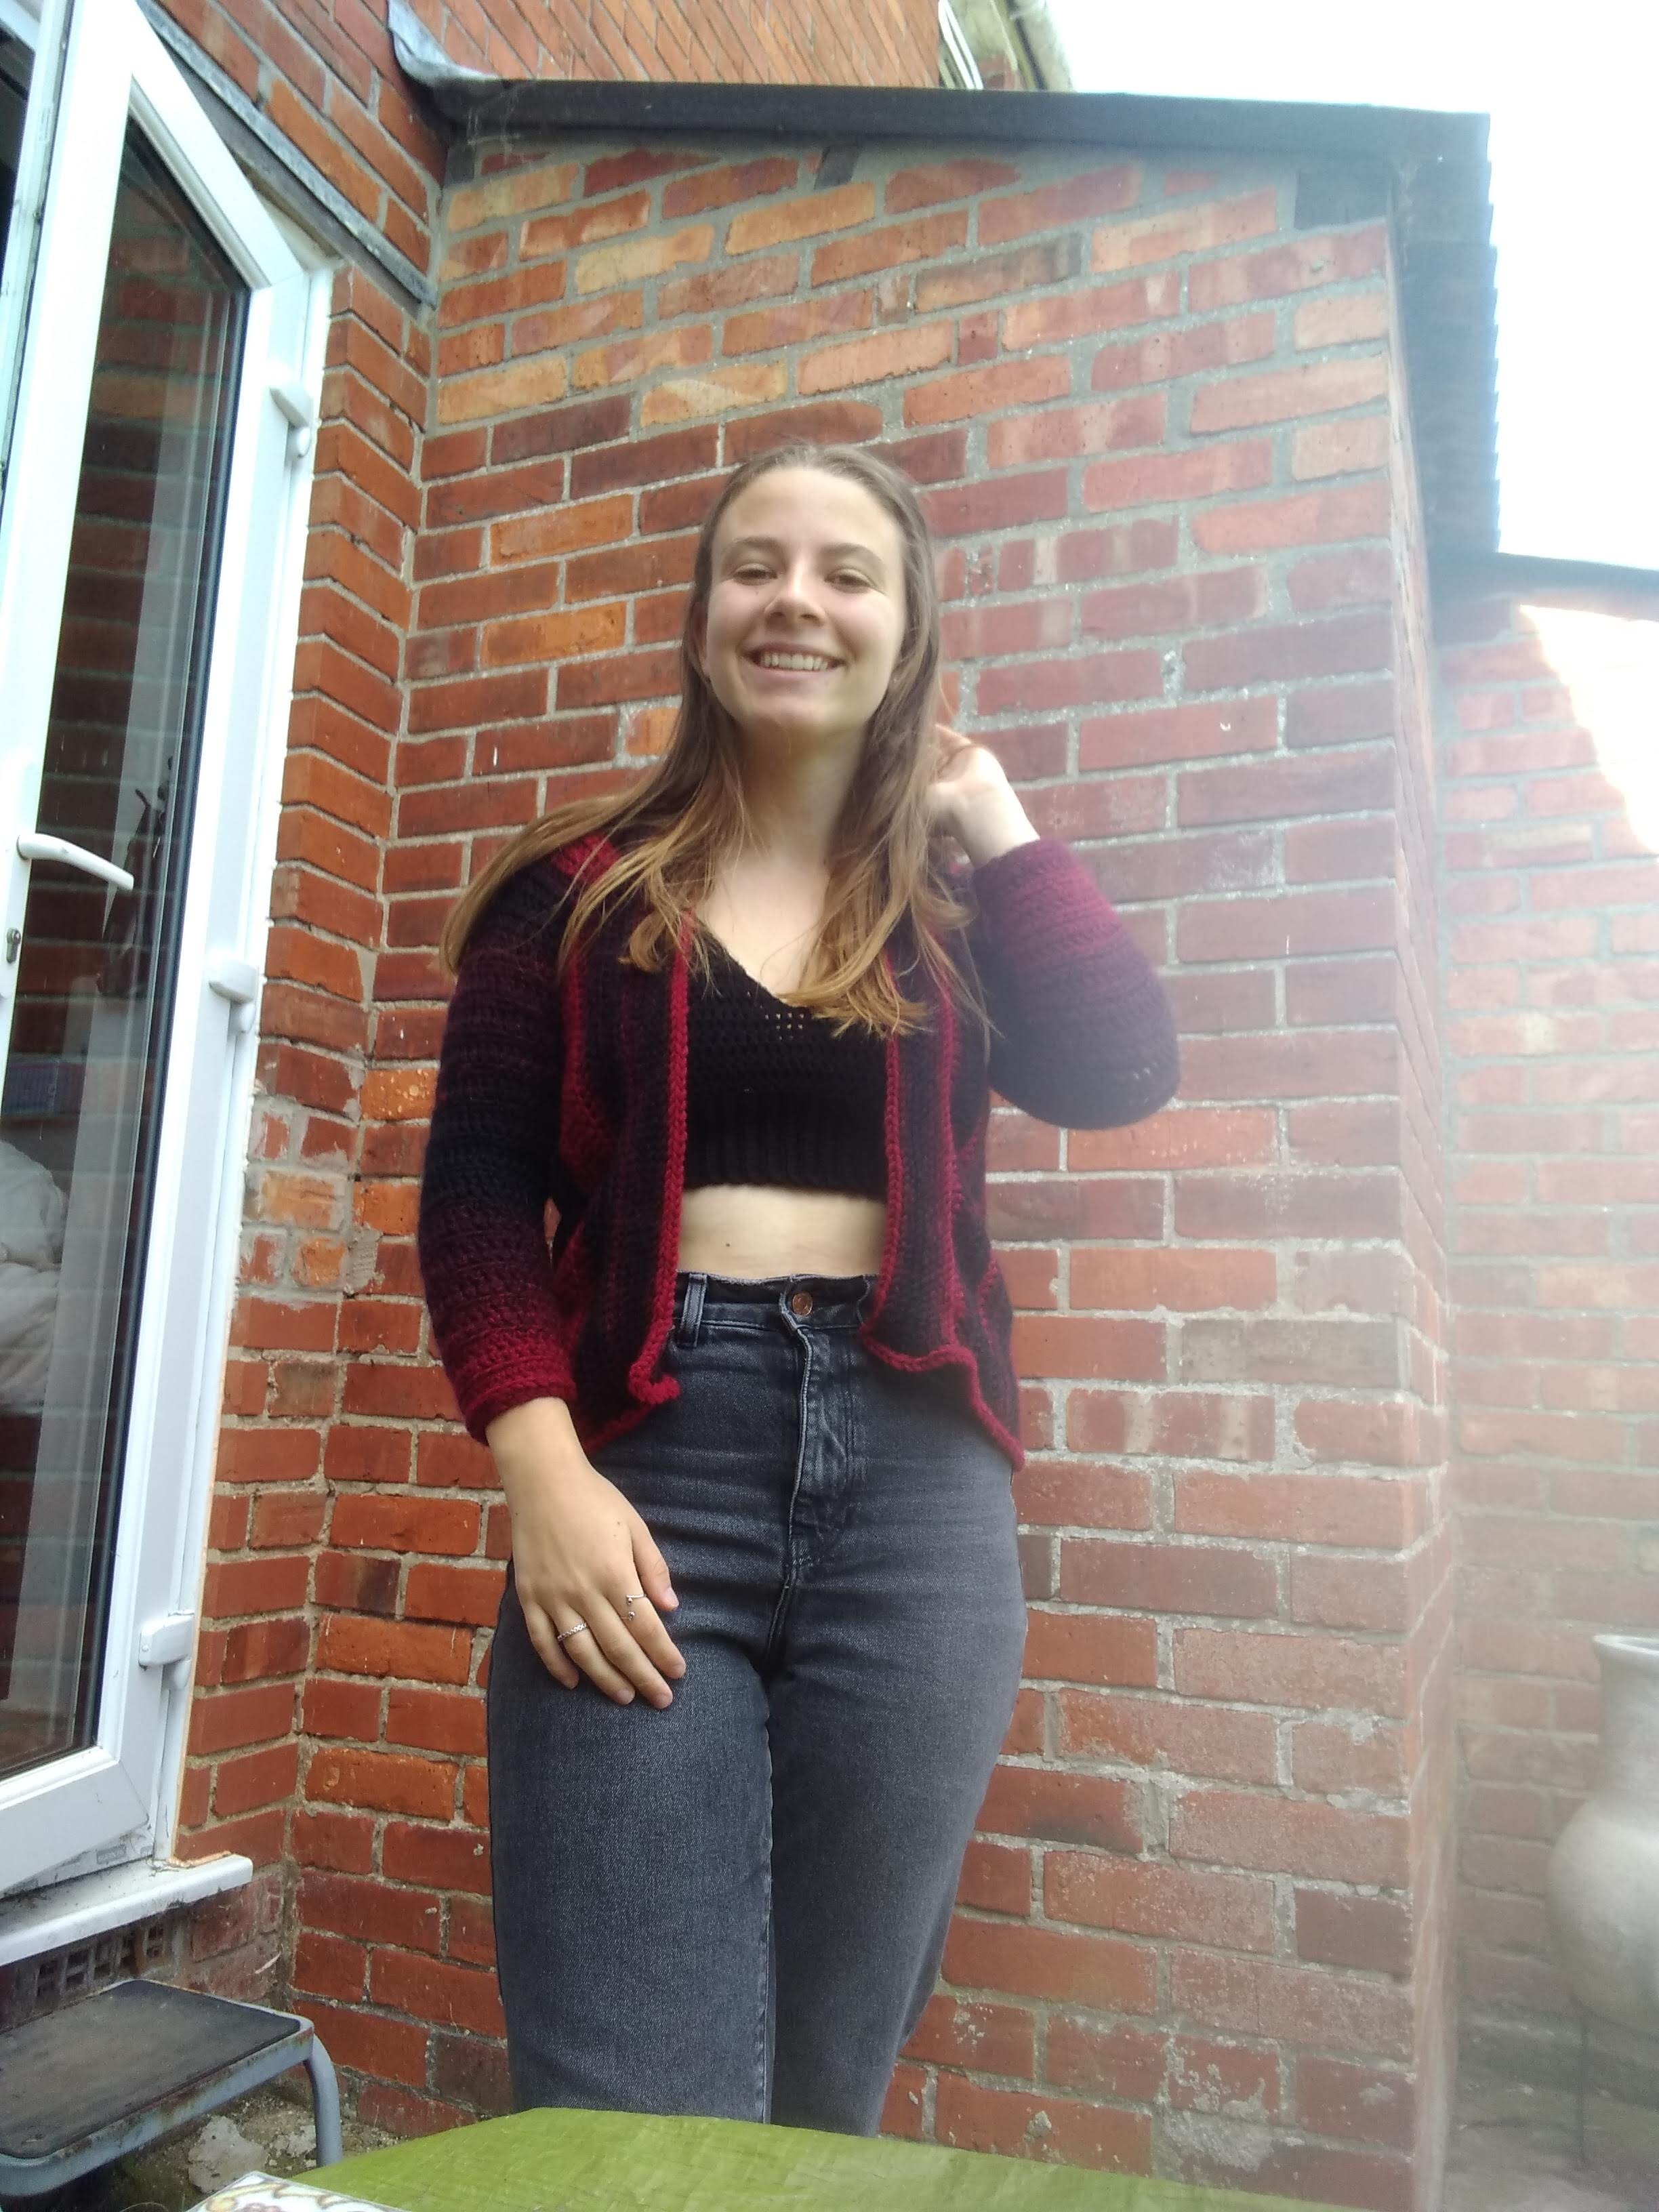
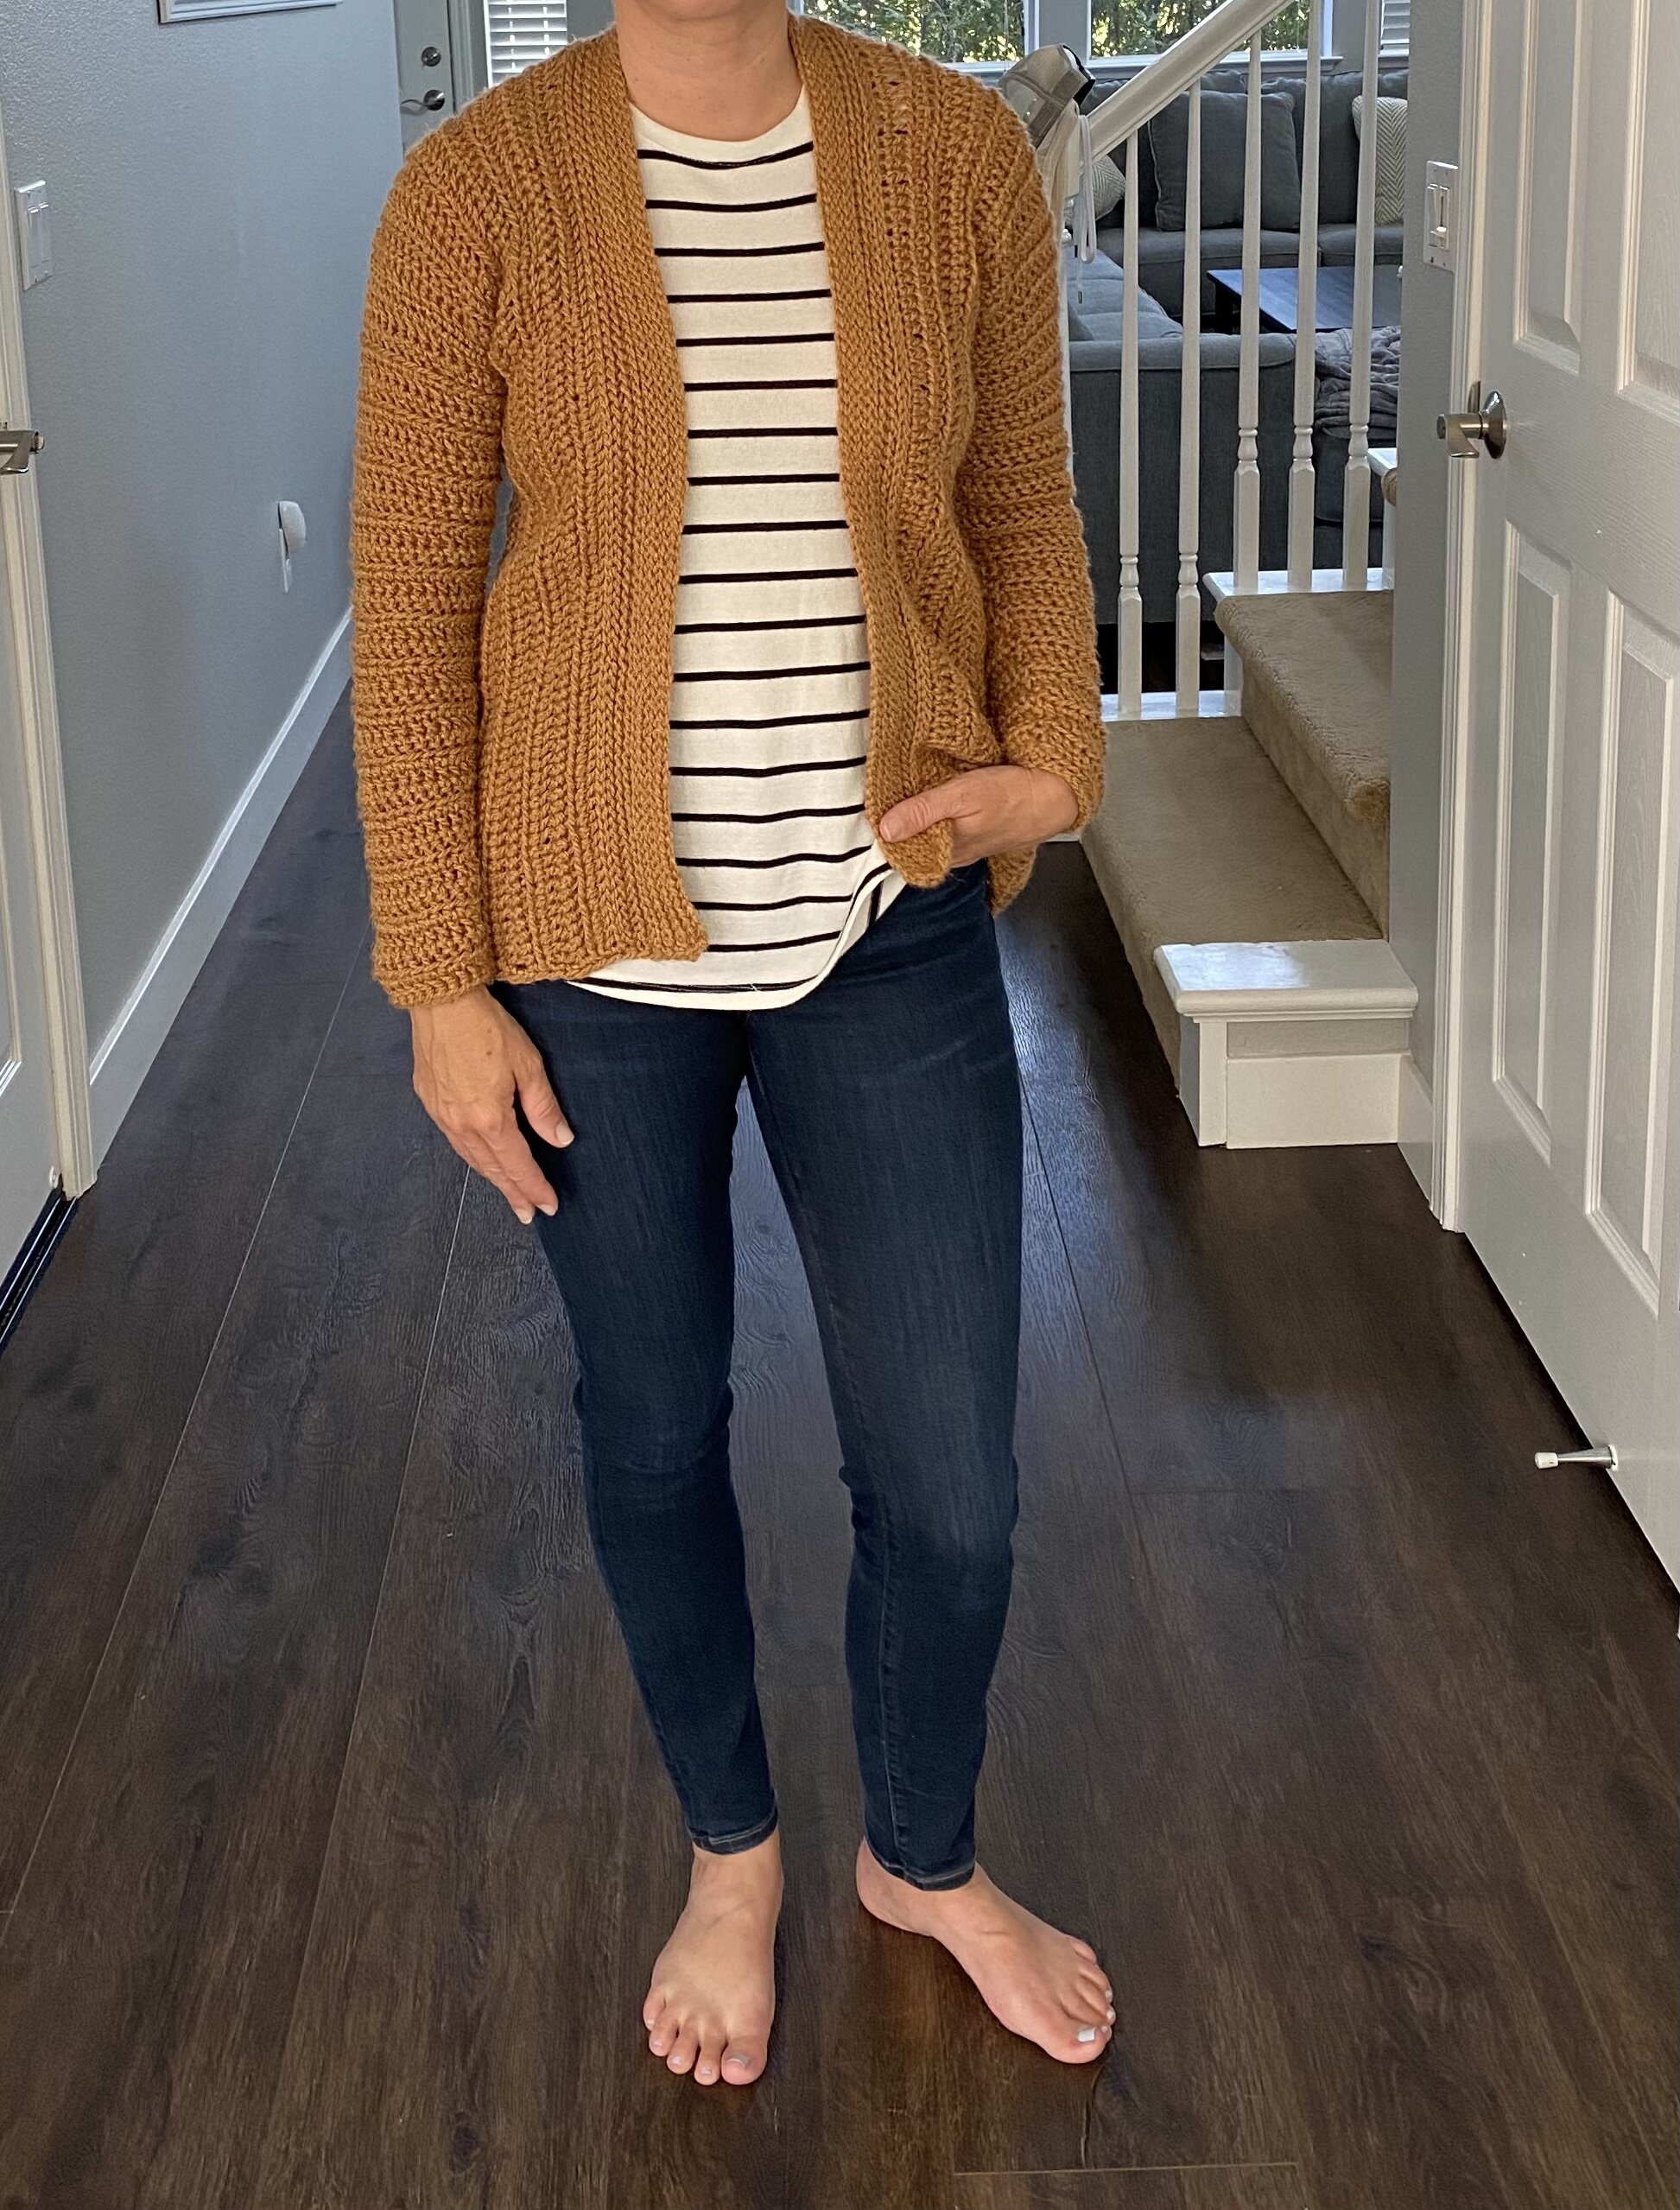
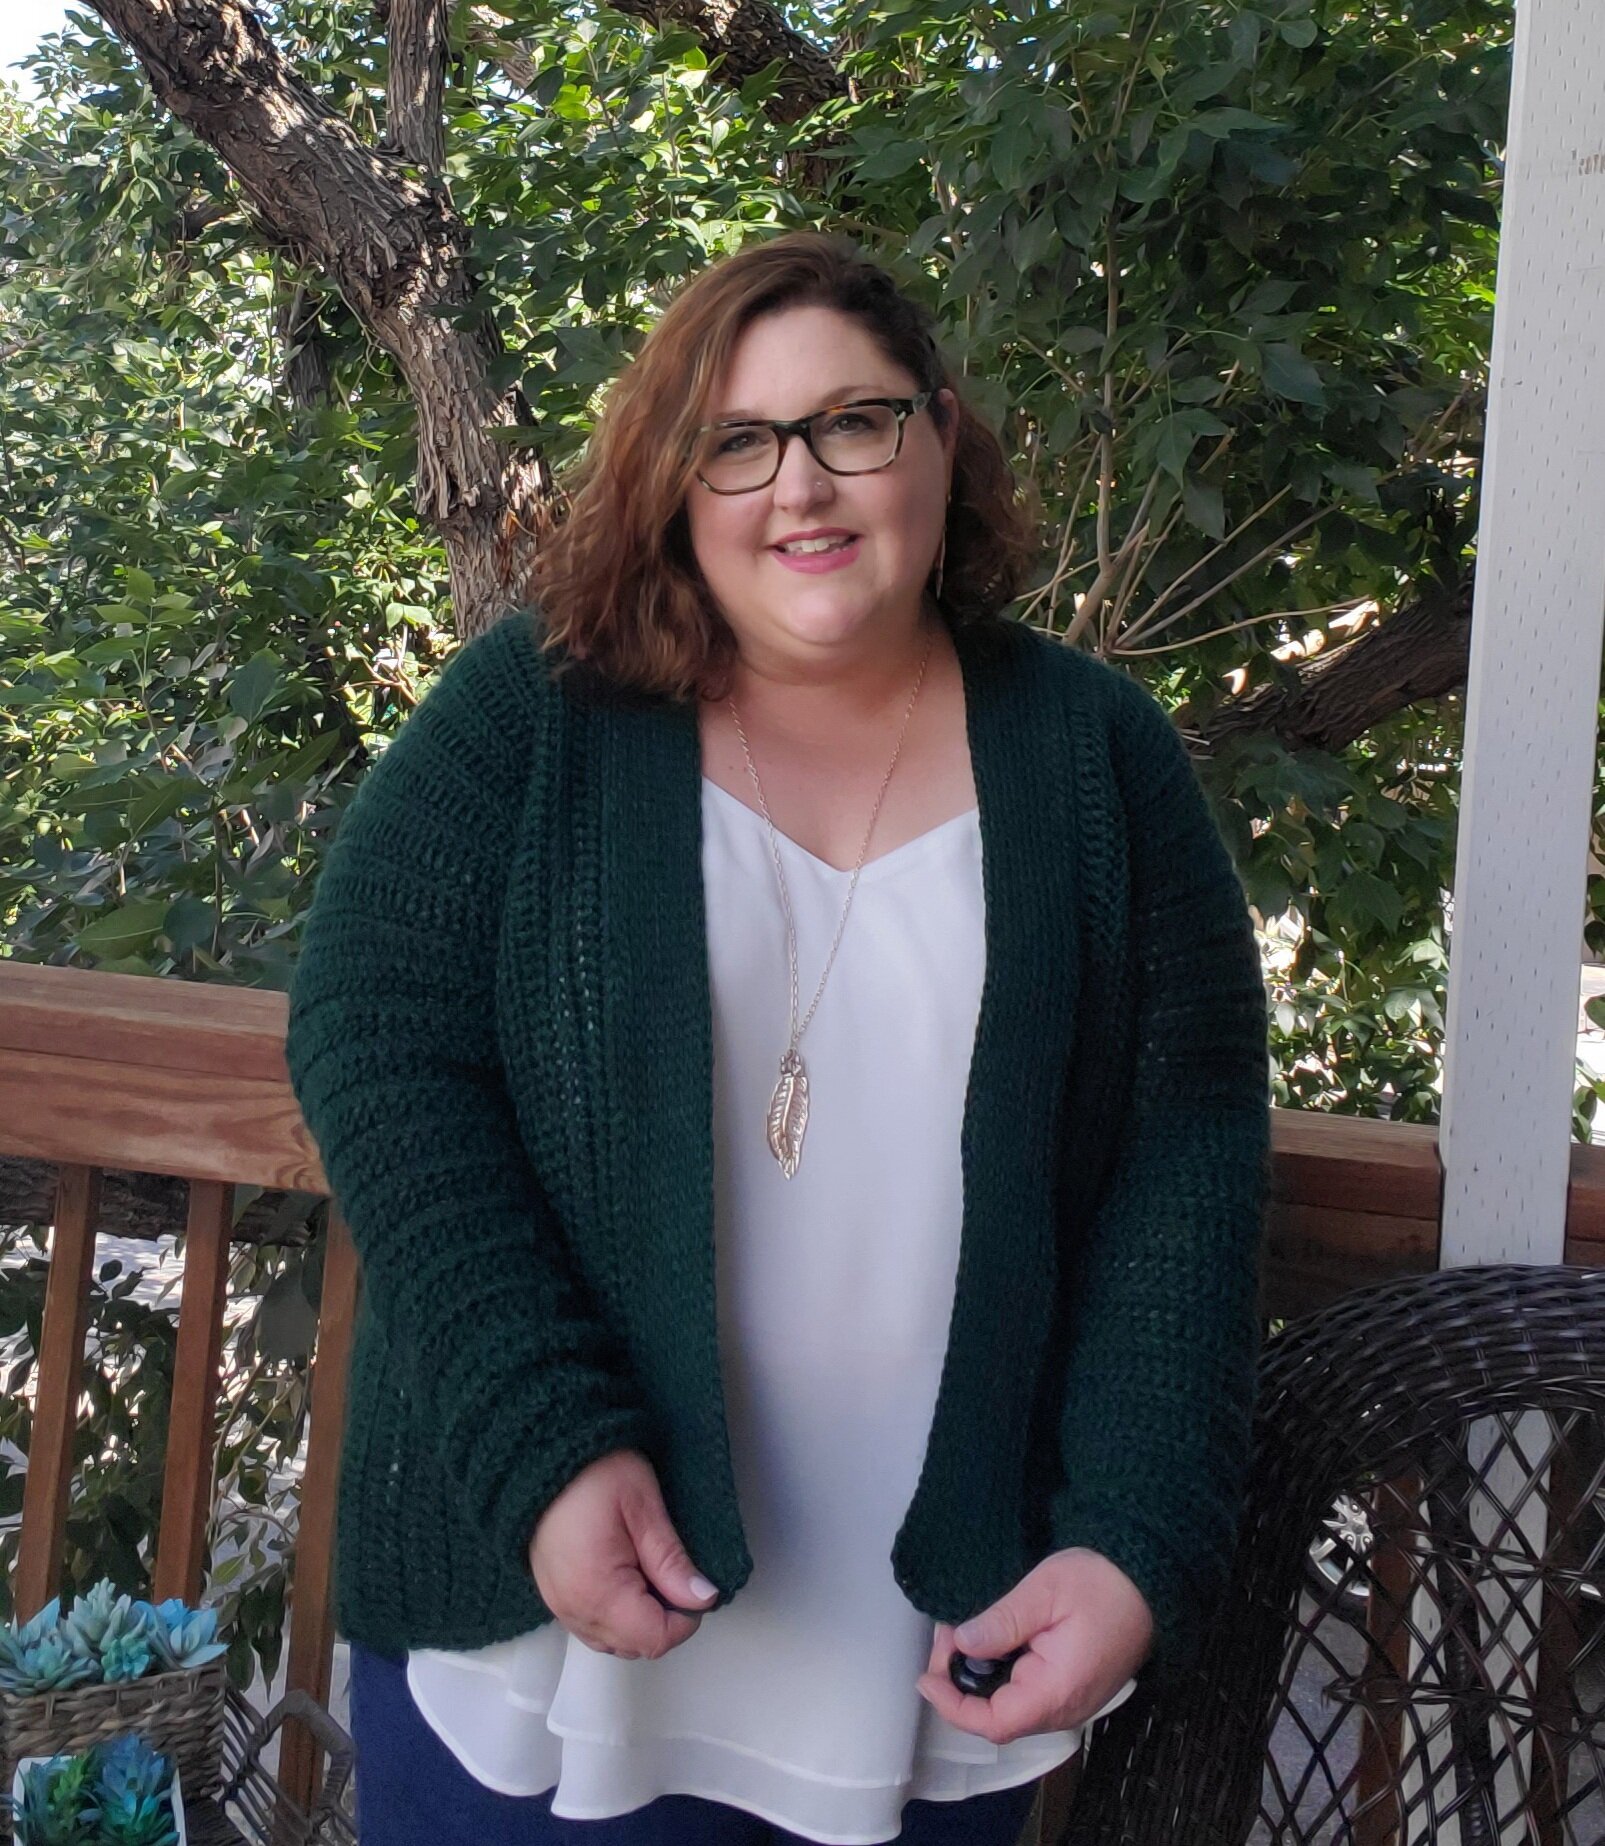
A special thank you to my amazing testers who totally knocked it out of the park. Check them out on Instagram and show them some love.
Top Row: @lovingneedle, @coycrochet, @crochet_grace_, @marcelyns_crochet
Bottom Row: @yarningandtea, @crochetsallday, @lauriestylecrochet, @knotmoreyarn
As always you can find a digital PDF version of this pattern in my shop, on Etsy or Ravelry. Or go ahead and treat yourself to the complete kit from Lion Brand Yarn. You’ll get all the Scarfie yarn you need in the color of your choice plus a digital copy of the pattern.
Happy Crocheting,
Meghan