The Clara Clutch
***The PDF pattern for the Clara Clutch is in the shop! The ad-free PDF is 35 full color pages with detailed instructions on how to create your own Clara Clutch. Or if you don't have time to make your own you can find some finished Clara Clutches in the shop!***
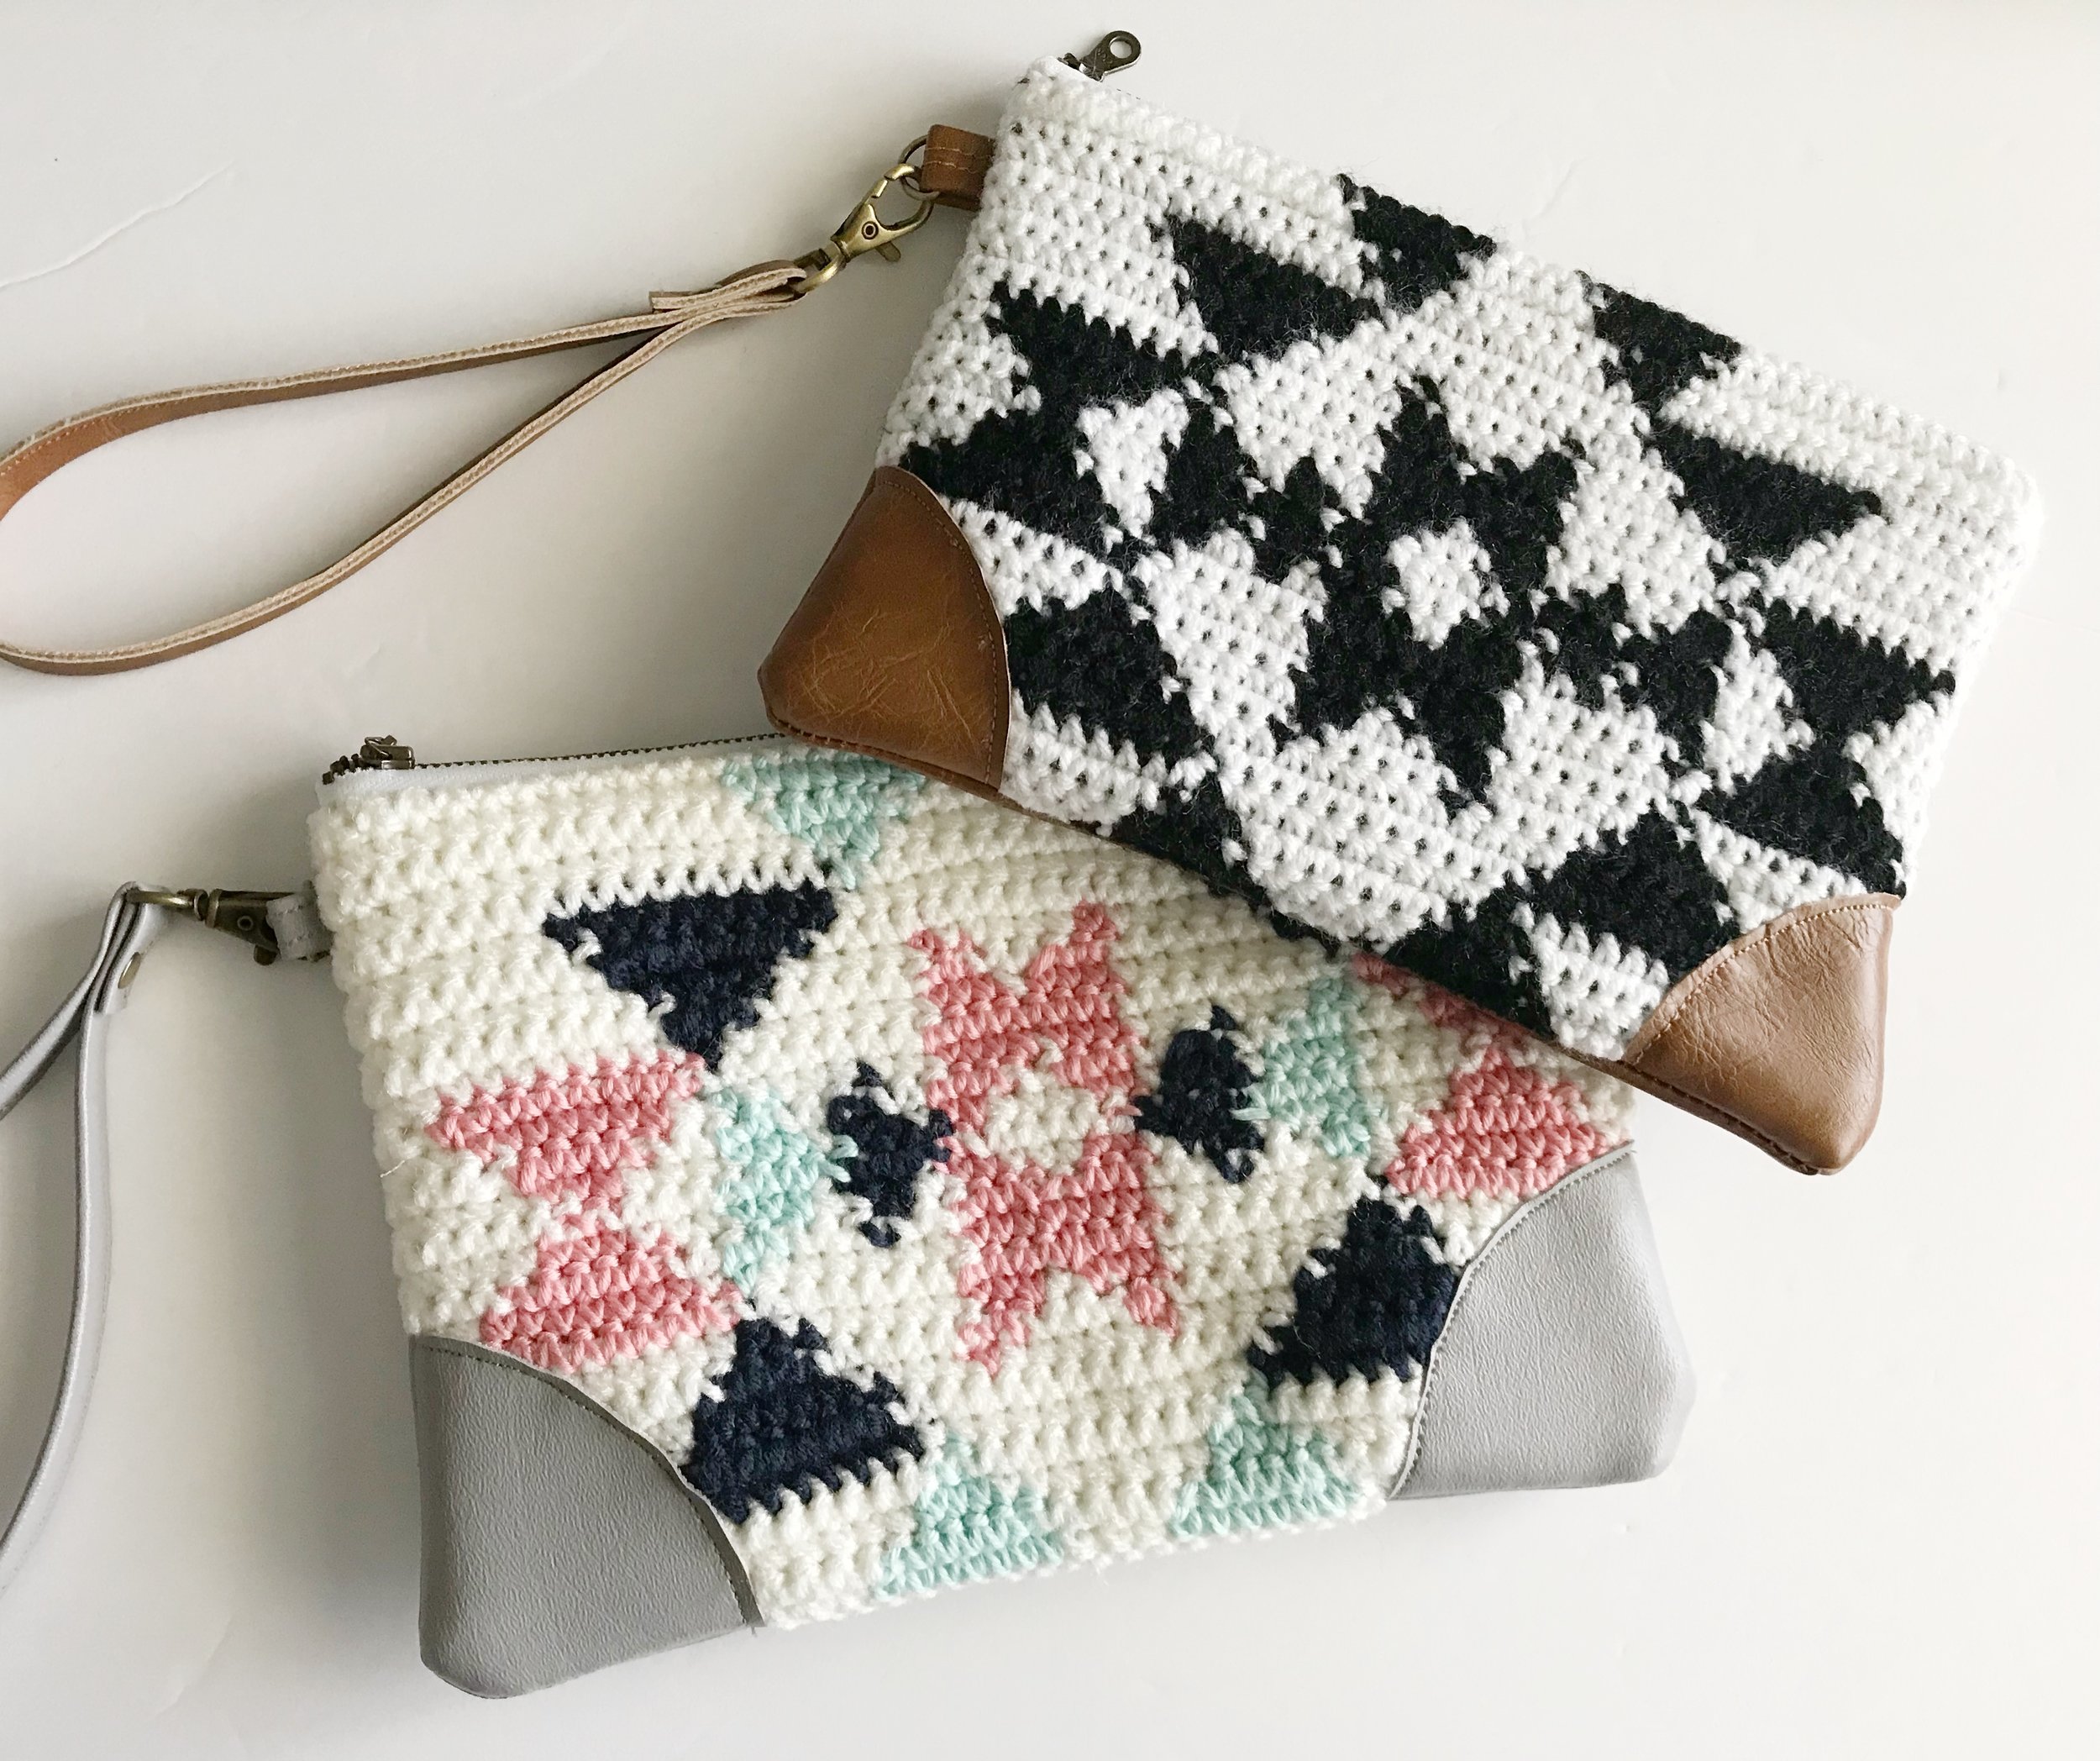
Say hello to your new best friend Clara! Isn't she just the most beautiful thing you've ever seen? I can't even begin to explain how much I love her. This is my very first pattern that combines my two loves, crochet and sewing. It turned out better than I could have ever imagined and I can't wait to create more "fusion crochet" patterns for you all.
This little clutch started out as an idea for a double zip cross body bag, but when I made the first sketch and saw the beauty of the panel I knew that it could stand on it's own. I love that it can be a clutch, wristlet or cross body bag.
This was my very first time doing tapestry crochet and now I think I'm hooked. I love all versatility of tapestry crochet and the color work is so fun to create. It took me a few tries to get it all worked out the way I wanted, but it was so worth the struggle. I love the simplicity of the black and white, but also wanted to create a more colorful version for spring.
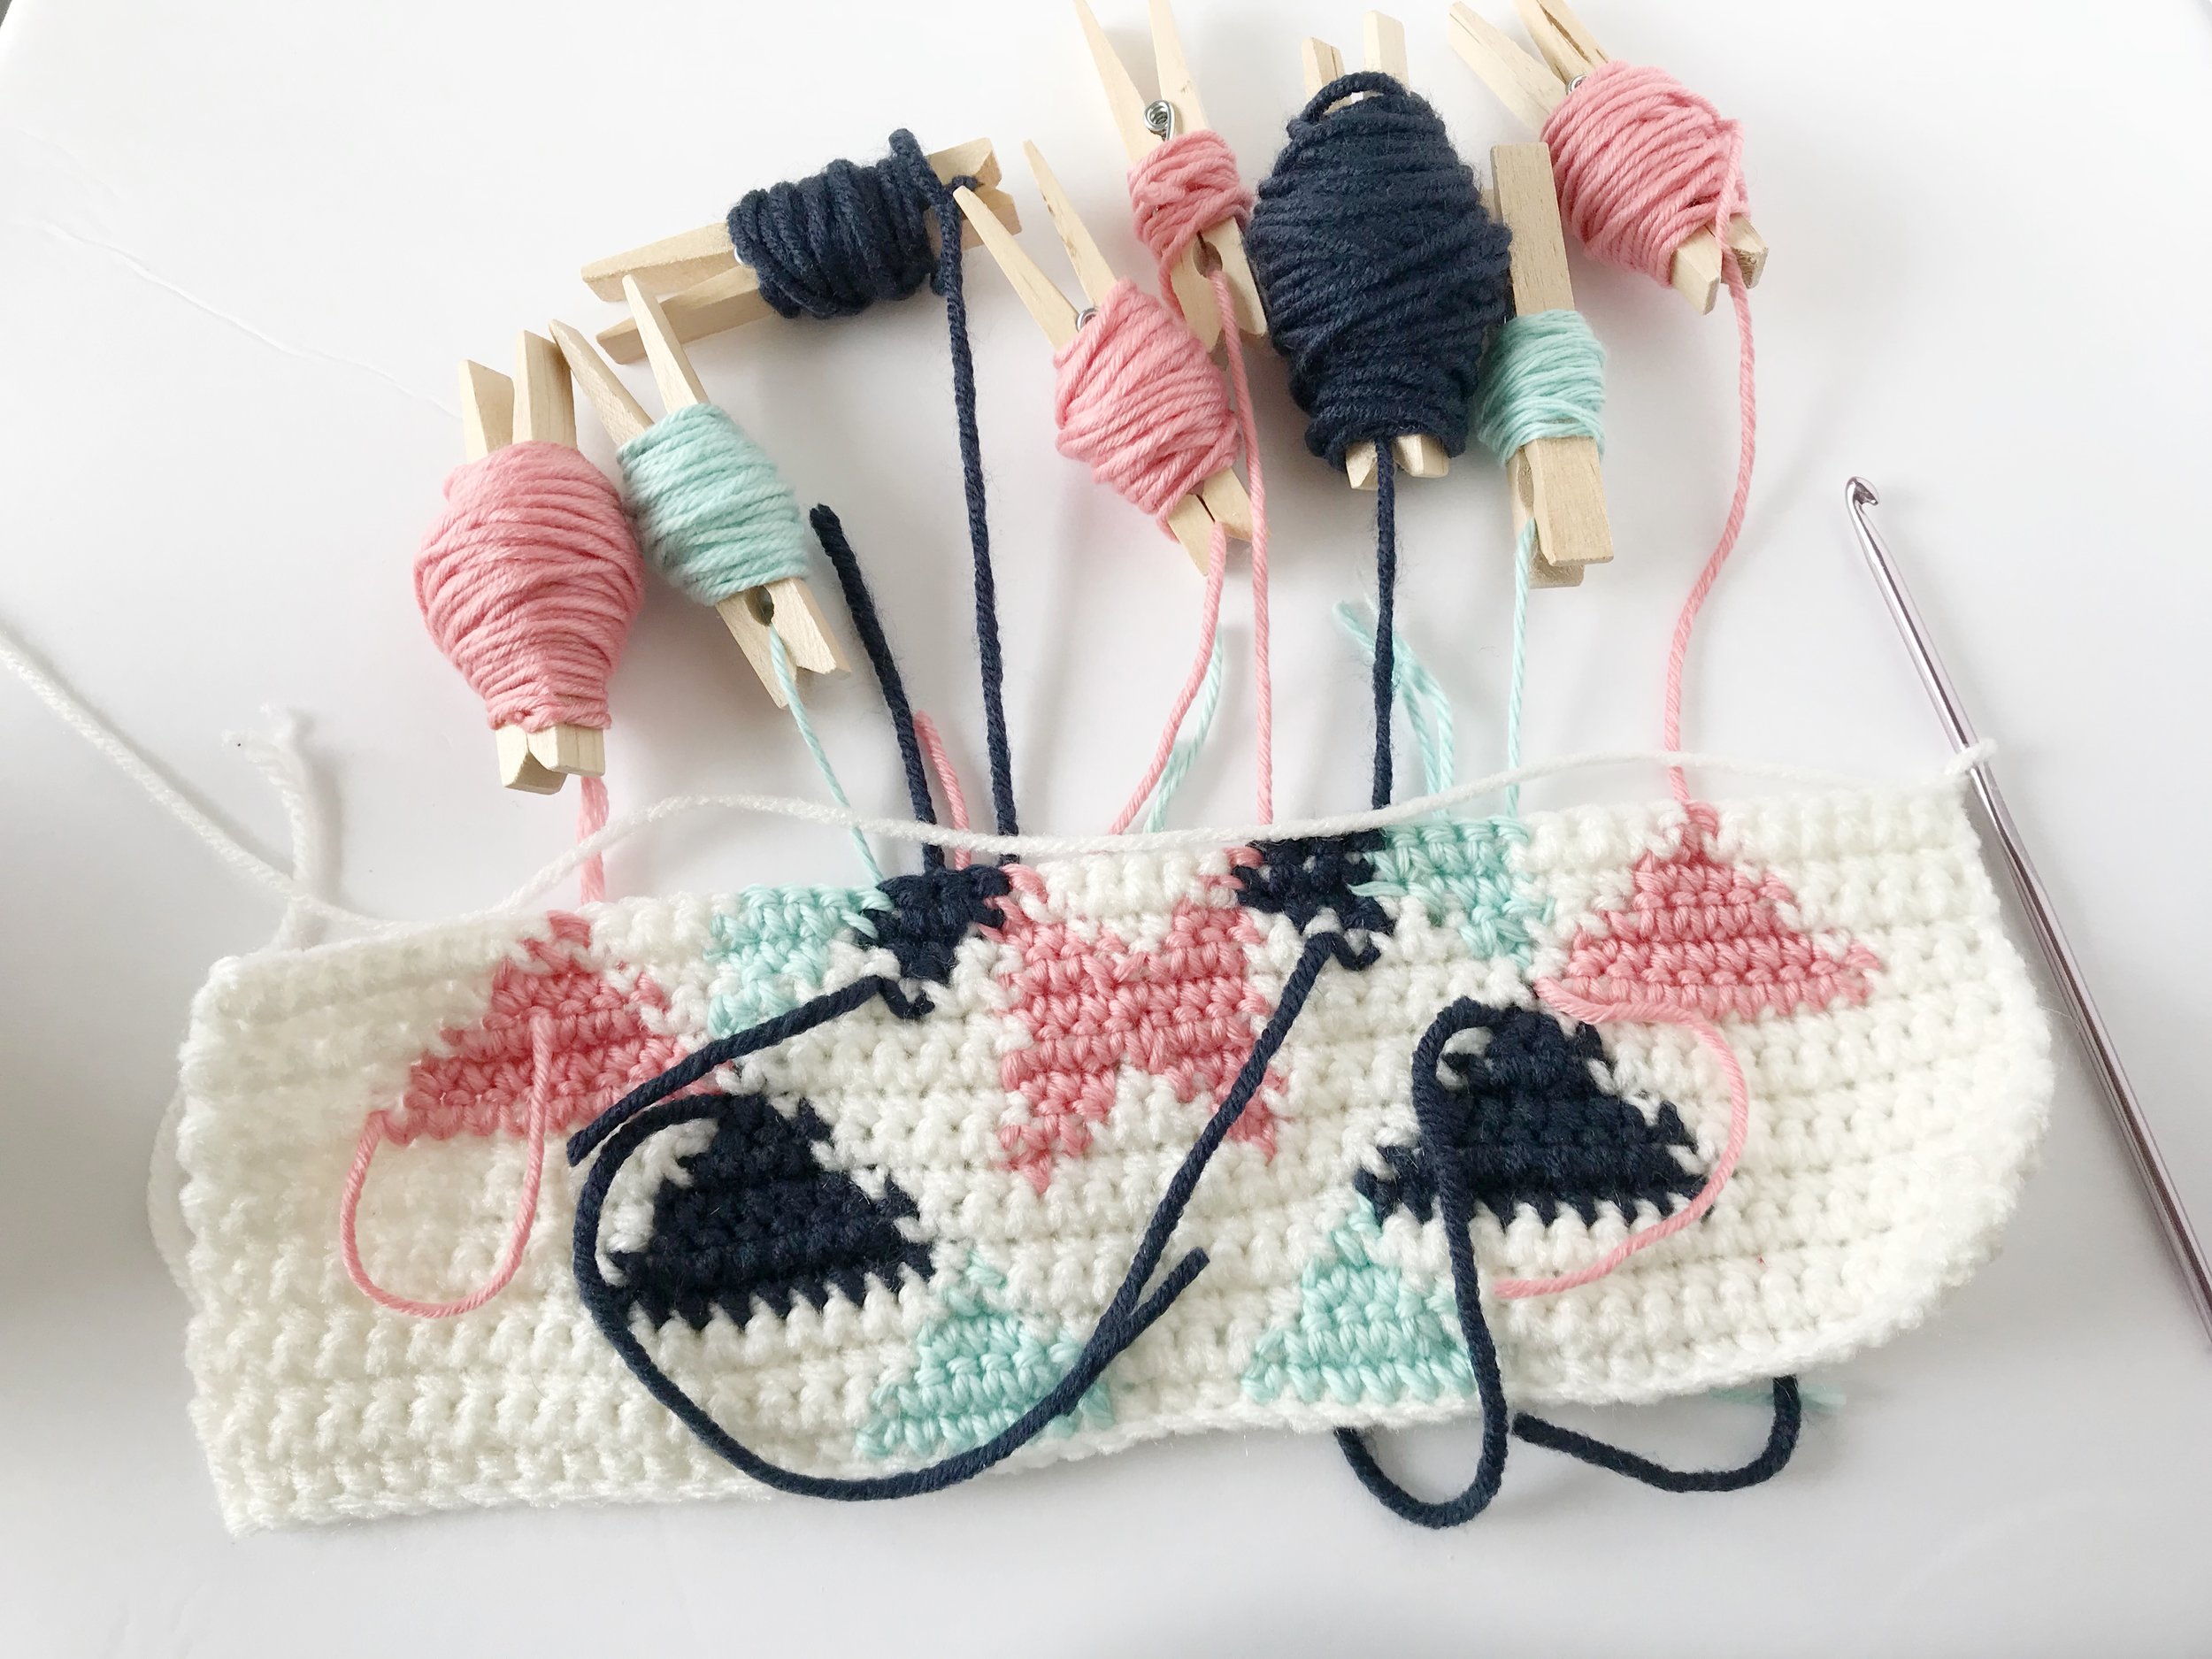
For the second version I decided to use a slightly different technique called intarsia crochet. It's a bit more complex because you have to create little bobbins for each colored section, but the results are so beautiful. Sometimes in tapestry crochet you can still see a few of the colors worked through, but with intarsia crochet you only work with one color at a time so the color changes are a bit more seamless. Here's a peek at the process of intarsia crochet.
Once the crochet panel was complete I knew that adding some faux leather was a must! I was a bit nervous to sew on top of my crochet panel, but it ended up not being as scary as I thought. I added a fabric backing so my crochet piece wouldn't get caught in my machine.
I love working with faux leather and have been using it a ton for my spring collection. When working with faux leather I highly recommend using upholstery thread, a leather needle and a walking foot, it will make things so much easier. I love the little faux leather corners so much! The back panel is all faux leather too.
When deciding on how to make the straps I knew that I wanted a simple and clean look. I decided to conquer another fear and try rivets. I seriously don't know what took me so long to try these because they are so simple to install! I picked up a leather punch, a rivet tool and some rivets and now I want to add them to all my bags! If you've never tried rivets before I highly recommend them and this would the perfect project to start with.
Look at all the rivet goodness! After creating the wristlet strap I knew I just had to make a cross body strap too because sometimes it's just nice to be able to carry hands free. Instructions for both strap styles has been included in the pattern. You will just need a bit longer piece of faux leather and a couple more swivel hooks and rivets.
Ready to make your own Clara Clutch? Head over to the shop to grab your pattern today.
Over the next week I'll be posting some tutorials here on the blog to help you construct your own Clara Clutch. I'll go over how to do tapestry crochet, intarsia crochet, basic pouch making, working with faux leather and how to install rivets. I can't wait!
If you make a Clara Clutch I would love to see it! Make sure to use #claraclutch on social media or tag @meghanmakesdo.


