The Calliope Coverup-Free Crochet Pattern
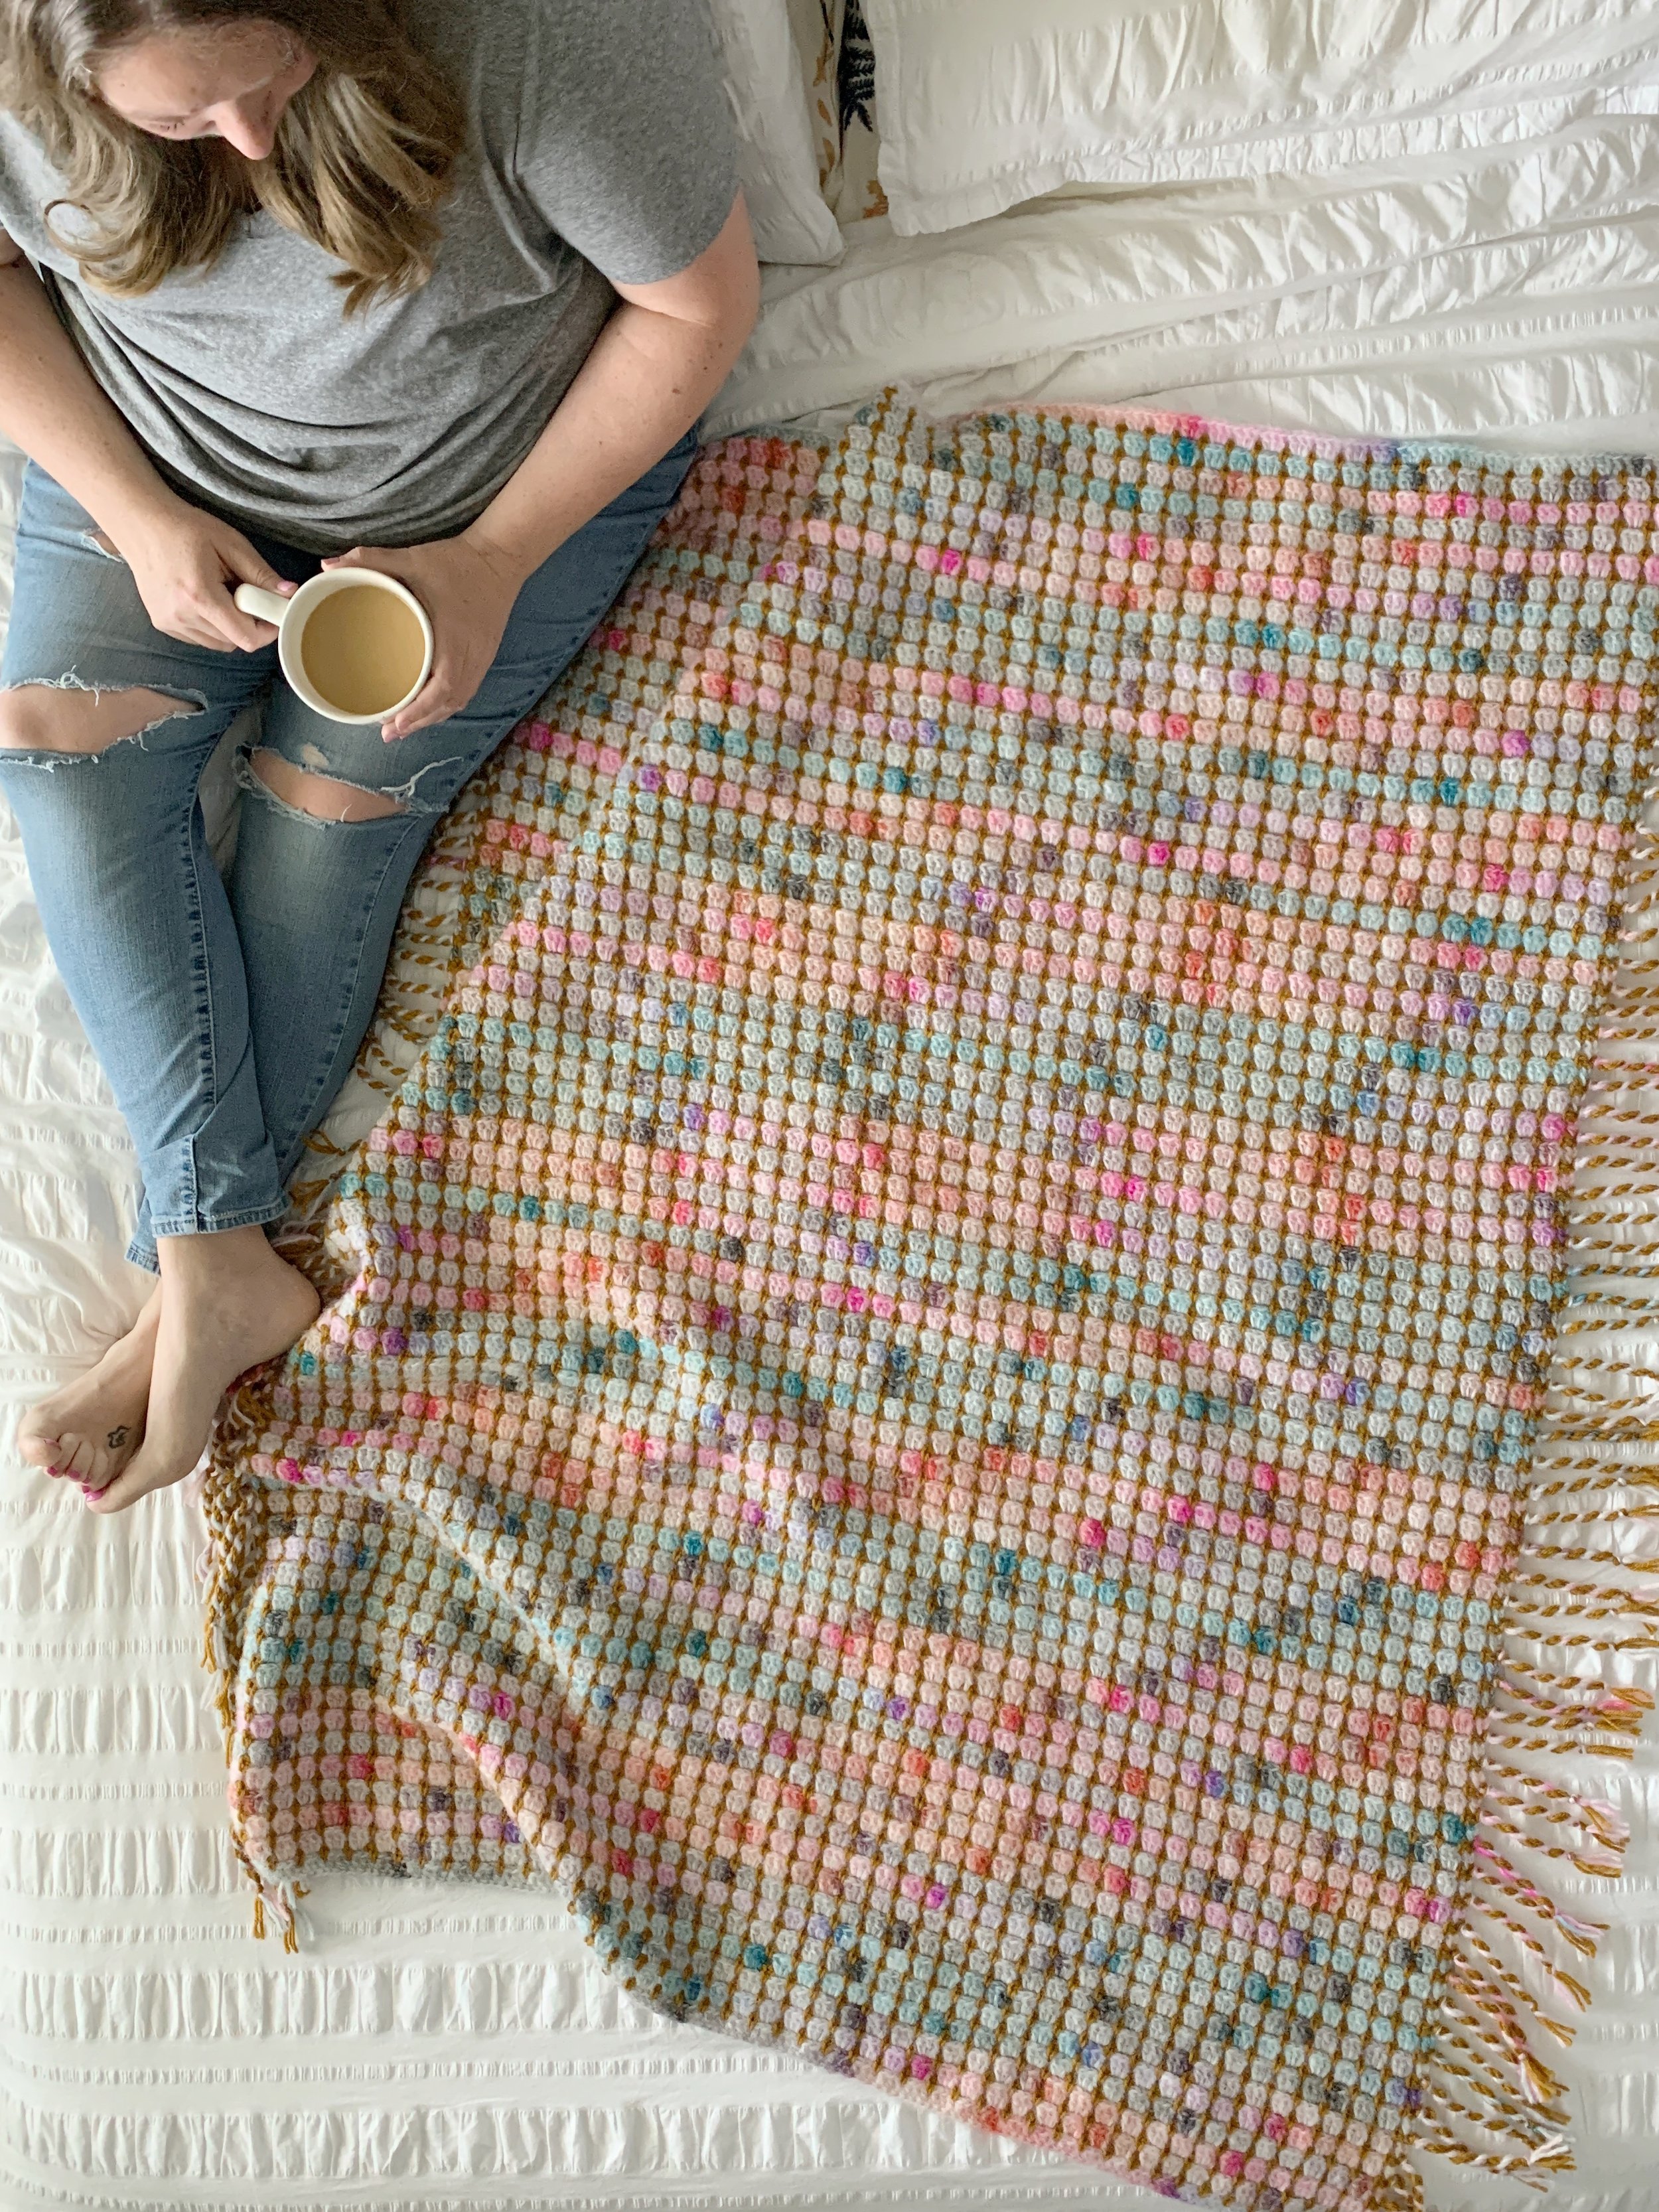
The Calliope Coverup crochet pattern is a super versatile piece that's all about comfy vibes with a touch of chic. It features an easy block mesh stitch, a flattering V-neckline, and a tie belt for that just-right fit. Wear it as a beach coverup or amp it up as a dress for those laid-back sunny days or breezy nights out. Find the free pattern below, get the PDF in my shop or grab it as a complete kit from Lion Brand Yarn.

Say hello to your new summer staple…The Calliope Cover Up! The weather is getting warmer and many sunny days are ahead. What better way to get ready for beach days and Summer fun than with a brand new cover up?
Crafted with the classic Lion Brand 24/7 cotton yarn, this pattern combines both comfort and durability, making it ideal for those sun-soaked days by the pool or lazy beach strolls. The Calliope is sure to become a staple in your Summer wardrobe.
The Calliope features a charming block mesh stitch, made from a two row repeat making it a quick and fun design to make. The V-neckline adds a flattering silhouette, while the tie belt cinches the waist for a customized fit that accentuates your curves. Made in just two pieces, you’ll have your new cover up made and ready to wear before you know it.
The best part about the Calliope is its versatility. While it's perfect for slipping over your swimsuit for a day at the beach, it can also effortlessly transition into an elegant dress for a sunset soirée or a casual brunch with friends. Just pop it over a body con dress, add a skinny belt and throw on your favorite sandals for an effortless Summer outfit.

The Calliope Coverup Crochet Pattern
Materials:
715-1625 yards (4-9 skeins) of Lion Brand 24/7 Cotton in the color Camel
Tapestry needle, scissors, tape measure, stitch markers
Abbreviations:
Ch(s)- chain(s)
St(s)- stitch(es)
sc- single crochet
sc3tog- single crochet three together
dc- double crochet
dc2tog- double crochet two together
sl st- slip stitch
sp- space
RS- right side
WS- wrong side
Notes:
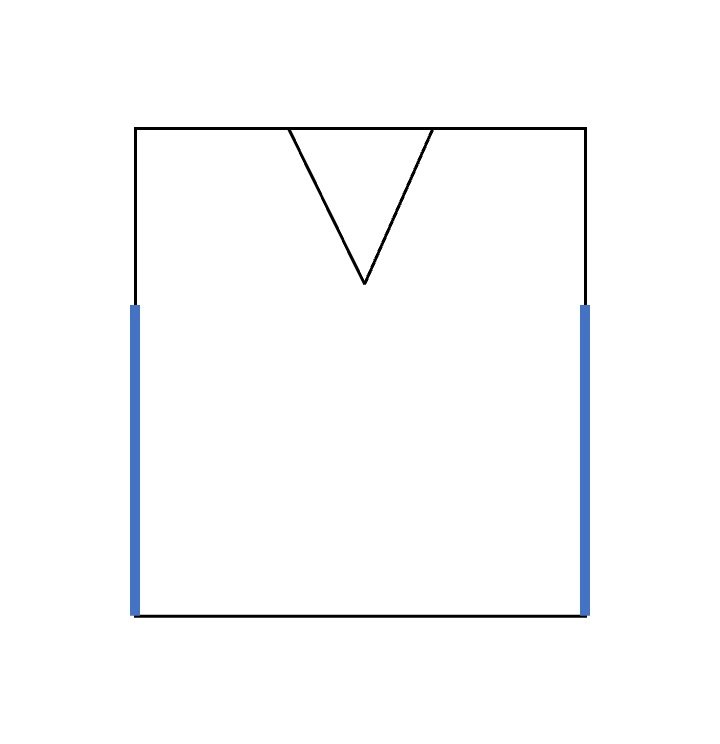
1. Coverup is made in two panels from the bottom up. The shoulders and sides are seamed and then an edging is added around the armholes and neckline. An optional belt/tie is then made and woven through the holes at the sides of the waist.
2. Ch 3 at beginning of rows counts as a stitch.
3. The pattern stitch is a multiple of 5+2.
4. Pattern is made with 5-9” of positive ease. Size up for a looser fit.
5. Model is wearing a size 2X and is 5’9”
Gauge:
16 sts X 7 rows = 4” X 4” in pattern stitch
(Ch 24 and use Rows 1-7 of back panel for gauge.)
Video Tutorial:
Size:
XS: fits bust 28-30” (approx. 715 yards/ 4 skeins)
S: fits bust 32-34” (approx. 825 yards/ 5 skeins)
M: fits bust 36-38” (approx. 950 yards/ 6 skeins)
L: fits bust 40-42” (approx. 1035 yards/ 6 skeins)
XL: fits bust 44-46” (approx. 1185 yards/ 7 skeins)
2X: fits bust 48-50” (approx. 1292 yards/ 7 skeins)
3X: fits bust 52-54” (approx. 1405 yards/ 8 skeins)
4X: fits bust 56-58” (approx. 1515 yards/ 9 skeins)
5X: fits bust 60-62” (approx. 1625 yards/ 9 skeins)

Pattern:
Back Panel:
Ch 69(79, 89, 99, 109, 119, 129, 139, 149)
Row 1: dc in 4th ch from hook, *ch 3, sk 3, dc 2, repeat from * across, turn. (67(77, 87, 97, 107, 117, 127, 137, 147)
Row 2: ch 3, 5dc into each ch-3 sp across, dc into top of ch 3, turn. (67(77, 87, 97, 107, 117, 127, 137, 147)
Row 3: ch 3, dc in next st, *ch 3, sk 3, dc 2, repeat from * across working last dc into the top of the ch 3, turn. (67(77, 87, 97, 107, 117, 127, 137, 147)
Repeat Rows 2 & 3, ending on a Row 2 repeat, for a total of 54(54, 54, 54, 56, 56, 56, 56, 56) rows.
Add or subtract rows here to lengthen or shorten your coverup.
Fasten off leaving a long tail for seaming.
Front Panel:
Work the same as Back Panel through Row 42.
Find the center group of 5dc, place a locking stitch marker in the center stitch.
We will now be splitting the front and working the top sections separately to create the V-neck.

Front Right Side:
Row 1: ch 3, dc in next st, ch 3, sk 3, *dc 2, ch 3, sk 3, repeat from * across until 3 sts remain before stitch marker, dc 1, dc2tog, turn. (32(37, 42, 47, 52, 57, 62, 67, 72)
Row 2: ch 3, 4dc into 1st ch-3 sp, 5dc into each ch-3 sp across, dc into top of ch 3, turn. (31(36, 41, 46, 51, 56, 61, 66, 71)
Row 3: ch 3, dc in next st, *ch 3, sk 3, dc 2, repeat from * across until 4 sts remain, ch 2, sk 2, dc2tog, turn. (30(35, 40, 45, 50, 55, 60, 65, 70)
Row 4: ch 3, 2dc into ch-2 sp, 5dc into each ch-3 sp across, dc into top of ch 3, turn. (29(34, 39, 44, 49, 54, 59, 64, 69)
Row 5: ch 3, dc in next st, *ch 3, sk 3, dc 2, repeat from * across until 2 sts remain, dc2tog, turn. (28(33, 38, 43, 48, 53, 58, 63, 68)
Row 6: ch 3, 5dc into each ch-3 sp across, dc into top of ch 3, turn. (27(32, 37, 42, 47, 52, 57, 62, 67)
Row 7: ch 3, dc in next st, ch 3, sk 3, *dc 2, ch 3, sk 3, repeat from * across until 2 sts remain, dc2tog, turn. (26(31, 36, 41, 46, 51, 56, 61, 66)
Rows 8-12: Repeat Rows 2-6. (22(27, 32, 37, 42, 47, 52, 57, 62)
XS-L ONLY
Fasten off leaving a long tail for seaming.
XL-5X ONLY
Row 13: ch 3, dc in next st, *ch 3, sk 3, dc 2, repeat from * across working last dc into the top of the ch 3, turn. (42, 47, 52, 57, 62)
Row 14: ch 3, 5dc into each ch-3 sp across, dc into top of ch 3, turn. (42, 47, 52, 57, 62)
Fasten off leaving a long tail for seaming.
Front Left Side:
With WS facing, attach yarn to Row 42 in st to the left of the stitch marker.
Row 1: ch 3, dc2tog, *ch 3, sk 3, dc 2, repeat from * across working last dc into the top of the ch 3, turn. (32(37, 42, 47, 52, 57, 62, 67, 72)
Row 2: ch 3(counts as 1st st), 5dc into each ch-3 sp across, until 1 ch-3 sp remains, 4dc into last ch-3 sp, dc into top of ch 3, turn. (31(36, 41, 46, 51, 56, 61, 66, 71)
Row 3: ch 5(counts as 1st st and ch 2), sk 3, dc 2, repeat from * across working last dc into the top of the ch 3, turn. (30(35, 40, 45, 50, 55, 60, 65, 70)
Row 4: ch 3, 5dc into each ch-3 sp across, 2dc into ch-5 sp, then dc into the 3rd ch of the ch 5, turn. (29(34, 39, 44, 49, 54, 59, 64, 69)
Row 5: ch 3, sk 1st st, dc 2, *ch 3, sk 3, dc 2, repeat from * across, turn. (28(33, 38, 43, 48, 53, 58, 63, 68)
Row 6: ch 3, 5dc into each ch-3 sp across, dc into top of ch 3, turn. (27(32, 37, 42, 47, 52, 57, 62, 67)
Row 7: ch 6(counts as 1st st and ch 3), sk 3, *dc 2, ch 3, sk 3, repeat from * across until 2 sts remain, dc 2 working last dc into the top of the ch 3, turn. (26(31, 36, 41, 46, 51, 56, 61, 66)
Rows 8-12: Repeat Rows 2-6. (22(27, 32, 37, 42, 47, 52, 57, 62)
XS-L ONLY
Fasten off.
XL-5X ONLY
Row 13: ch 3, dc in next st, *ch 3, sk 3, dc 2, repeat from * across working last dc into the top of the ch 3, turn. (42, 47, 52, 57, 62)
Row 14: ch 3, 5dc into each ch-3 sp across, dc into top of ch 3, turn. (42, 47, 52, 57, 62)
Fasten off.
Seaming:
Lay Back Panel and Front Panel together at the shoulders with RS facing up. Using your preferred seaming method attach front panel to back panel at shoulders starting from the outside edges and working in towards the center.

Fold cover up at shoulders so front and back panels are laying flat with WS together.
Measure 7(7.5, 8, 8.5, 9, 9.5, 10, 10.5, 10.5) inches down from the shoulders to mark the opening for the armholes. Place a stitch marker through both panels at that point. Repeat on the other side. Seam the sides from the bottom up to the stitch marker on both sides.
Neckline Edging:
Attach yarn to the edge of the neckline at the left shoulder seam.
Ch 1, sc in same spot as join, then sc evenly down the left side of the neckline. Sc3tog over the three stitches that are in the point of the v, then sc evenly up the right side of the neckline and in each st across the back. Join to the first stitch and weave in ends. Make sure to have the same number of stitches on either side of the neckline.
Armhole Edging:
Attach yarn to the edge of the armhole at the underarm seam.
Ch 1, sc in same spot as join, then sc evenly up the armhole to the shoulder seam and back down to the underarm seam making sure to work the same amount of stitches on either side. Join to first st and weave in ends.
Repeat on other armhole.
Belt: (optional)
To create a belt start with a slip knot on your hook.
Place the tail end over the hook, yo and pull through both loops on the hook. There will be two vertical loops next to the loop on the hook. *Insert your hook into the right loop, yo and pull through both loops on hook, repeat from * until belt measures 2 times your waist circumference.


Fasten off and weave in ends.
Steam block if needed.

Now go enjoy your brand new coverup!
As always you can find a digital PDF version in my shop, Etsy and Ravelry. Or grab the complete kit from Lion Brand Yarn.
Happy Crocheting,
Meghan