
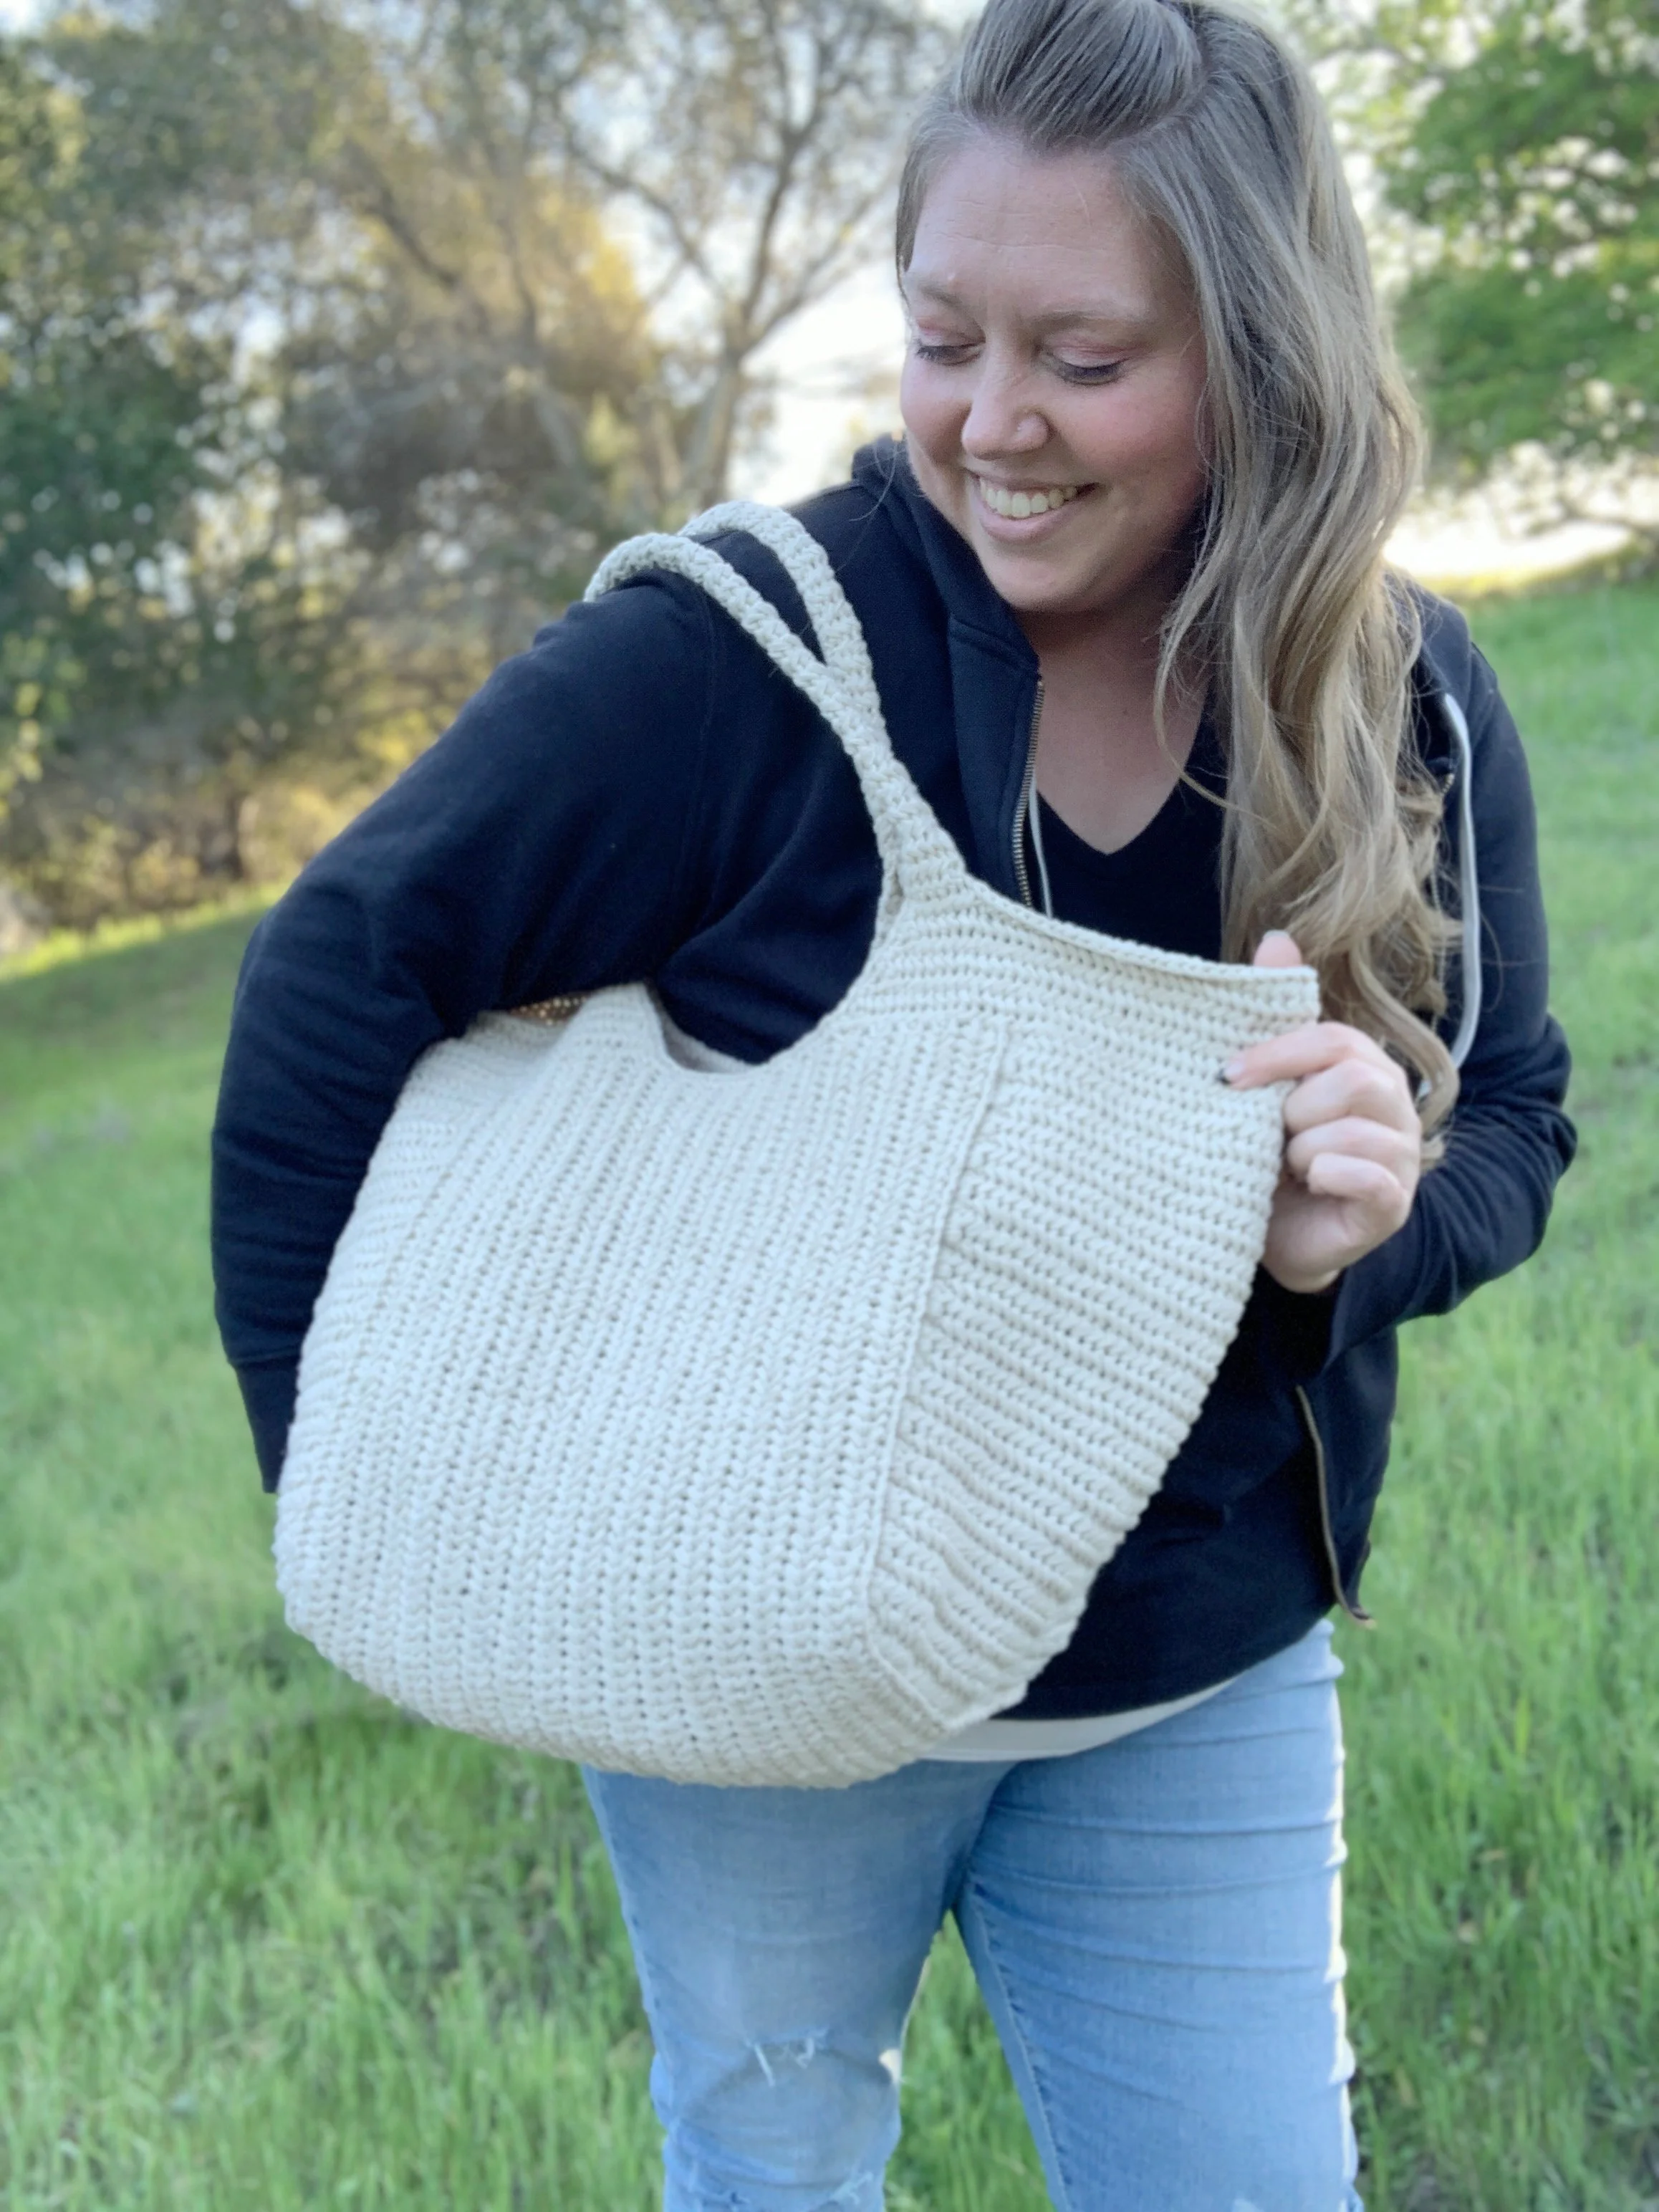
The Truitt Tote- Free Crochet Pattern
The Truitt Tote is sure to become your go-to bag for everything. Great for trips to the beach, farmer's market or as a storage basket around the home. The Truitt features the herringbone single crochet stitch, a unique construction and sturdy handles. Find the free pattern below, purchase a PDF version in my shop , or grab the kit from Lion Brand Yarn.

Have you ever fallen in love with a stitch before? I am smitten with the herringbone single crochet stitch and knew I had to design something fun and unique with this beautiful stitch. After the success of my Marlowe Tote last year I knew that the combination of the herringbone stitch and Lion Brand’s Rewind yarn would make another stunning tote bag.
I’m thrilled to be bringing you The Truitt Tote! This beautiful bag features a unique construction and uses the deceptively easy herringbone stitch. If you haven’t tried this stitch yet then now is the perfect time to give it a go. I’ve included a photo tutorial for the stitch and a complete video tutorial so you can see exactly how to make and assemble your Truitt Tote.
This giant tote is square shaped when open which makes it perfect for a day at the beach or as use as a storage bin at home. Plus the Rewind yarn comes in so many beautiful colors and since you only need 4 skeins you can make one in every color!

The Truitt Tote Crochet Pattern
Materials:
815 yards (4 skeins) of Lion Brand Rewind in the color Elm
Scissors
Abbreviations:
ch(s)- chain(s)
st(s)- stitch(es)
sc- single crochet
rsc- reverse single crochet
hsc- herringbone single crochet
rhsc- reverse herringbone single crochet
RS- right side
WS- wrong side
yo- yarn over
Gauge:
18 sts and 12 rows in herringbone stitch= 4” square.
Notes:
1.Pattern is worked in 3 pieces and then seamed together. The top section and straps are added directly to the top of the bag.
2.Ch(s) at beginning of rows do(es) not count as a stitch.
Size:
one size
Finished tote will measure approx. 14”H X 22”W X 10.5”D
Video Tutorial:
Special Stitches:
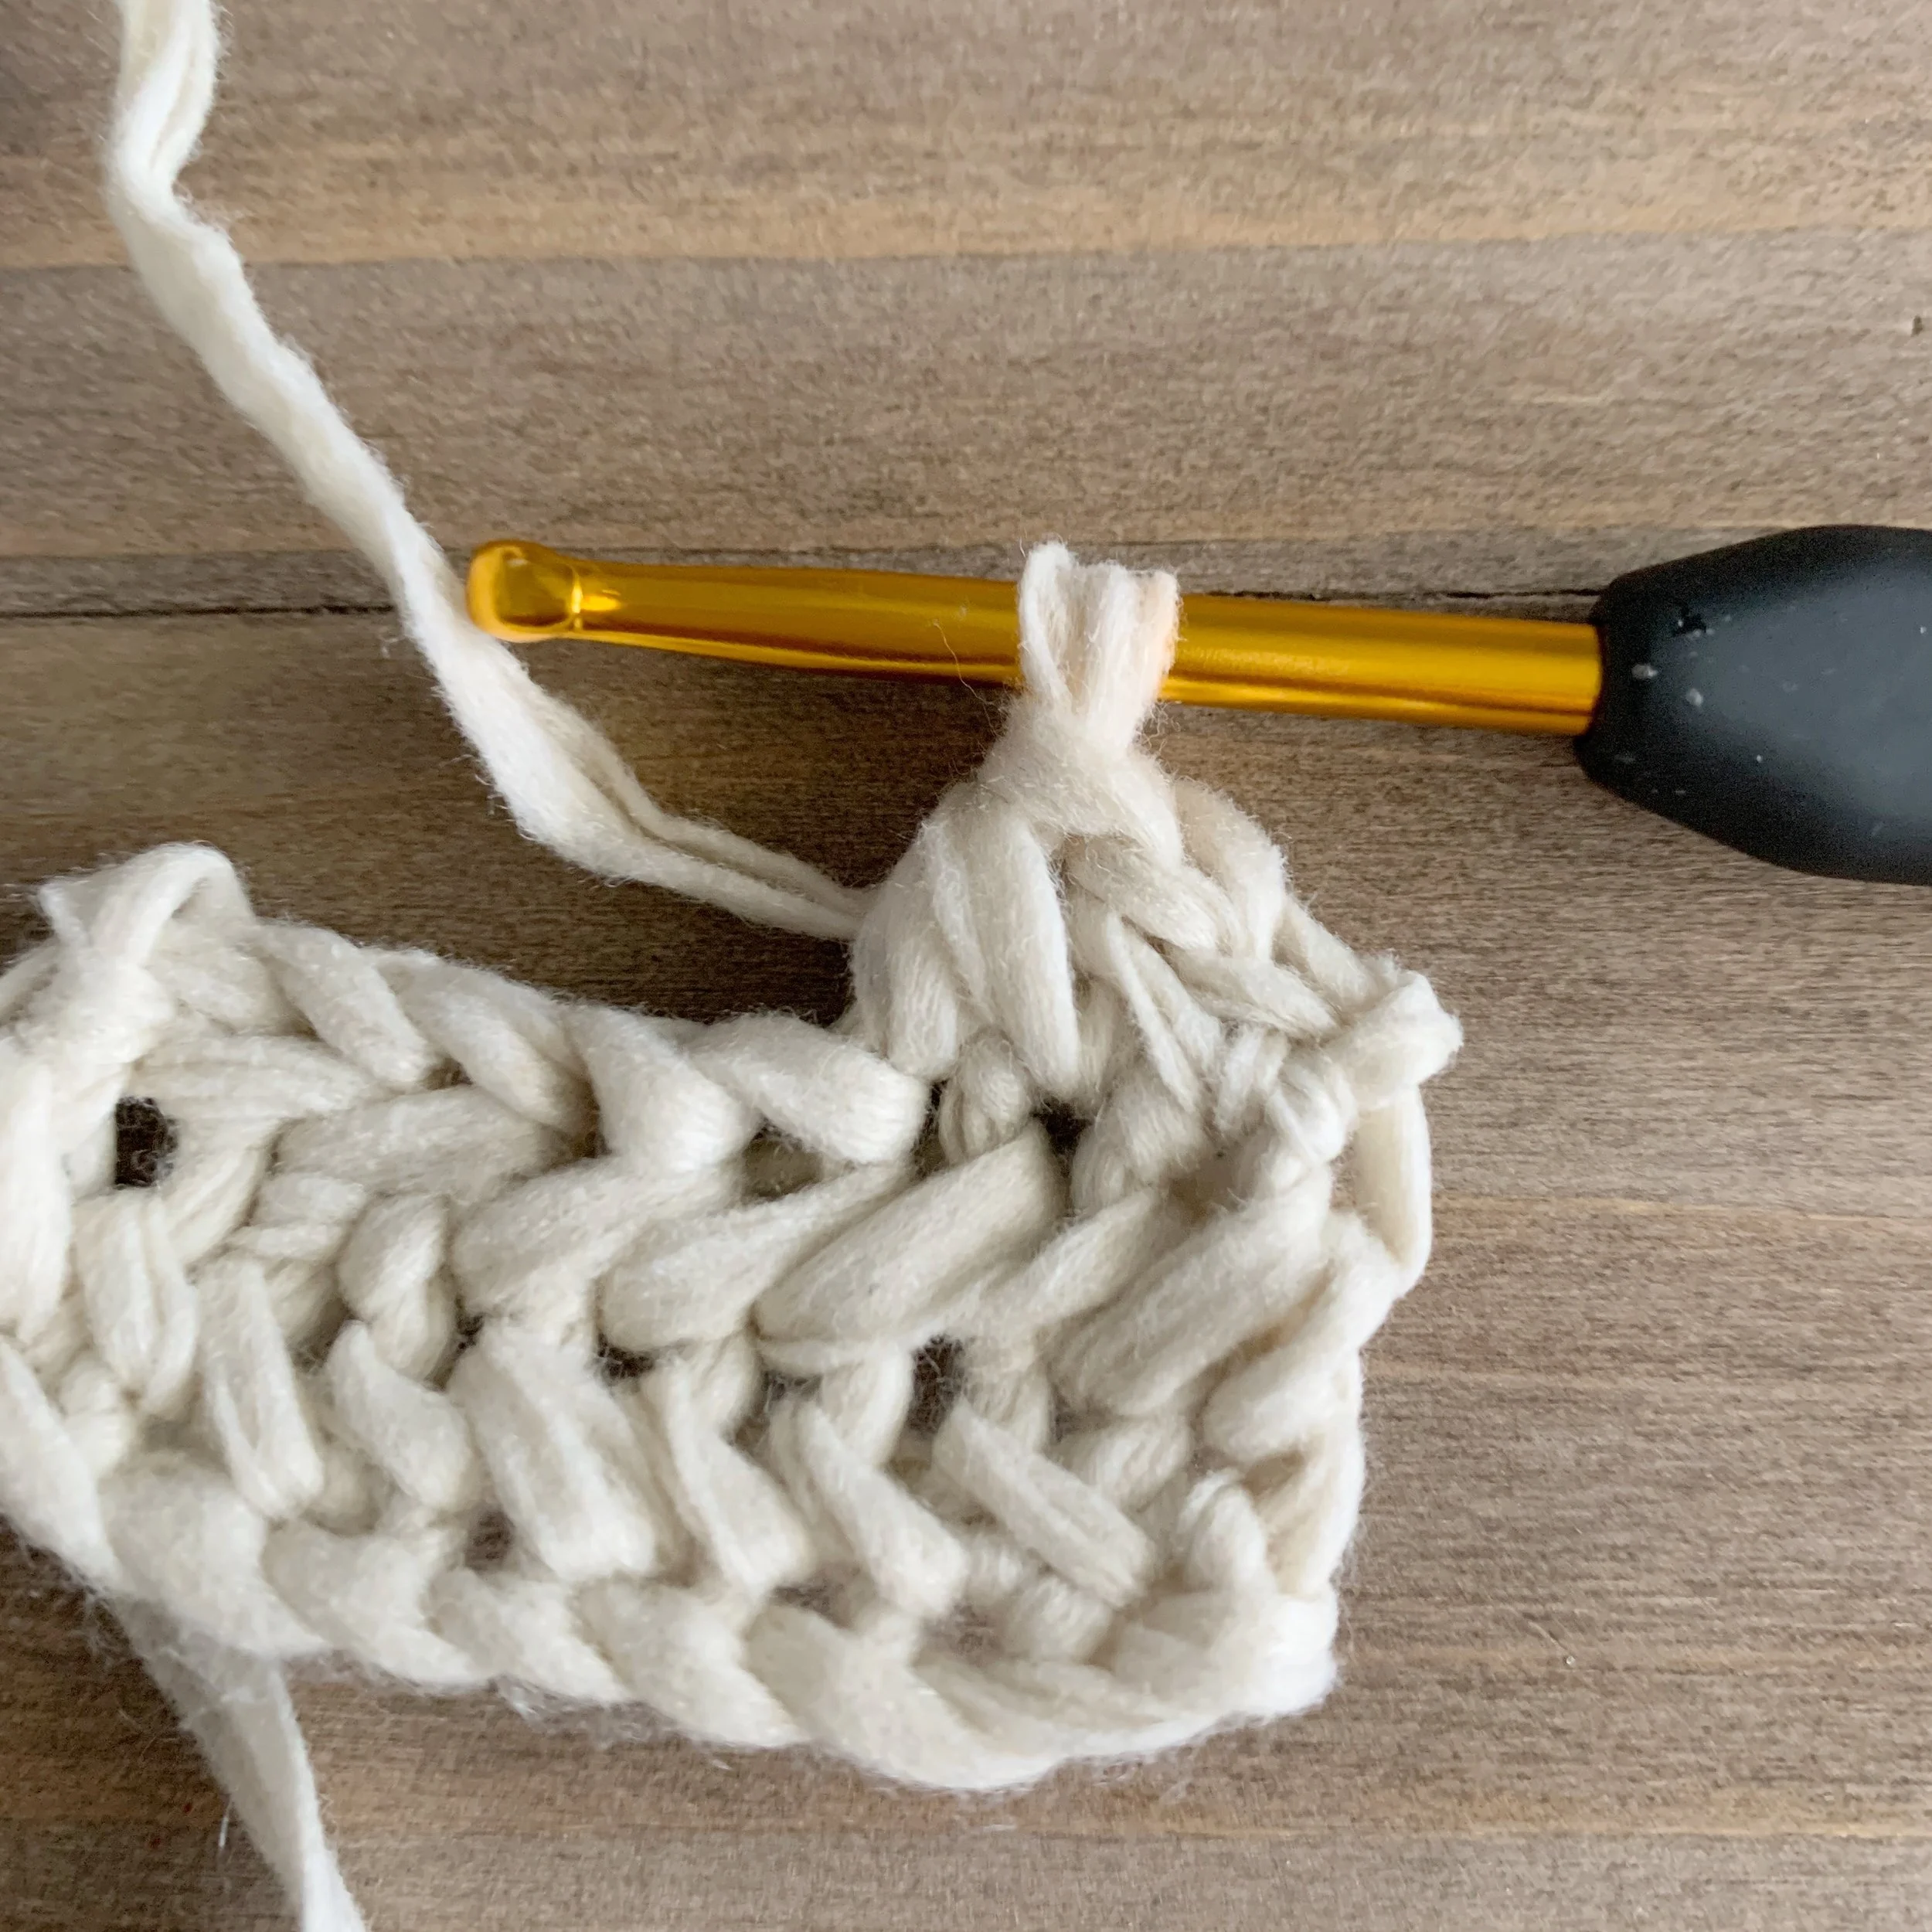
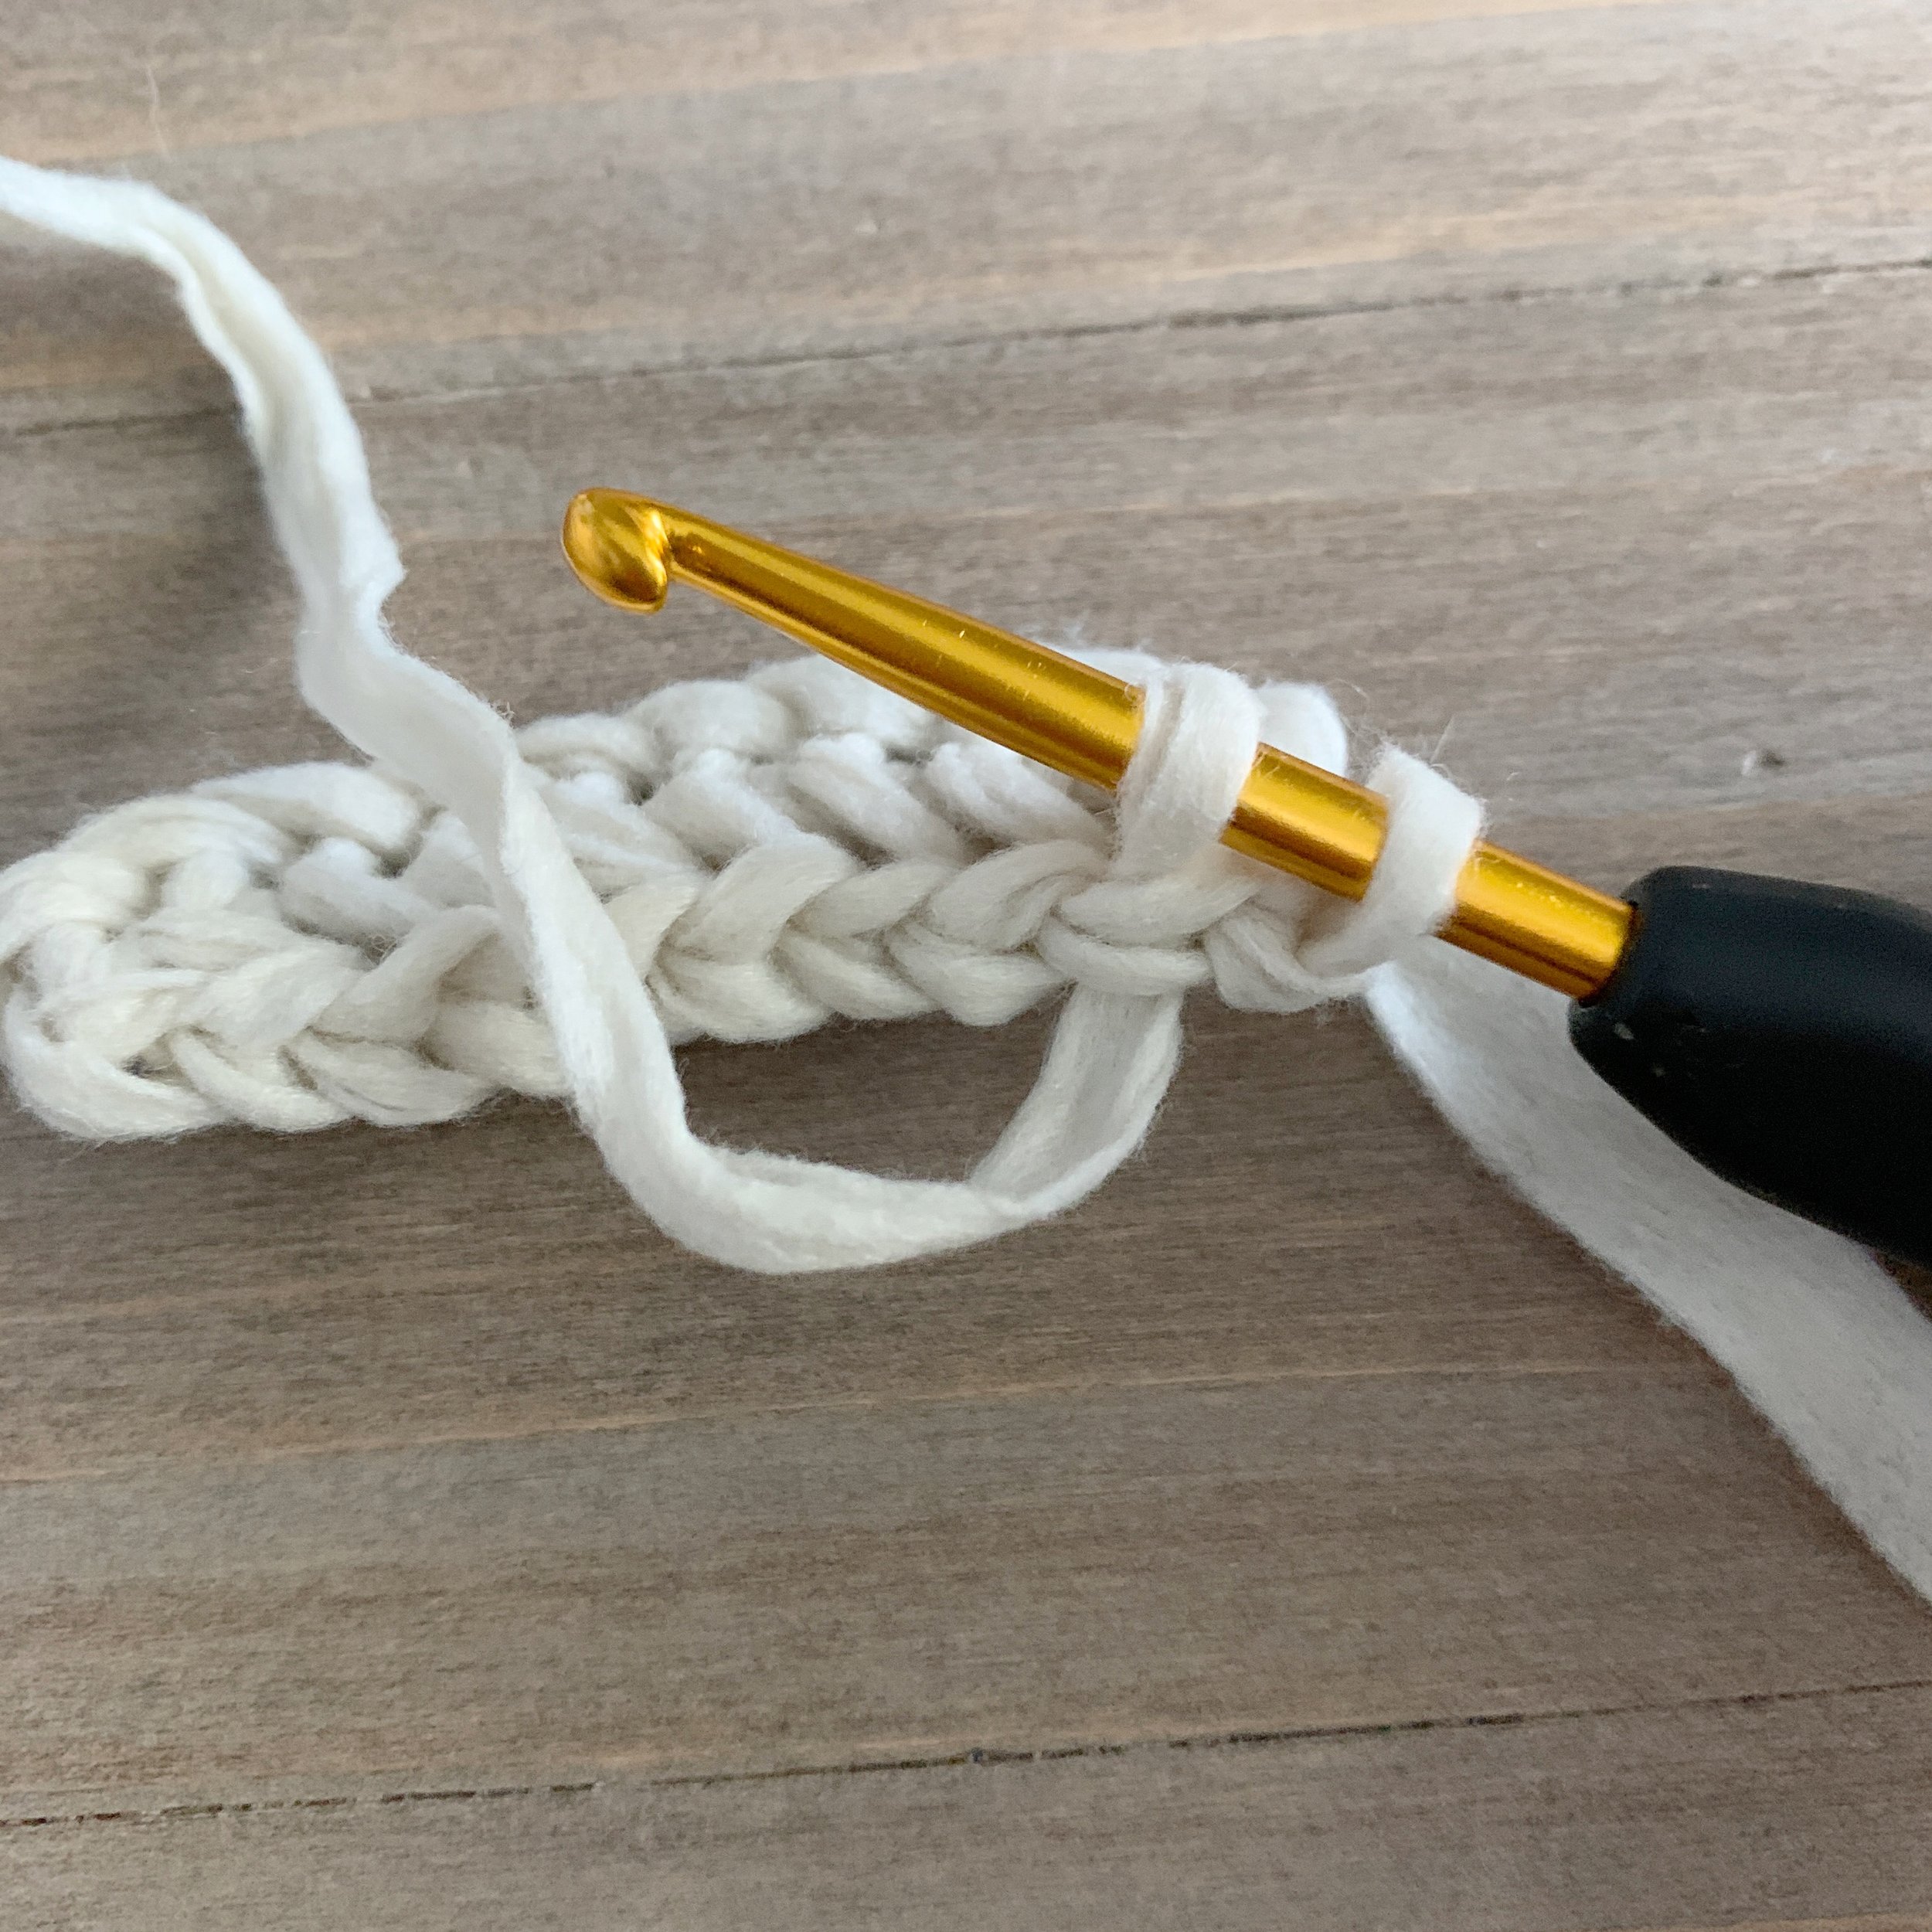
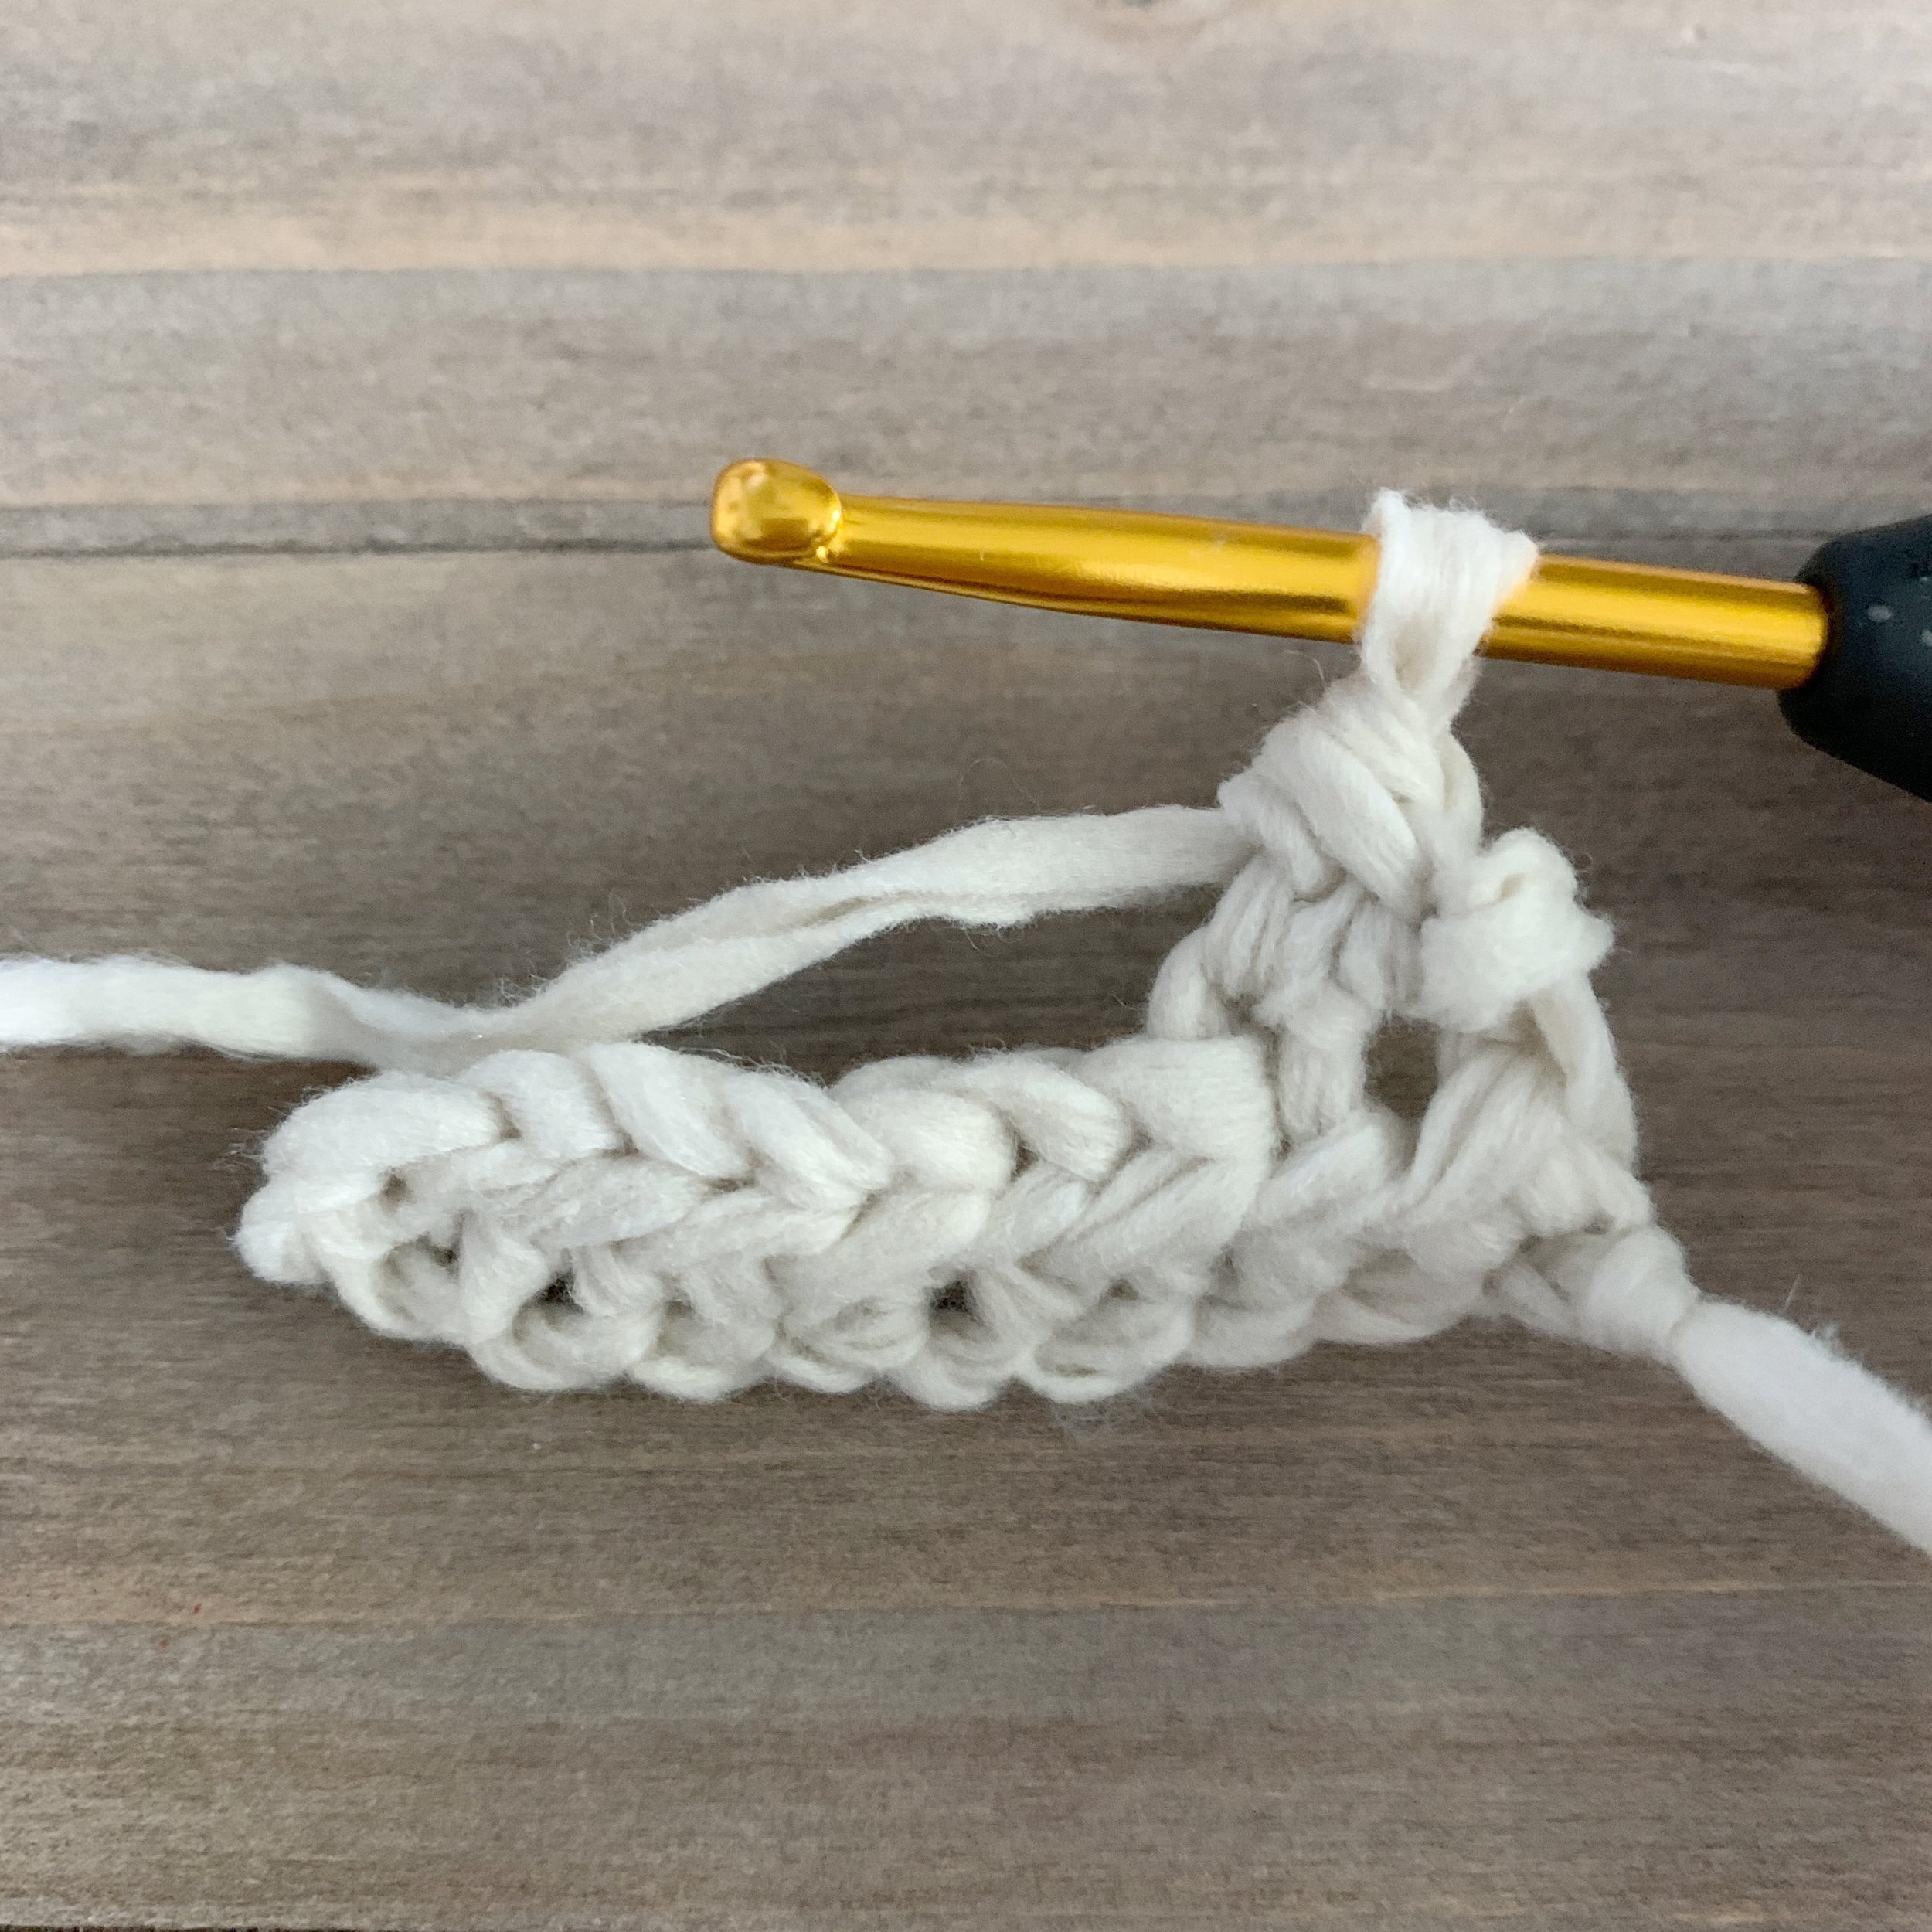
Herringbone single crochet (hsc): insert hook into left post of previous stitch, from right to left, then insert hook into next stitch. Yo and draw up a loop, yo and draw through all 3 loops on hook.


Reverse single crochet (rsc): with yarn in front, insert hook from back to front through the indicated stitch, yo and draw up a loop, yo and draw through both loops on hook.


Reverse herringbone single crochet (rhsc): with yarn in front, insert hook into left post of previous stitch, from right to left, on the RS of the work, then insert hook into next stitch from back to front. Yo and draw up a loop, yo and draw through all 3 loops on hook.


Pattern:
Side Panel: (make two)
Ch 49
Row 1(RS): sc in 2nd ch from hook, hsc in each ch across, ch 1, turn. (48)
Row 2(WS): rsc in 1st st, rhsc in each st across, ch 1, turn. (48)
Row 3: sc in 1st st, hsc in each st across, ch 1, turn. (48)
Rows 4-32: repeat Rows 2 & 3 ending on a Row 2 repeat. (48)
Fasten off.
With RS facing up, join yarn to the side of the 1st row and sc 48 sts evenly along the row edge. Repeat on the second side. Do this for both side panels. This will create a neat edge for seaming to the center panel.
Fasten off and weave in all ends.
Center Panel: (make one)
Ch 145
Row 1(RS): sc in 2nd ch from hook, hsc in each ch across, ch 1, turn. (144)
Row 2(WS): rsc in 1st st, rhsc in each st across, ch 1, turn. (144)
Row 3: sc in 1st st, hsc in each st across, ch 1, turn. (144)
Rows 4-32: repeat Rows 2 & 3 ending on a Row 2 repeat. (144)
Fasten off and weave in all ends.
Seaming:
Start by placing stitch markers on both long sides of the center panel, 48 sts in from the short edges. You will be sewing the center panel to the sides so that it slightly overlaps on top. Each side will use 48 sts from the center panel. Make sure RS is facing up and the beginning rows of the side panels are in line with the top of the center panel.

Using a long piece of yarn and a tapestry needle, start at the top edge of both the side piece and the center panel piece,


*bring your yarn up from the back of the side panel through the first st and from back to front of the 1st st of the center panel.


Then sew from the front to back through the next st on the center panel and the next st on the side panel. Repeat from * going back and forth between the panels until you have seamed the center panel to the side panel all the way round. Then repeat this same process for the second side.
This is what your tote will look like after seaming.


Top Sides:
Attach yarn to the top edge of the back center panel with WS facing you, 10 rows from the left seam.
Row 1(WS): ch 1, rsc in same st as join, rhsc 16 along the center panel edge and into the seam, rhsc in each st across the side panel, rhsc 16 along the seam and the next center panel seam, turn. (80)
Row 2(RS): ch 1, sk 1st st, sc in next, hsc in each st across until 2 sts remain, sk 1 st, hsc in last, turn. (78)
Row 3: ch 1, sk 1st st, rsc in next, rhsc in each st across until 2 sts remain, sk 1 st, rhsc in last, turn. (76)
Rows 4-6: Repeat Rows 2 & 3. (70)
Row 7: rsc in 1st st, rhsc in each st around. (70)
Fasten off and weave in ends.
Repeat Top Sides instructions for second side of tote.


Straps:
Lay your tote down RS up. Starting at the top right hand side join yarn to the edge of the last st of the top side, ch 1.


Row 1(RS): sc in same st as join and evenly along the top side edge, across the center panel and up the next top side edge, ch 1, sc in edge of st just made, hsc in next 6 sts along the top side, turn. (40 along edges, 7 for first row of strap)
Row 2(WS): ch 1, rsc in 1st st, rhsc in each st across, turn. (7)
Row 3: ch 1, sc in 1st st, hsc in each st across, turn. (7)

Rows 4-52: Repeat Rows 2 & 3 ending on a Row 2 repeat. (7)
Fasten off and leave a long tail for sewing.
Sew end of strap to the right top side where you started Row 1, using the whip stitch. Then using a long piece of yarn, sew the strap edges together starting and ending about 4 rows up from the top of the tote.


Repeat on opposite side of tote. Weave in any remaining ends and enjoy!

I hope you love your new Truitt Tote! If you make one I’d love to see it. Make sure to tag me @meghanmakesdo and use #thetruitttote on social media.
As always you can find a PDF version of this pattern in my shop, Etsy or Ravelry. Or grab the complete kit from Lion Brand Yarn.
Happy Crocheting,
Meghan

