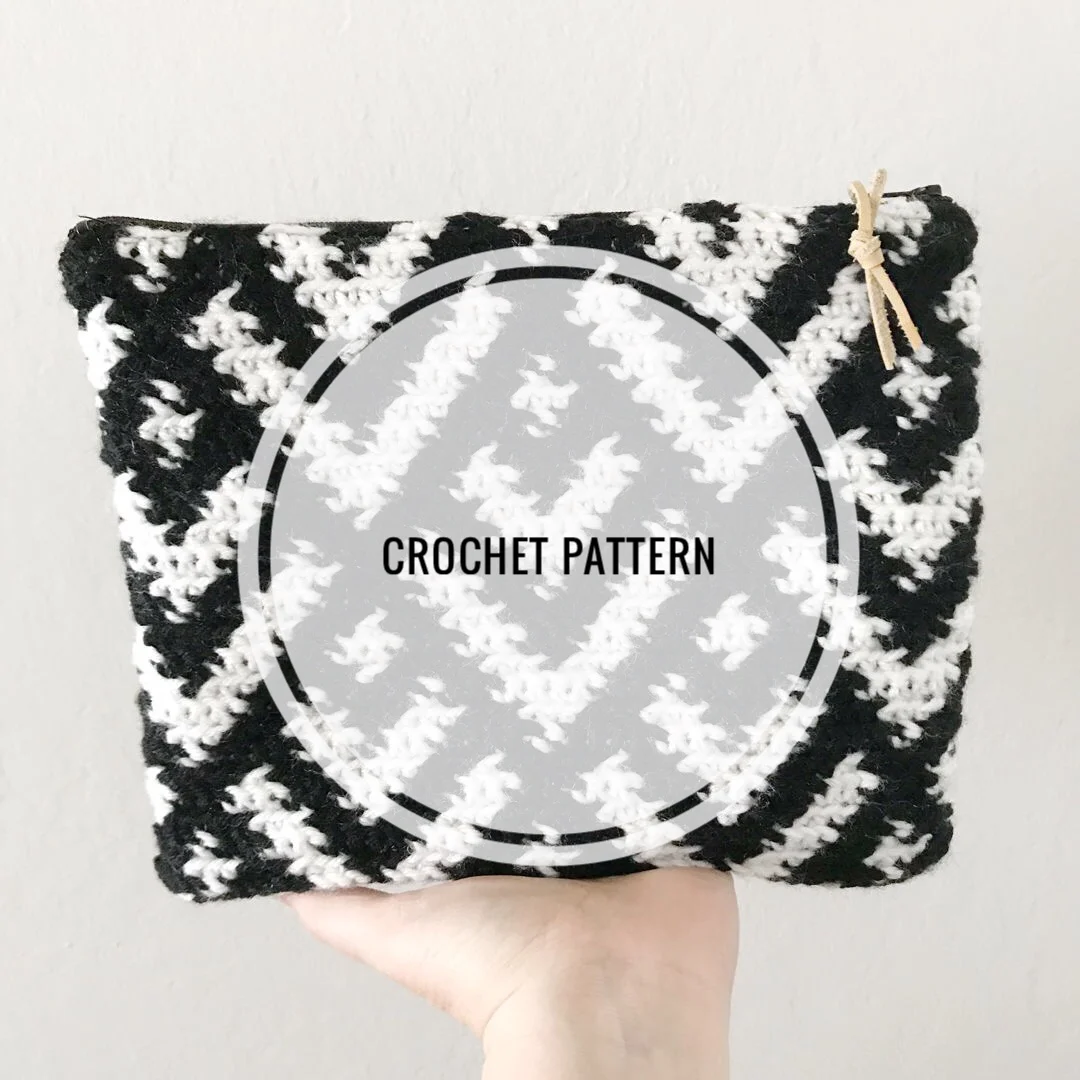
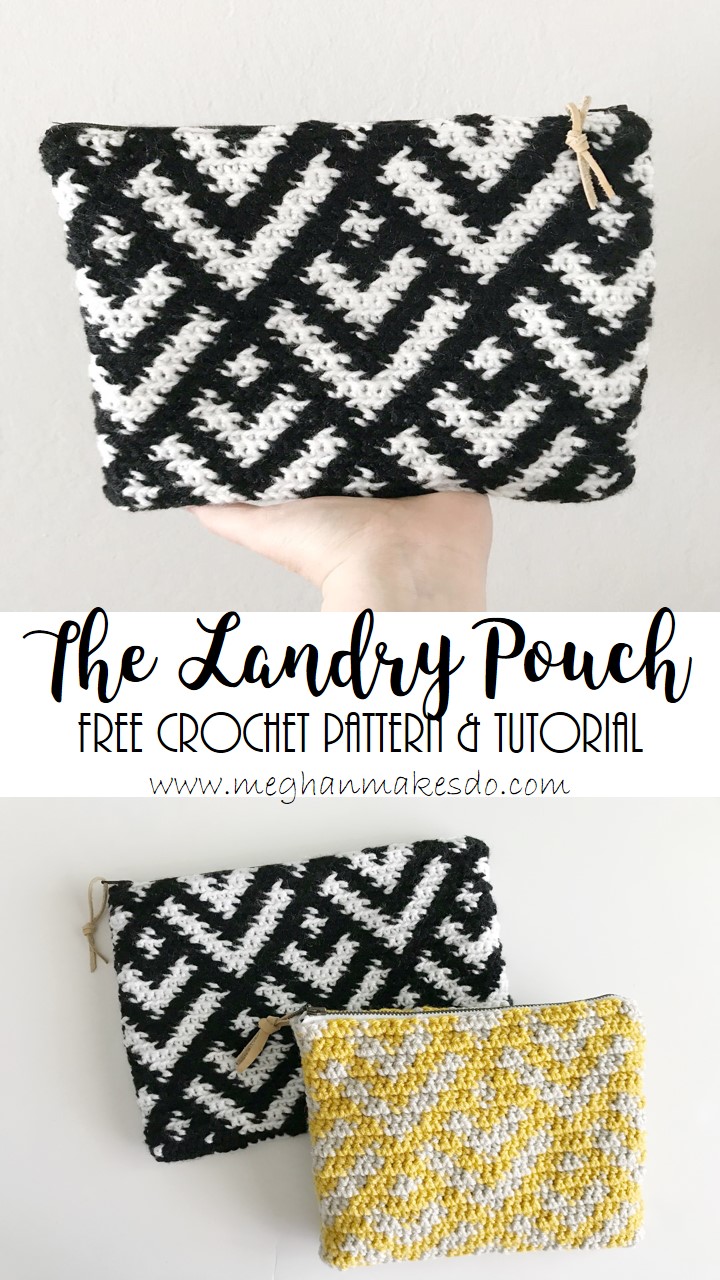
The Landry Pouch-Free Crochet Pattern
You may have seen my latest blog post about How to Design Your Own Tapestry Crochet where I showed you how to create a beautiful tapestry crochet panel and today I'm going to show you how to turn that panel into a fun little zippered pouch.
***This pattern is also available in my shop as an AD-FREE printable PDF, which you can find HERE. Or on Ravelry HERE. It is 18 full color pages and includes the graphs and written instructions for creating your own Landry Pouch in two sizes.***
Here is what you will need:
150 yards of worsted weight yarn in two colors (I used Vanna's Choice in Black and White for the large and Mustard and Linen for the small. I also recommend Lion Brand 24/7 cotton)
Size G(4.25mm) Crochet Hook
Tapestry Needle
10-inch zipper (large) & 8-inch zipper (small)
1/4 yard of quilting cotton for the lining (optional)
interfacing (optional) I used Pellon 987F fusible fleece
sewing machine
pins
sewing needle
thread
Notes:
1. This pattern uses the tapestry crochet technique. If you are unfamiliar with this technique you can find a in depth tutorial here.
2. The large pouch was made by crocheting in the BLO for all odd rows and FLO for all even rows.
3. The small pouch was made by crocheting in both loops through out the entire piece.
4. The pouch can be sewn together by hand or machine, instructions for both are included.
5. Lining is optional.
Gauge: 15 stitches and 17 rows = 4" X 4" square in tapestry crochet
Finished Size: Large is approx. 8" X 10" Small is approx. 7" X 8.5"
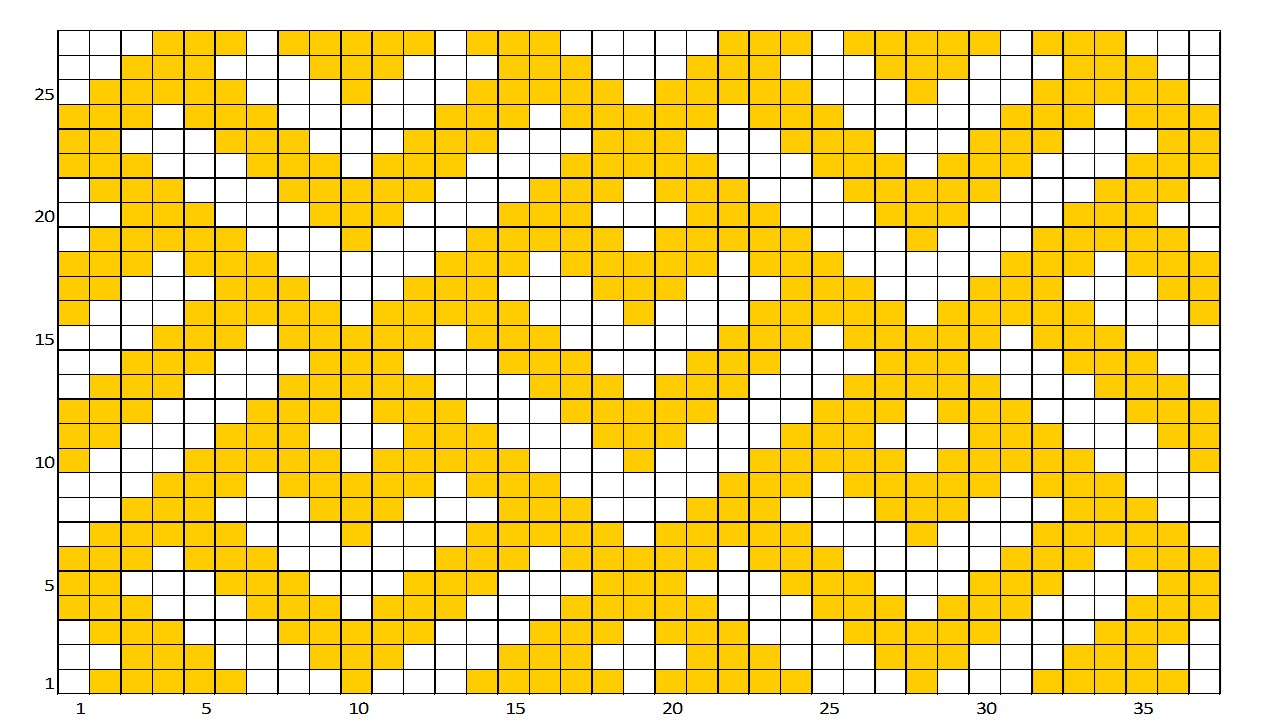
Pattern
Large: W(white) B(black) using all single crochet. Make two.
With black ch 44
Row 1: BLO sc 1W, 5B, 1W, 3B, 5W, 3B, 1W, 5B, 1W, 3B, 5W, 3B, 1W, 5B, 1W changing to black in last stitch.
Row 2: FLO sc 3B, 1W, 5B, 3W, 1B, 3W, 5B, 1W, 5B, 3W, 1B, 3W, 5B, 1W, 3B
Row 3: BLO sc 2B, 3W, 3B, 3W, 3B, 3W, 3B, 3W, 3B, 3W, 3B, 3W, 3B, 3W, 2B
Row 4: FLO sc 3B, 1W, 3B, 3W, 5B, 3W, 3B, 1W, 3B, 3W, 5B, 3W, 3B, 1W, 3B changing to white in the last stitch.
Row 5: BLO sc 1W, 5B, 3W, 3B, 1W, 3B, 3W, 5B, 3W, 3B, 1W, 3B, 3W, 5B,1W
Row 6: FLO sc 2W, 3B, 3W, 3B, 3W, 3B, 3W, 3B, 3W, 3B, 3W, 3B, 3W, 3B, 2W
Row 7: BLO sc 1W, 5B, 1W, 3B, 5W, 3B, 1W, 5B, 1W, 3B, 5W, 3B, 1W, 5B, 1W changing to black in the last stitch.
Row 8: FLO sc 3B, 1W, 5B, 3W, 1B, 3W, 5B, 1W, 5B, 3W, 1B, 3W, 5B, 1W, 3B
Row 9: BLO sc 2B, 3W, 3B, 3W, 3B, 3W, 3B, 3W, 3B, 3W, 3B, 3W, 3B, 3W, 2B
Row 10: FLO sc 1B, 5W, 3B, 1W, 5B, 1W, 3B, 5W, 3B, 1W, 5B, 1W, 3B, 5W, 1B changing to white in the last stitch.
Row 11: BLO sc 3W, 1B, 3W, 5B, 1W, 5B, 3W, 1B, 3W, 5B, 1W, 5B, 3W, 1B, 3W
Row 12: FLO sc 2W, 3B, 3W, 3B, 3W, 3B, 3W, 3B, 3W, 3B, 3W, 3B, 3W, 3B, 2W
Row 13: BLO sc 1W, 5B, 3W, 3B, 1W, 3B, 3W, 5B, 3W, 3B, 1W, 3B, 3W, 5B,1W changing to black in the last stitch.
Row 14: FLO sc 3B, 1W, 3B, 3W, 5B, 3W, 3B, 1W, 3B, 3W, 5B, 3W, 3B, 1W, 3B
Row 15: BLO sc 2B, 3W, 3B, 3W, 3B, 3W, 3B, 3W, 3B, 3W, 3B, 3W, 3B, 3W, 2B
Row 16: FLO sc 1B, 5W, 3B, 1W, 5B, 1W, 3B, 5W, 3B, 1W, 5B, 1W, 3B, 5W, 1B changing to white in the last stitch.
Row 17: BLO sc 3W, 1B, 3W, 5B, 1W, 5B, 3W, 1B, 3W, 5B, 1W, 5B, 3W, 1B, 3W
Row 18: FLO sc 2W, 3B, 3W, 3B, 3W, 3B, 3W, 3B, 3W, 3B, 3W, 3B, 3W, 3B, 2W
Row 19: BLO sc 1W, 5B, 1W, 3B, 5W, 3B, 1W, 5B, 1W, 3B, 5W, 3B, 1W, 5B, 1W changing to black in the last stitch.
Row 20: FLO sc 3B, 1W, 5B, 3W, 1B, 3W, 5B, 1W, 5B, 3W, 1B, 3W, 5B, 1W, 3B
Row 21: BLO sc 2B, 3W, 3B, 3W, 3B, 3W, 3B, 3W, 3B, 3W, 3B, 3W, 3B, 3W, 2B
Row 22: FLO sc 3B, 1W, 3B, 3W, 5B, 3W, 3B, 1W, 3B, 3W, 5B, 3W, 3B, 1W, 3B changing to white in the last stitch.
Row 23: BLO sc 1W, 5B, 3W, 3B, 1W, 3B, 3W, 5B, 3W, 3B, 1W, 3B, 3W, 5B,1W
Row 24: FLO sc 2W, 3B, 3W, 3B, 3W, 3B, 3W, 3B, 3W, 3B, 3W, 3B, 3W, 3B, 2W
Row 25: BLO sc 1W, 5B, 1W, 3B, 5W, 3B, 1W, 5B, 1W, 3B, 5W, 3B, 1W, 5B, 1W changing to black in the last stitch.
Row 26: FLO sc 3B, 1W, 5B, 3W, 1B, 3W, 5B, 1W, 5B, 3W, 1B, 3W, 5B, 1W, 3B
Row 27: BLO sc 2B, 3W, 3B, 3W, 3B, 3W, 3B, 3W, 3B, 3W, 3B, 3W, 3B, 3W, 2B
Fasten off and weave in ends.

Small: M(mustard) L(linen) using all single crochet. Make two.
With Linen ch 38
Row 1: sc 1L, 5M, 3L, 1M, 3L, 5M, 1L, 5M, 3L, 1M, 3L, 5M, 1L
Row 2: sc 2L, 3M, 3L, 3M, 3L, 3M, 3L, 3M, 3L, 3M, 3L, 3M, 2L
Row 3: sc 1L, 3M, 3L, 5M, 3L, 3M, 1L, 3M, 3L, 5M, 3L, 3M, 1L changing to mustard in last stitch.
Row 4: sc 3M, 3L, 3M, 1L, 3M, 3L, 5M, 3L, 3M, 1L, 3M, 3L, 3M
Row 5: sc 2M, 3L, 3M, 3L, 3M, 3L, 3M, 3L, 3M, 3L, 3M, 3L, 2M
Row 6: sc 3M, 1L, 3M, 5L, 3M, 1L, 5M, 1L, 3M, 5L, 3M, 1L, 3M changing to linen in last stitch.
Row 7: sc 1L, 5M, 3L, 1M, 3L, 5M, 1L, 5M, 3L, 1M, 3L, 5M, 1L
Row 8: sc 2L, 3M, 3L, 3M, 3L, 3M, 3L, 3M, 3L, 3M, 3L, 3M, 2L
Row 9: sc 3L, 3M, 1L, 5M, 1L, 3M, 5L, 3M, 1L, 5M, 1L, 3M, 3L changing to mustard in last stitch.
Row 10: sc 1M, 3L, 5M, 1L, 5M, 3L, 1M, 3L, 5M, 1L, 5M, 3L, 1M
Row 11: sc 2M, 3L, 3M, 3L, 3M, 3L, 3M, 3L, 3M, 3L, 3M, 3L, 2M
Row 12: sc 3M, 3L, 3M, 1L, 3M, 3L, 5M, 3L, 3M, 1L, 3M, 3L, 3M changing to linen in last stitch.
Row 13: sc 1L, 3M, 3L, 5M, 3L, 3M, 1L, 3M, 3L, 5M, 3L, 3M, 1L
Row 14: sc 2L, 3M, 3L, 3M, 3L, 3M, 3L, 3M, 3L, 3M, 3L, 3M, 2L
Row 15: sc 3L, 3M, 1L, 5M, 1L, 3M, 5L, 3M, 1L, 5M, 1L, 3M, 3L changing to mustard in last stitch.
Row 16: sc 1M, 3L, 5M, 1L, 5M, 3L, 1M, 3L, 5M, 1L, 5M, 3L, 1M
Row 17: sc 2M, 3L, 3M, 3L, 3M, 3L, 3M, 3L, 3M, 3L, 3M, 3L, 2M
Row 18: sc 3M, 1L, 3M, 5L, 3M, 1L, 5M, 1L, 3M, 5L, 3M, 1L, 3M changing to linen in last stitch.
Row 19: sc 1L, 5M, 3L, 1M, 3L, 5M, 1L, 5M, 3L, 1M, 3L, 5M, 1L
Row 20: sc 2L, 3M, 3L, 3M, 3L, 3M, 3L, 3M, 3L, 3M, 3L, 3M, 2L
Row 21: sc 1L, 3M, 3L, 5M, 3L, 3M, 1L, 3M, 3L, 5M, 3L, 3M, 1L changing to mustard in last stitch.
Row 22: sc 3M, 3L, 3M, 1L, 3M, 3L, 5M, 3L, 3M, 1L, 3M, 3L, 3M
Row 23: sc 2M, 3L, 3M, 3L, 3M, 3L, 3M, 3L, 3M, 3L, 3M, 3L, 2M
Row 24: sc 3M, 1L, 3M, 5L, 3M, 1L, 5M, 1L, 3M, 5L, 3M, 1L, 3M changing to linen in last stitch.
Row 25: sc 1L, 5M, 3L, 1M, 3L, 5M, 1L, 5M, 3L, 1M, 3L, 5M, 1L
Row 26: sc 2L, 3M, 3L, 3M, 3L, 3M, 3L, 3M, 3L, 3M, 3L, 3M, 2L
Row 27: sc 3L, 3M, 1L, 5M, 1L, 3M, 5L, 3M, 1L, 5M, 1L, 3M, 3L
Fasten off and weave in ends.
Once both crochet panels are complete it is time to assemble them into a pouch. If you are going to line the pouch cut two pieces from your quilting cotton fabric close to the same size as your crochet panels.
Large: cut two pieces 8.5" X 10.5"
Small: cut two pieces 7.5" X 9"

If using interfacing to make your pouch sturdier add that to the back of the lining pieces. I used fusible fleece for the large pouch and no interfacing for the small pouch.

If sewing with a machine I recommend using a zipper foot.
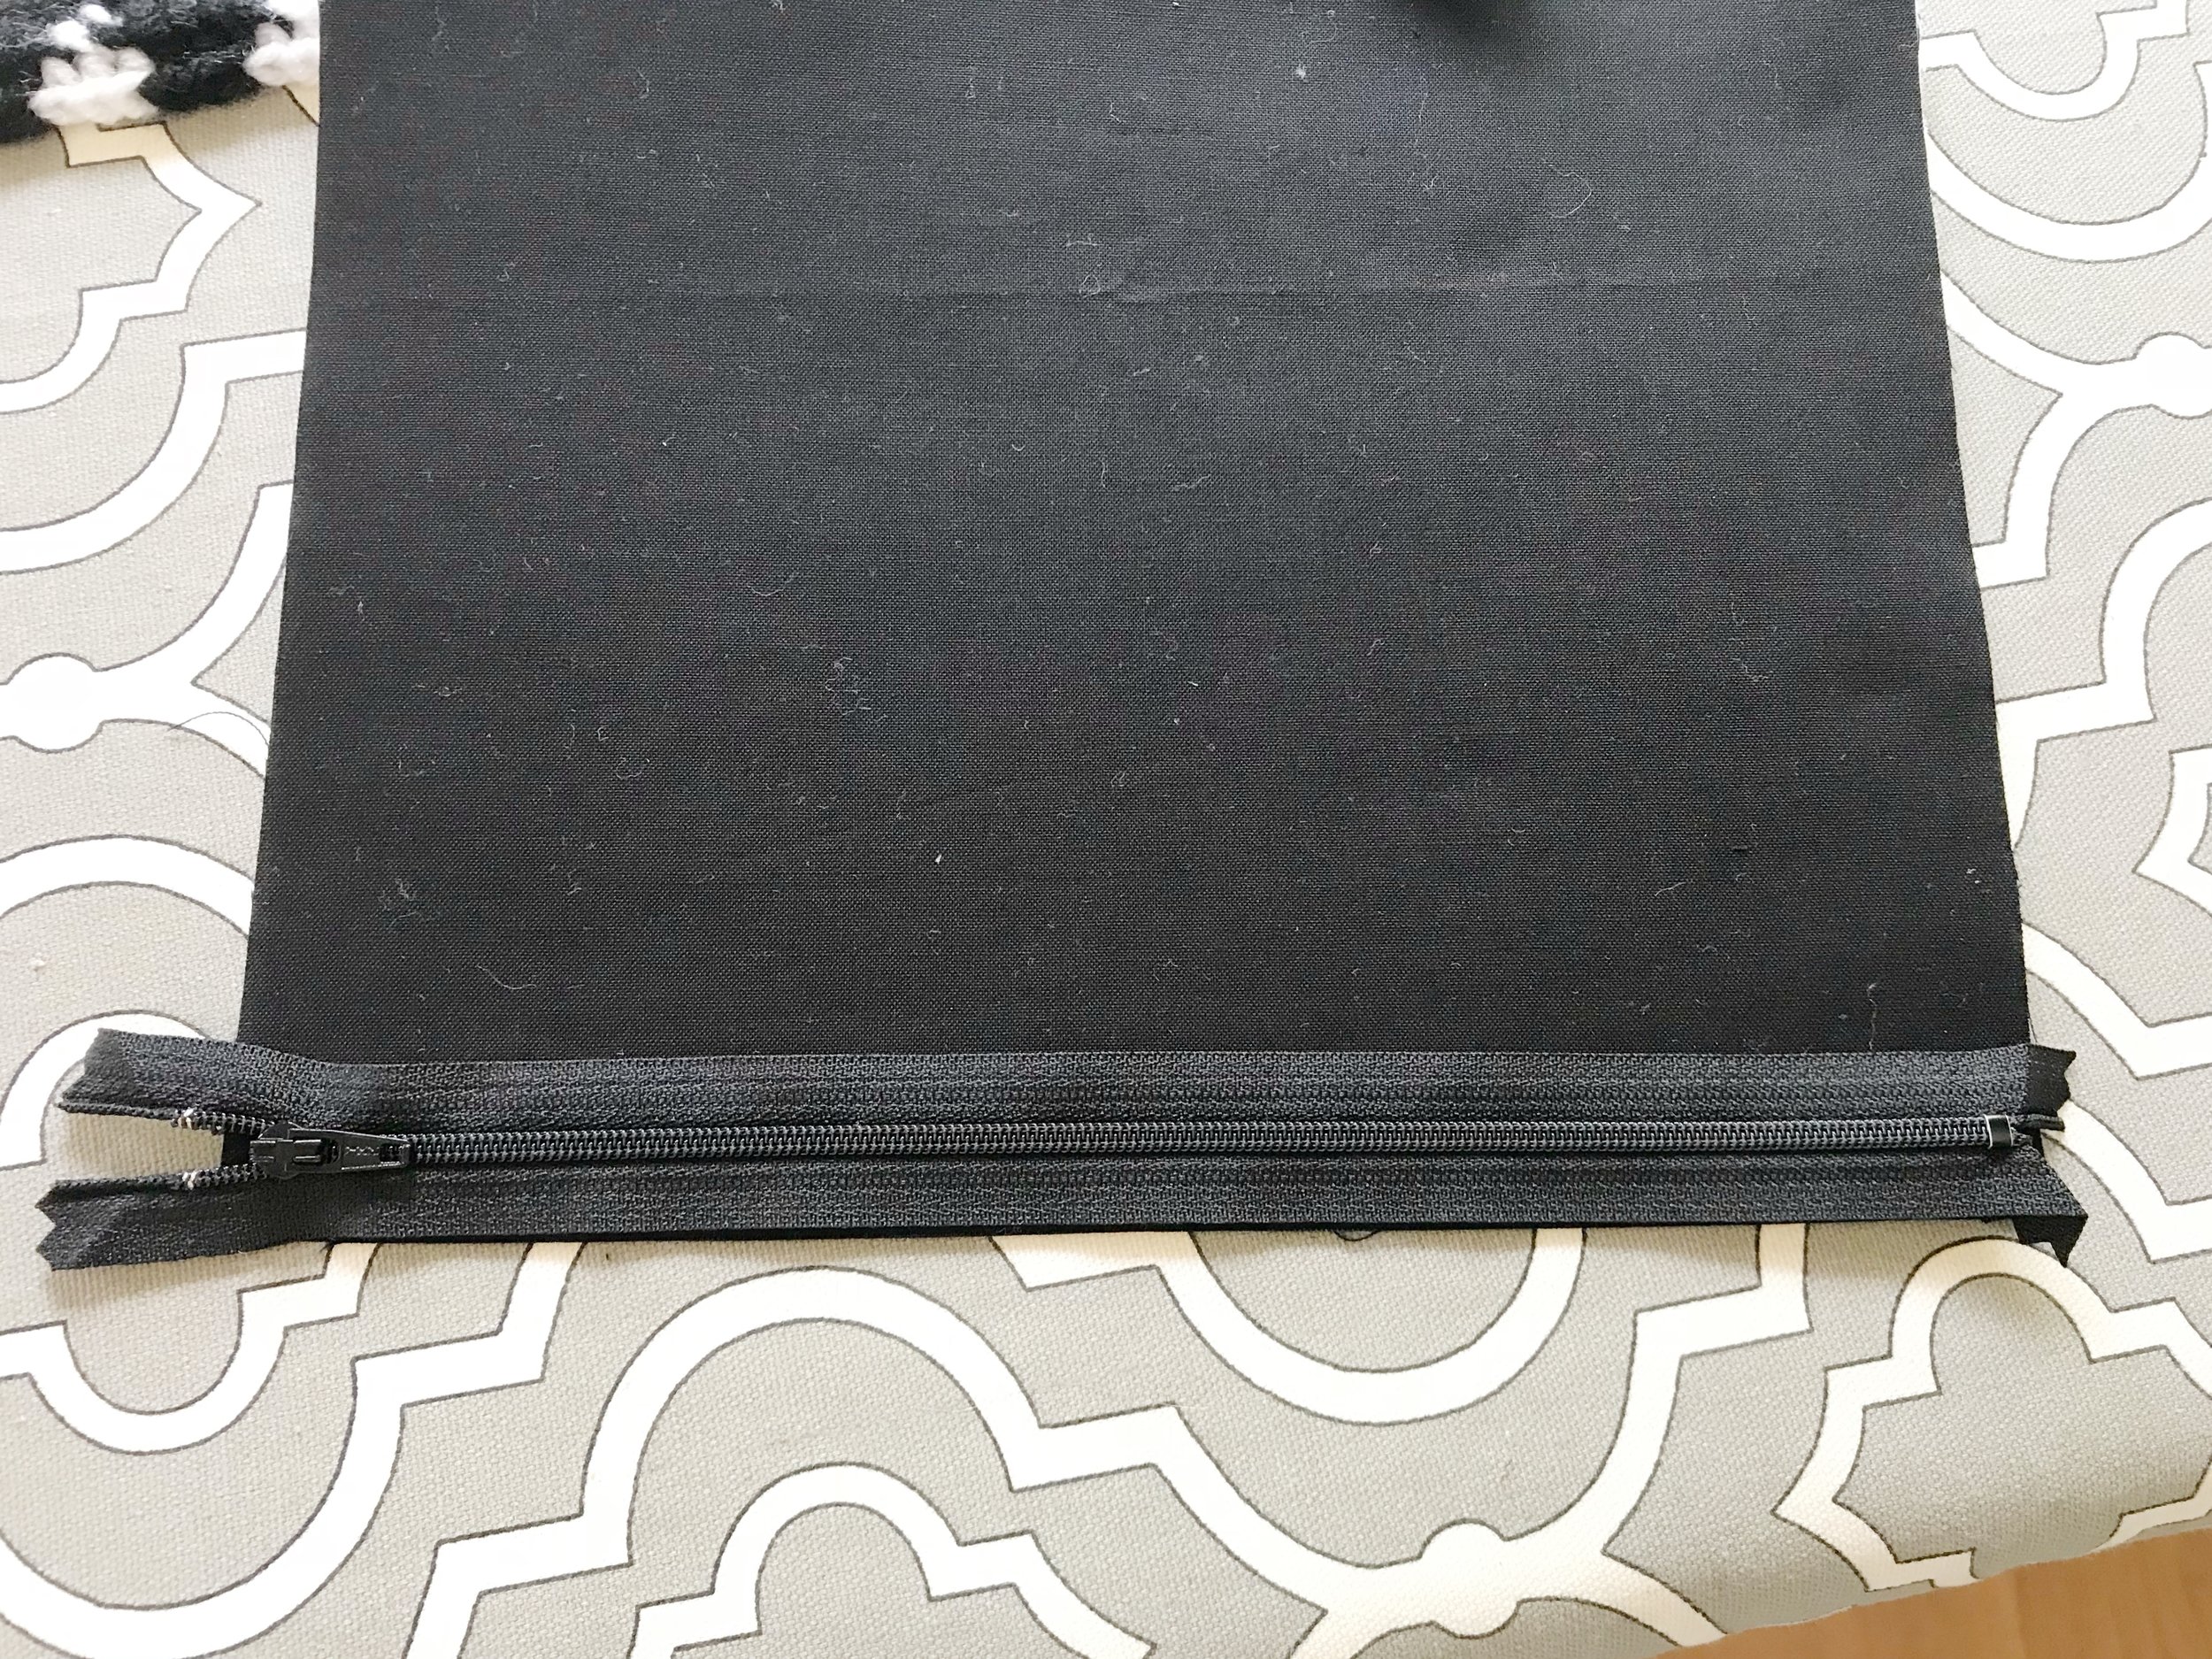
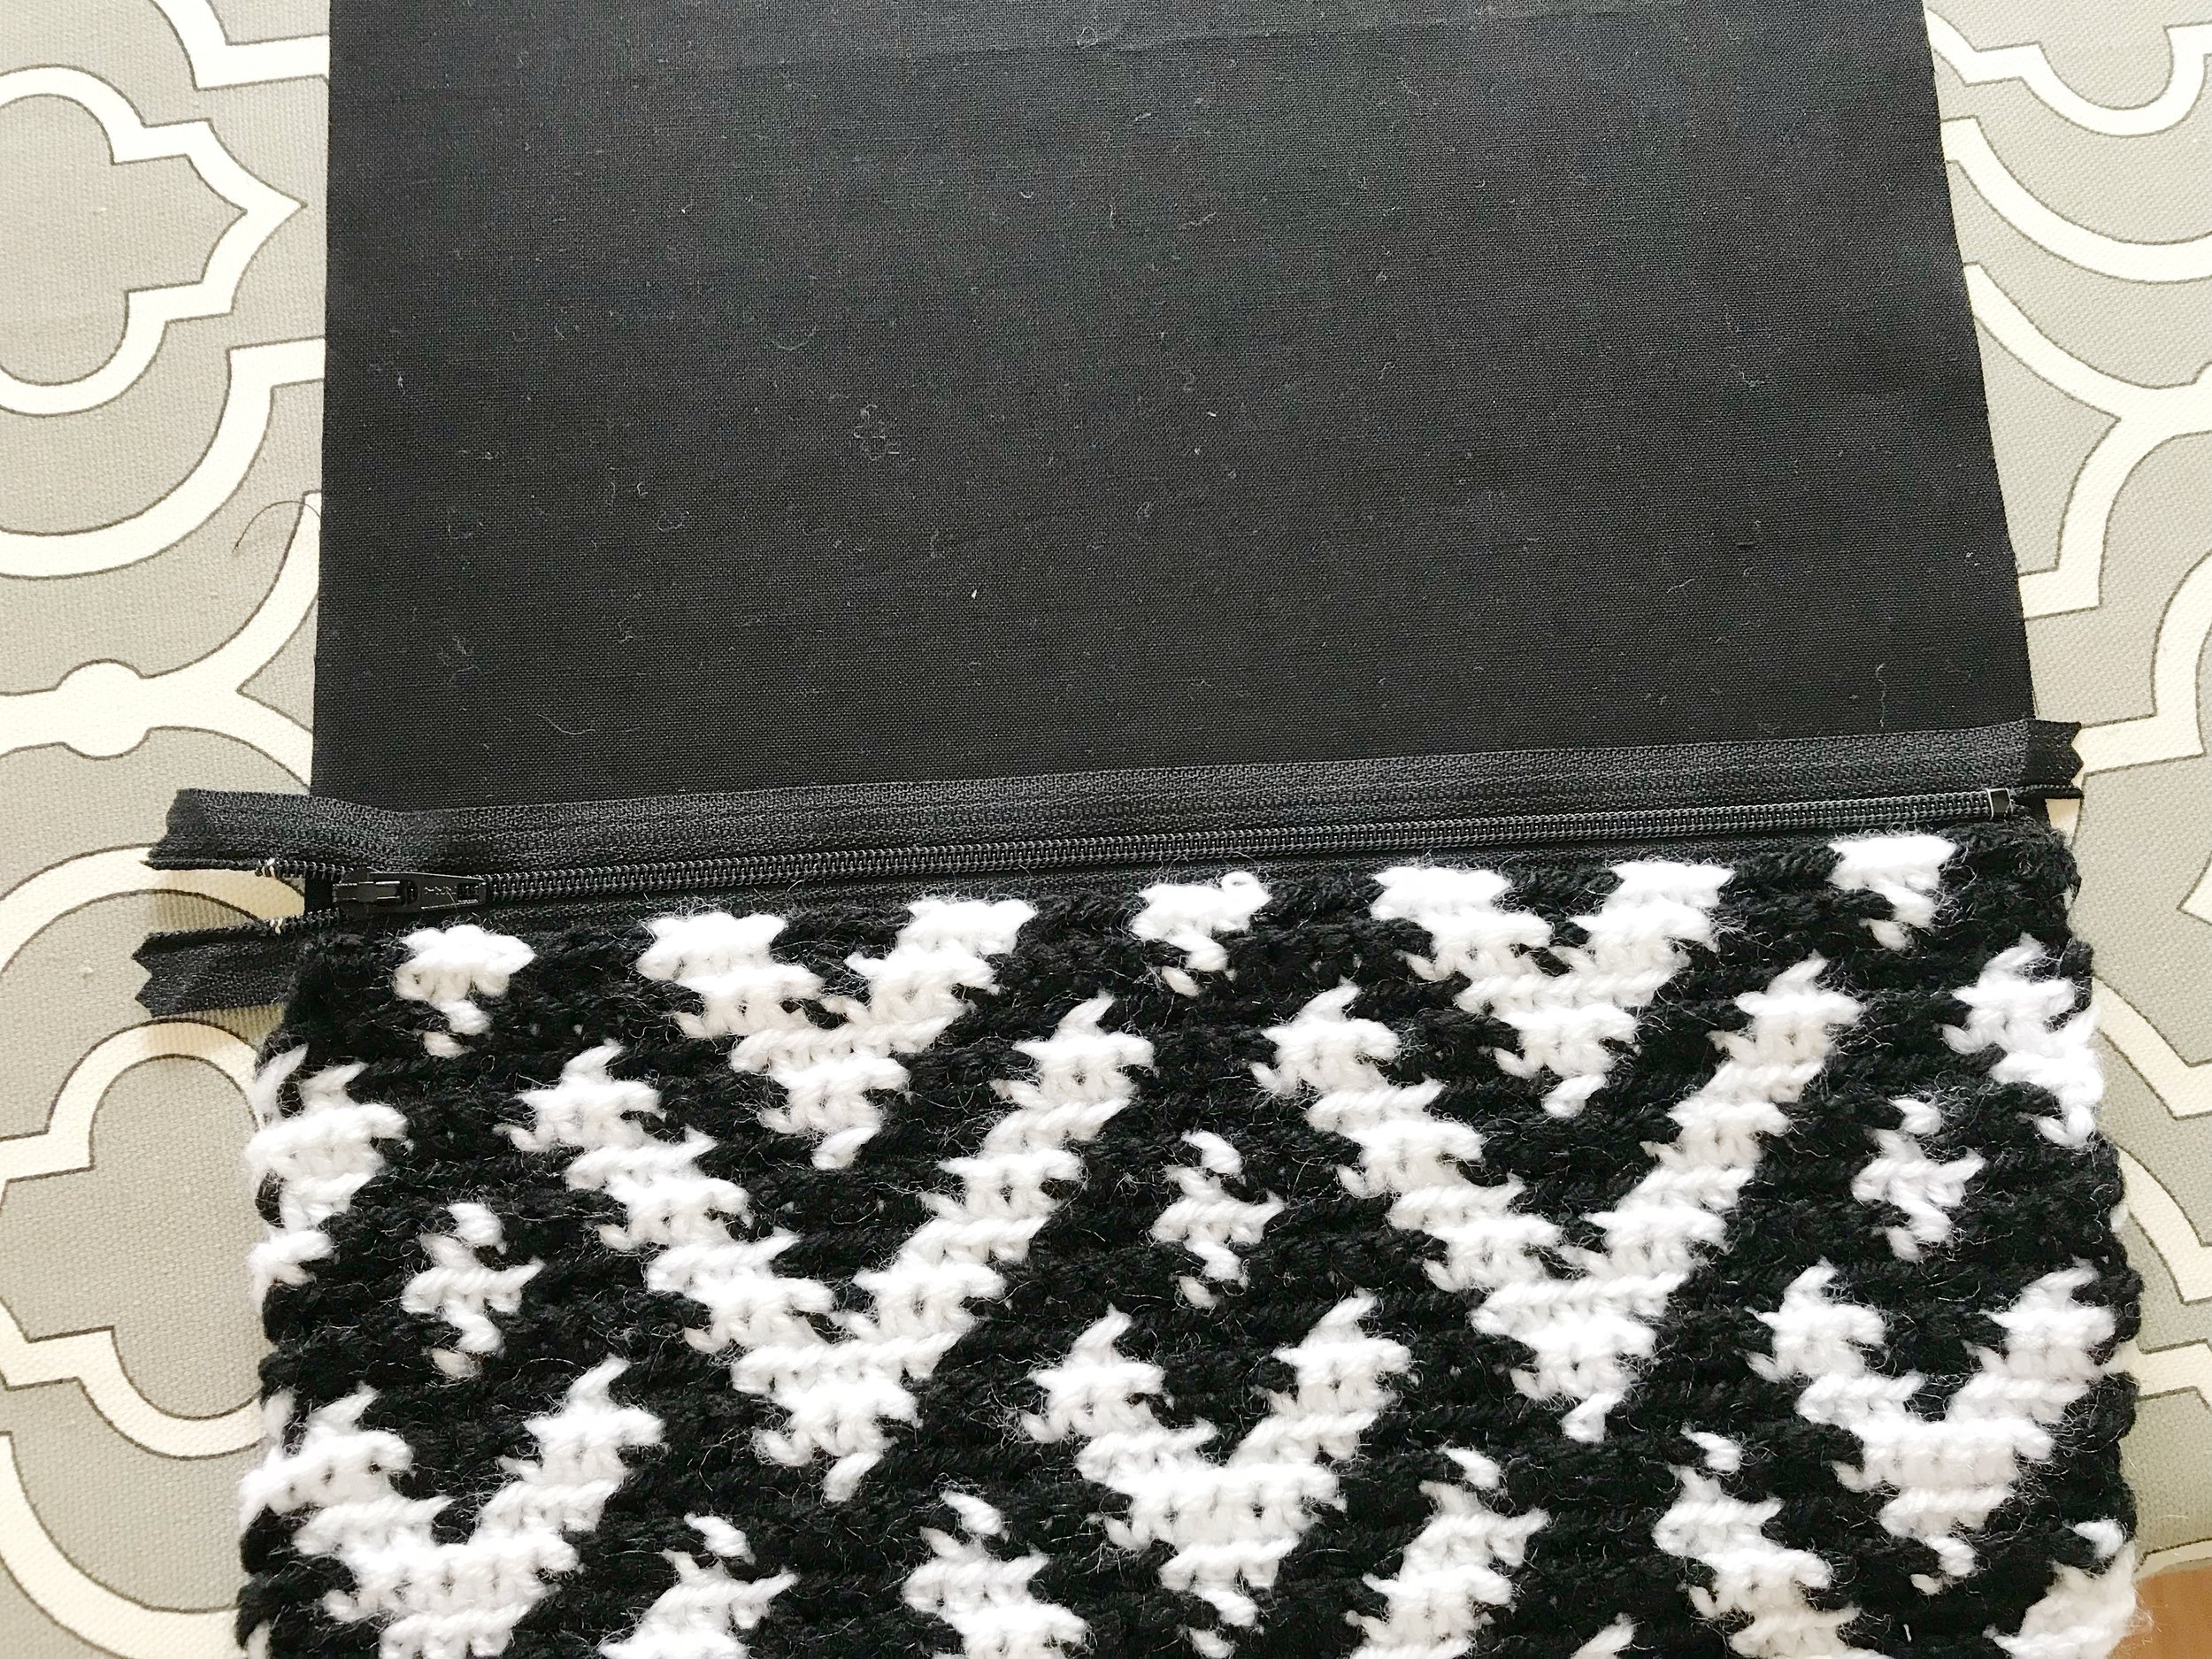
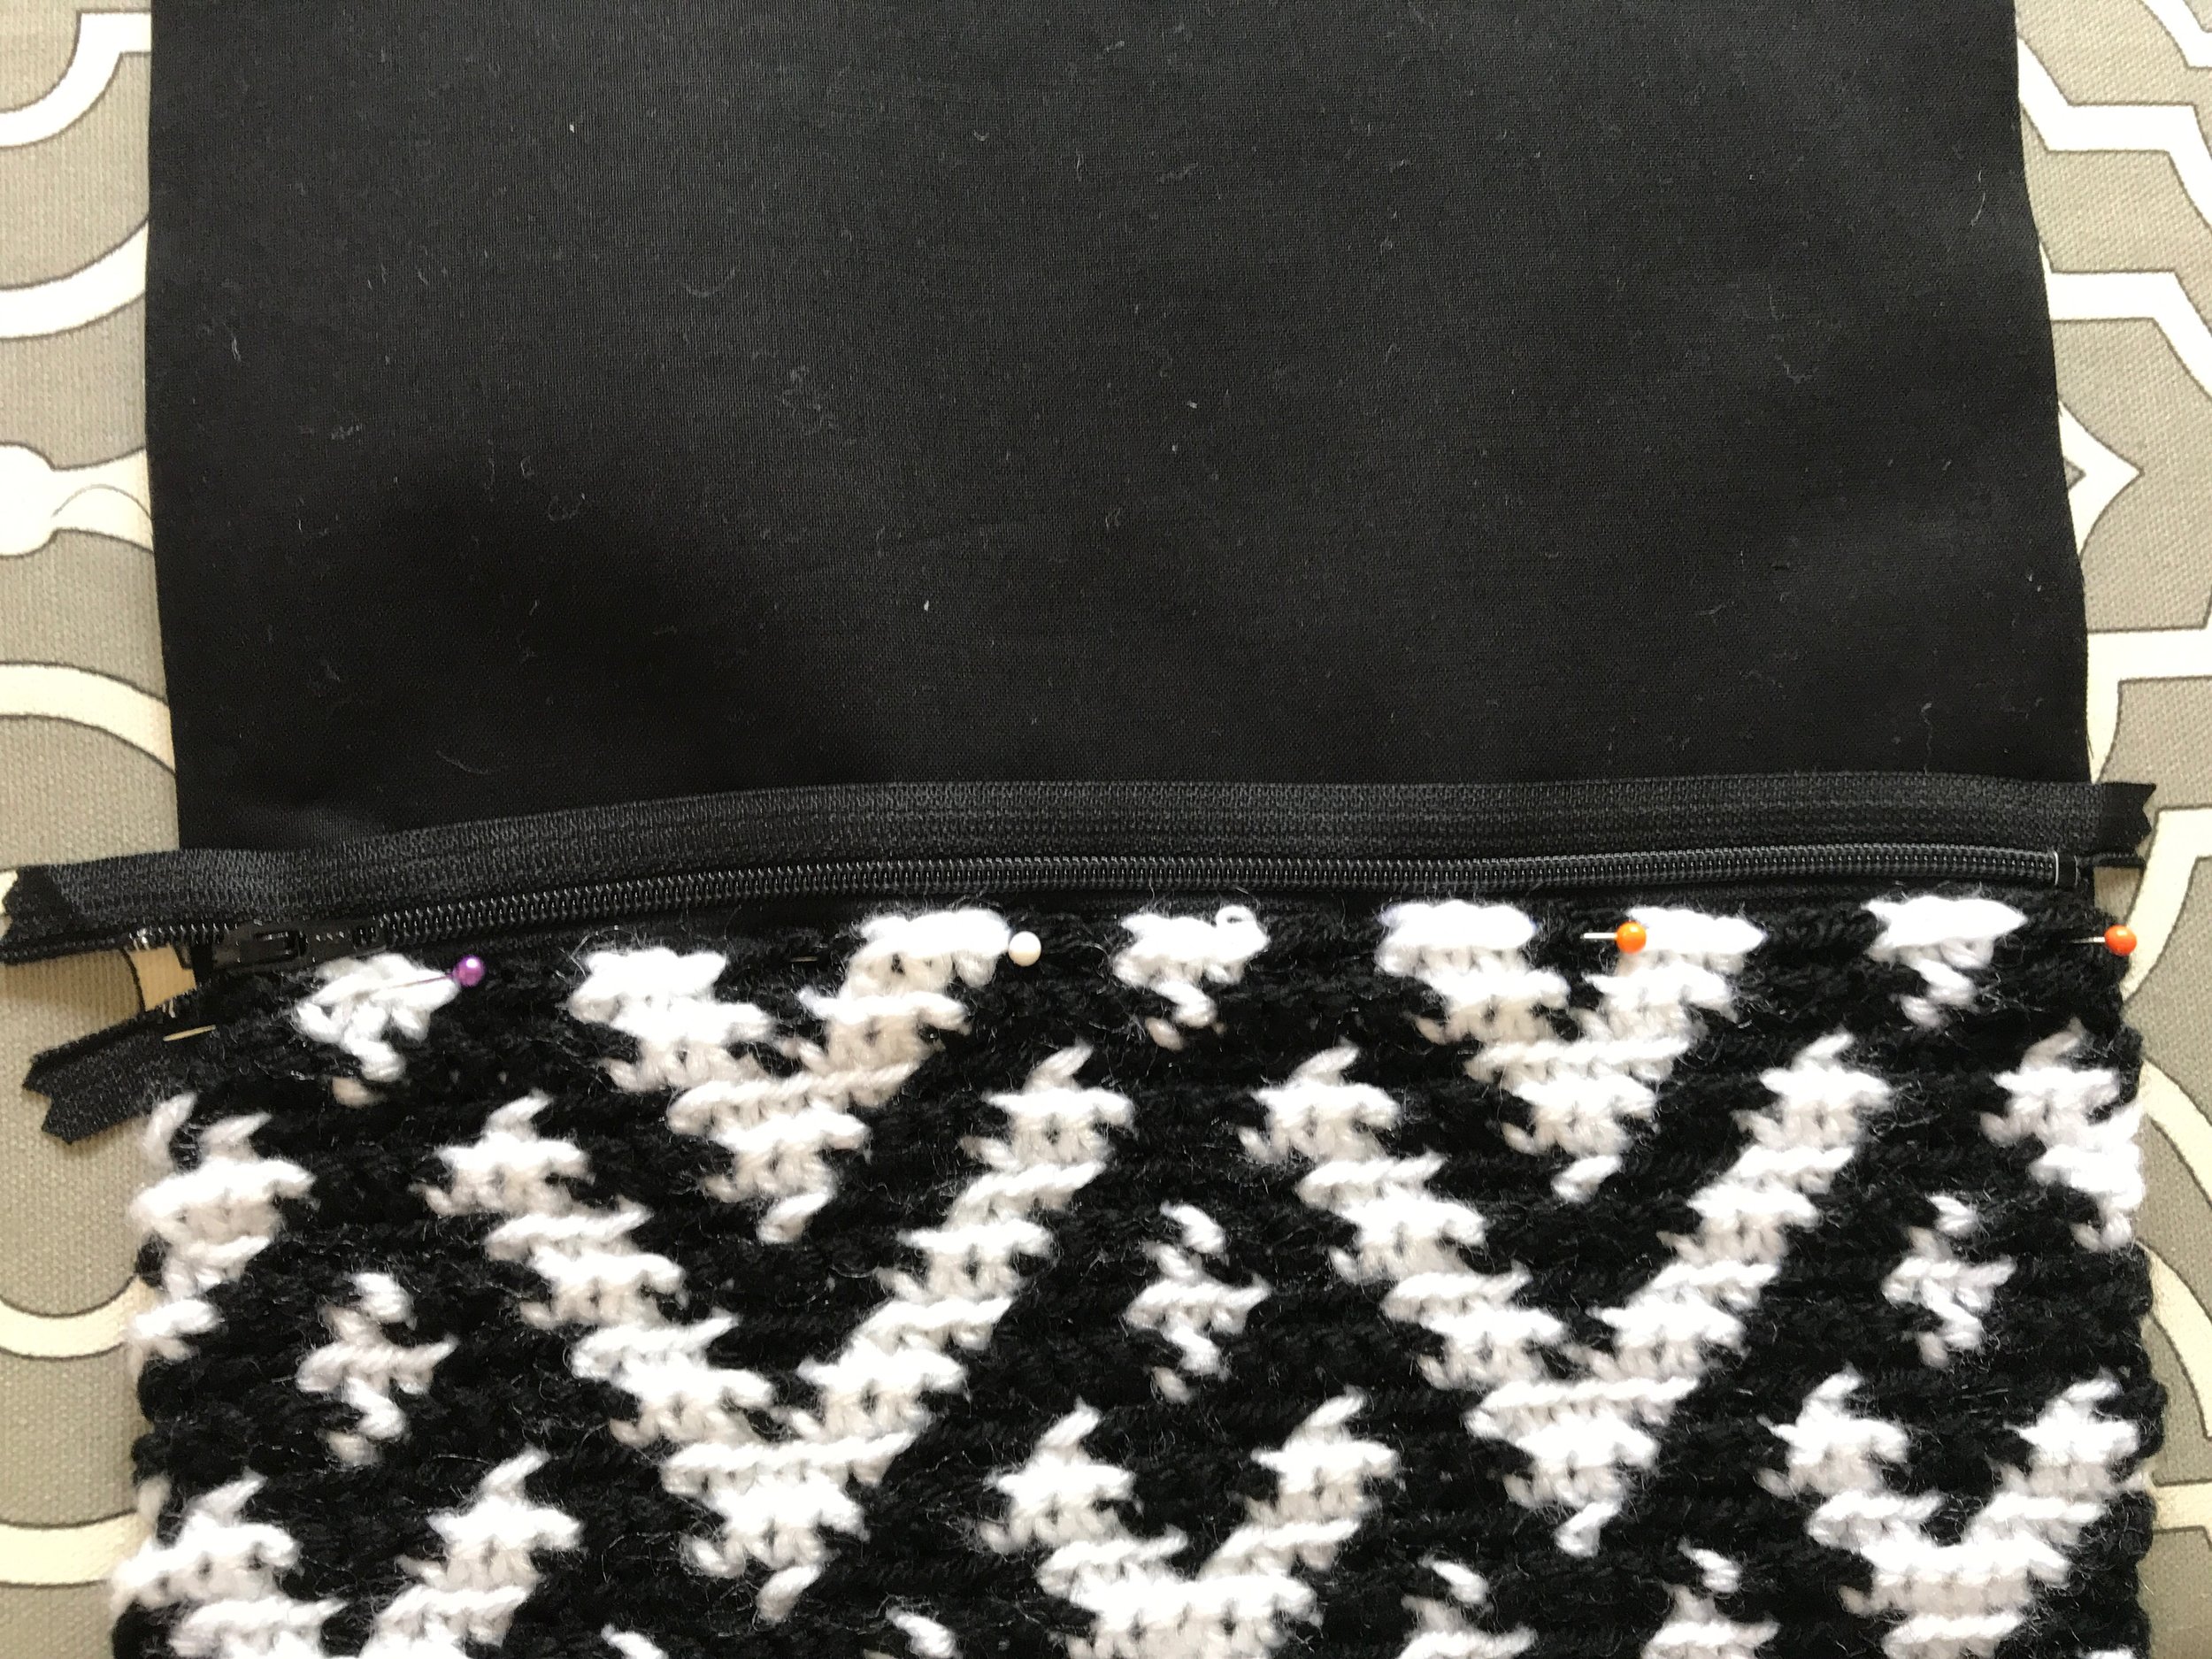
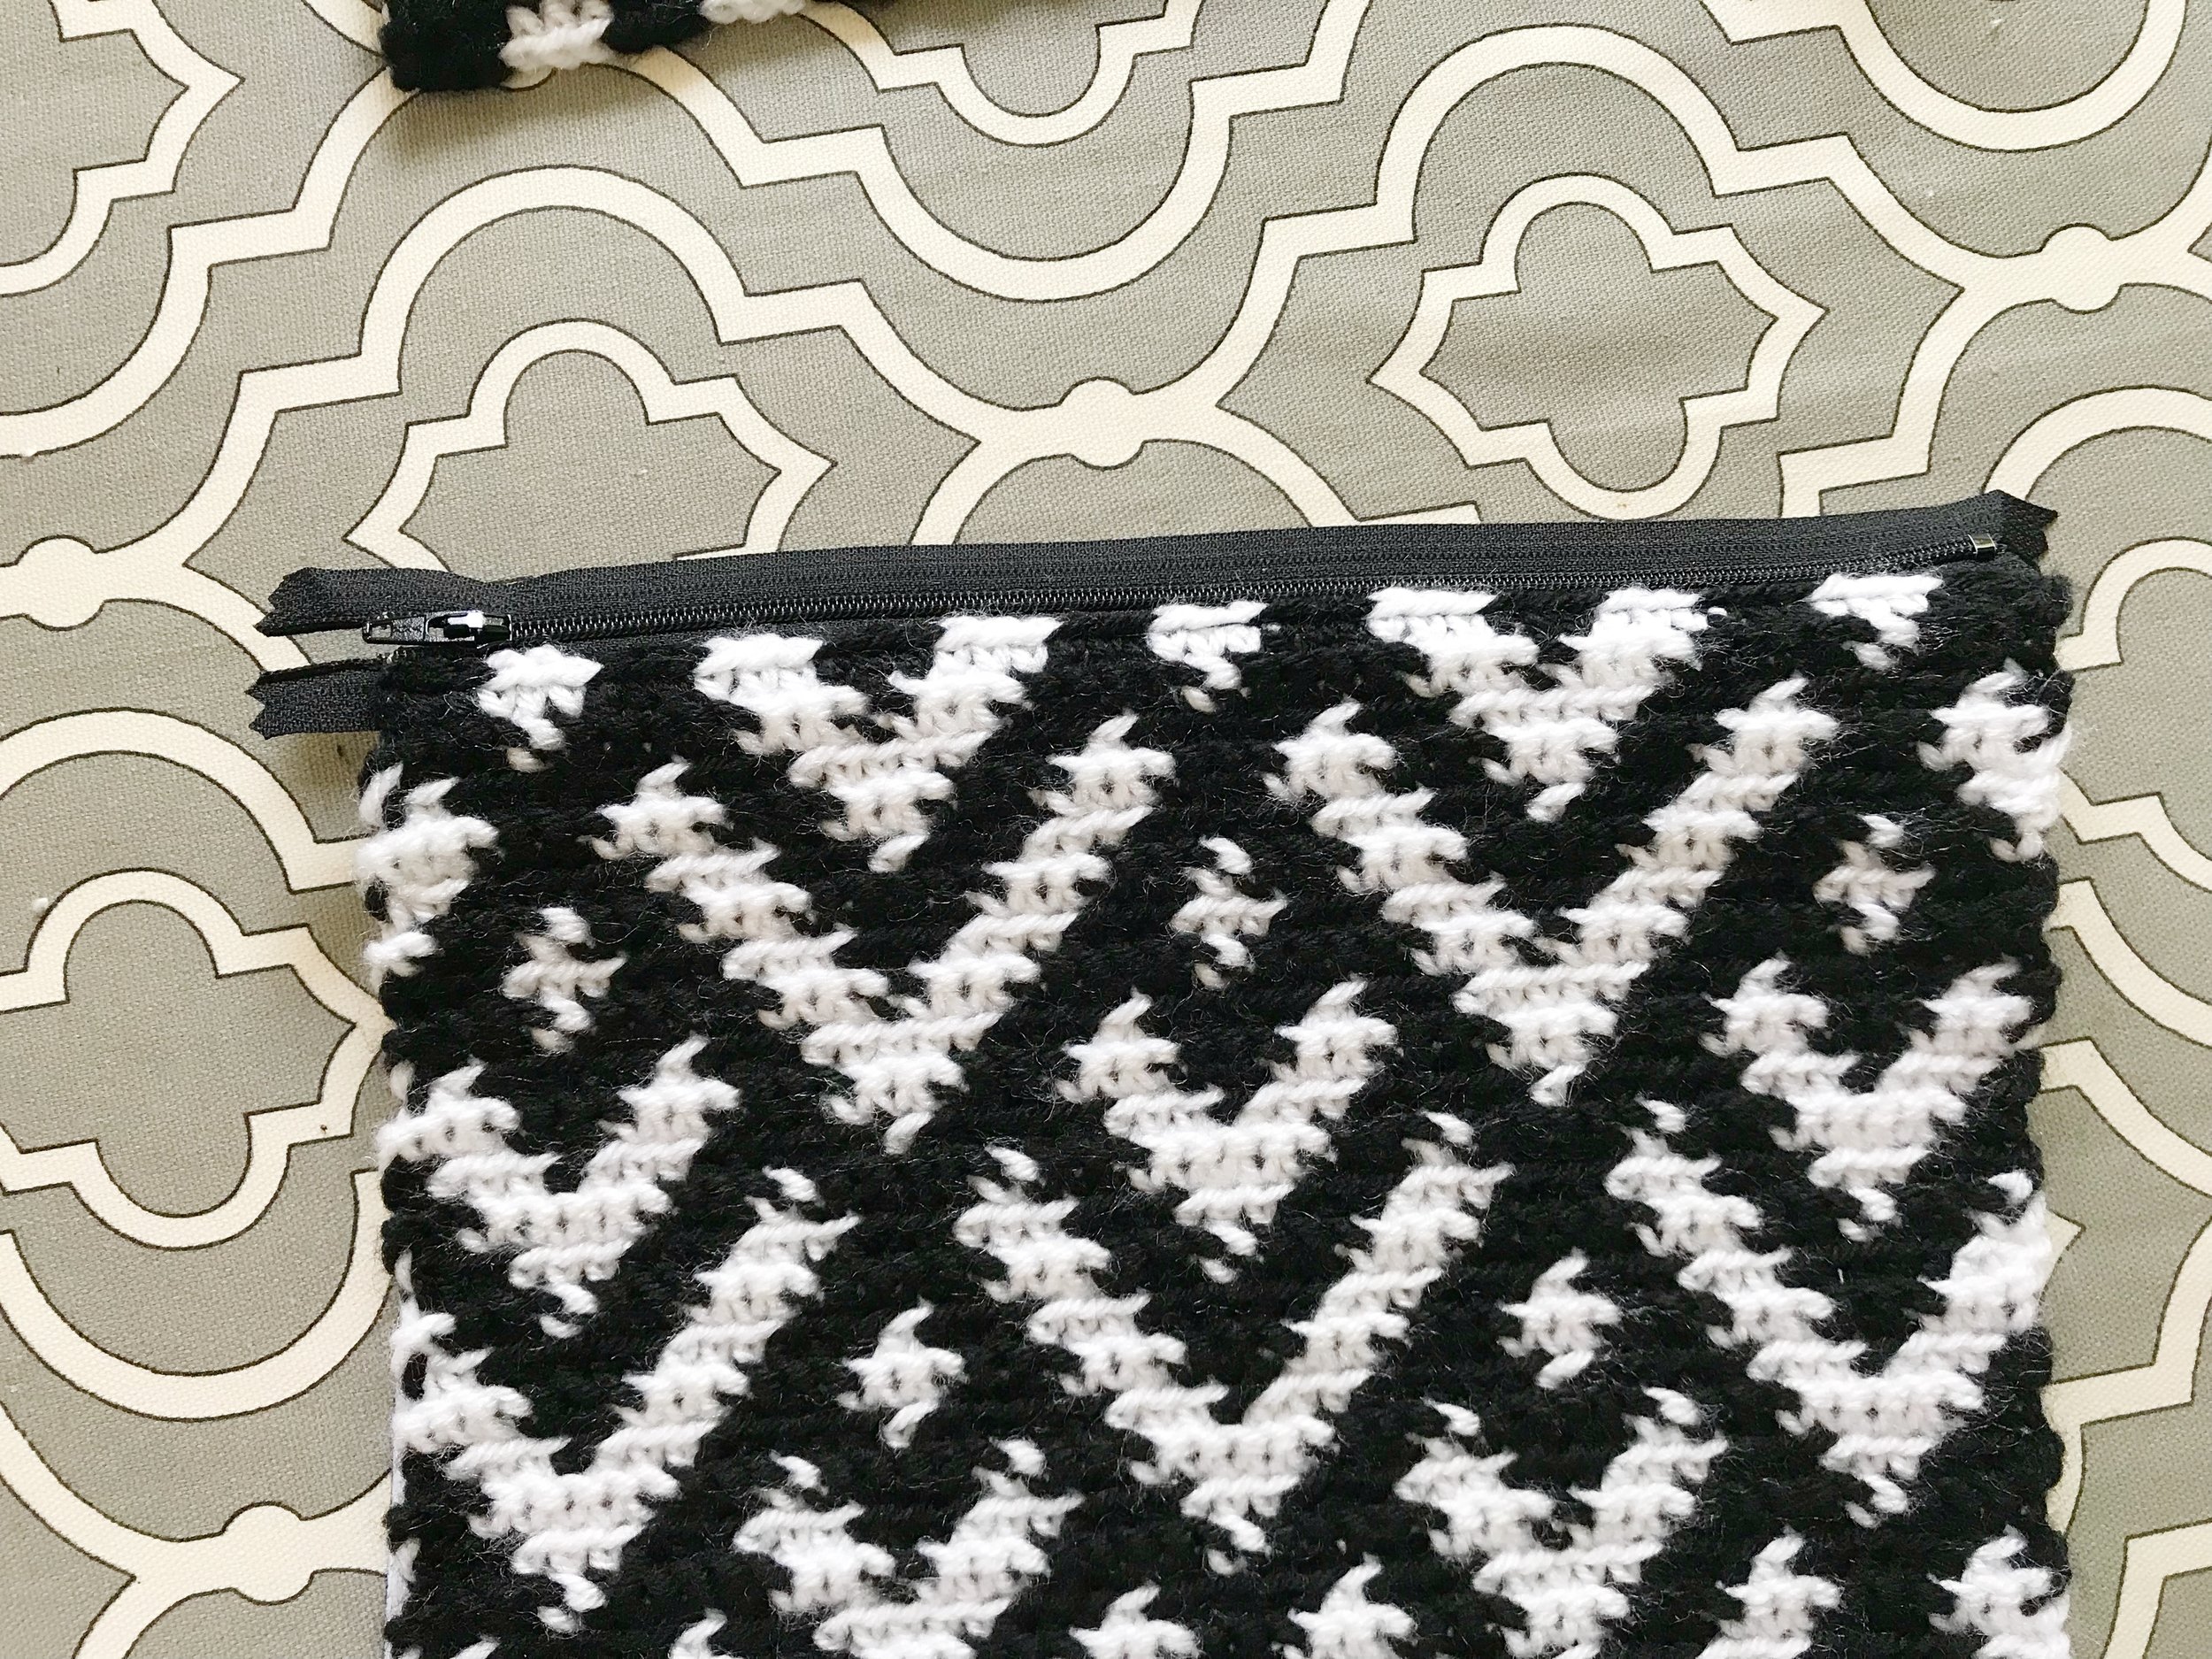
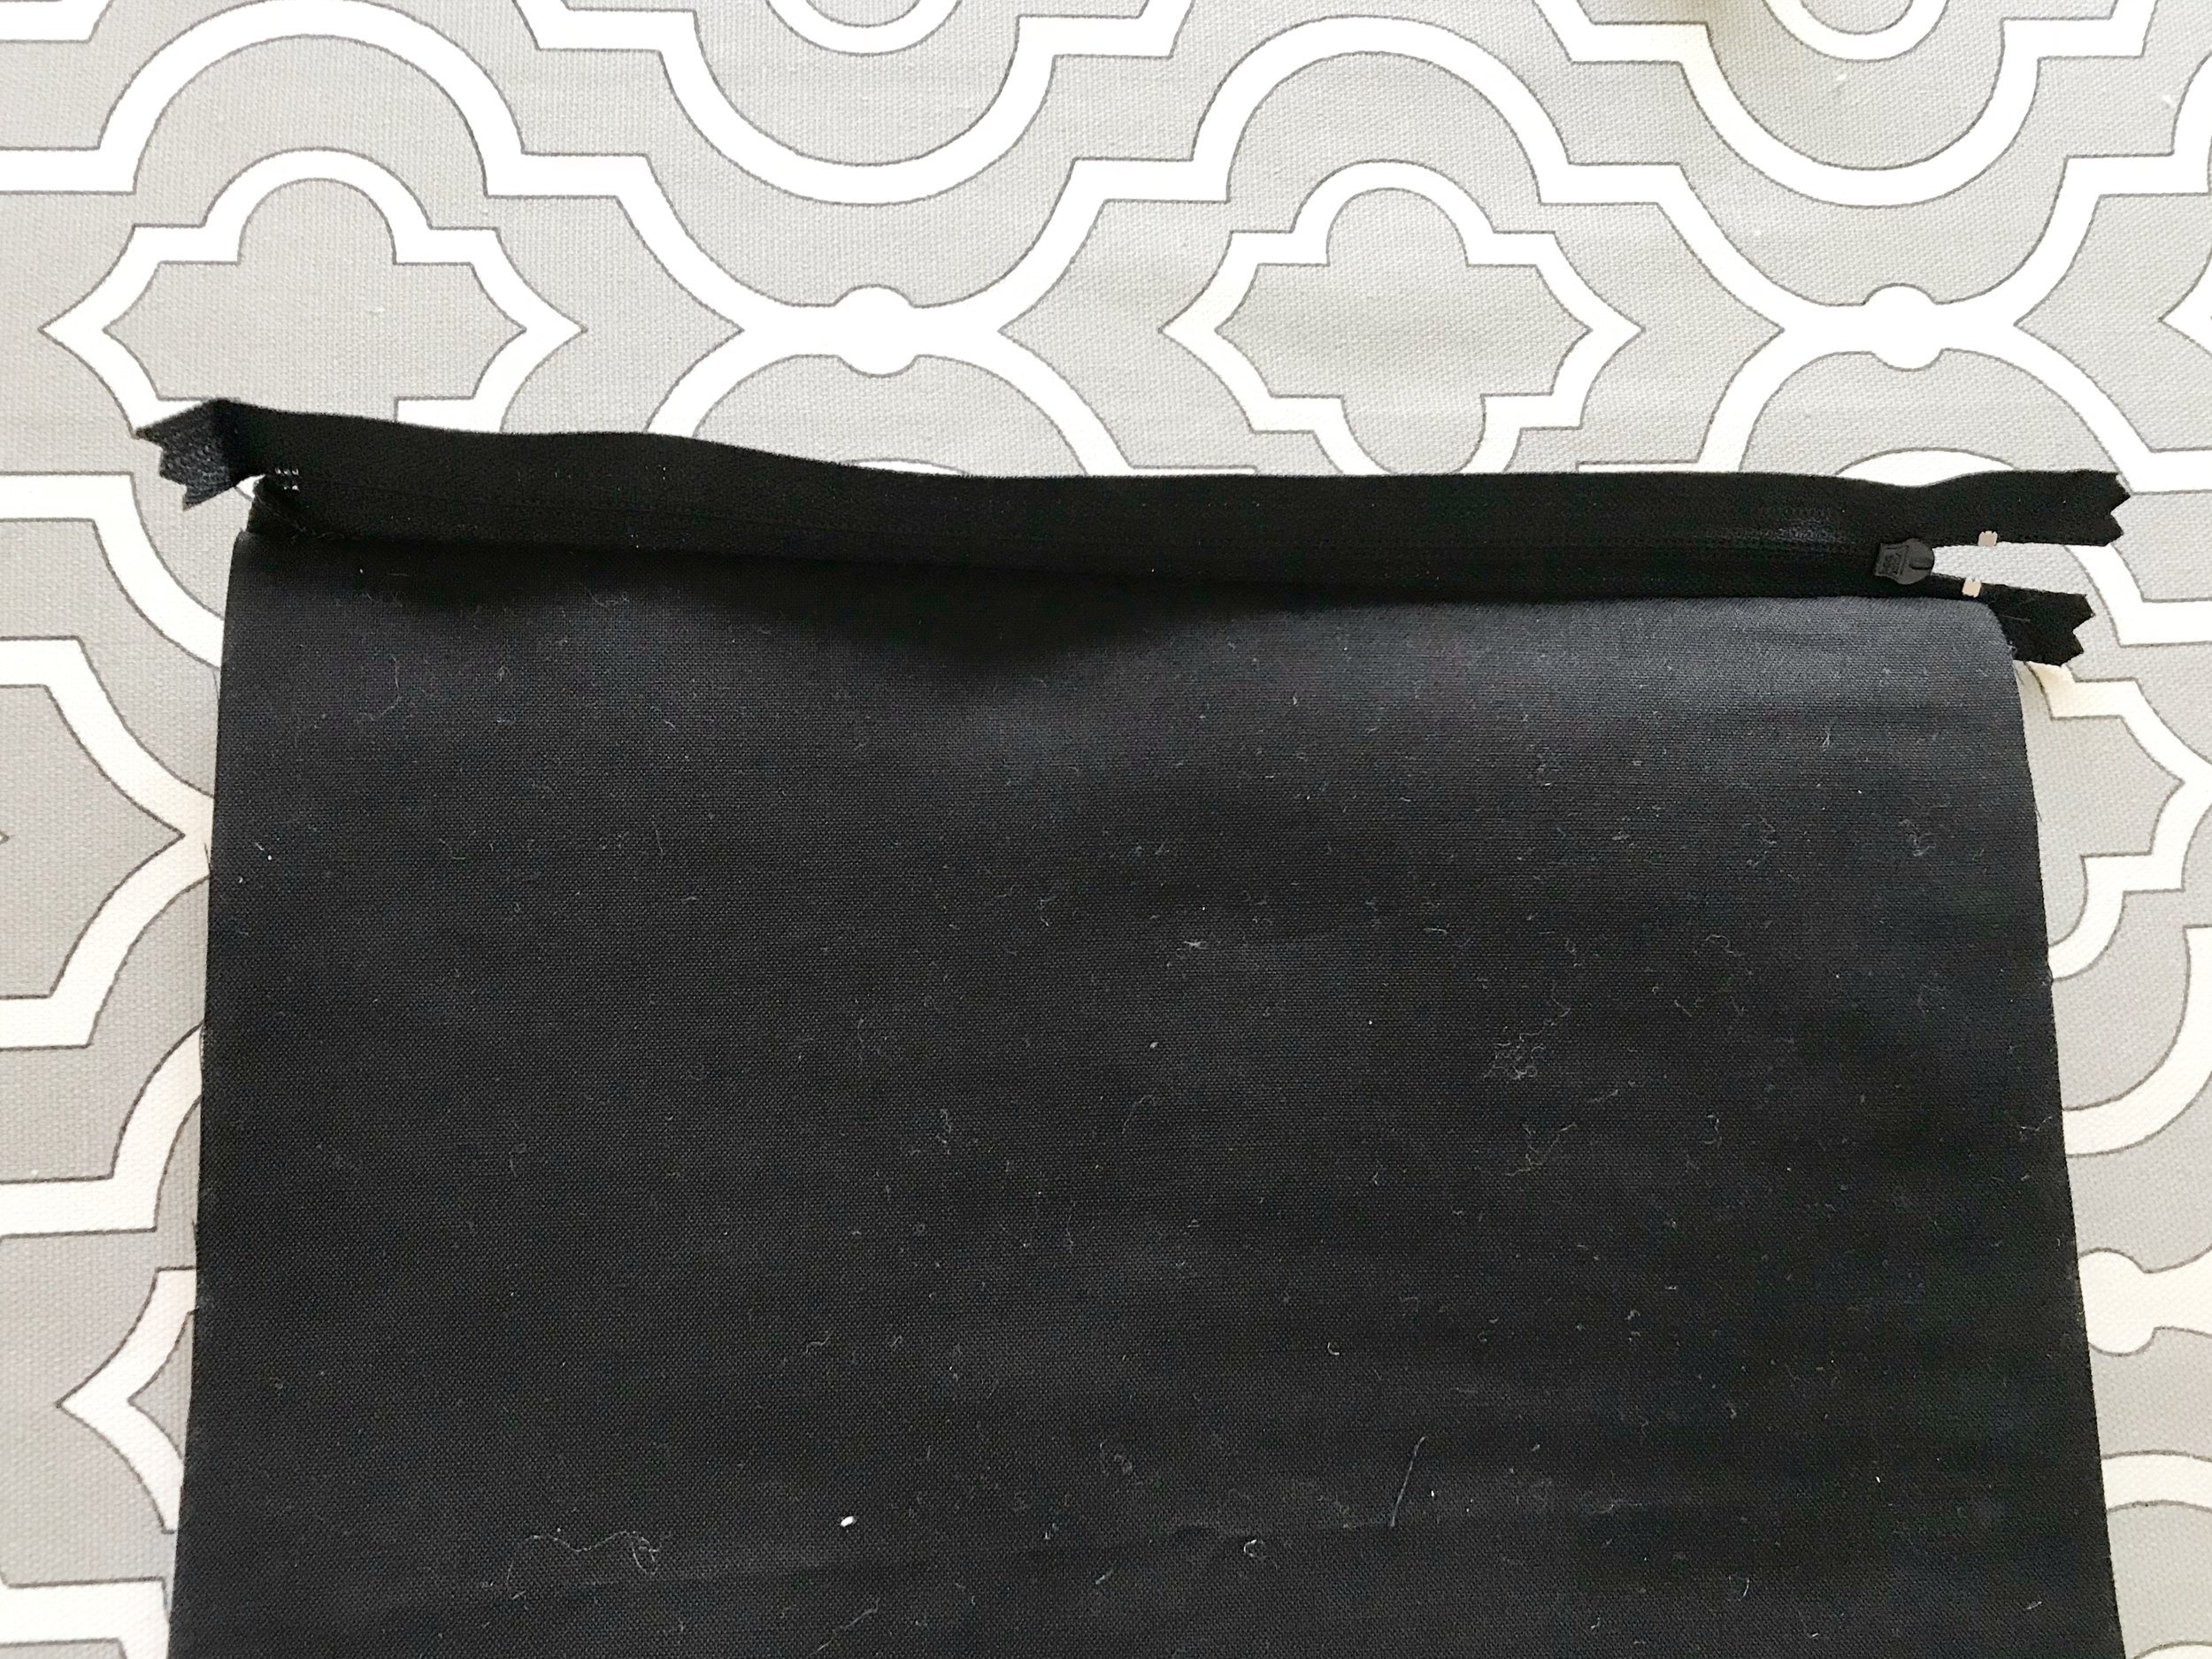
Lay the zipper down, facing up, along the bottom edge of one of the pieces of lining. Then place the top edge of one of the crochet panels down on top of the zipper. Pin in place and sew along the edge.
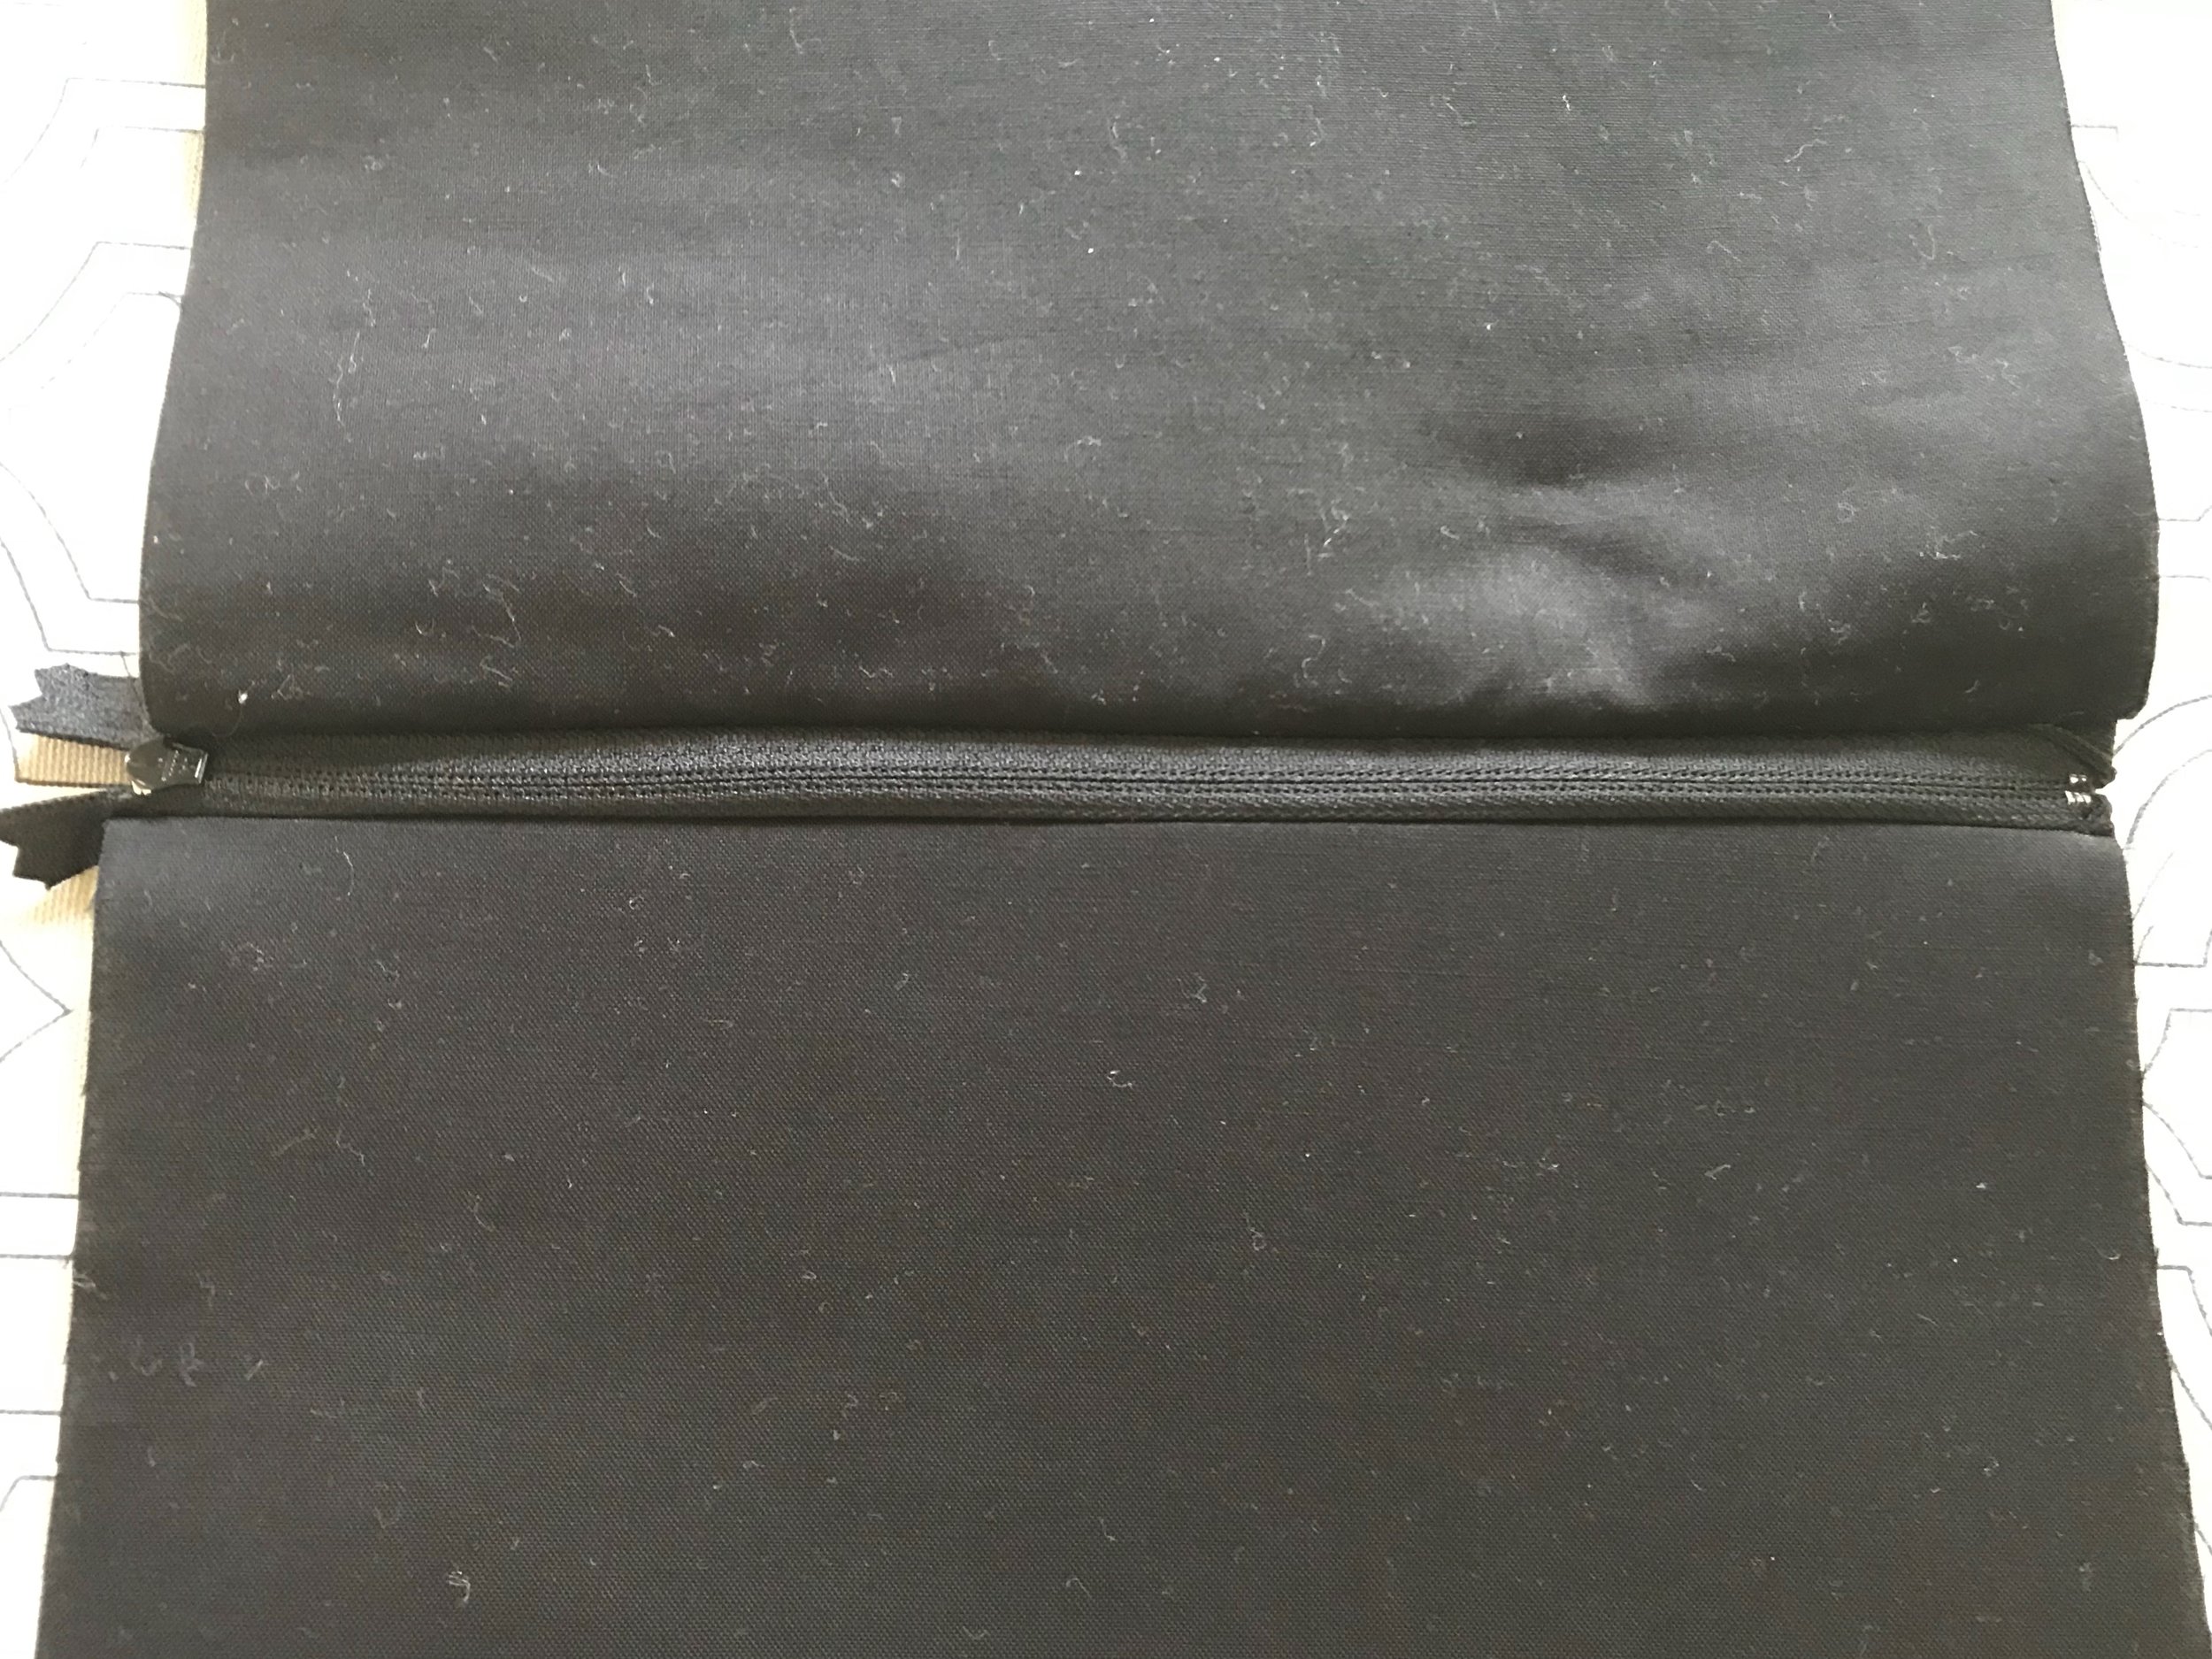
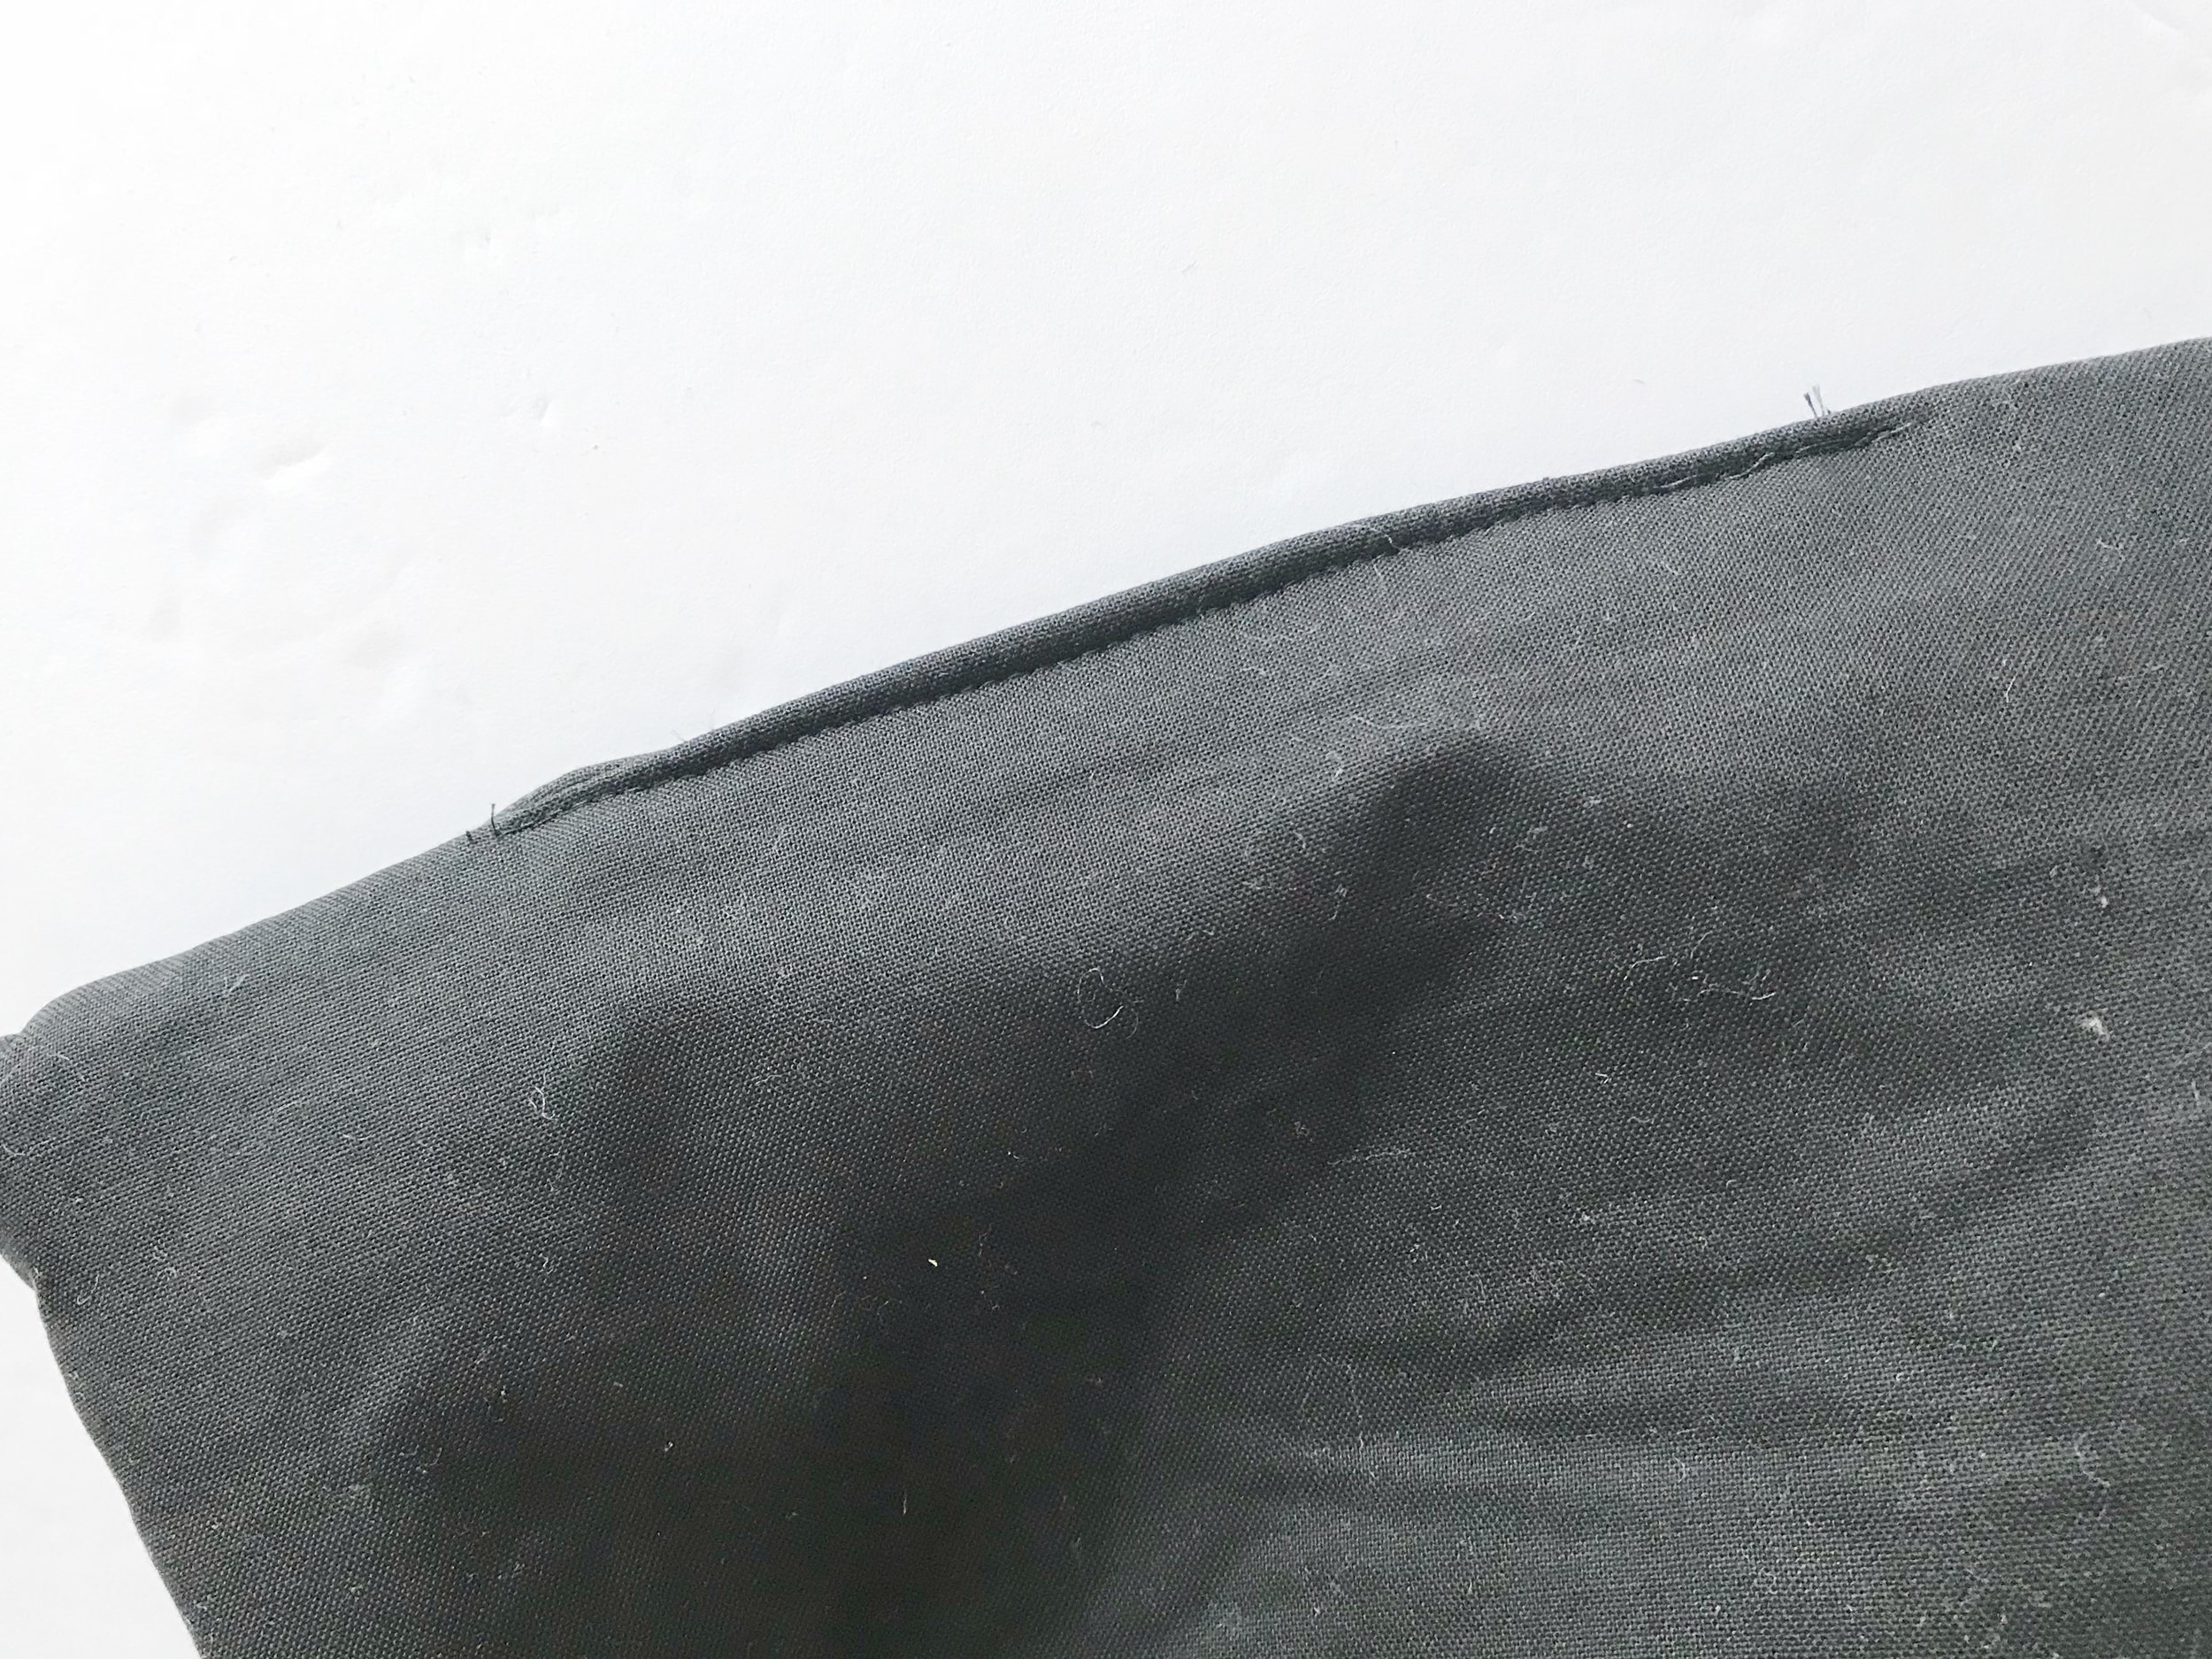
Fold the lining down and flip the piece over so the crochet panel is facing down. Gently press the seam along the zipper with an iron making sure not to crush your crochet panel. Follow the same instructions to attach the second piece of lining and crochet panel.


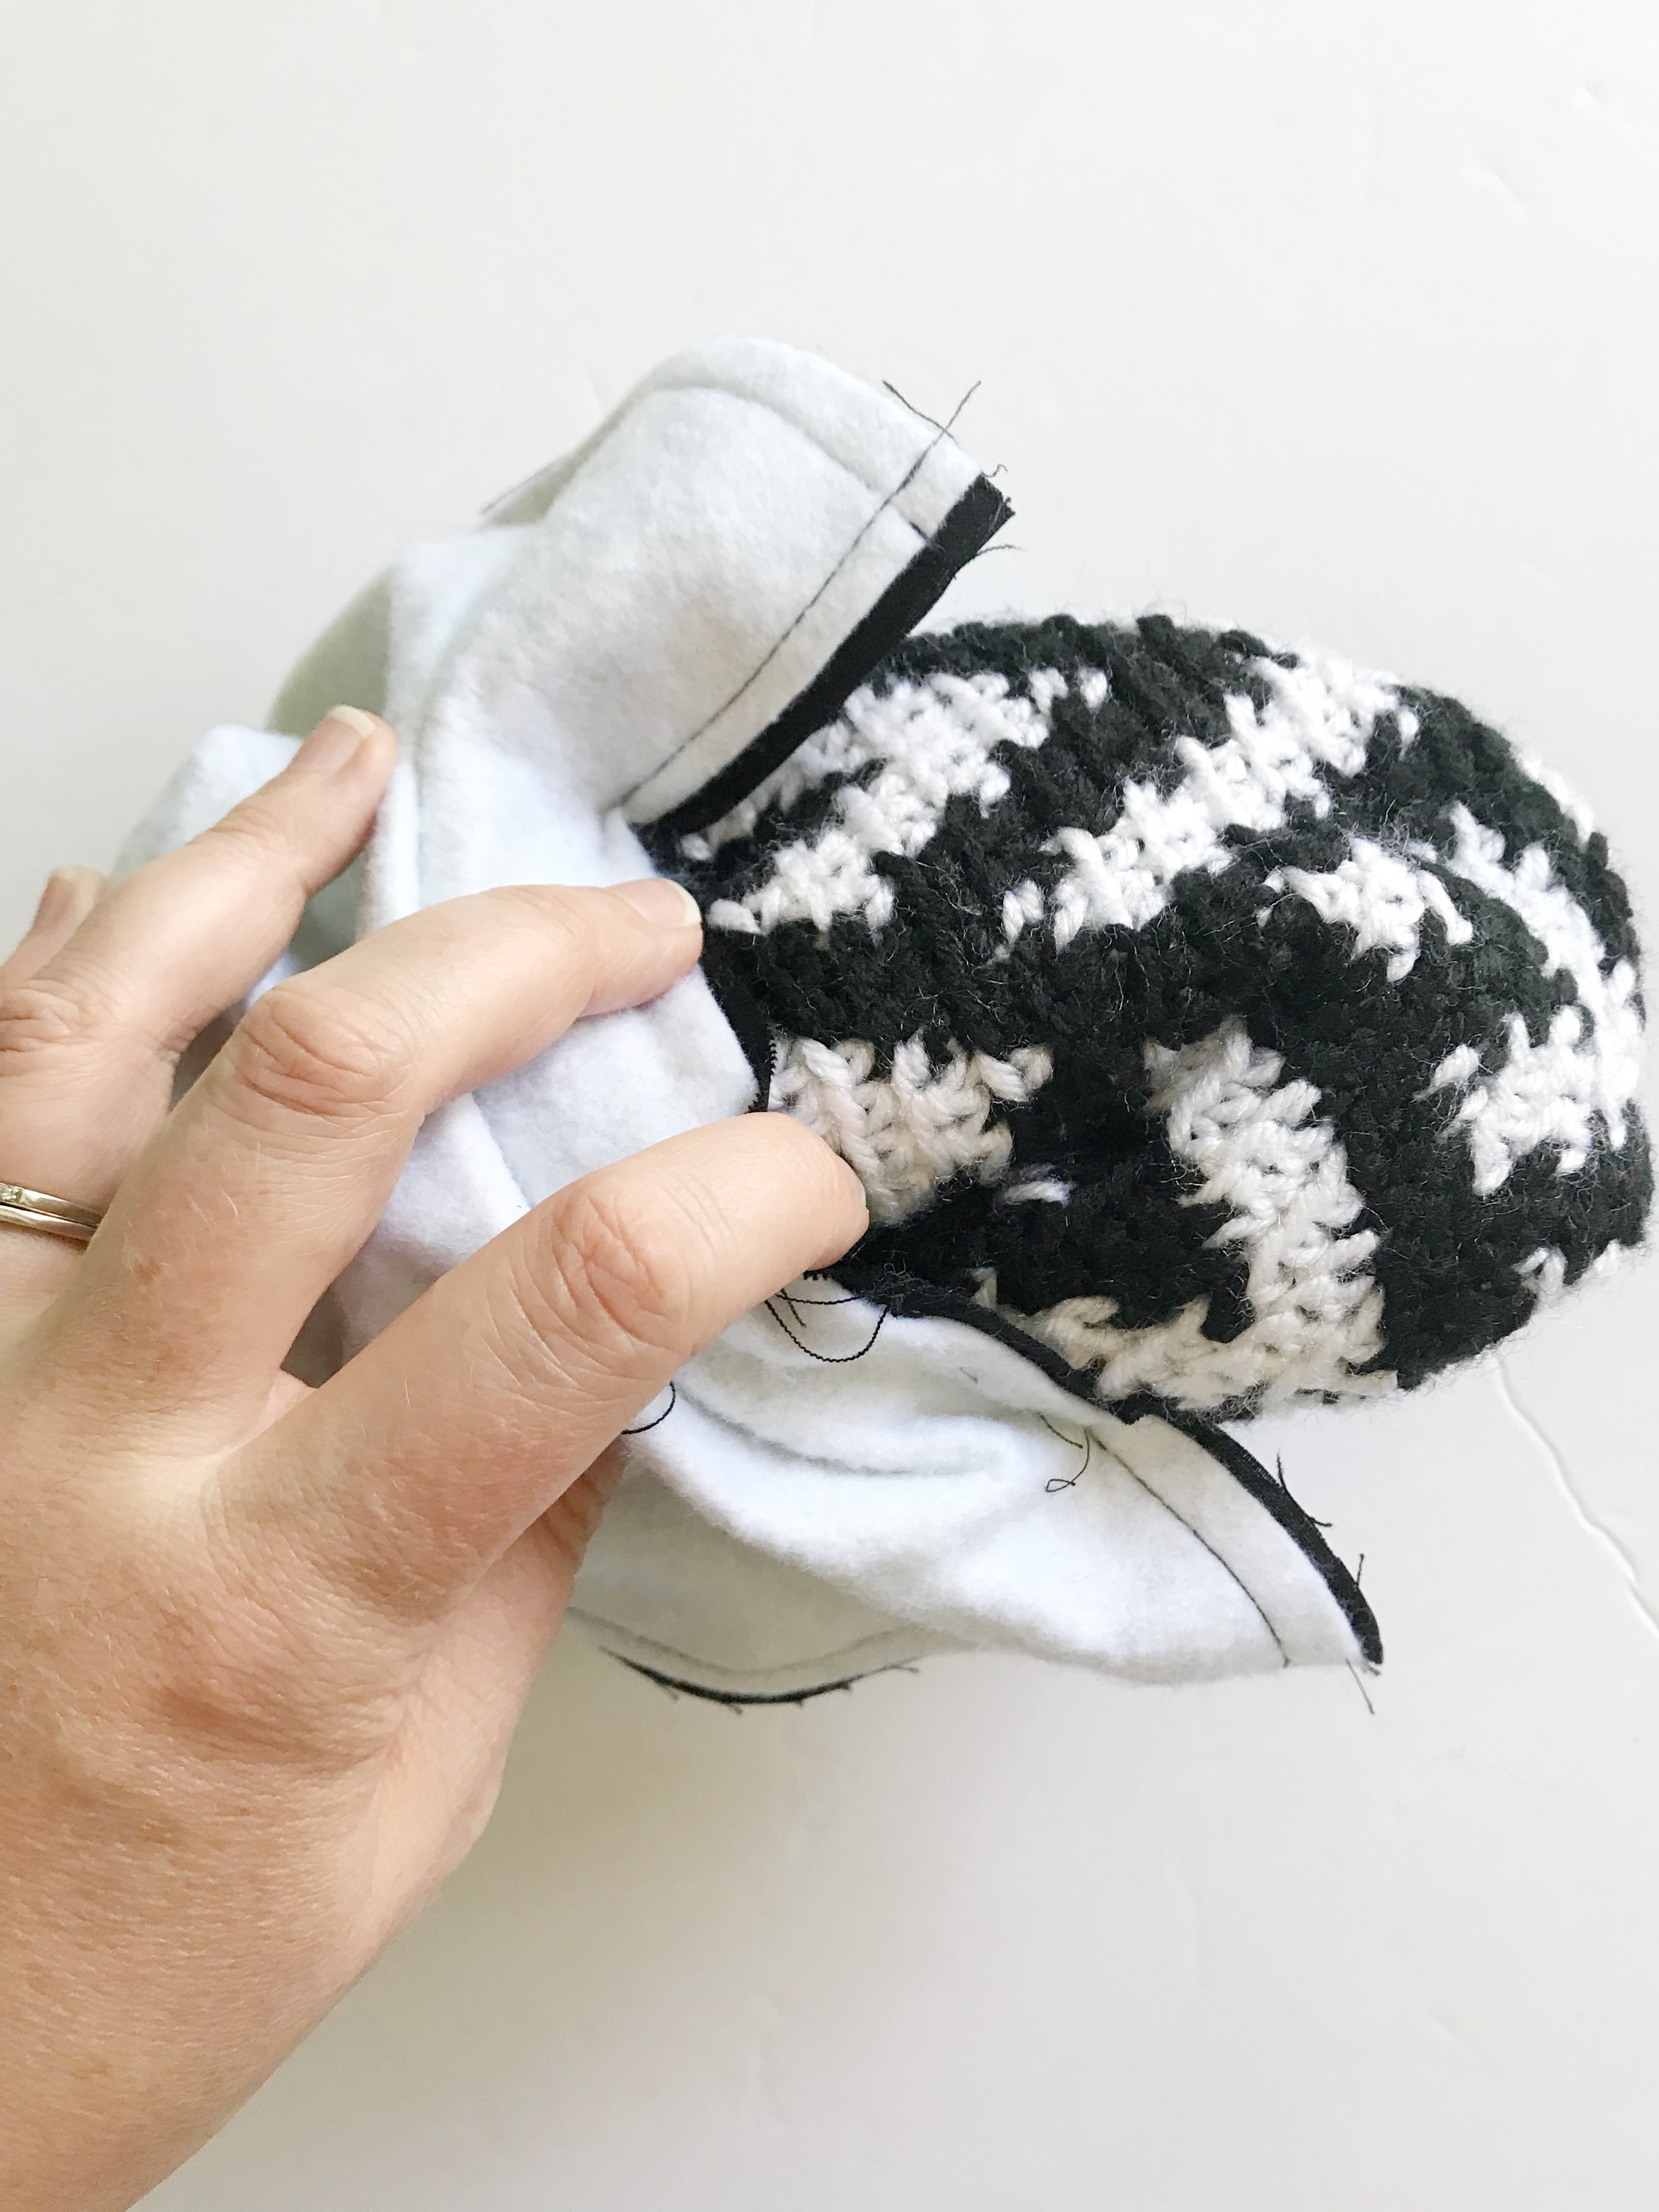
Once both sides are in place, unzip the zipper almost all the way. Align the zipper ends and bring the lining pieces and the crochet panels together with right sides in.


Sew along the sides and bottom of the lining pieces, leaving a small gap for turning. Then using black yarn and a tapestry needle, whip stitch along both sides and the bottom of the crochet panels.

Pull the pouch right side out thru the gap in the lining. Then stitch the lining closed and push it inside the pouch.
If sewing by hand follow the instructions below.


Using linen yarn and a tapestry needle, whip stitch the sides and bottom edge of the crochet panels together with right sides facing each other. Weave in ends and turn right side out.
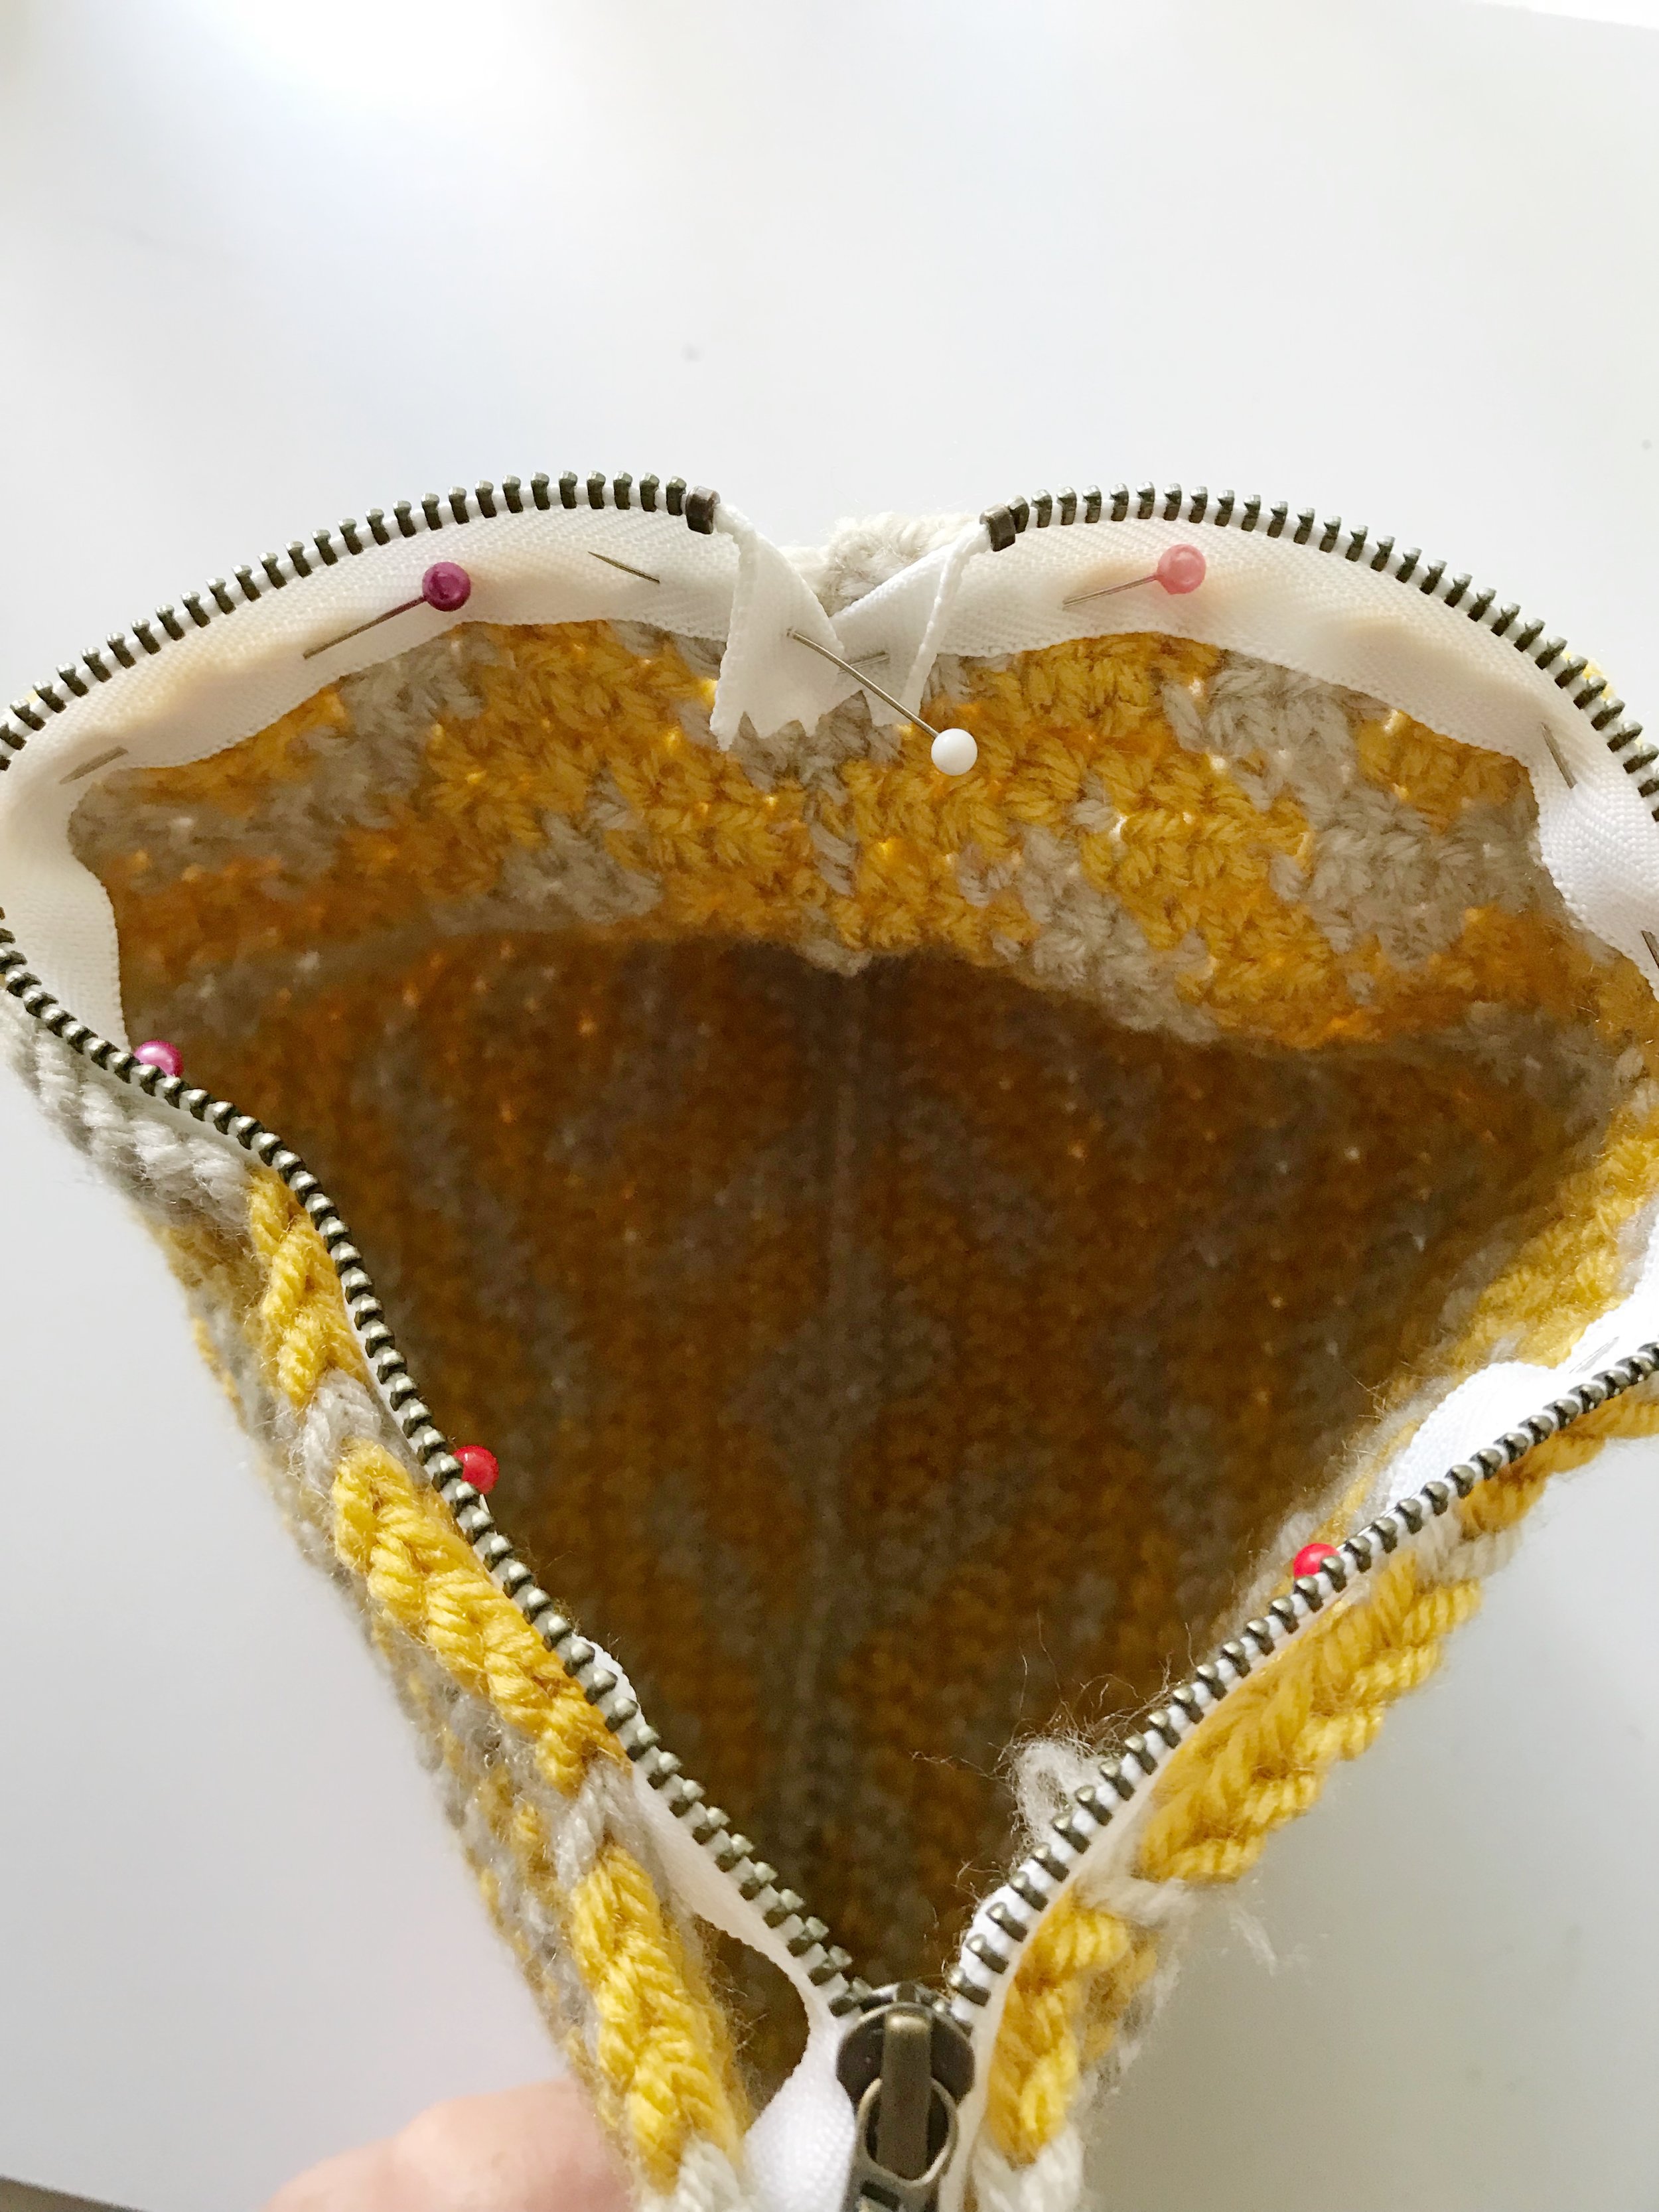
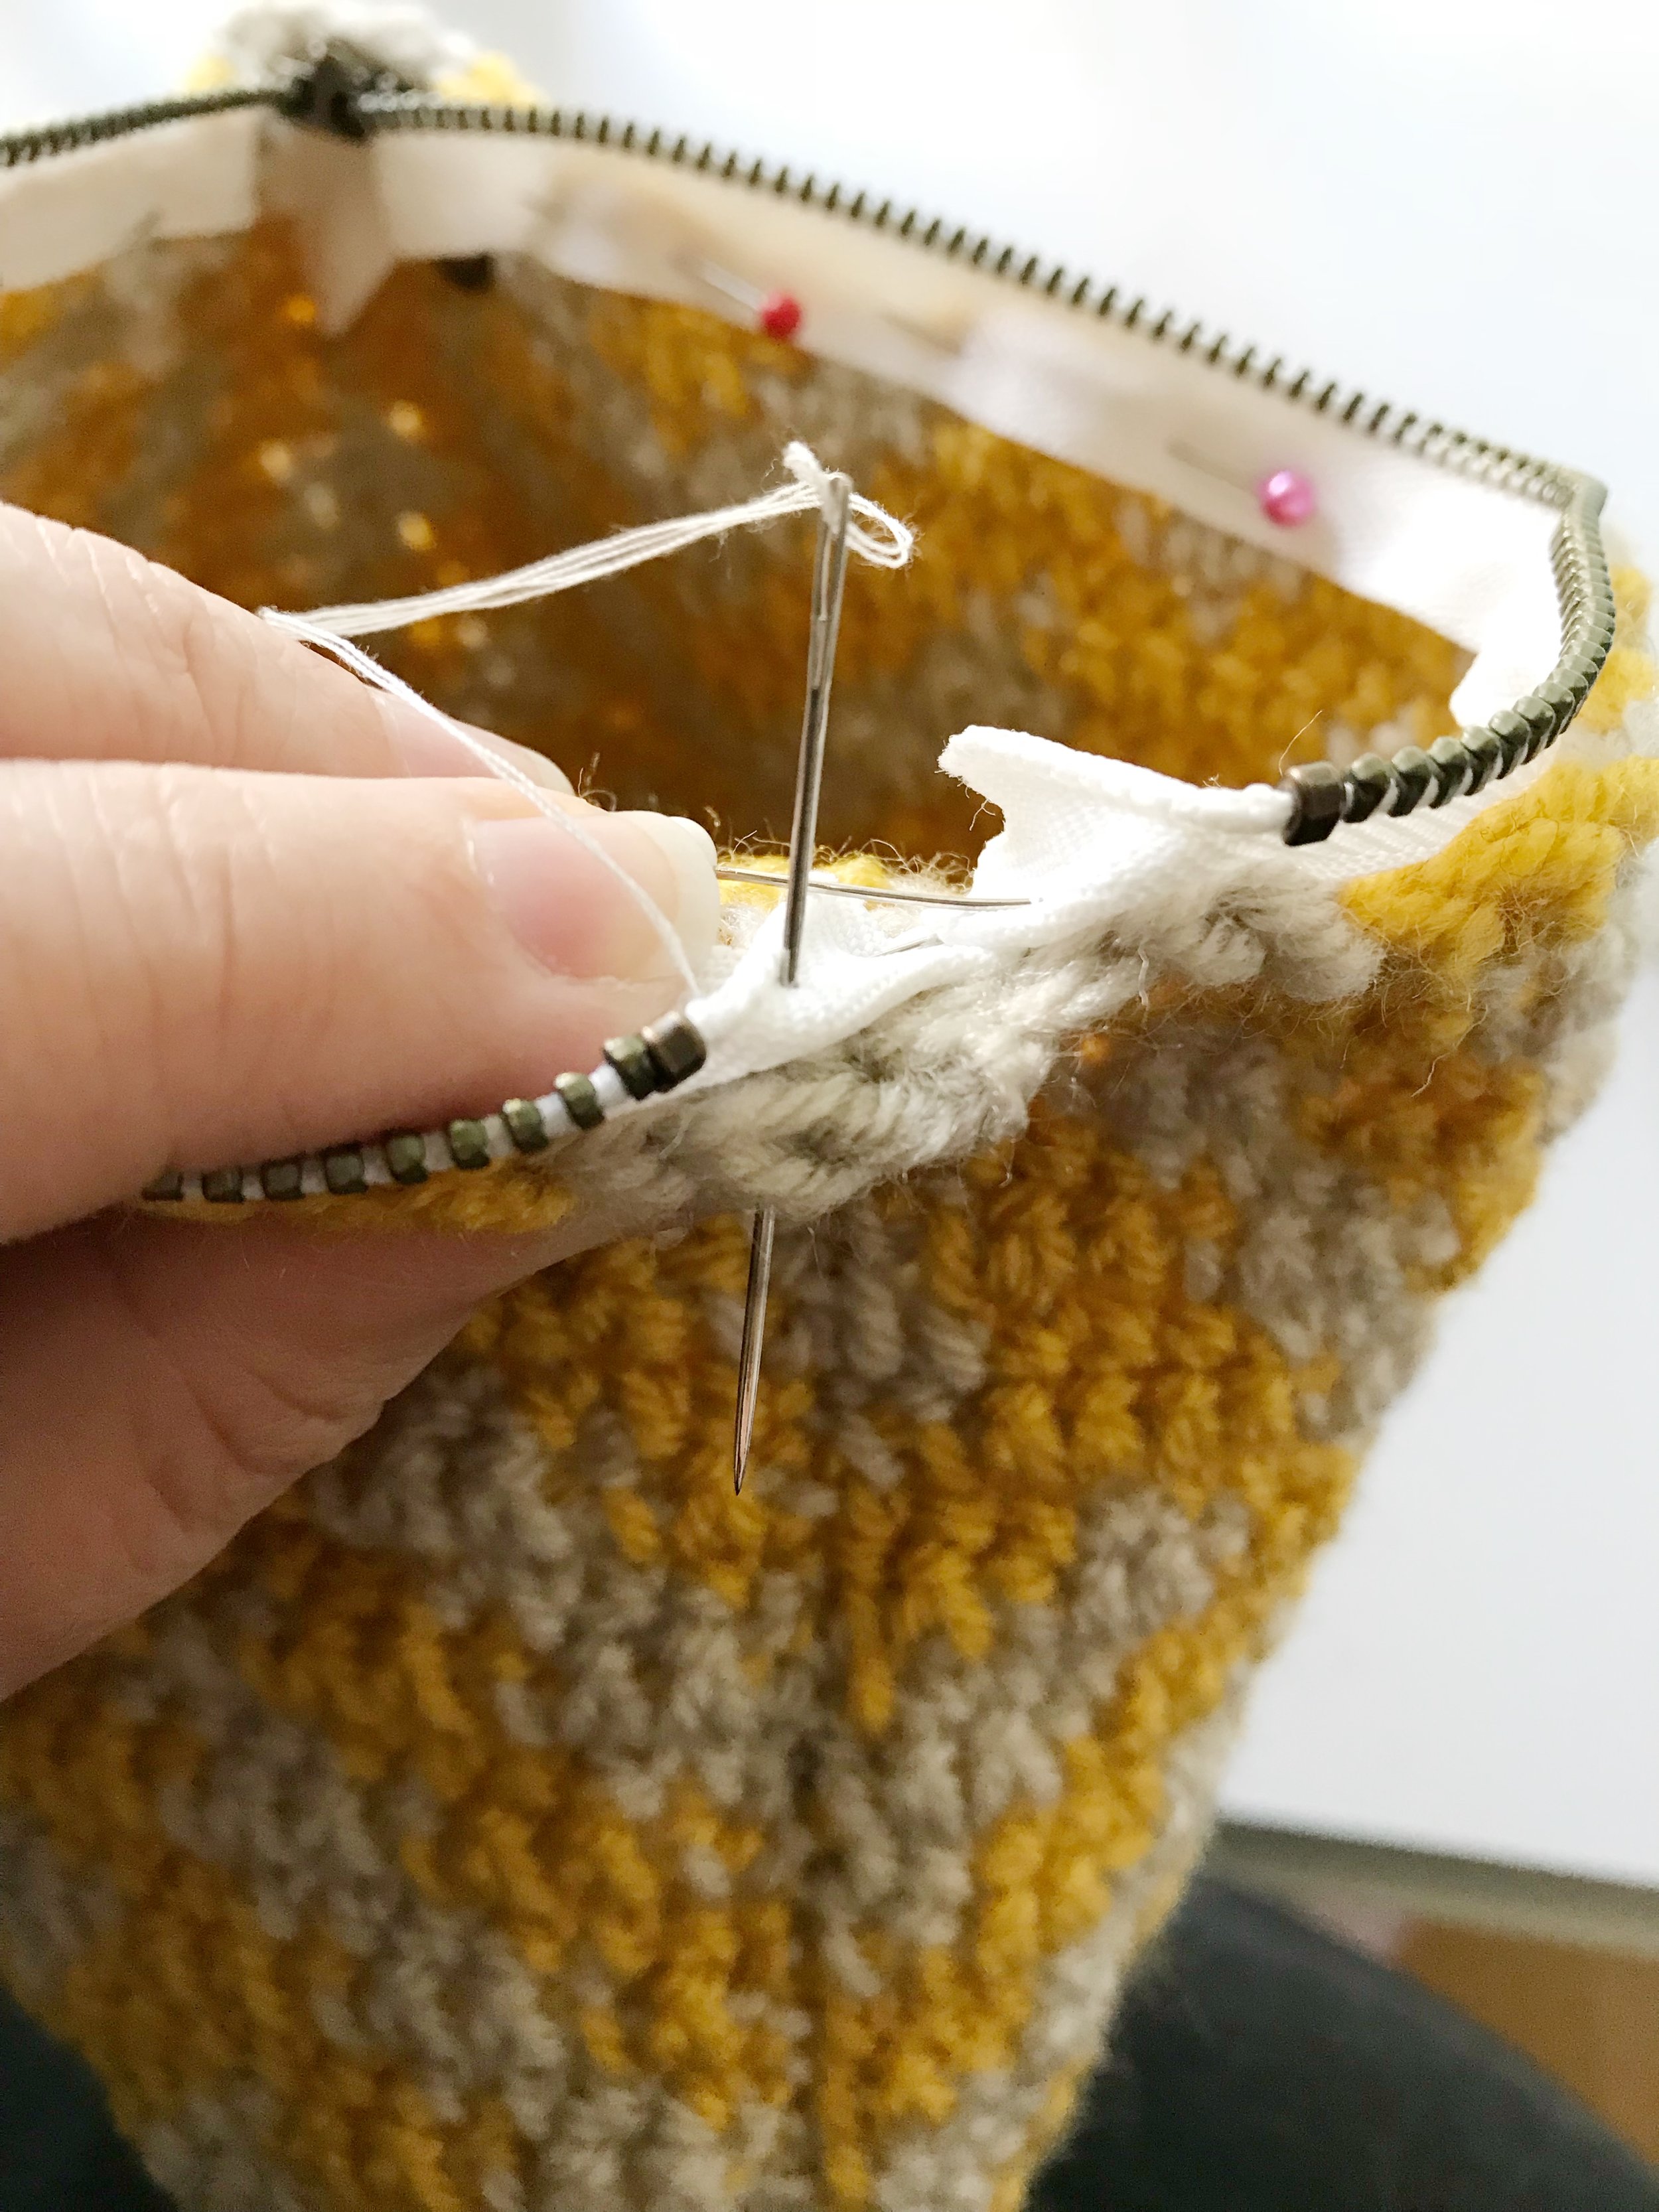
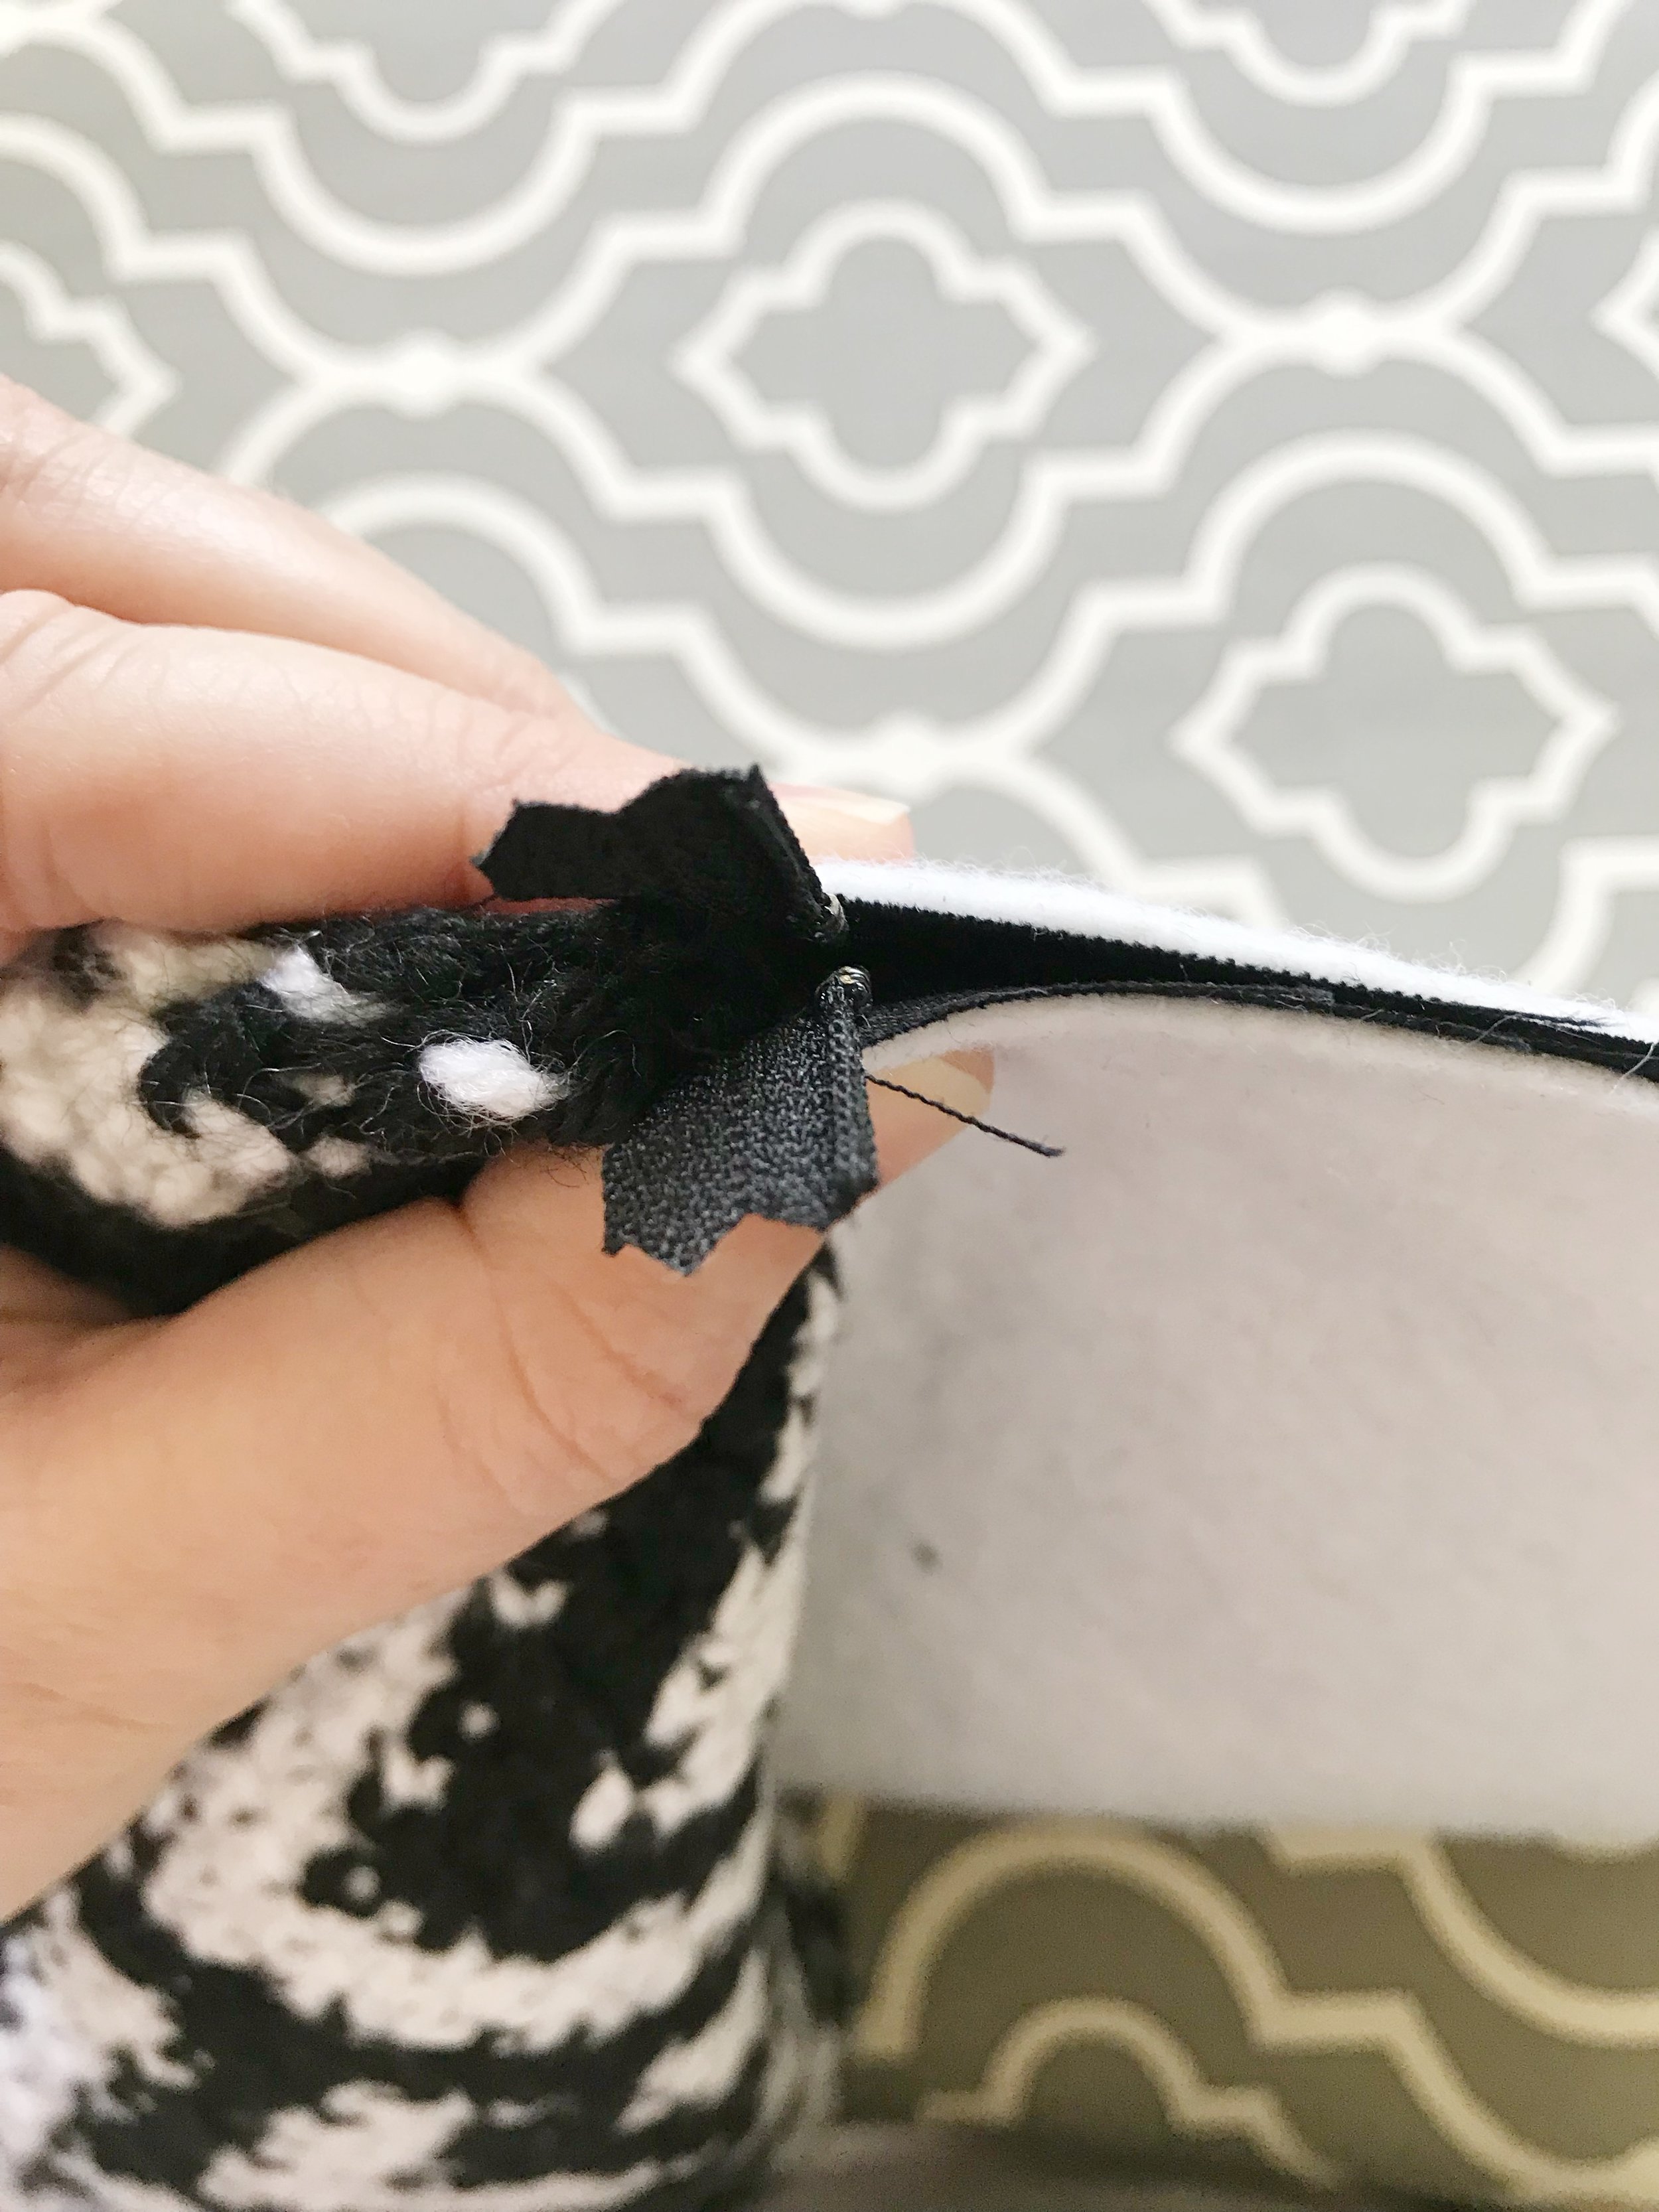
Pin the zipper to the inside edge of the pouch with teeth facing up. Fold the zipper ends over at a 45 degree angle and then using needle and thread, sew into place. Make sure to sew thru the ends so they will stay tucked inside the pouch.
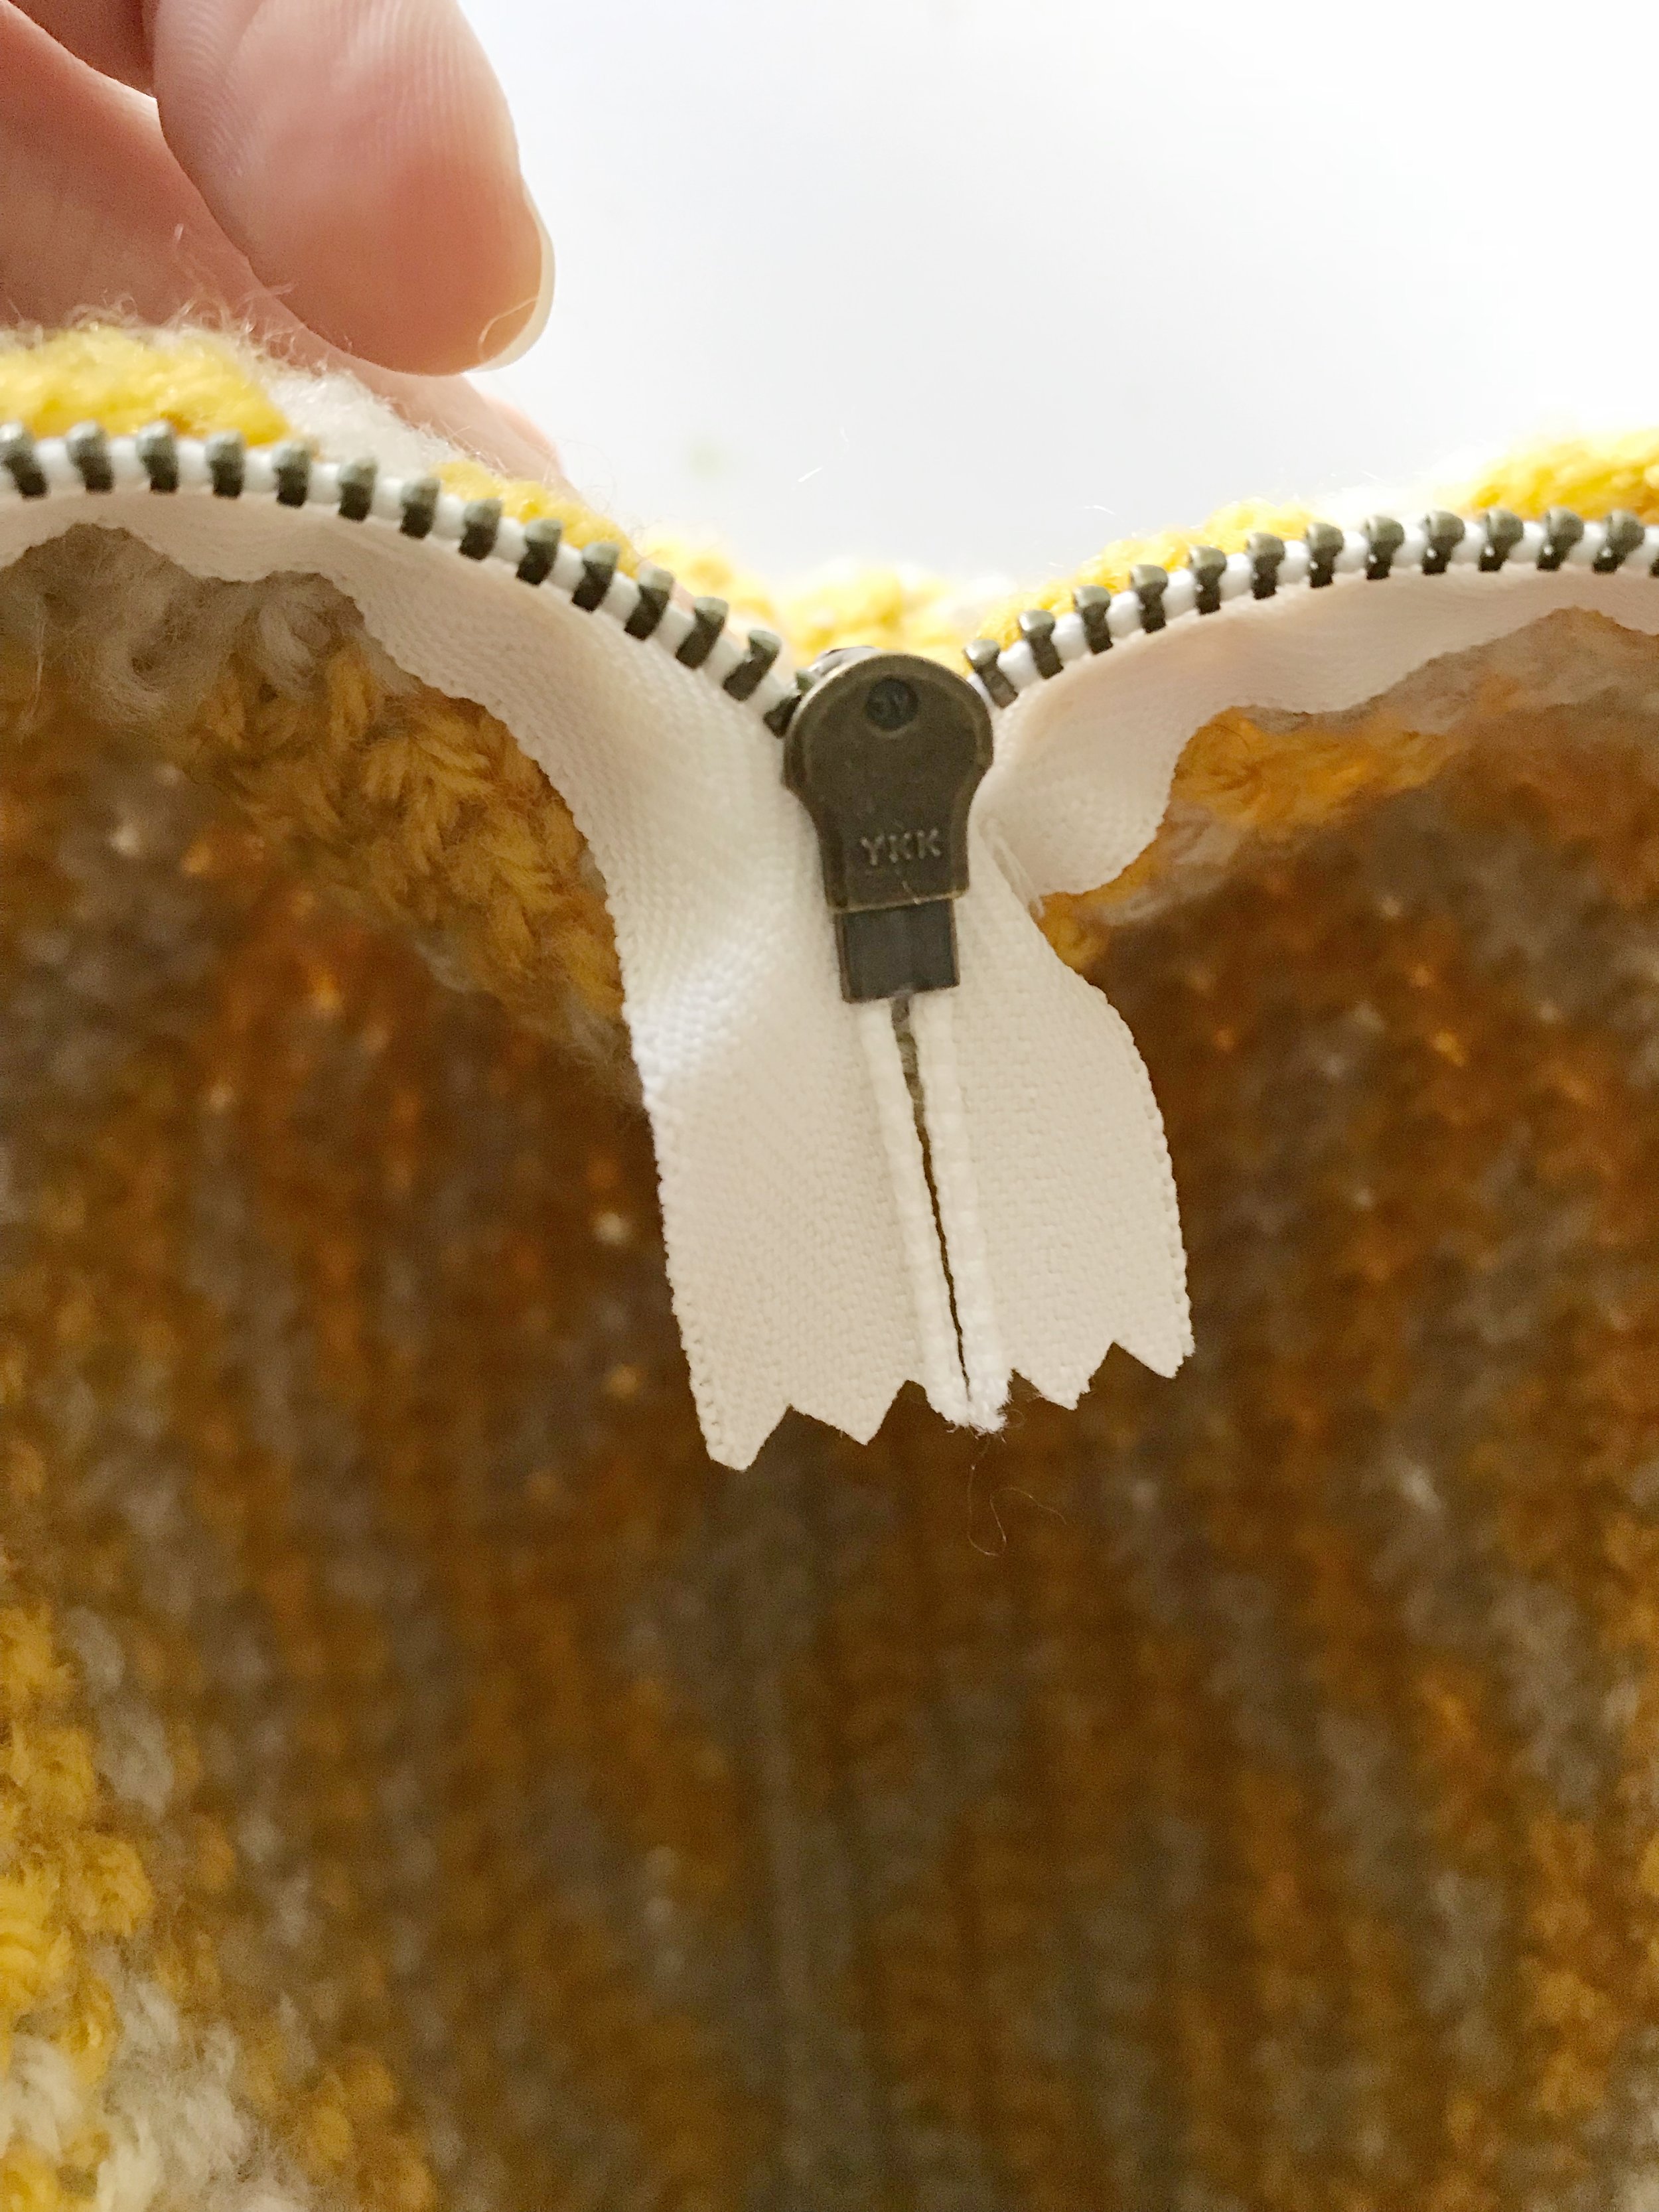


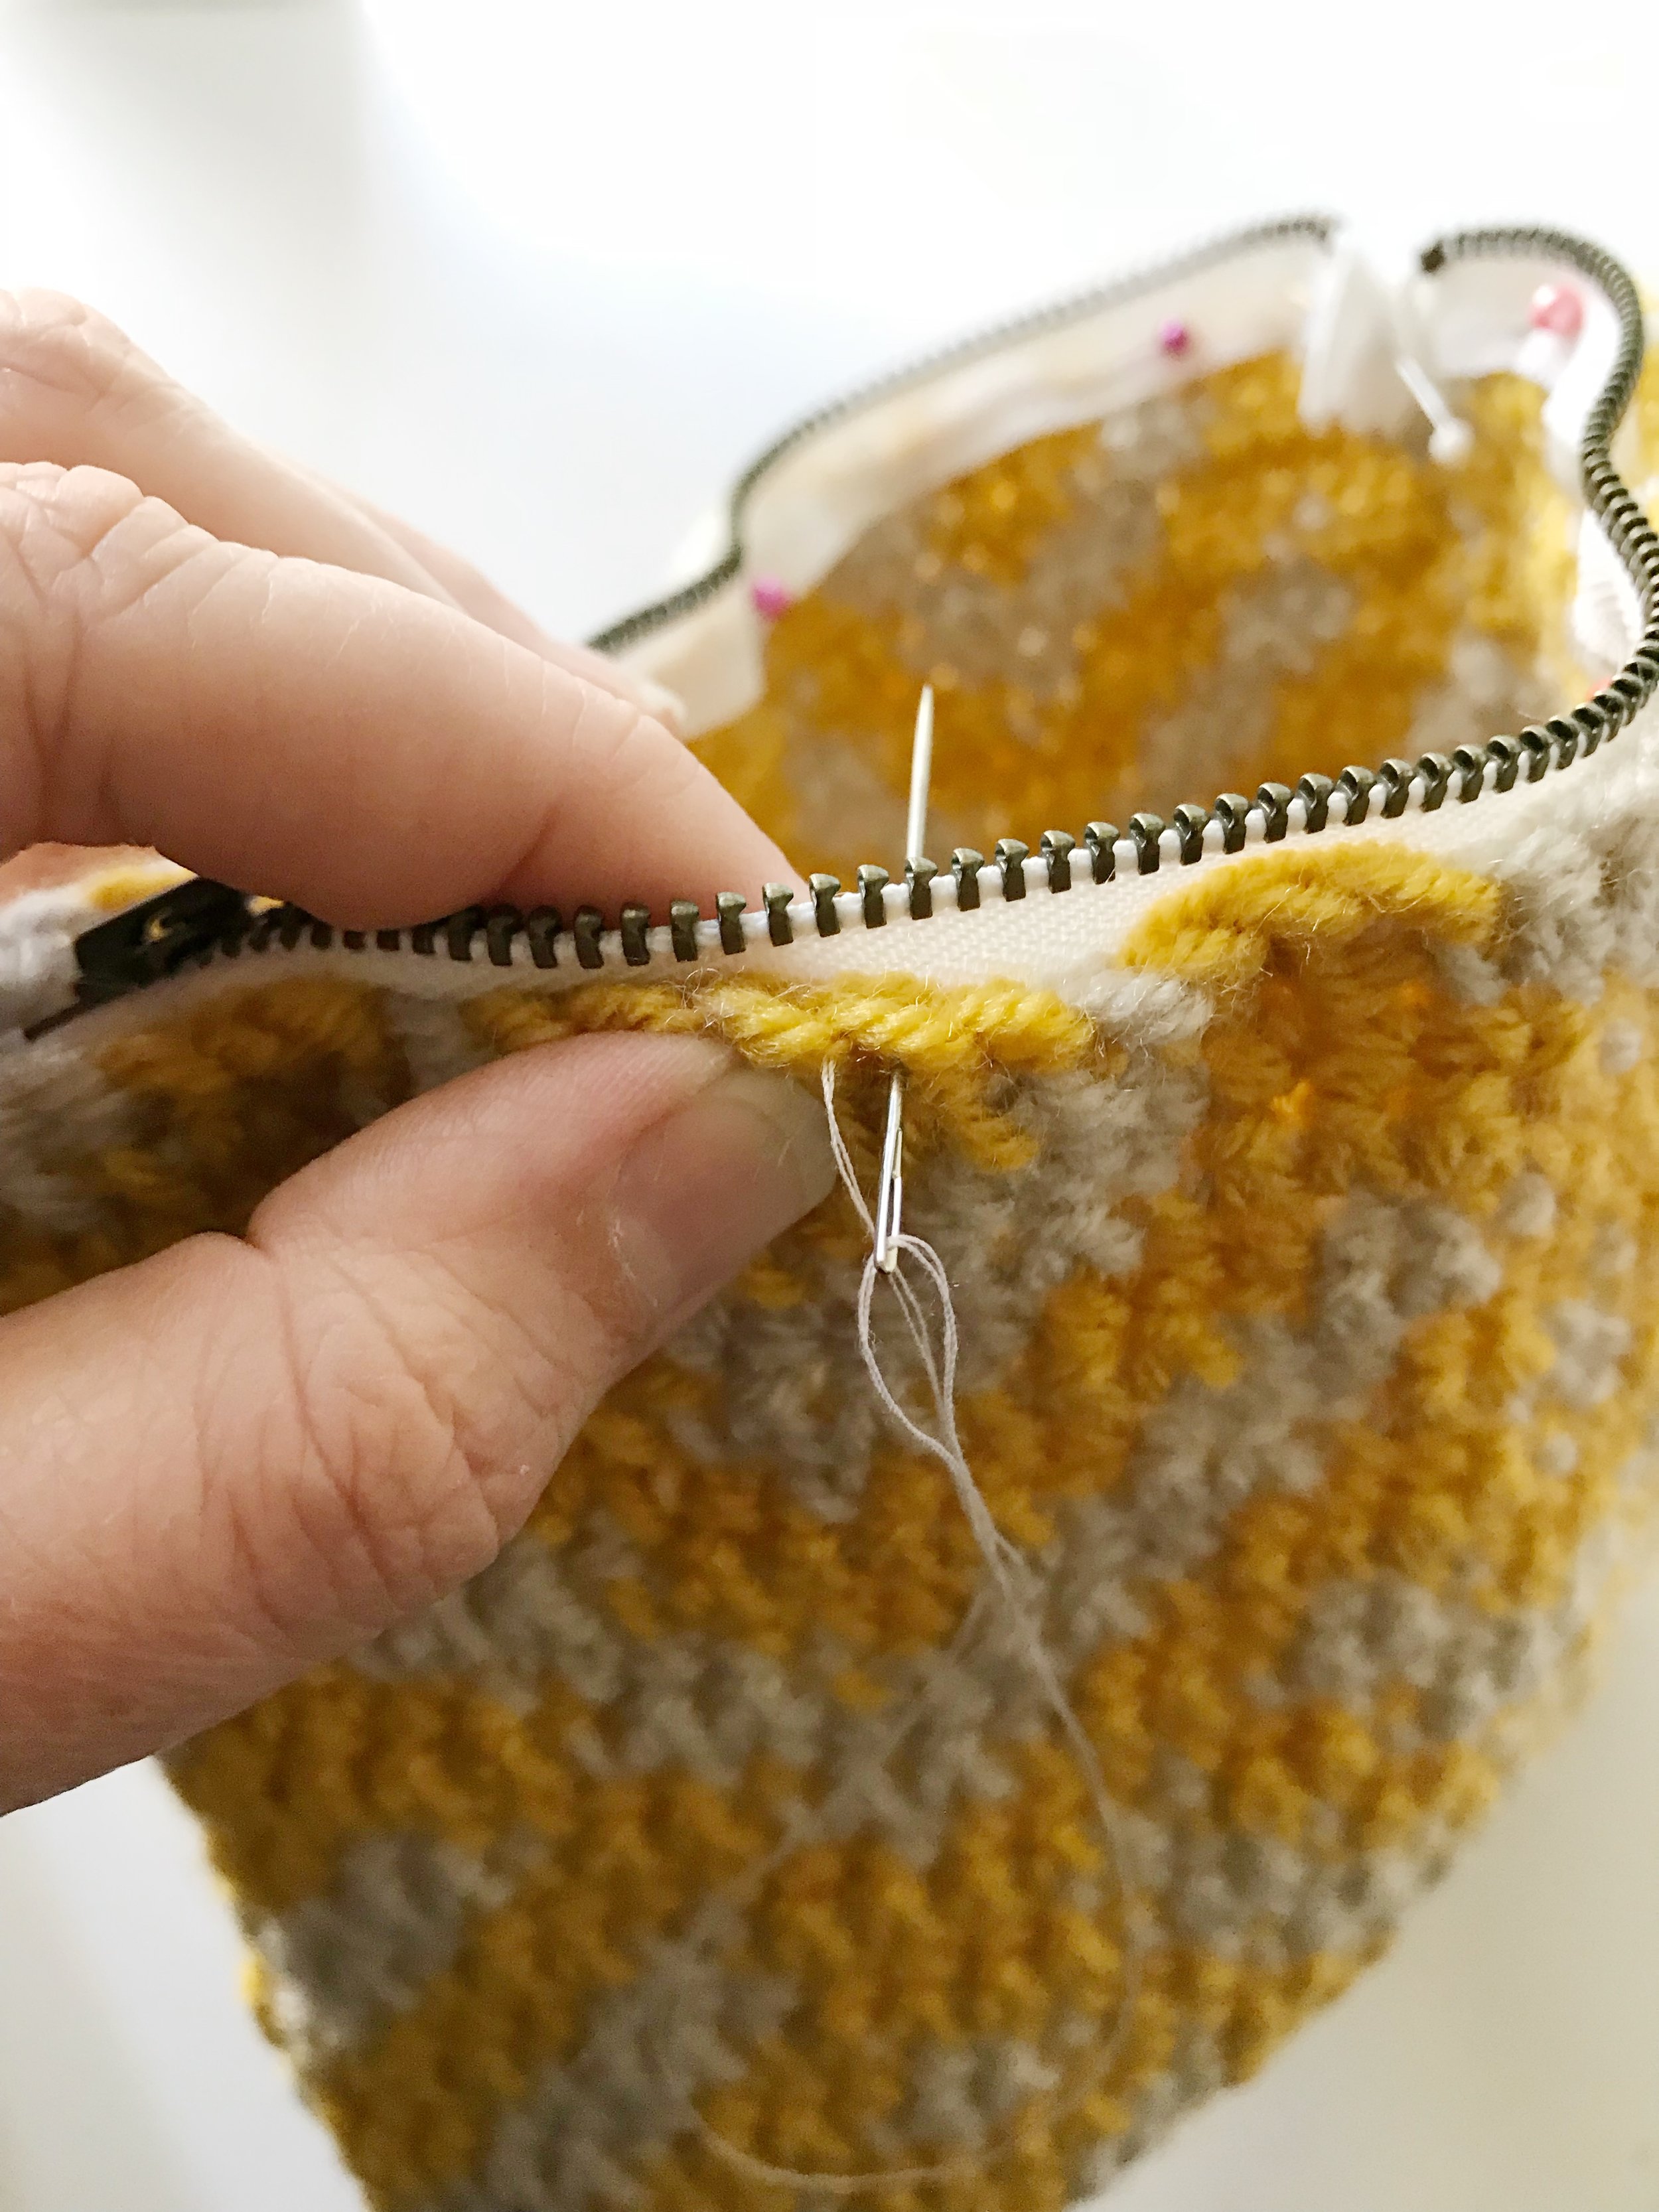
The end of the zipper can be a bit tricky. Sew the zipper in place as close to the seam of the pouch as possible. Then fold the ends of the zipper up at a 45 degree angle and stitch in place. The very edge of the pouch will not be attached to the zipper.


If adding a lining, sew the two pieces together along the sides and bottom with right sides facing each other. You can do this with a machine or by hand. Then fold down the top edge about a 1/4 inch all the way around and press. Pin the lining into the pouch so that the edge covers most of the zipper tape. Using needle and thread, stitch the lining to the zipper all the way around.
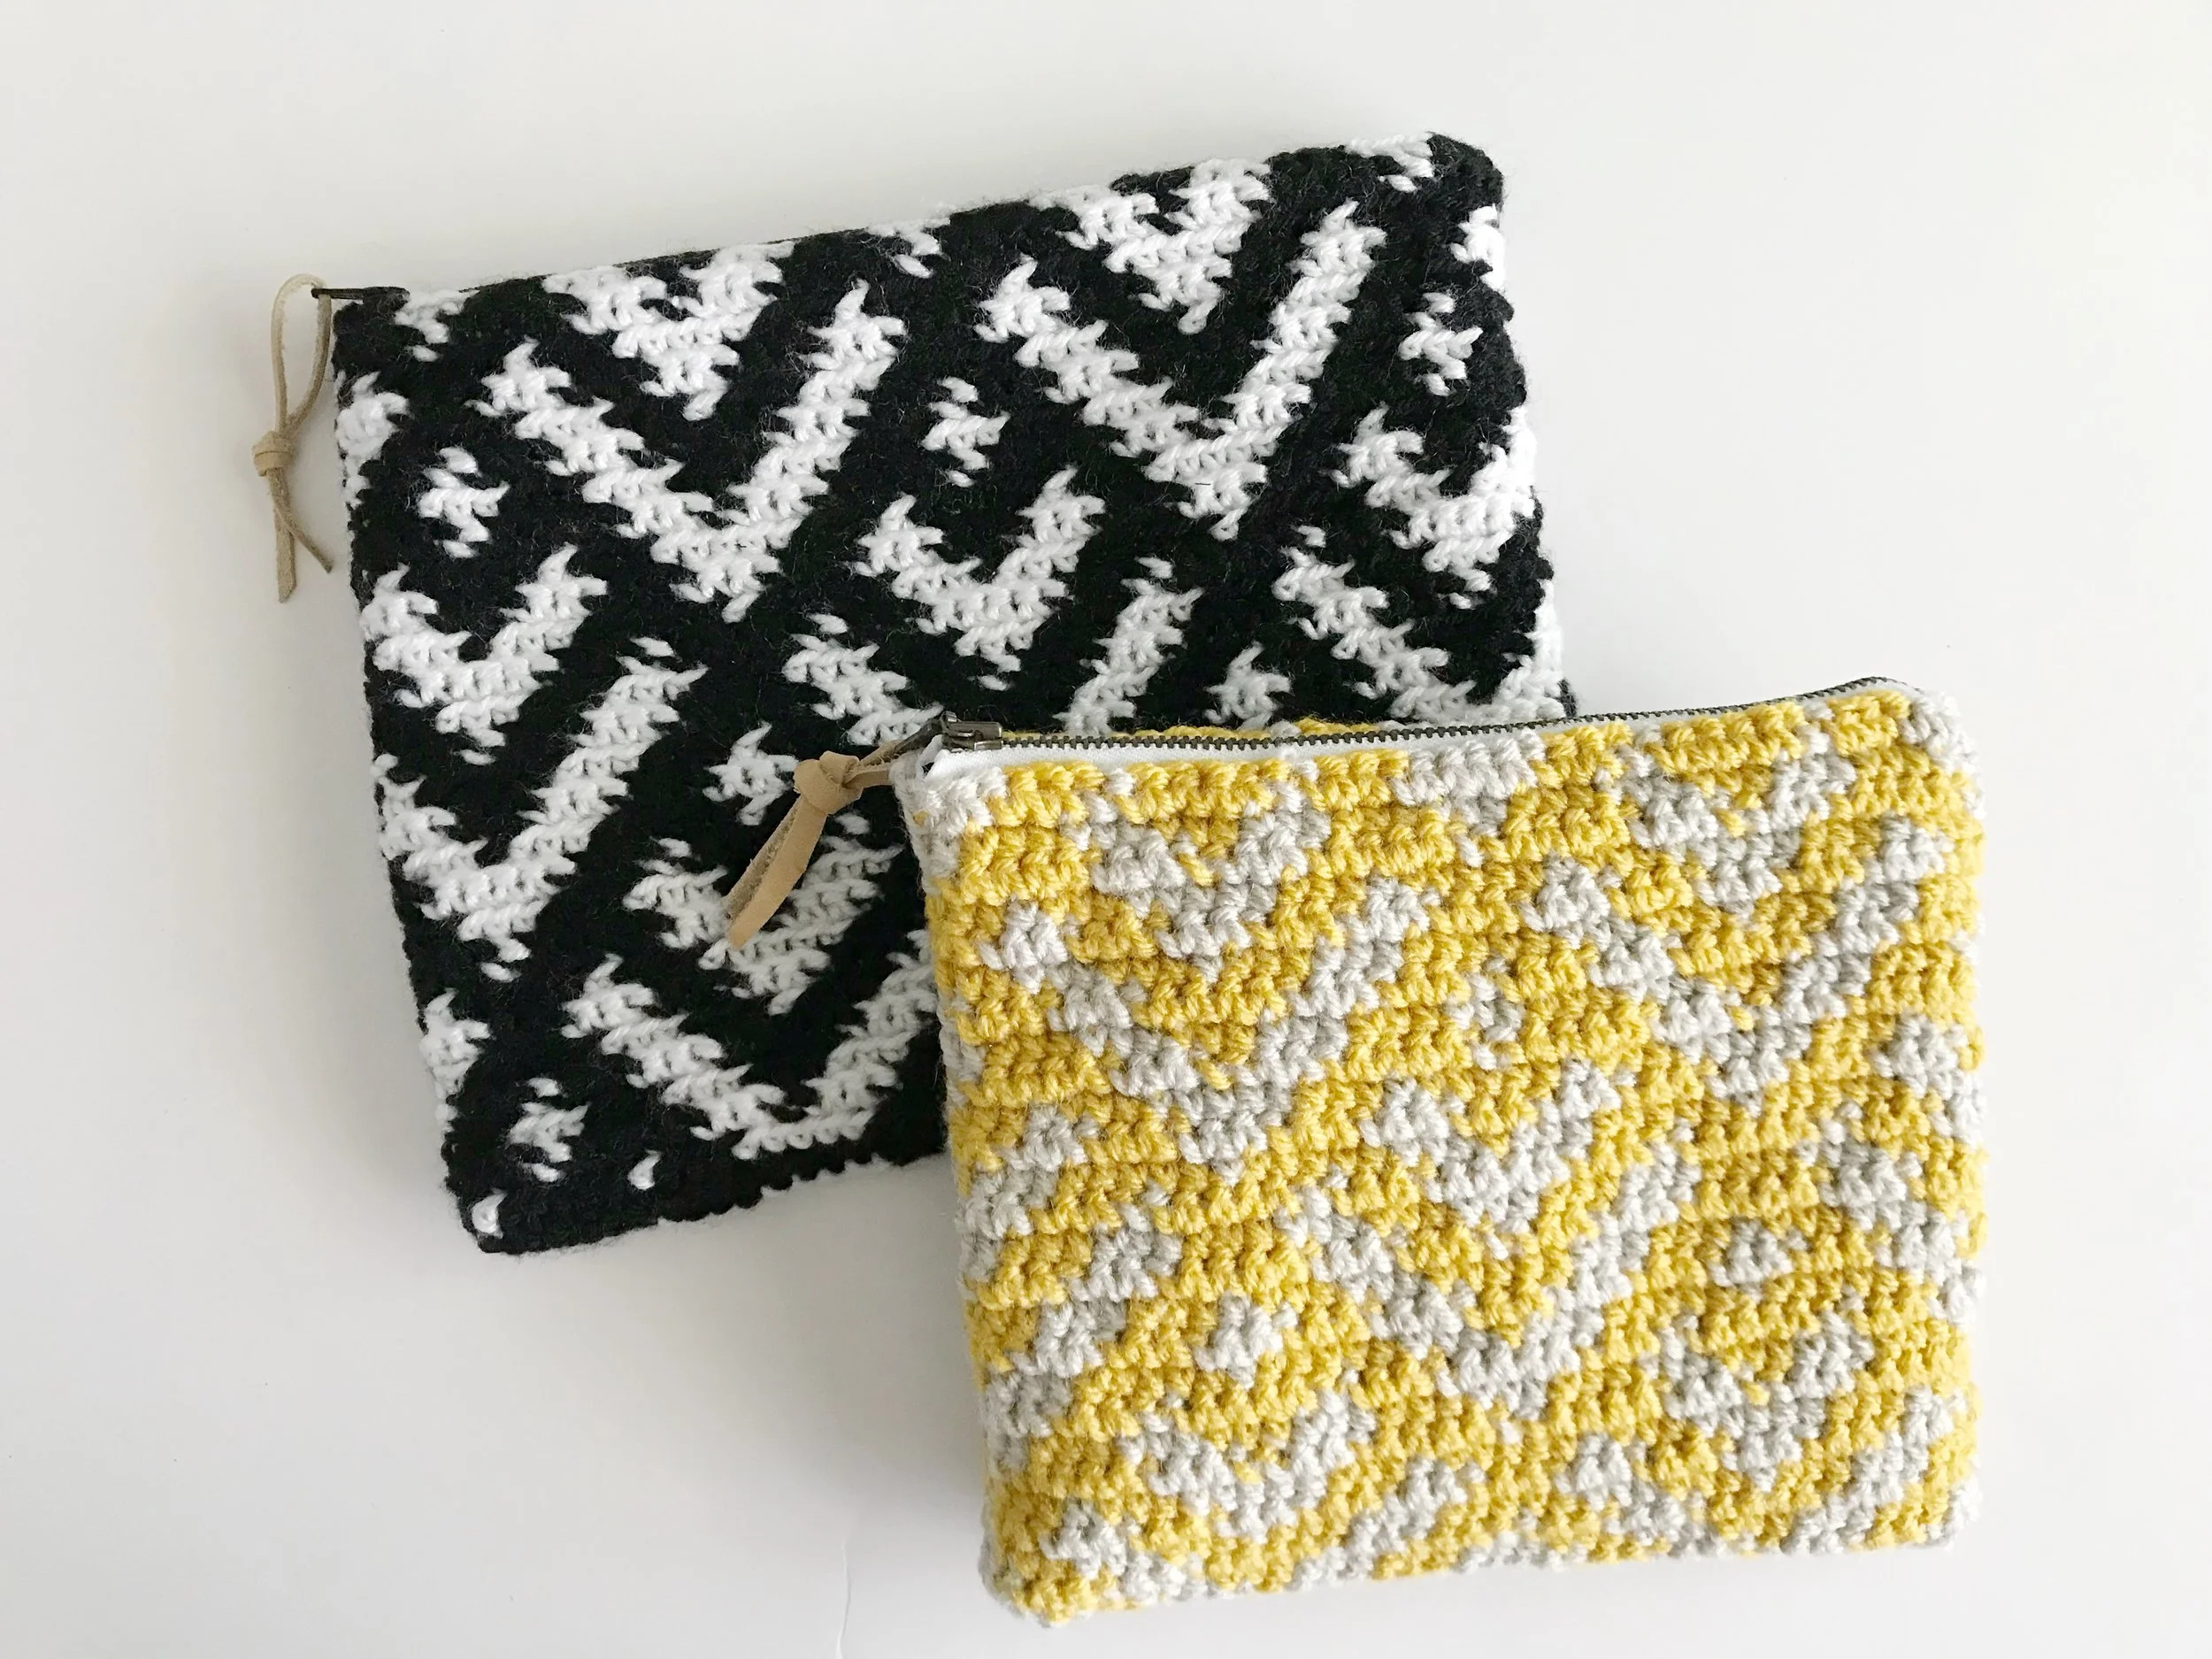
Congratulations, you just finished your Landry pouch! These little pouches are perfect for holding craft supplies, markers or as a little clutch for going out. I hope you enjoyed this free pattern. If you would like to purchase the PDF it is available in my shop HERE.
I'd love to see your finished Landry Pouches. Tag me @meghanmakesdo or use #meghanmakesdo or #landrypouch on social media so I can see your amazing work!
Enjoy!
Meghan