
The Billie Tee- Free Crochet Pattern
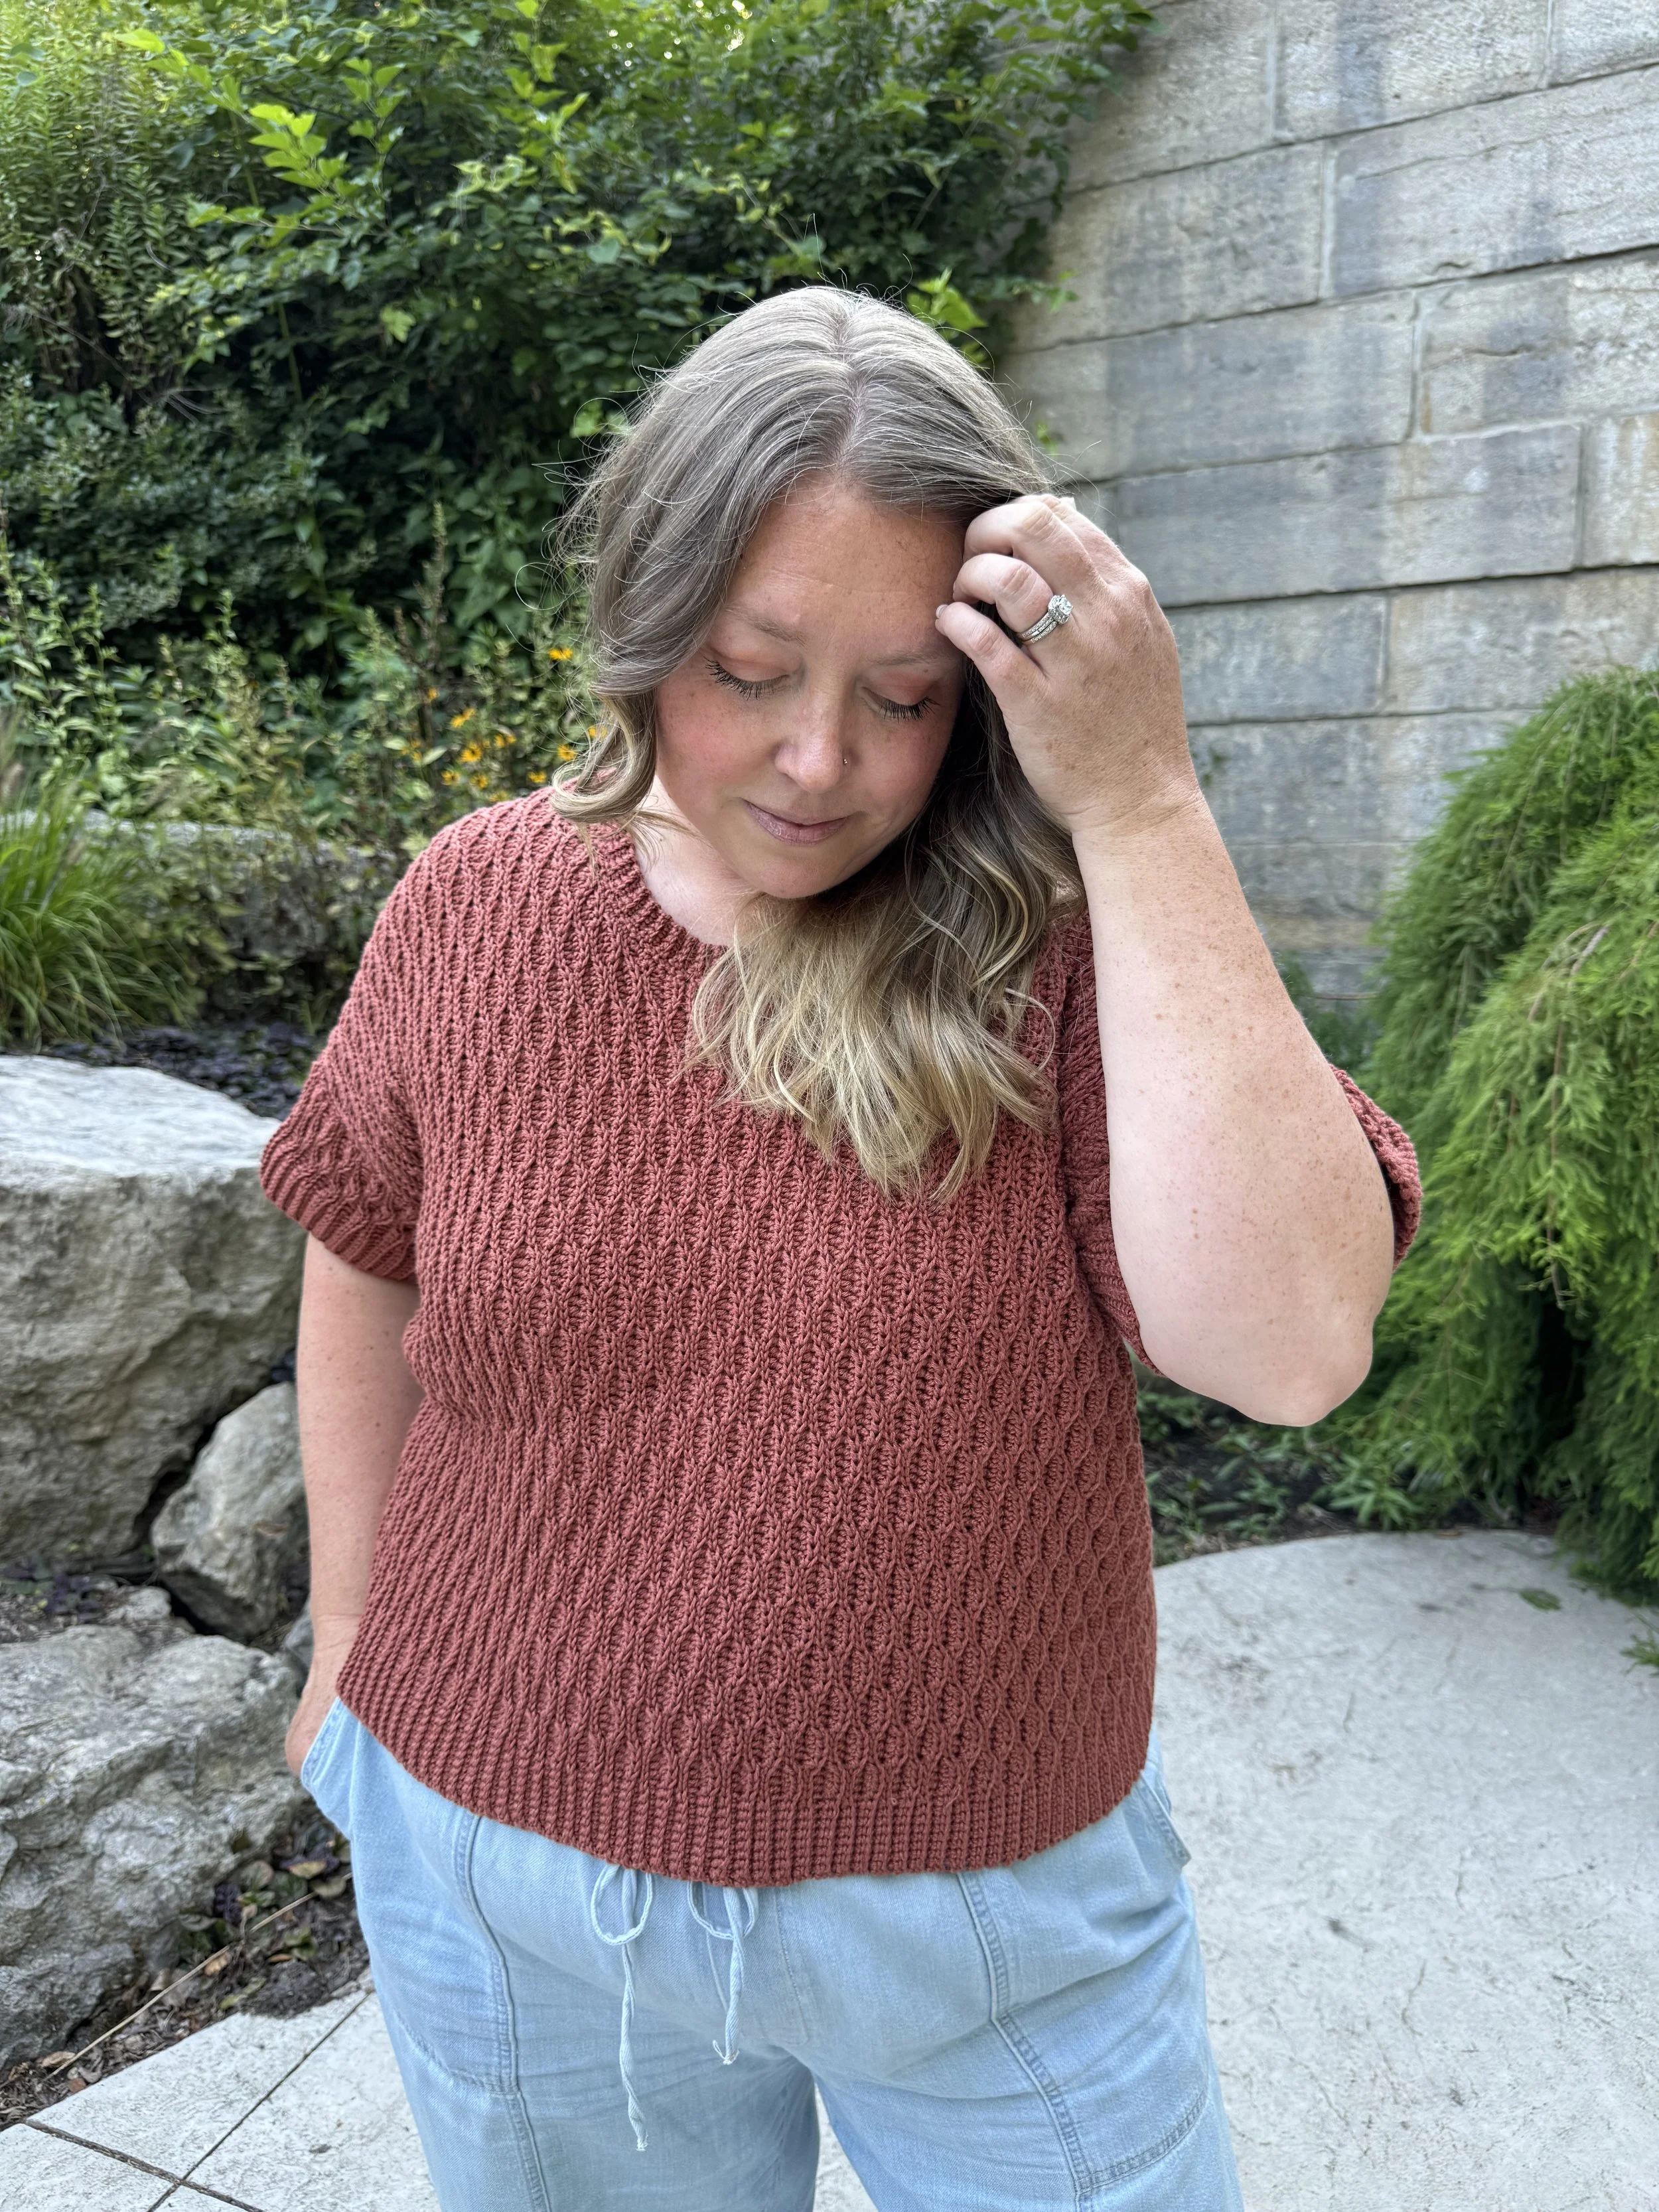
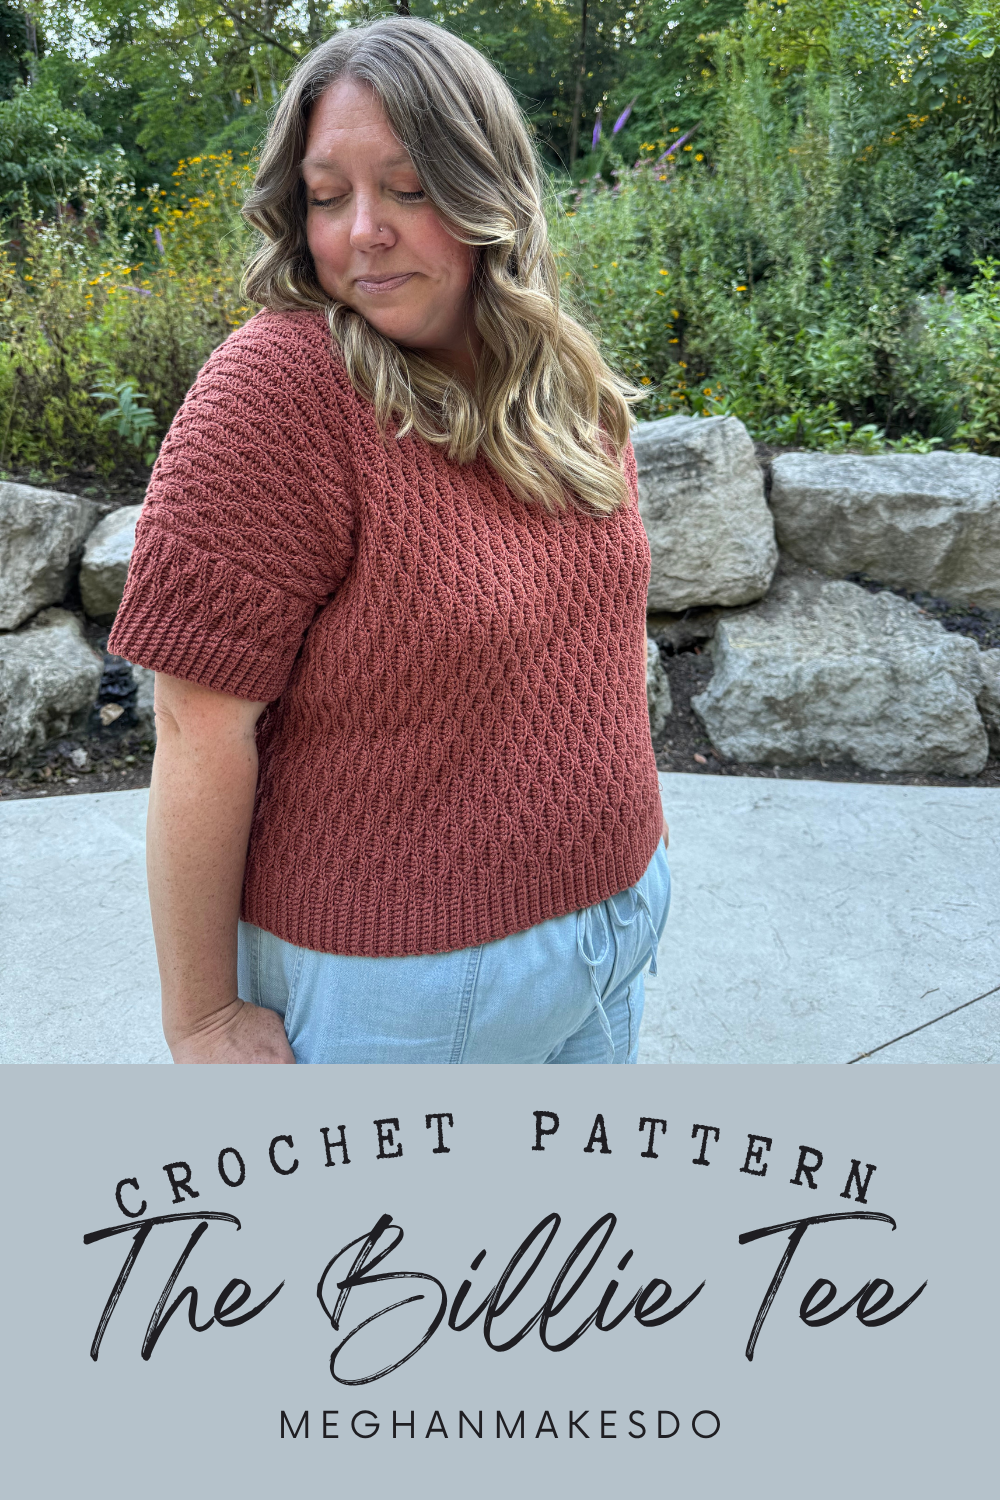
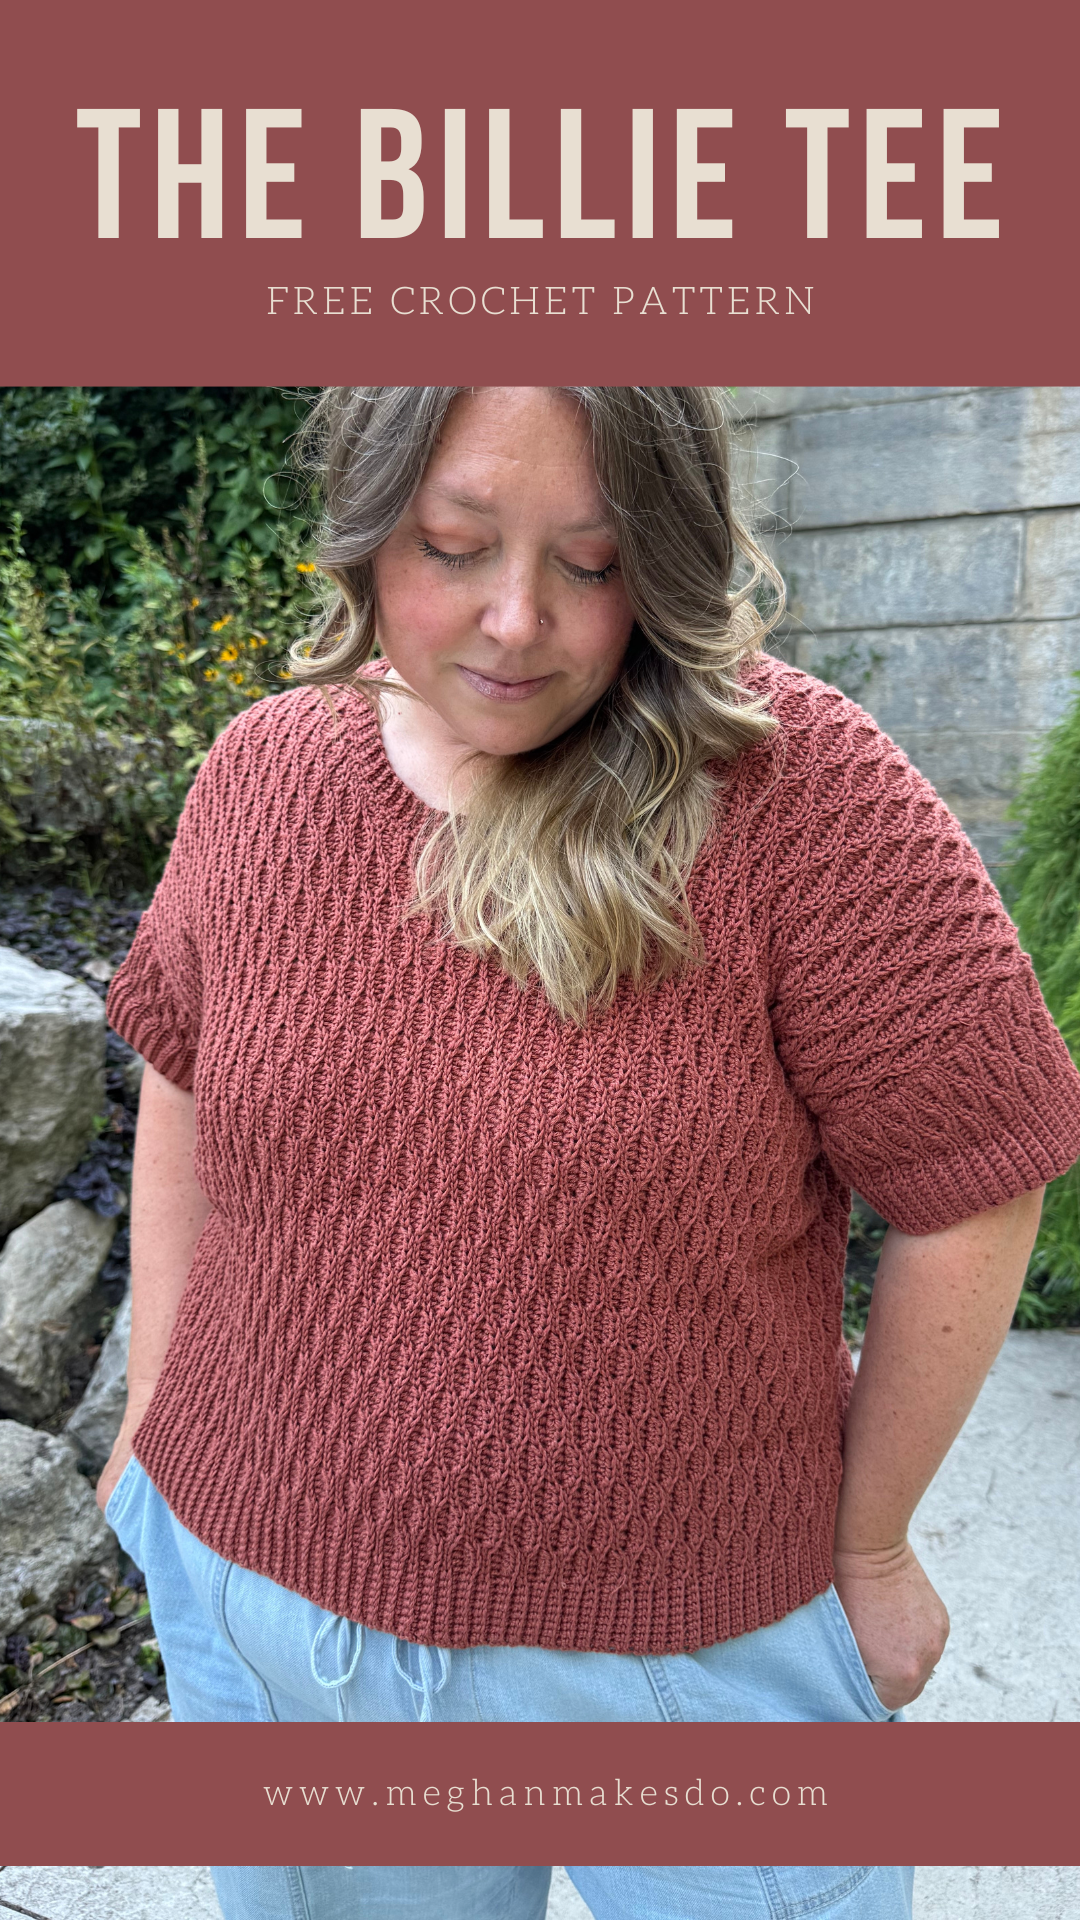
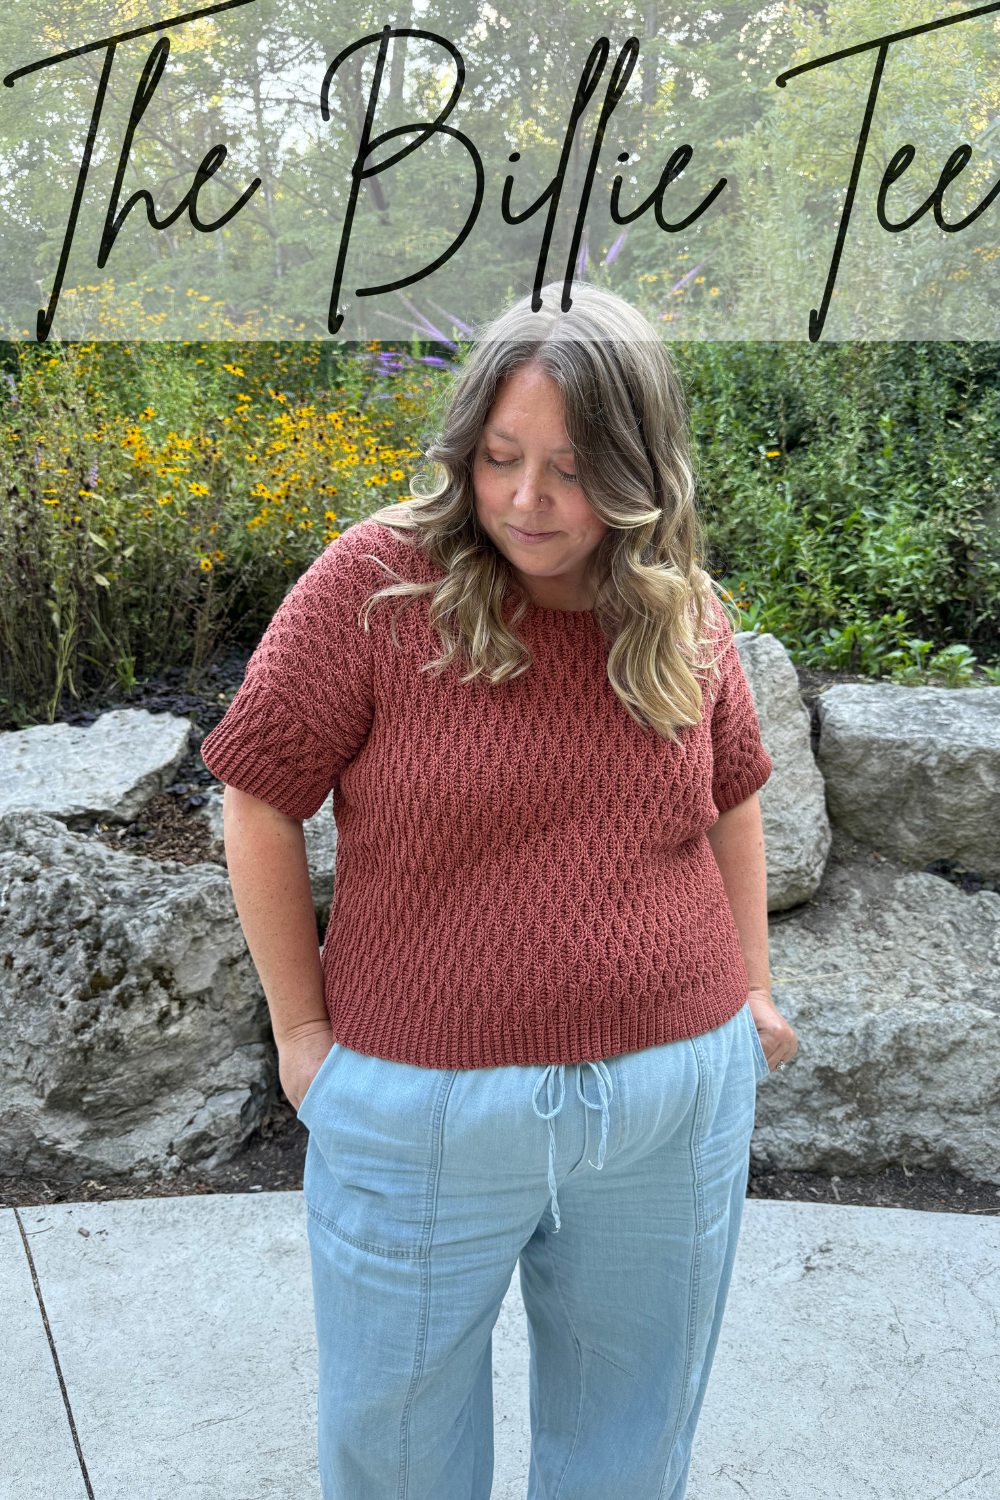
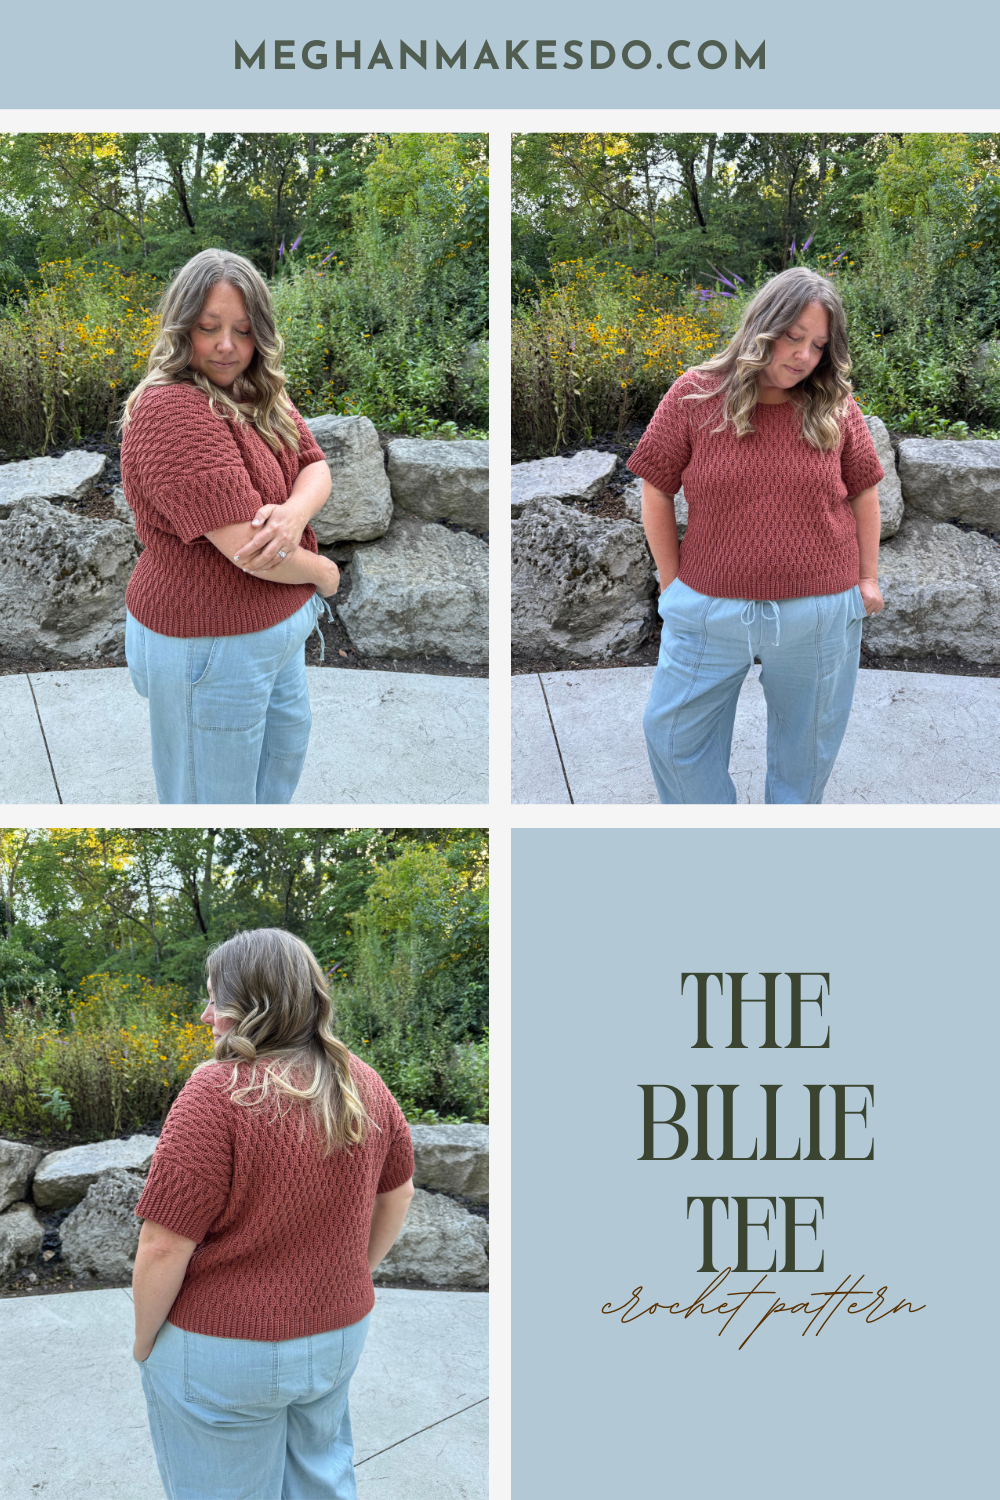
The Billie Tee is a slightly oversized, short-sleeve crew neck top with timeless style and an eye catching texture. Worked side to side using a combination of simple crochet stitches, it creates a fabric with gorgeous drape and a polished, knit-inspired look. Designed to be a versatile wardrobe staple, the Billie Tee is the perfect handmade piece to dress up or down all season long. Keep scrolling for the free pattern, pick up the PDF in my shop or grab the complete kit from Lion Brand Yarn.
Earlier this year, after I designed the Bronte Tee knitting pattern, I asked over on Instagram if you all would want a crochet version. The answer was a resounding YES!
I couldn't wait to get started, so I ordered the yarn right away and did my best to wrap up my other projects so I could finally dive in. Of course, those projects took a little longer than expected, and I ended up crocheting most of the Billie Tee while I was on my trip to Norway. There was a lot of crocheting on airplanes, buses, and ferries and even on a grassy hillside in Viking country.
Luckily, I'd already spent a good chunk of time working out the design before the trip, so once we left, I could simply enjoy the crocheting process in between all the amazing adventures.
When I started looking for a crochet stitch that would mimic the beautiful knit texture of the Bronte Tee, I came across the almond ridge stitch, and it was practically perfect... except for one little detail. To get the stitch to look the way I wanted, I'd have to construct the tee sideways.
I've designed a handful of side-to-side projects before, but this one also needed a rounded neckline, and I won't lie that part made me a little nervous. In the end, I decided to jump in with both feet and trust that I'd figure it out along the way. Thankfully, it all came together!
I absolutely love how the Billie Tee turned out. The almond ridge stitch gives it that same delicate, knit-like texture I loved in the Bronte Tee while still celebrating crochet for what it is. It's made with the same lightweight Lion Brand Yarn Cottino, so it has beautiful drape and is incredibly comfortable to wear. Plus, it's easy to customize, making it simple to create a fit that's just right for you.
Making Adjustments
I want your Billie Tee to fit just the way you like it, so here are a few tips to help you customize the size.
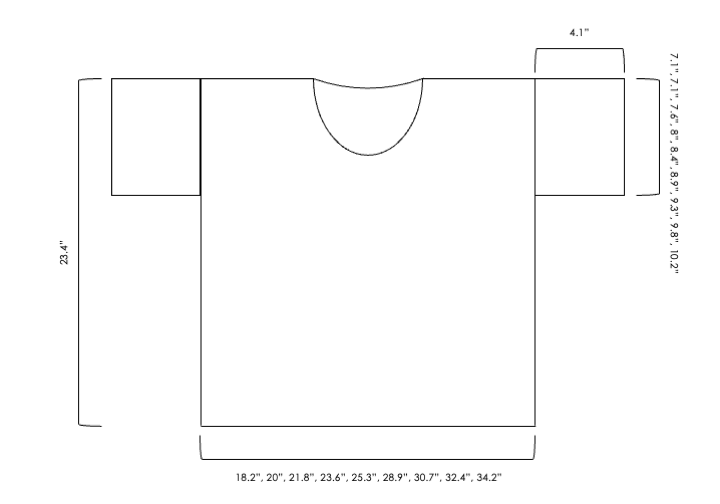
Since the Billie Tee is constructed side to side, your starting chains determine the height, while your rows determine the width.
To adjust the height of the body, add or subtract your starting chains in multiples of 8 stitches.
To adjust the width of the body, add or subtract rows in multiples of 4 on each side before the neckline shaping on the front, making sure to end on the same row repeat listed in the pattern. You'll also need to make the same adjustment to the back panel, which means the total number of rows added or removed will be a multiple of 8.
The sleeves can be customized the same way. To adjust the sleeve length, add or subtract starting chains in multiples of 8. To adjust the sleeve width, add or subtract rows in multiples of 4.
One of my favorite things about making your own clothes is being able to customize them to fit you. If you ever get stuck or aren't sure how to make an adjustment, don't hesitate to reach out. I'm always happy to help!
The Billie Tee Crochet Pattern
Materials:
1351-2486 yards (5-9 skeins) of Lion Brand Cottino (3.5oz/100g; 296yd/271m; 55%cotton, 45%superwash merino wool) Shown in the color Sedona
Crochet hook size E(3.5mm)
Crochet hook size F(3.75mm)
Tapestry needle, scissors, tape measure
Notes:
1.Pattern is made in four pieces (back, front, sleeves), and then seamed together. The neckline is worked directly onto the tee.
2.All pieces are made side to side. Use the 3.5mm hook for the ribbing and the 3.75mm hook for the main body.
3.Pattern is written in sizes XS(S, M, L, XL, 2X, 3X, 4X, 5X). It is recommended to go through and highlight your size in all sections.
Abbreviations:
Ch(s)- chain(s)
st(s)- stitch(es)
sl st- slip stitch
hdc- half double crochet
sc- single crochet
BLO- back loop only
slst2tog- slip stitch two together
hdc2tog- half double crochet two together
Gauge:
20 sts X 18 rows = 4” X 4” in main pattern stitch
Ch 24 sts and then use Rows 1-20 of back panel excluding the ribbing stitches for gauge.
Size:
XS: fits bust 28-30” (approx. 1351 yards/5 skeins)
S: fits bust 32-34” (approx. 1469 yards/5 skeins)
M: fits bust 36-38” (approx. 1597 yards/6 skeins)
L: fits bust 40-42” (approx. 1726 yards/6 skeins)
XL: fits bust 44-46” (approx. 1854 yards/7 skeins)
2X: fits bust 48-50” (approx. 2100 yards/8 skeins)
3X: fits bust 52-54” (approx. 2229 yards/8 skeins)
4X: fits bust 56-58” (approx. 2357 yards/8 skeins)
5X: fits bust 60-62” (approx. 2486yards/9 skeins)
Video Tutorial:
Pattern:
Back Panel
With 3.75mm hook, ch 118 (adjust height by adding or subtracting chains here by multiples of 8)
*use 3.5mm hook for ribbing stitches and 3.75mm hook for main body stitches
Row 1: (3.5mm hook) sc in 2nd ch from hook and next 8 chs, (3.75mm hook) sl st 4, *hdc 4, sl st 4, repeat from * across, ch 1, turn. (117)
Row 2: (3.75mm hook) sl st BLO 4, *hdc BLO 4, sl st BLO 4, repeat from * until 9 sts remain, (3.5mm hook) sc BLO 9, ch 1, turn. (117)
Row 3: (3.5mm hook) sc BLO 9, (3.75mm hook) hdc BLO 4, *sl st BLO 4, hdc BLO 4, repeat from * across, ch 1, turn. (117)
Row 4: (3.75mm hook) hdc BLO 4, *sl st BLO 4, hdc BLO 4, repeat from * until 9 sts remain, (3.5mm hook) sc BLO 9, ch 1, turn. (117)
Row 5: (3.5mm hook) sc BLO 9, (3.75mm hook) sl st BLO 4, *hdc BLO 4, sl st BLO 4, repeat from * across, ch 1, turn. (117)
Repeat Rows 2-5 for a total of 82(90, 98, 106, 114, 130, 138, 146, 154) ending on a Row 2 repeat.
Fasten off leaving a long tail for seaming.
Front Panel
Front panel is made in 3 continuous parts. Start with the Front Right Side, then move on to the Center Neckline and finish with the Front Left Side.
Front Right Side
With 3.75mm hook, ch 118 (adjust height by adding or subtracting chains here by multiples of 8)
*use 3.5mm hook for ribbing stitches and 3.75mm hook for main body stitches
Row 1: (3.5mm hook) sc in 2nd ch from hook and next 8 chs, (3.75mm hook) hdc 4, *sl st 4, hdc 4, repeat from * across, ch 1, turn. (117)
Row 2: (3.75mm hook) hdc BLO 4, *sl st BLO 4, hdc BLO 4, repeat from * until 9 sts remain, (3.5mm hook) sc BLO 9, ch 1, turn. (117)
Row 3: (3.5mm hook) sc BLO 9, (3.75mm hook) sl st BLO 4, *hdc BLO 4, sl st BLO 4, repeat from * across, ch 1, turn. (117)
Row 4: (3.75mm hook) sl st BLO 4, *hdc BLO 4, sl st BLO 4, repeat from * until 9 sts remain, (3.5mm hook) sc BLO 9, ch 1, turn. (117)
Row 5: (3.5mm hook) sc BLO 9, (3.75mm hook) hdc BLO 4, *sl st BLO 4, hdc BLO 4, repeat from * across, ch 1, turn. (117)
Repeat Rows 2-5 for a total of 23(27, 31, 35, 39, 47, 51, 55, 59) ending on a Row 3 repeat.
Center Neckline
We will now be creating the neckline shaping. Note that row counts start over for this section, but you still continue on directly into the Front Right Side.
Row 1: sl st BLO 12, *hdc BLO 4, sl st BLO 4, repeat from * until 9 sts remain, (3.5mm hook) sc BLO 9, ch 1, turn. (117)
*place a stitch marker in the 1st hdc of Row 1 to mark where you’ll work the last st of Row 2.
Row 2: (3.5mm hook) sc BLO 9, (3.75mm hook) hdc BLO 4, *sl st BLO 4, hdc BLO 4, repeat from * until 4 sts remain, slst2togBLO TWICE, ch 1, turn. (103)
Row 3: (3.75mm hook) slst2togBLO, hdc2togBLO, hdc BLO 2, *sl st BLO 4, hdc BLO 4, repeat from * until 9 sts remain, (3.5mm hook) sc BLO 9, ch 1, turn. (101)
Row 4: (3.5mm hook) sc BLO 9, (3.75mm hook) *sl st BLO 4, hdc BLO 4, repeat from * until 4 sts remain, slst2togBLO TWICE, ch 1, turn. (99)
Row 5: (3.75mm hook) slst2togBLO, hdc2togBLO, hdc BLO 2, sl st BLO 4, *hdc BLO 4, sl st BLO 4 repeat from * until 9 sts remain, (3.5mm hook) sc BLO 9, ch 1, turn. (97)
Row 6: (3.5mm hook) sc BLO 9, (3.75mm hook) hdc BLO 4, *sl st BLO 4, hdc BLO 4, repeat from * until 4 sts remain, slst2togBLO TWICE, ch 1, turn. (95)
Row 7: (3.75mm hook) slst2togBLO, hdc BLO 4, *sl st BLO 4, hdc BLO 4, repeat from * until 9 sts remain, (3.5mm hook) sc BLO 9, ch 1, turn. (94)
Row 8: (3.5mm hook) sc BLO 9, (3.75mm hook) *sl st BLO 4, hdc BLO 4, repeat from * until 5 sts remain, sl st BLO 3, slst2togBLO, ch 1, turn. (93)
Row 9: (3.75mm hook) slst2togBLO, sl st BLO 2, *hdc BLO 4, sl st BLO 4, repeat from * until 9 sts remain, (3.5mm hook) sc BLO 9, ch 1, turn. (92)
Row 10: (3.5mm hook) sc BLO 9, (3.75mm hook) *hdc BLO 4, sl st BLO 4, repeat from * until 3 sts remain, hdc BLO, hdc2togBLO, ch 1, turn. (91)
Row 11: (3.75mm hook) hdc2togBLO, *sl st BLO 4, hdc BLO 4, repeat from * until 9 sts remain, (3.5mm hook), sc BLO 9, ch 1, turn. (90)
Row 12: (3.5mm hook) sc BLO 9, (3.75mm hook) *sl st BLO 4, hdc BLO 4, repeat from * until 5 sts remain, hdc BLO 3, hdc2togBLO, ch 1, turn. (89)
Row 13: (3.75mm hook), *hdc BLO 4, sl st BLO 4, repeat from * until 9 sts remain, (3.5mm hook) sc BLO 9, ch 1, turn. (89)
Row 14: (3.5mm hook) sc BLO 9, (3.75mm hook) *hdc BLO 4, sl st BLO 4, repeat from * across, ch 1, turn. (89)
Row 15: (3.75mm hook) *sl st BLO 4, hdc BLO 4, repeat from * until 9 sts remain, (3.5mm hook), sc BLO 9, ch 1, turn. (89)
Row 16: (3.5mm hook) sc BLO 9, (3.75mm hook), *sl st BLO 4, hdc BLO 4, repeat from * across, ch 1, turn. (89)
Row 17: (3.75mm hook) *hdc BLO 4, sl st BLO 4, repeat from * until 9 sts remain, (3.5mm hook) sc BLO 9, ch 1, turn. (89)
Rows 18-25: repeat Rows 14-17
Row 26: (3.5mm hook) sc BLO 9, (3.75mm hook) *hdc BLO 4, sl st BLO 4, repeat from * across, work an additional hdc BLO into last st, ch 1, turn. (90)
Row 27: (3.75mm hook) 2hdc BLO into 1st st, *sl st BLO 4, hdc BLO 4, repeat from * until 9 sts remain, (3.5mm hook), sc BLO 9, ch 1, turn. (91)
Row 28: (3.5mm hook) sc BLO 9, (3.75mm hook), *sl st BLO 4, hdc BLO 4, repeat from * across until 2 sts remain, sl st BLO 1, 2slst BLO in last st, ch 1, turn. (92)
Row 29: (3.75mm hook) 2slst BLO into 1st st, sl st BLO 2 *hdc BLO 4, sl st BLO 4, repeat from * until 9 sts remain, (3.5mm hook) sc BLO 9, ch 1, turn. (93)
Row 30: (3.5mm hook) sc BLO 9, (3.75mm hook) *hdc BLO 4, sl st BLO 4, repeat from * across until 4 sts remain, hdc BLO 4, work an additional sl st BLO into last st, ch 1, turn. (94)
Row 31: (3.75mm hook) 2sl st BLO into 1st st, hdc BLO 4, *sl st BLO 4, hdc BLO 4, repeat from * until 9 sts remain, (3.5mm hook), sc BLO 9, ch 1, turn. (95)
Row 32: (3.5mm hook) sc BLO 9, (3.75mm hook), *sl st BLO 4, hdc BLO 4, repeat from * across until 6 sts remain, sl st BLO 4, 2hdc BLO in next 2 sts, ch 1, turn. (97)
Row 33: (3.75mm hook) 2slst BLO into 1st st, 2hdc BLO into next st, hdc BLO 2, slst BLO 4 *hdc BLO 4, sl st BLO 4, repeat from * until 9 sts remain, (3.5mm hook) sc BLO 9, ch 1, turn. (99)
Row 34: (3.5mm hook) sc BLO 9, (3.75mm hook) *hdc BLO 4, sl st BLO 4, repeat from * across until 2 sts remain, 2hdc BLO in next 2 sts, ch 1, turn. (101)
Row 35: (3.75mm hook) 2sl st BLO into 1st st, 2hdc BLO in next, hdc BLO 2, *sl st BLO 4, hdc BLO 4, repeat from * until 9 sts remain, (3.5mm hook), sc BLO 9, ch 1, turn. (103)
Row 36: (3.5mm hook) sc BLO 9, (3.75mm hook), *sl st BLO 4, hdc BLO 4, repeat from * across until 6 sts remain, sl st BLO 4, 2hdc BLO in next 2 sts, ch 1, turn. (105)
Row 37: (3.75mm hook) ch 13, sl st in 2nd ch from hook and in next 3 sts, hdc 4, sl st 4, *hdc BLO 4, sl st BLO 4, repeat from * across until 9 sts remain, (3.5mm hook) sc BLO 9, ch 1, turn. (117)
Front Left Side
Row 1: (3.5mm hook) sc BLO 9, (3.75mm hook) hdc BLO 4, *sl st BLO 4, hdc BLO 4, repeat from * across, ch 1, turn. (117)
Row 2: (3.75mm hook) hdc BLO 4, *sl st BLO 4, hdc BLO 4, repeat from * until 9 sts remain, (3.5mm hook) sc BLO 9, ch 1, turn. (117)
Row 3: (3.5mm hook) sc BLO 9, (3.75mm hook) sl st BLO 4, *hdc BLO 4, sl st BLO 4, repeat from * across, ch 1, turn. (117)
Row 4: (3.75mm hook) sl st BLO 4, *hdc BLO 4, sl st BLO 4, repeat from * until 9 sts remain, (3.5mm hook) sc BLO 9, ch 1, turn. (117)
Repeat Rows 1-4 for a total of 22(26, 30, 34, 38, 46, 50, 54, 58) ending on a Row 2 repeat.
Fasten off leaving a long tail for seaming.
Sleeves- make two
With 3.75mm hook, ch 22
*use 3.5mm hook for ribbing stitches and 3.75mm hook for main body stitches
Row 1: (3.5mm hook) sc in 2nd ch from hook and next 8 chs, (3.75mm hook) sl st 4, hdc 4, sl st 4, ch 1, turn. (21)
Row 2: (3.75mm hook) sl st BLO 4, hdc BLO 4, sl st BLO 4, (3.5mm hook) sc BLO 9, ch 1, turn. (21)
Row 3: (3.5mm hook) sc BLO 9, (3.75mm hook) hdc BLO 4, sl st BLO 4, hdc BLO 4, ch 1, turn. (21)
Row 4: (3.75mm hook) hdc BLO 4, sl st BLO 4, hdc BLO 4, (3.5mm hook) sc BLO 9, ch 1, turn. (21)
Row 5: (3.5mm hook) sc BLO 9, (3.75mm hook) sl st BLO 4, hdc BLO 4, sl st BLO 4, ch 1, turn. (21)
Repeat Rows 2-5 for a total of 64(64, 68, 72, 76, 80, 84, 88, 92) ending on a Row 4 repeat.
Fasten off and move on to seaming.
Seaming Shoulders
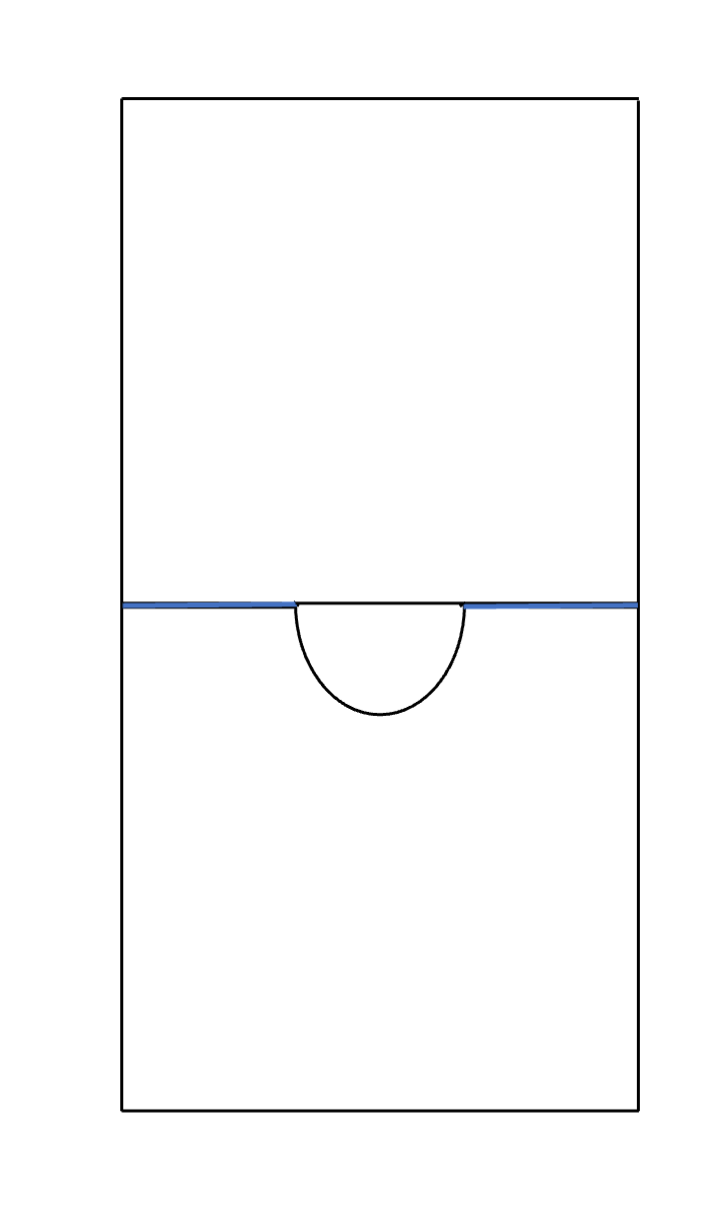
Lay the front and back panels together RS facing up at the shoulders. Using a tapestry needle and the long tails, seam the shoulders together using your preferred method of seaming.
Seaming
Attach the sleeves to the sides of the tee, using your preferred seaming method, making sure to align the center of the sleeve with the shoulder seam. Make sure the sleeves are attached evenly from the center shoulder seam, down the sides. Using stitch markers to hold the sleeve in place is recommended.
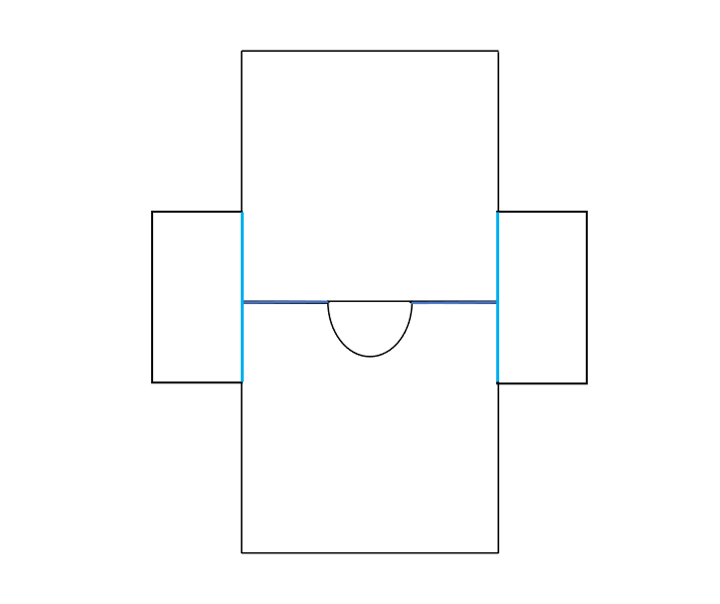
Fold the tee so that the back and front panels are on top of each other. Then seam the sleeves from the underarm to the cuff. Seam the sides from the underarm down to the bottom.
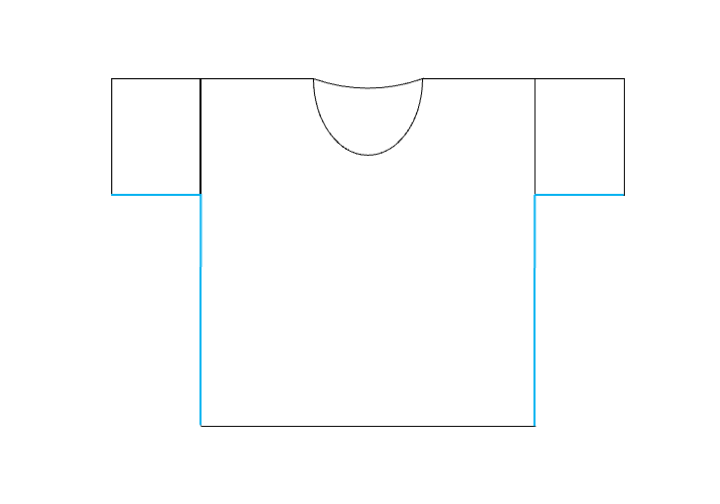
Neckline Ribbing
Starting in one of shoulder seams, with right side facing out, attach yarn and ch 1 using a 3.5mm hook.
Set Up Round: sc in same st as join and evenly around neckline, sl st to 1st st to join. (approx. 96 sts)
ch 5
Row 1: sc in 2nd ch from hook and in each ch across, sl st into next 2 sc, turn. (4sc, 2 sl sts)
Row 2: sk 2 sl sts, sc BLO 4, ch 1, turn. (4sc)
Row 3: sc BLO 4, sl st into next 2 sc, turn. (4sc, 2 sl sts)
Repeat Rows 2-3 all the way around the neckline.
Sl st or sew beginning and ending rows together.
Weave in all remaining ends.
I hope you love your new Billie Tee. If you make one I’d love to see it. Make sure to tag me @meghanmakesdo on socials and use #thebillietee so I can share.
As always you can find a PDF version of this pattern in my shop, Etsy and Ravelry or as a complete kit from Lion Brand Yarn.
Happy Crocheting,
Meghan