Free Trick or Treat Bag Patterns
Halloween is only a week away, but that is plenty of time to whip up some cute trick or treat bags for your kiddos. We used to have one of those generic plastic pumpkin buckets, but it is too bulky to store and I wanted something a bit more original and fun for the kids to use. I also wanted something that they could reuse for a few years and would go with whatever costumes they had.
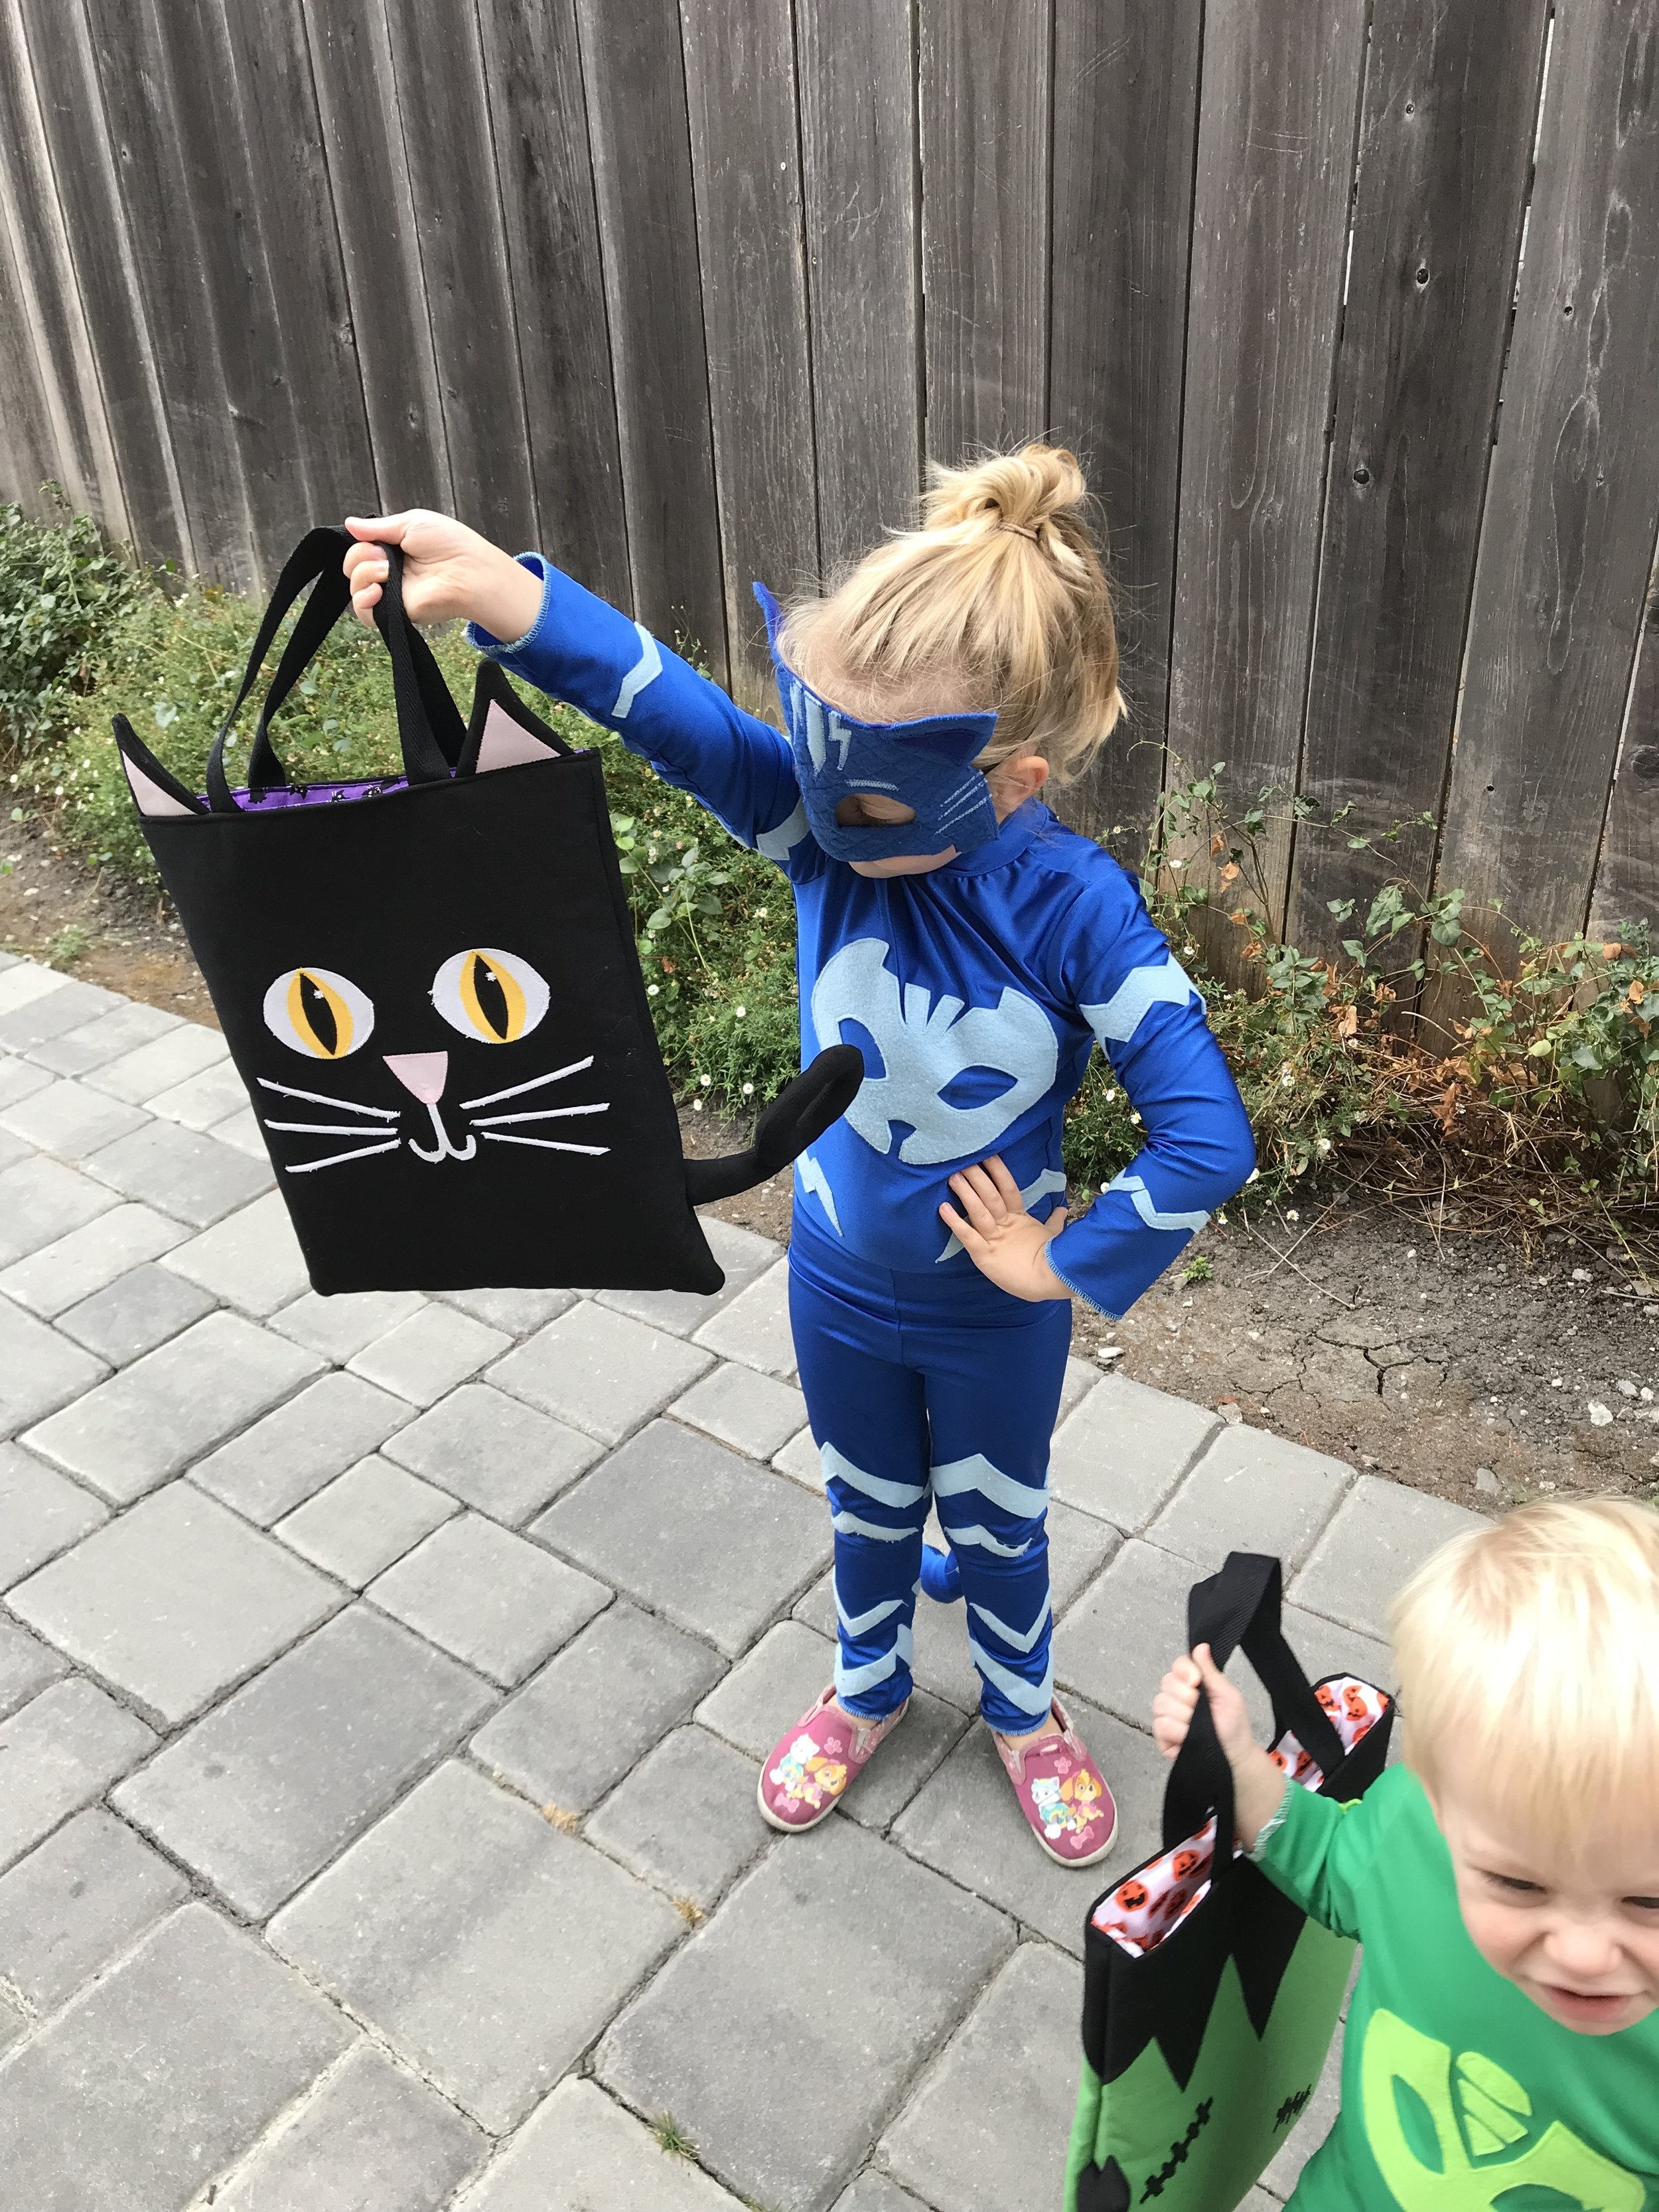
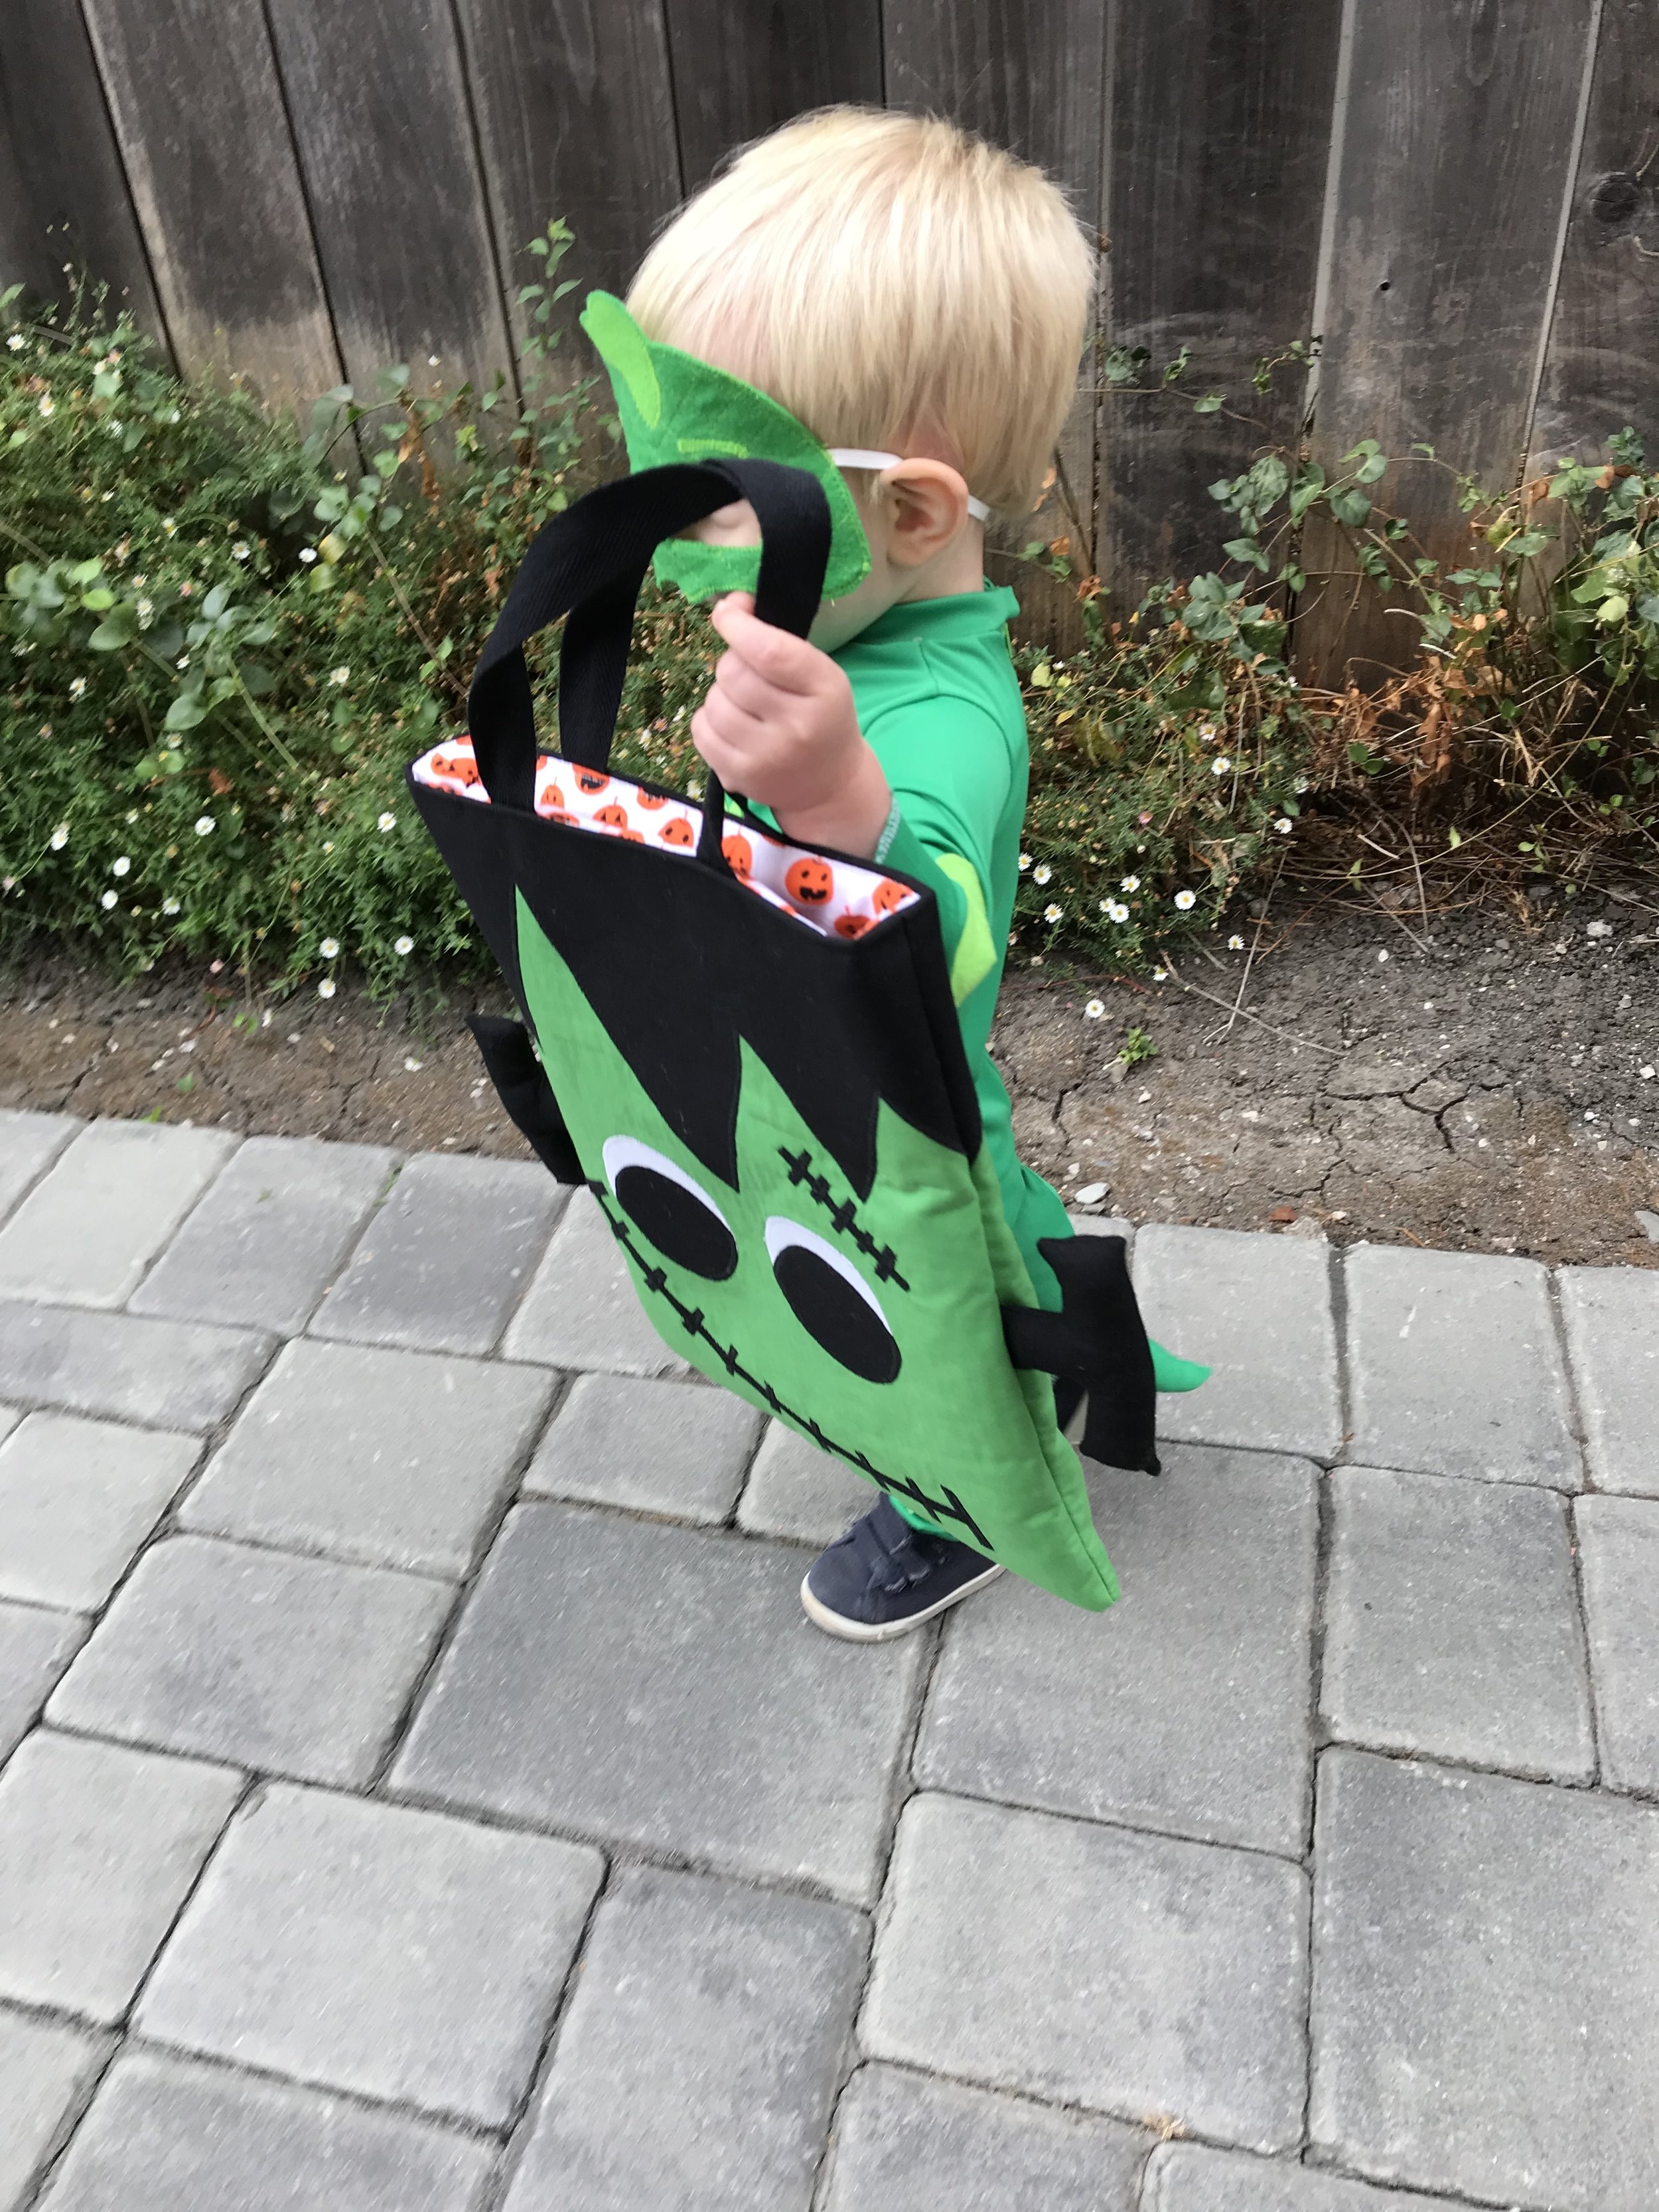
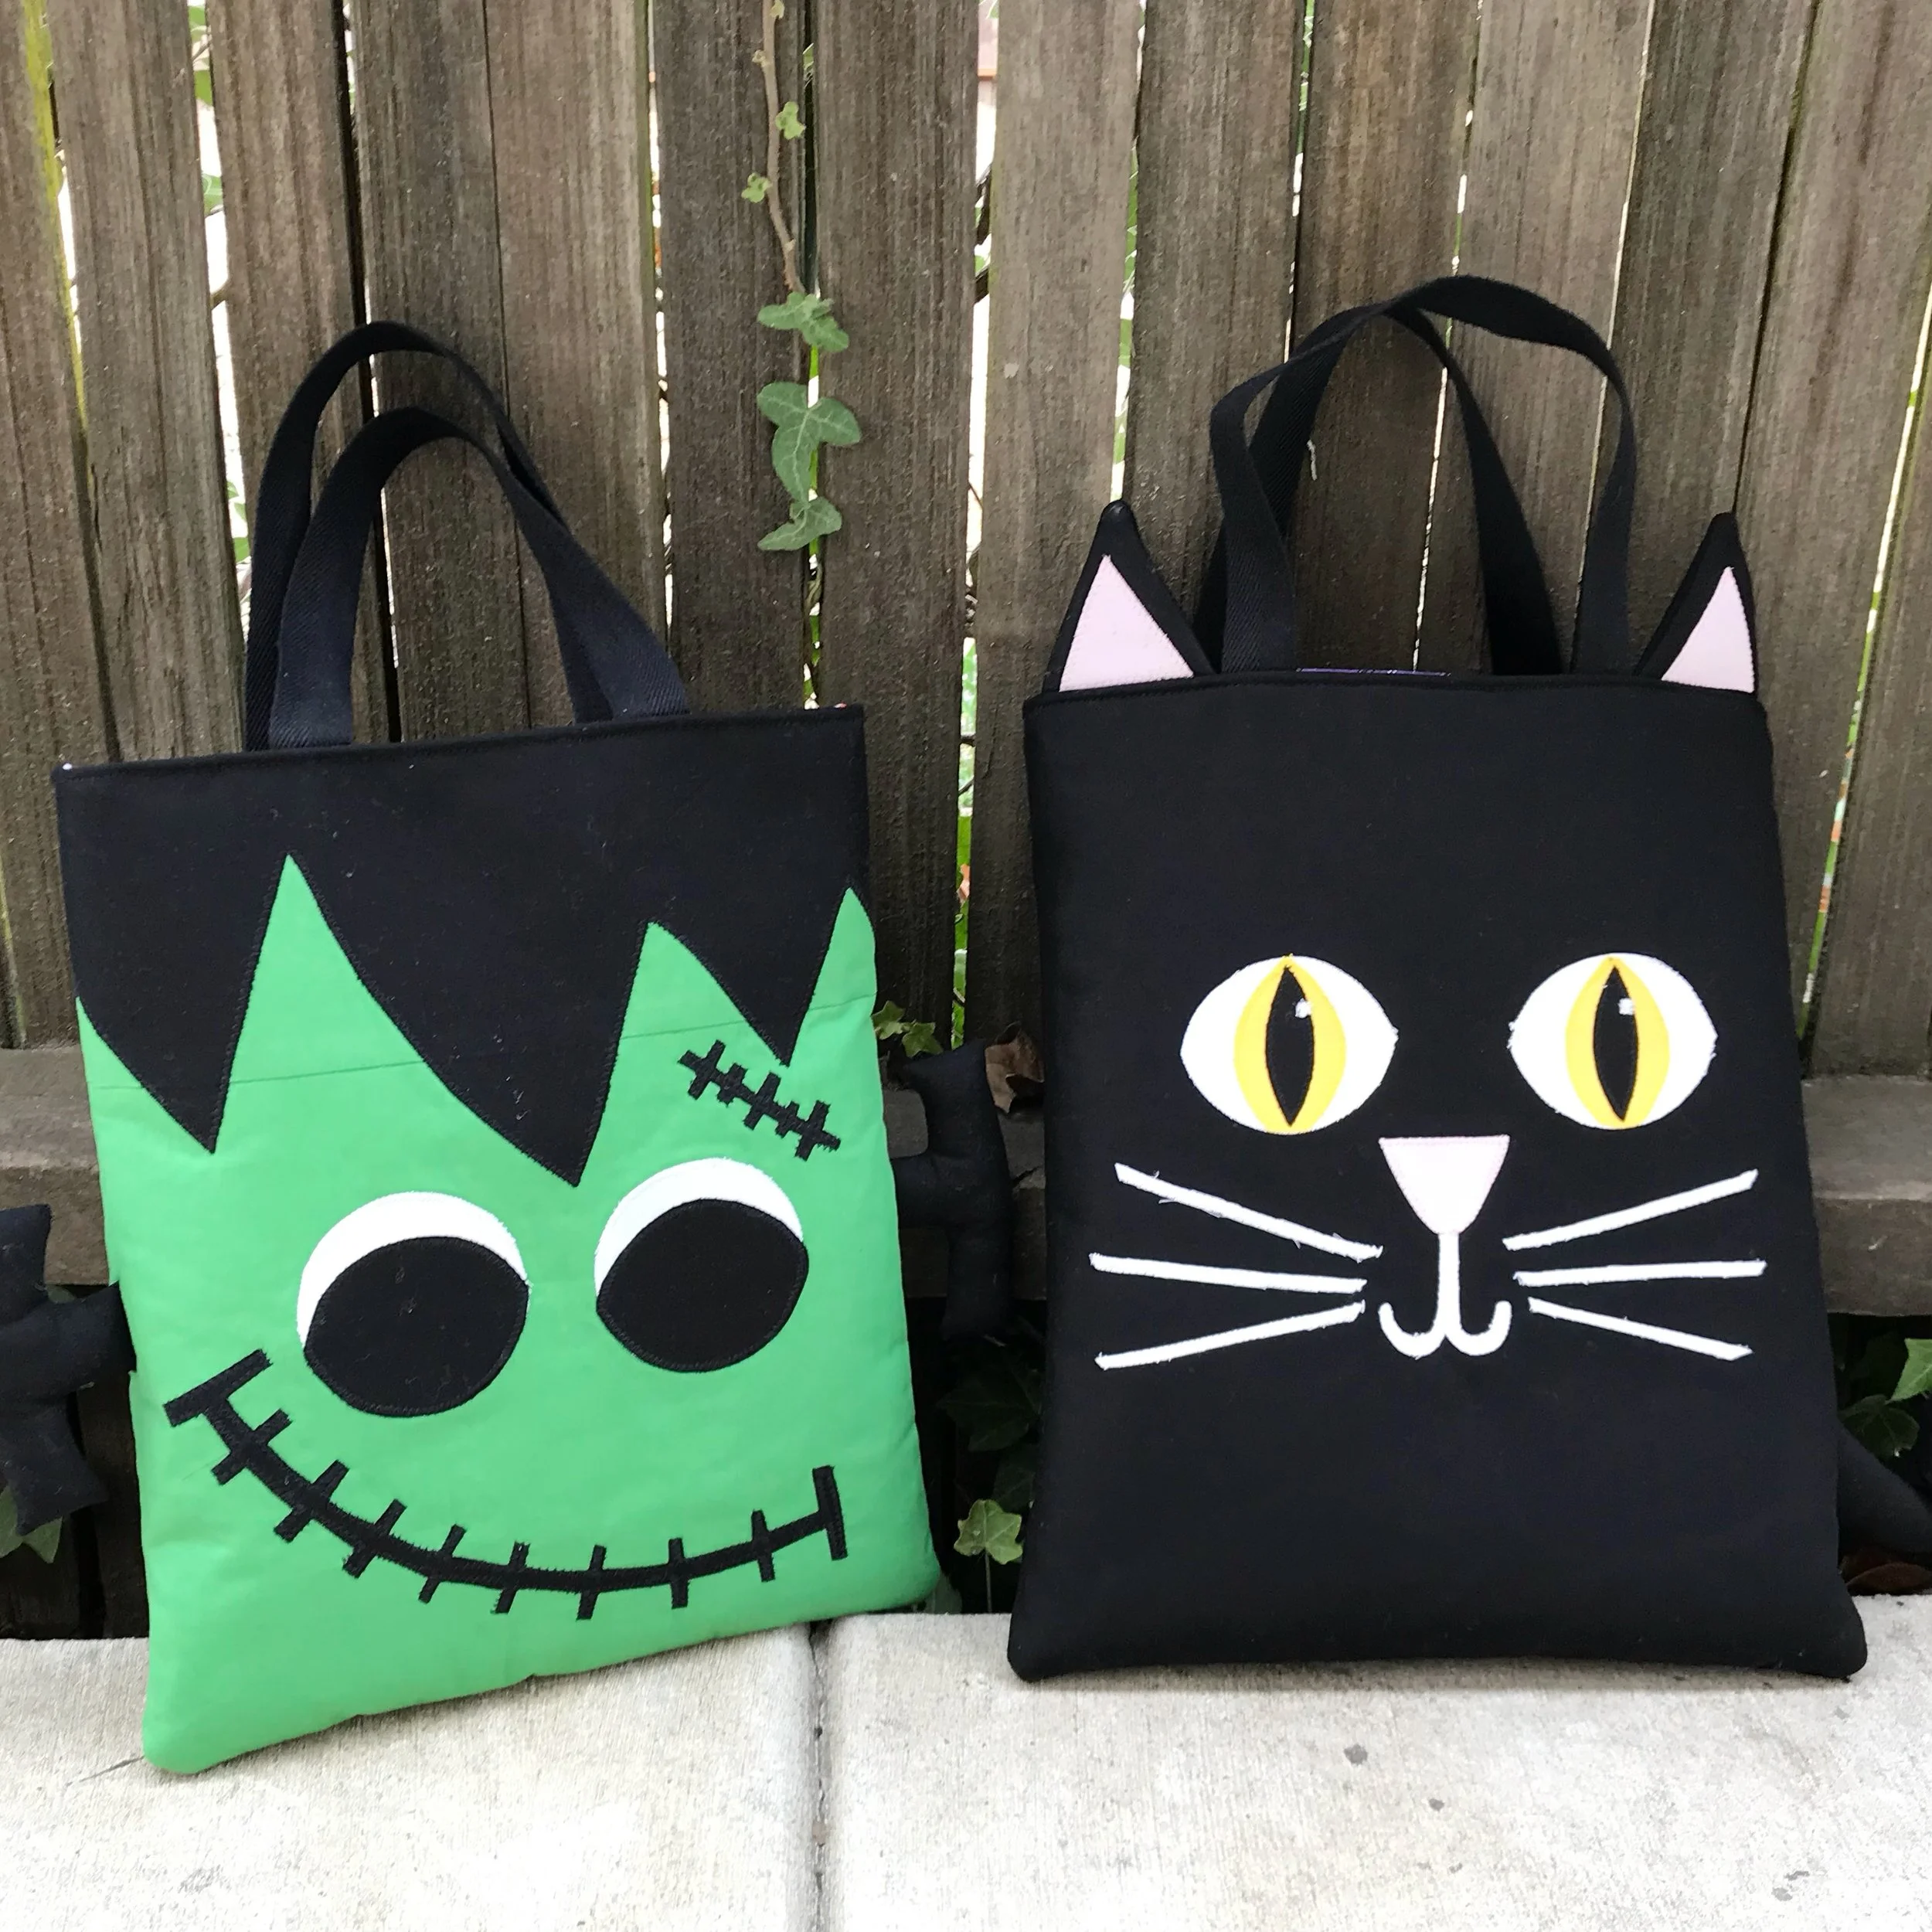
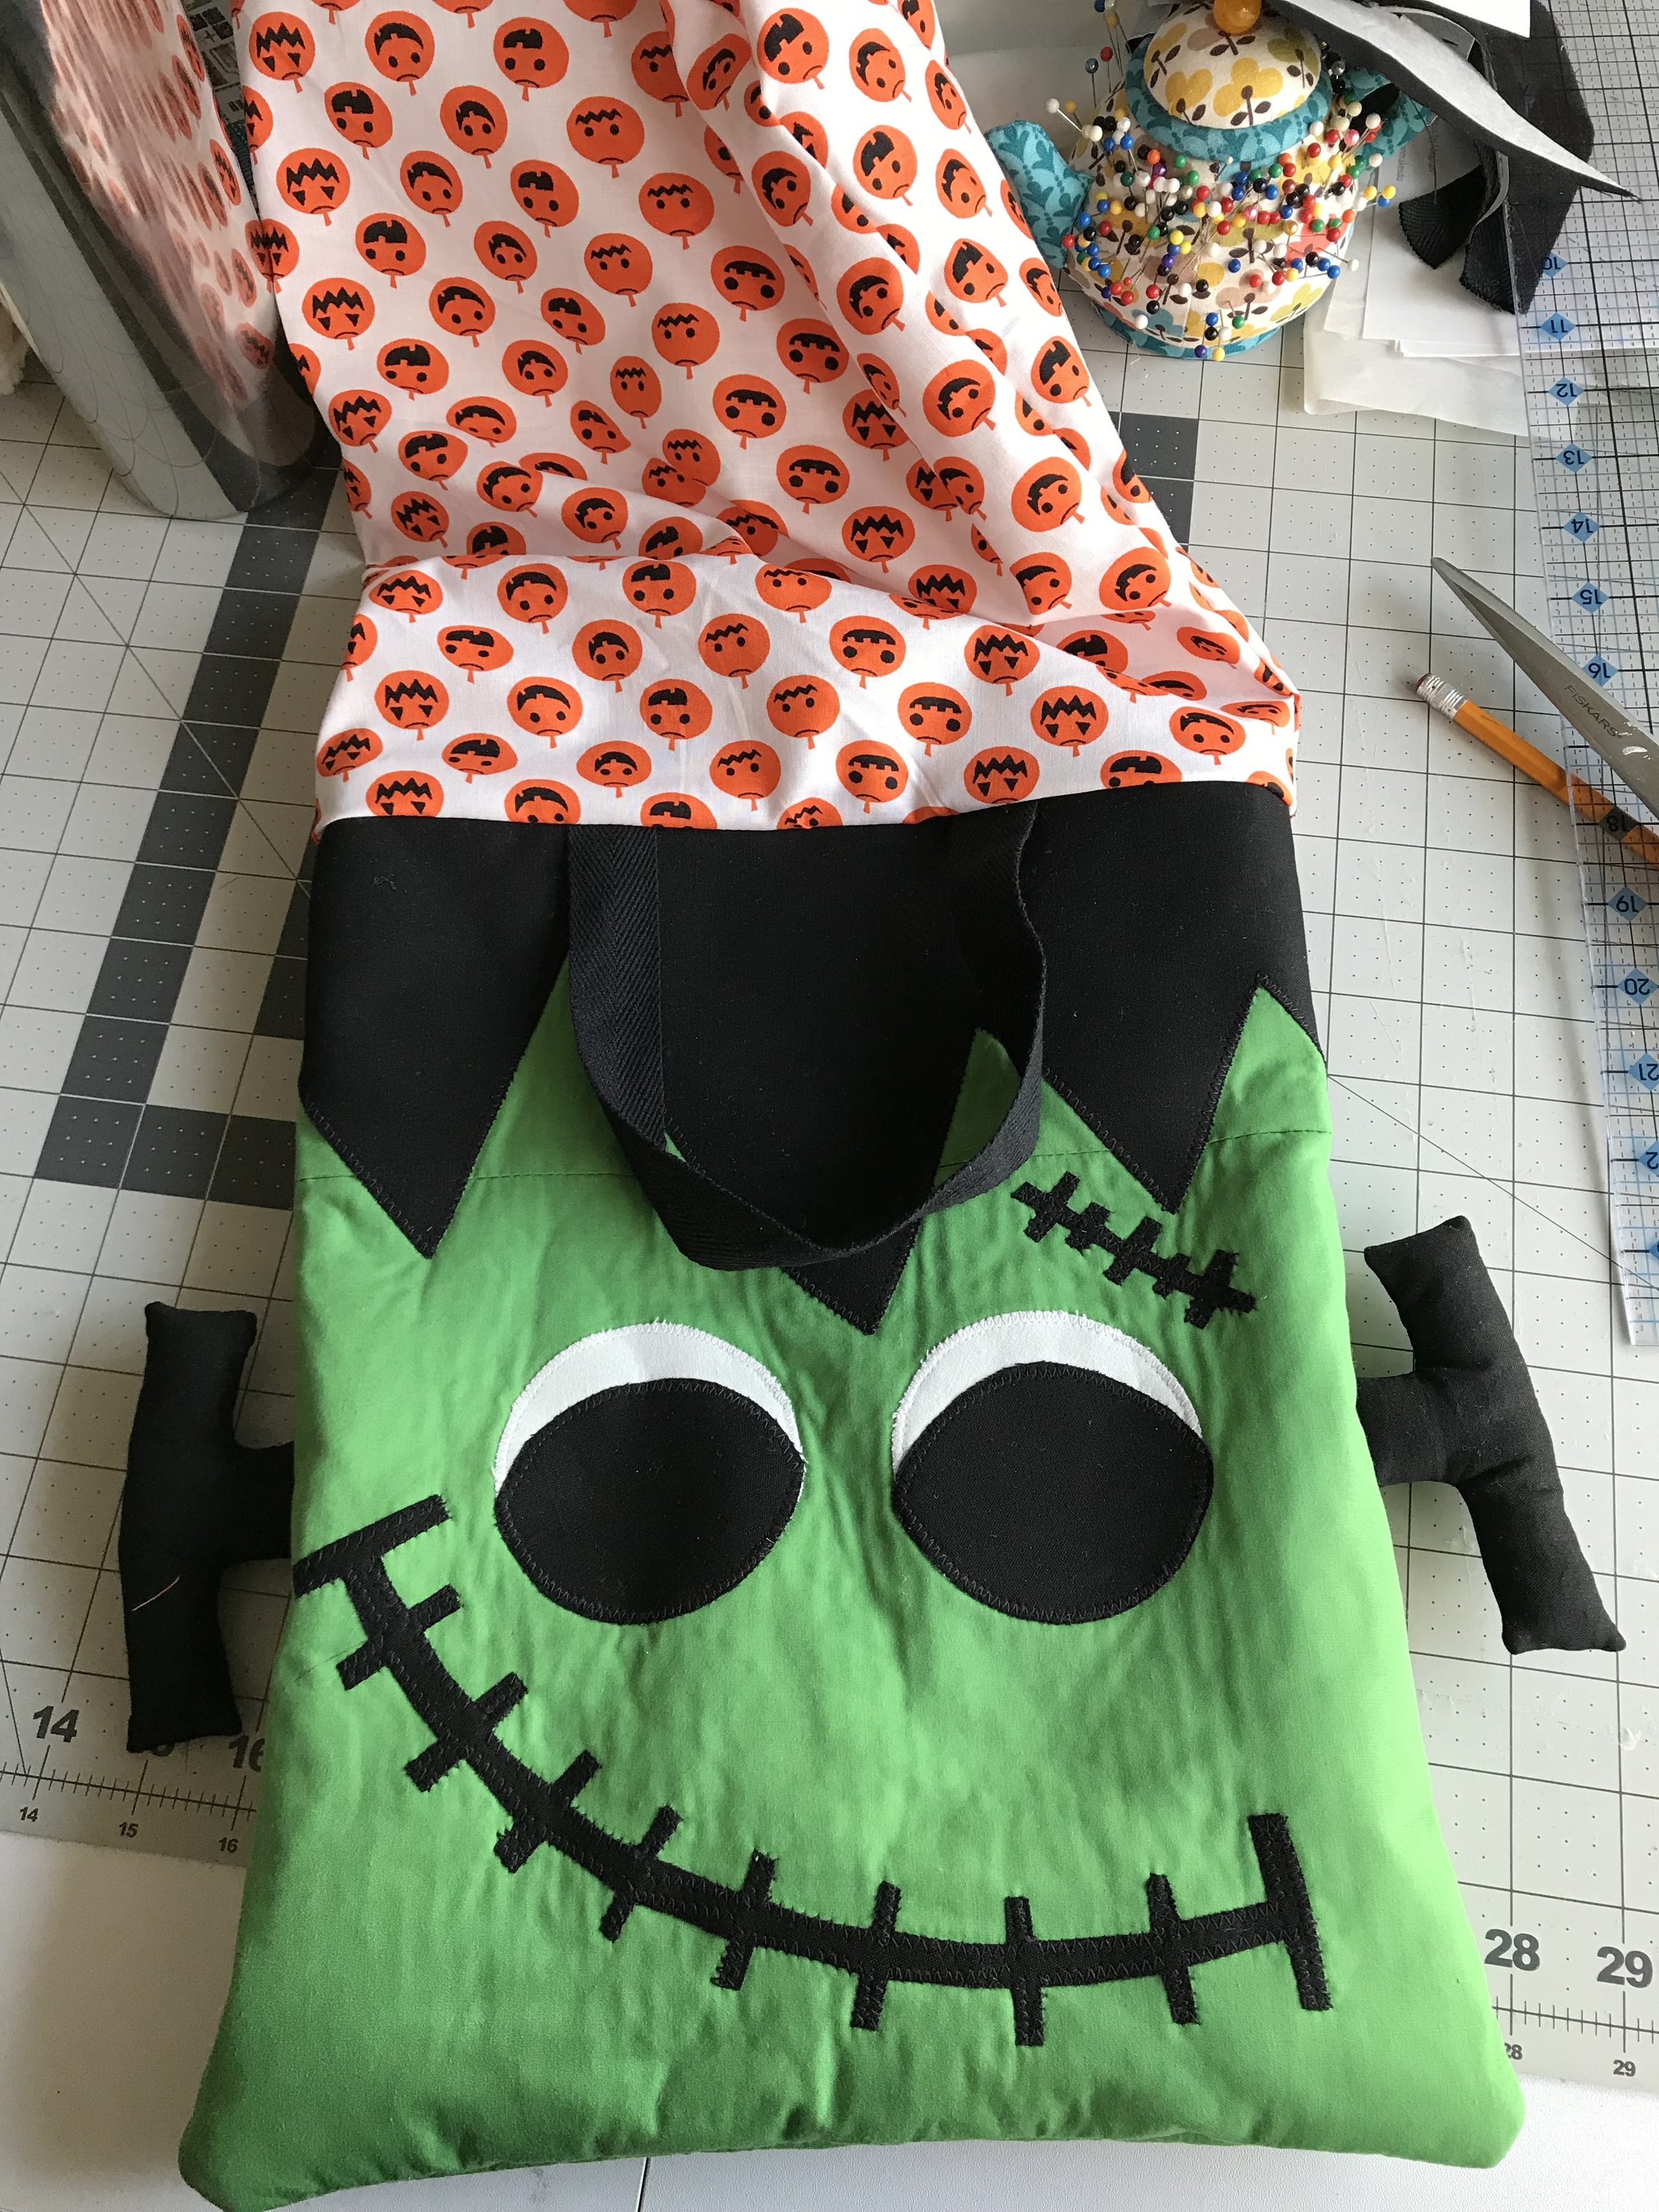
Emerson loves cats so I decided to make her a black cat bag. For Emmett I made a happy little Frankenstein bag and I call him Frank. Emerson helped pick out the lining fabrics for both bags. She picked a purple cat pattern for her bag and a pumpkin pattern for Emmett's.

I love how they turned out and I'm so excited to share the pattern with you today for FREE!
I've been learning how to use Illustrator to create my own patterns and I'm a bit obsessed now. I love being able to take my hand drawings and turn them into printable patterns for you guys.
Here is what you will need to make your own Frank or Black Cat bag:
Frank
1/2 yard green fabric
1/2 yard lining fabric (I used a pumpkin print)
1/2 yard fusible fleece
1/4 yard of black fabric
scraps of white fabric
1 yard of 1" black cotton webbing for straps
Pellon Wonder Under
fiberfill for the screws
basic sewing supplies
Black Cat
1/2 yard black fabric
1/2 yard lining fabric (I used purple with black cats print)
1/2 fusible fleece
scraps of white, pink and yellow fabric for face details
1 yard of 1" black cotton webbing for straps
Pellon Wonder Under
fiberfill for the tail
basic sewing supplies
First you will cut out your bag pieces. You will need two 13"X15" rectangles from the green fabric and/or black fabric, fusible fleece and lining fabric.

I used a remnant of green fabric for my Frank and it was a bit small so I had to cut smaller pieces and sew them together so I have a seam in my bag, but it kind of goes with the whole Frankenstein theme since he has stitches, right? At least that's what I'm telling myself.
Then you will fuse the fleece to the wrong side of the black and/or green fabric pieces with an iron.

Now it's time to add the details to the front and back of the bags. Use the free template to cut out the pieces you need from the different color fabrics. You will want to also attach some Wonder Under to the back sides of your pieces to make it easier to attach to the bag. I suggest fusing the Wonder Under to the fabrics before cutting out the pieces to make it easier. For Frank I cut 2 pieces of fabric and Wonder Under that were 7"X13" for the hair. The rest of the black piece will fit on one piece that is 7"X12."


You will want to attach Frank's hair pieces to the top of both sides of your bag so they are mirror images. That way when you sew the sides together the hair will meet on the edges and look more uniform.
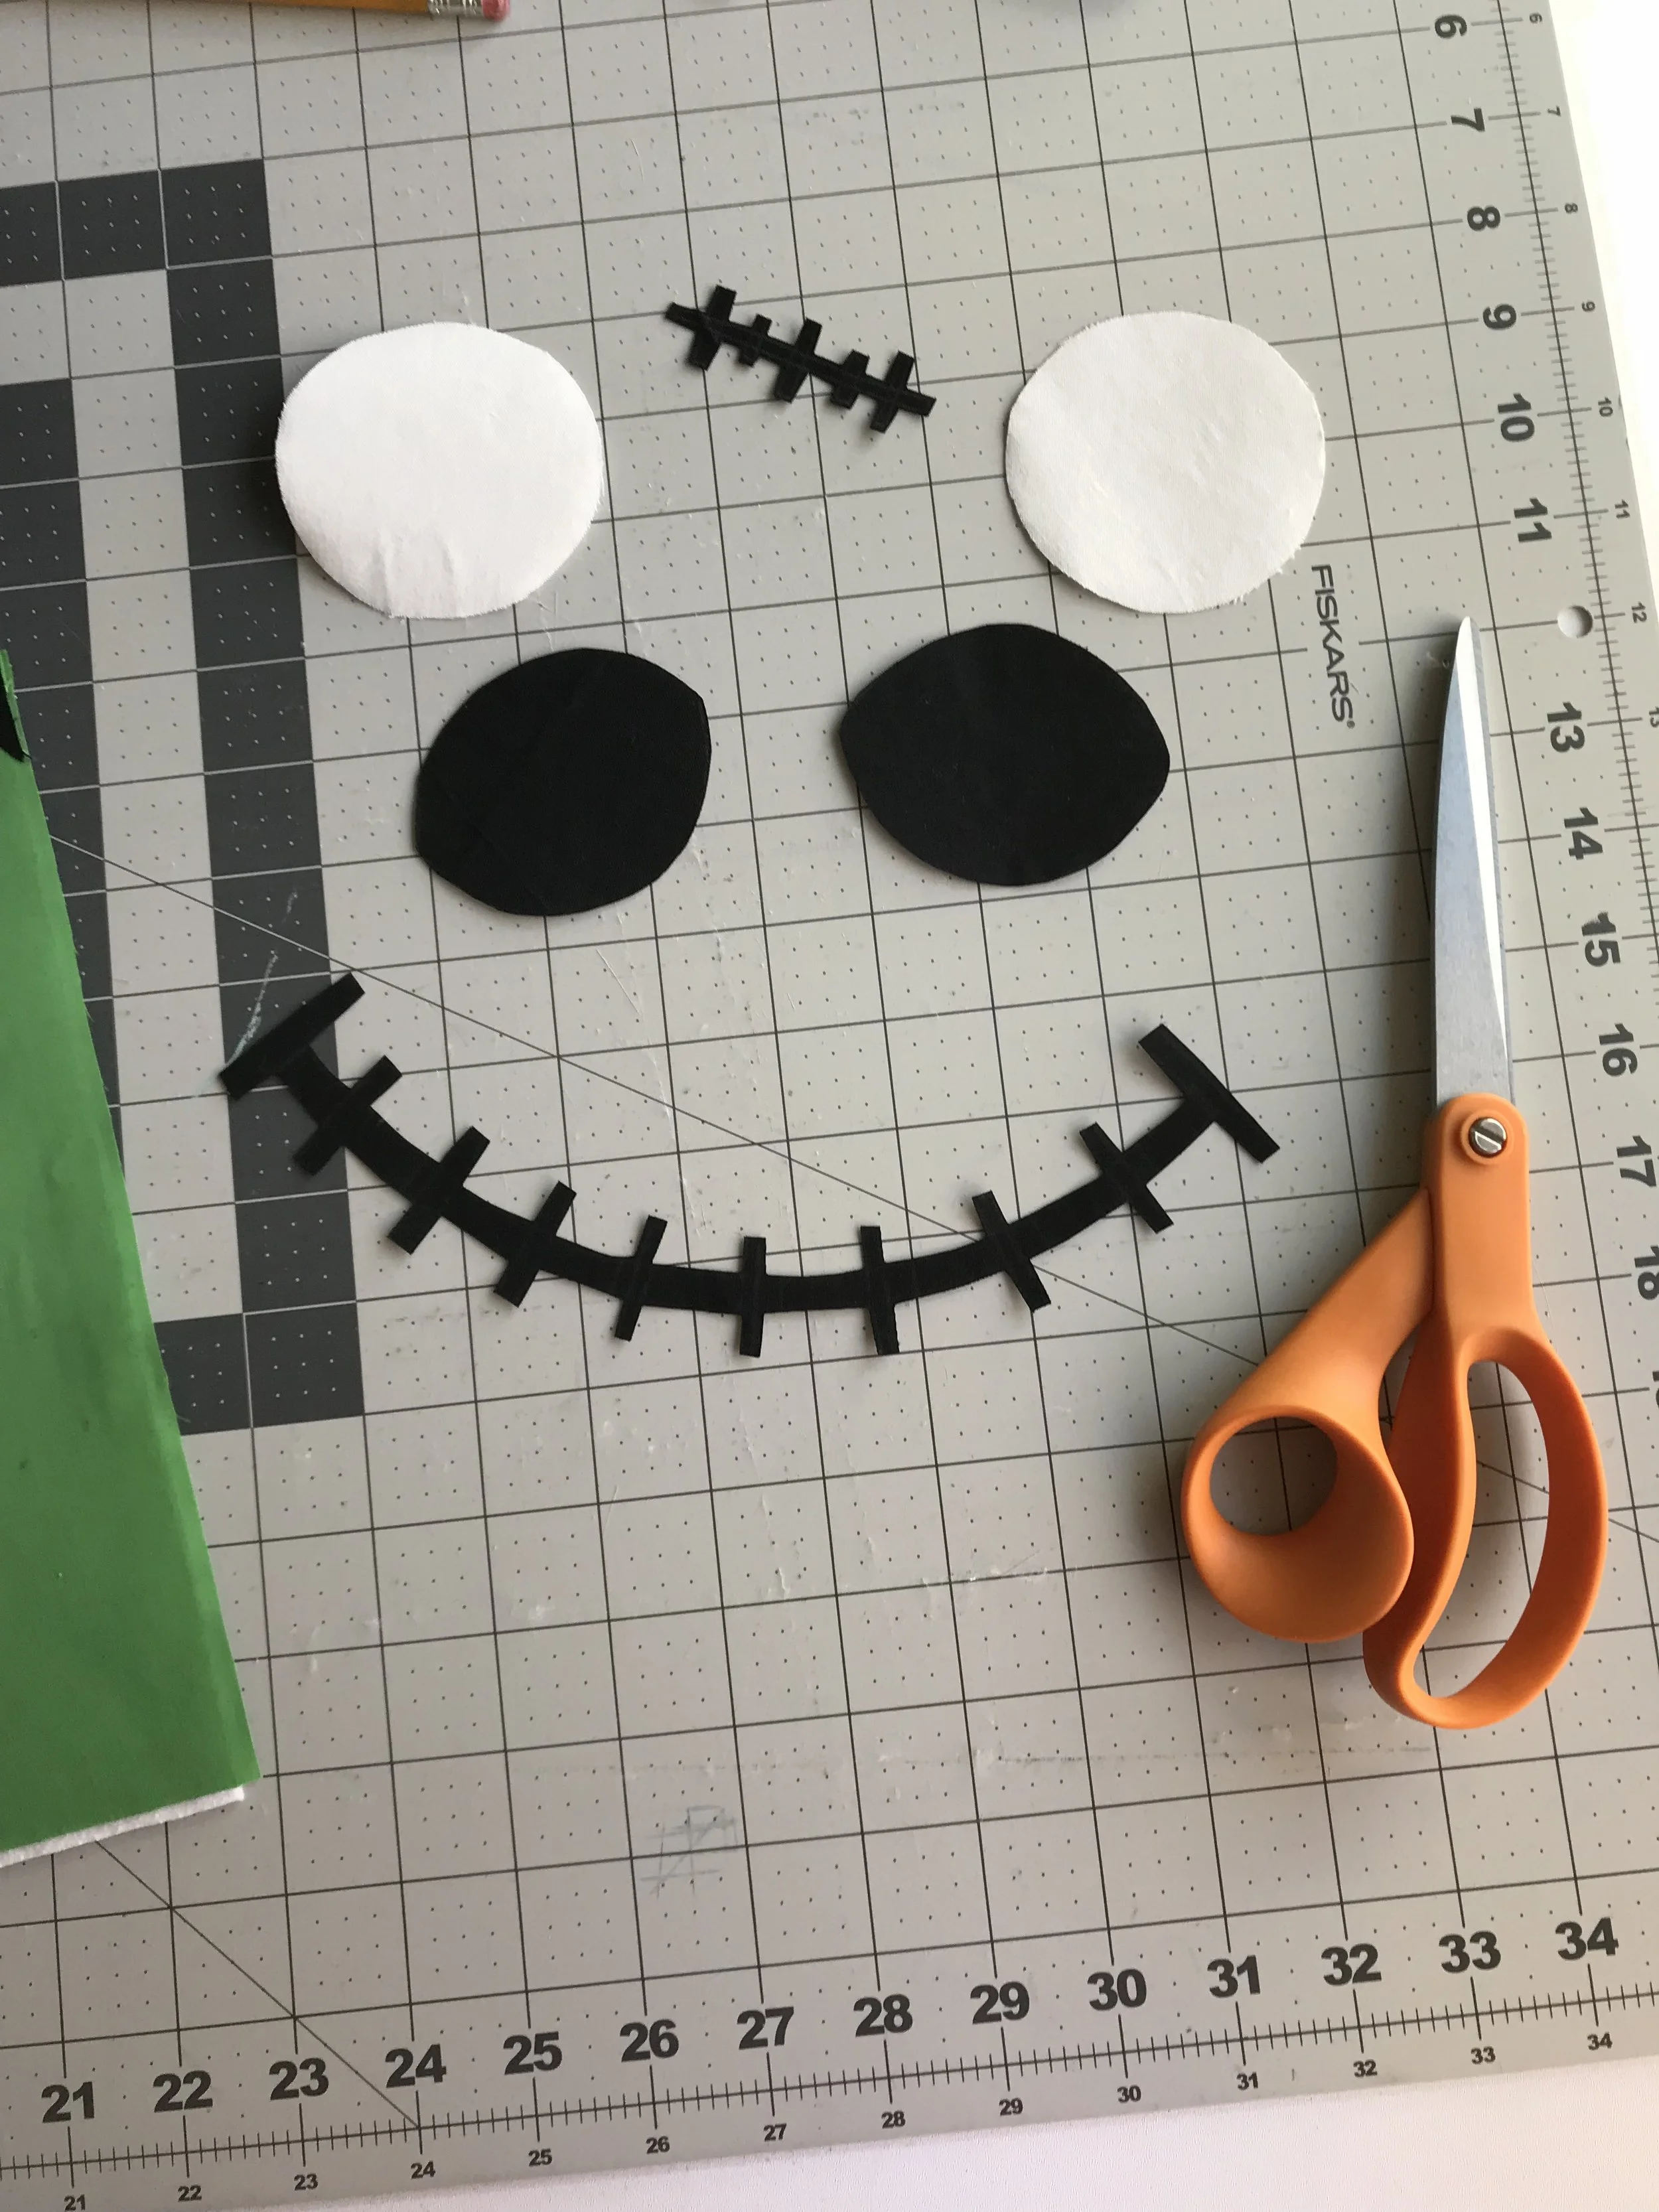
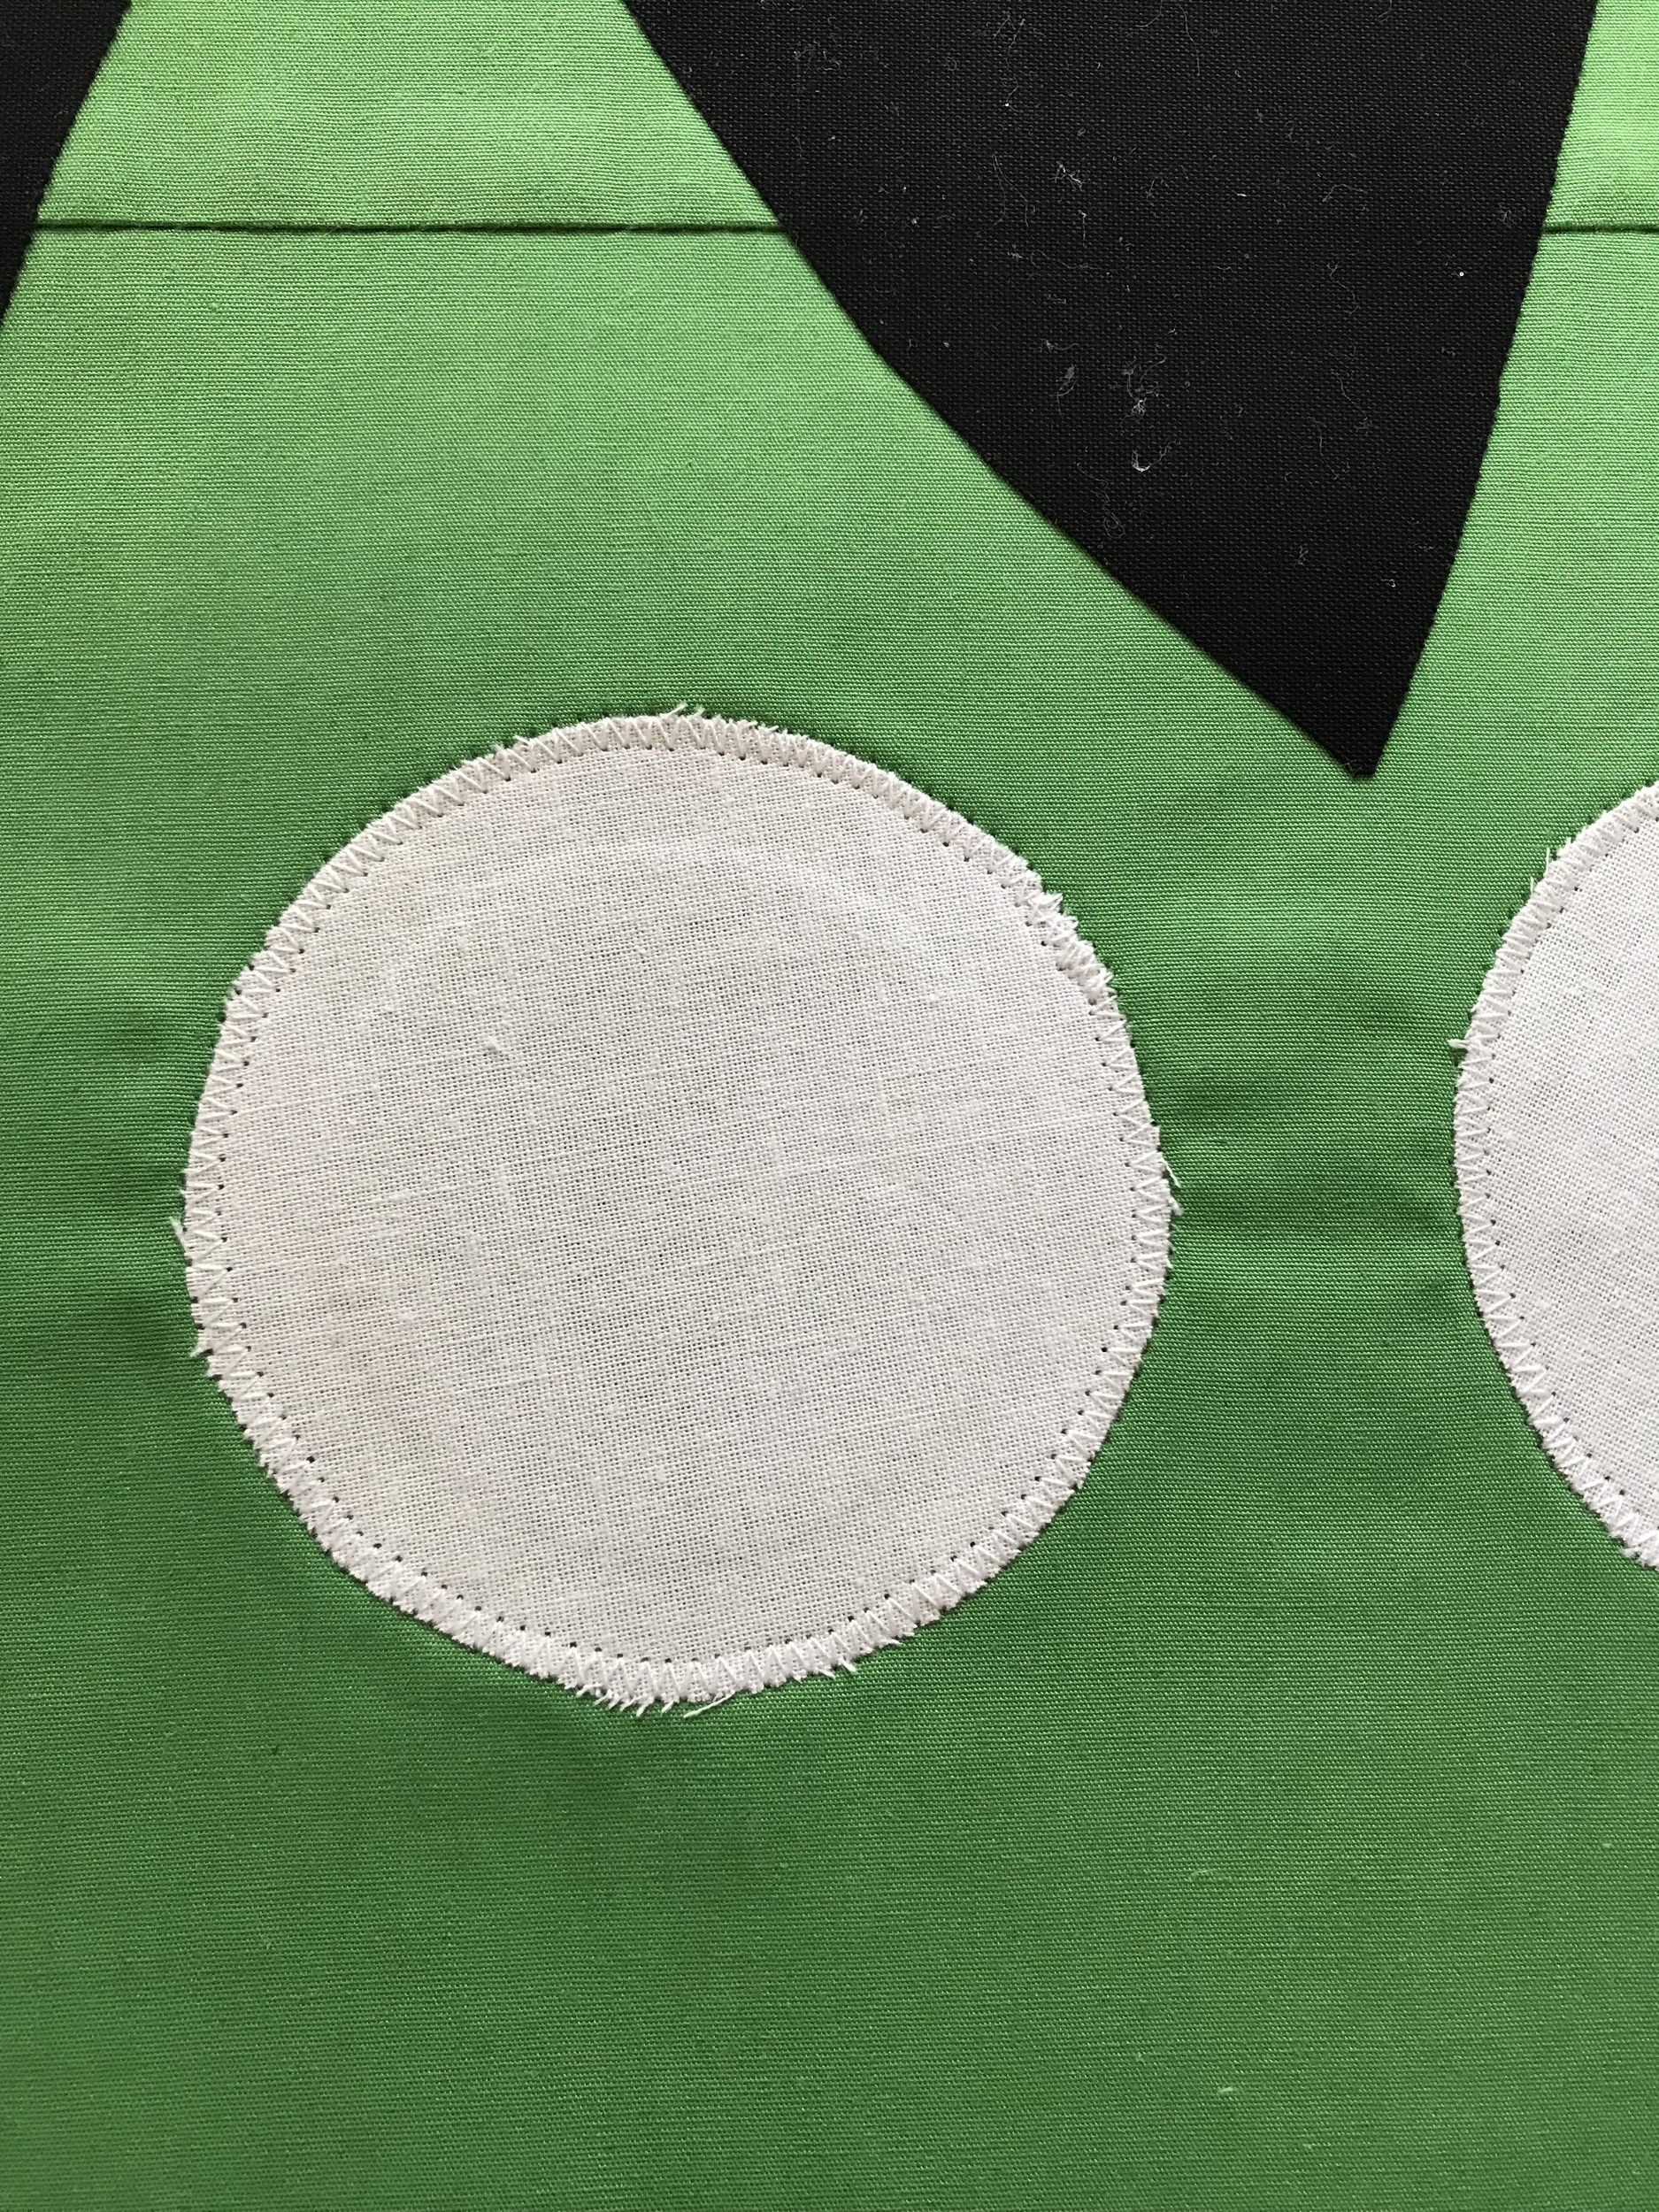
Now we will use the rest of the cut out pieces to create the face and the stitches. Start with the white eye pieces. Peel the paper backing of the Wonder Under off and line them up glue side down where you want them on your bag. Then iron them in place and zigzag stitch all the way around.

Now do the same thing with the black pieces. Add the black eye details right on top of the white. You can put the smile and stitches anywhere you like. I thought it looked cuter with the smile a bit offset. Iron them on where you want them and then zigzag stitch all the way around.
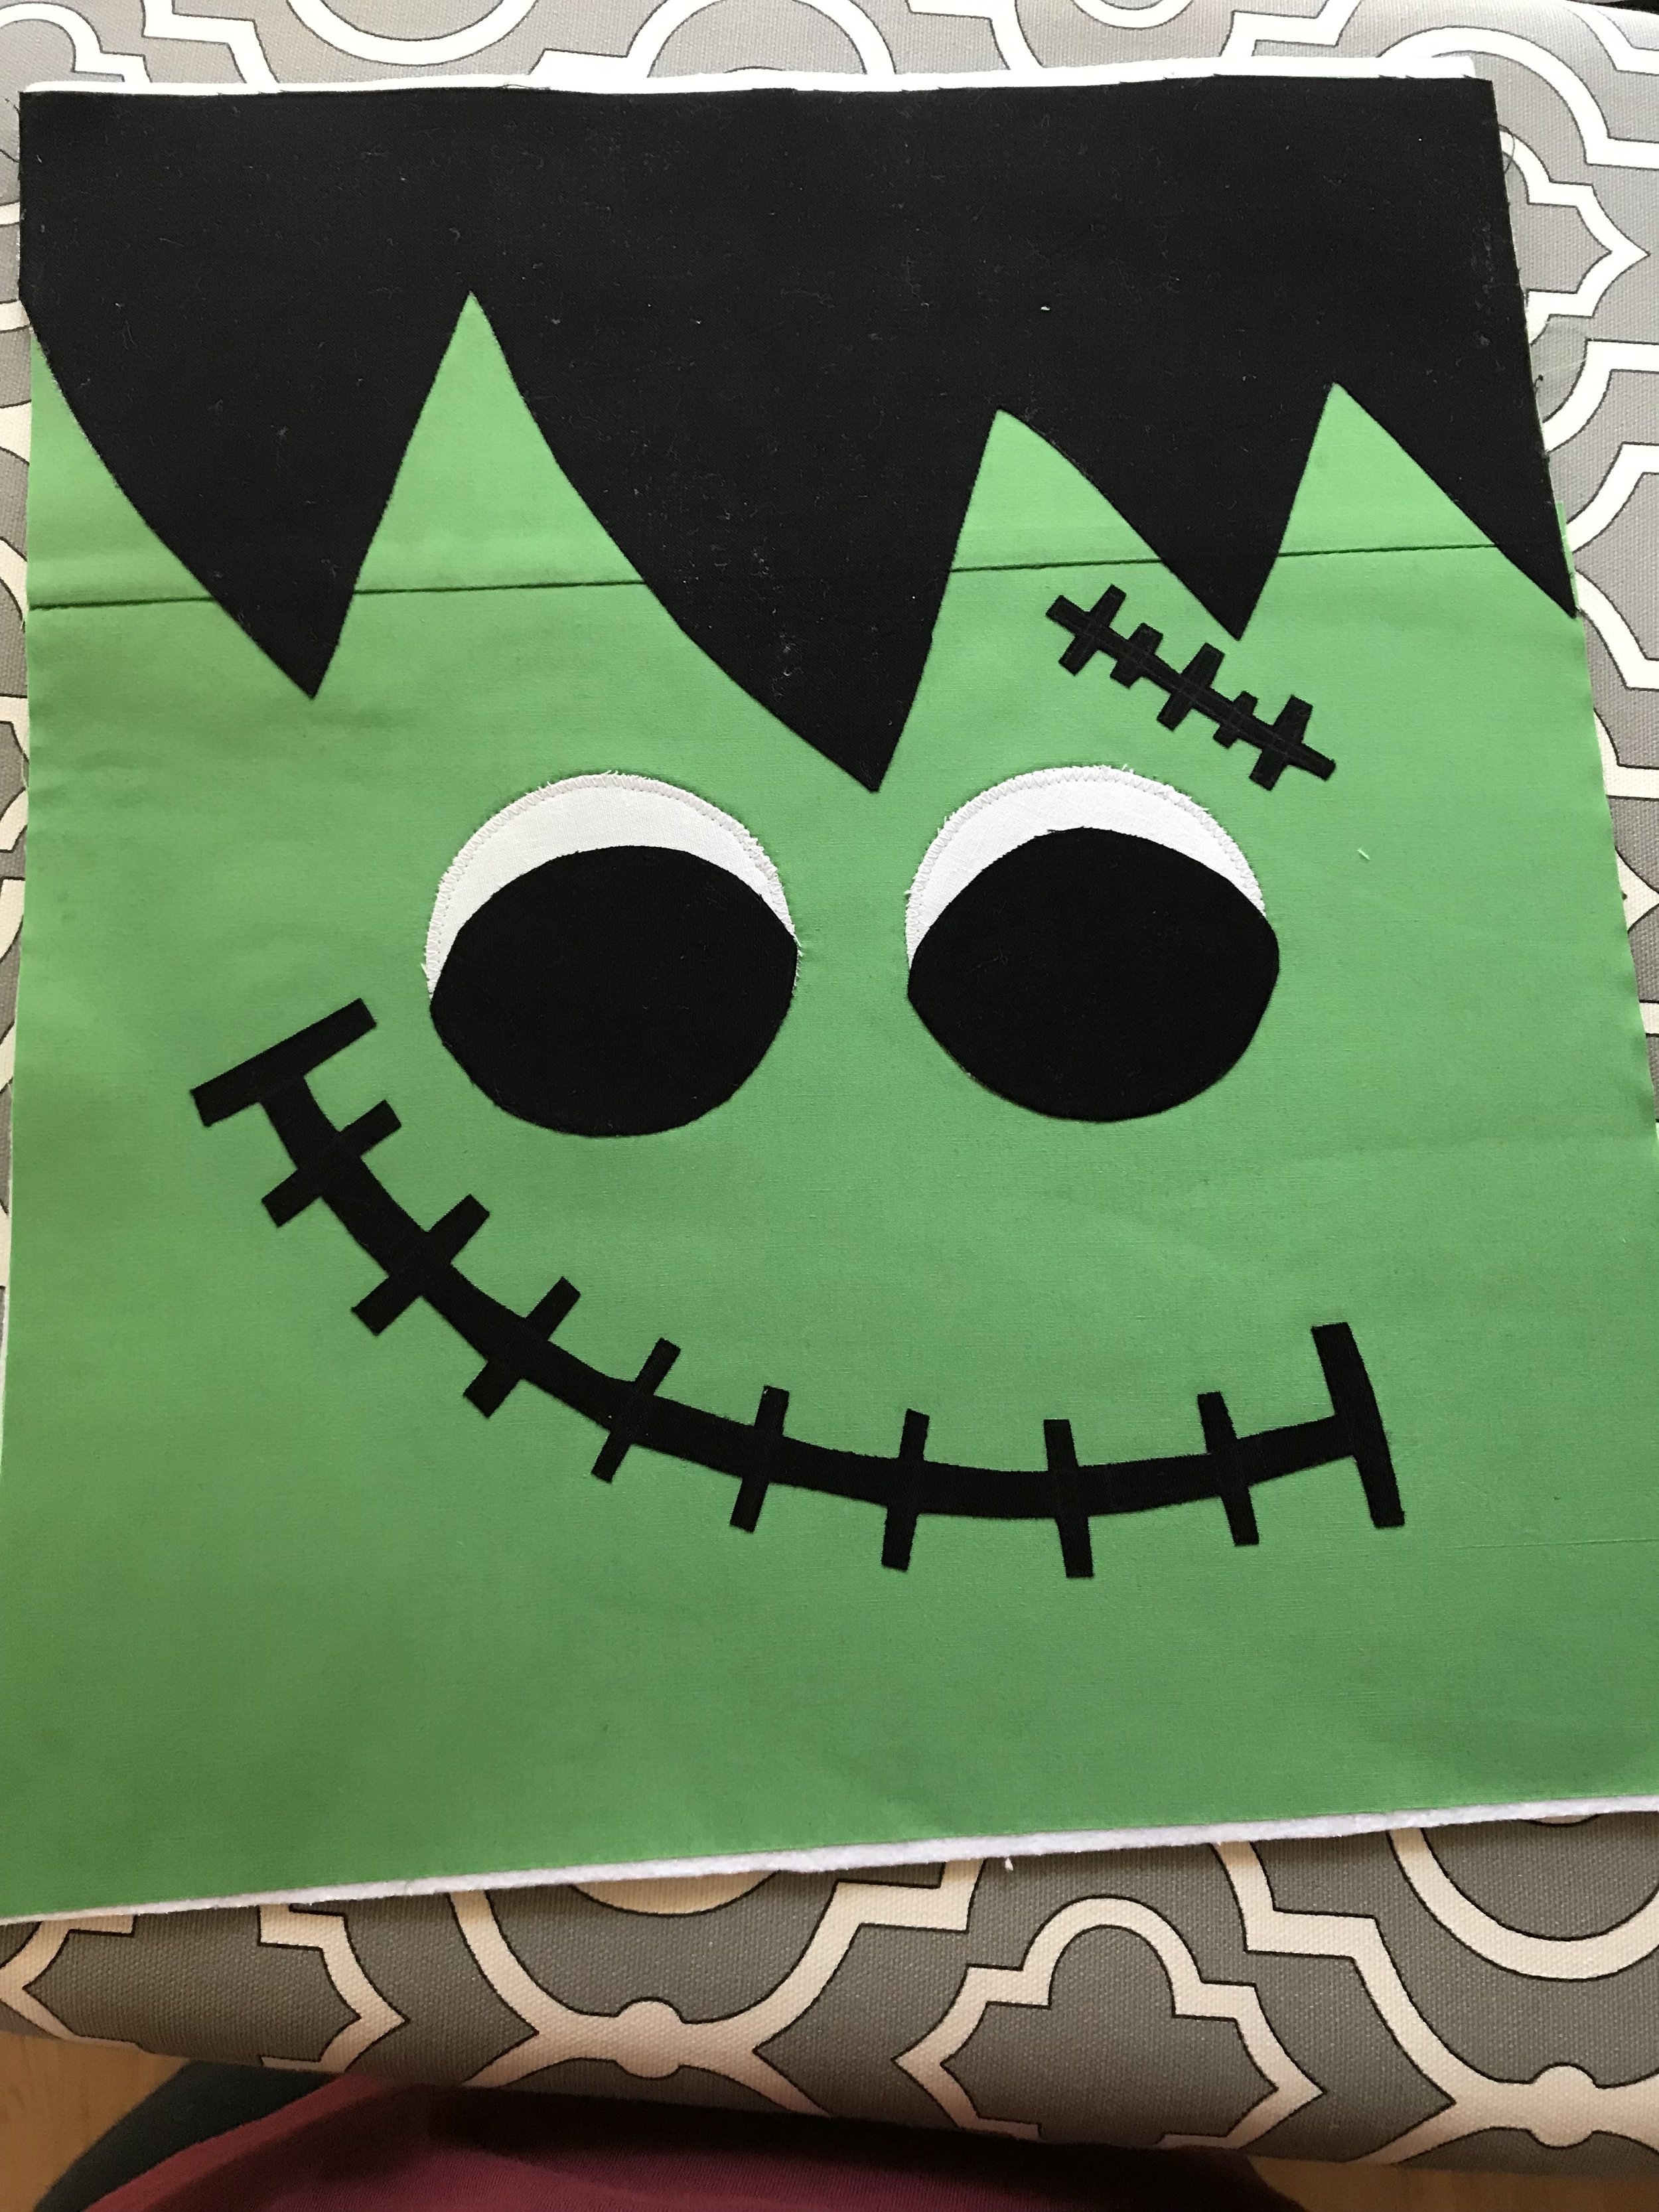

For the stitches and the smile, it can be difficult to zigzag around all the edges so you can also just zigzag stitch down the length of the piece and then go back and zigzag down each of the "stitch" lines. Put the other two stitches pieces on the back of the bag.


Next cut out 4 screw pieces from black fabric. Sew all the way around the edges leaving the smallest end open. Snip the fabric off of the corner so that it is not as bulky when you turn it right side out. It also helps to cut a slit up to the stitching on the inner corners so that it will turn correctly. I hope that makes sense. I tried to take some pictures to show what I mean.
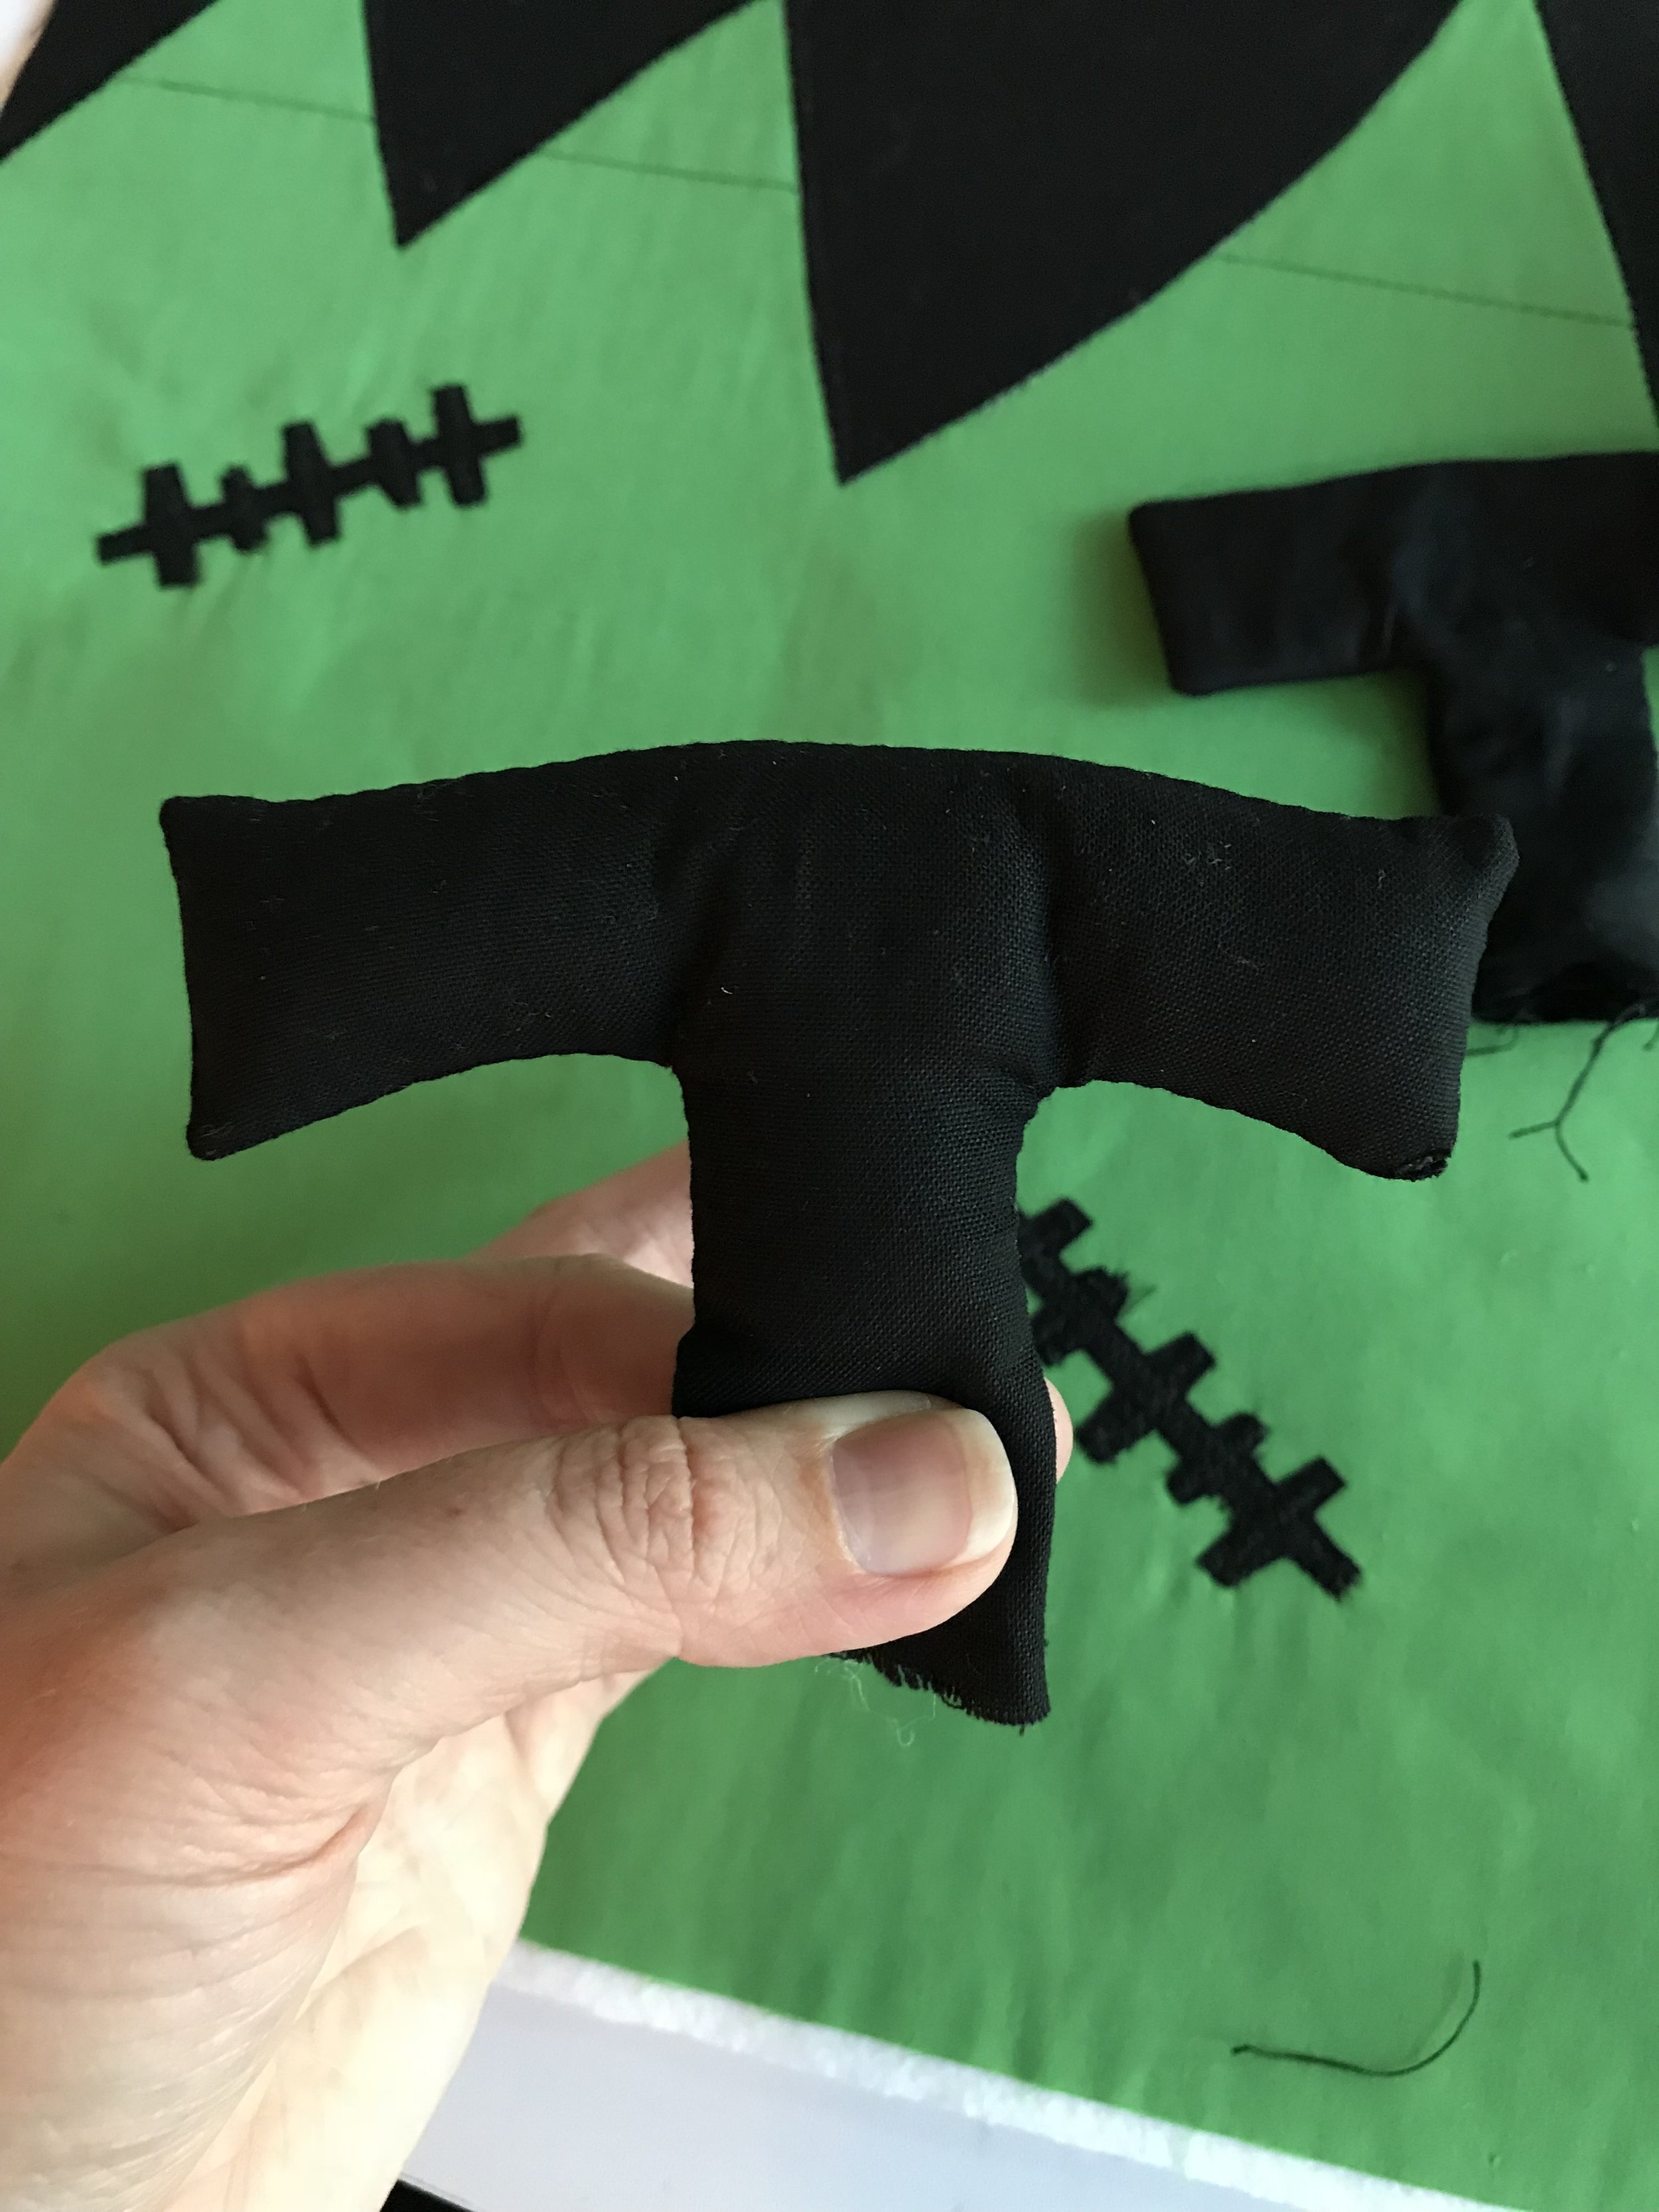
Now turn the screws right side out and poke your corners out the best you can. I have a plastic turning tool and a plastic chopstick that I use for getting my corners crisp, but you can also use a pencil. Then stuff the screws with some fiberfill so they are nice and stiff.


Pin the screws to the sides of face piece in line with the eyes. Then place the back piece on top making sure to line up the hair. Pin in place and sew down the sides and the bottom using a 1/2 inch seam allowance. Then turn the bag right side out.

Now sew the lining pieces with right sides together. Sew down each side and partially across the bottom. You will want to leave a space open at the bottom so you can turn the bag right side out after sewing the lining and the outer bag together.
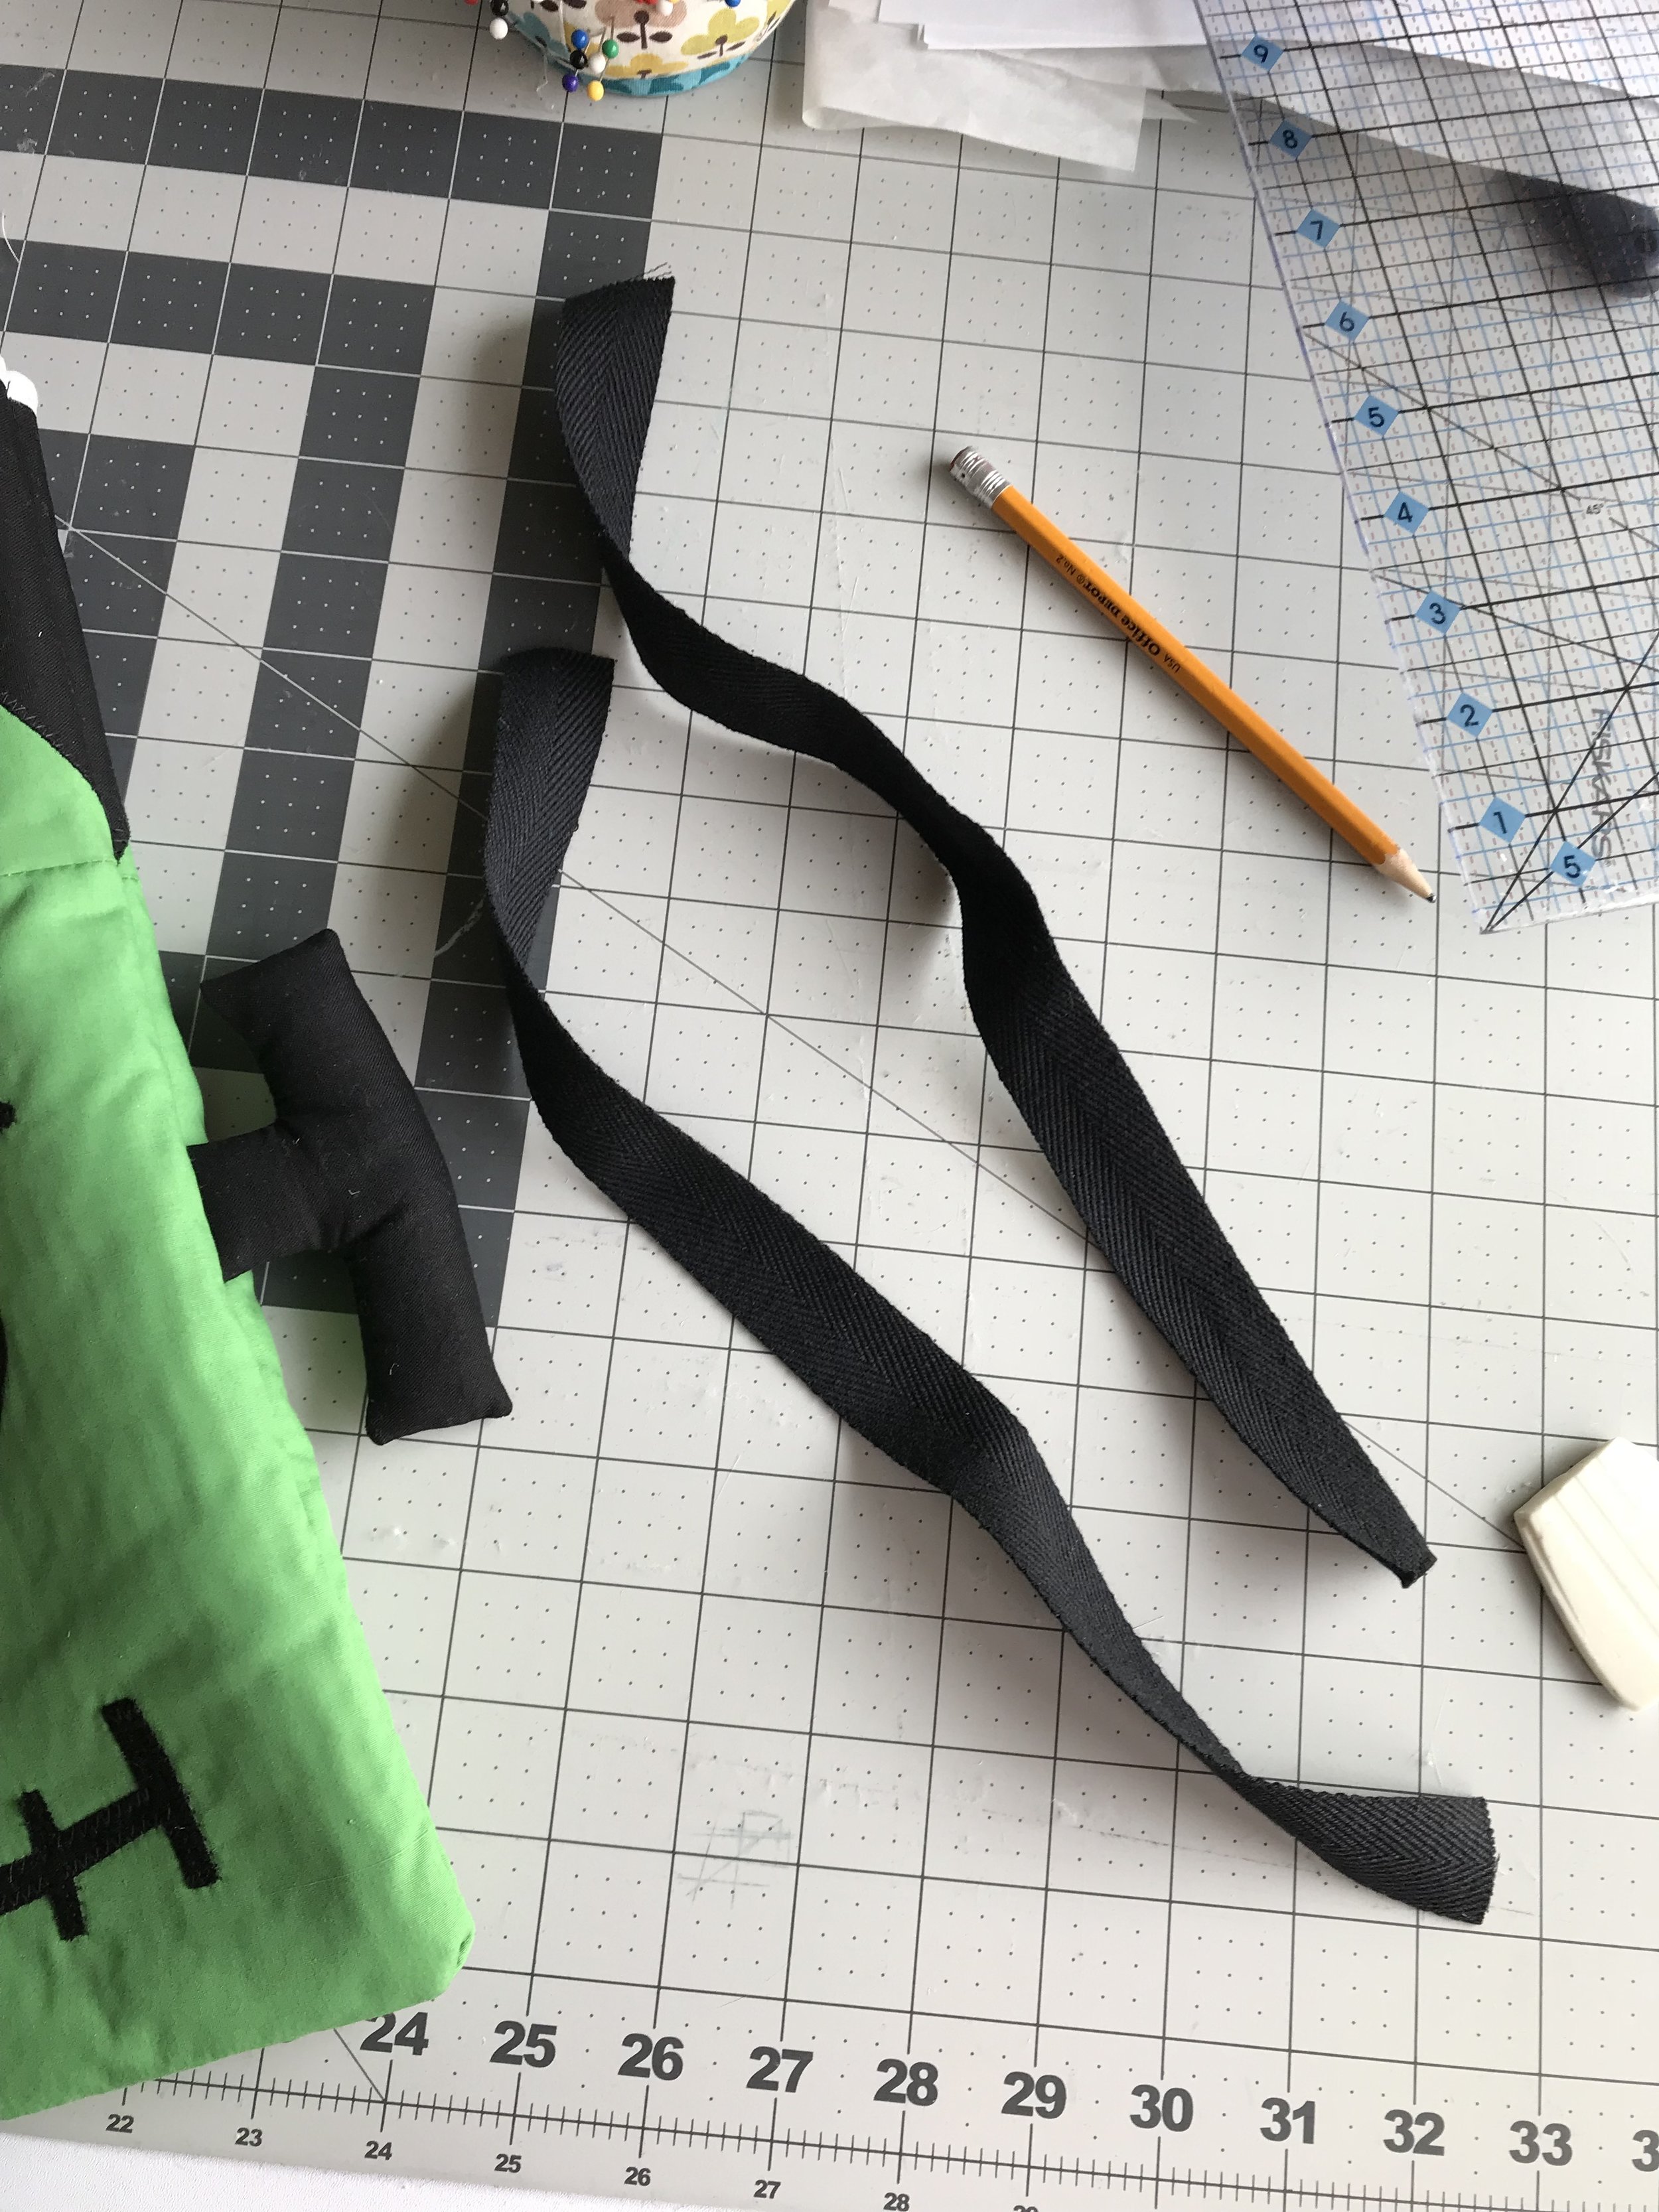
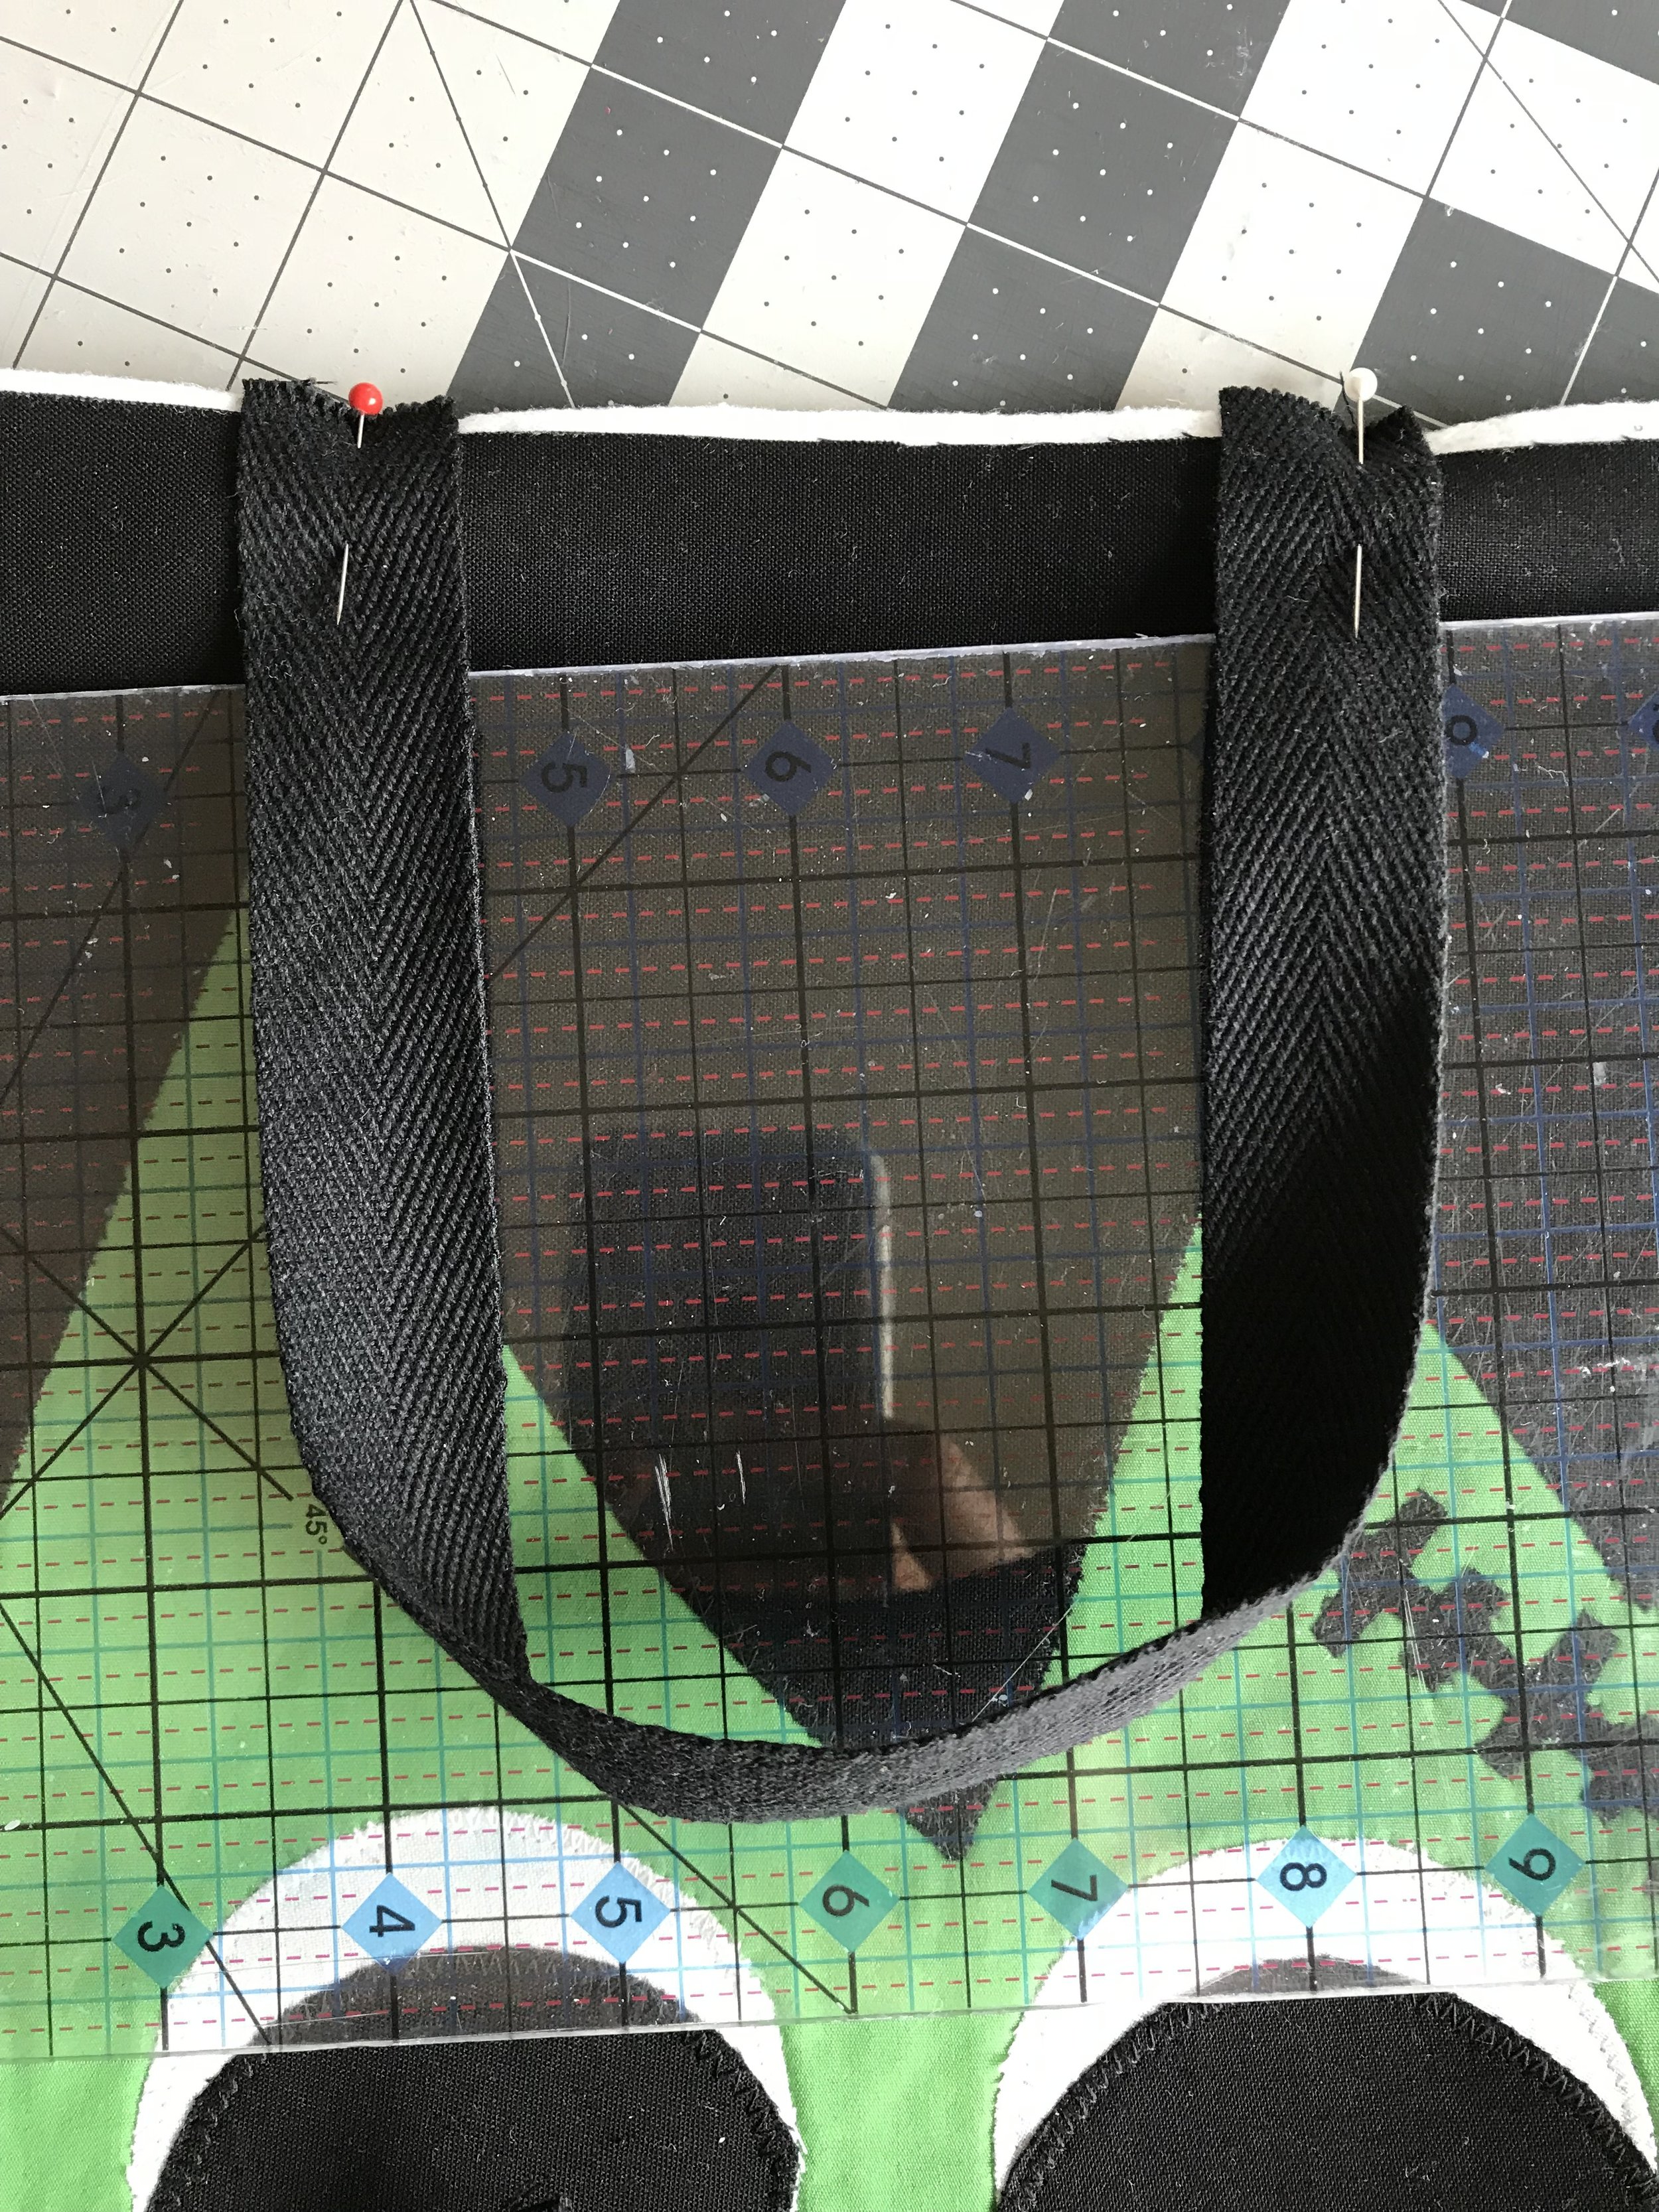

Before we attach the lining to the bag we need to cut our straps. I made mine about 15 inches each. Pin them to the outside of the bag 3 inches in from the edge. Flip the bag over and pin the other handle in place the same way.

Next, slide the lining (it should be wrong side out) over top of the bag (right sides out).

Line up the side seams of the lining with the side seams of the outer bag and pin in place. Then add at least one pin to each side along the top, making sure that the straps are down in between the two layers.

Sew all the way around the top of the bag. Be careful to make sure that you sew the straps in place too.


Now it's time to turn our bag right side out. Open up the lining where you left a space and carefully pull out the outer layer of the bag. Keep pulling until the whole bag is right side out. Then you will need to tuck the lining into the inside of the bag.
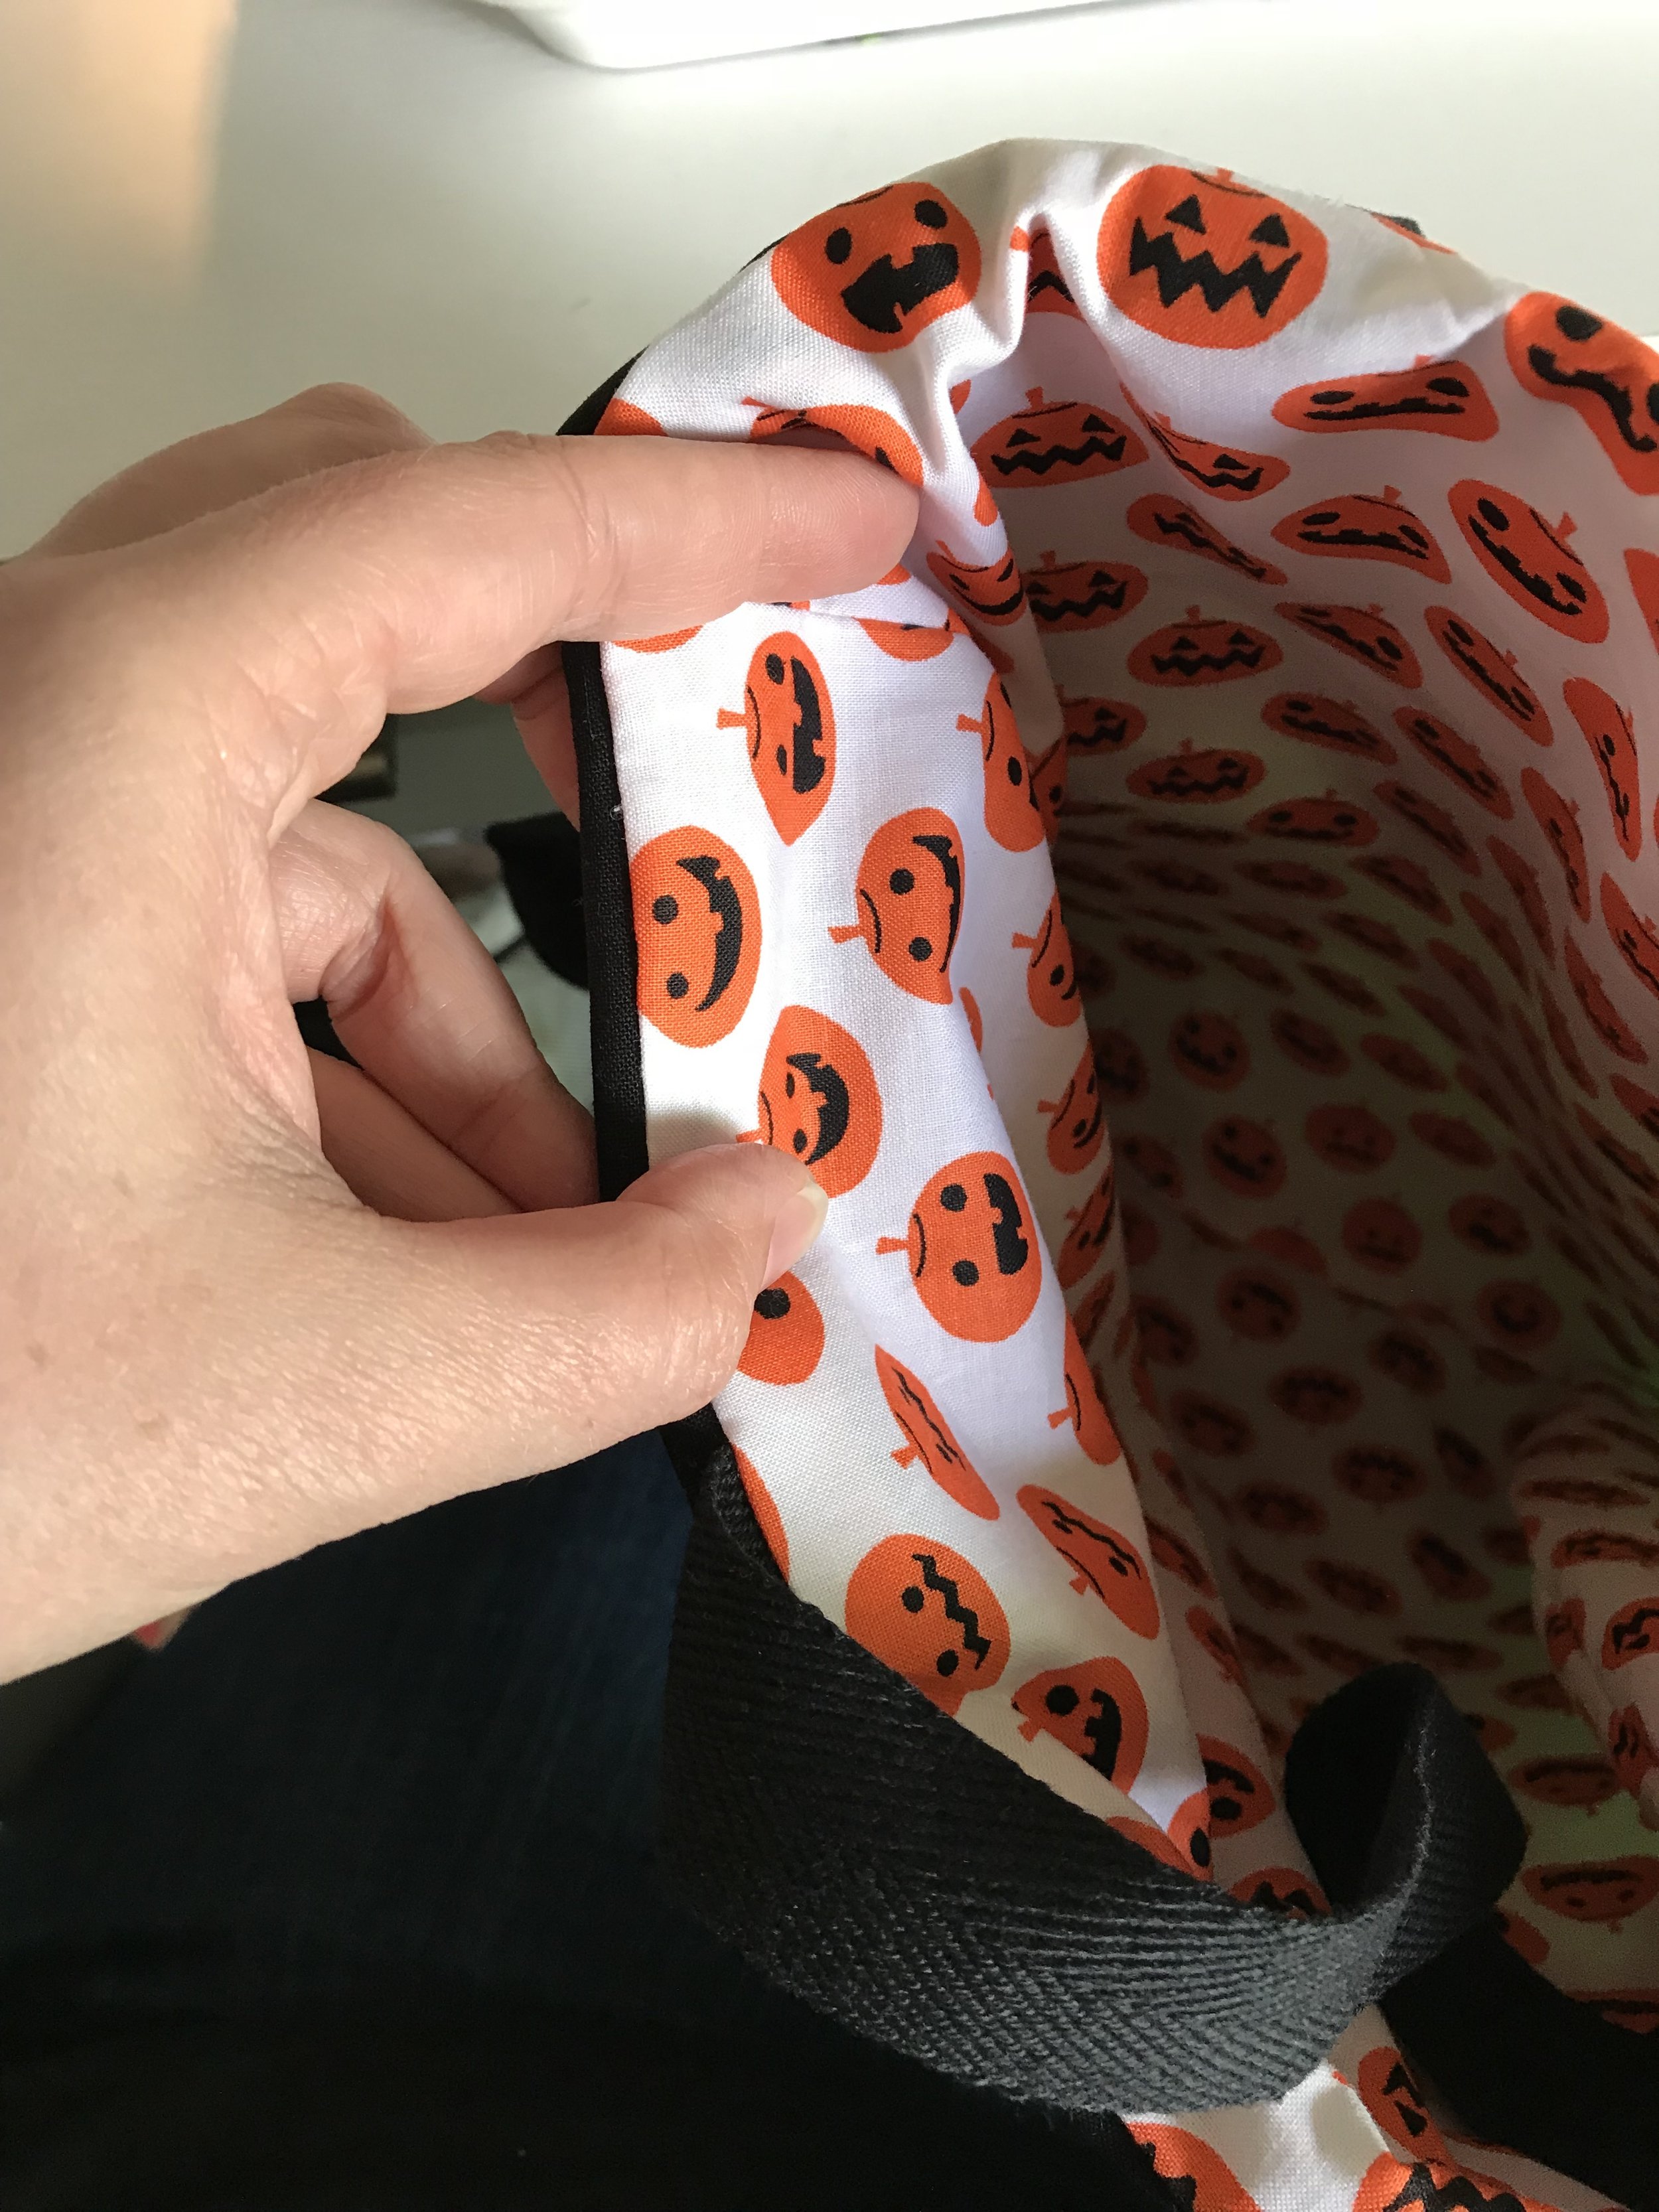

Make sure the lining is tucked all the way into the bag and finger press the top seam down. Topstitch all the way around the top of the bag making sure that the straps are out of the way.

Then pull the lining back out and either hand stitch or machine stitch the opening closed. Stuff the lining back into the bag and you're done!

The Black Cat bag is worked up the same way, but it has a few extra pieces. Here is how you will layer your pieces to create the face.


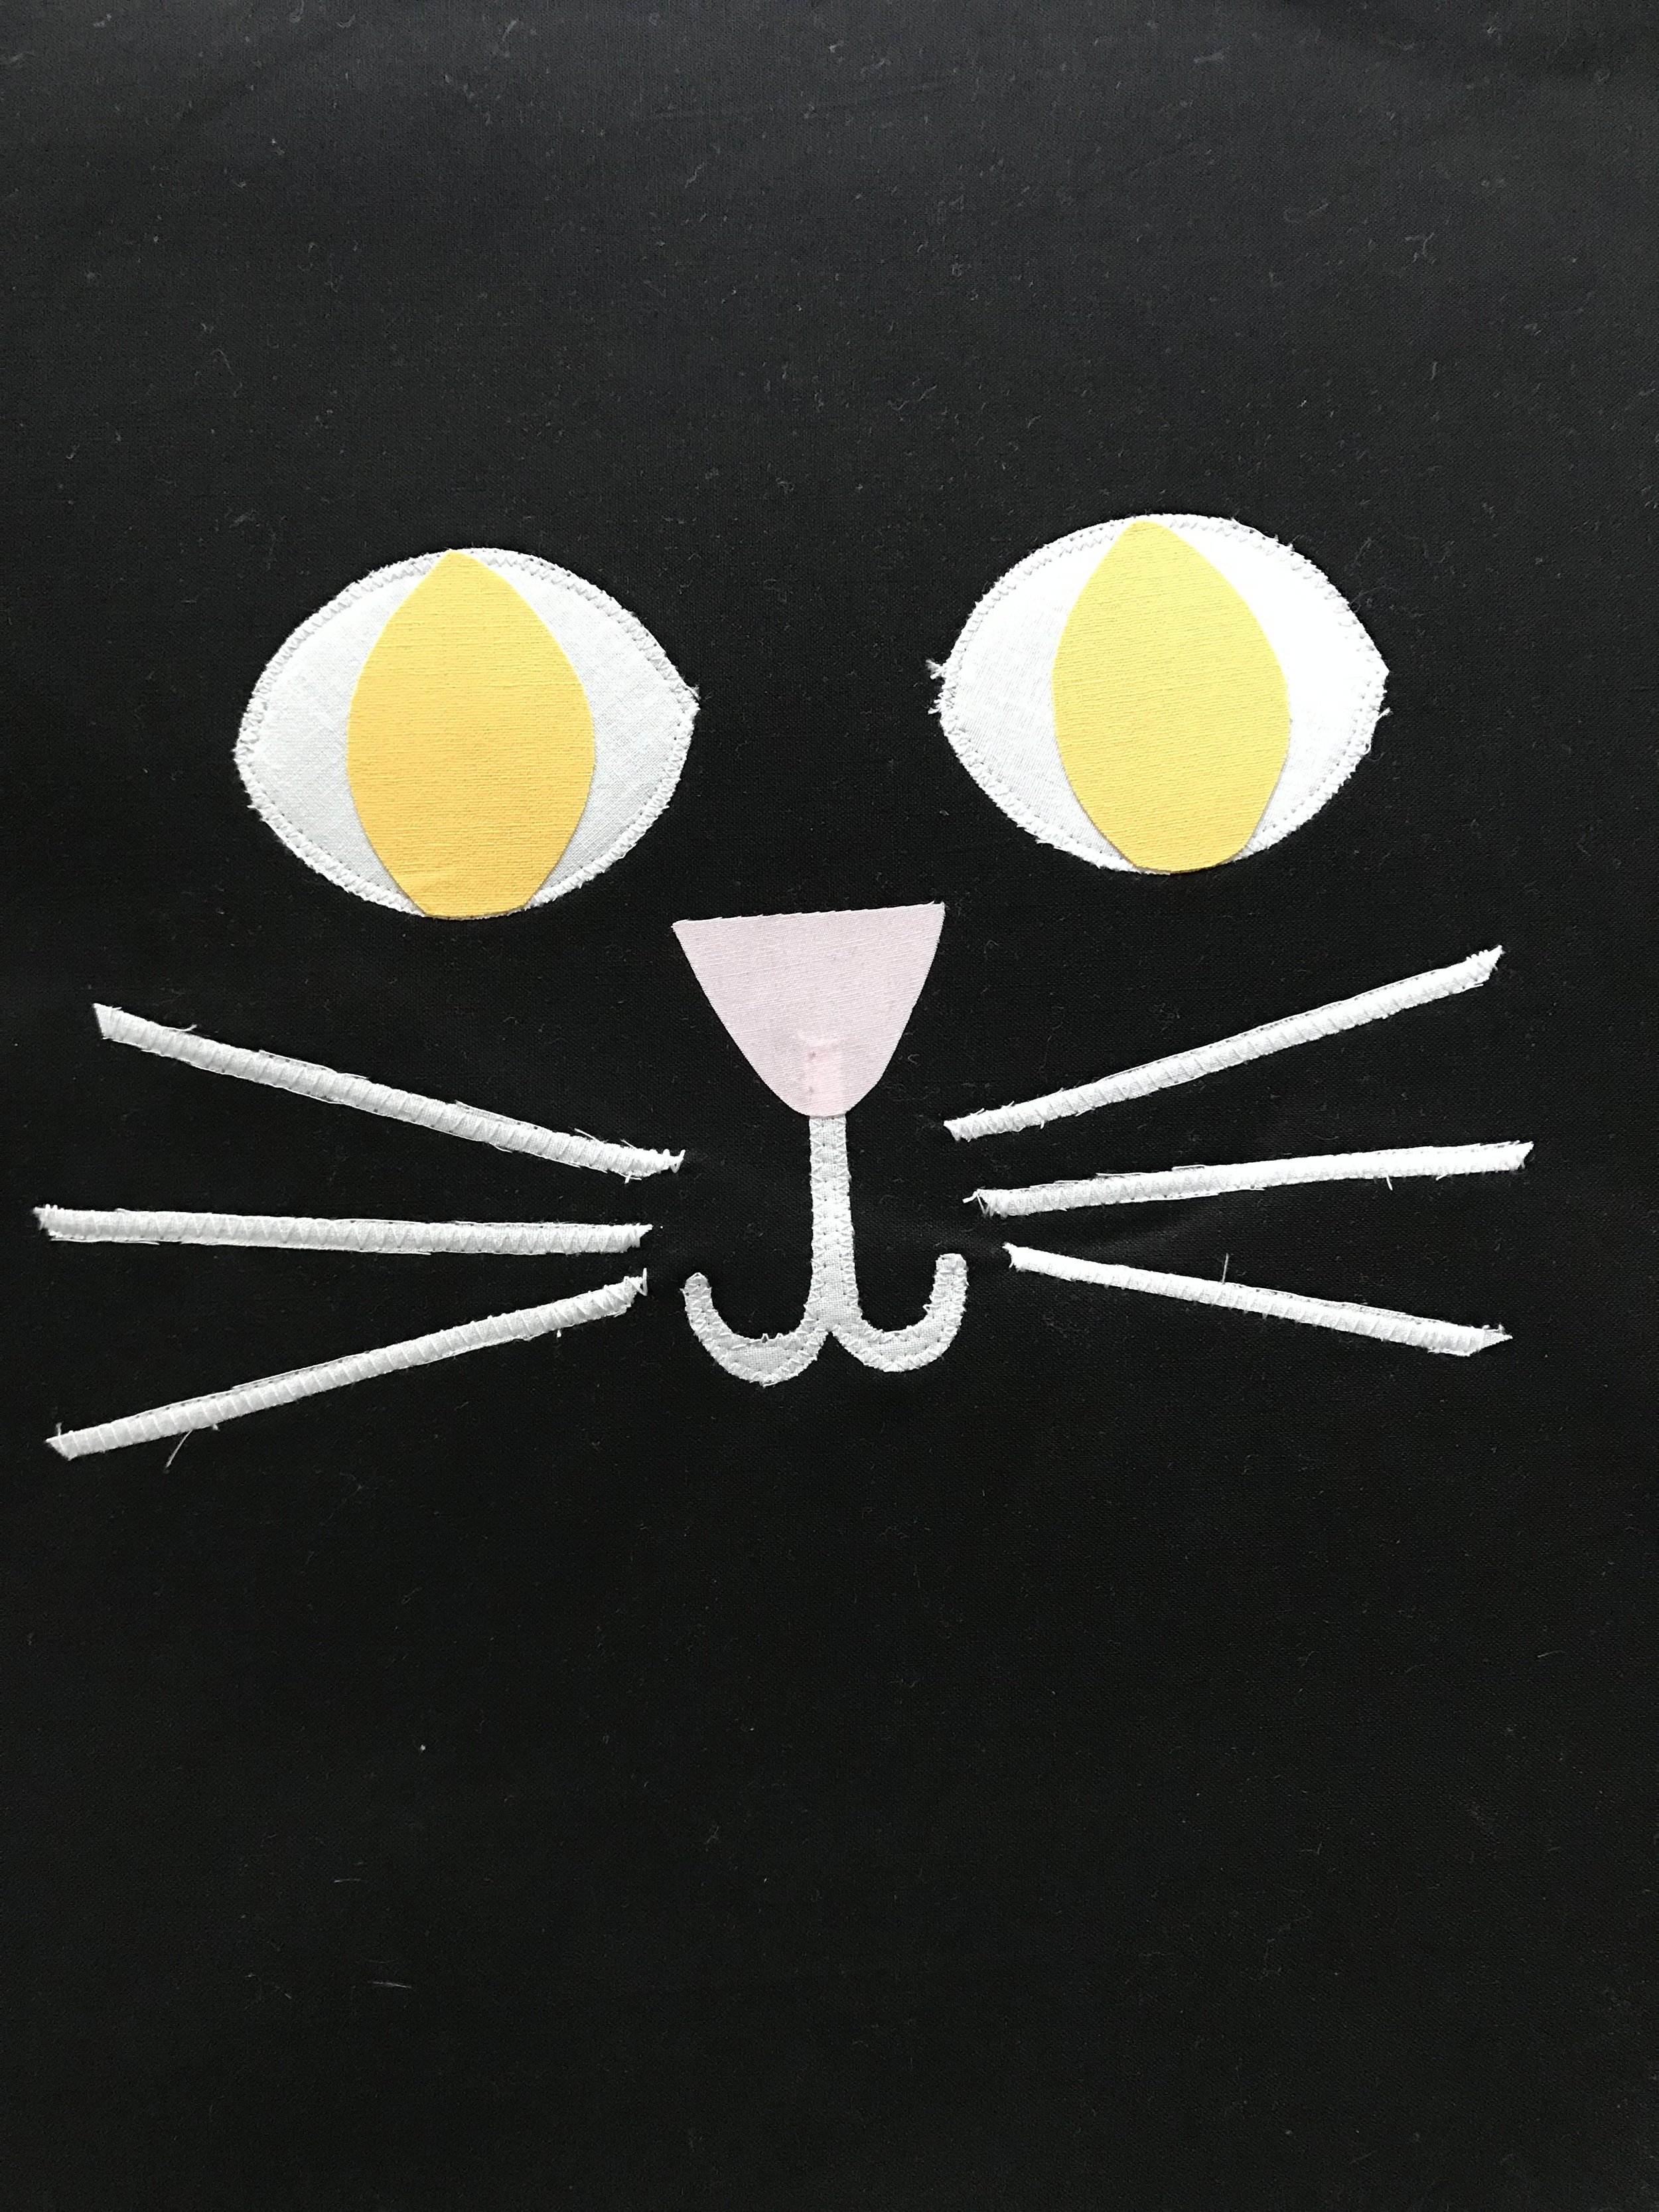

Start with your white pieces first. You should have two white eye pieces, a white mouth piece and then cut 6 strips of white for the whiskers. They don't have to be perfect, just similar in size and length.
Then add the yellow eye pieces and the pink nose.
Last you will add the black pupil and then little squares of white to make a highlight in the eyes (optional).

After completing the face, move on to the ears. In the picture above I had cut my ears on the fold and then later ended up cutting them in two so make sure you cut 4 triangle ears for yours. Then cut 4 outer ear pieces from fusible fleece and iron onto the back side of all pieces. This will add some thickness to the ears and help keep them standing up right.
Cut out 2 pink inner ear pieces and zigzag stitch them on to 2 outer ear pieces.
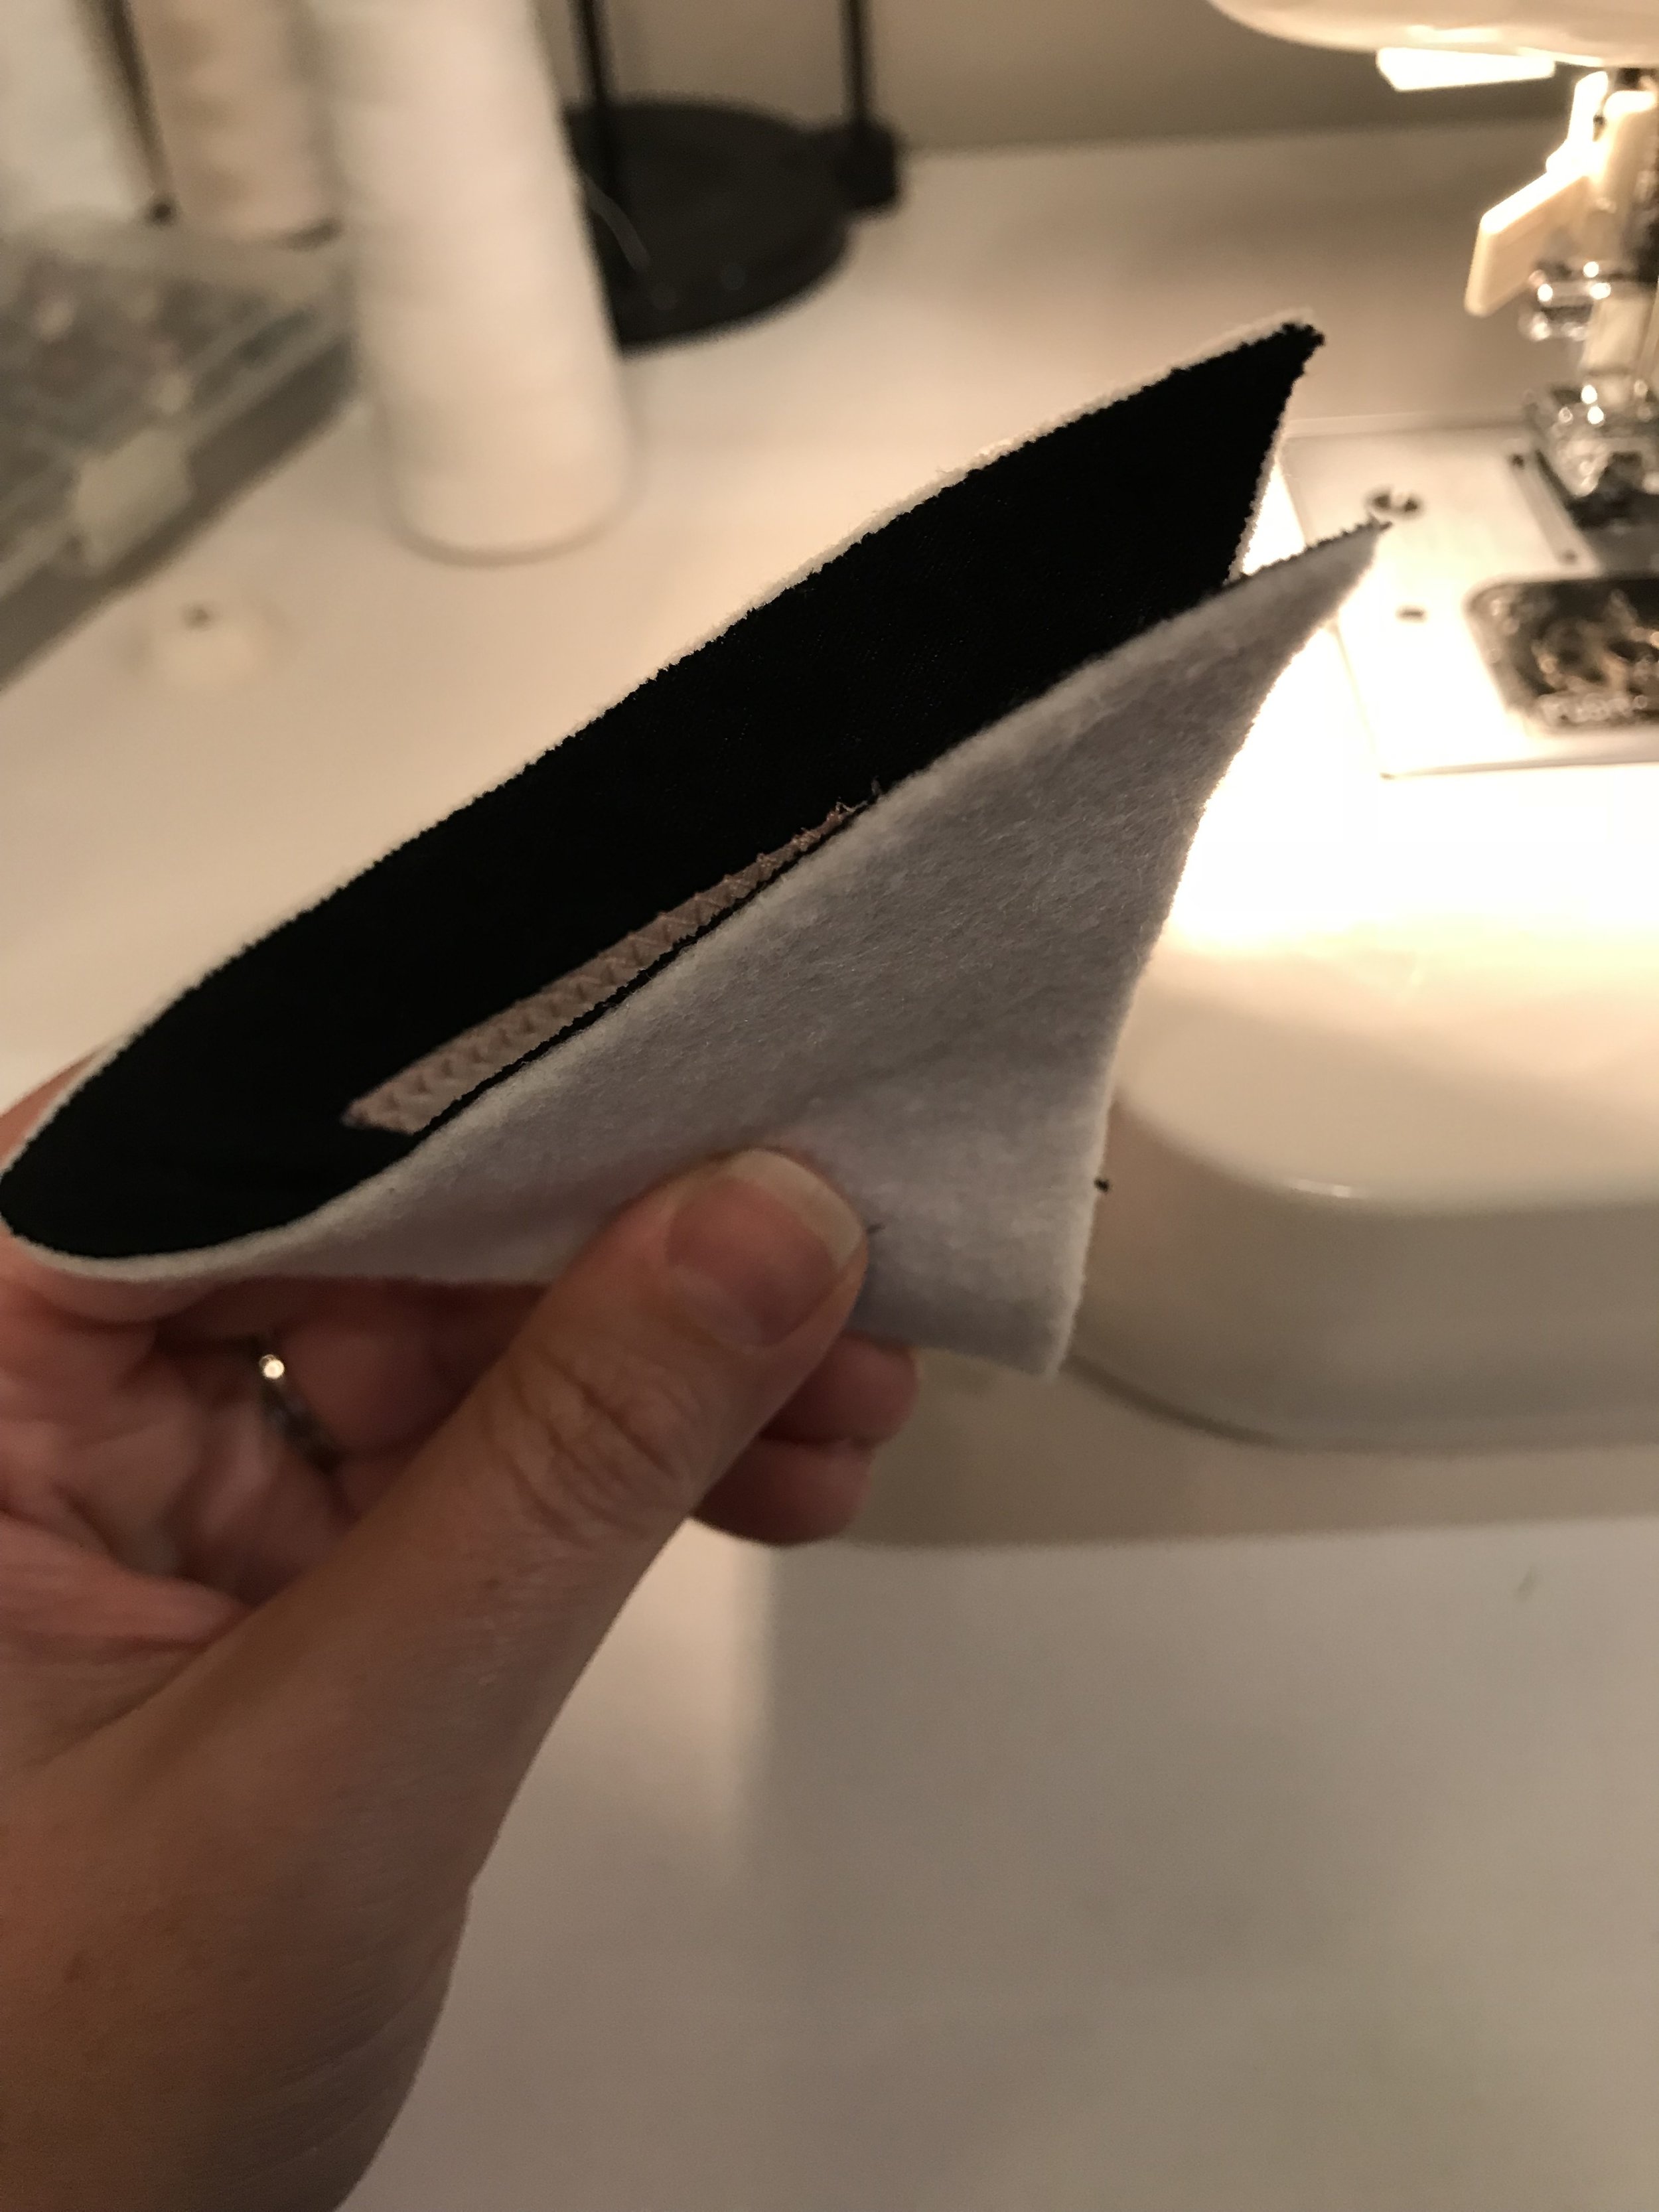
Line up one black ear piece with one black and pink ear piece and sew across two edges. Leave the bottom edge open for turning.

Make sure to snip the tip off of the ears so when you turn it you can get a nice point. Again you will want to use a turning tool, chopstick or pencil to help.
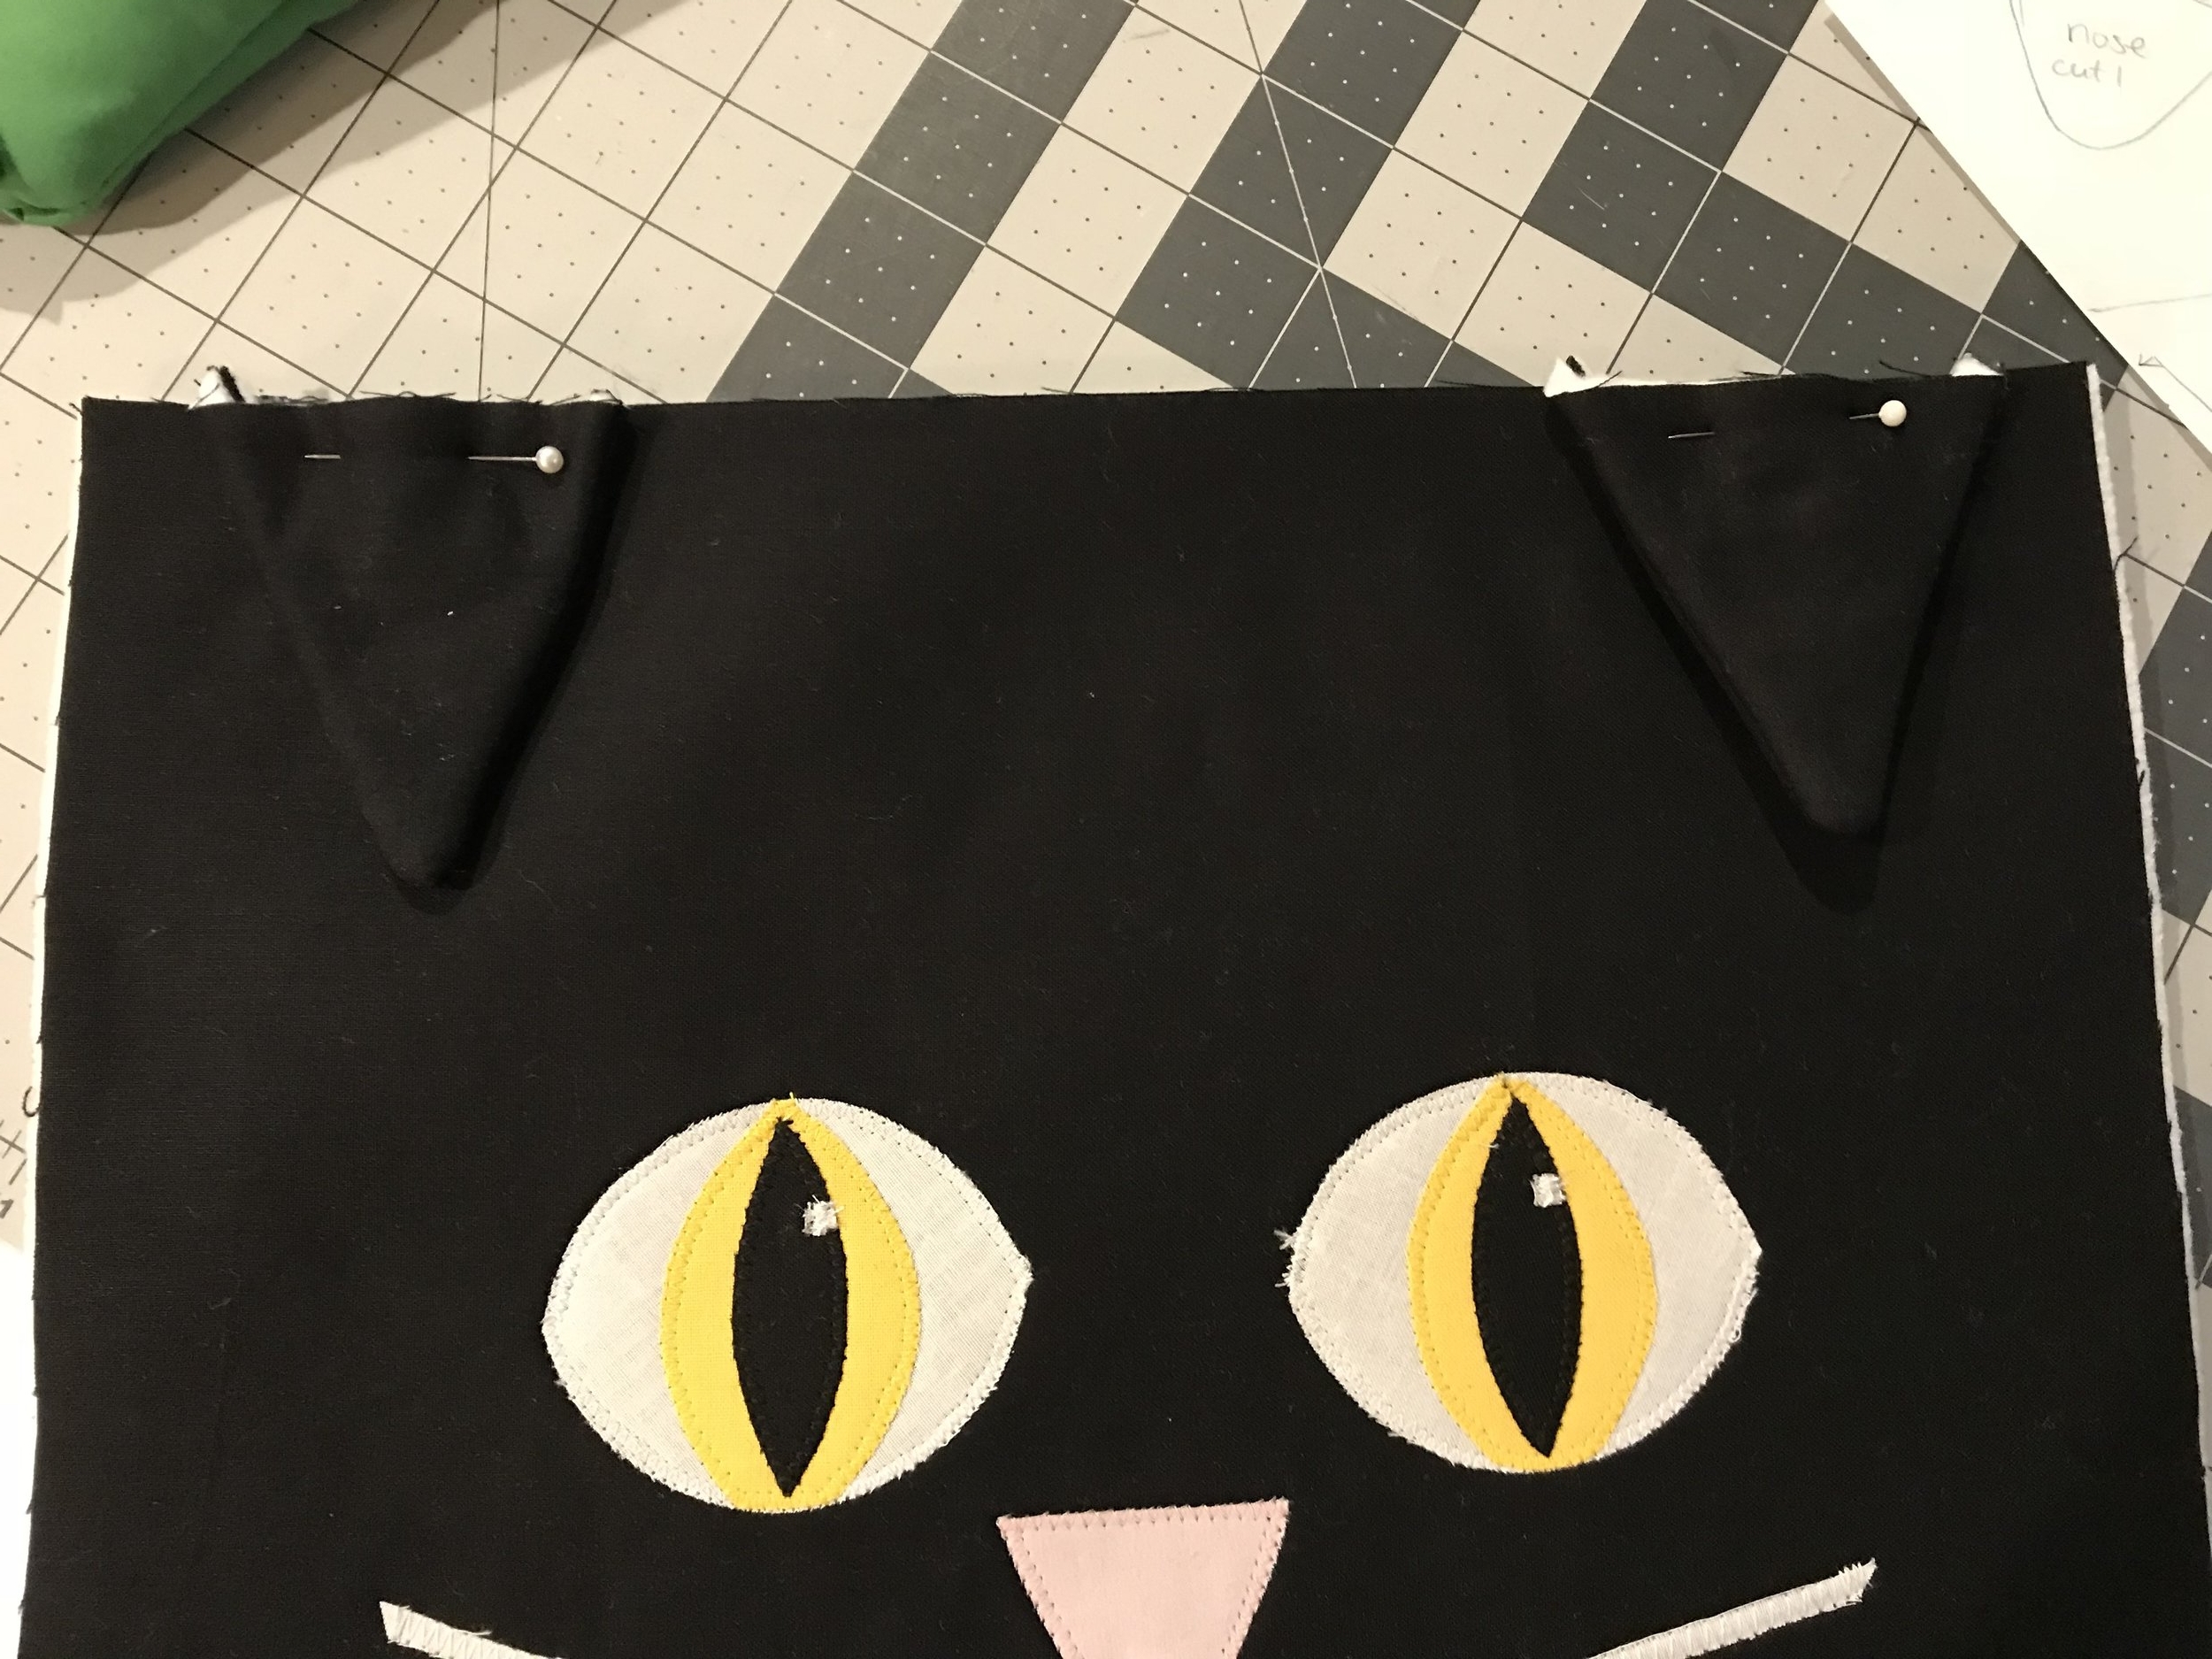
Now you will sew the ears onto the front of the bag. Pin them on pointing down and with pink side facing the bag. I pinned mine a smidge more than 1/2" in front the side so they wouldn't get sewed in the the seam. Then I sewed them in place as close to the edge as possible.


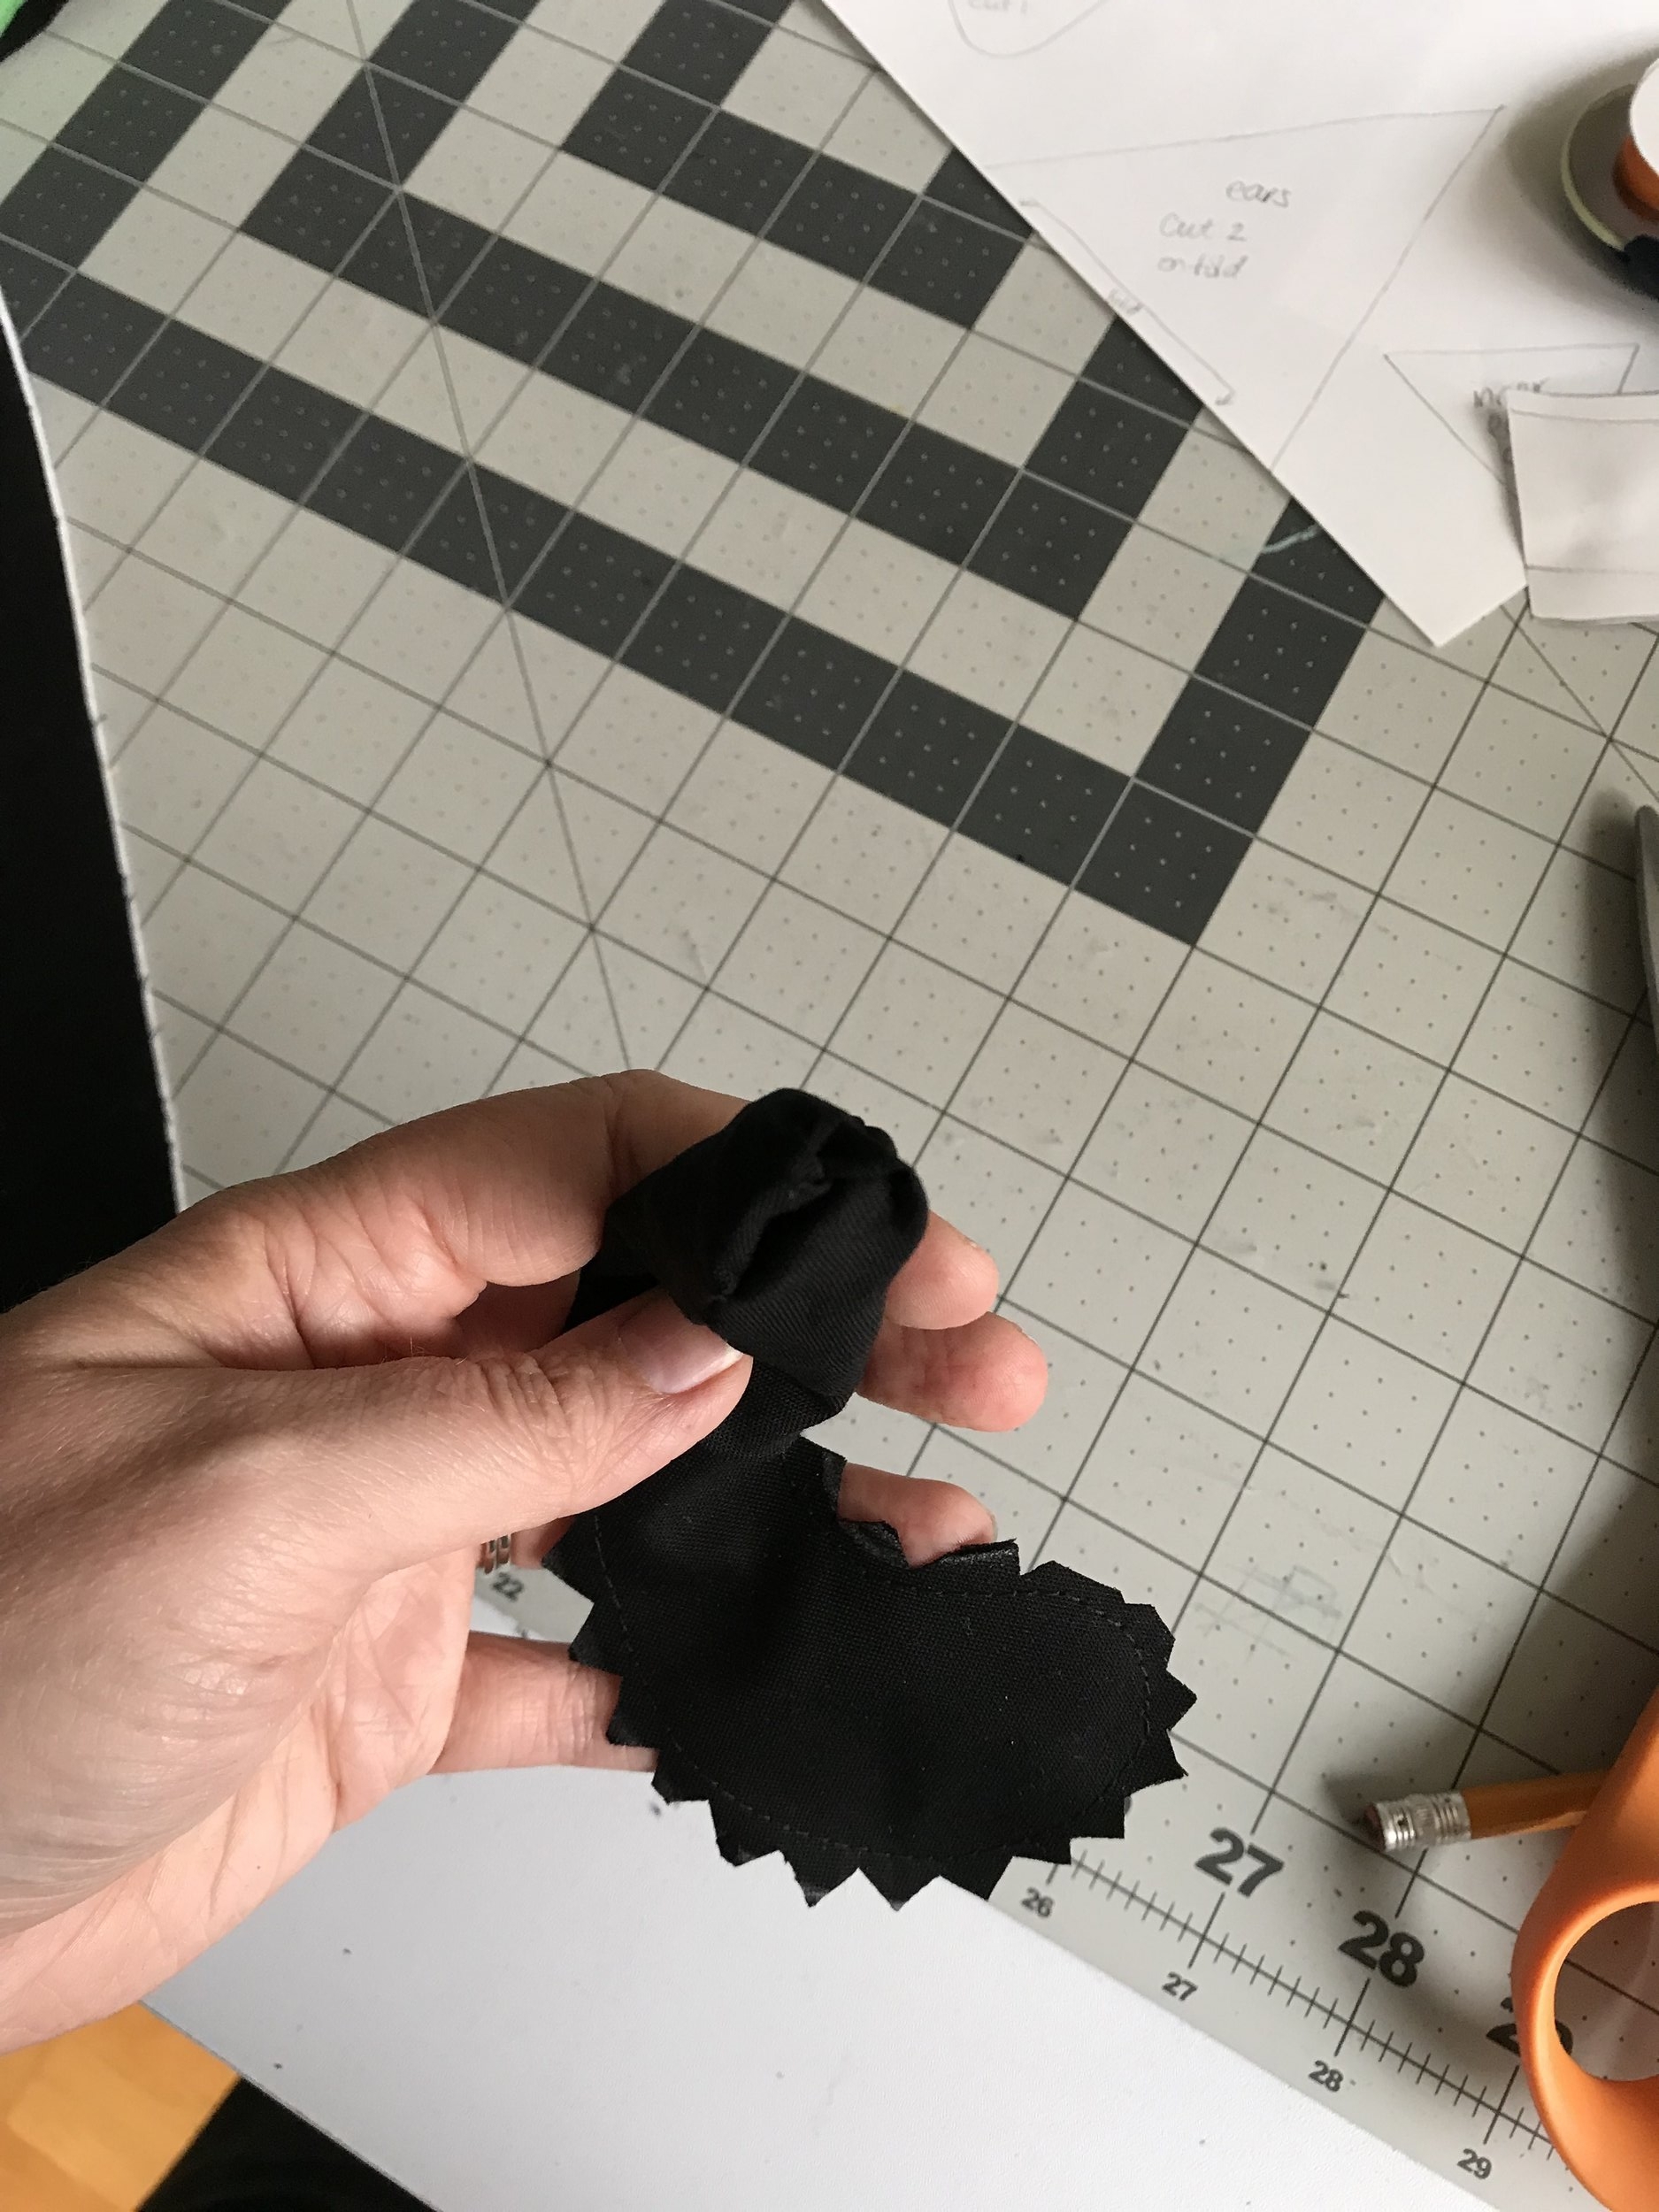
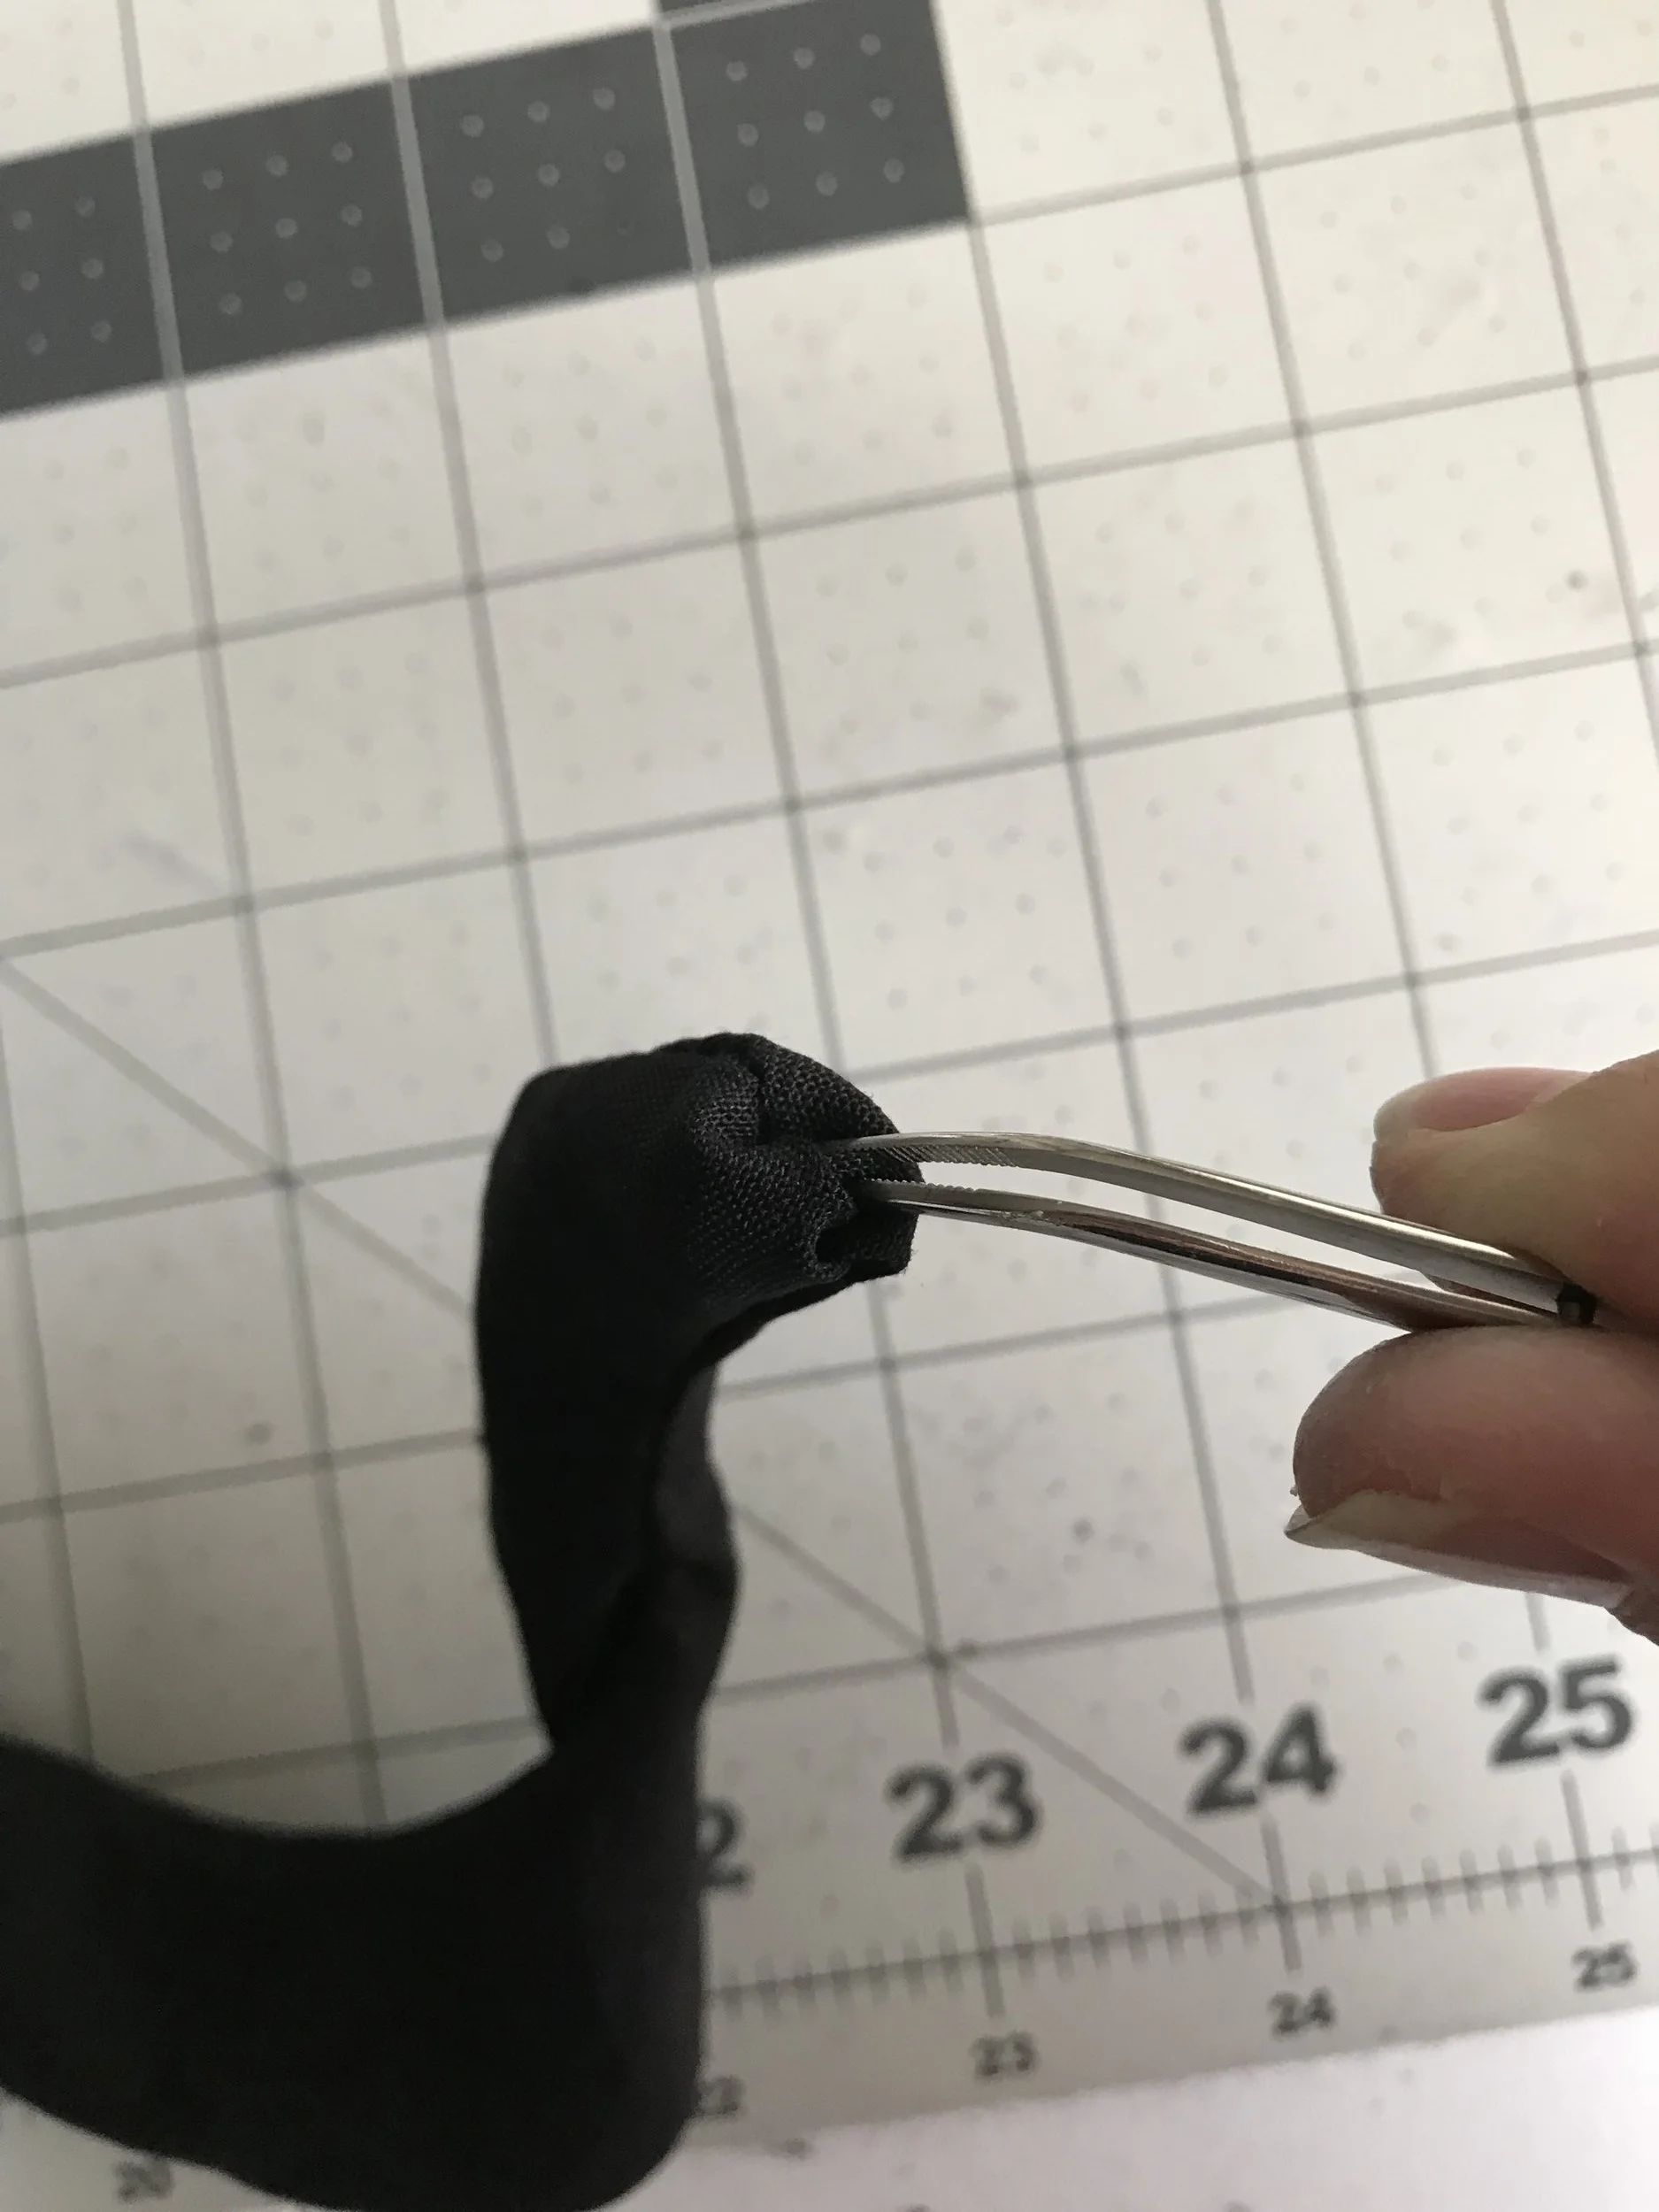
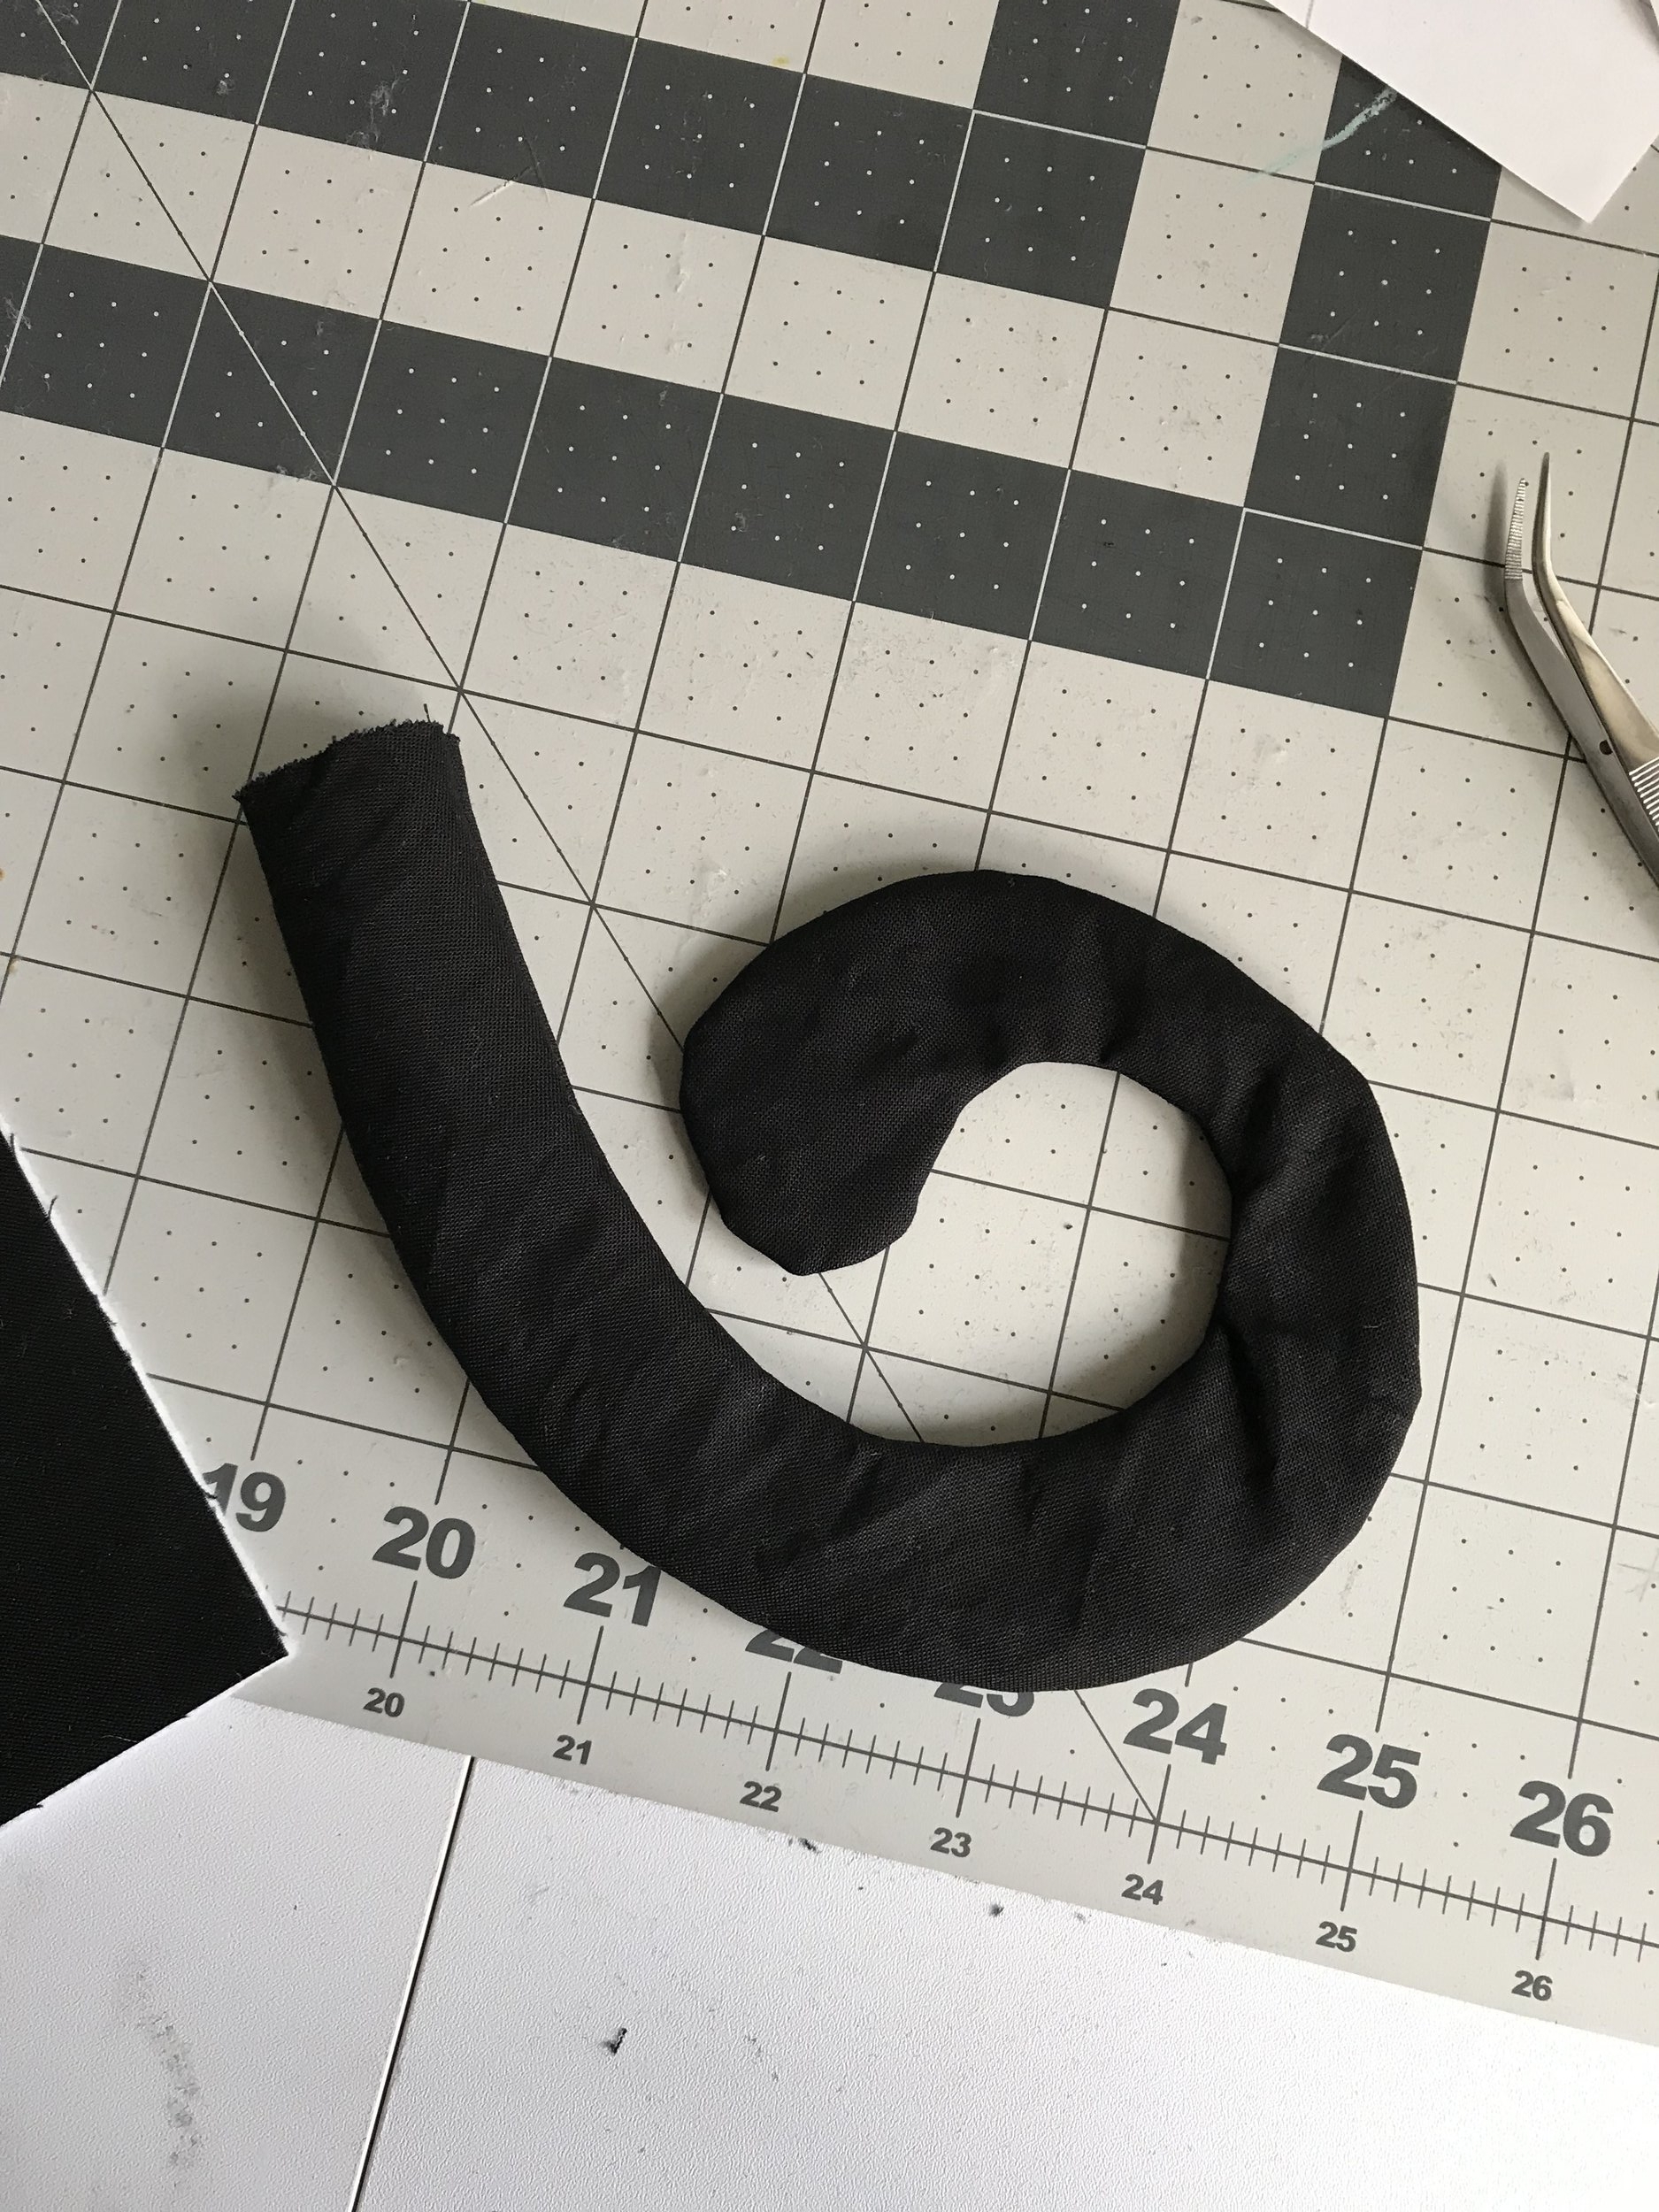
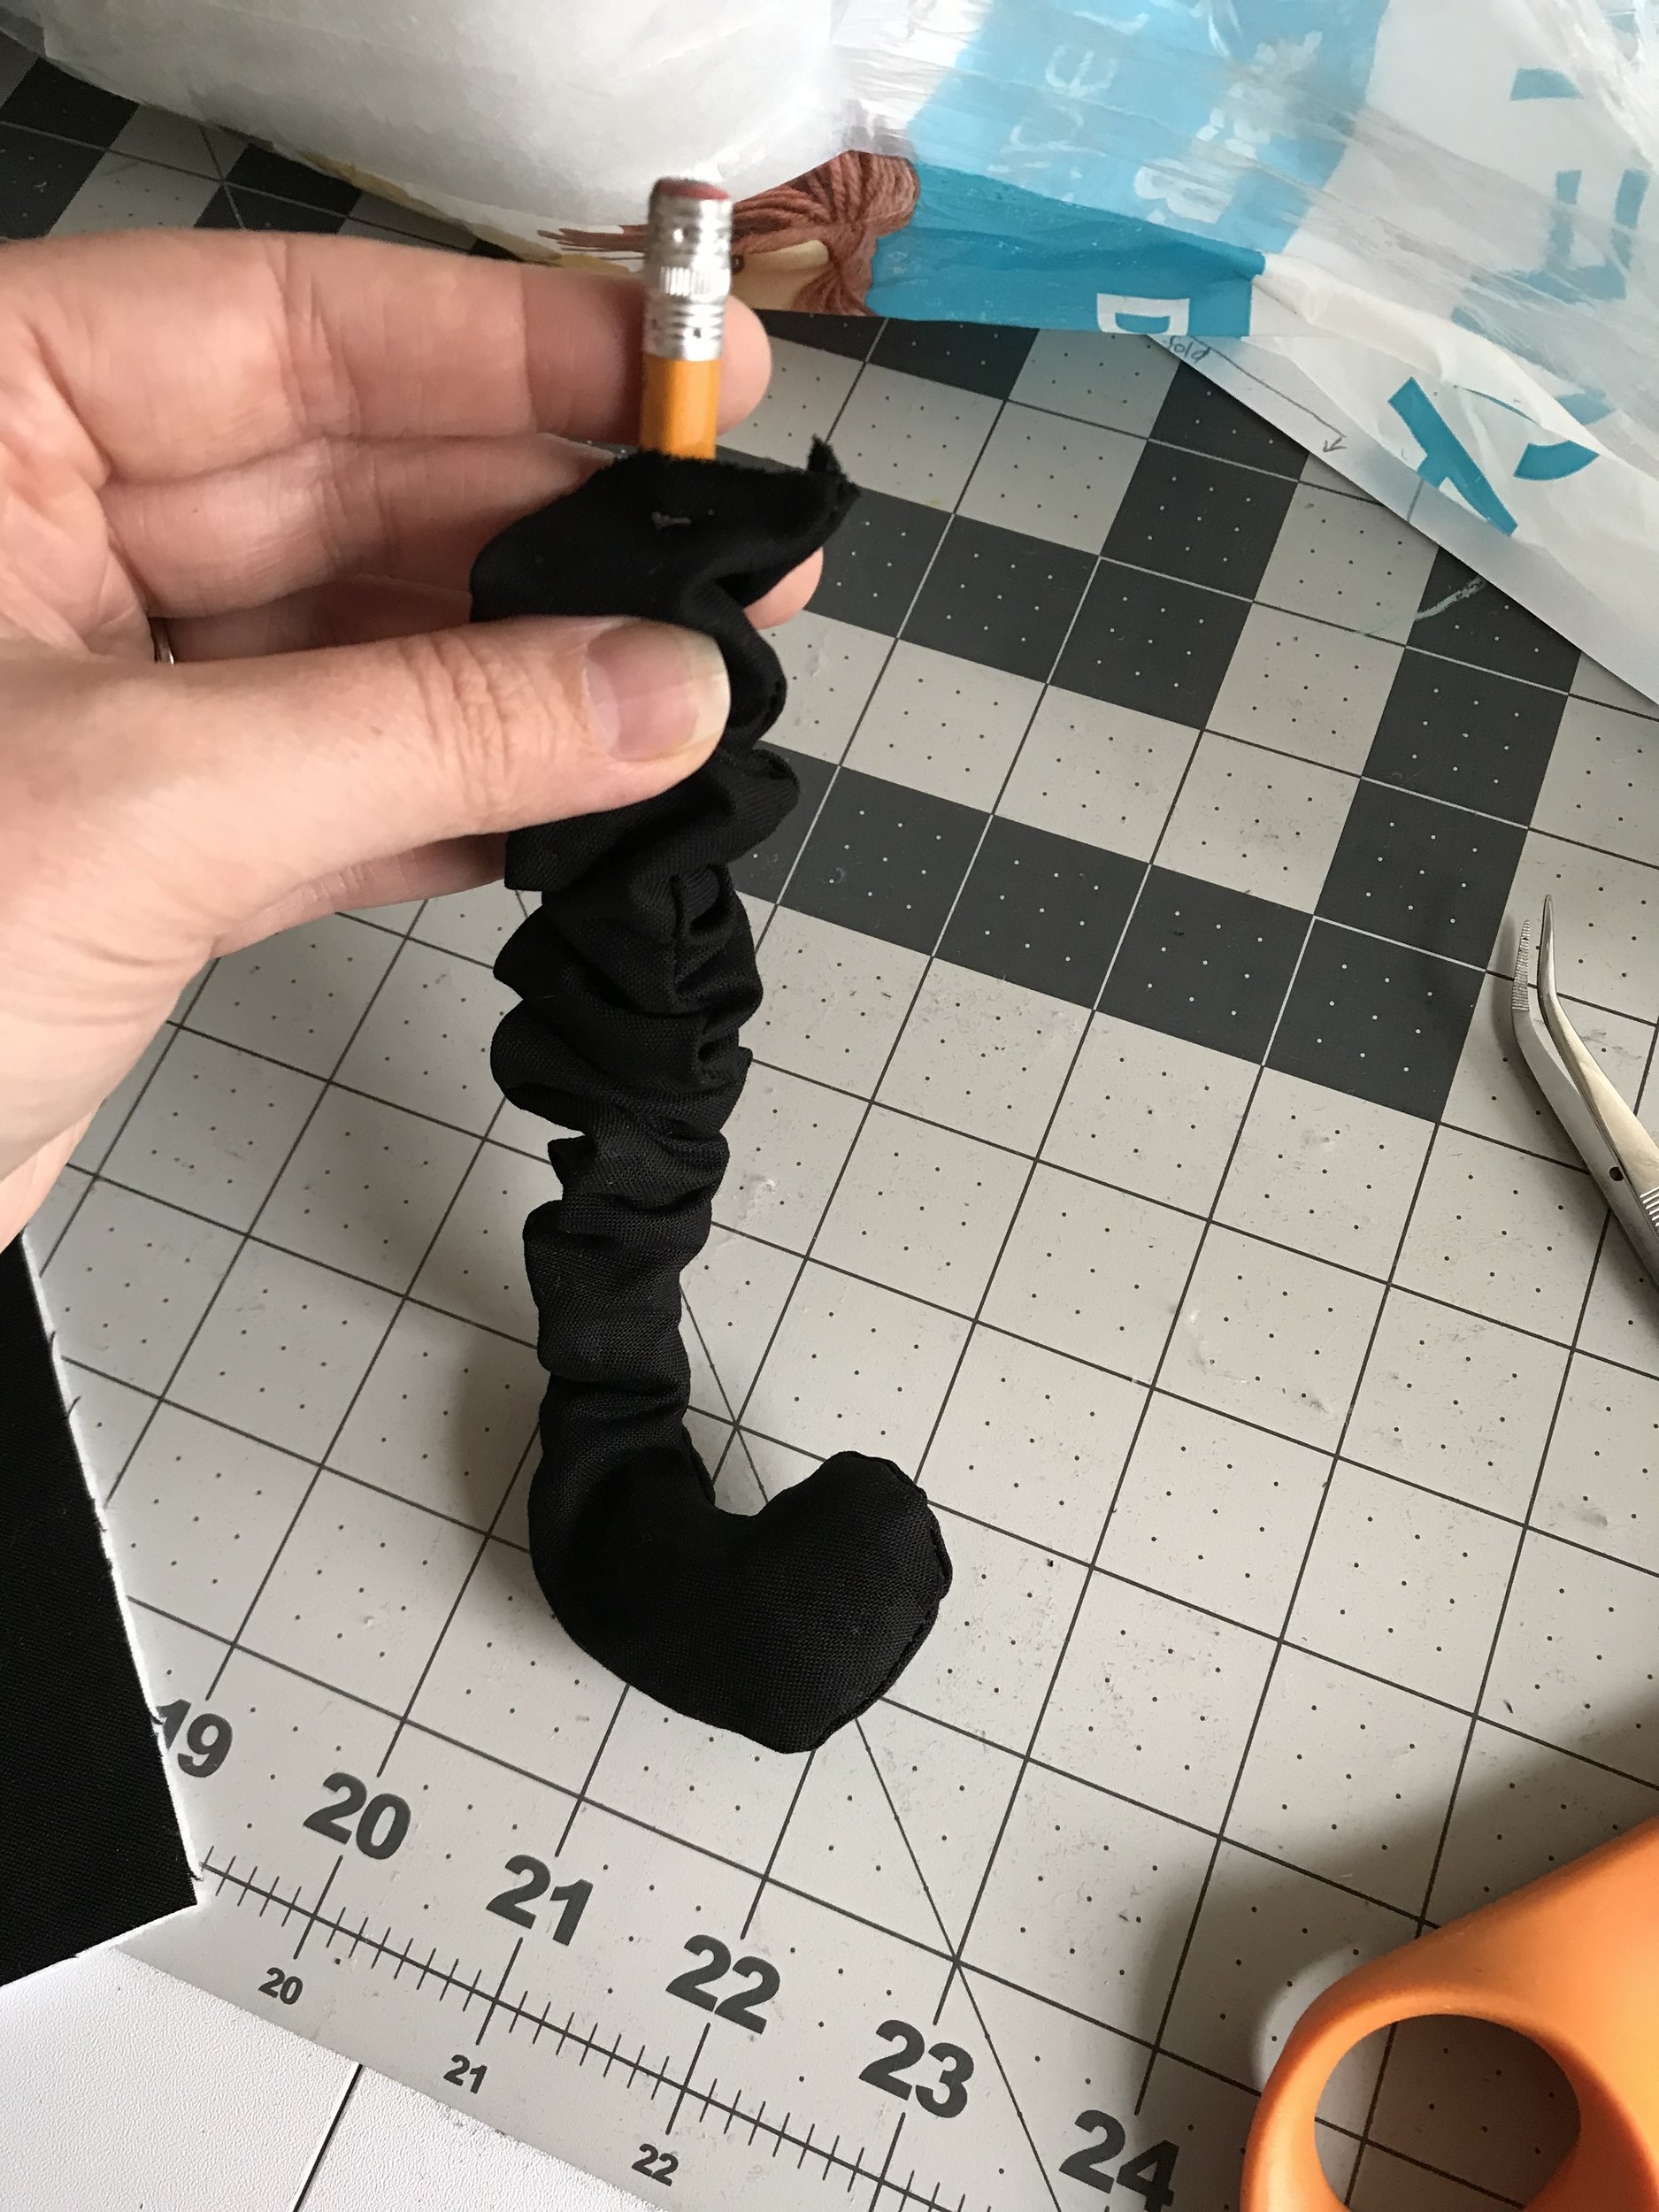
For the tail you will cut two pieces and then sew all the way around leaving the end open. I used a 1/4 inch seam allowance. Next you will need to clip triangle shaped pieces out of the seams to make the curved edges lay right. Cut all the way to the seam, being careful not to snip the actual seam. Then turn the tail right side out. It can be a bit tricky since it's curved and has tight spaces so I used tweezers to help pull it through. Then stuff the tail with fiberfill. In order to get the fiberfill all the way to the end of the tail I had to shove it down with a pencil. Once it is full pin it to the front of the face side of the bag with the tail facing in.

Now you can finish the bag the same way as the Frank bag.
Emerson was so happy with her black cat bag that she kept telling me "Thank You!" all day. I tried to get some pictures of them with their bags, but it proved to be a bit difficult. I can't wait to see them filled with candy!